620W Solar Panels with 30kWh Battery & 11kW Inverter System
Complete Residential Solar Installation: 16x Jinko 620W N-Type Bifacial Panels, 2x SUNESS 15kWh LiFePO4 Batteries (CATL Cells), and AlpSolarr 11kW Hybrid Inverter
Introduction
This project documents the complete installation of a residential solar power system on a two-story residential compound. The system comprises 16 Jinko Solar JKM620N-66HL4M-BDV 620W N-Type bifacial panels arranged in 2 strings of 8 panels in series for PV1 and PV2 inputs, delivering a total array capacity of 9.92kWp. Energy storage is provided by 2 units of SUNESS EC-48300F 15kWh LiFePO4 battery systems powered by CATL cells, totalling 30kWh of storage. Power conversion is handled by an AlpSolarr 11kW hybrid inverter with dual MPPT channels, manufactured by Shenzhen Ligoo New Energy Technologies Co., Ltd. The installation was completed over two days in March 2026.
System Overview
The installation involved a full end-to-end solar power system setup on a multi-unit residential building with a green stone-coated metal roof. The work covered everything from unboxing and inspecting equipment, indoor electrical infrastructure setup, rooftop panel mounting, cable routing, and final system commissioning. The system was designed to provide reliable solar power generation with battery backup for the residential units.
- Equipment delivery, inspection, and unboxing
- Indoor cable trunking and conduit installation
- Wall-mounted inverter and distribution board setup
- Surge protection and circuit breaker installation
- DC and AC cable routing and termination
- Rooftop mounting rail installation on stone-coated roof
- Solar panel hoisting, mounting, and series wiring
- Battery positioning, wiring, and BMS configuration
- System commissioning and performance testing
Components and Specifications
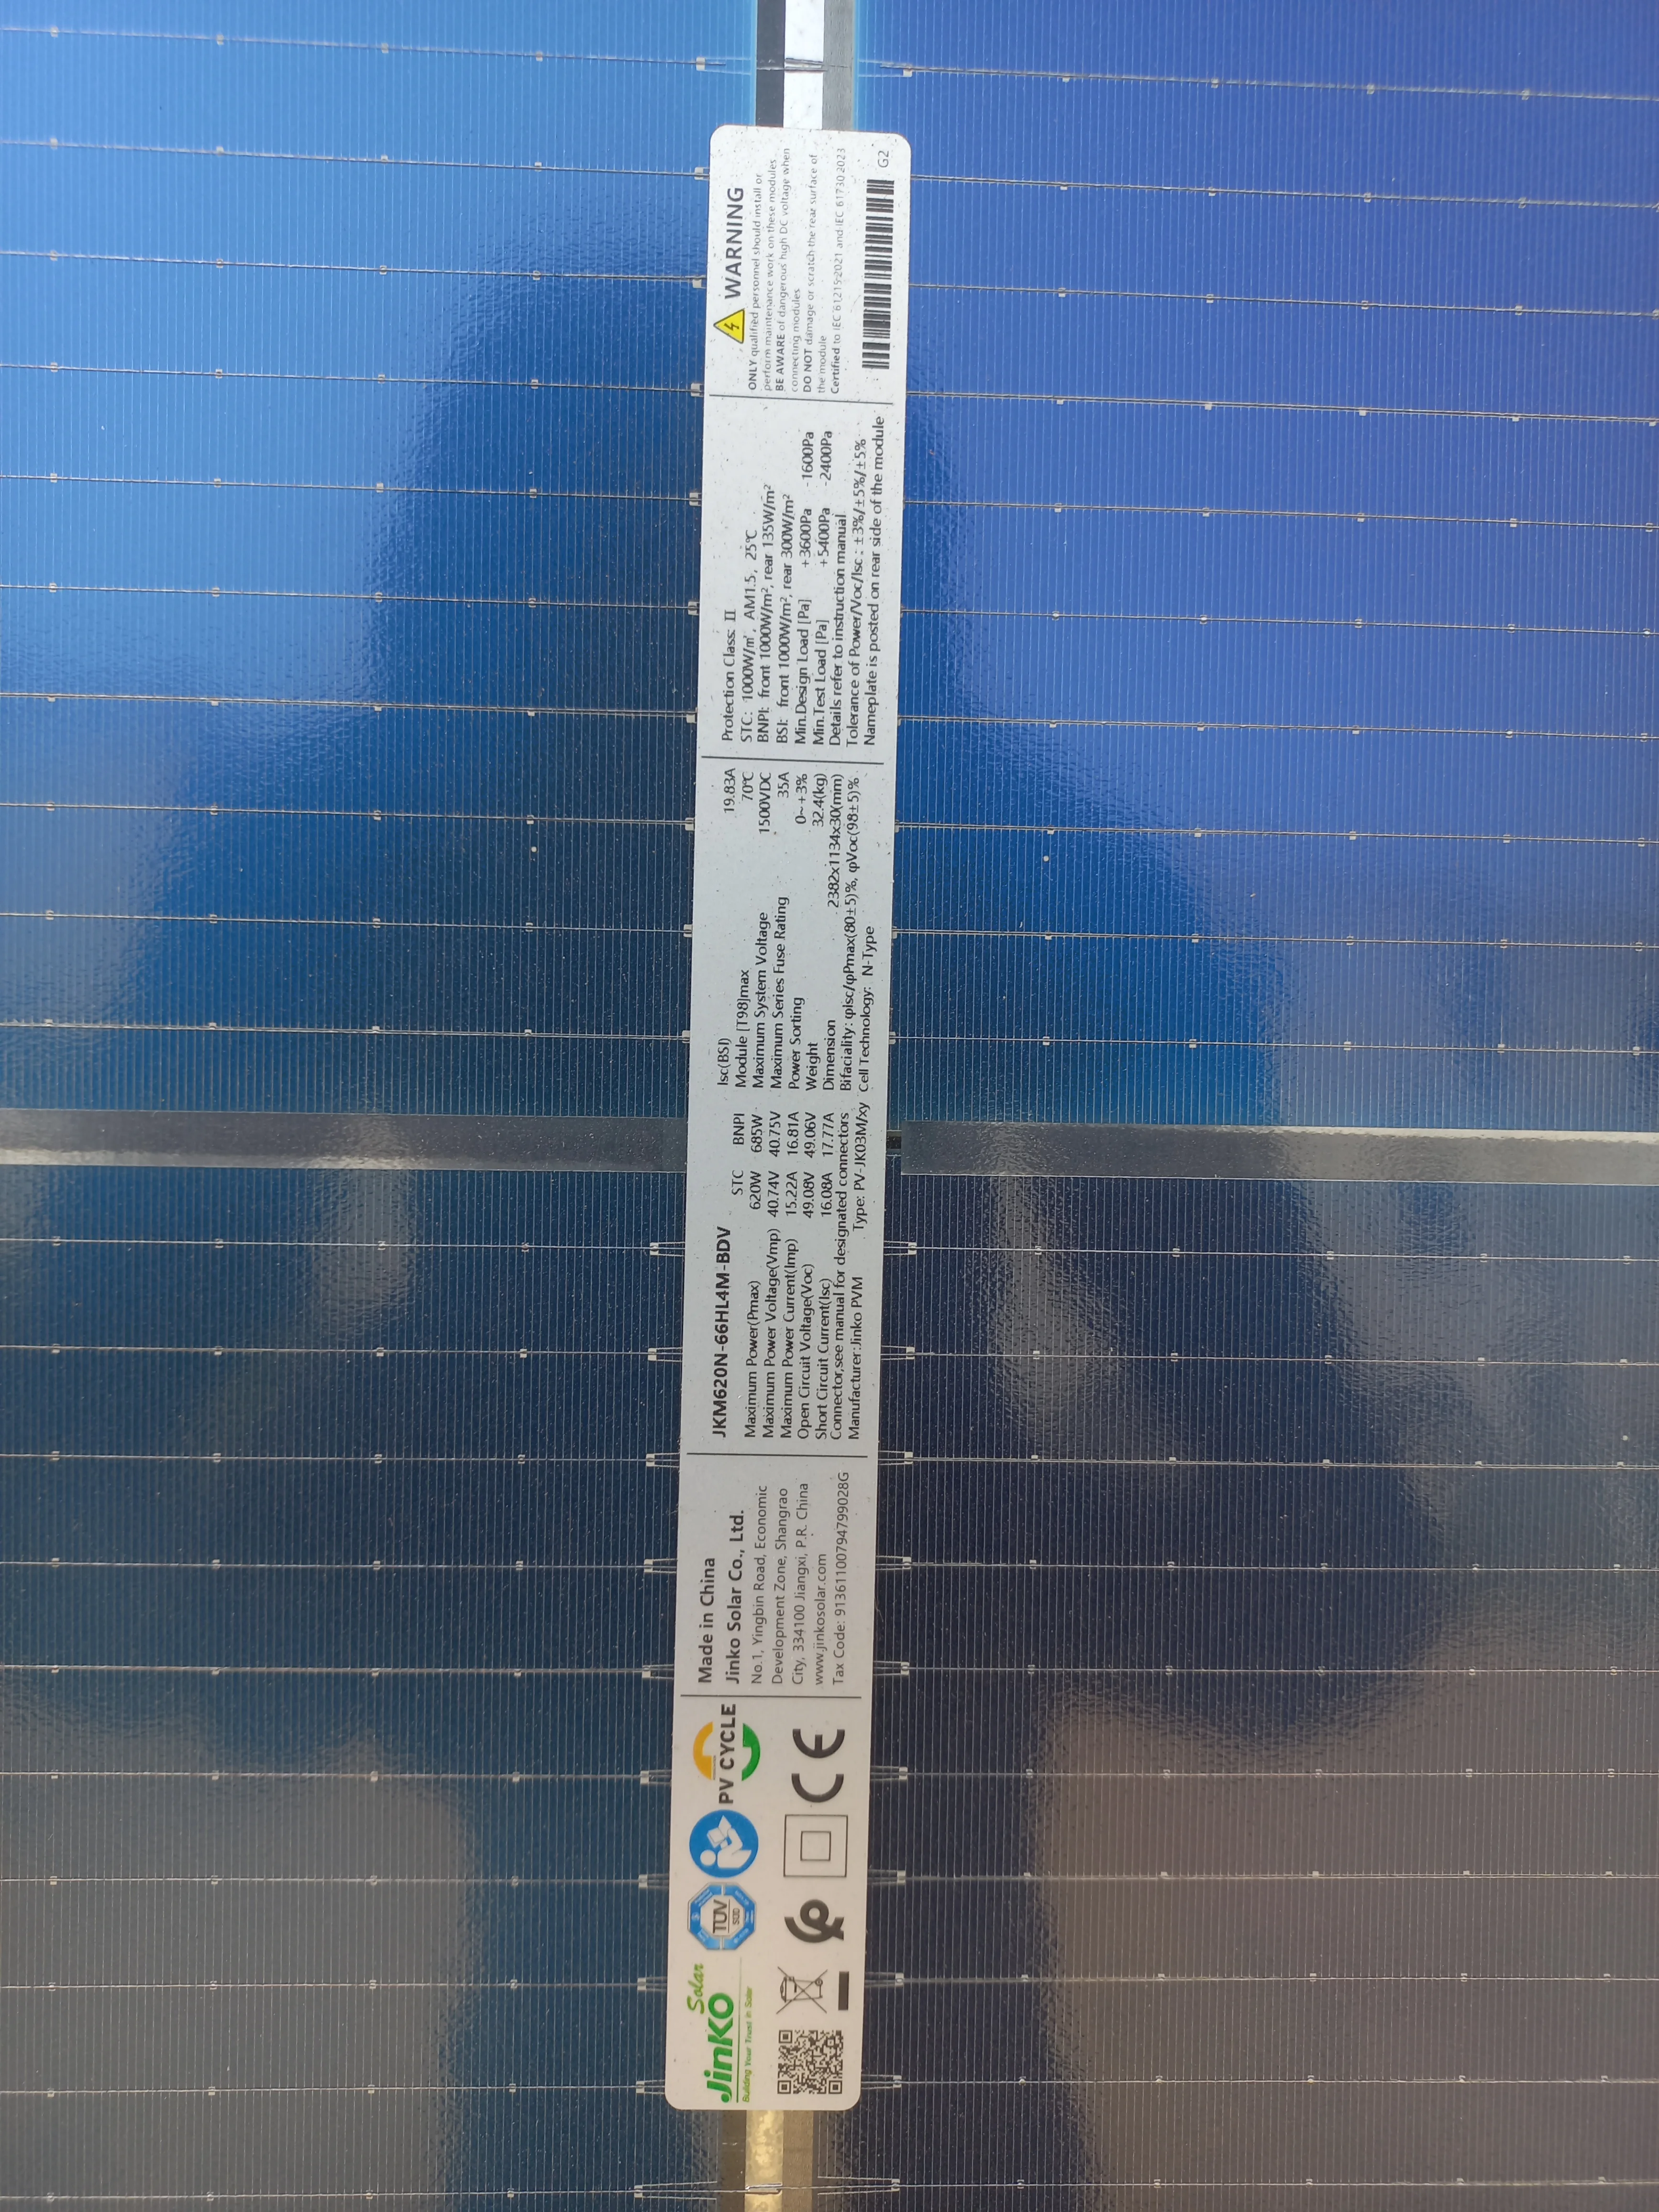
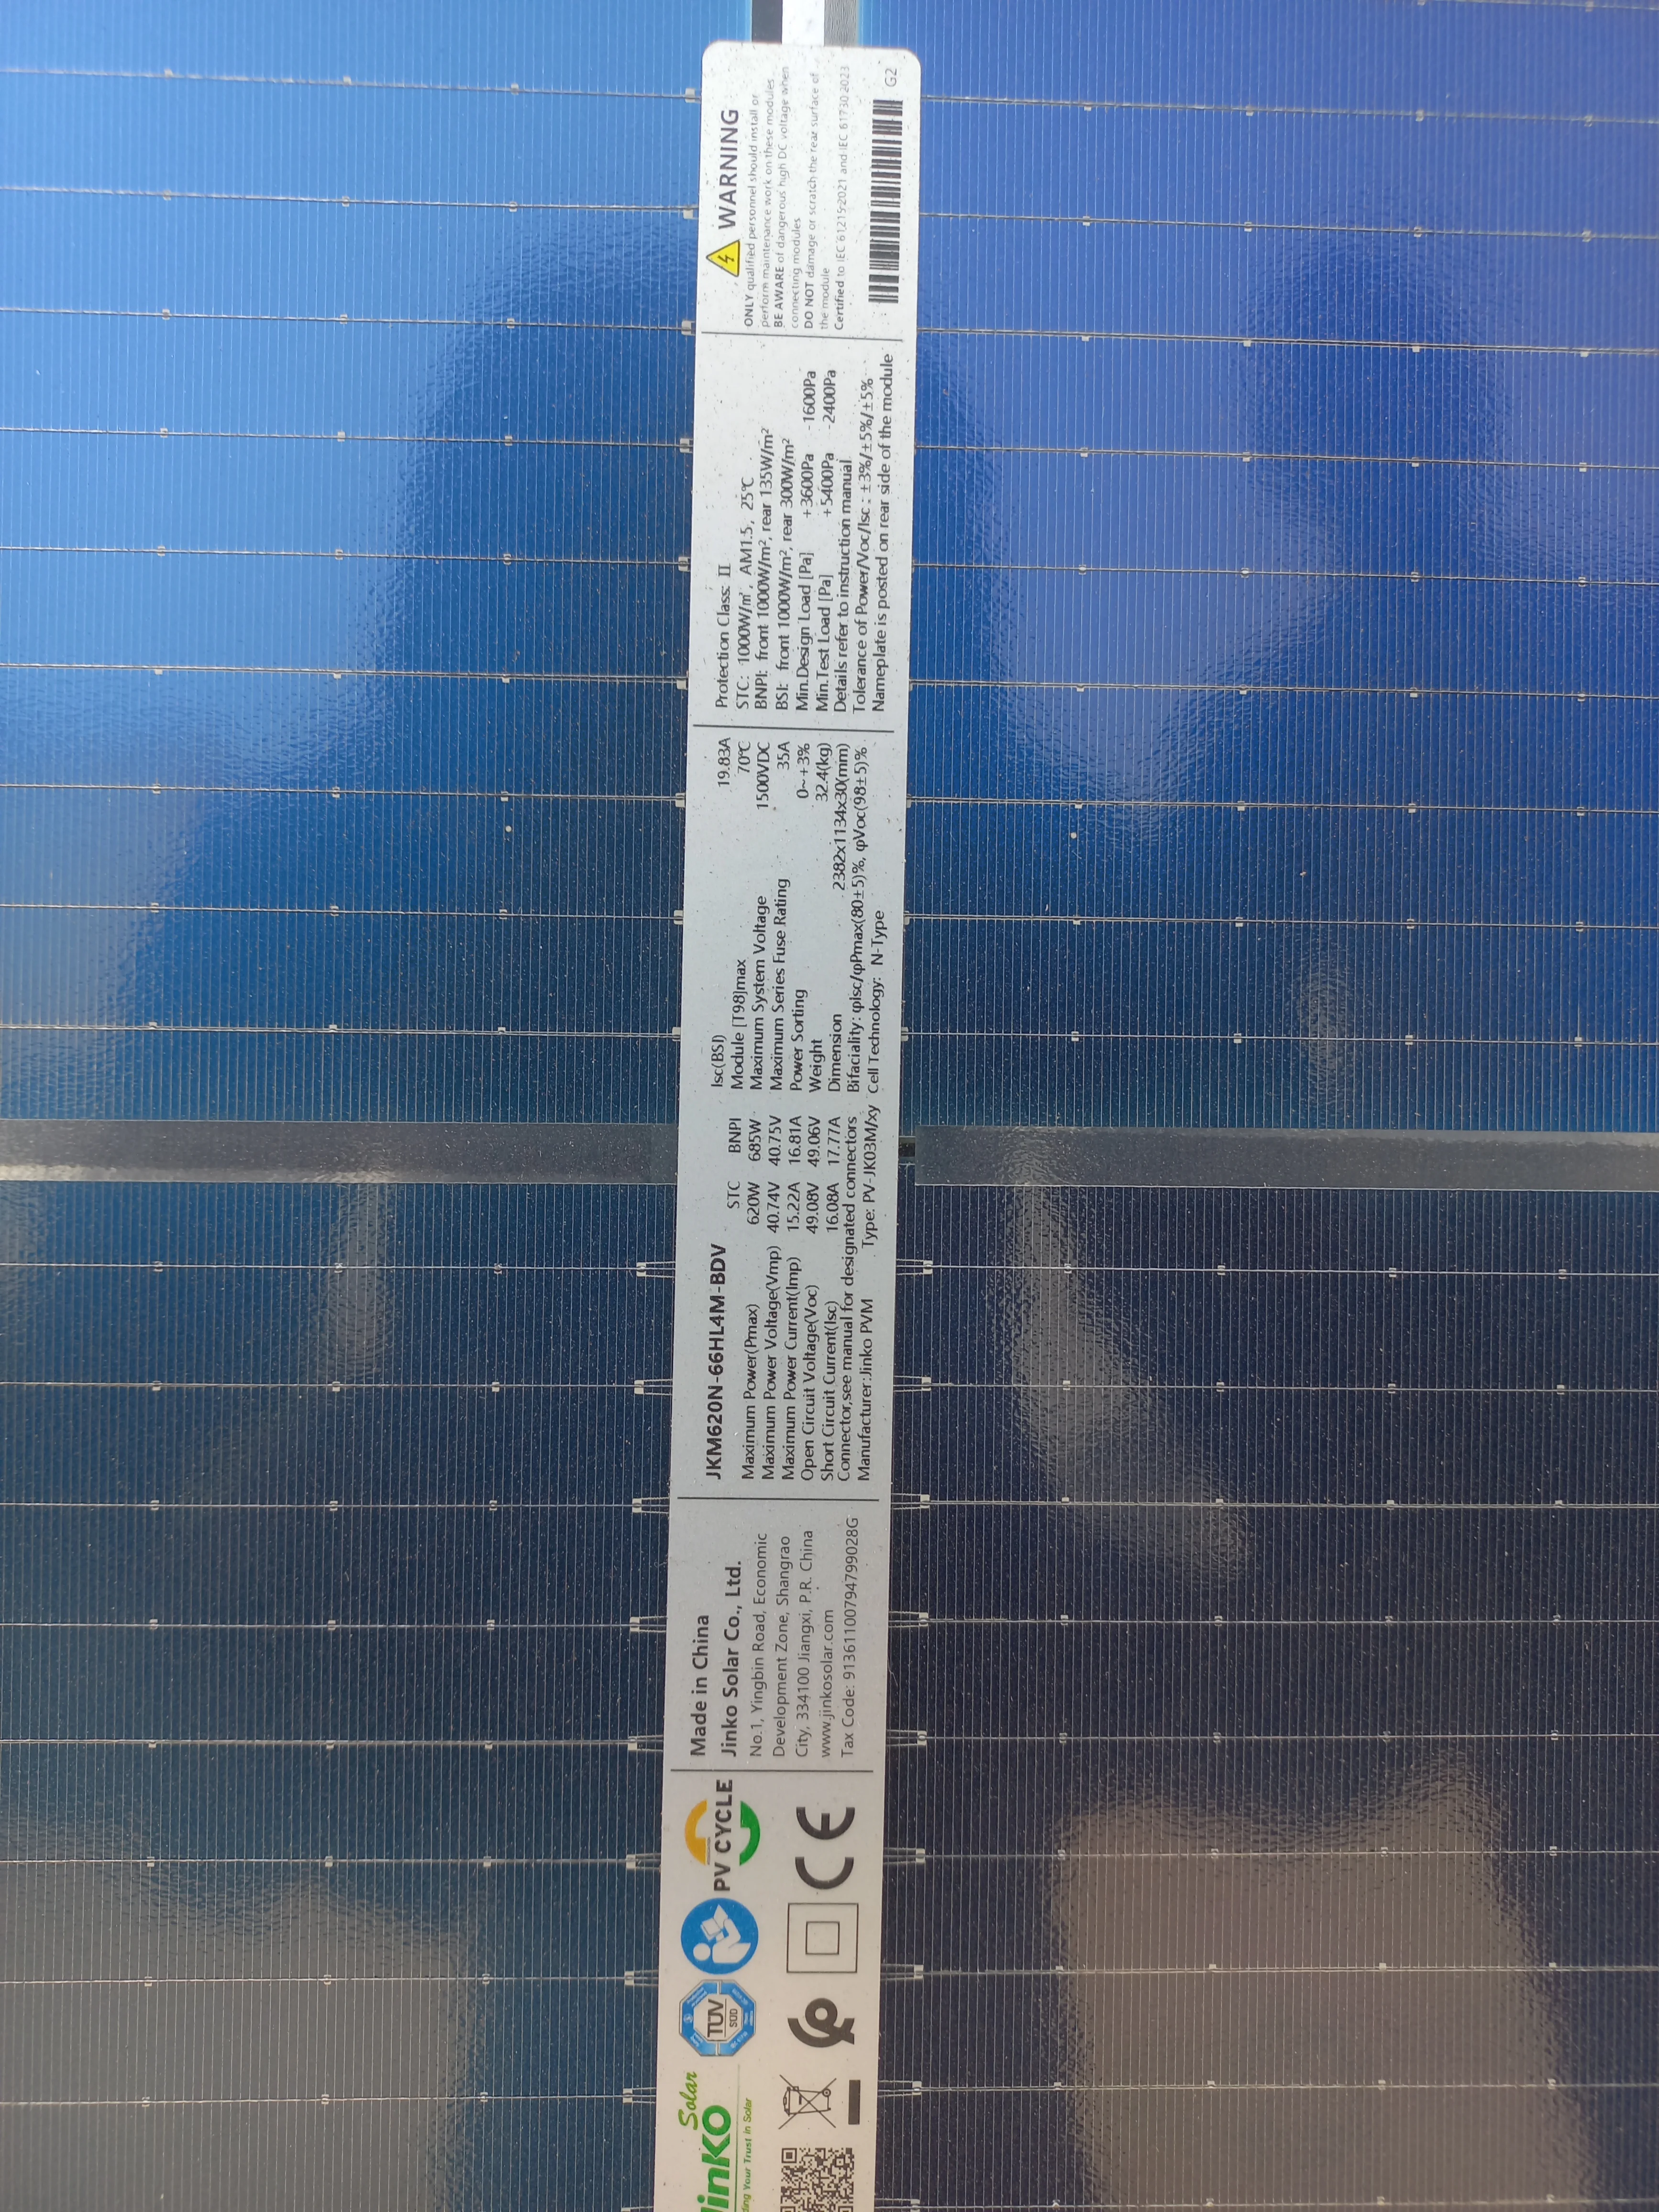
Solar Panels — Jinko Solar JKM620N-66HL4M-BDV
- Quantity: 16 panels (total 9.92kWp)
- Power Rating: 620W per panel (STC)
- Cell Technology: N-Type bifacial (Bifaciality ~80.5%)
- Configuration: 2 strings of 8 panels in series (PV1 and PV2)
- Maximum Power Voltage (Vmp): ~40.5V
- Maximum Power Current (Imp): ~15.22A
- Open Circuit Voltage (Voc): ~49V
- Short Circuit Current (Isc): ~16.01A
- Maximum System Voltage: 1500VDC
- Weight: 32.4kg per panel
- Certifications: CE, TUV, PV CYCLE
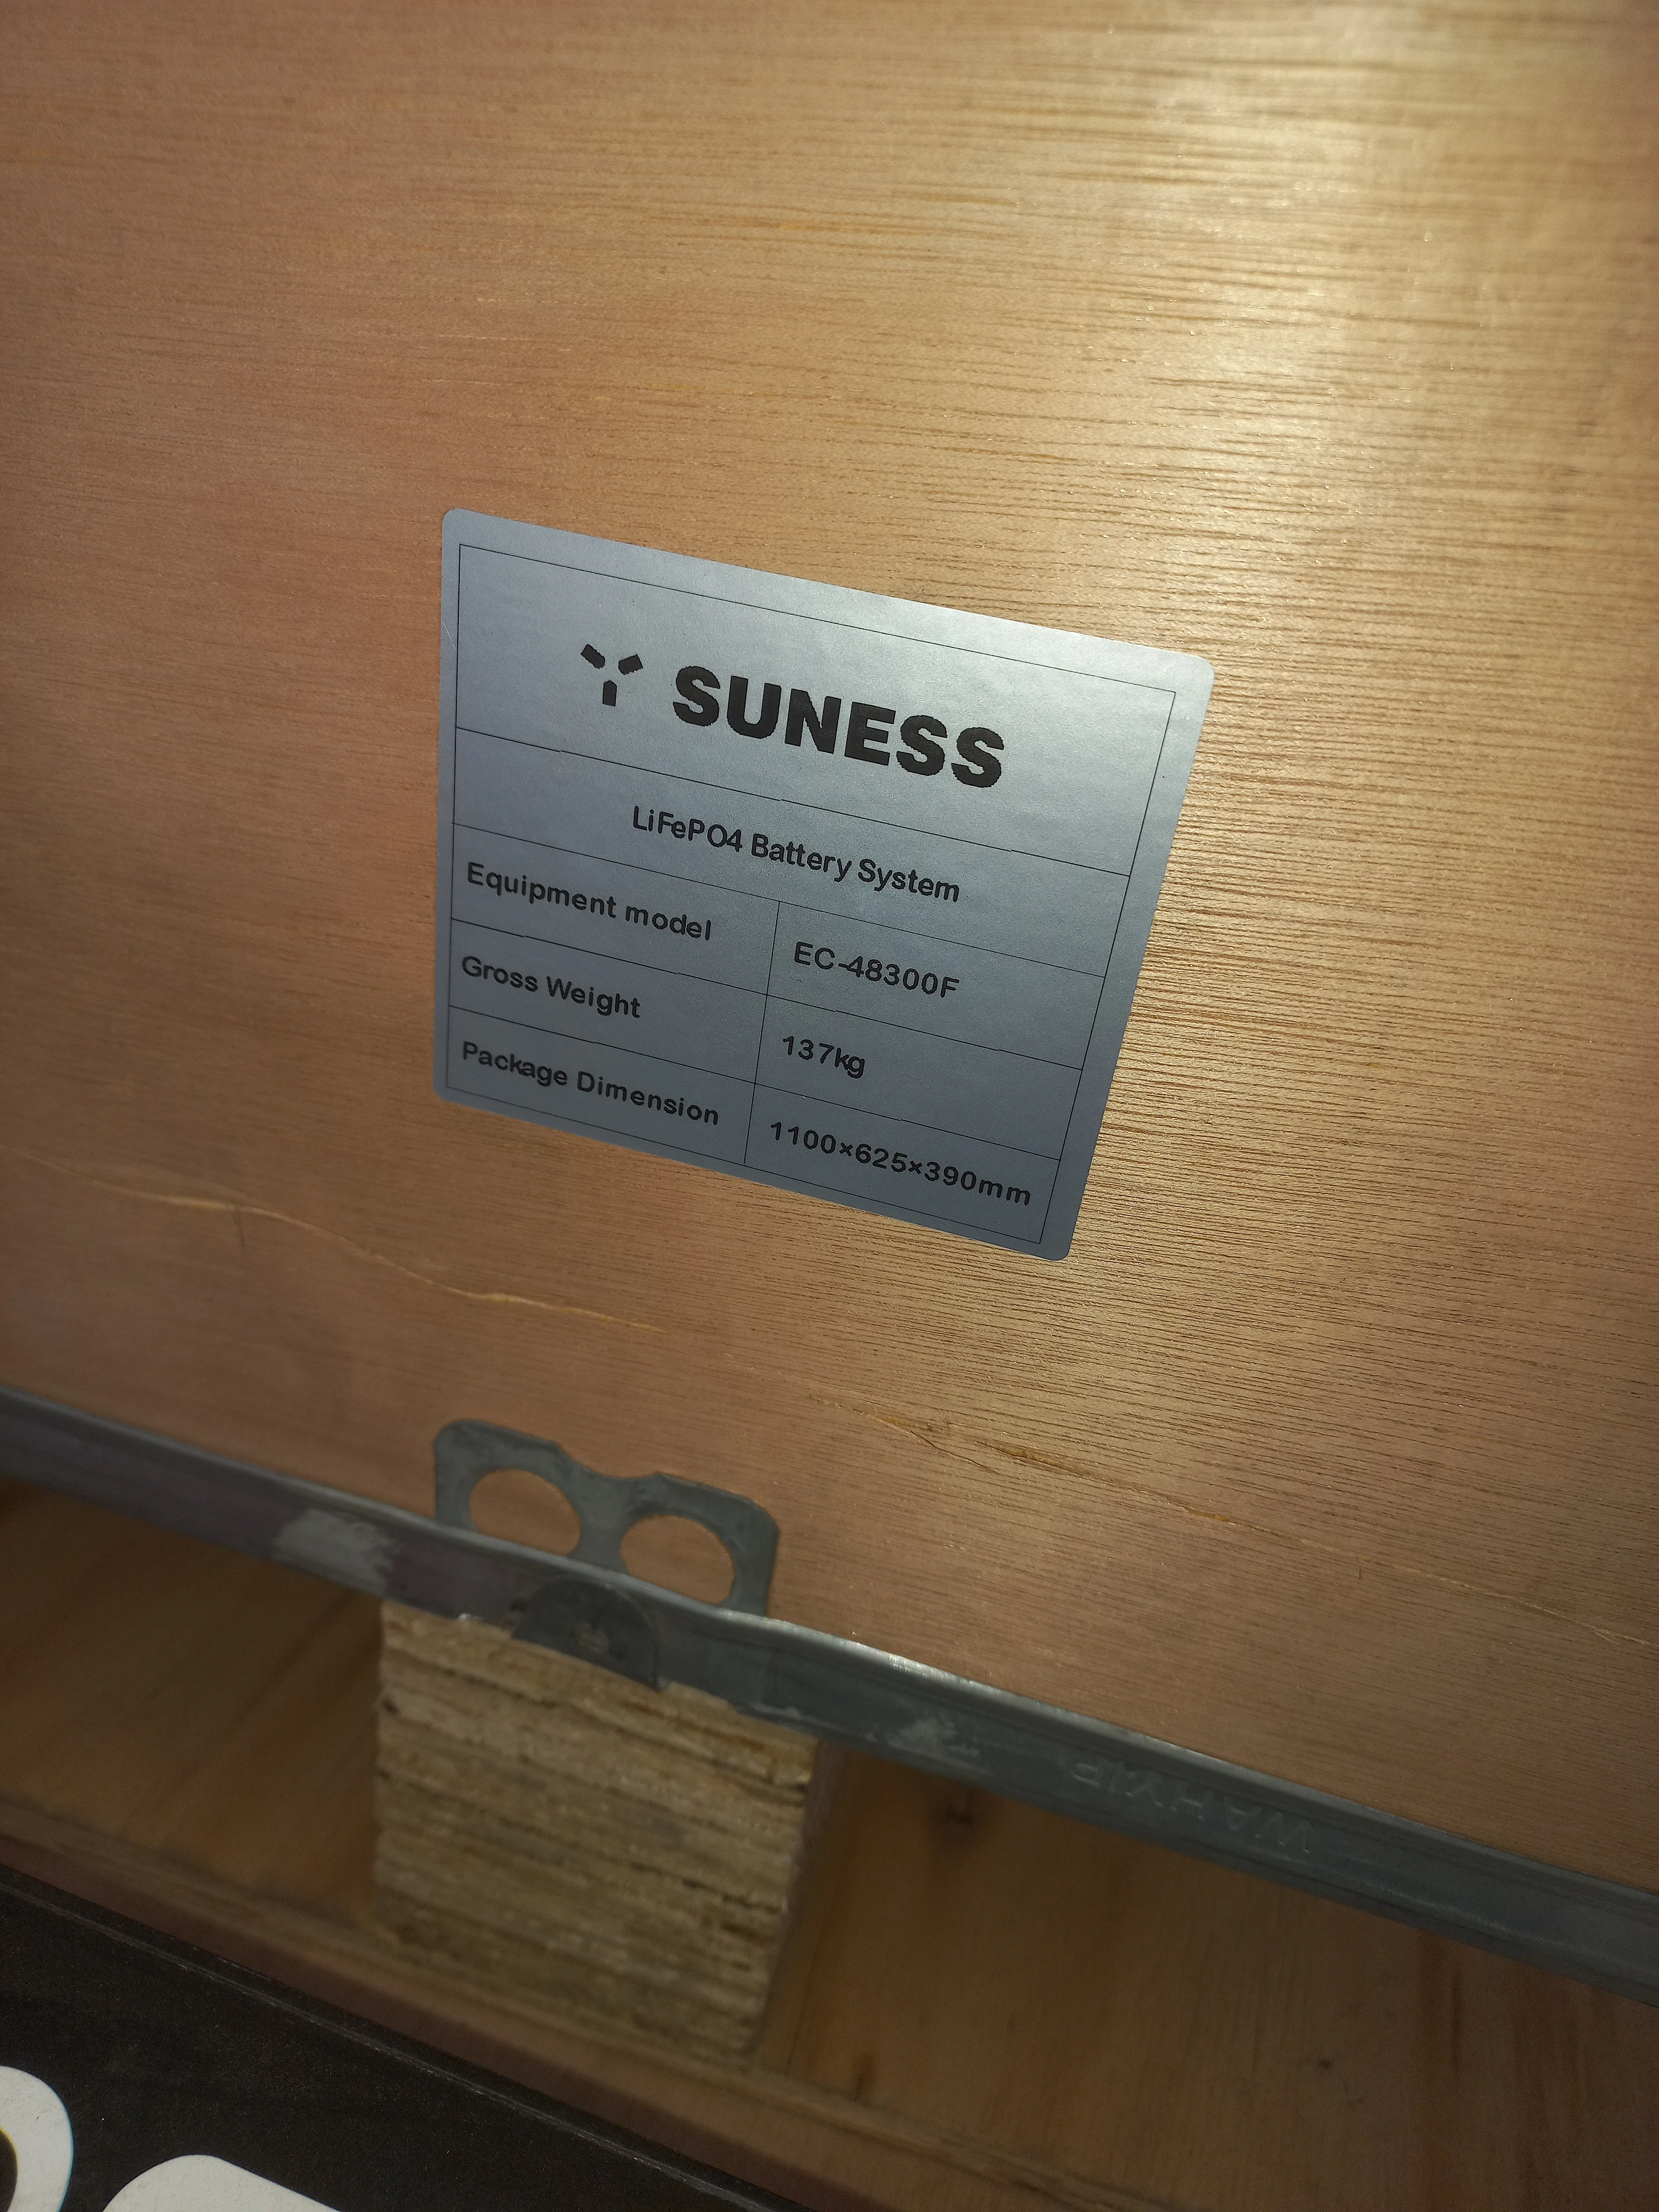
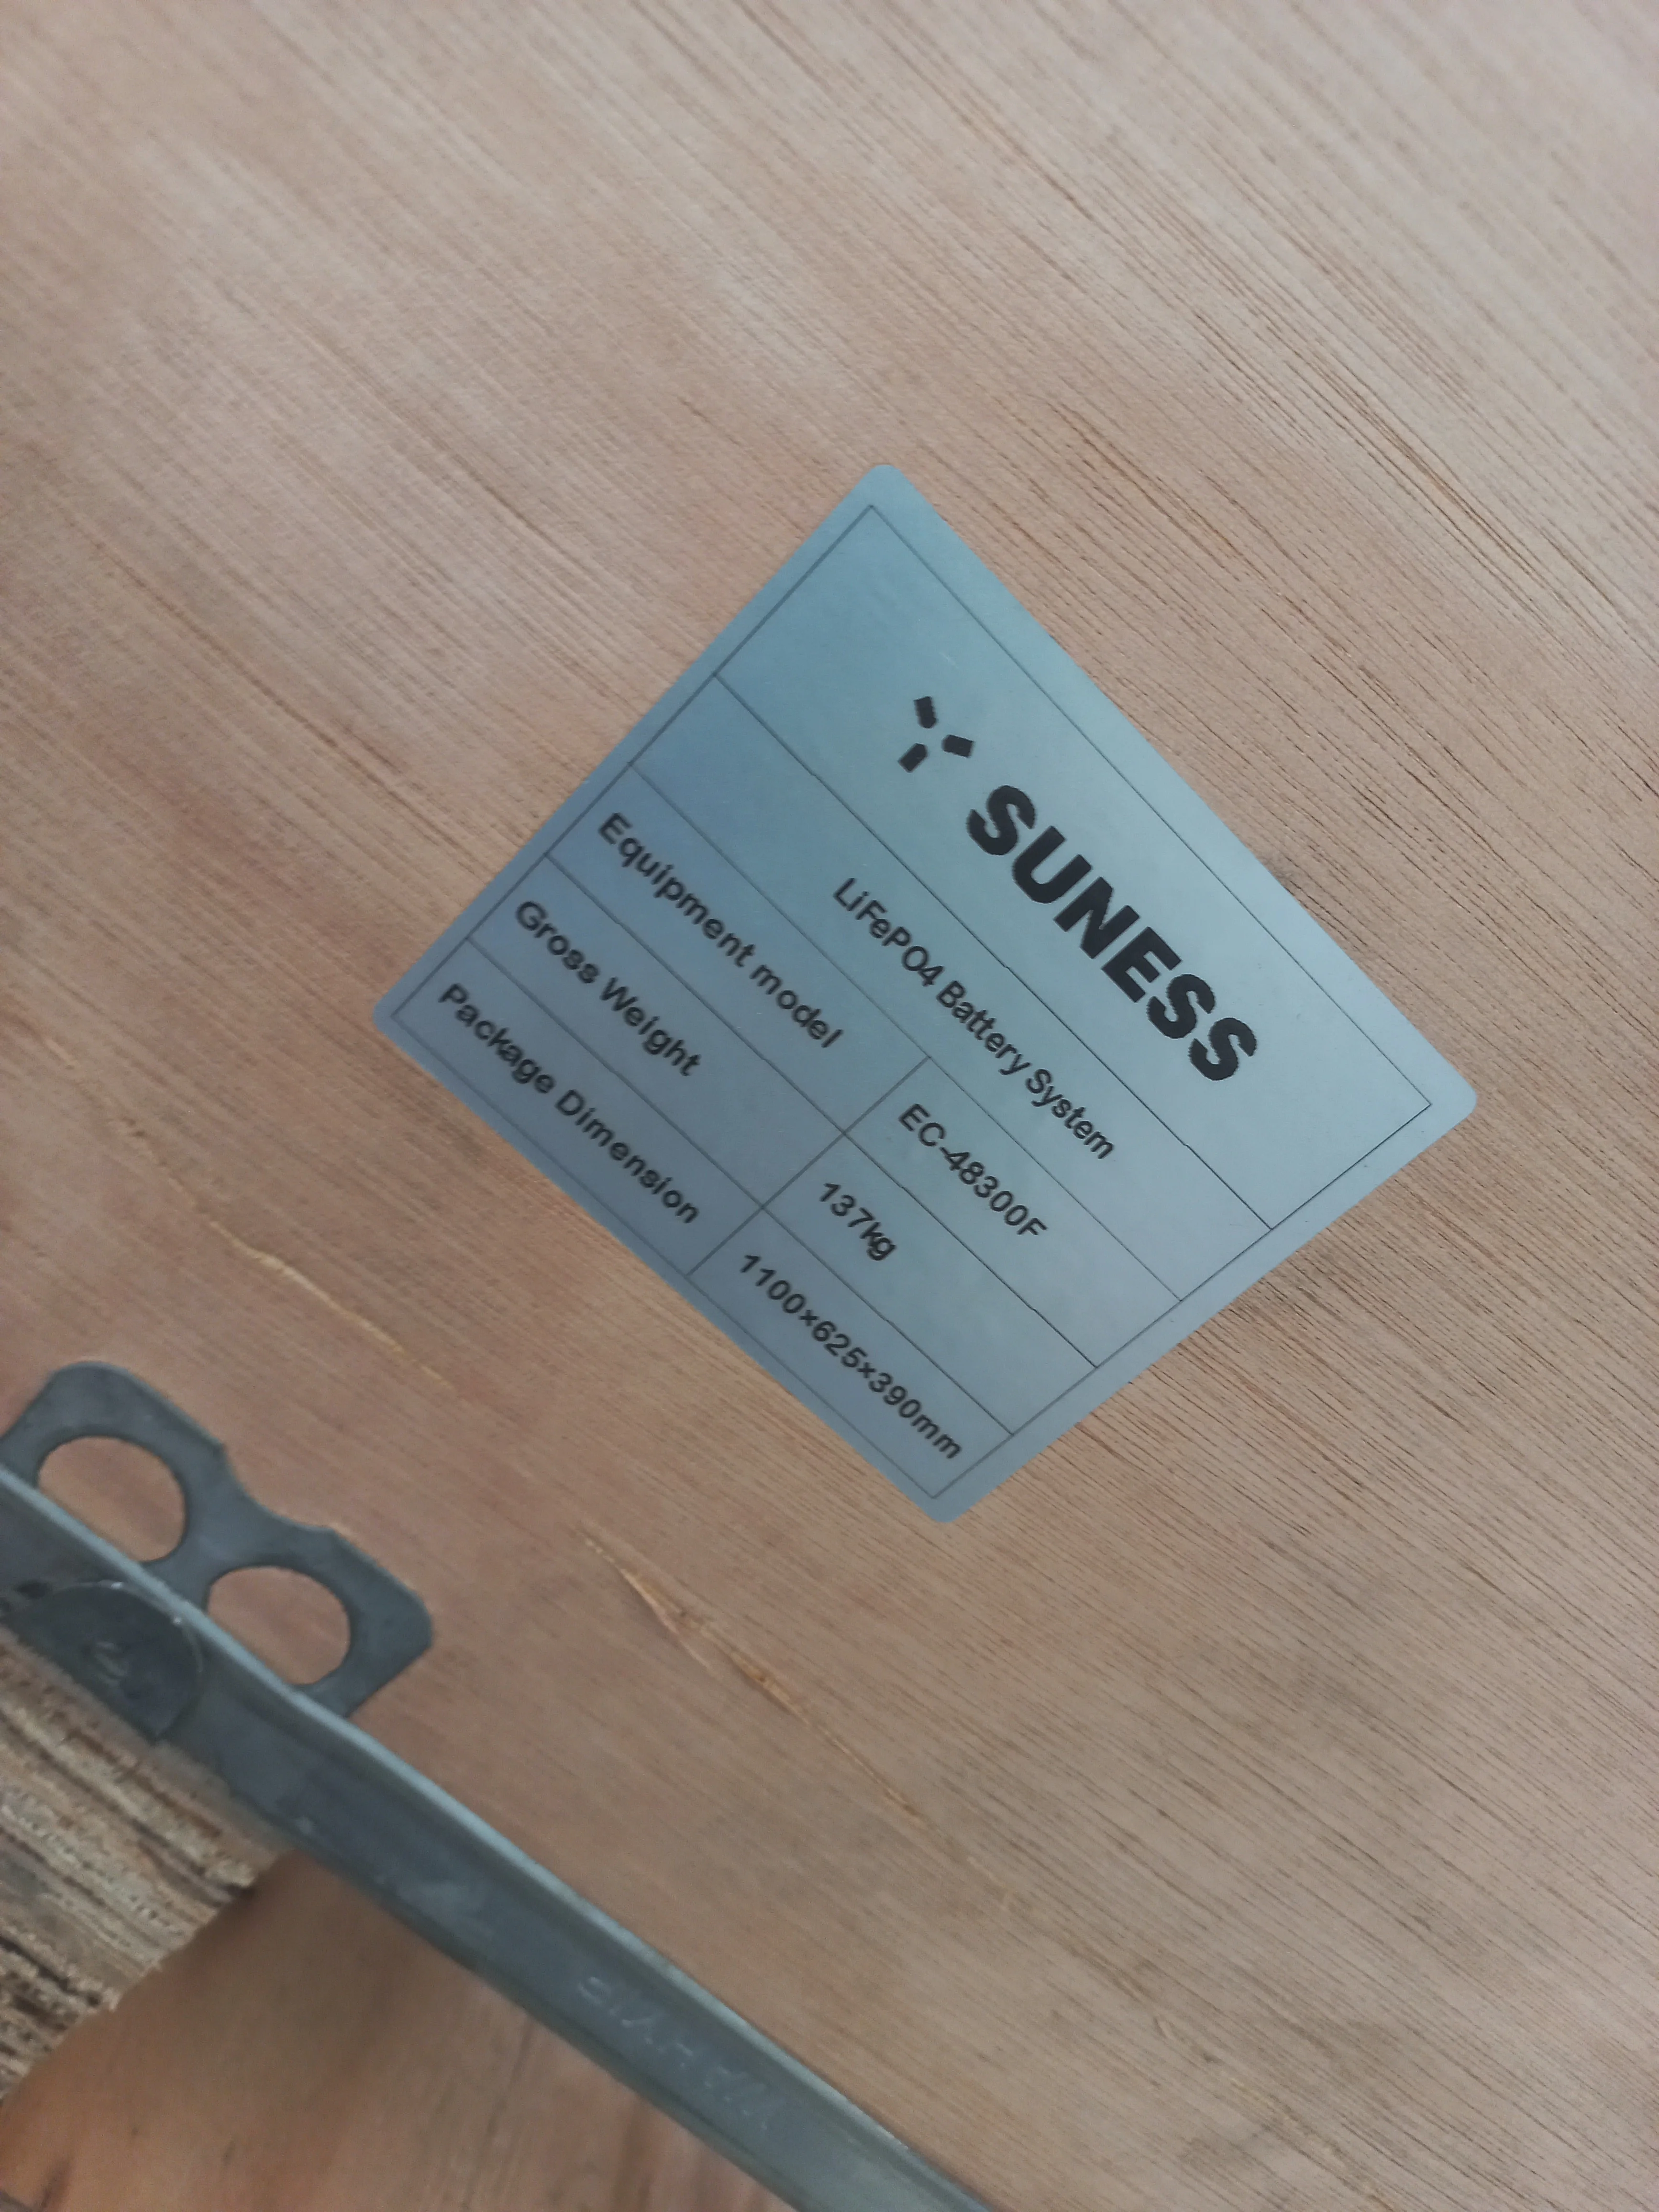
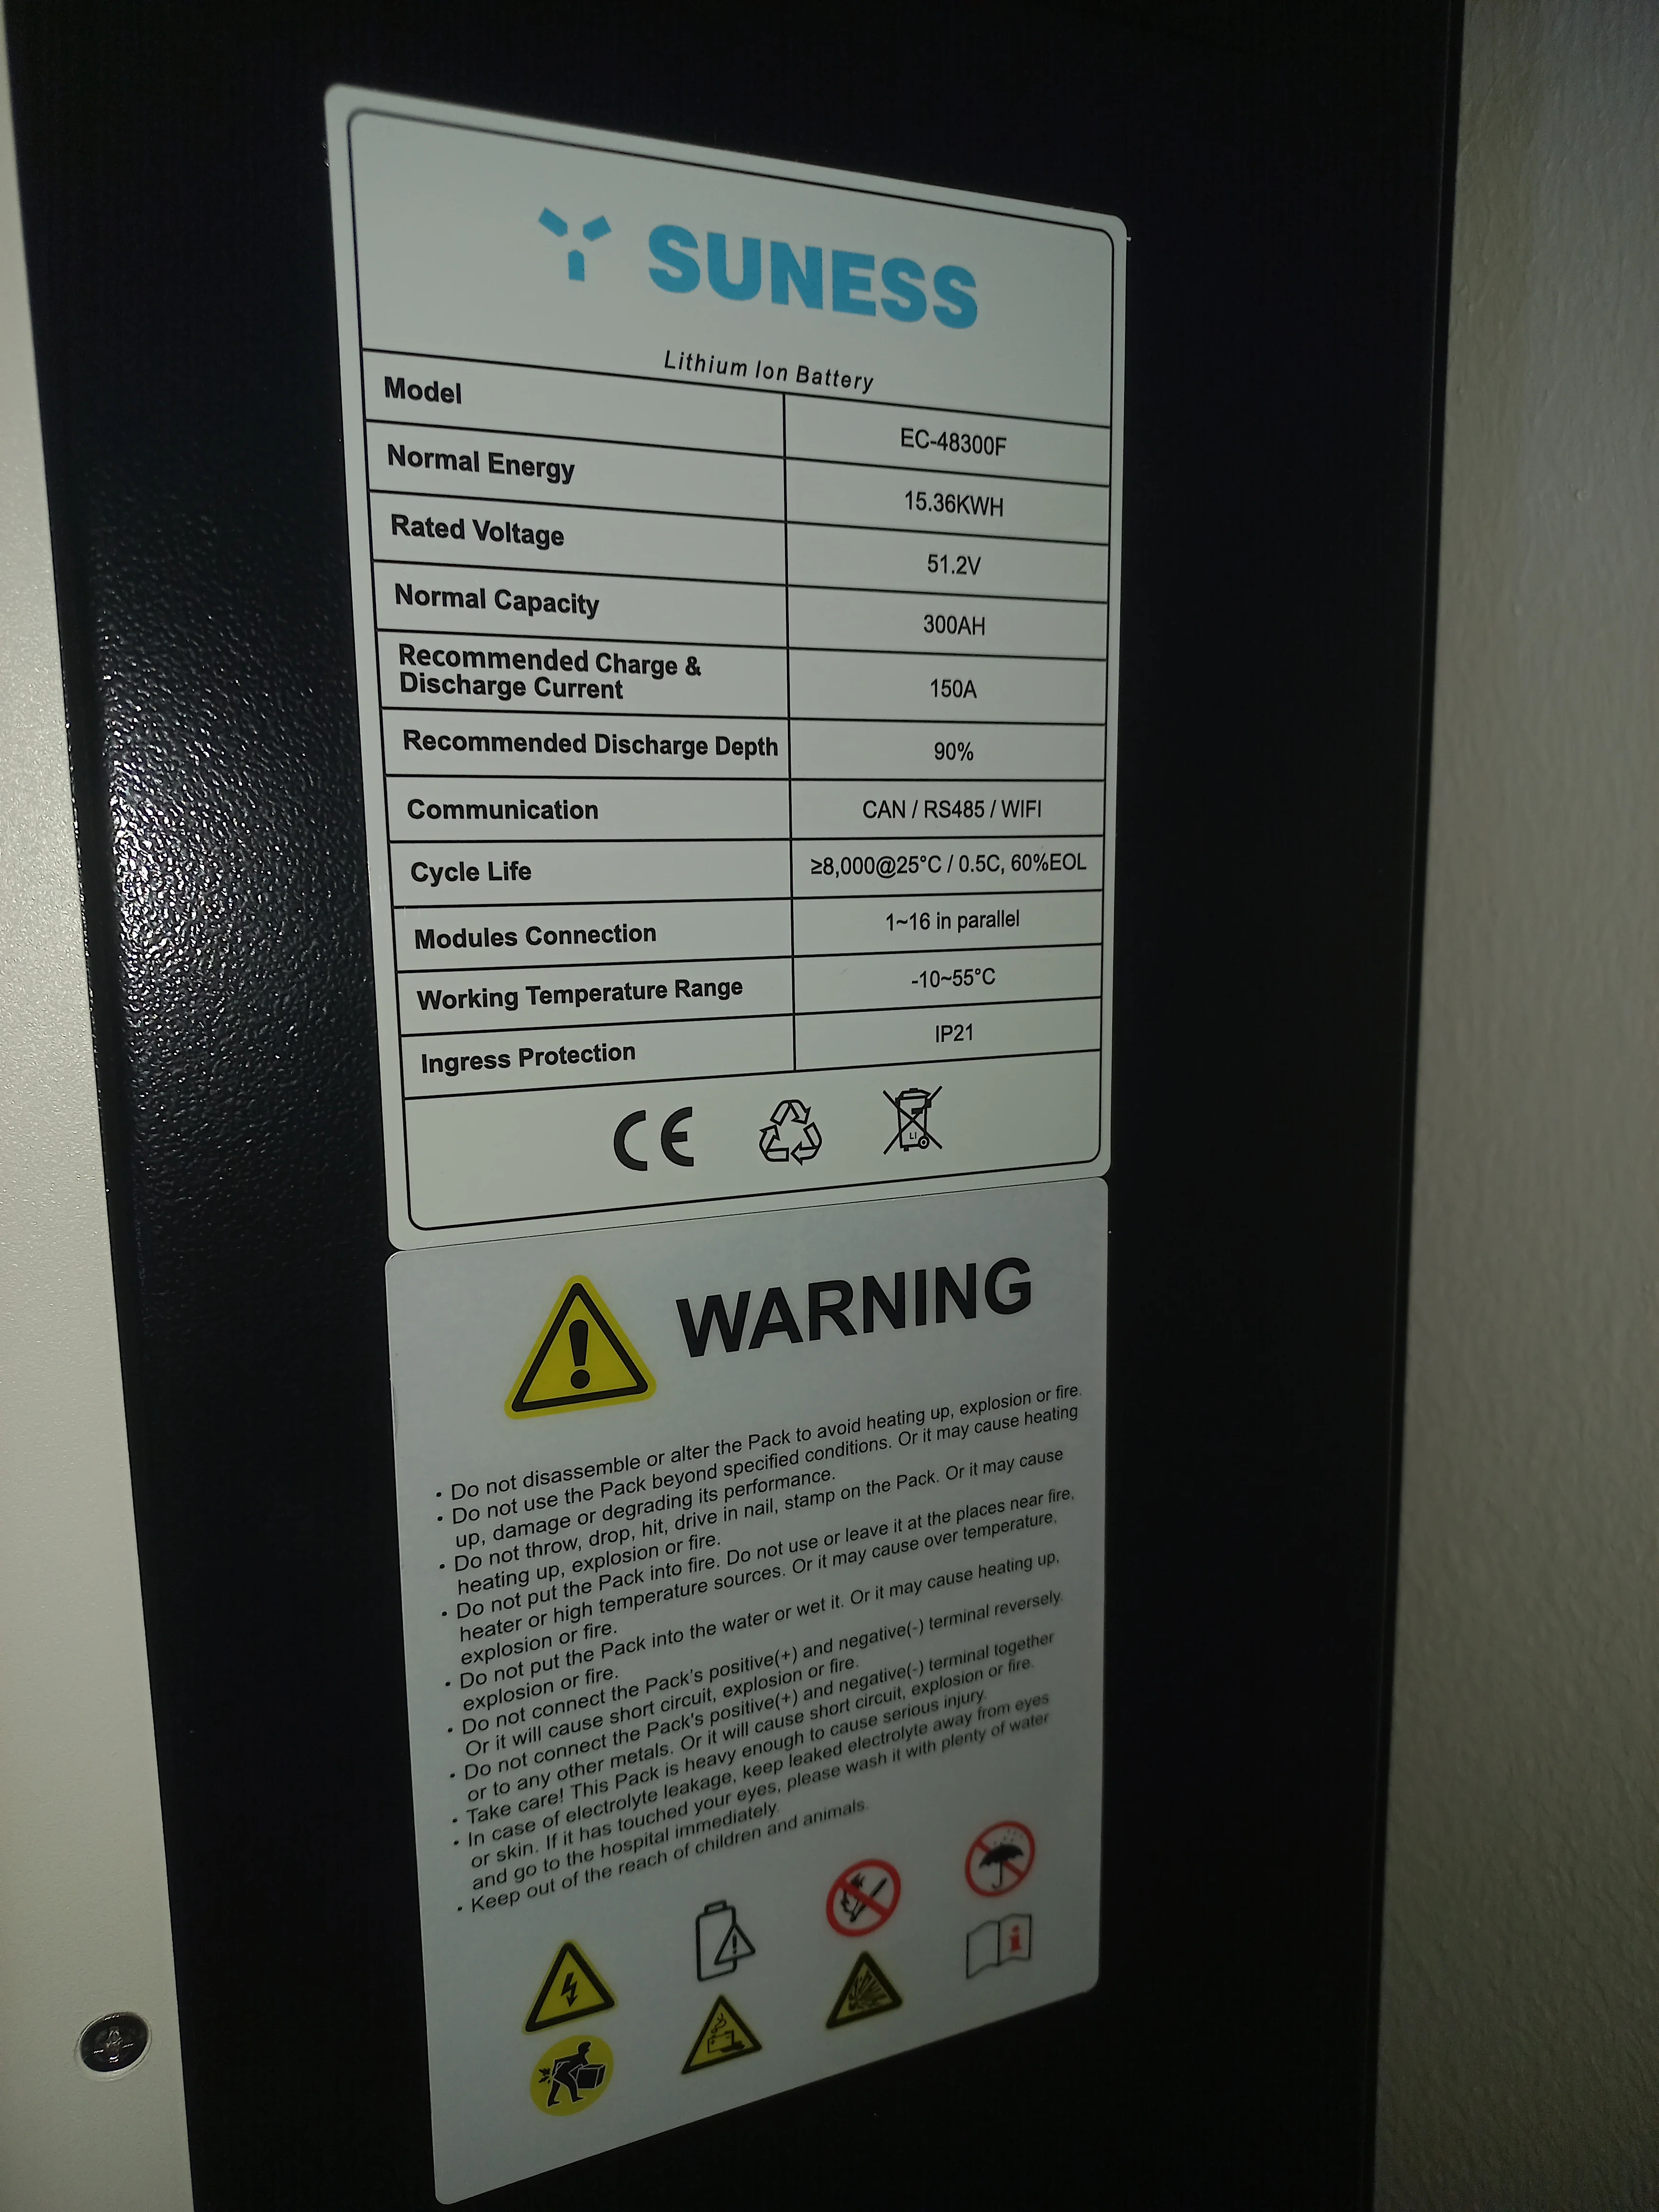
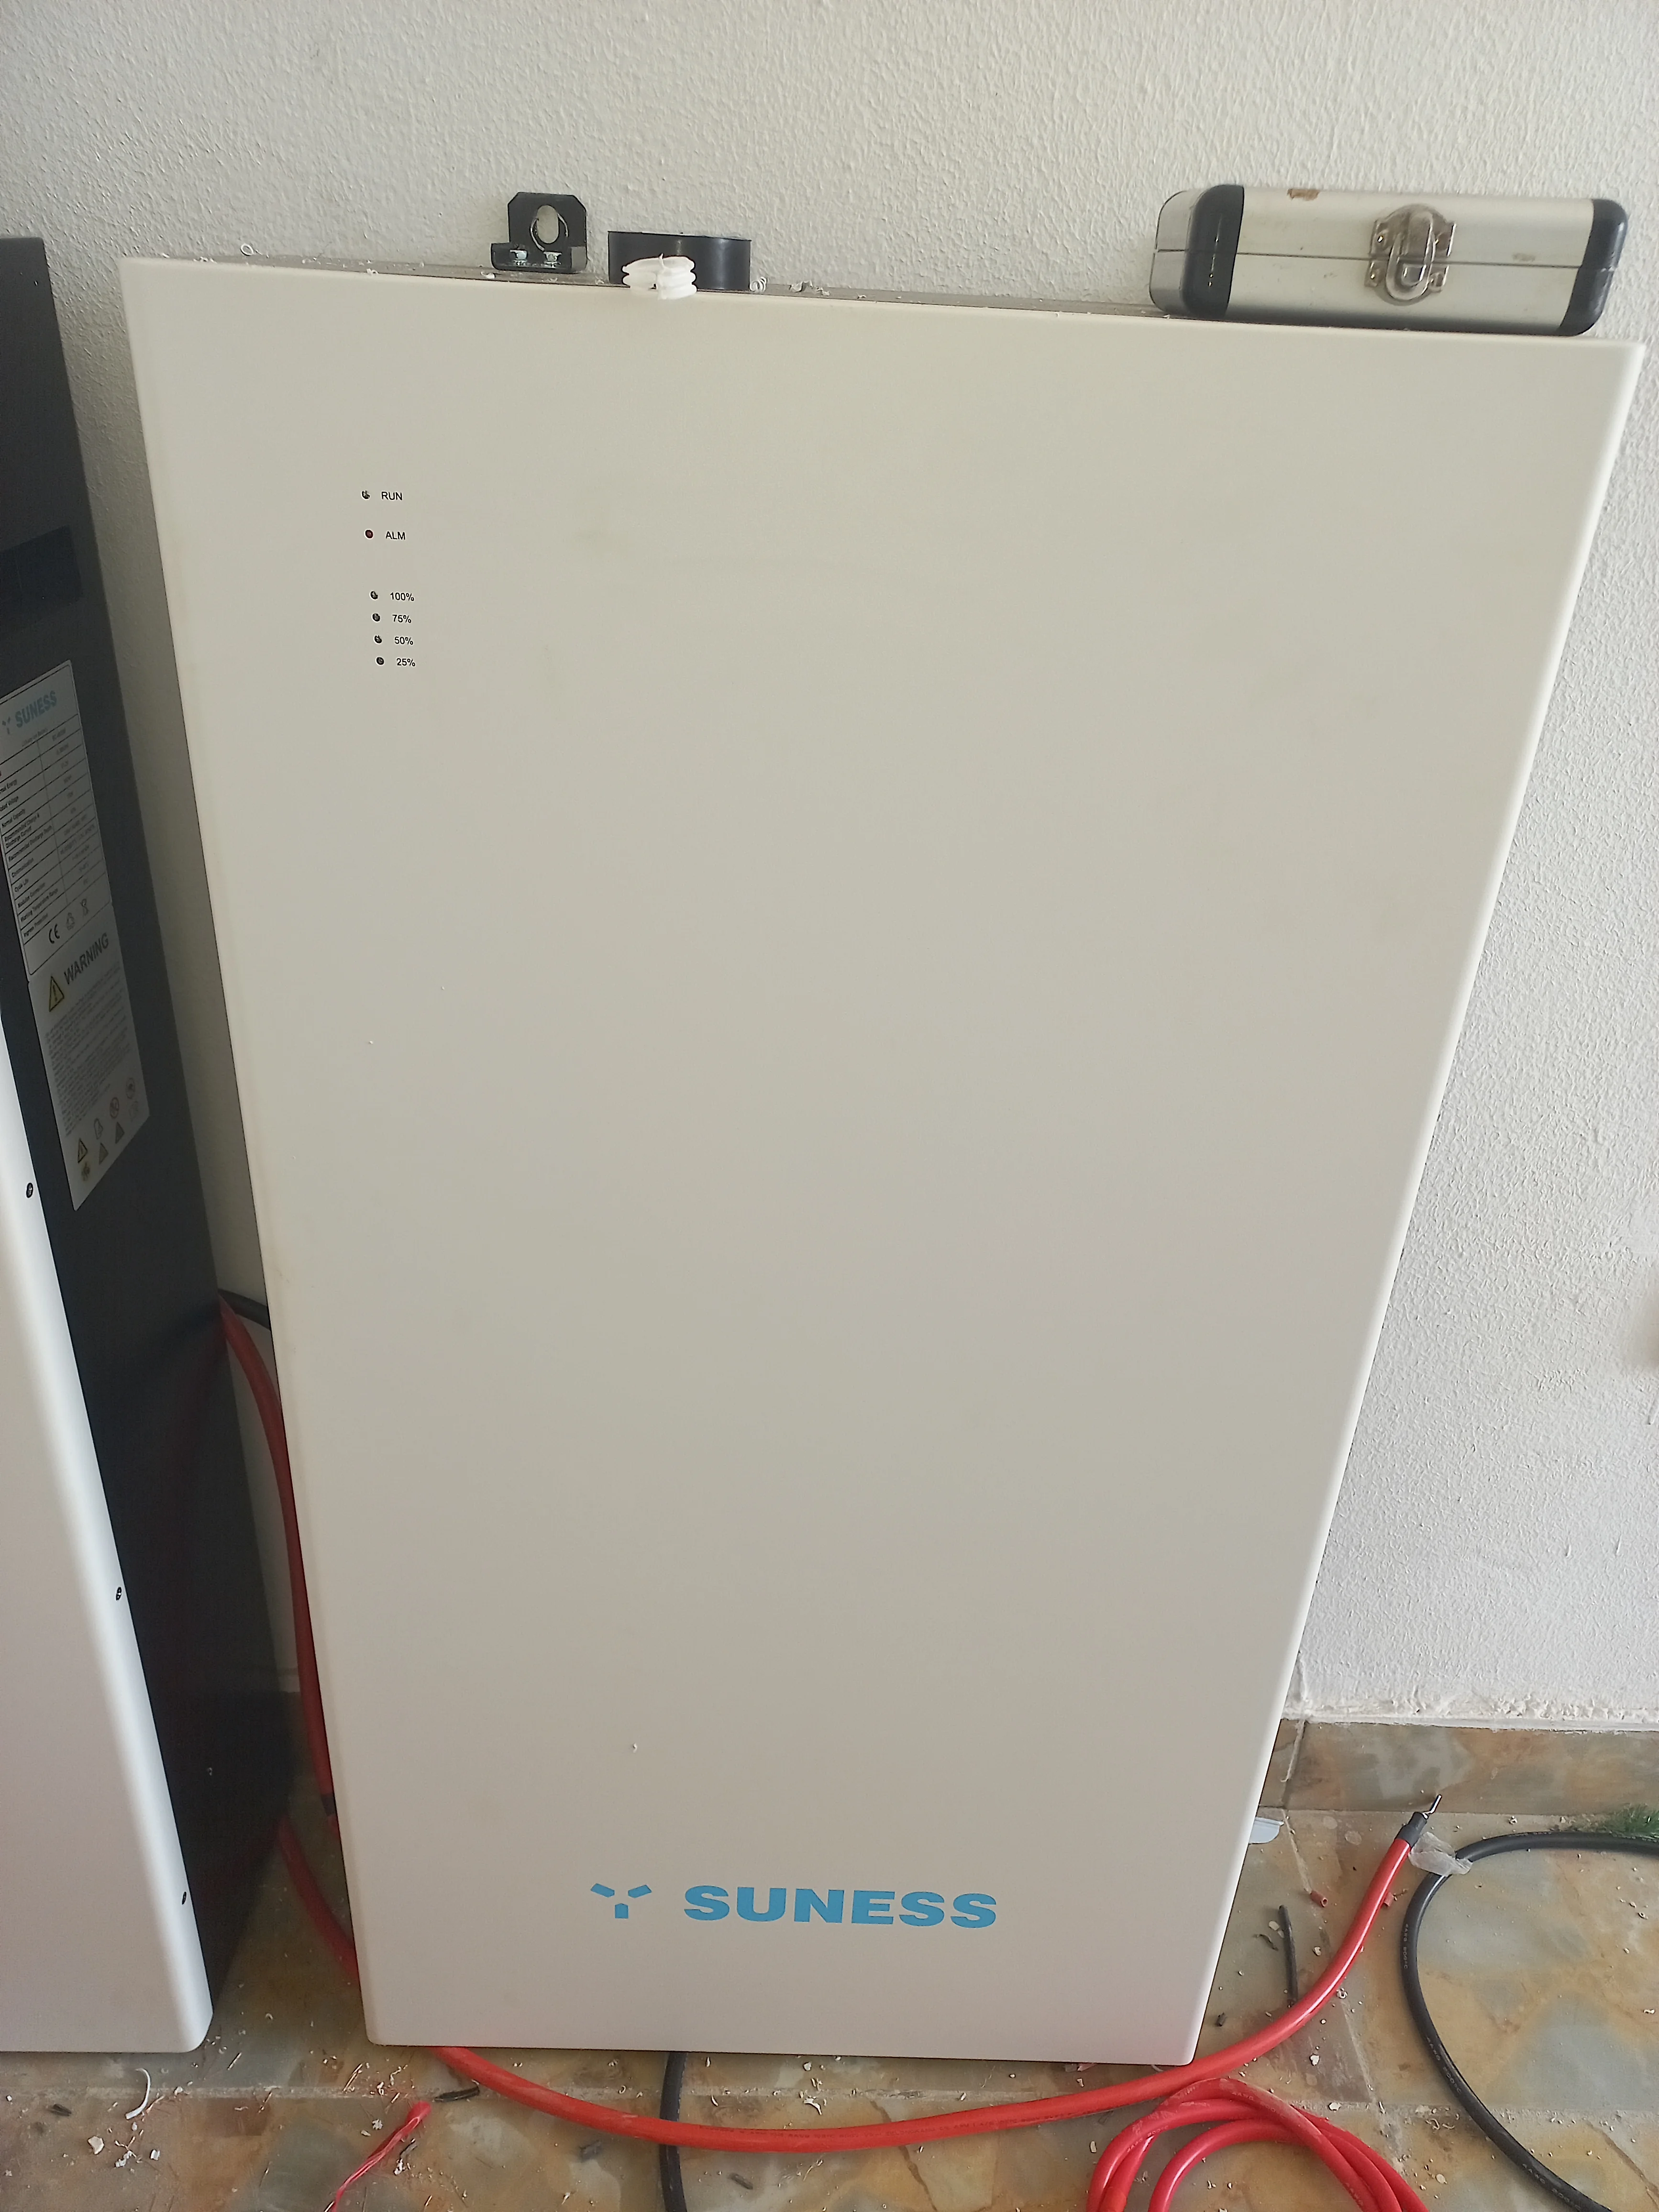
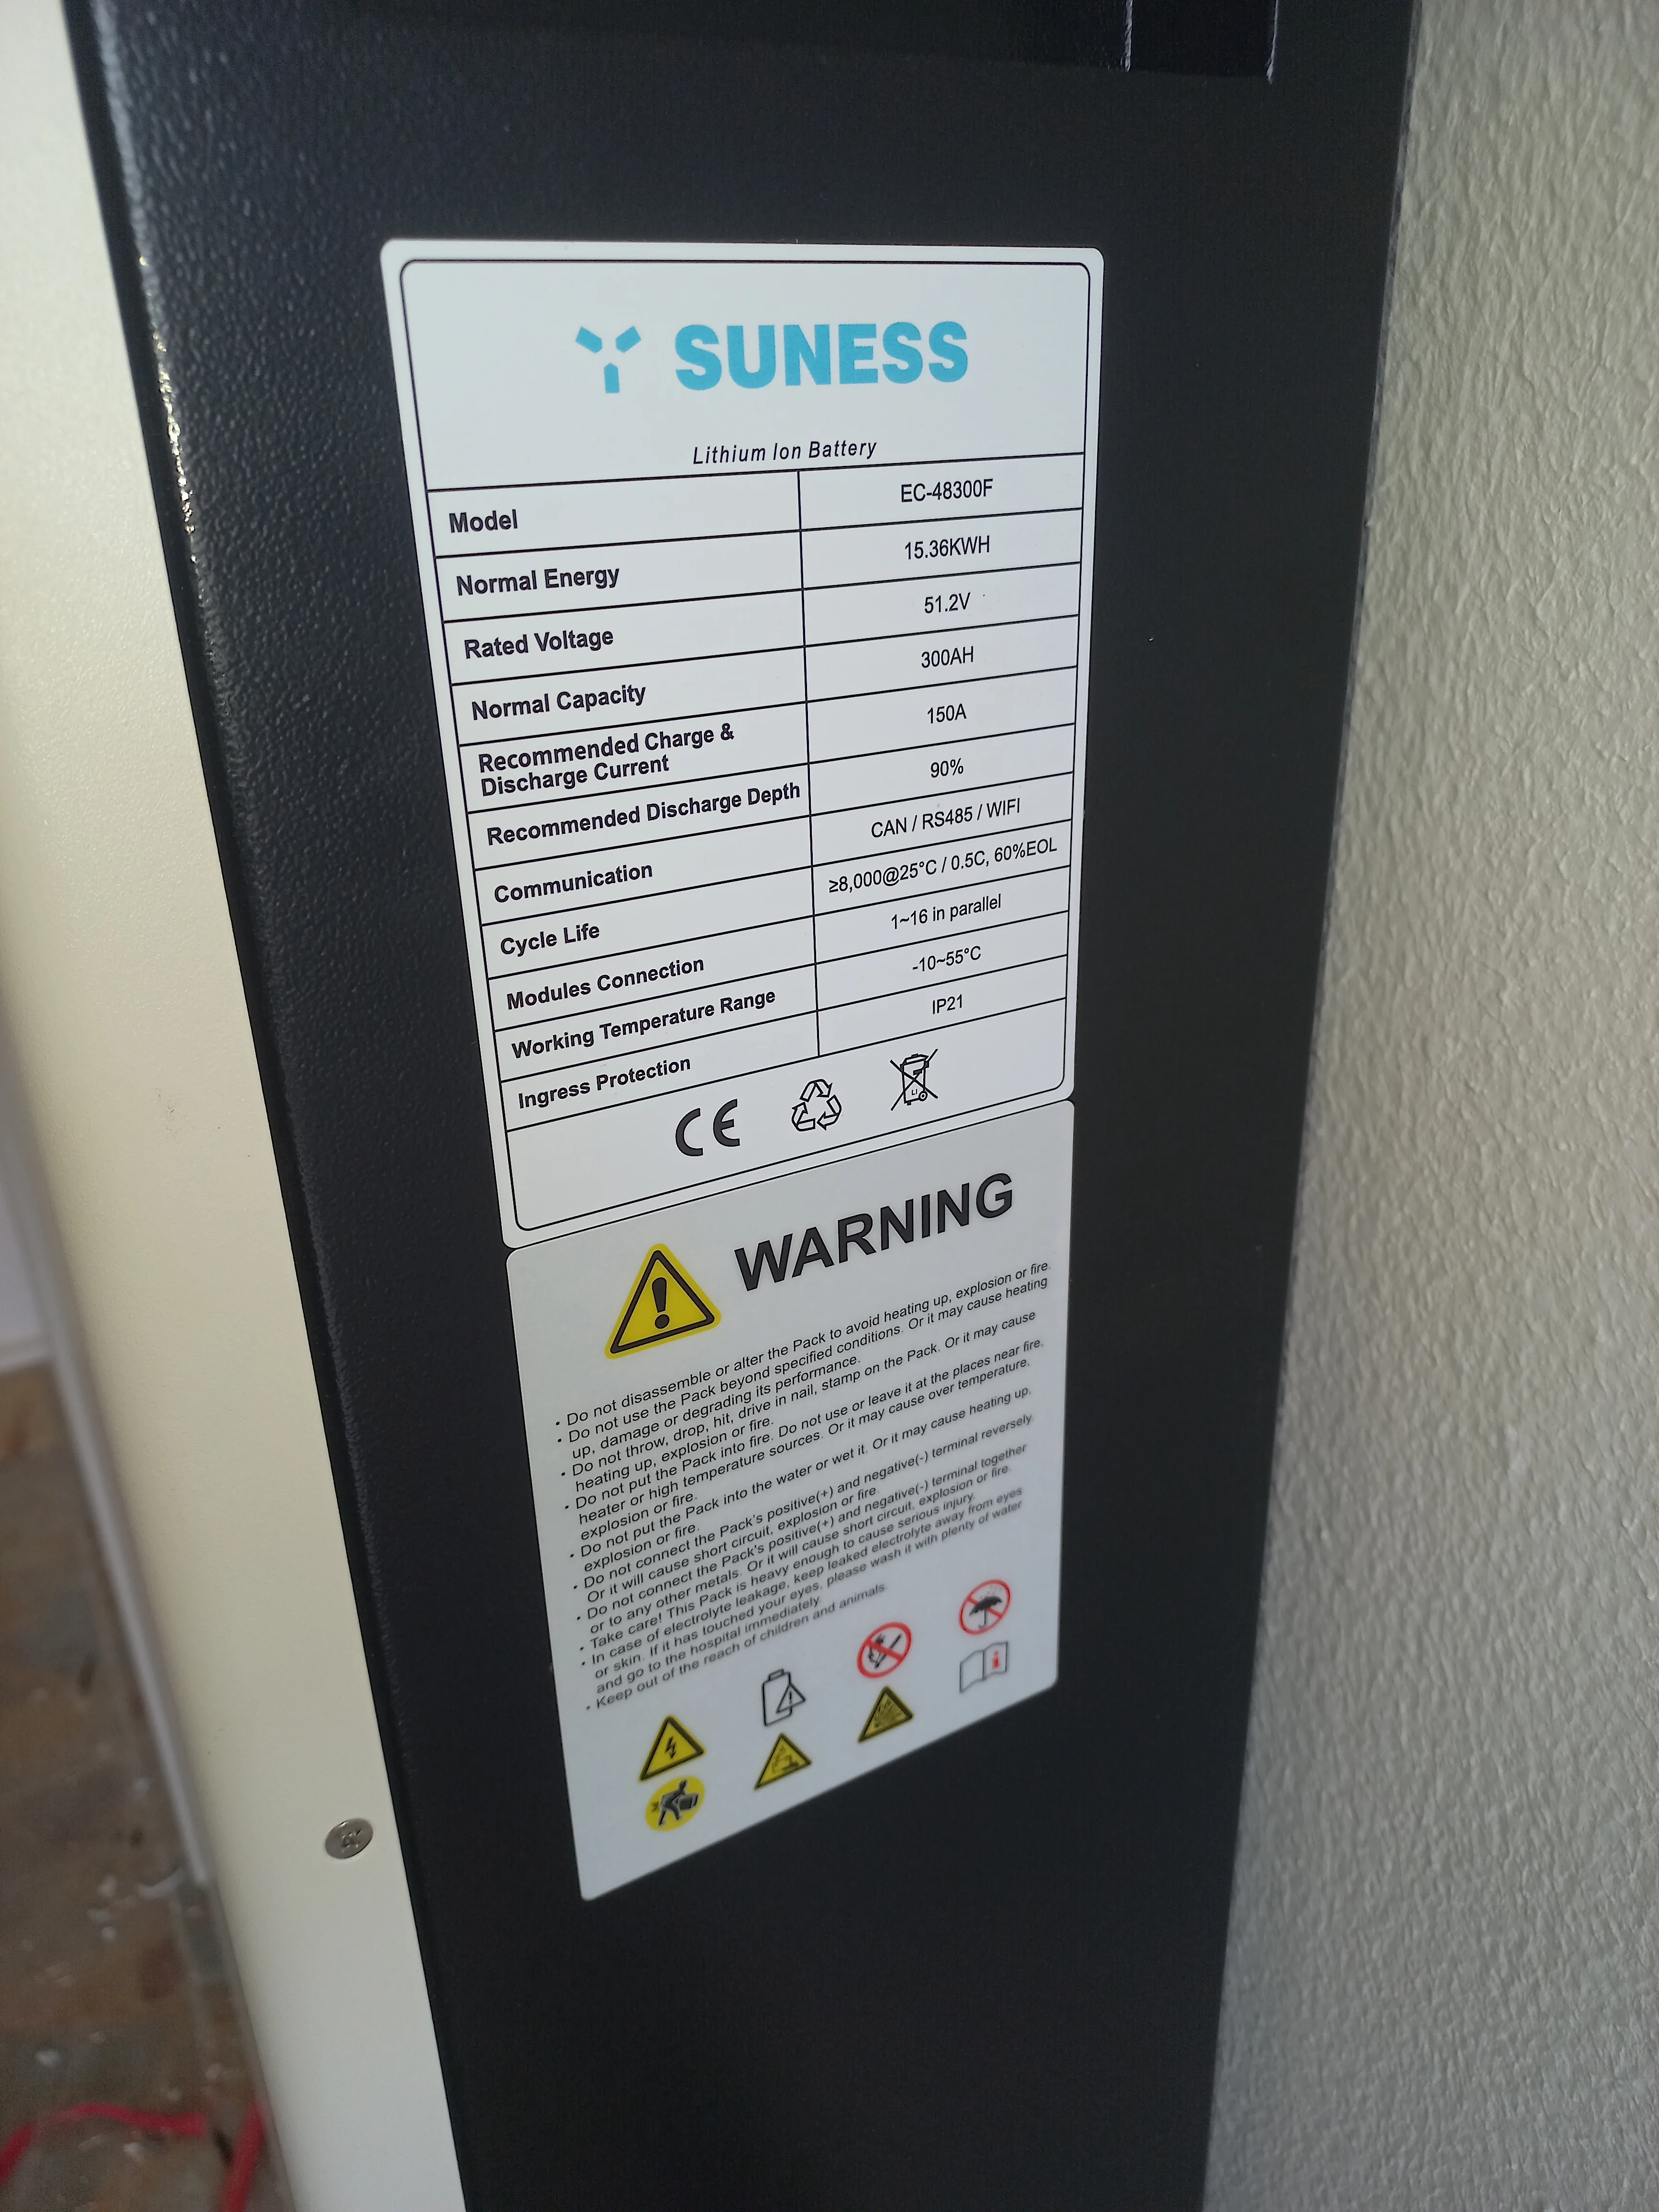
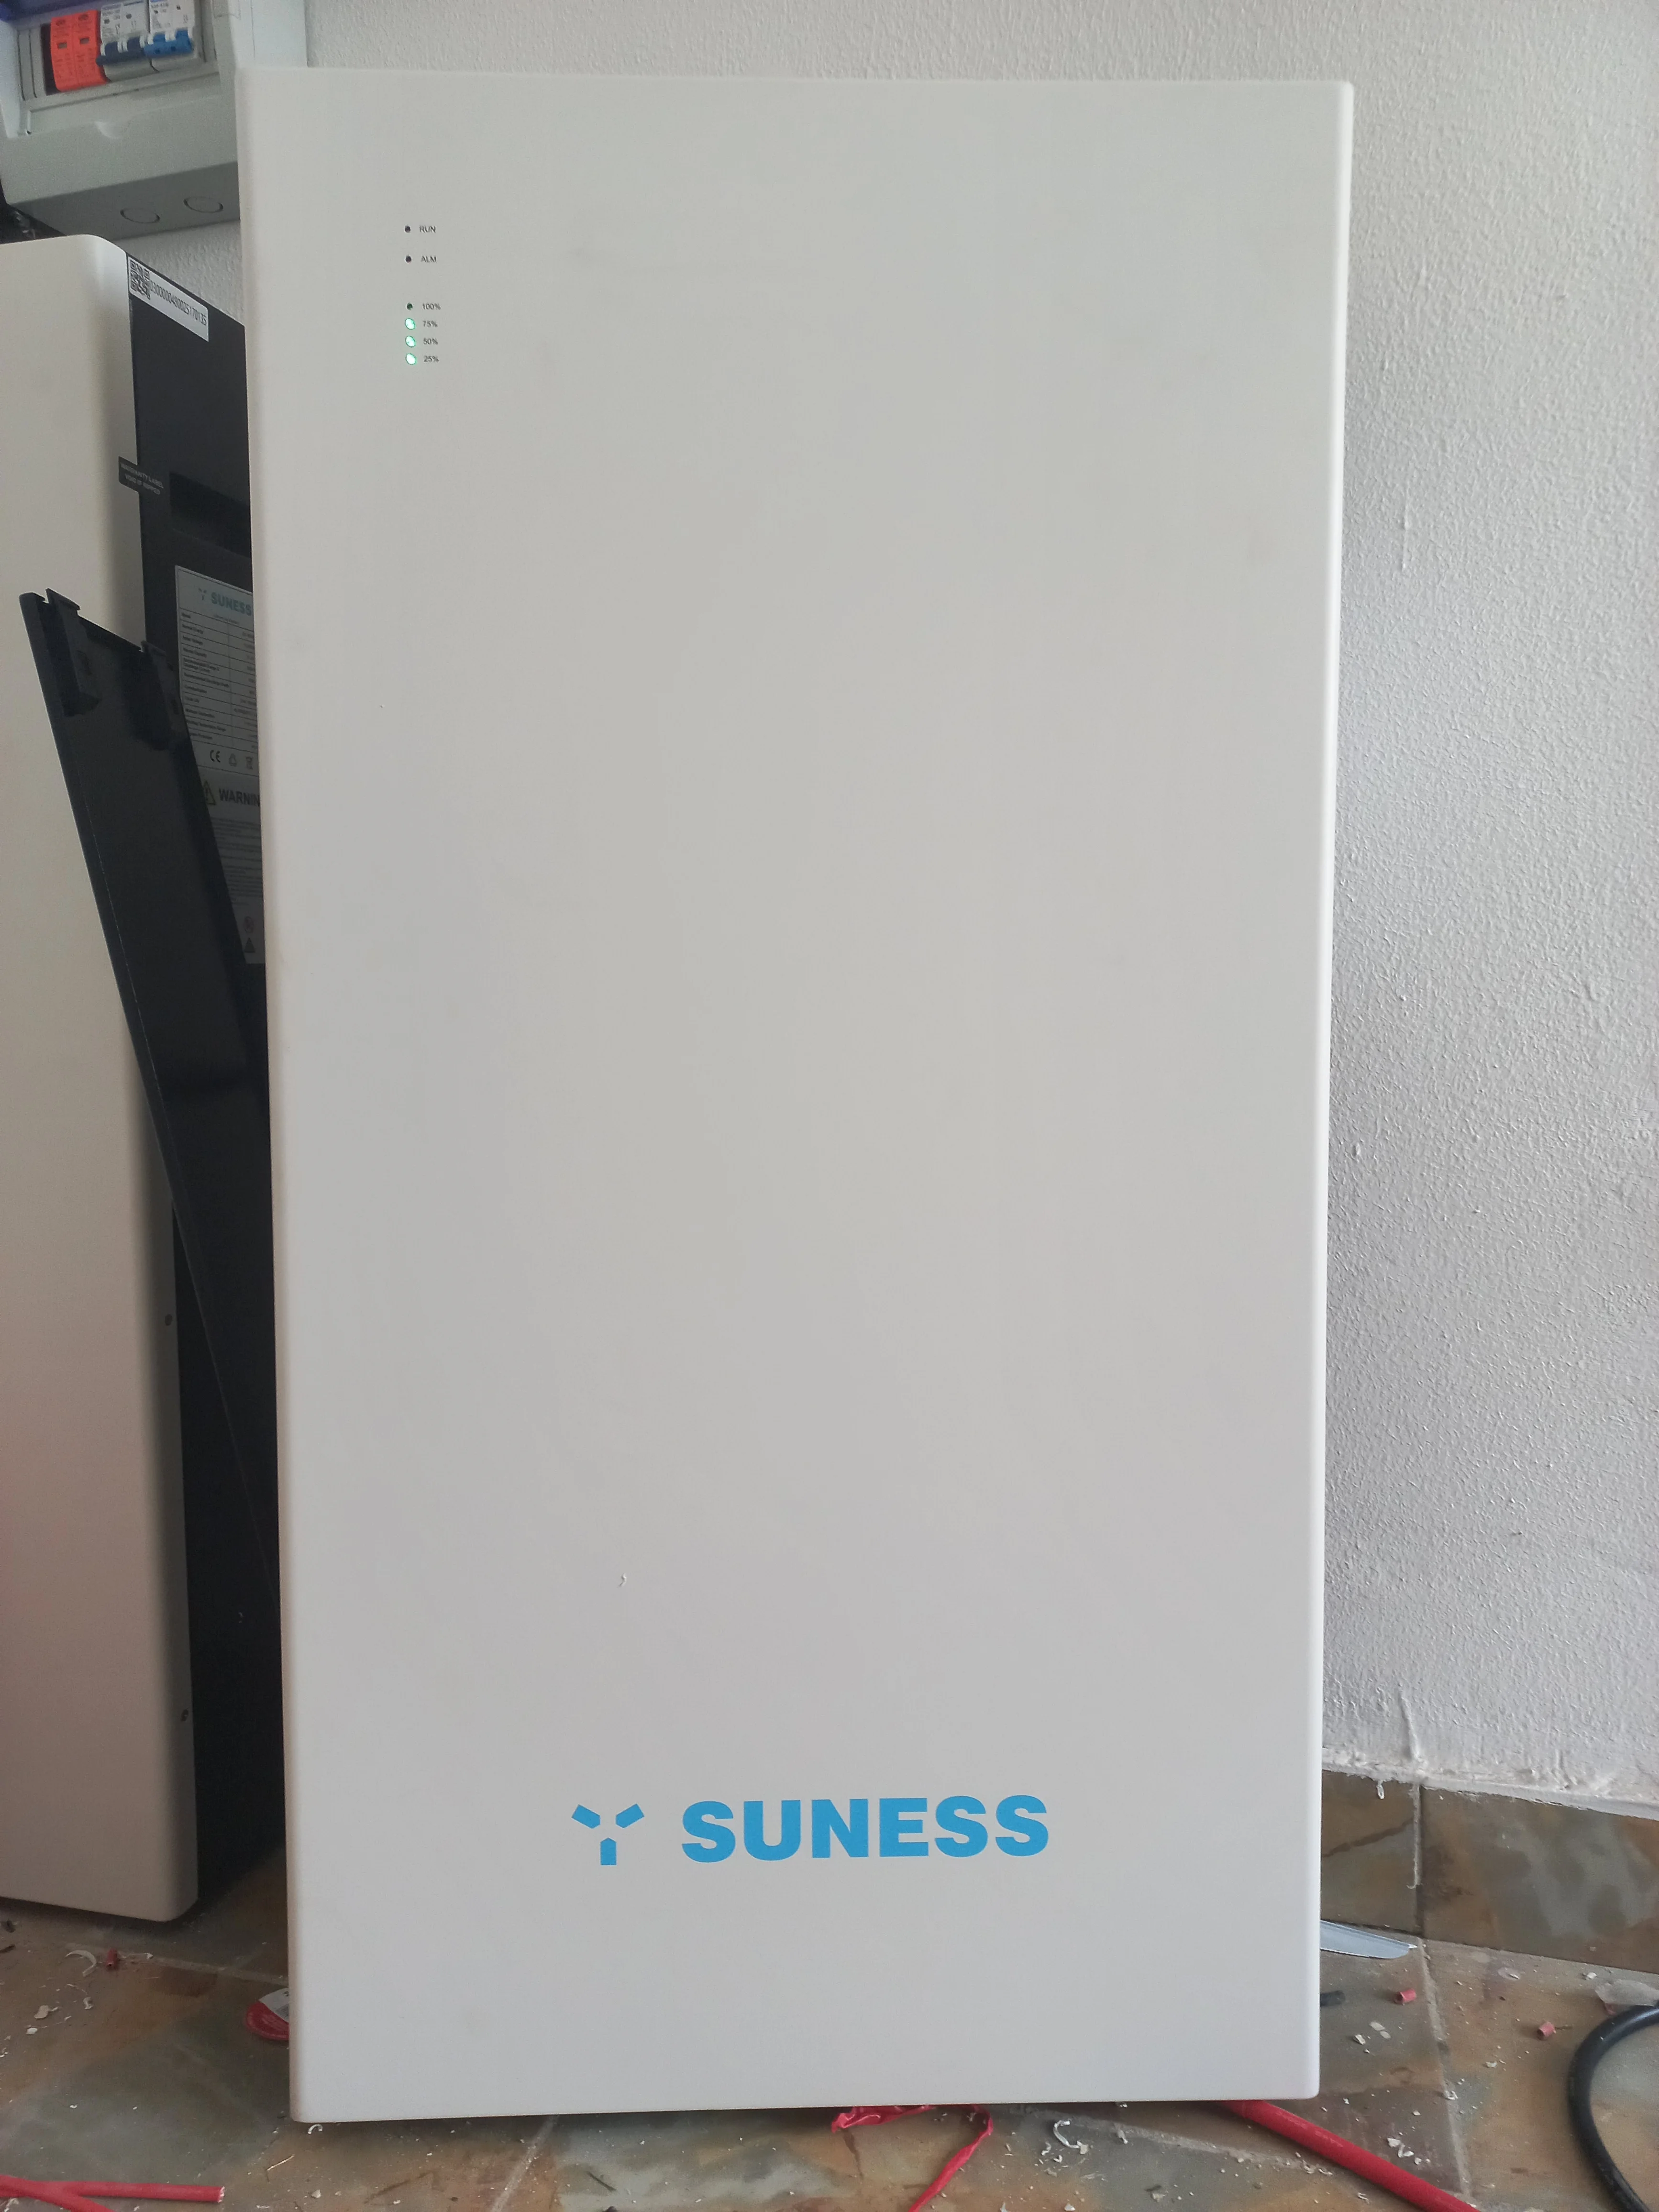
Battery Storage — SUNESS EC-48300F
- Quantity: 2 units (total 30kWh)
- Capacity: 15kWh per unit
- Chemistry: LiFePO4 (Lithium Iron Phosphate)
- Cell Manufacturer: CATL
- Nominal Voltage: 48V
- Gross Weight: 137kg per unit
- Package Dimensions: 1100 x 625 x 390mm
- Mounting: Floor-standing with metal bracket stands
- Status Indicators: Green LED charge level indicators
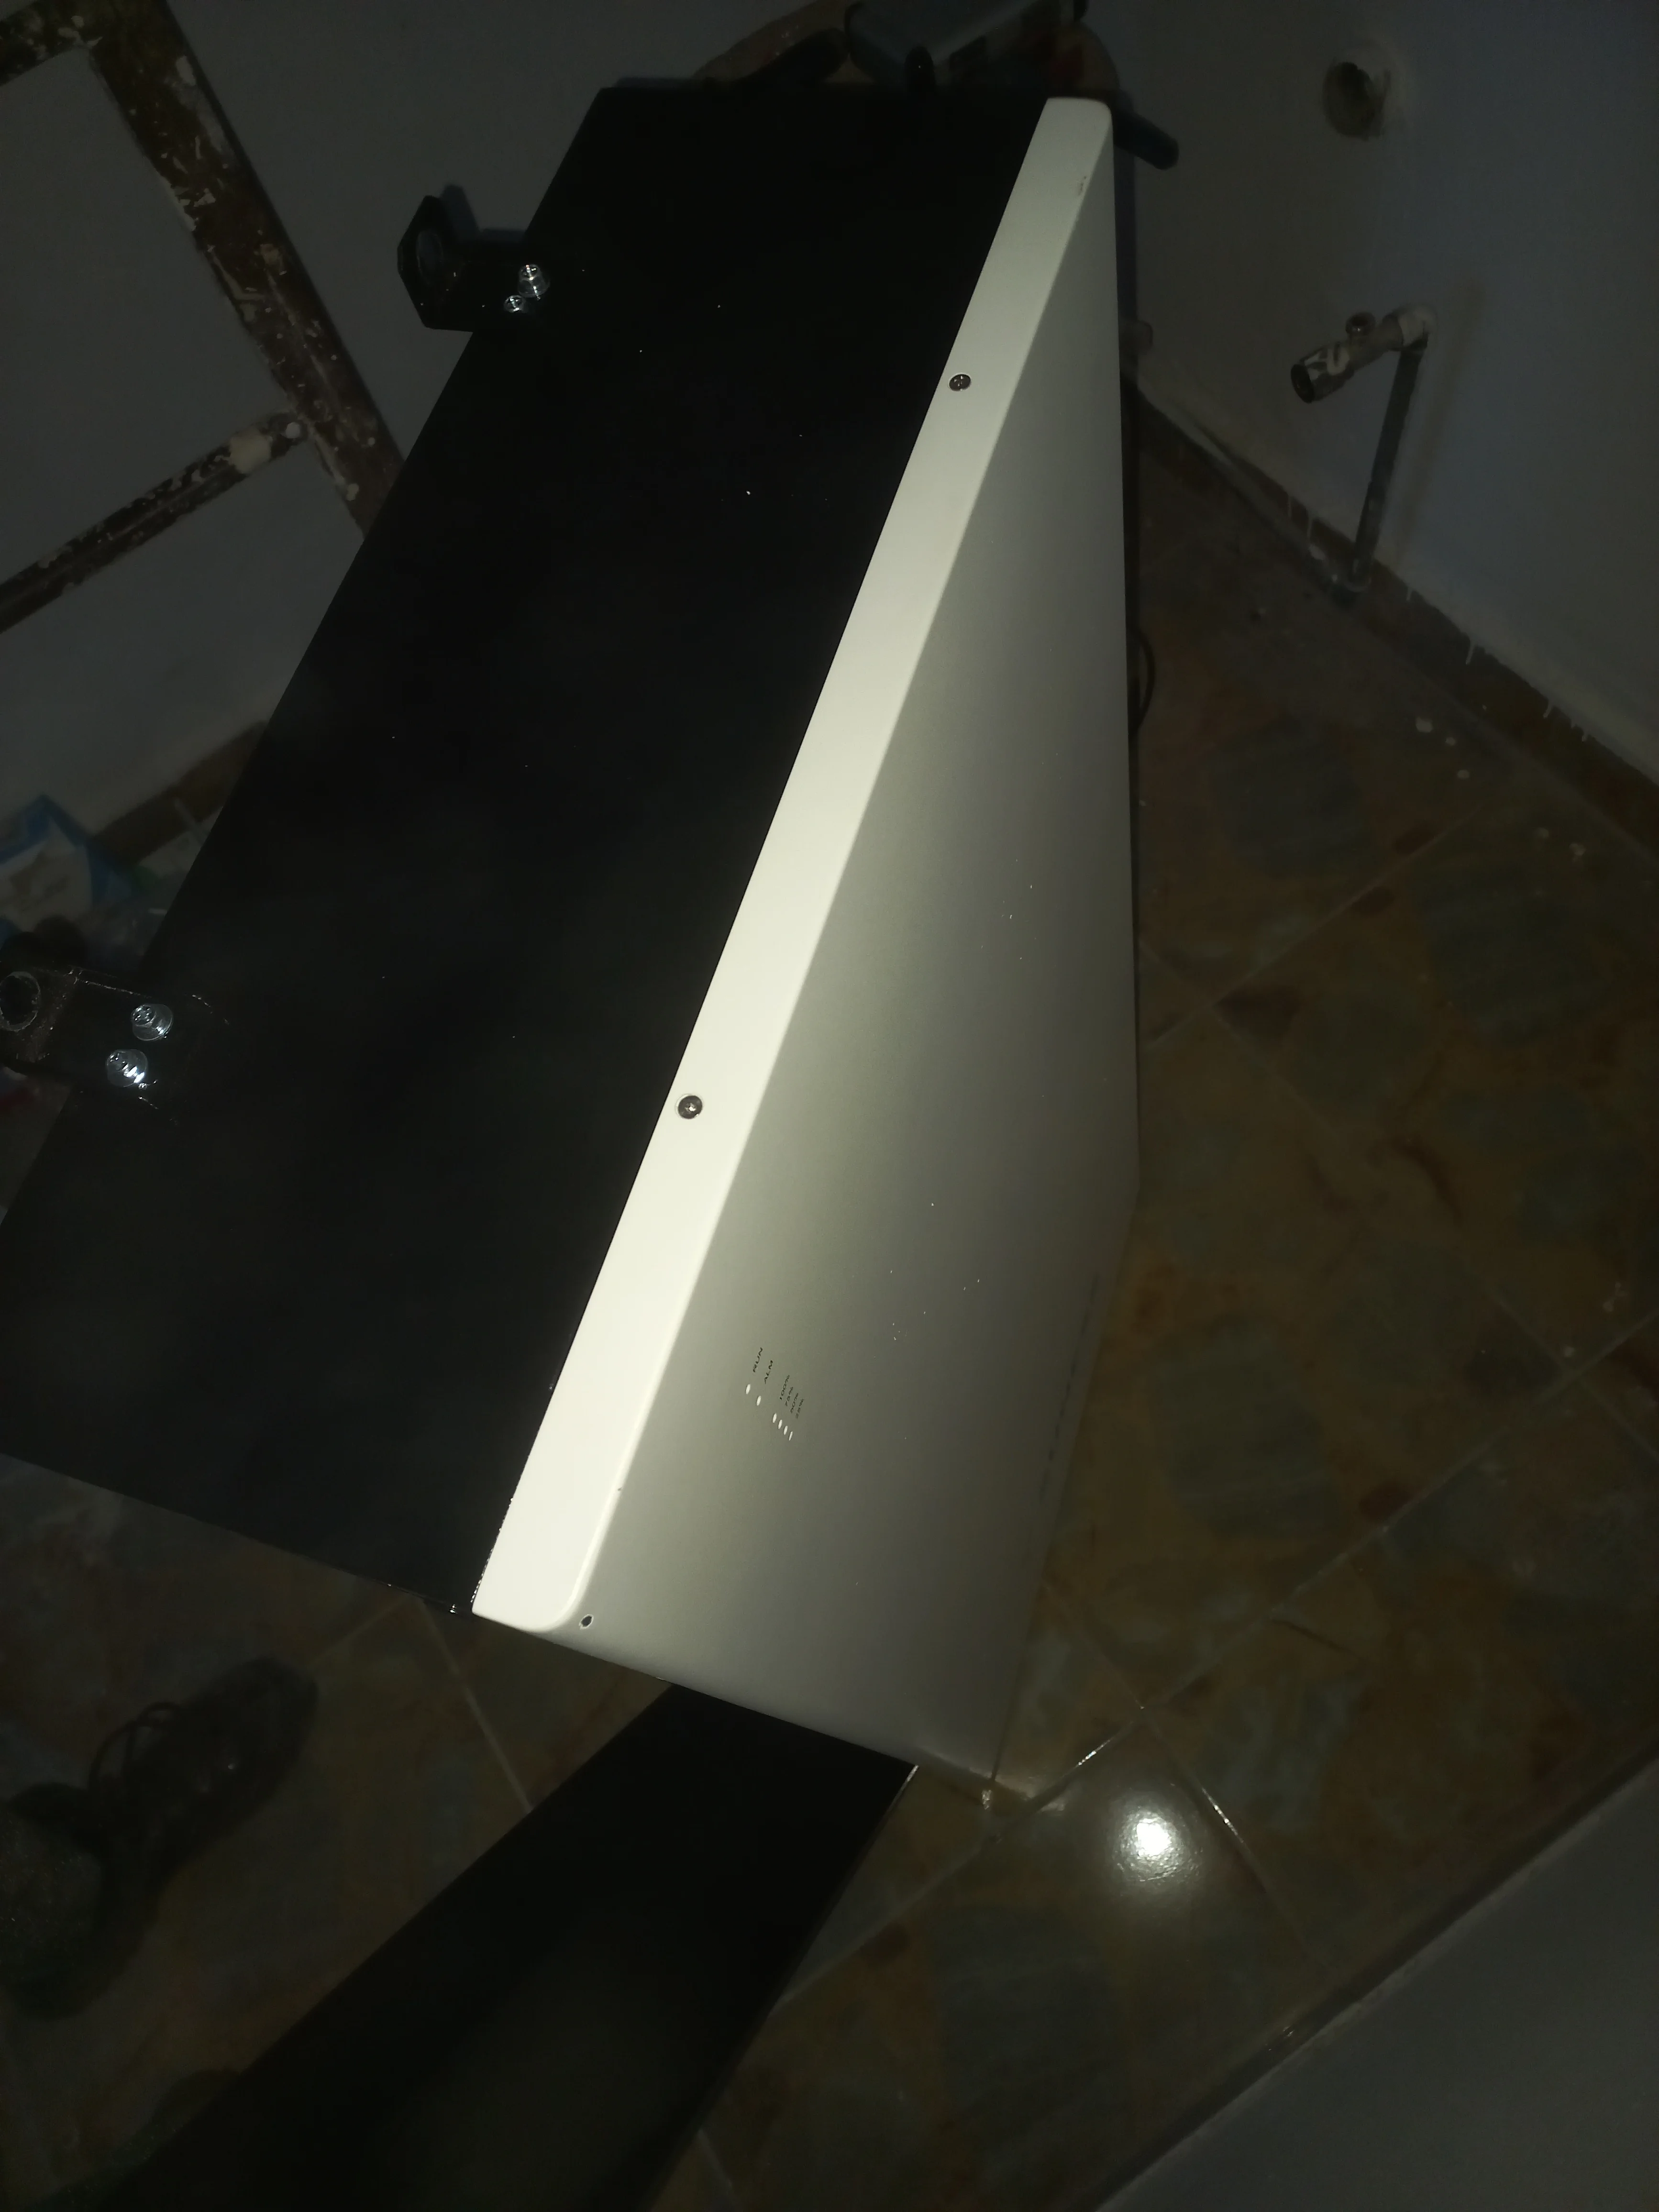
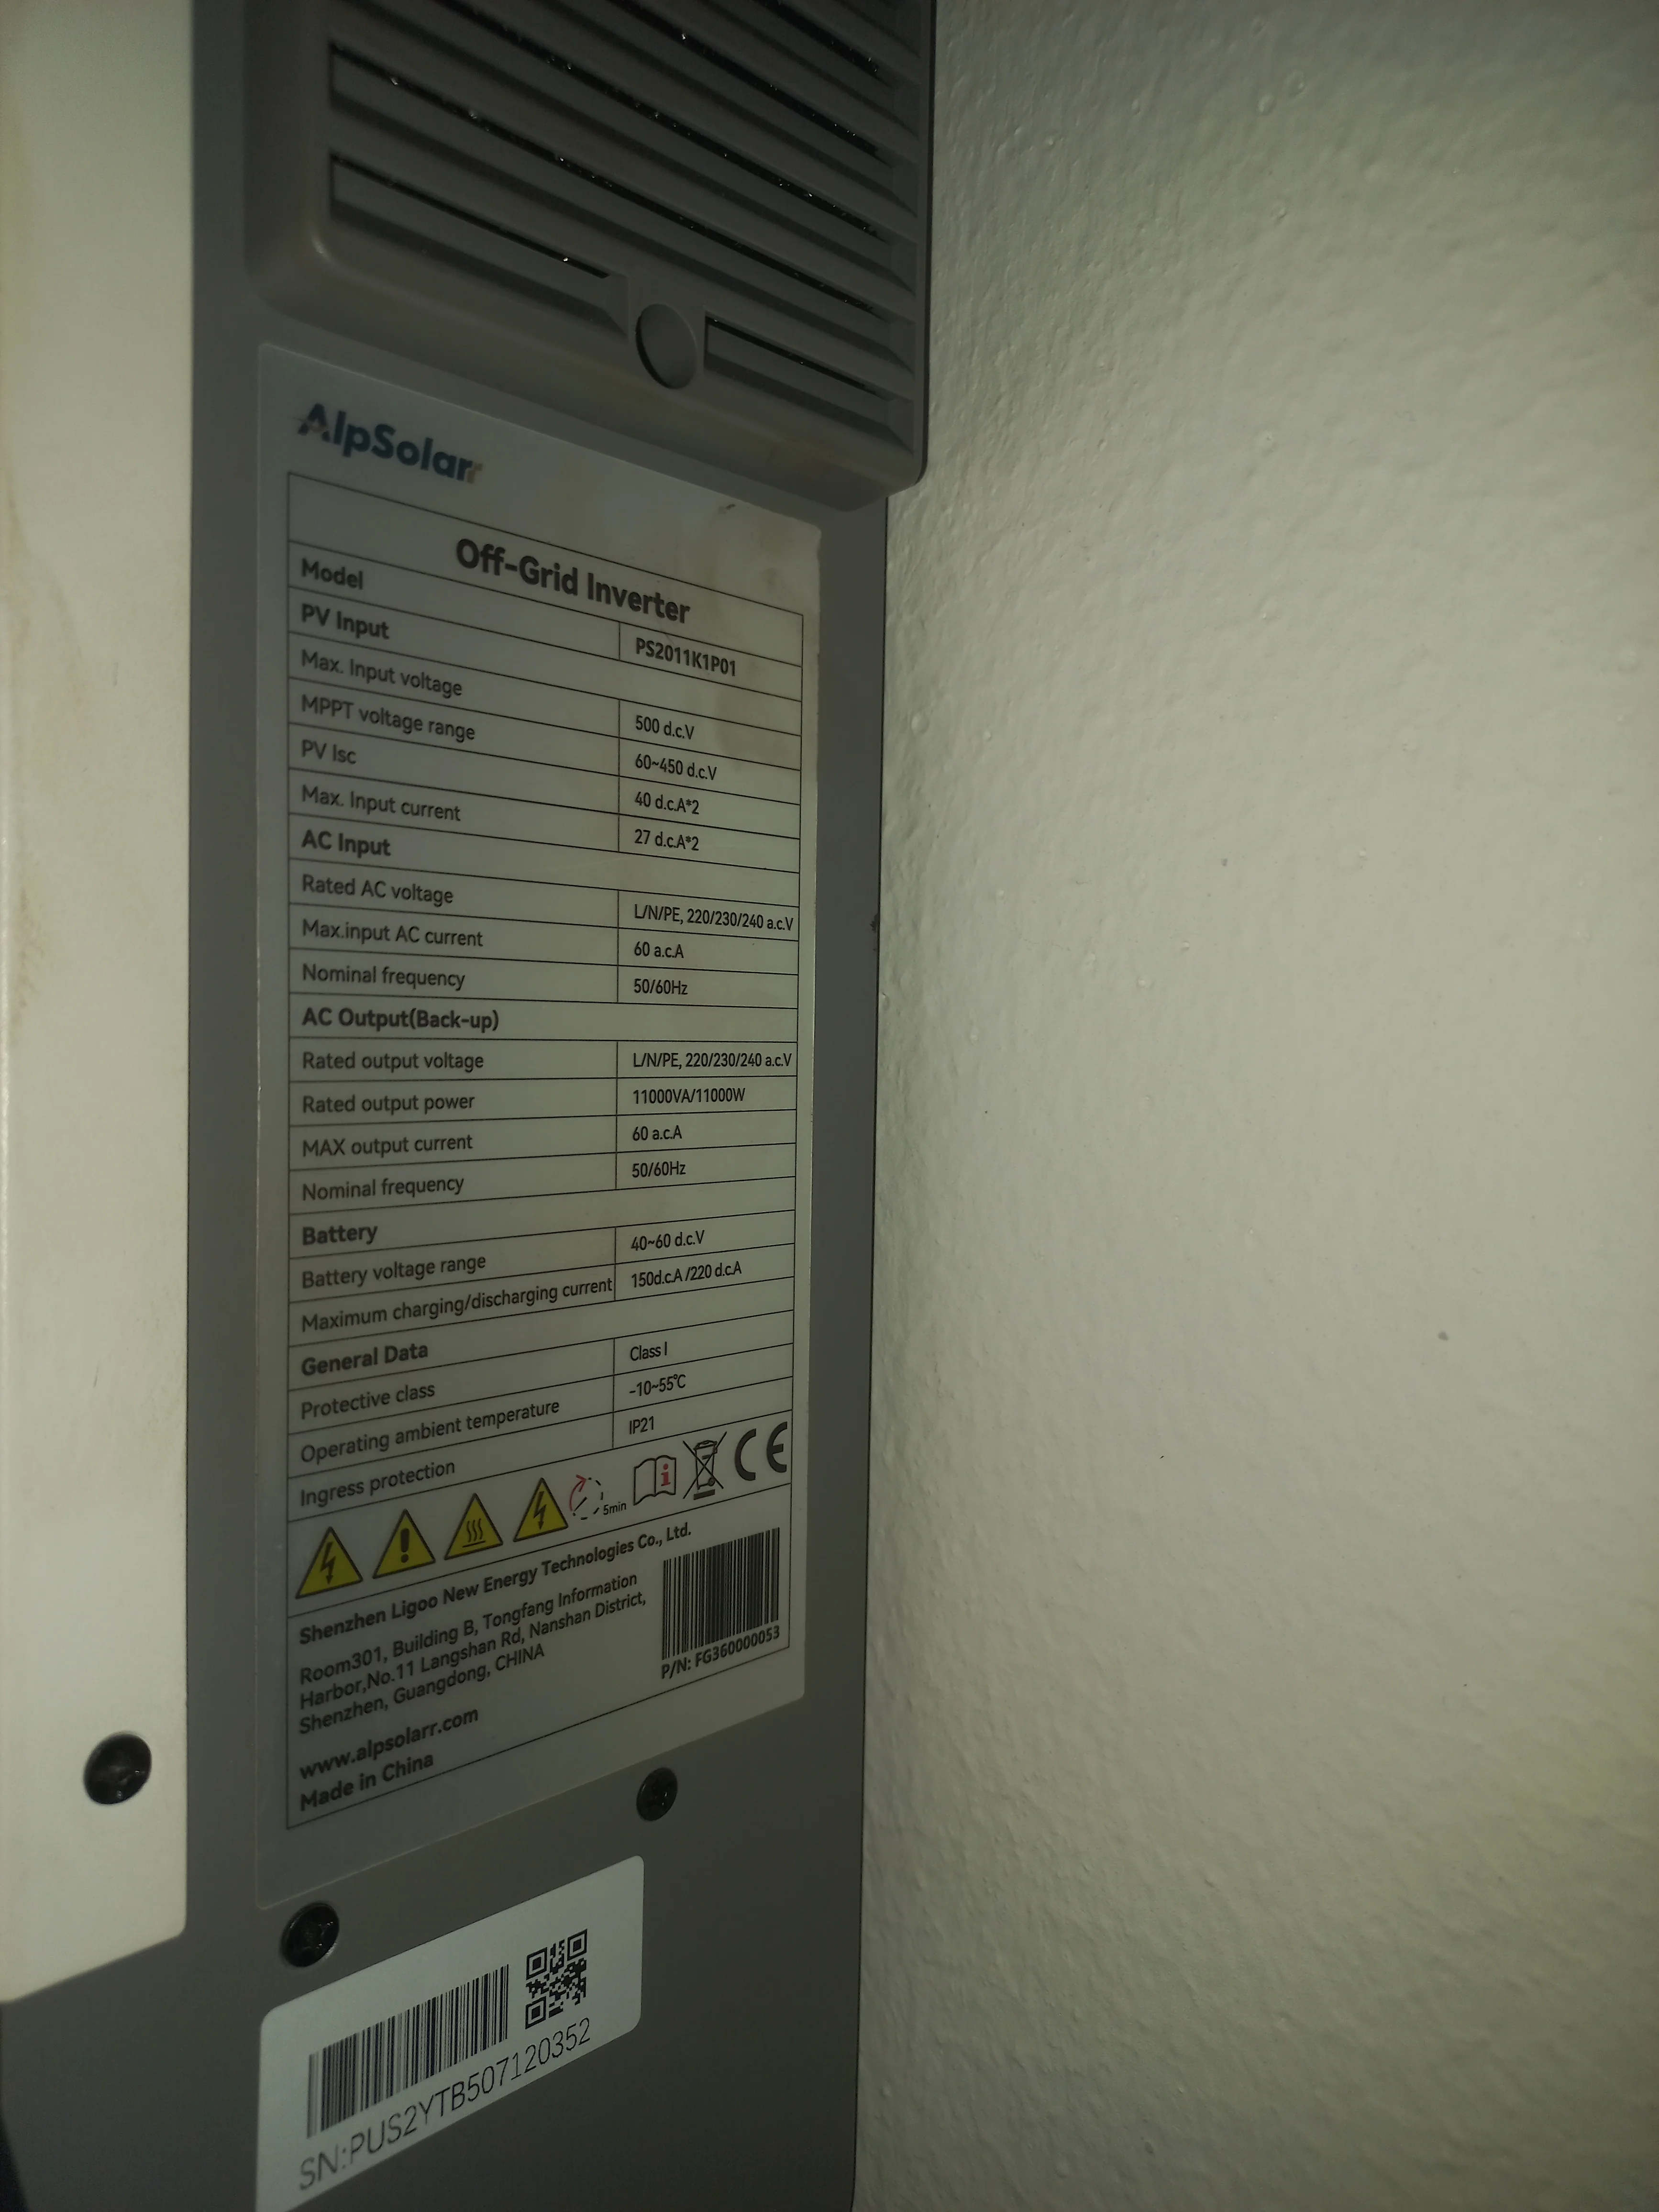
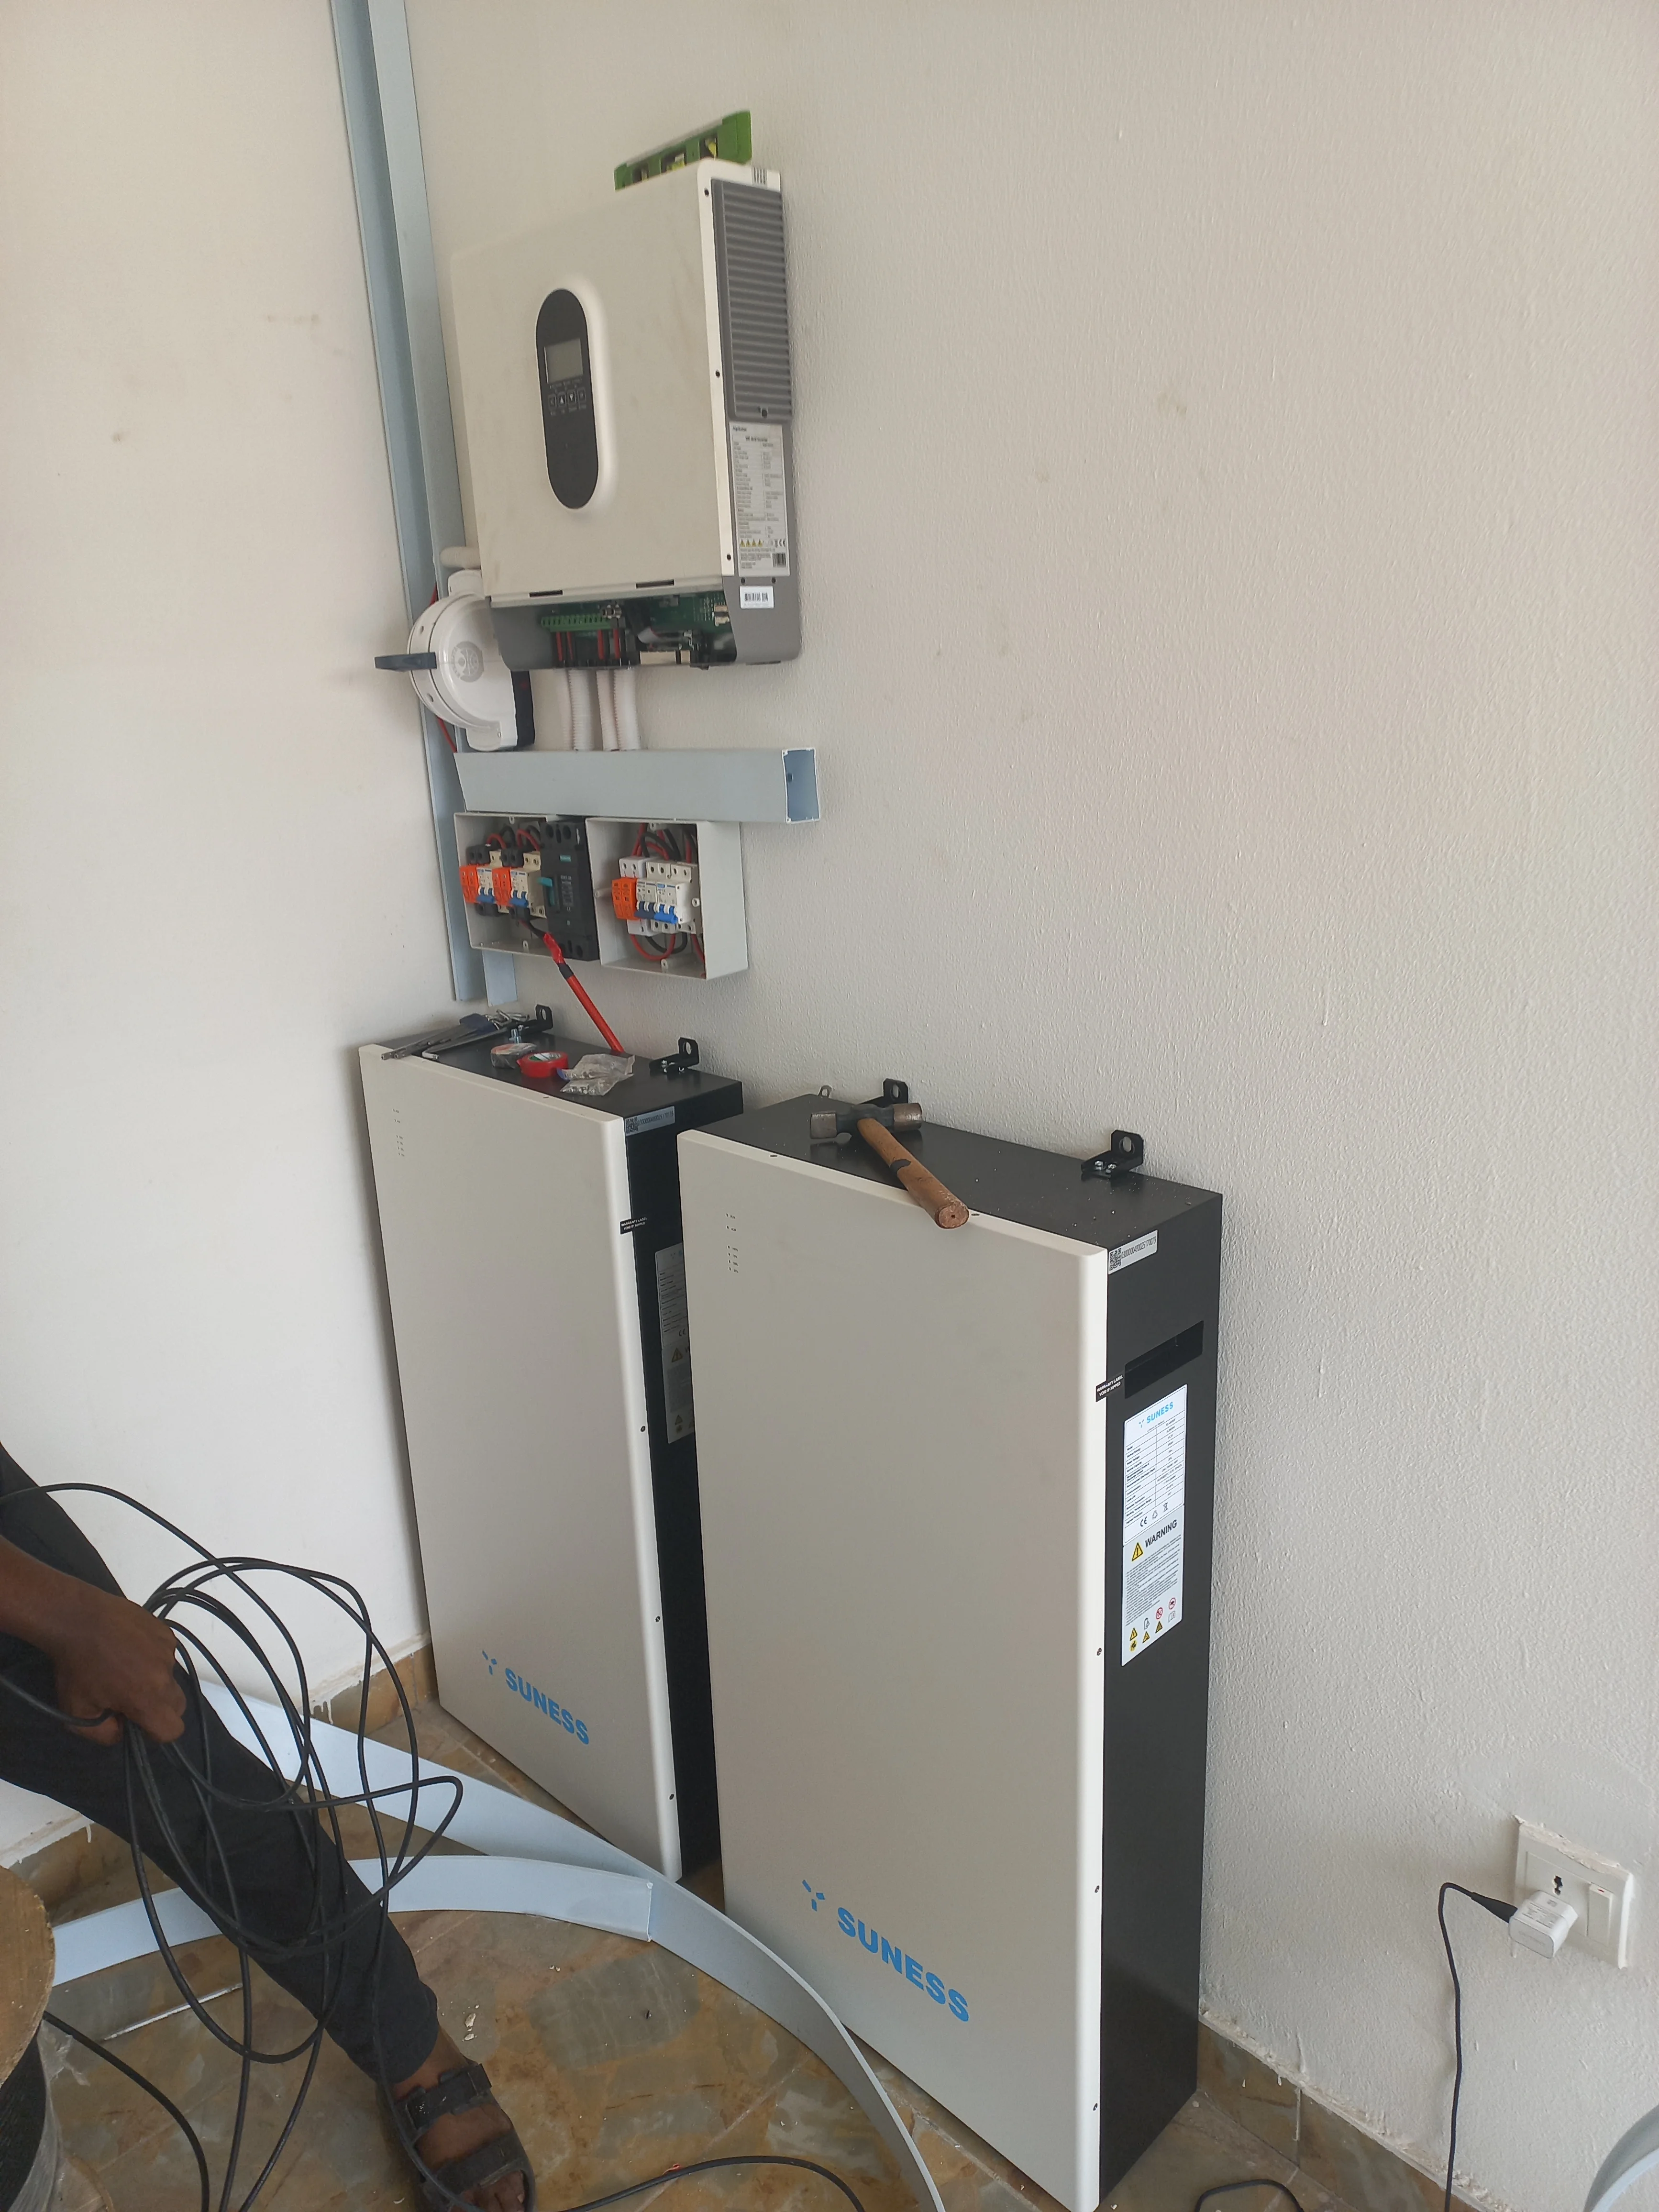
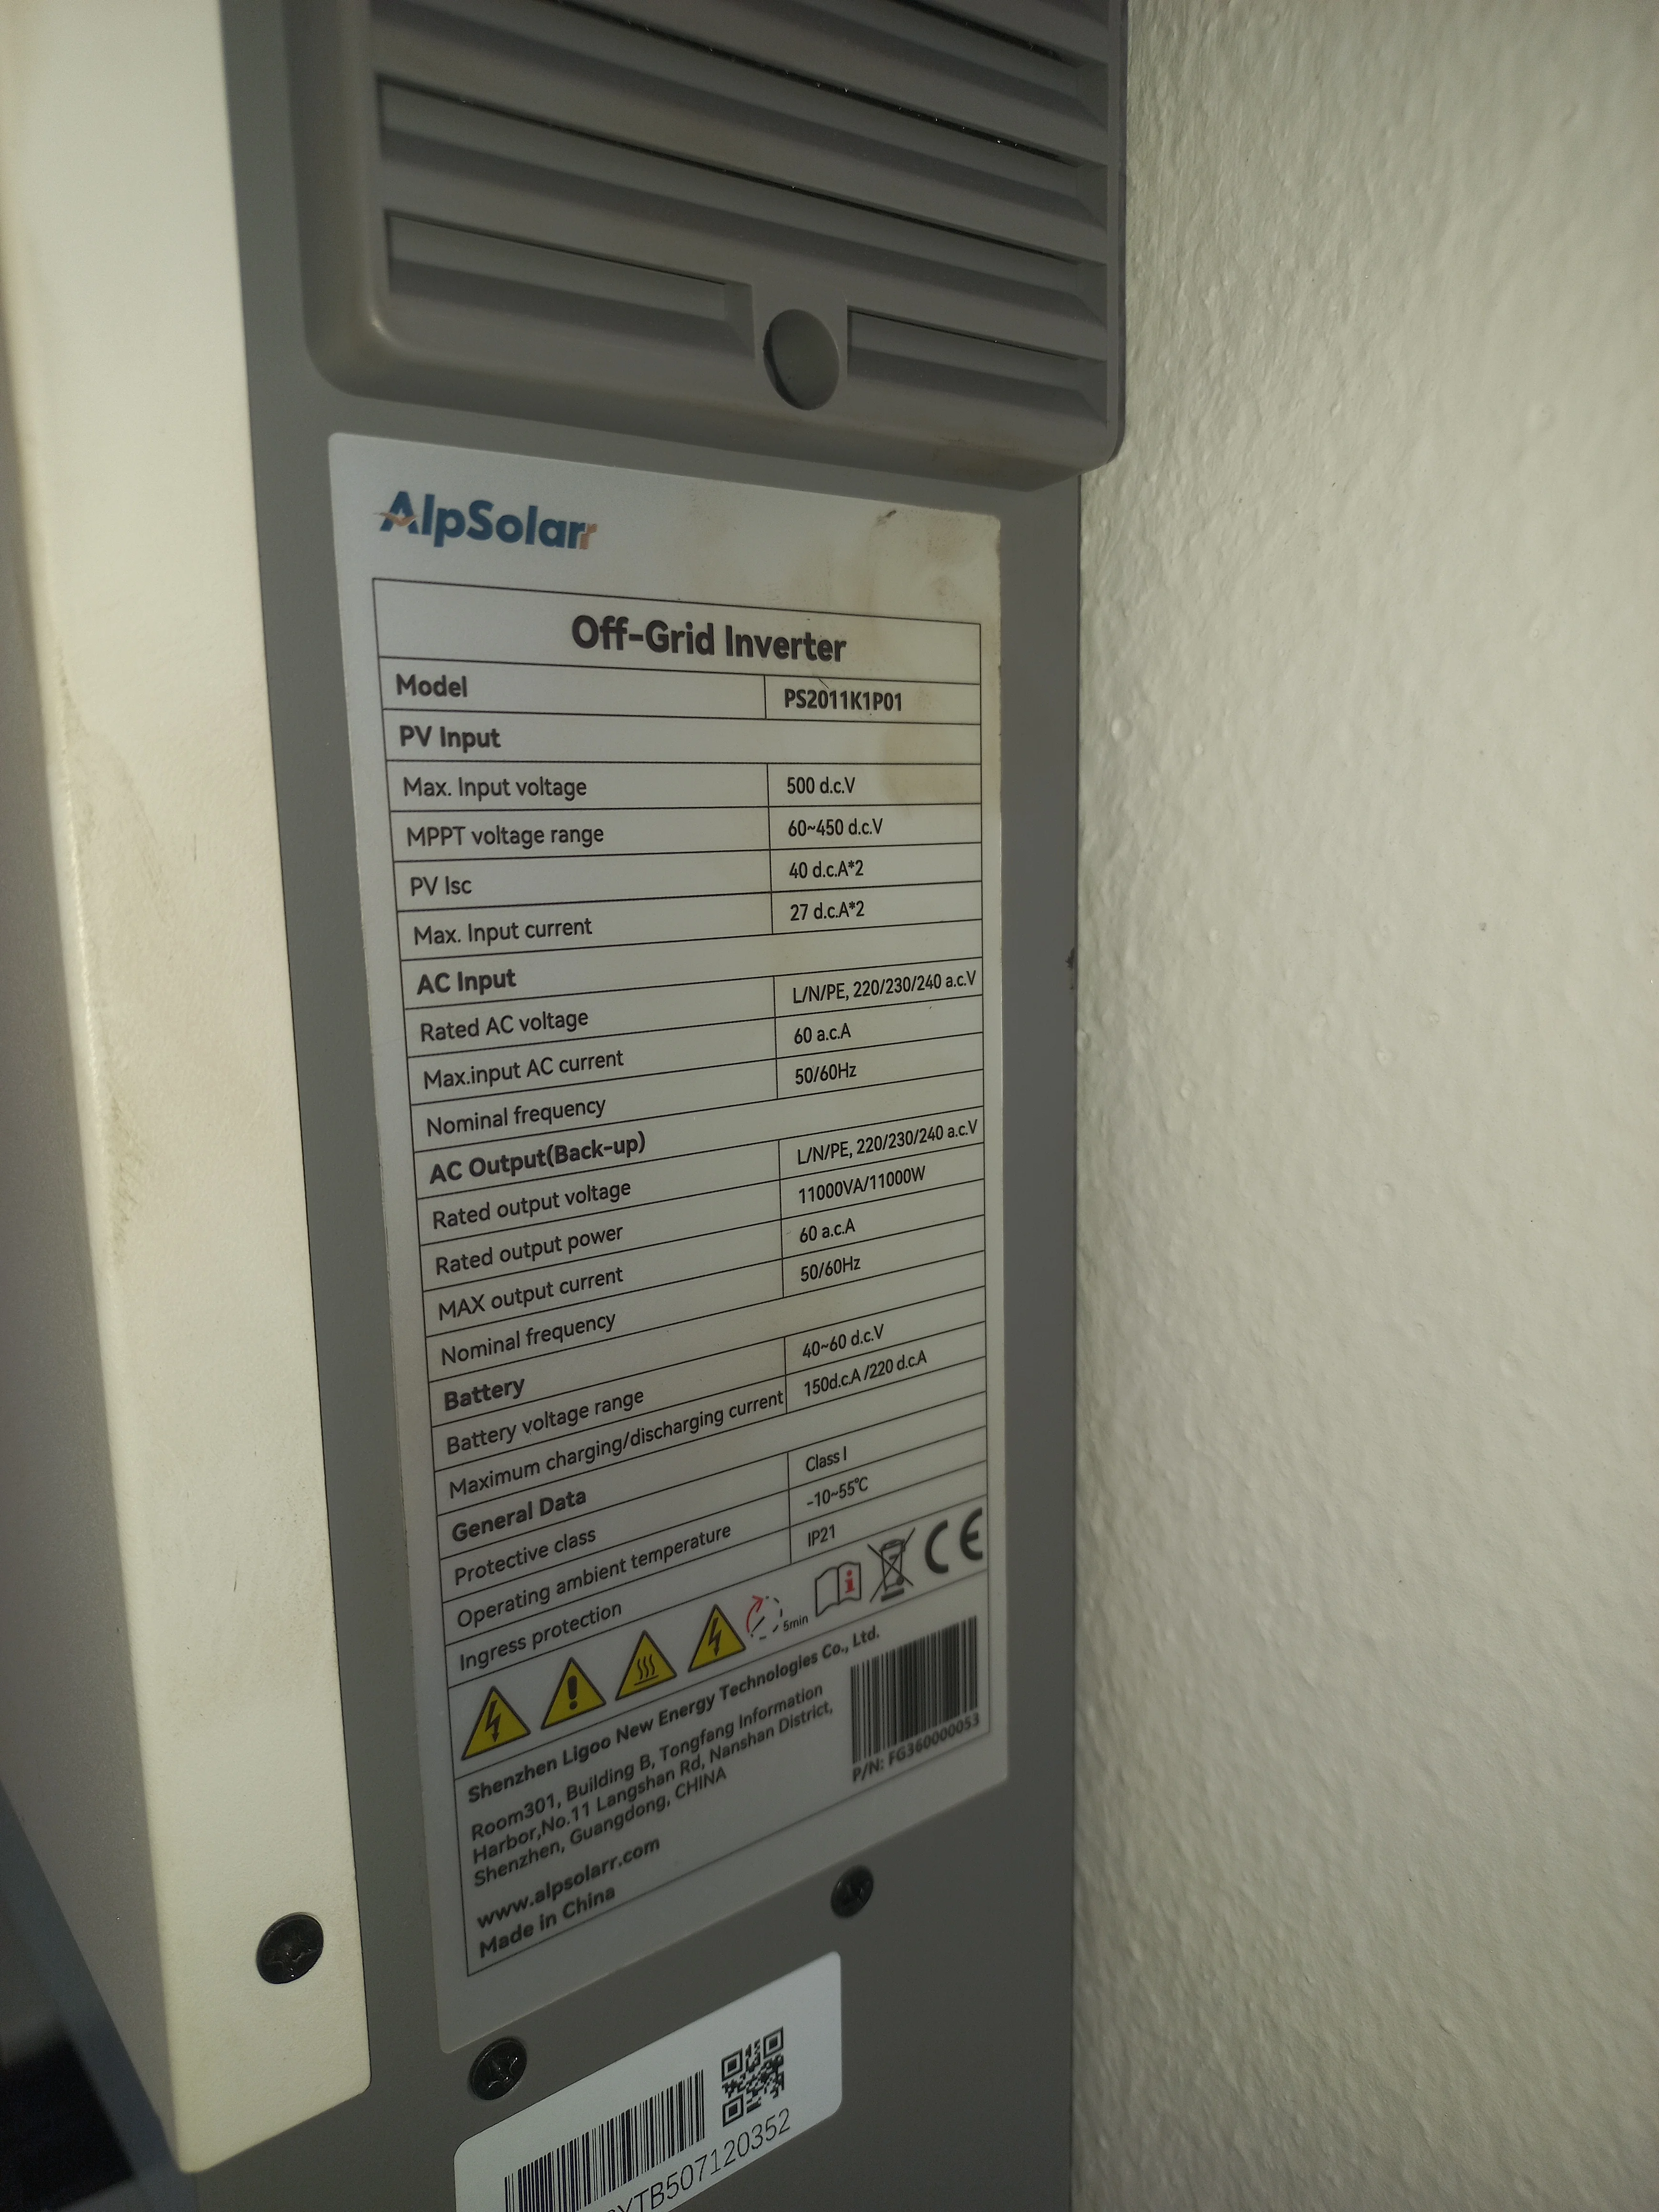
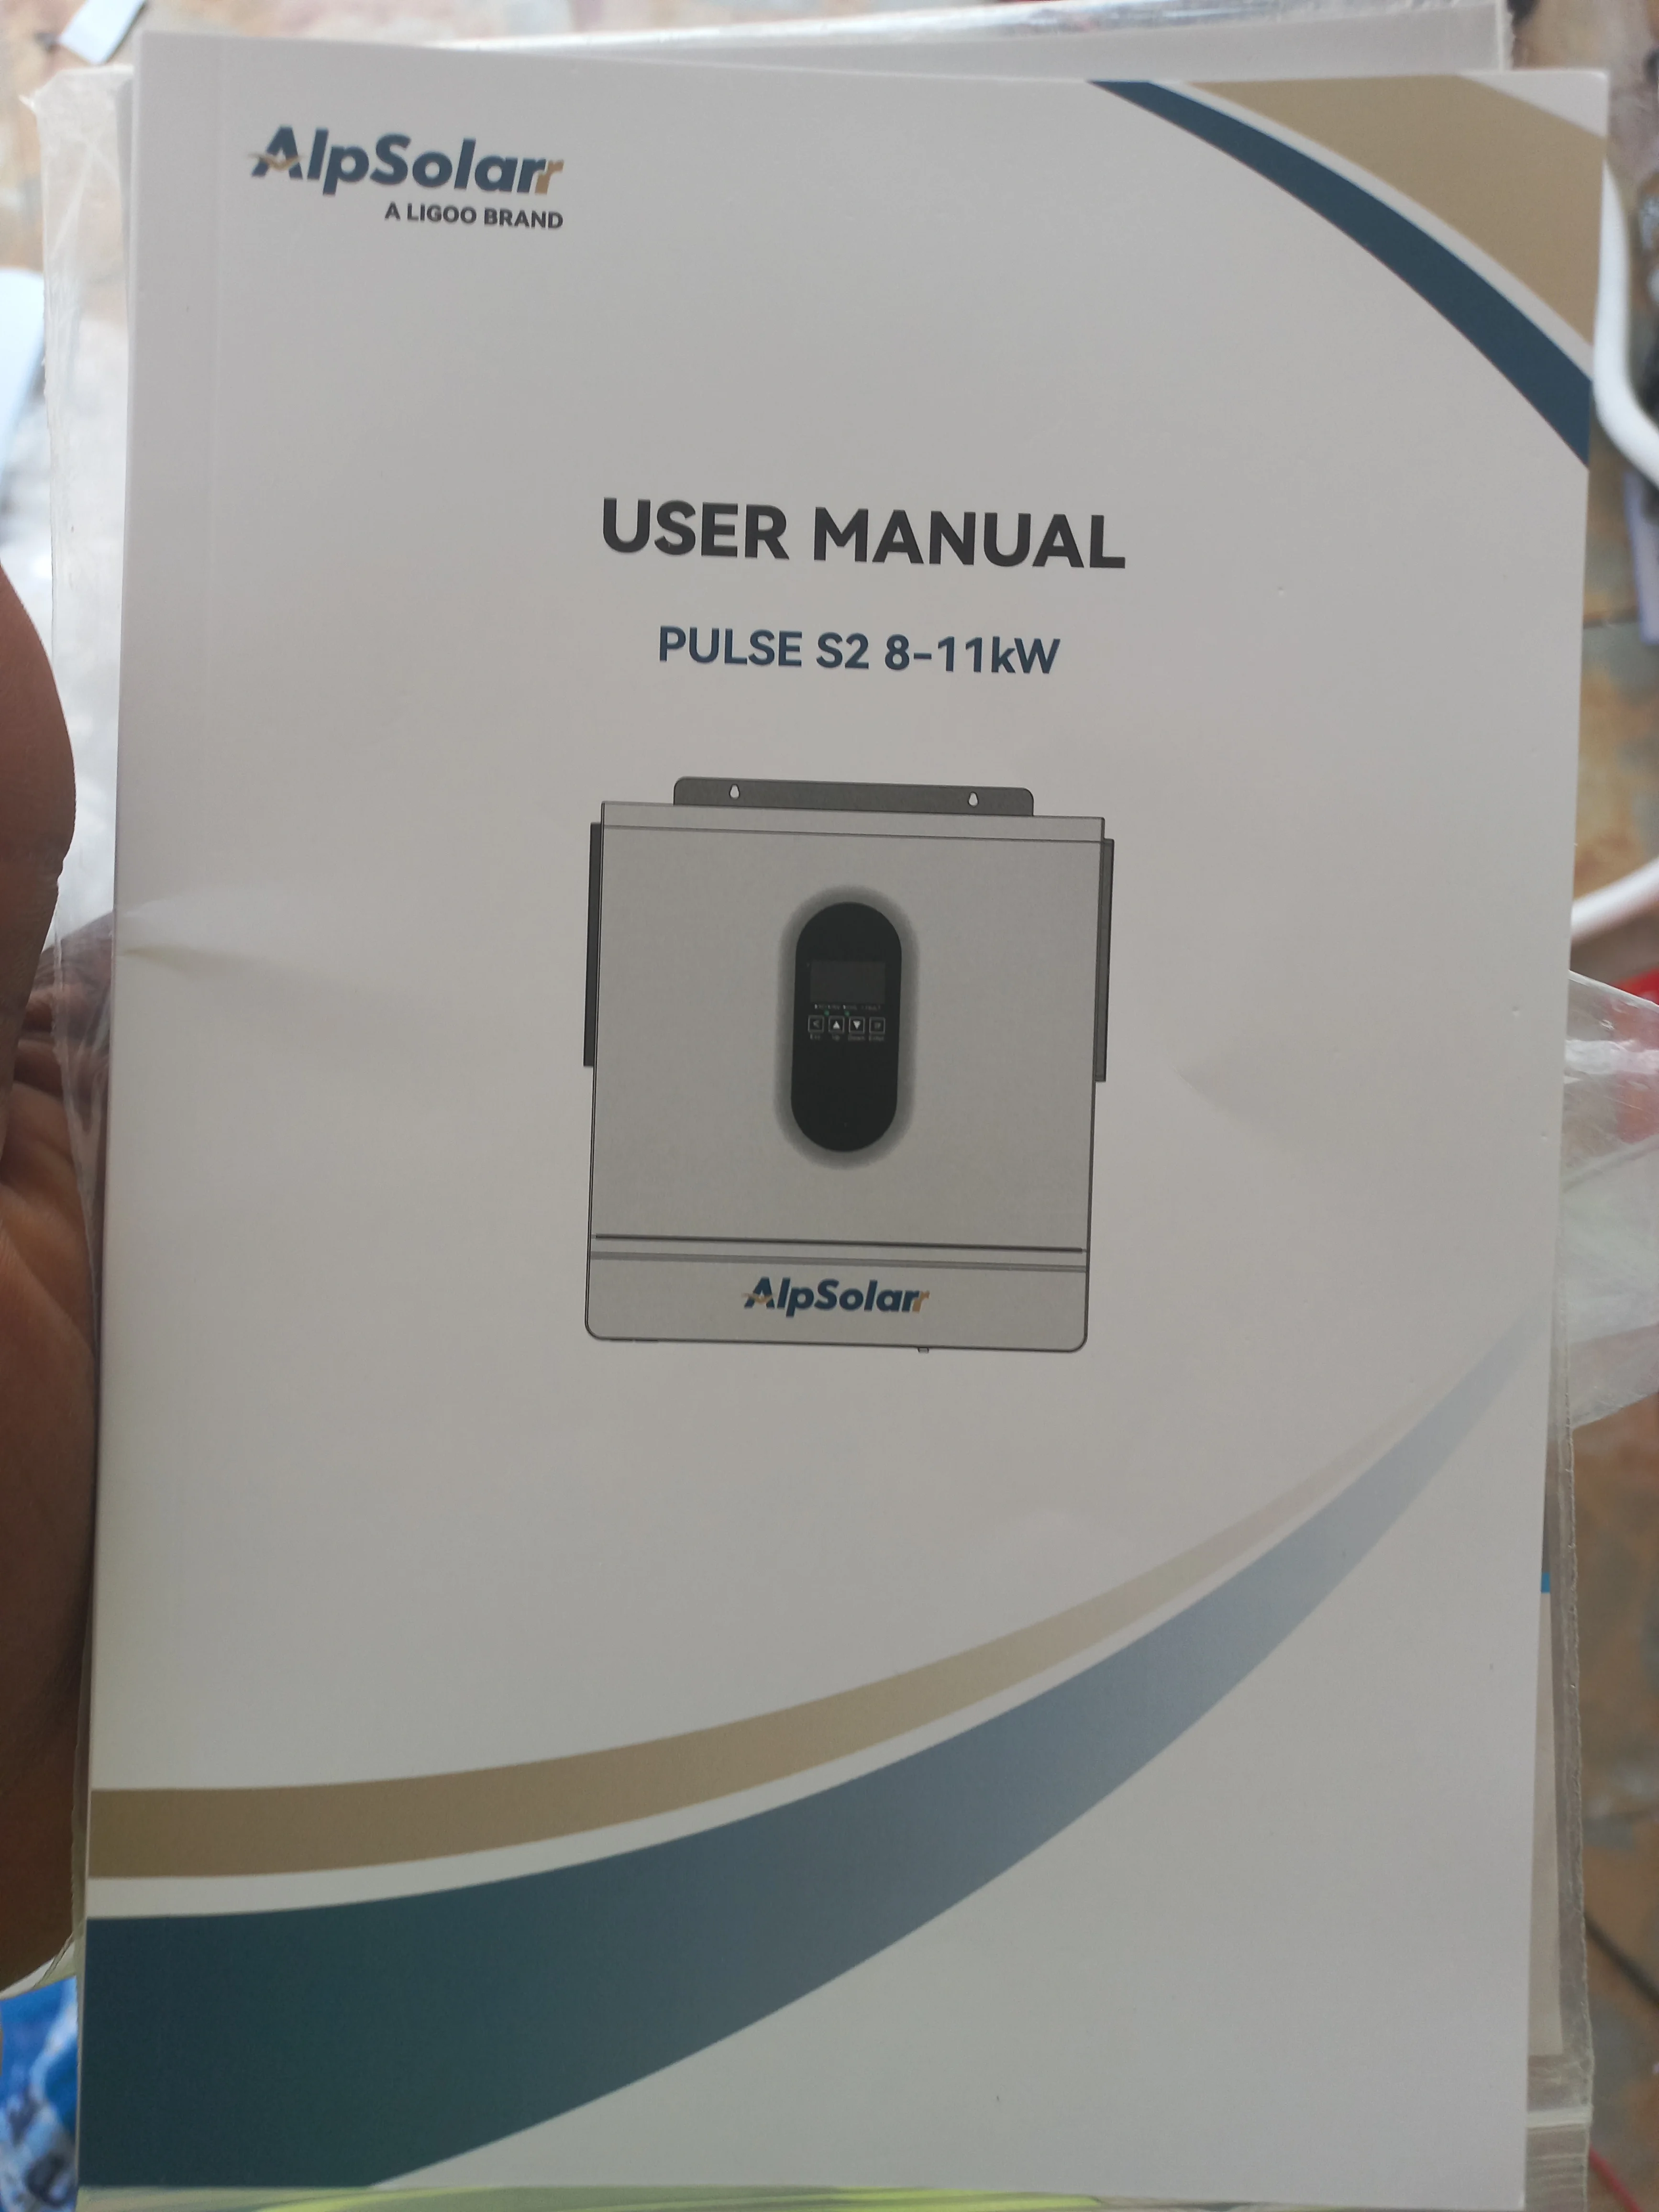
Inverter — AlpSolarr 11kW Hybrid
- Power Rating: 11kW
- Type: Hybrid inverter with dual MPPT and battery interface
- Manufacturer: Shenzhen Ligoo New Energy Technologies Co., Ltd.
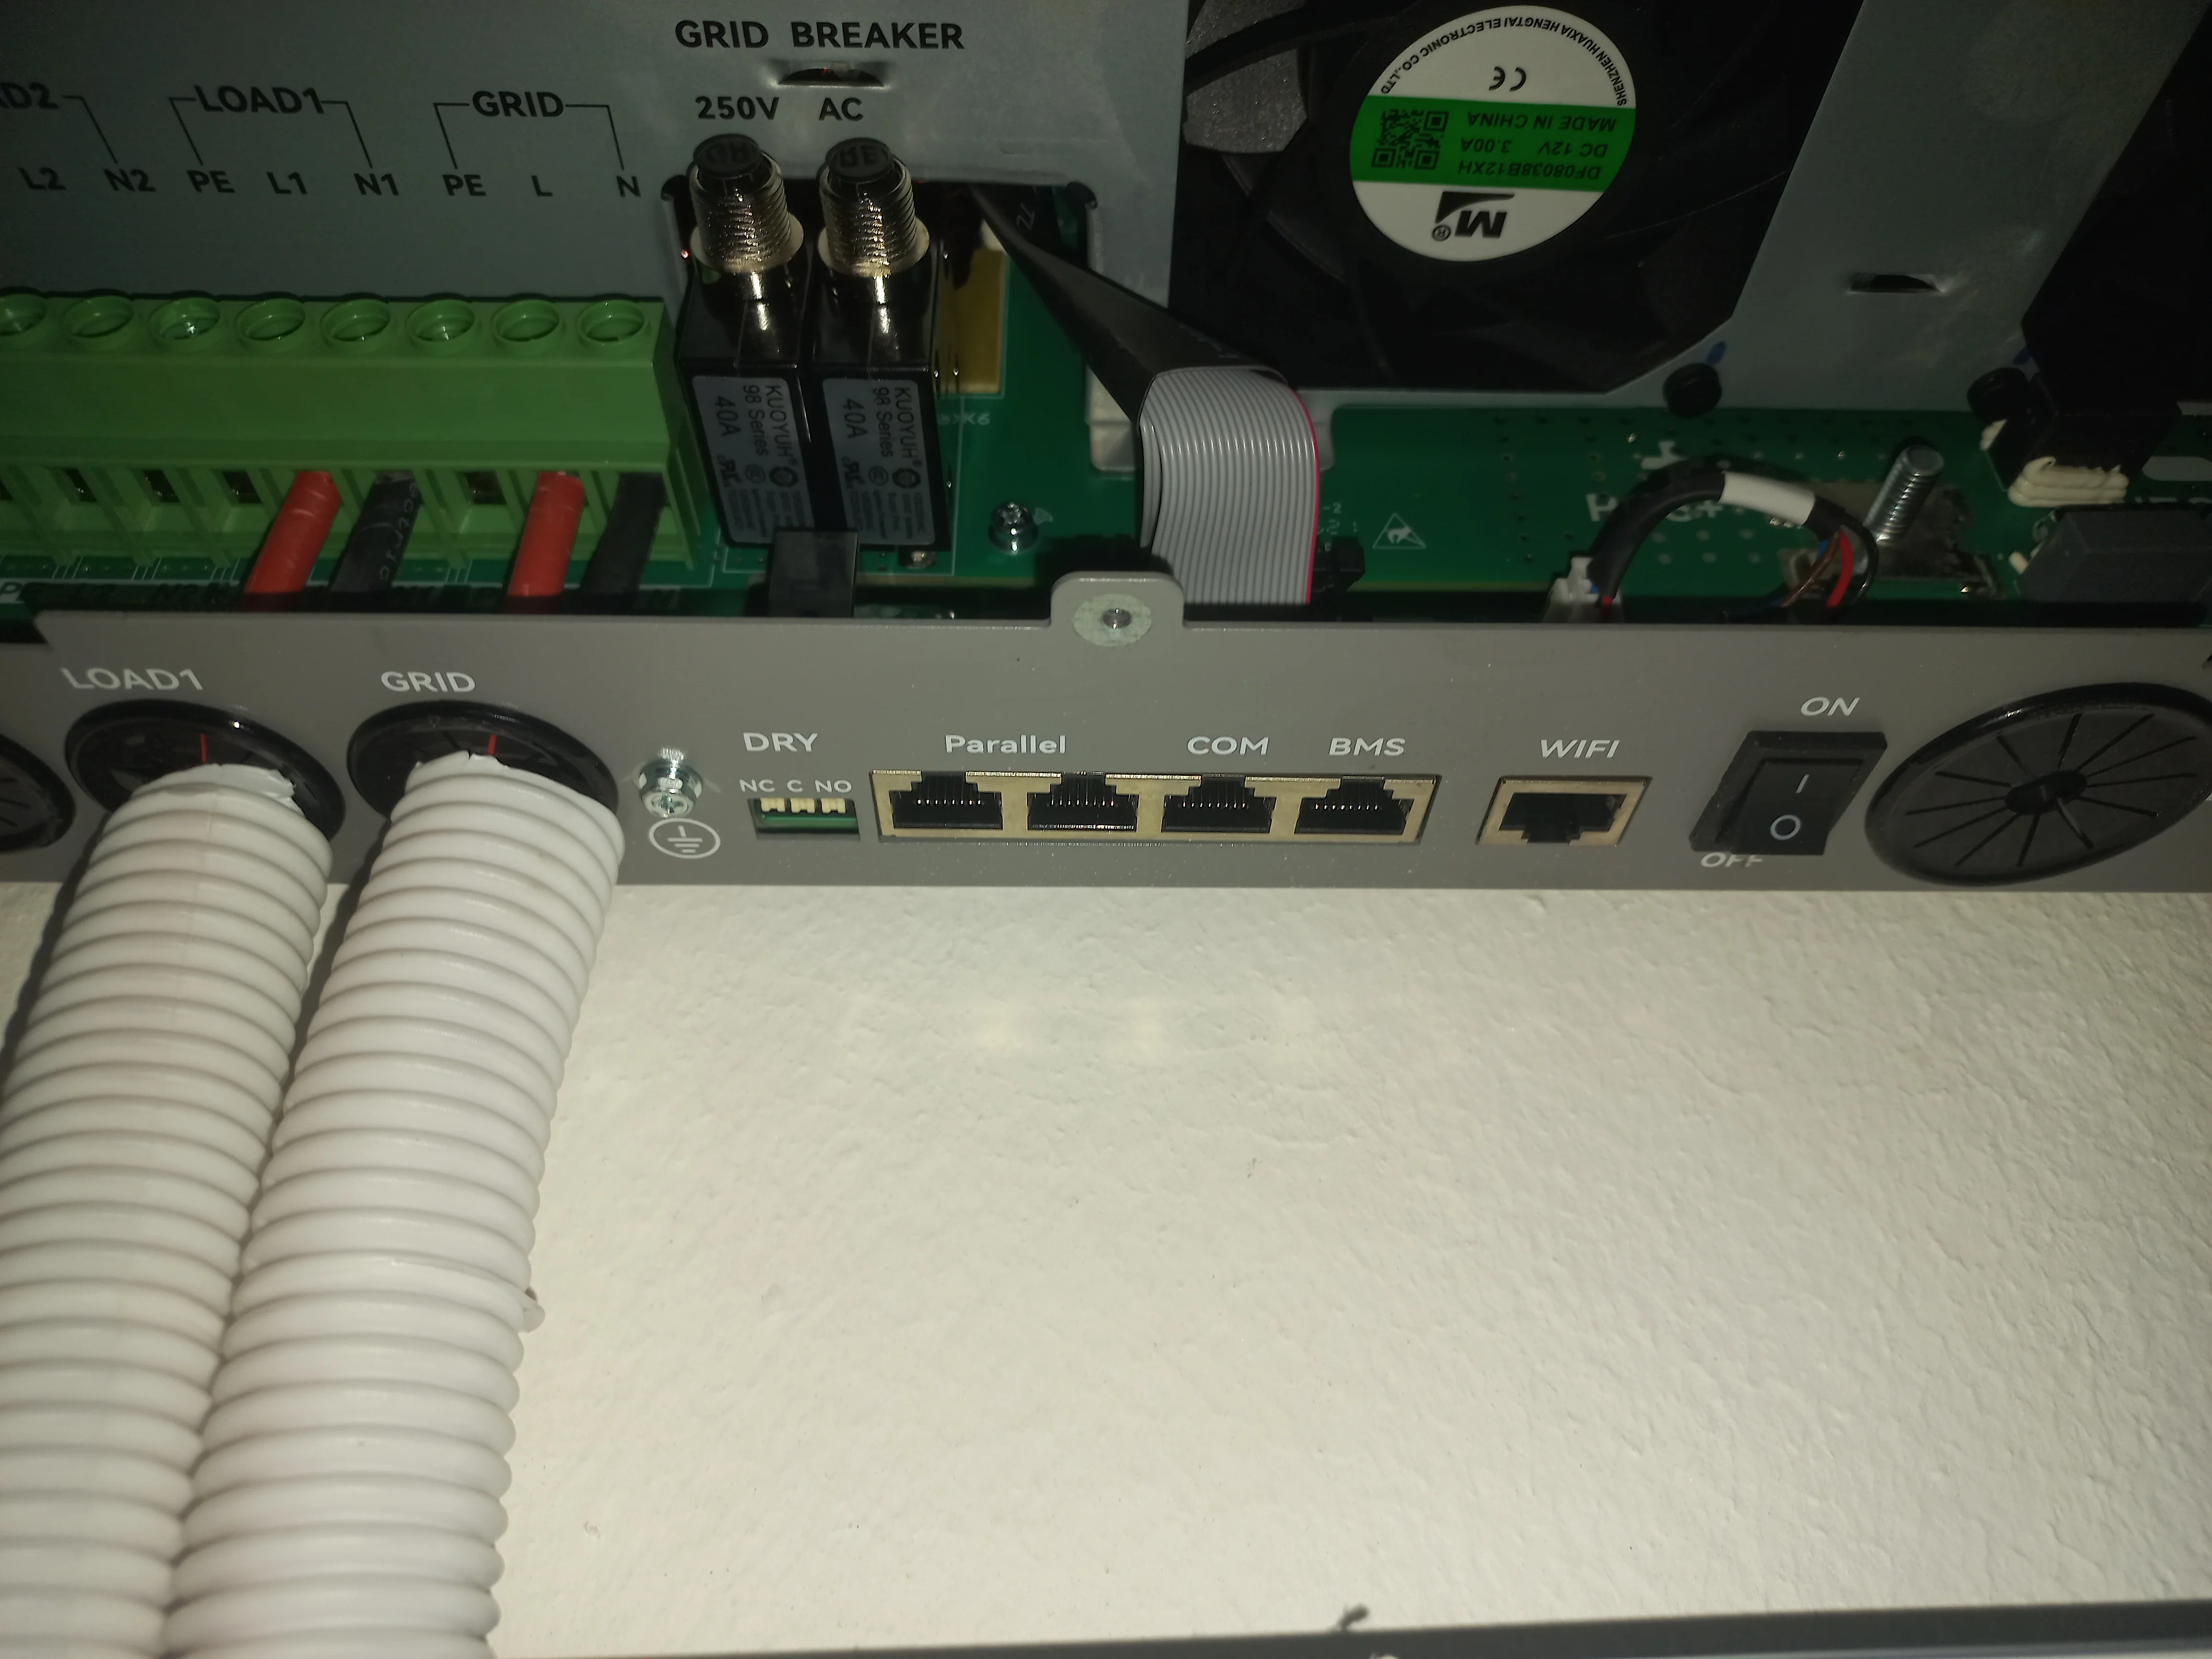
- MPPT Channels: 2 (PV1 and PV2)
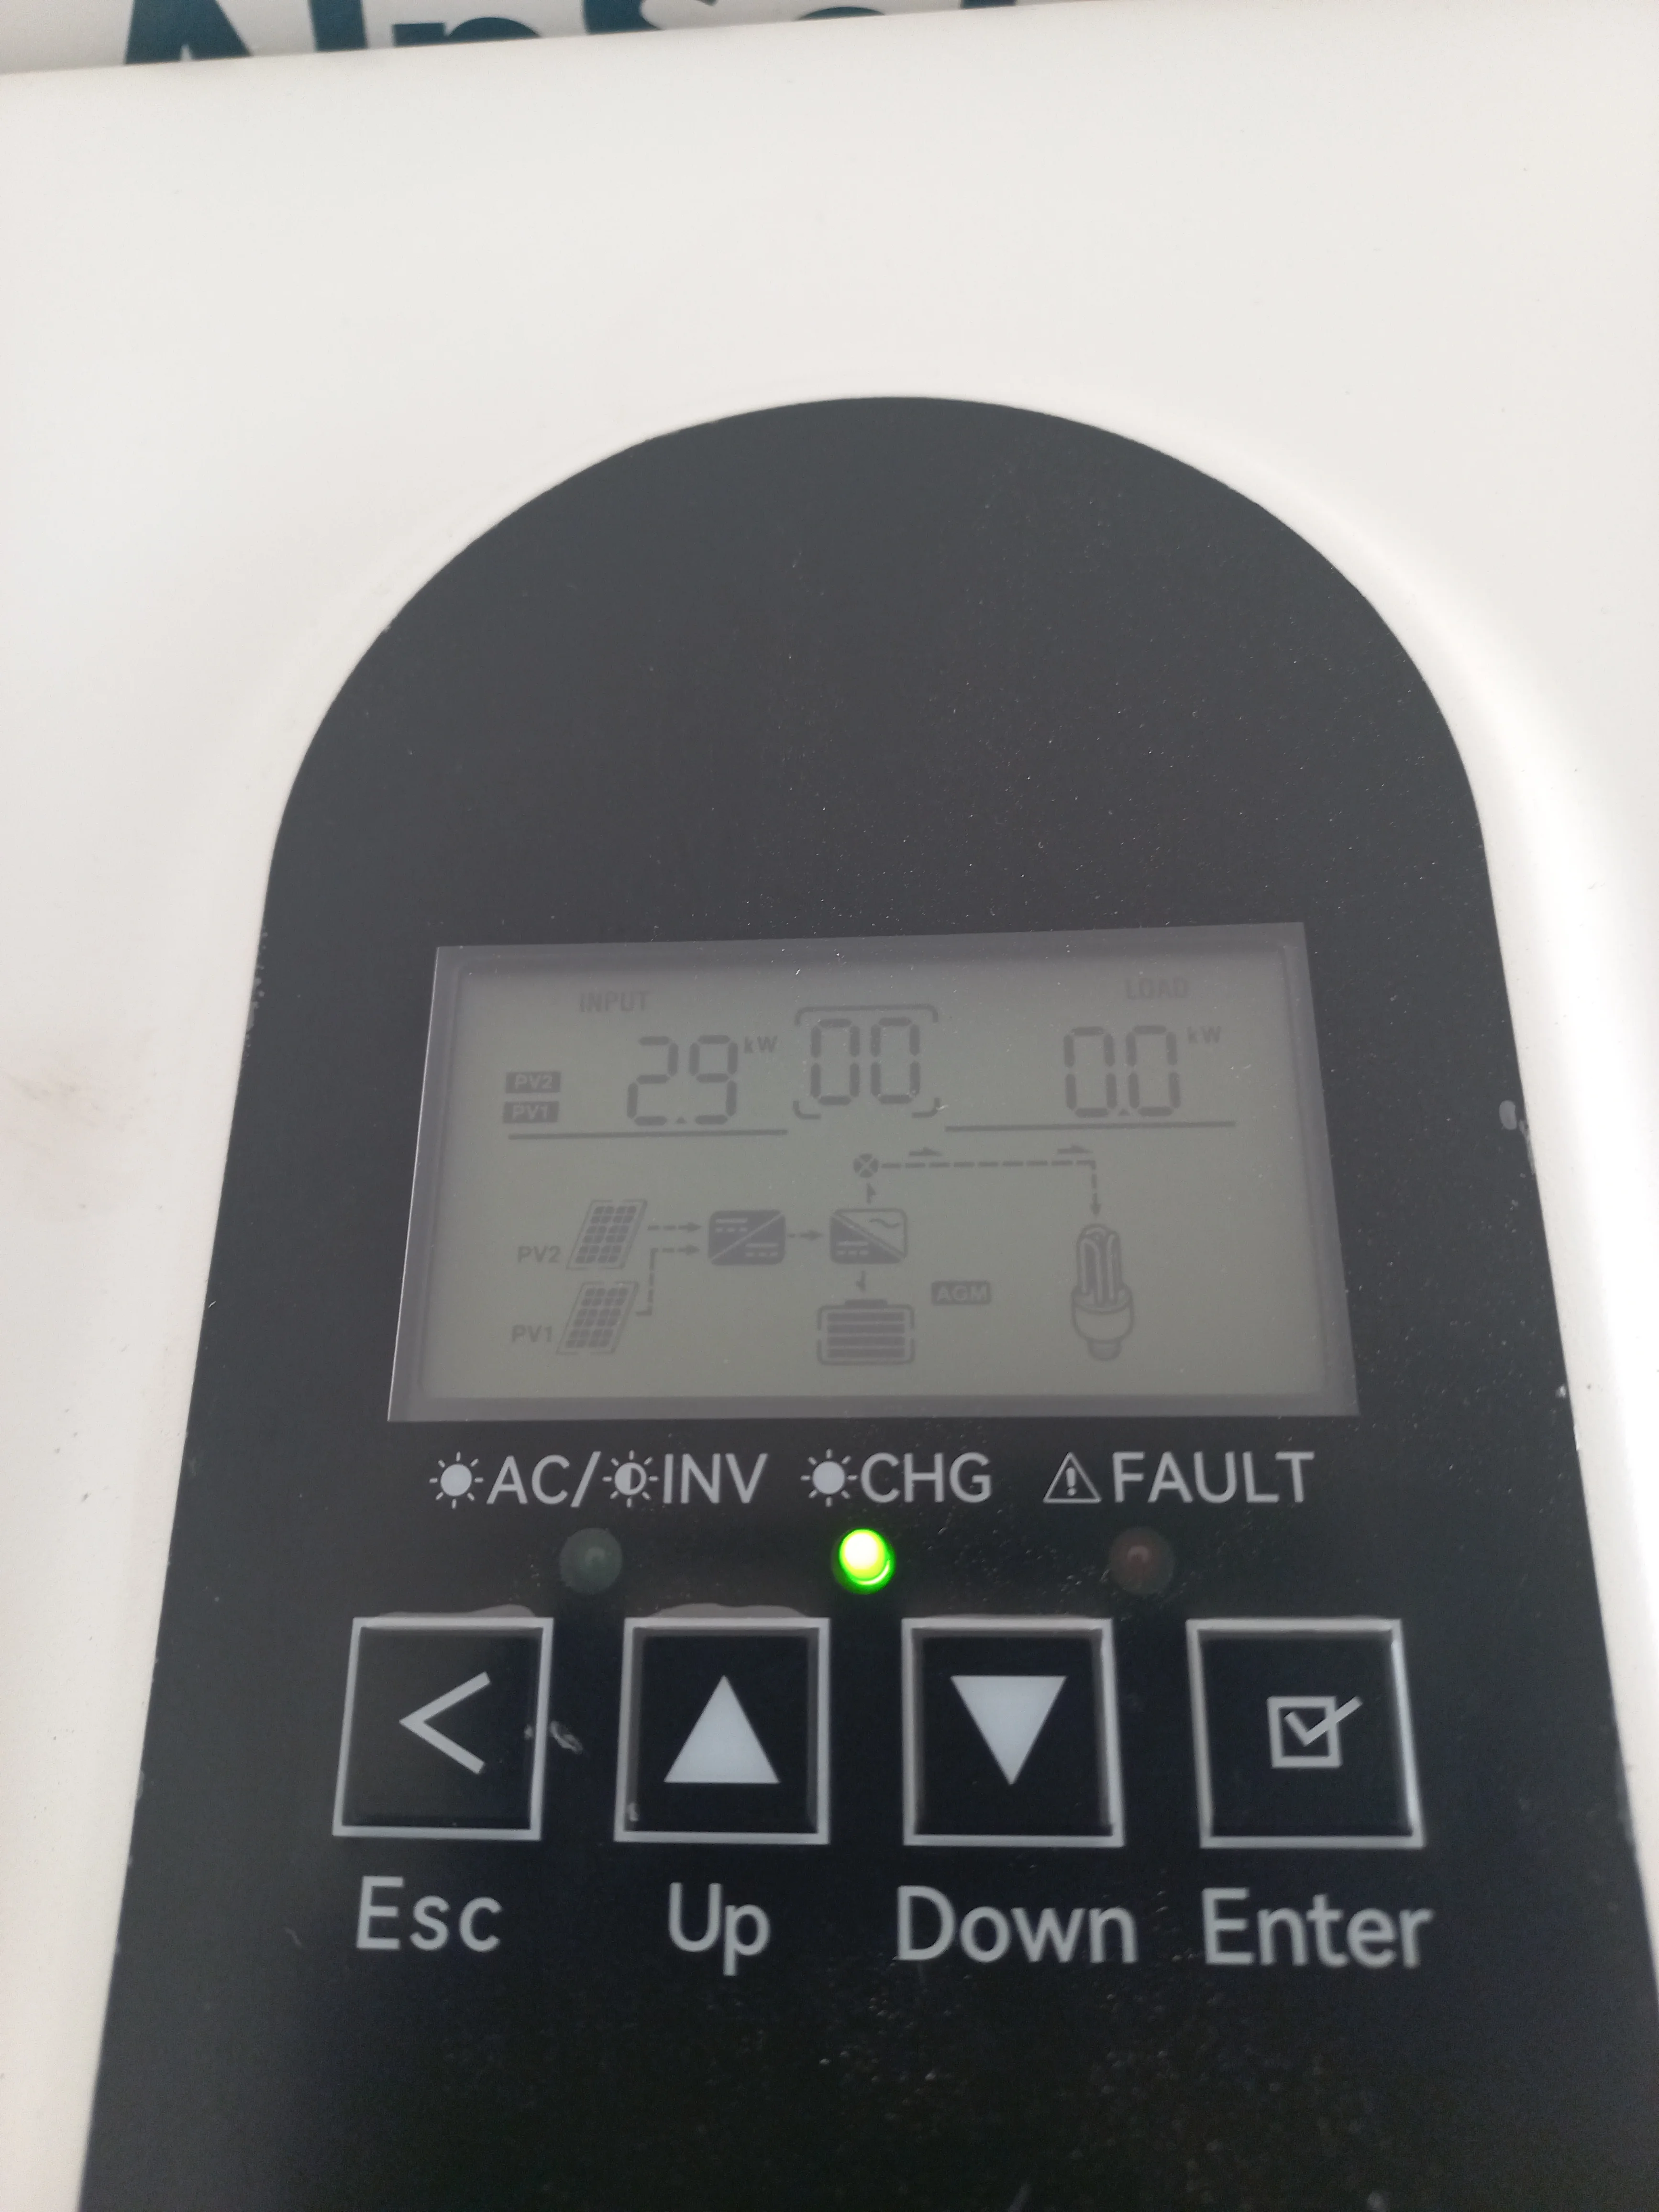
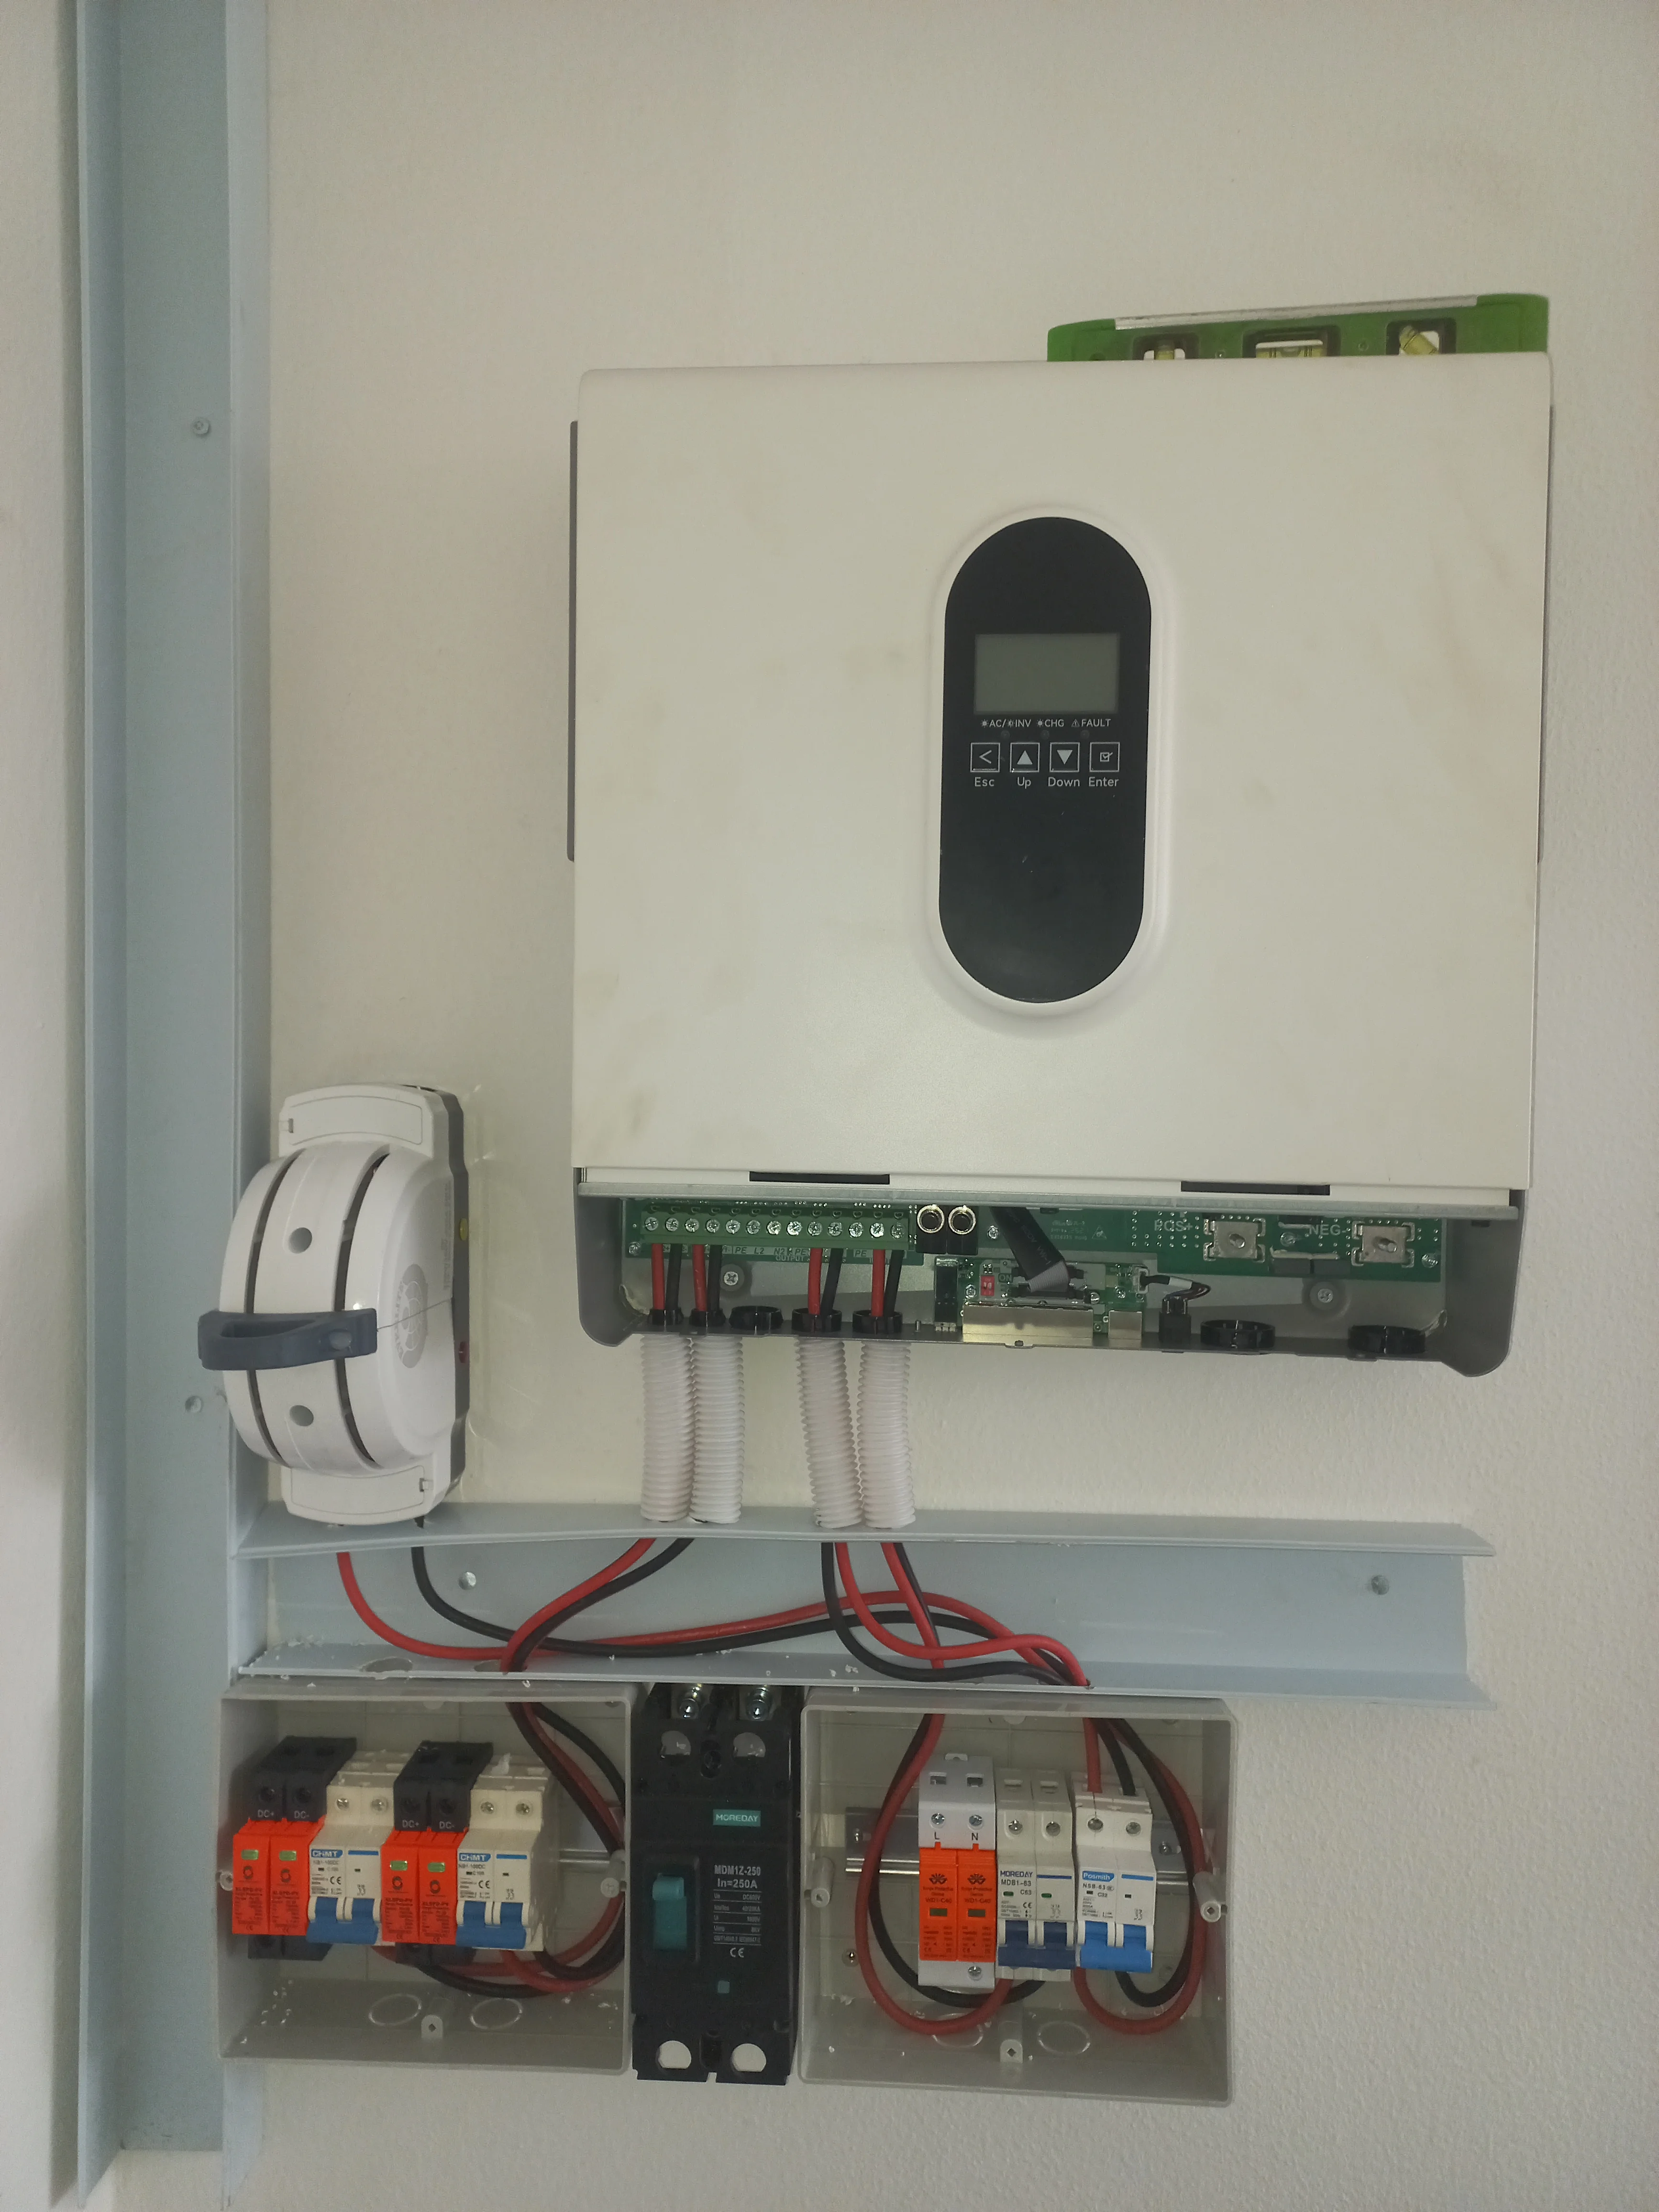
- Display: Built-in LCD with energy flow diagram, Esc/Up/Down/Enter buttons
- Indicators: AC, INV, CHG, FAULT LEDs
- Mounting: Wall-mounted on cable trunking rail
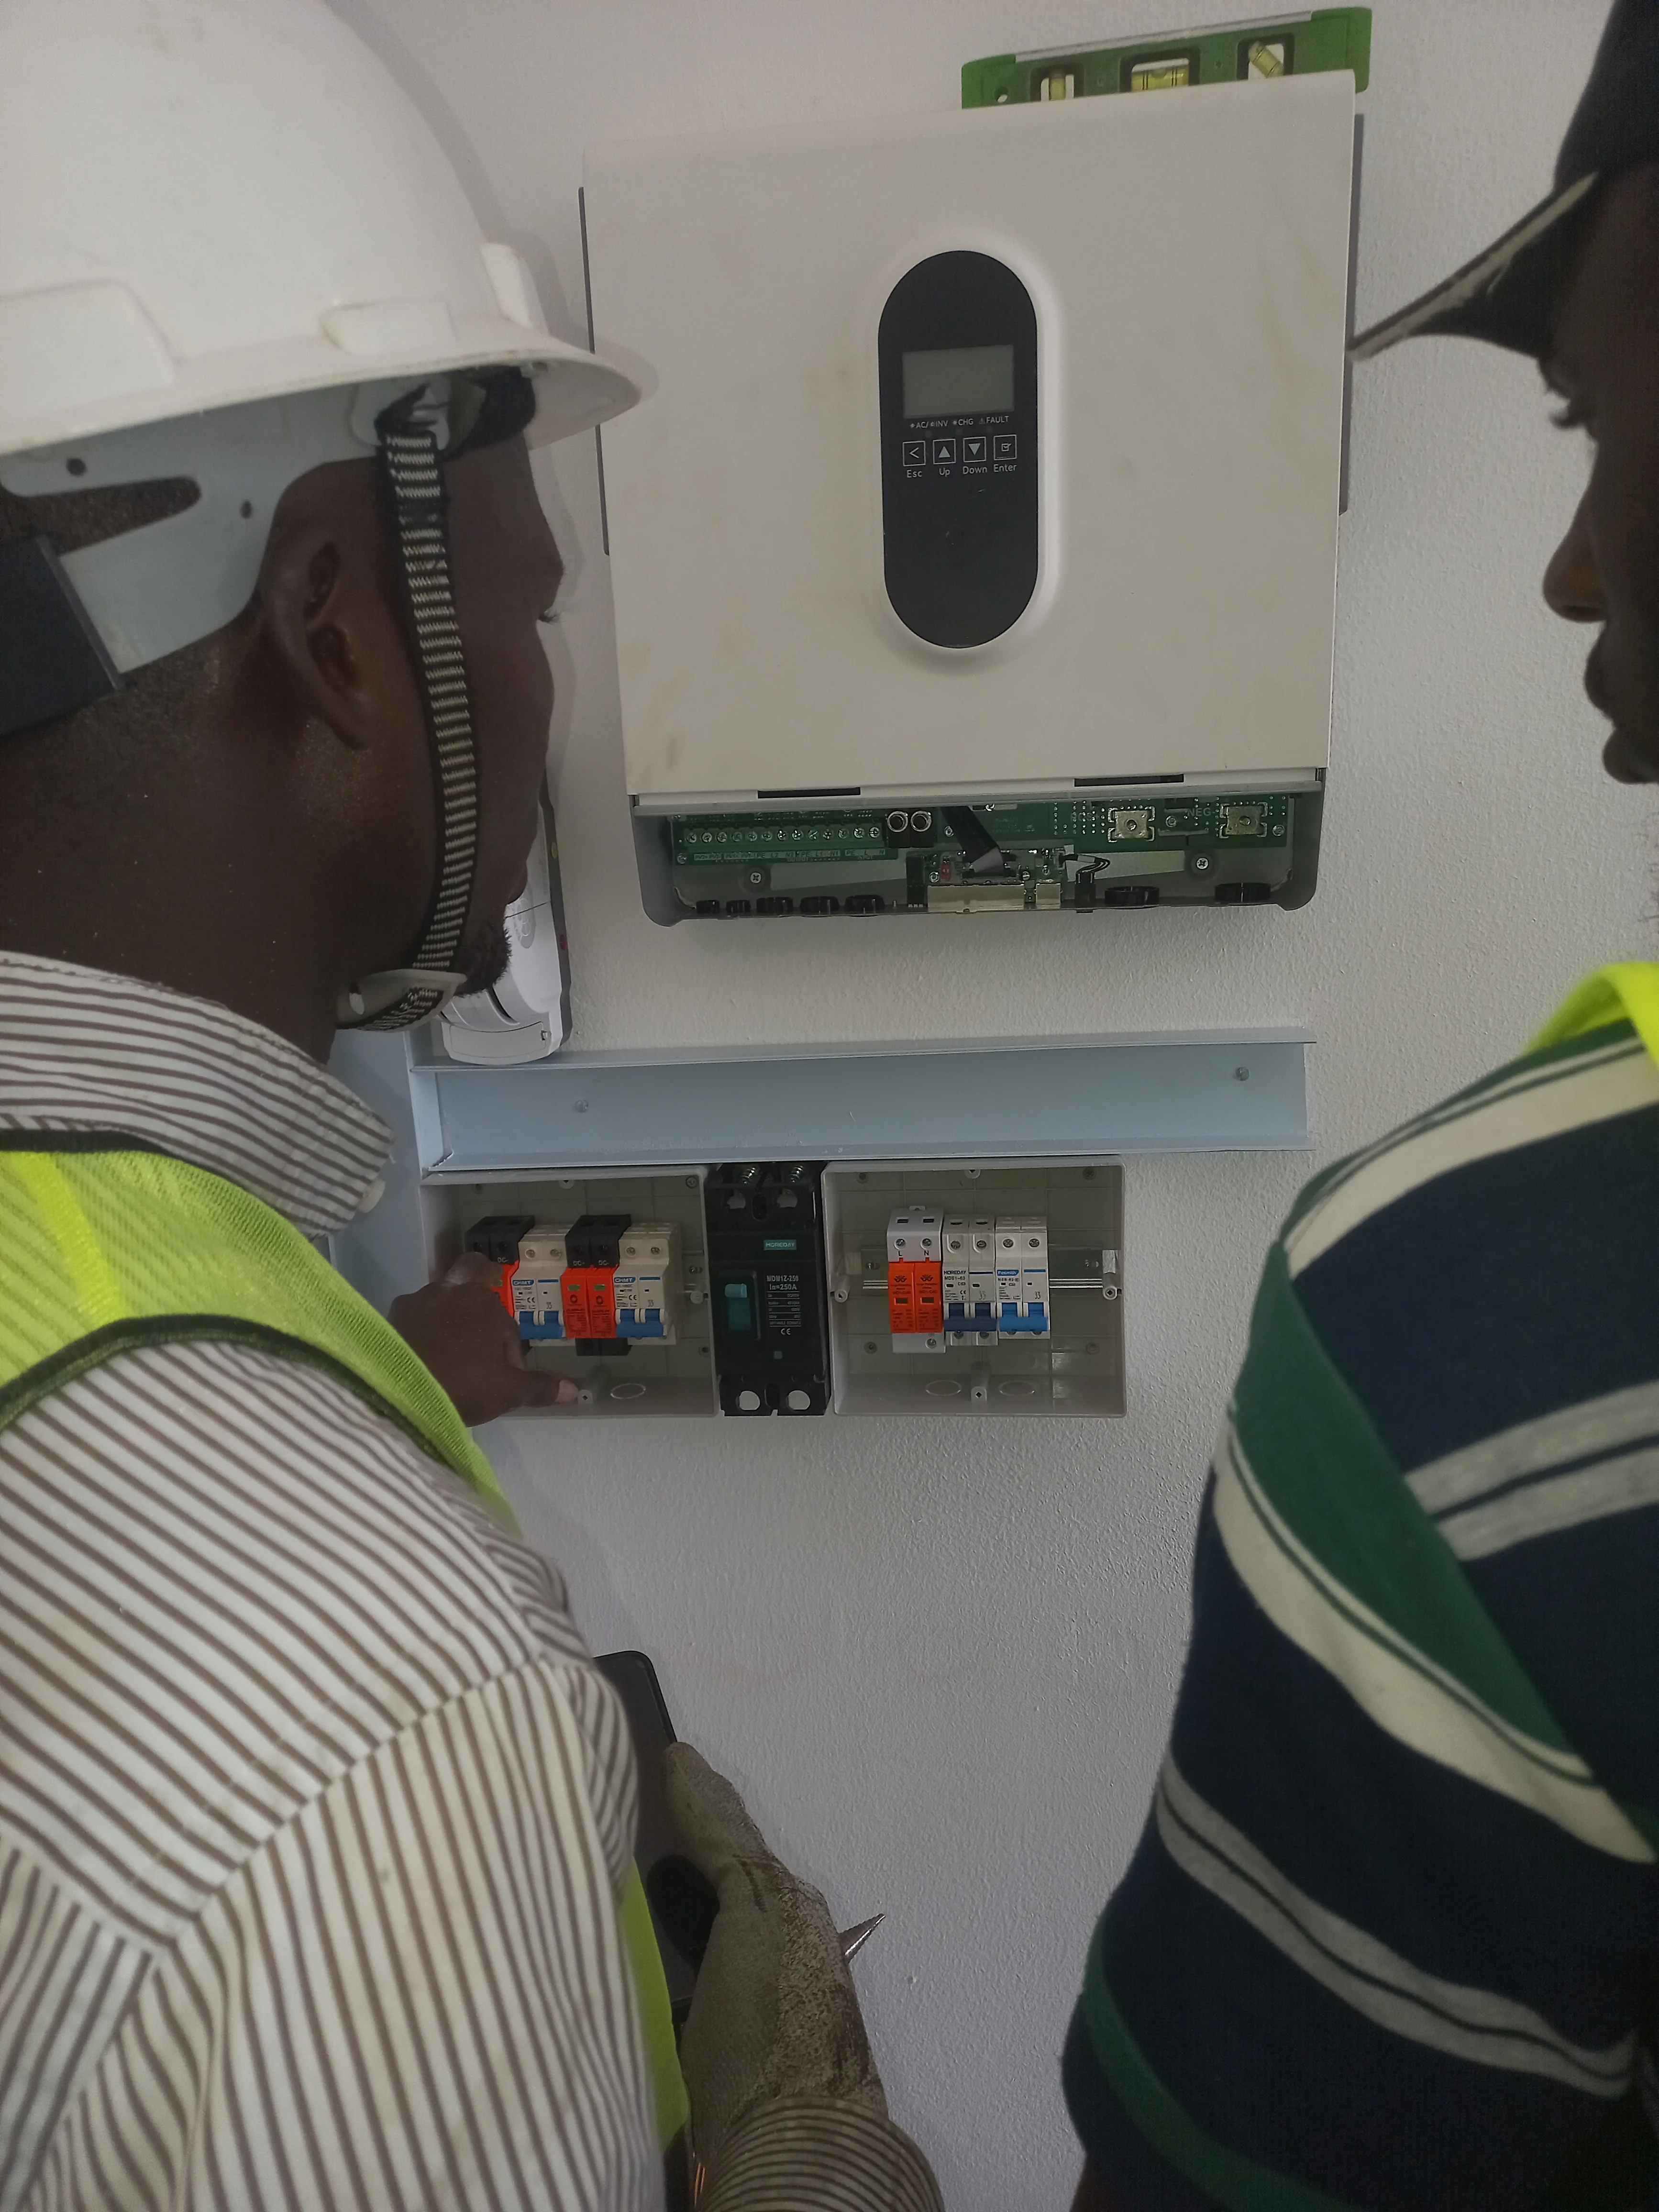
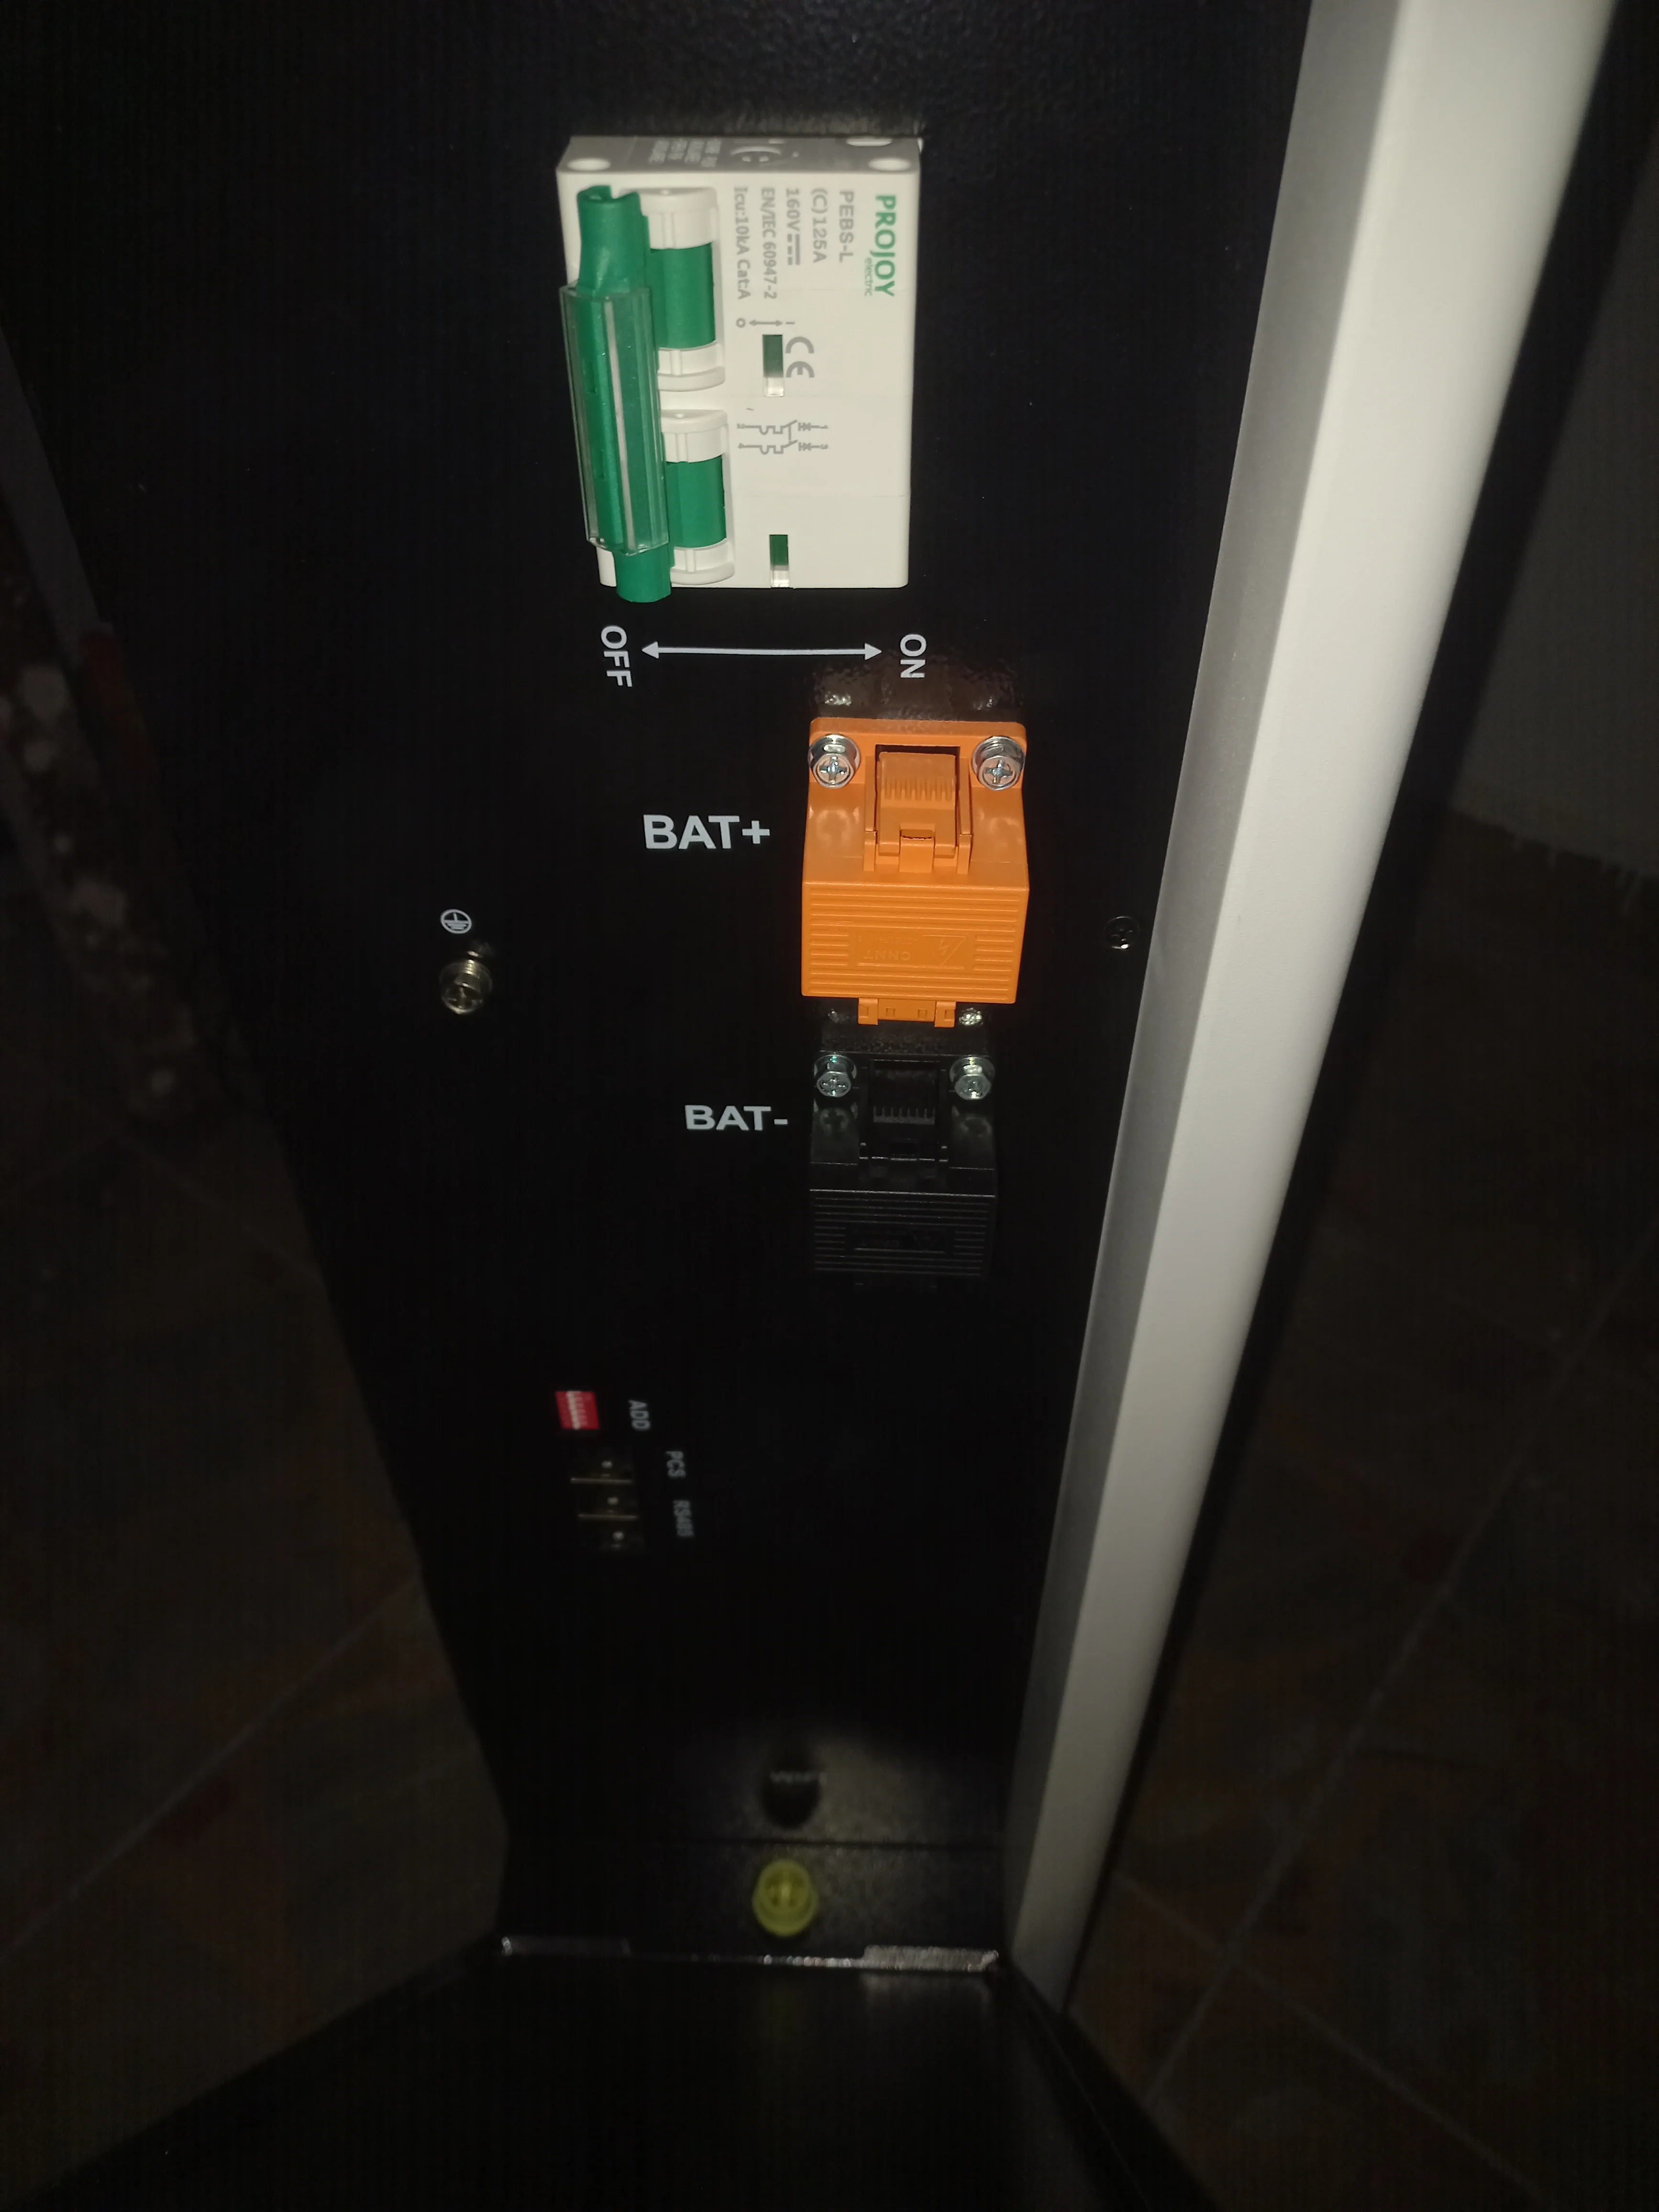
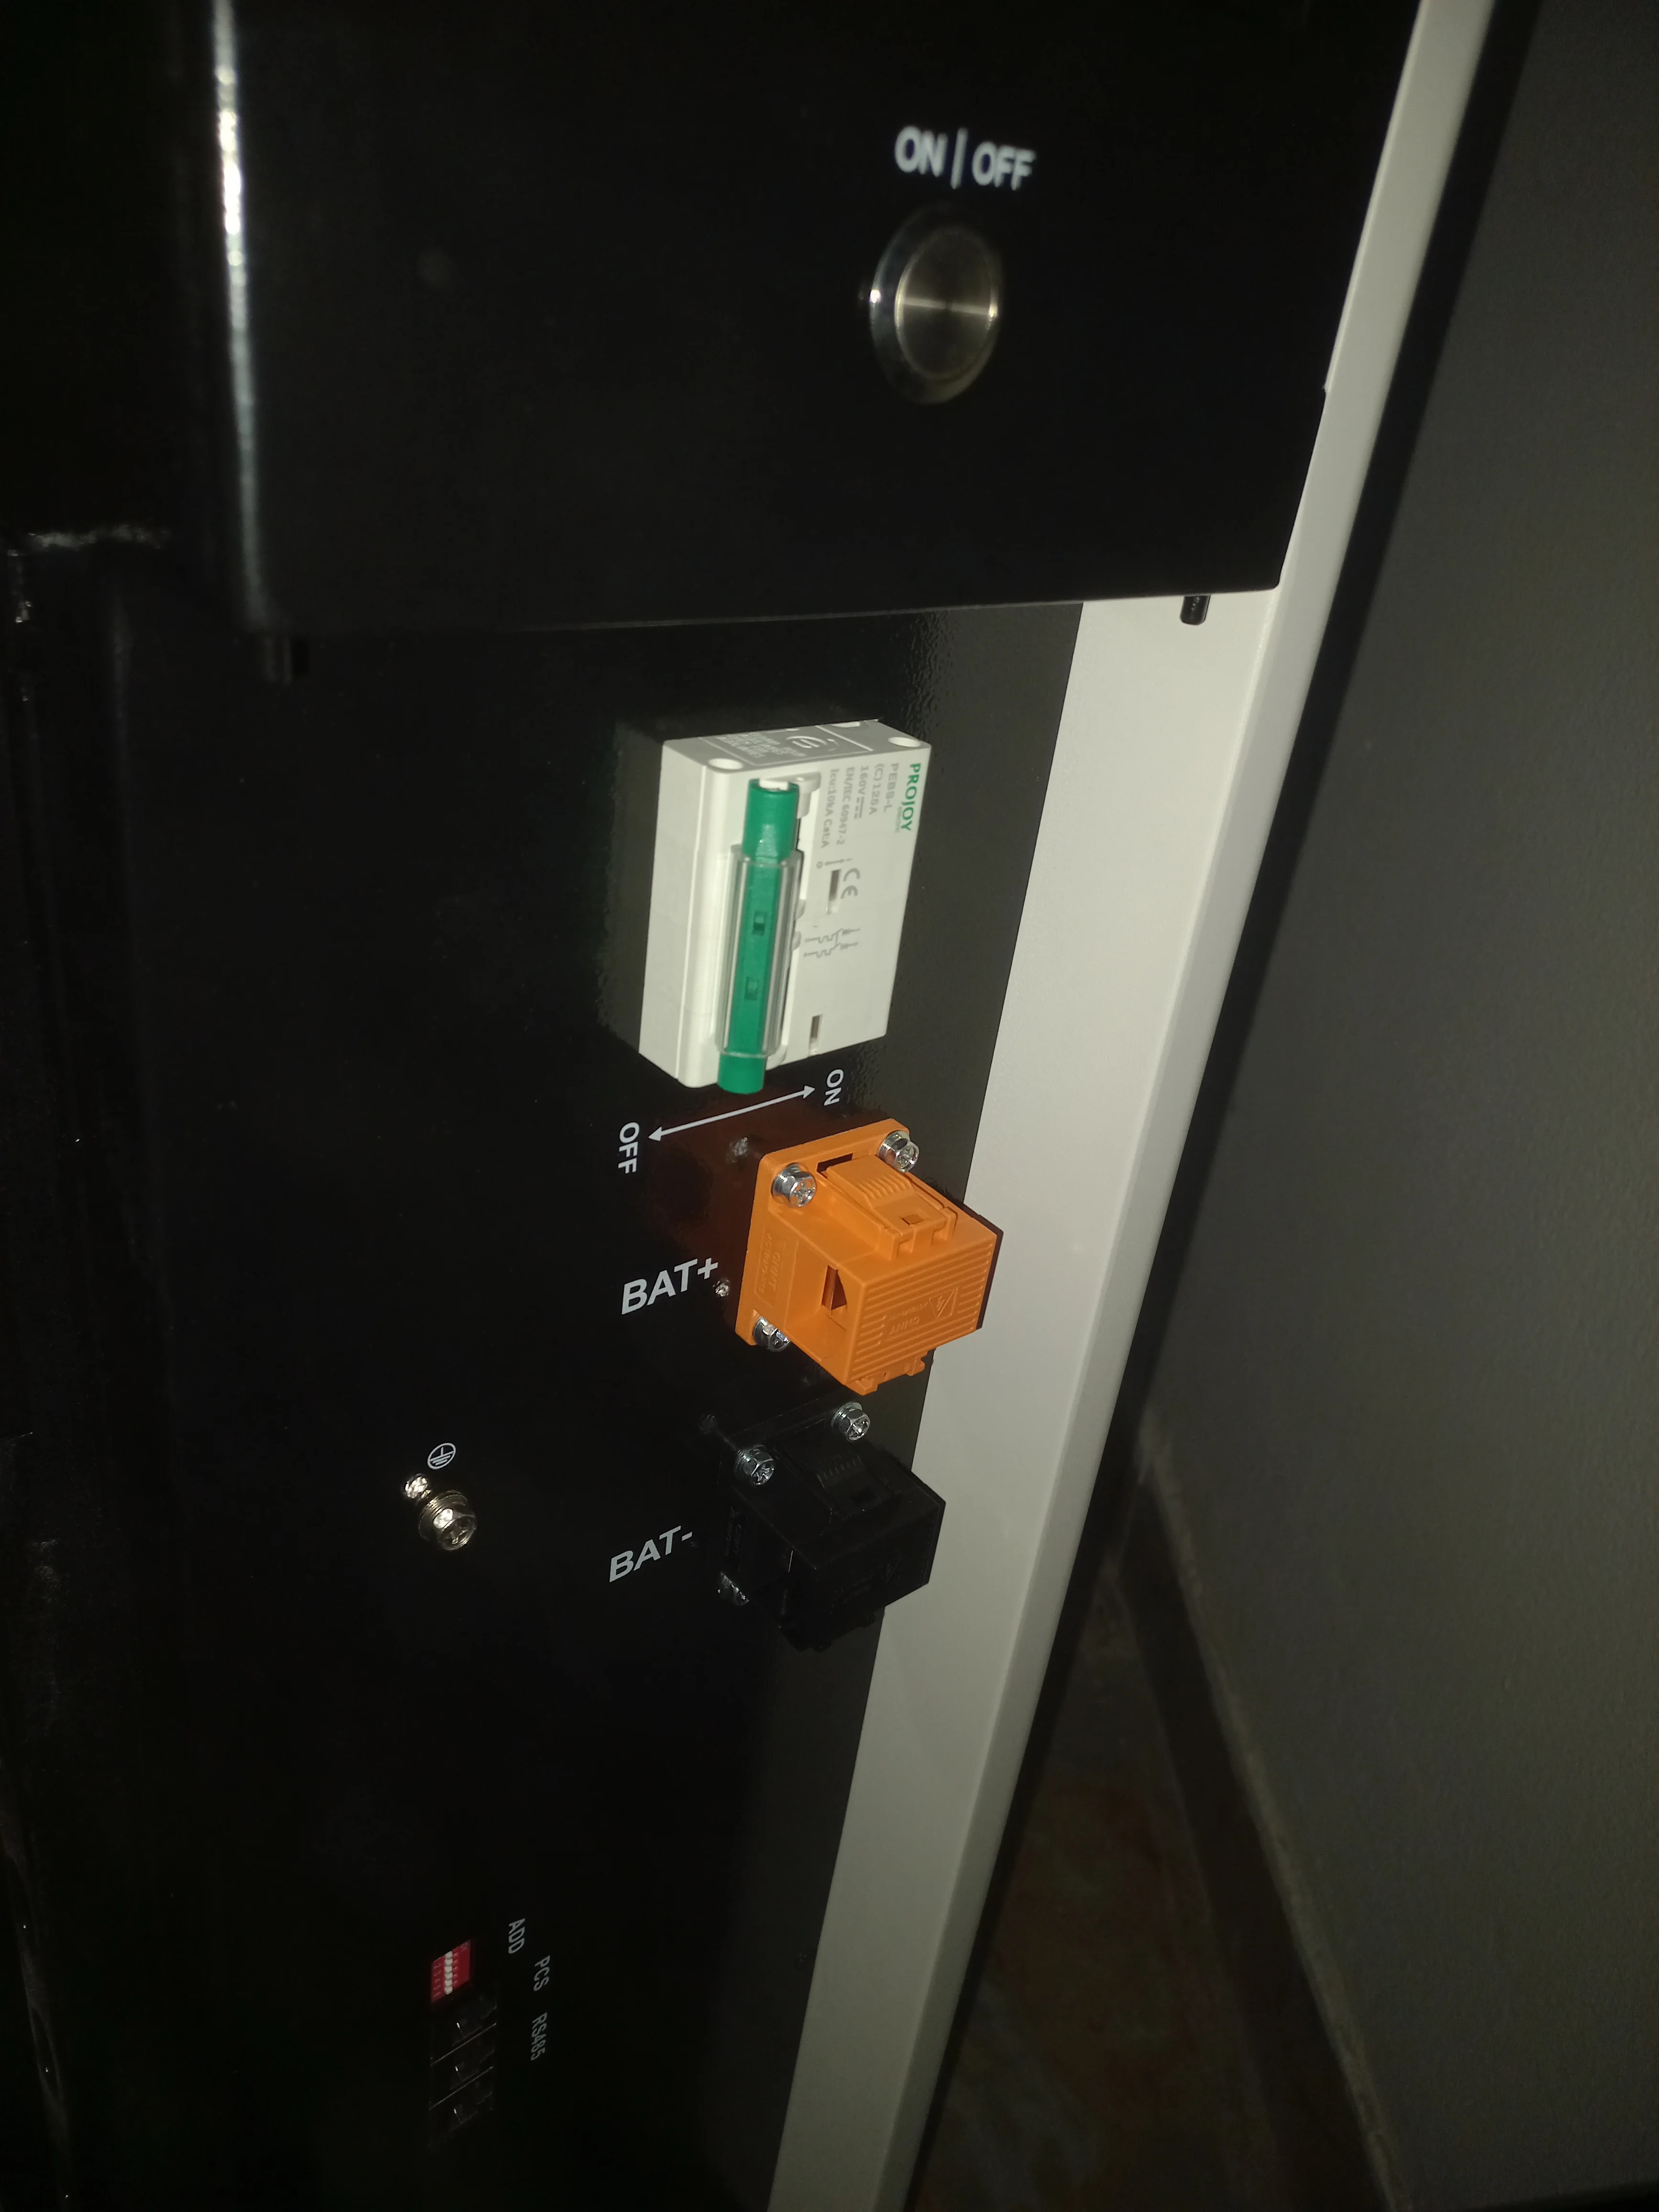
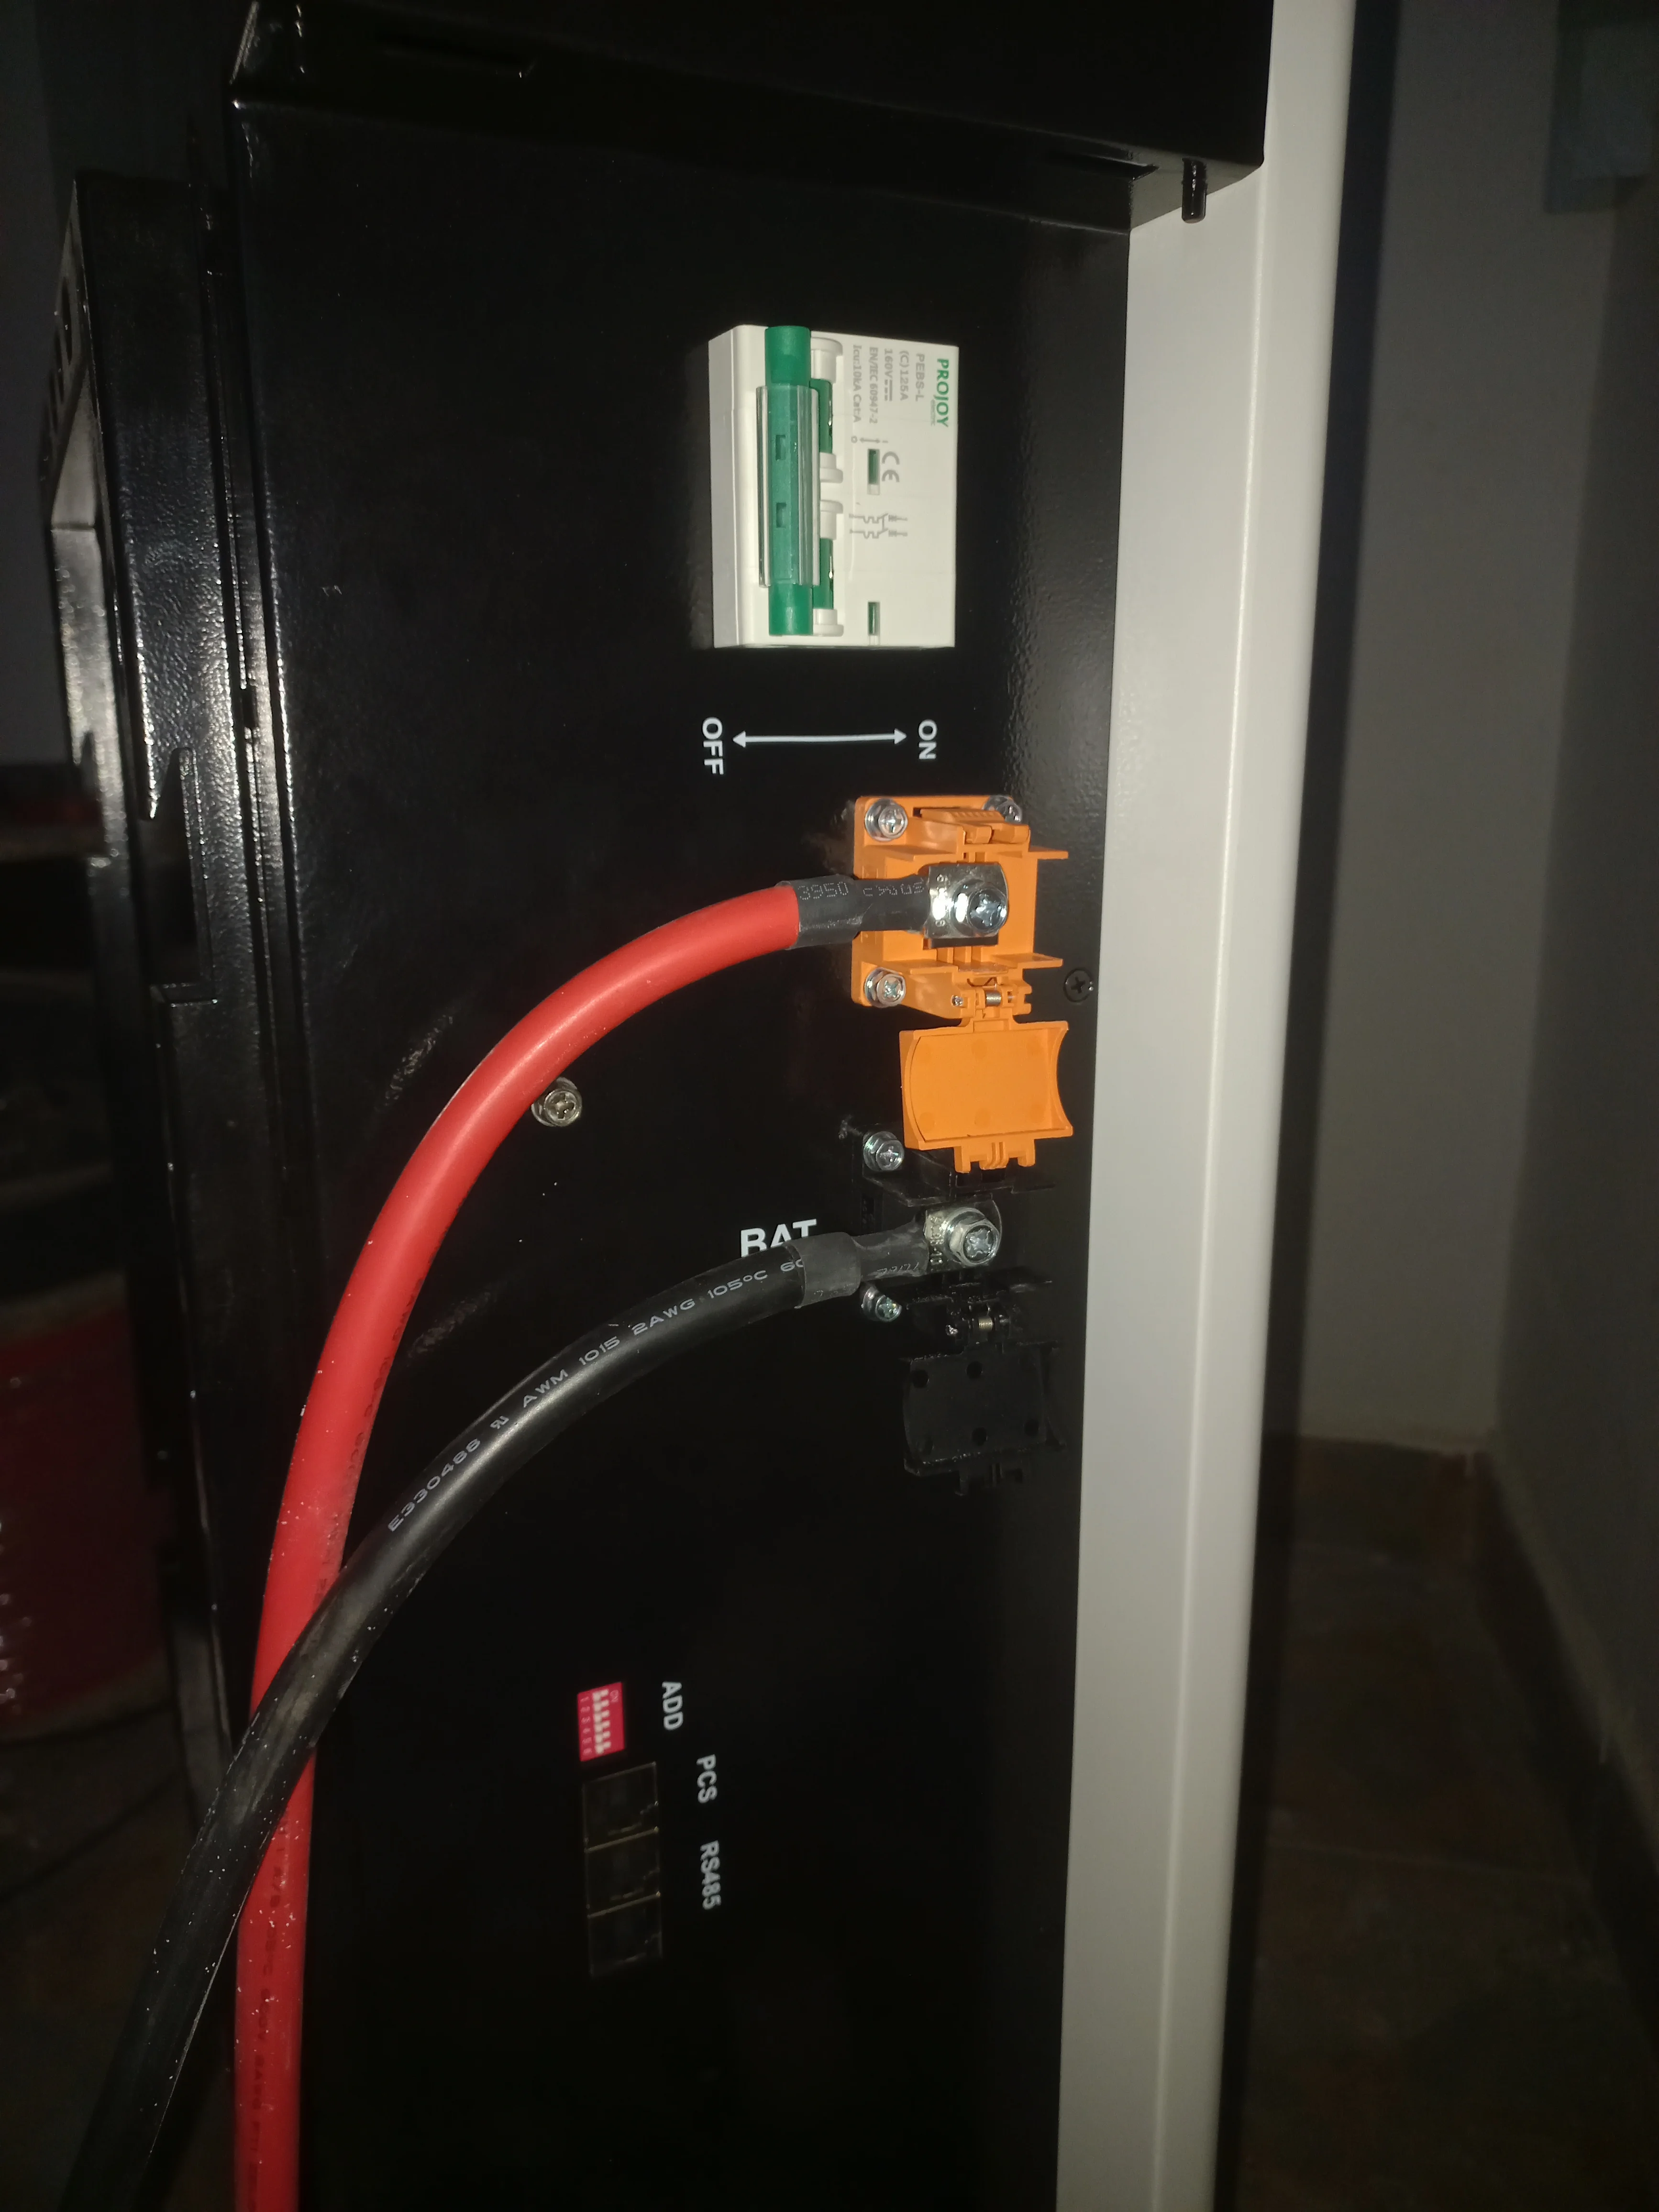
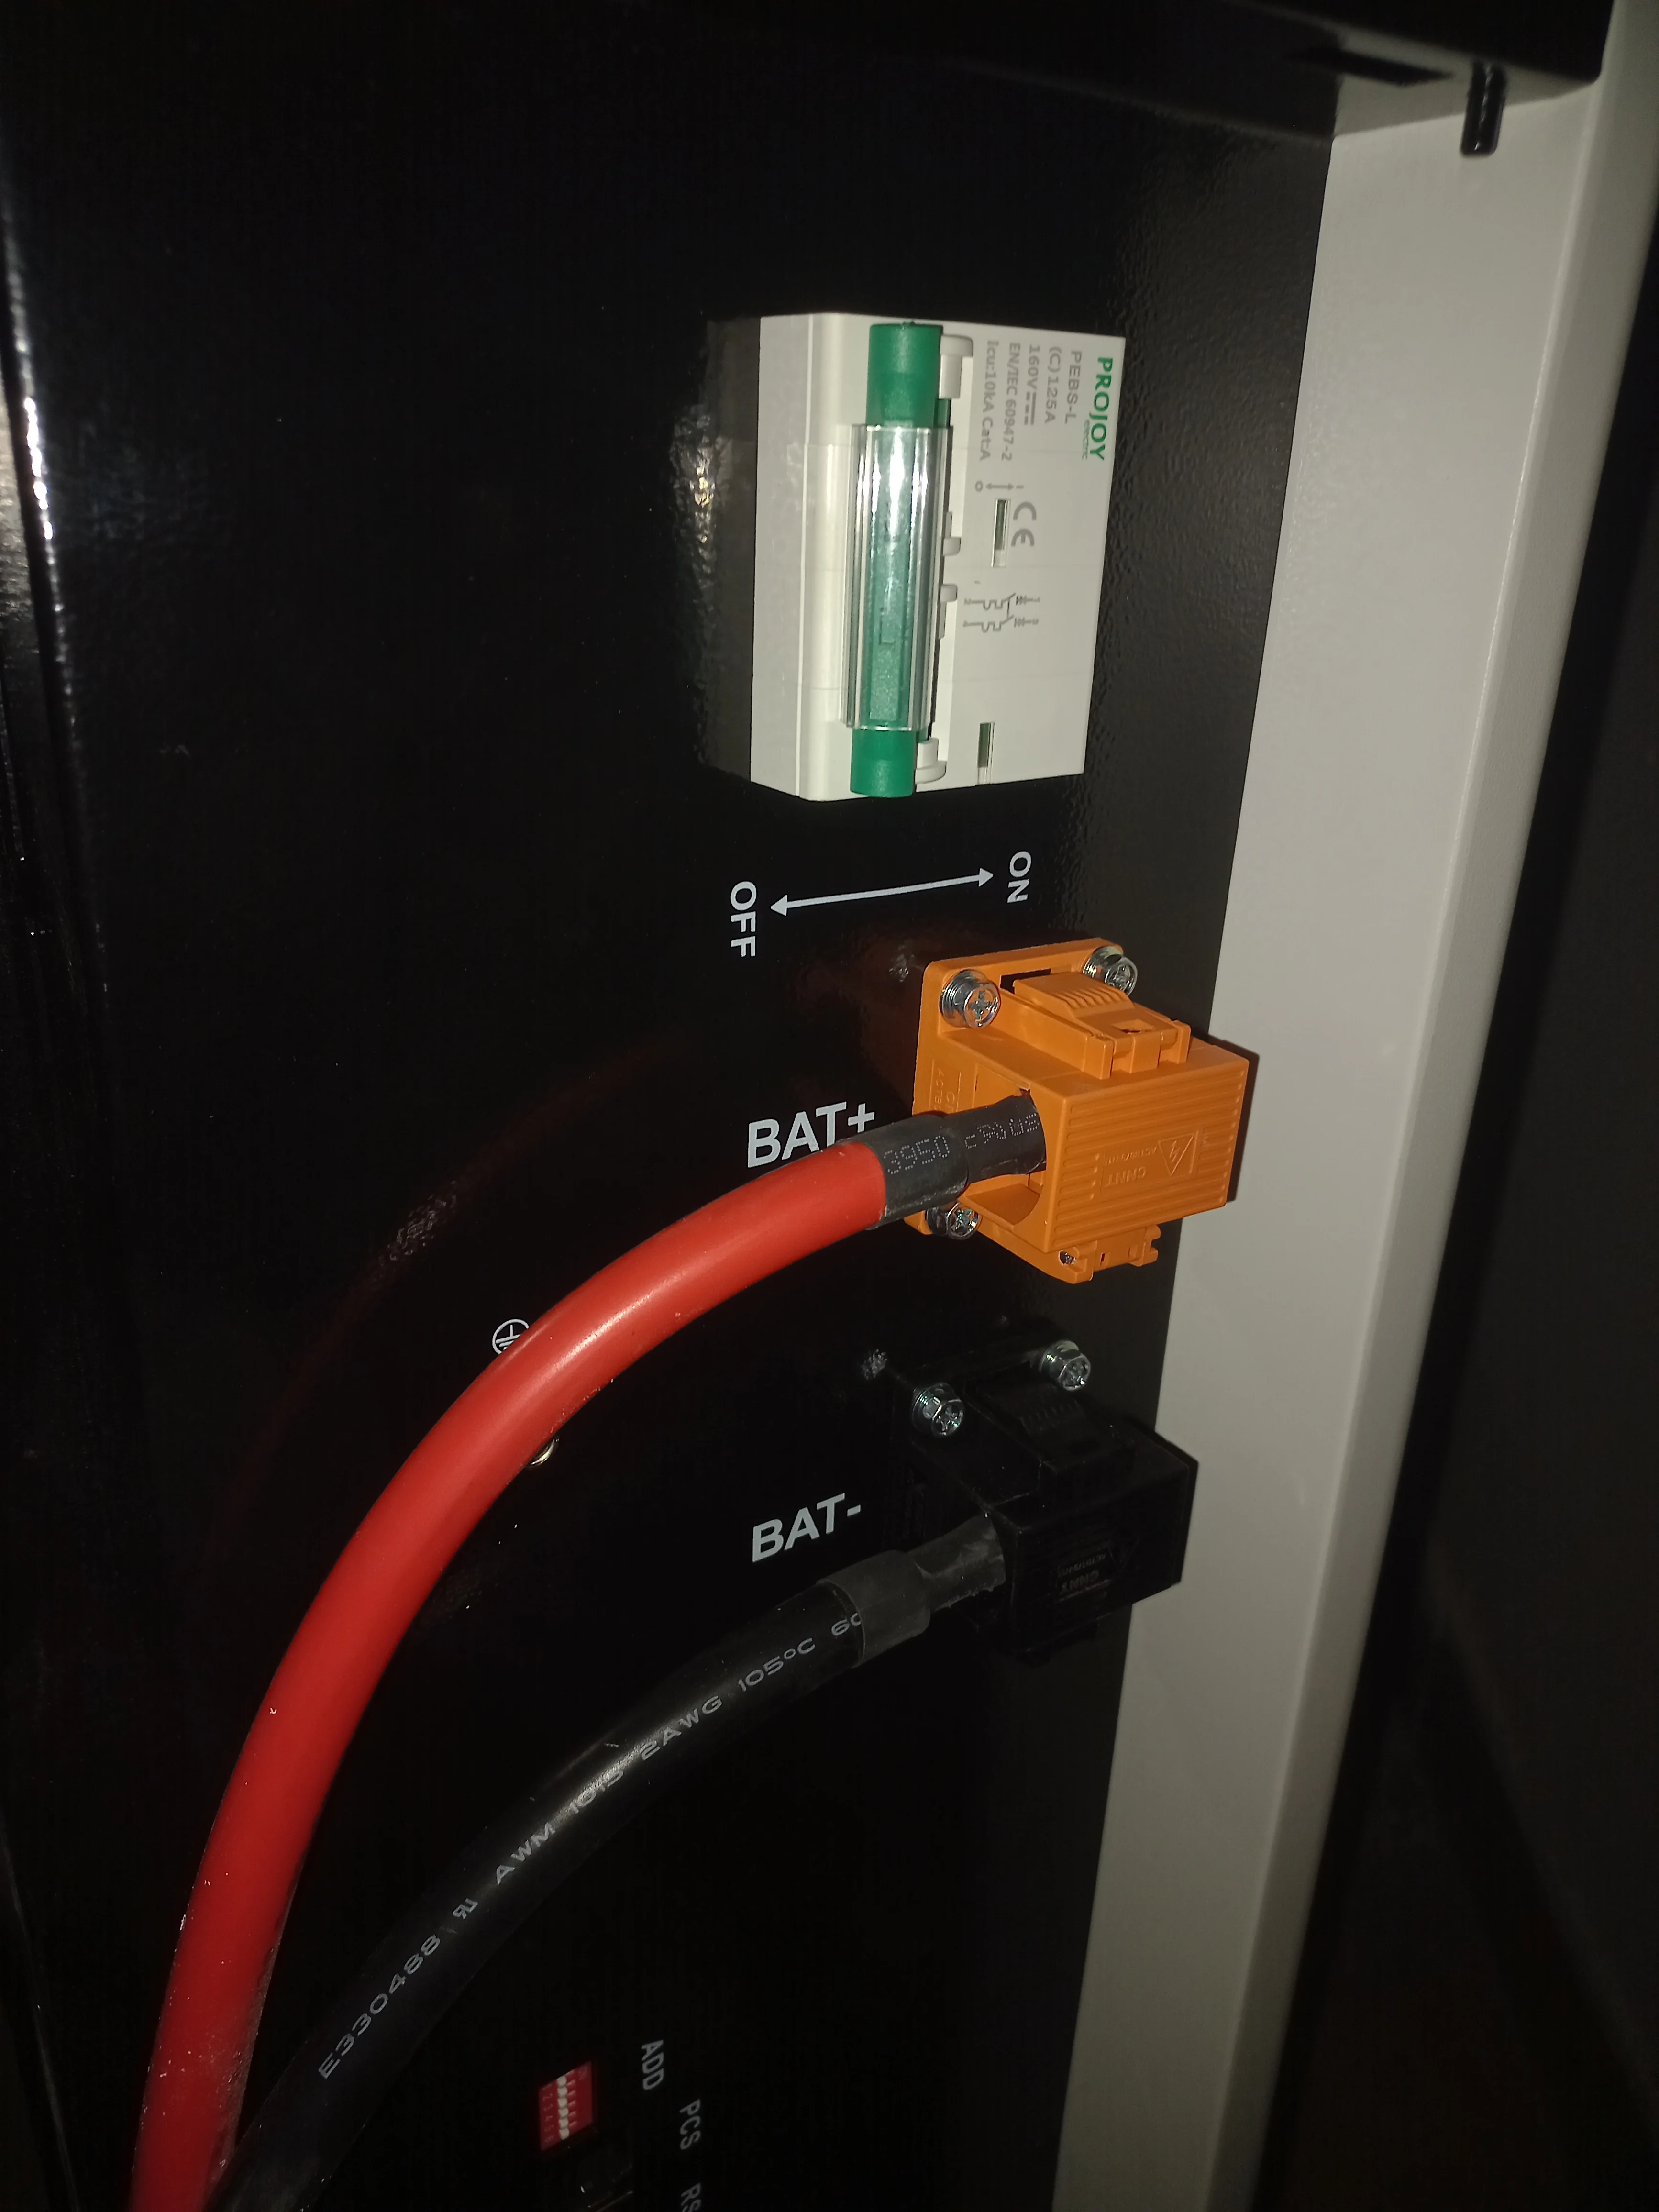
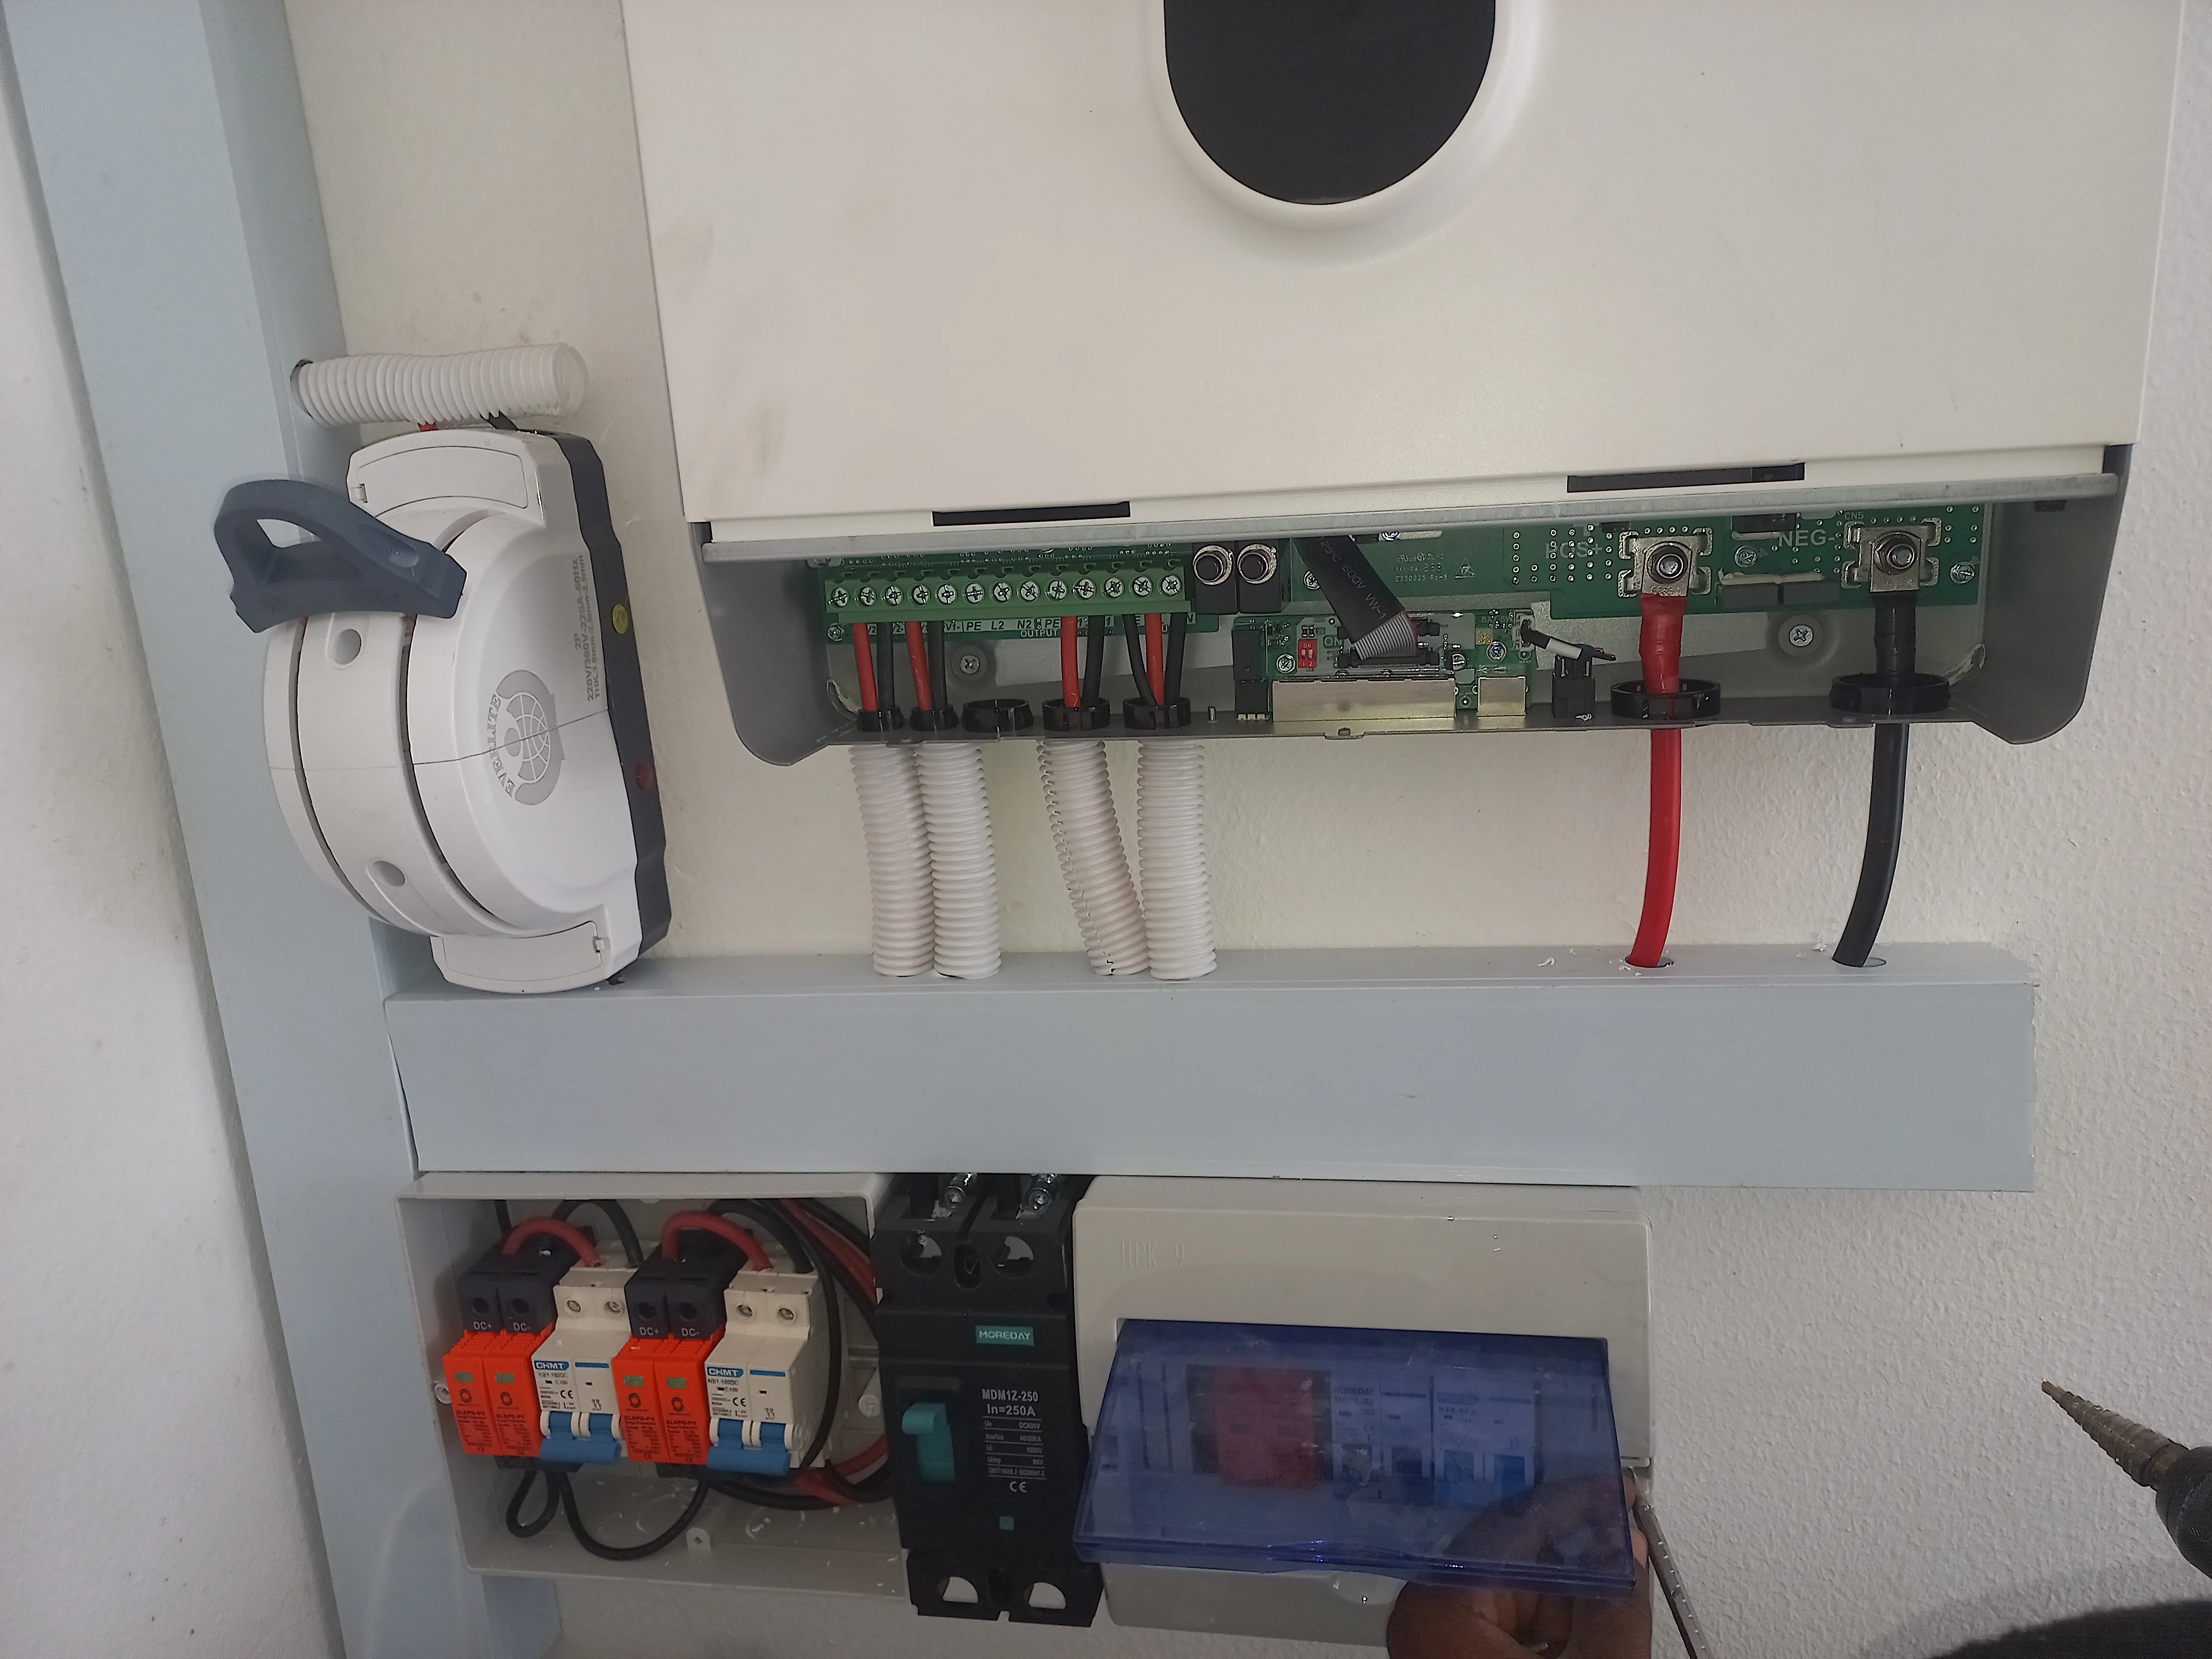
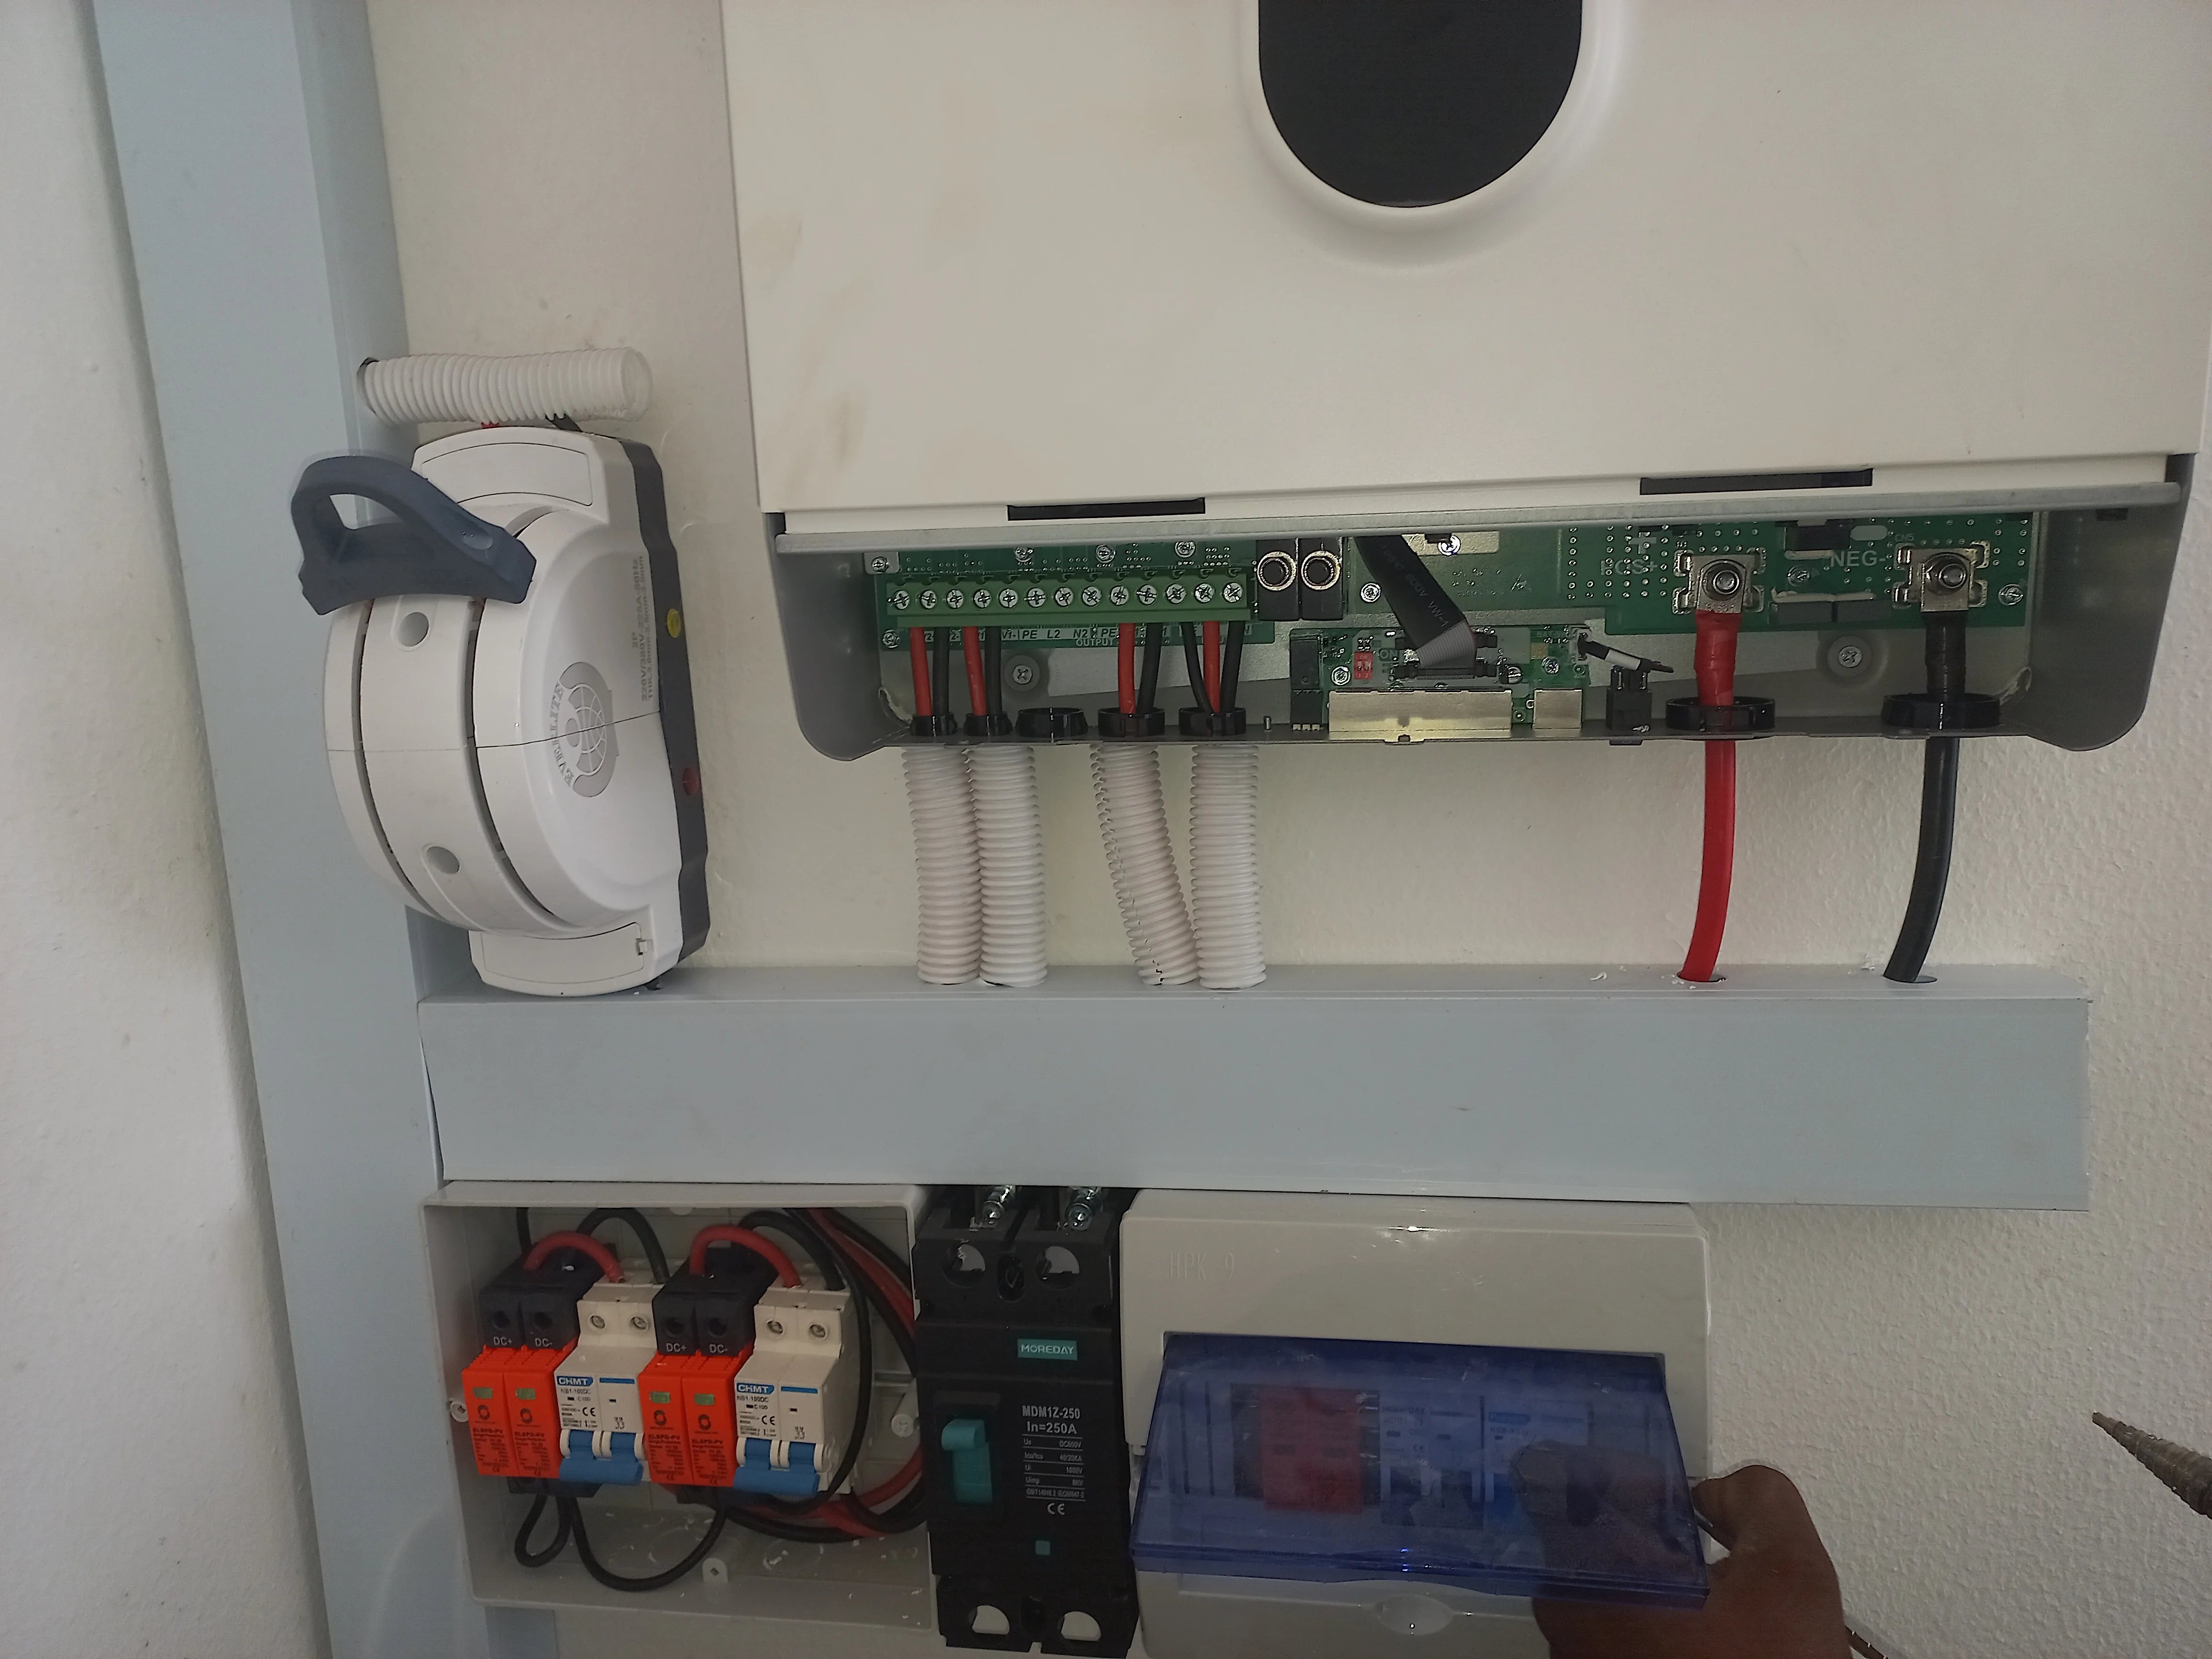
Protection & Switchgear
- DC Surge Protectors: CHINT brand (2 sets for PV1 and PV2 strings)
- Main Circuit Breaker: MDM1Z-250, 250A MCCB
- AC Surge Protector: HOREDAY brand
- MCBs: HOREDAY miniature circuit breakers
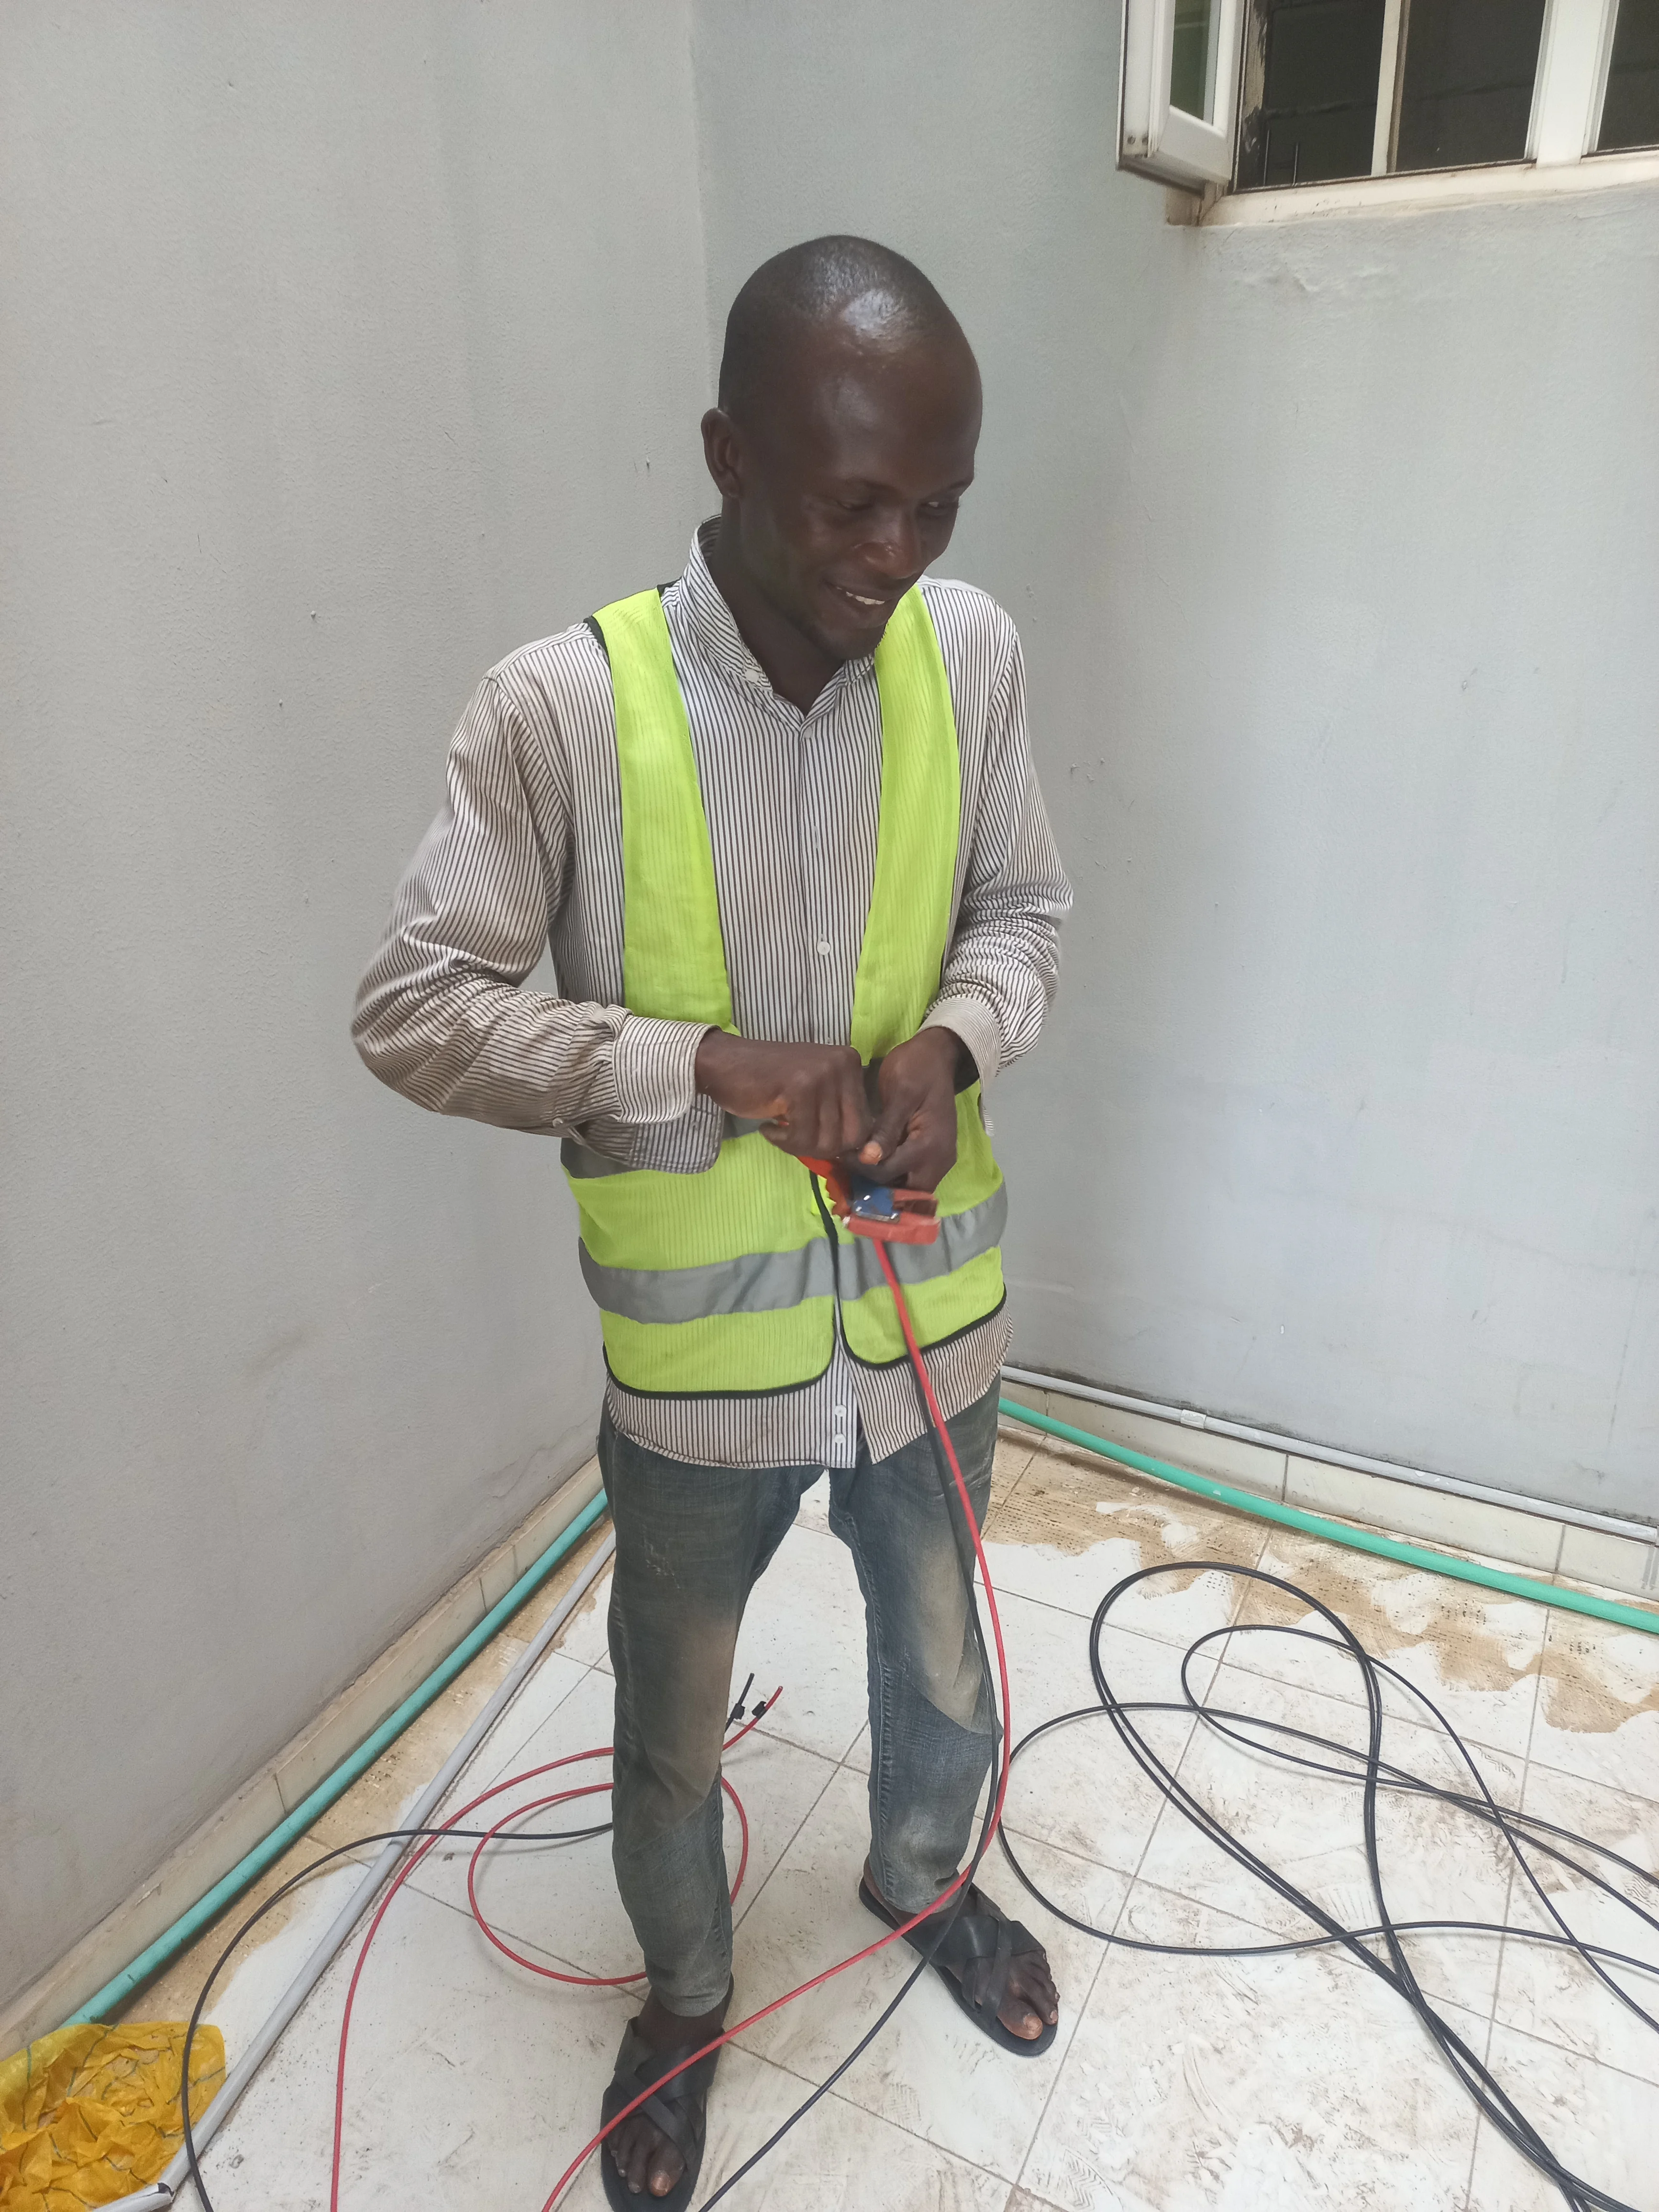
- Cabling: Red (positive) and black (negative) PV DC cables, routed through flexible conduit
Installation Process
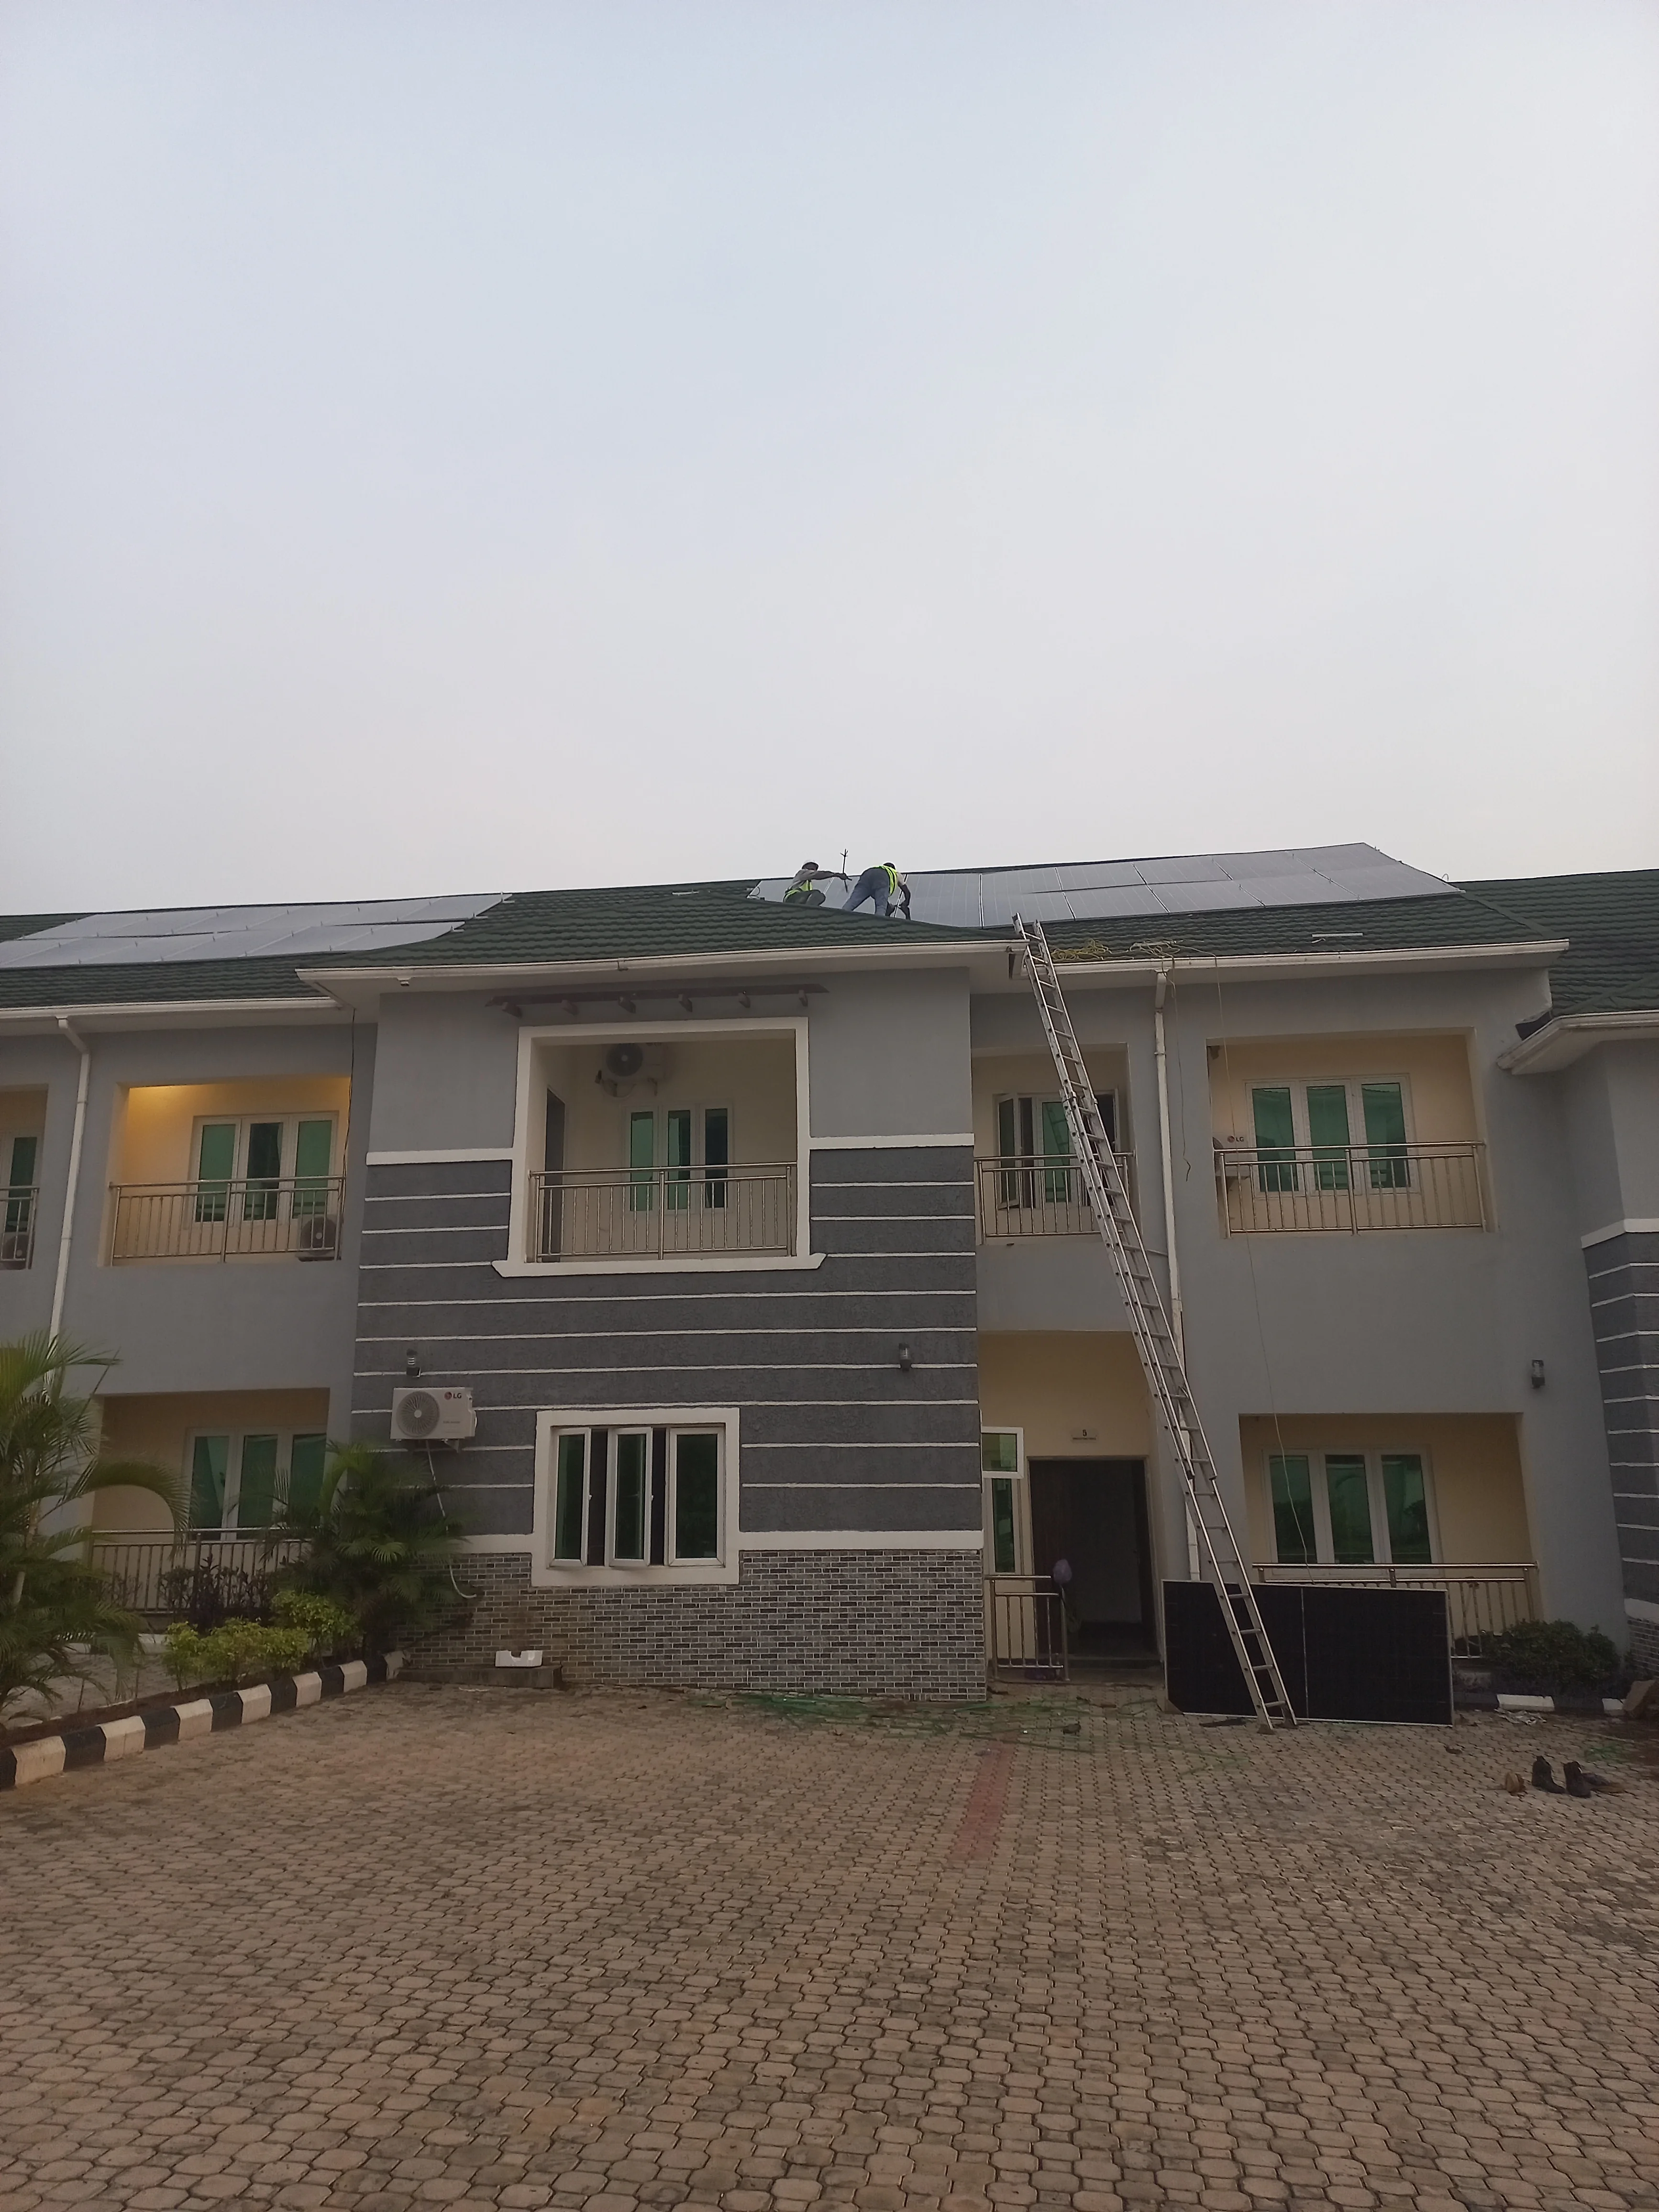
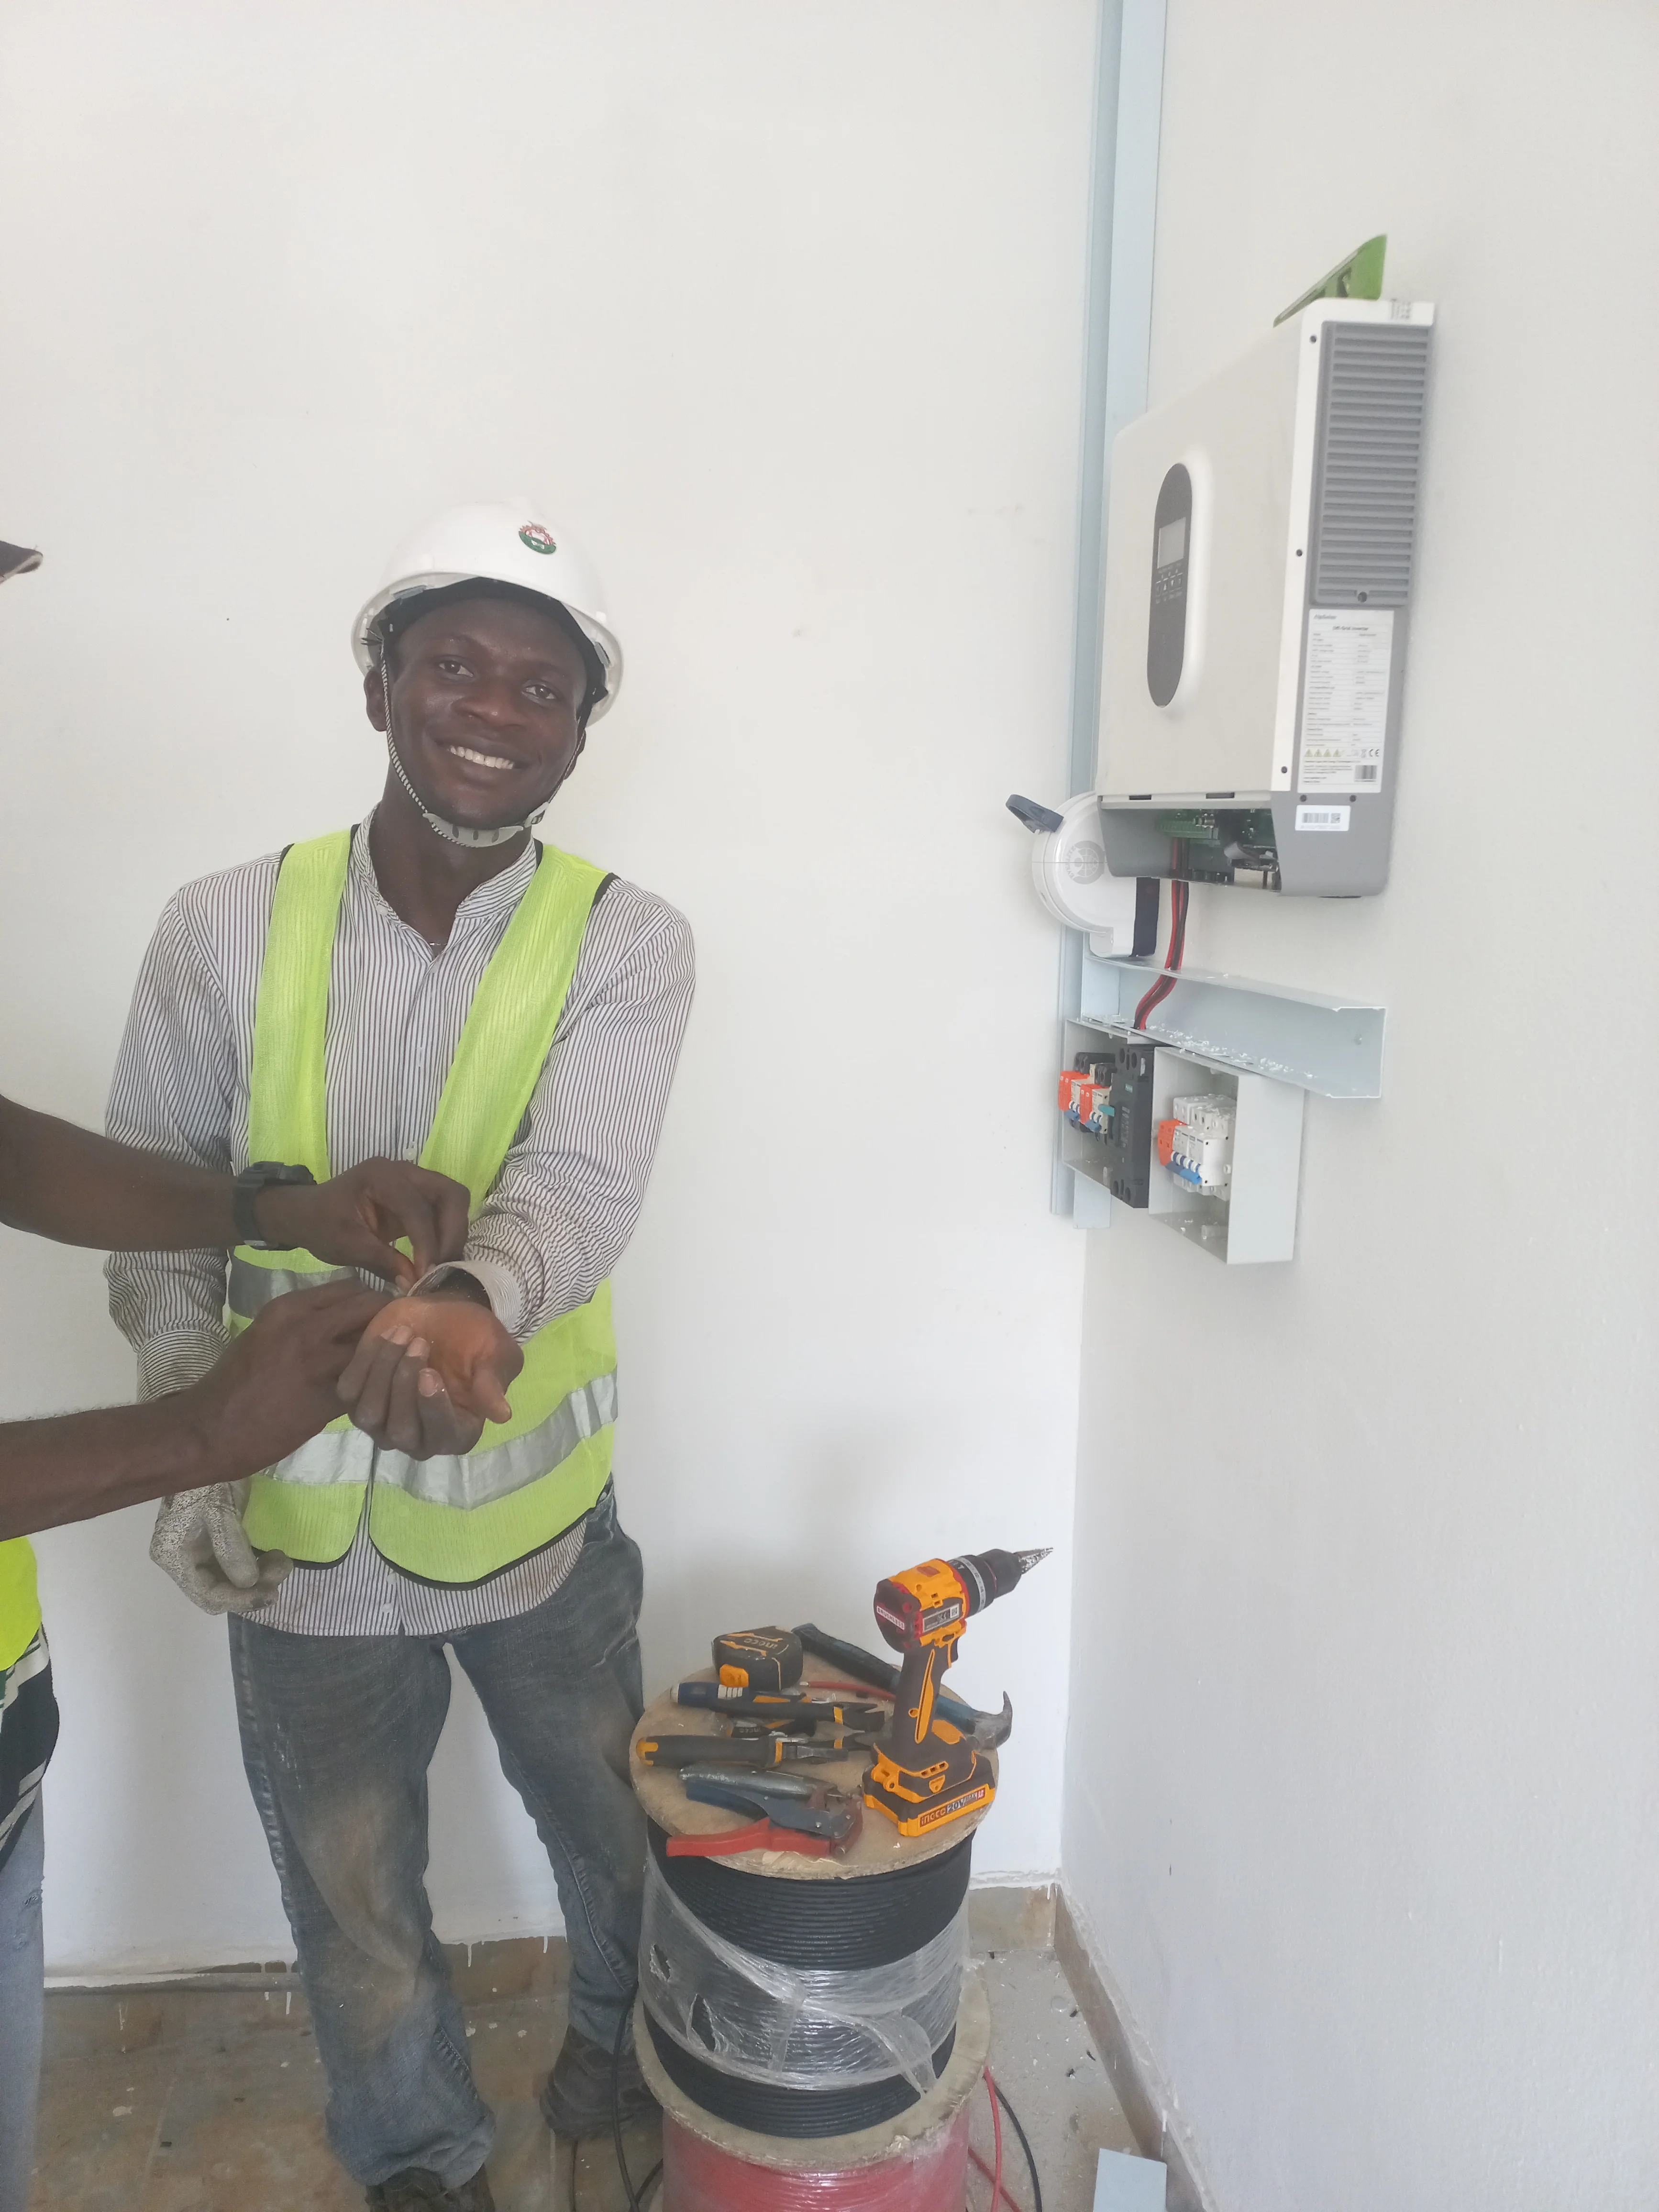
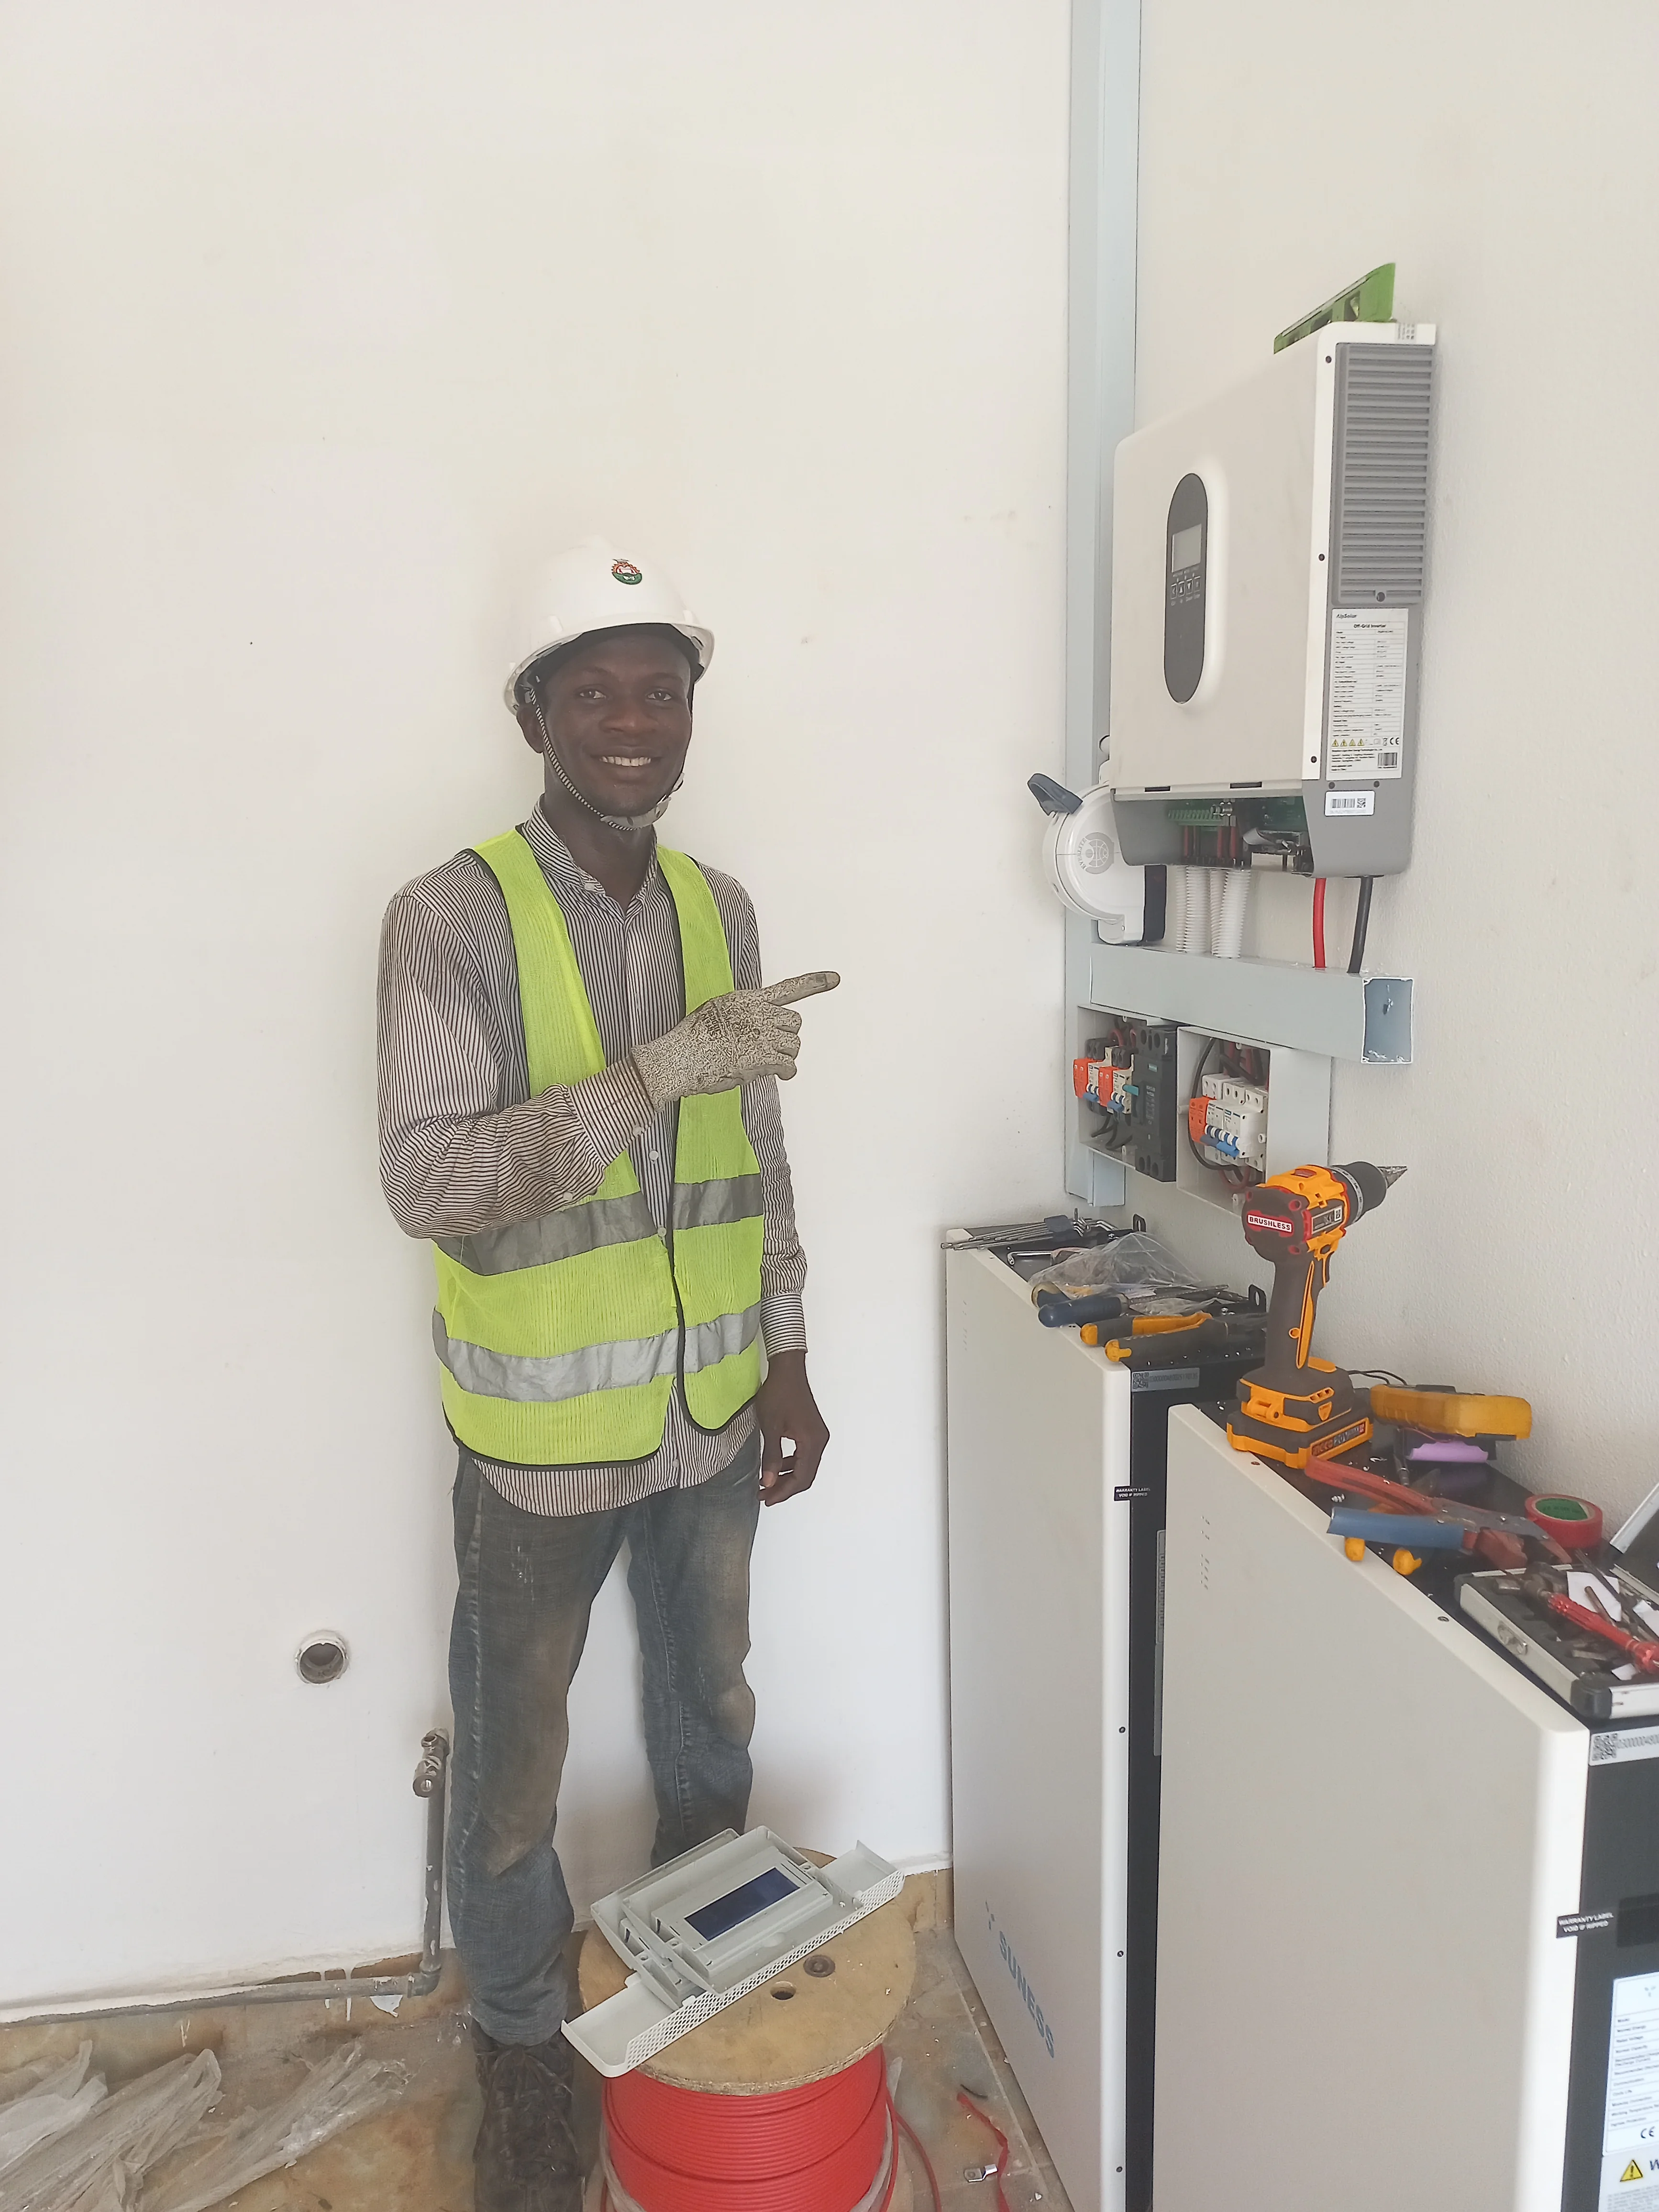
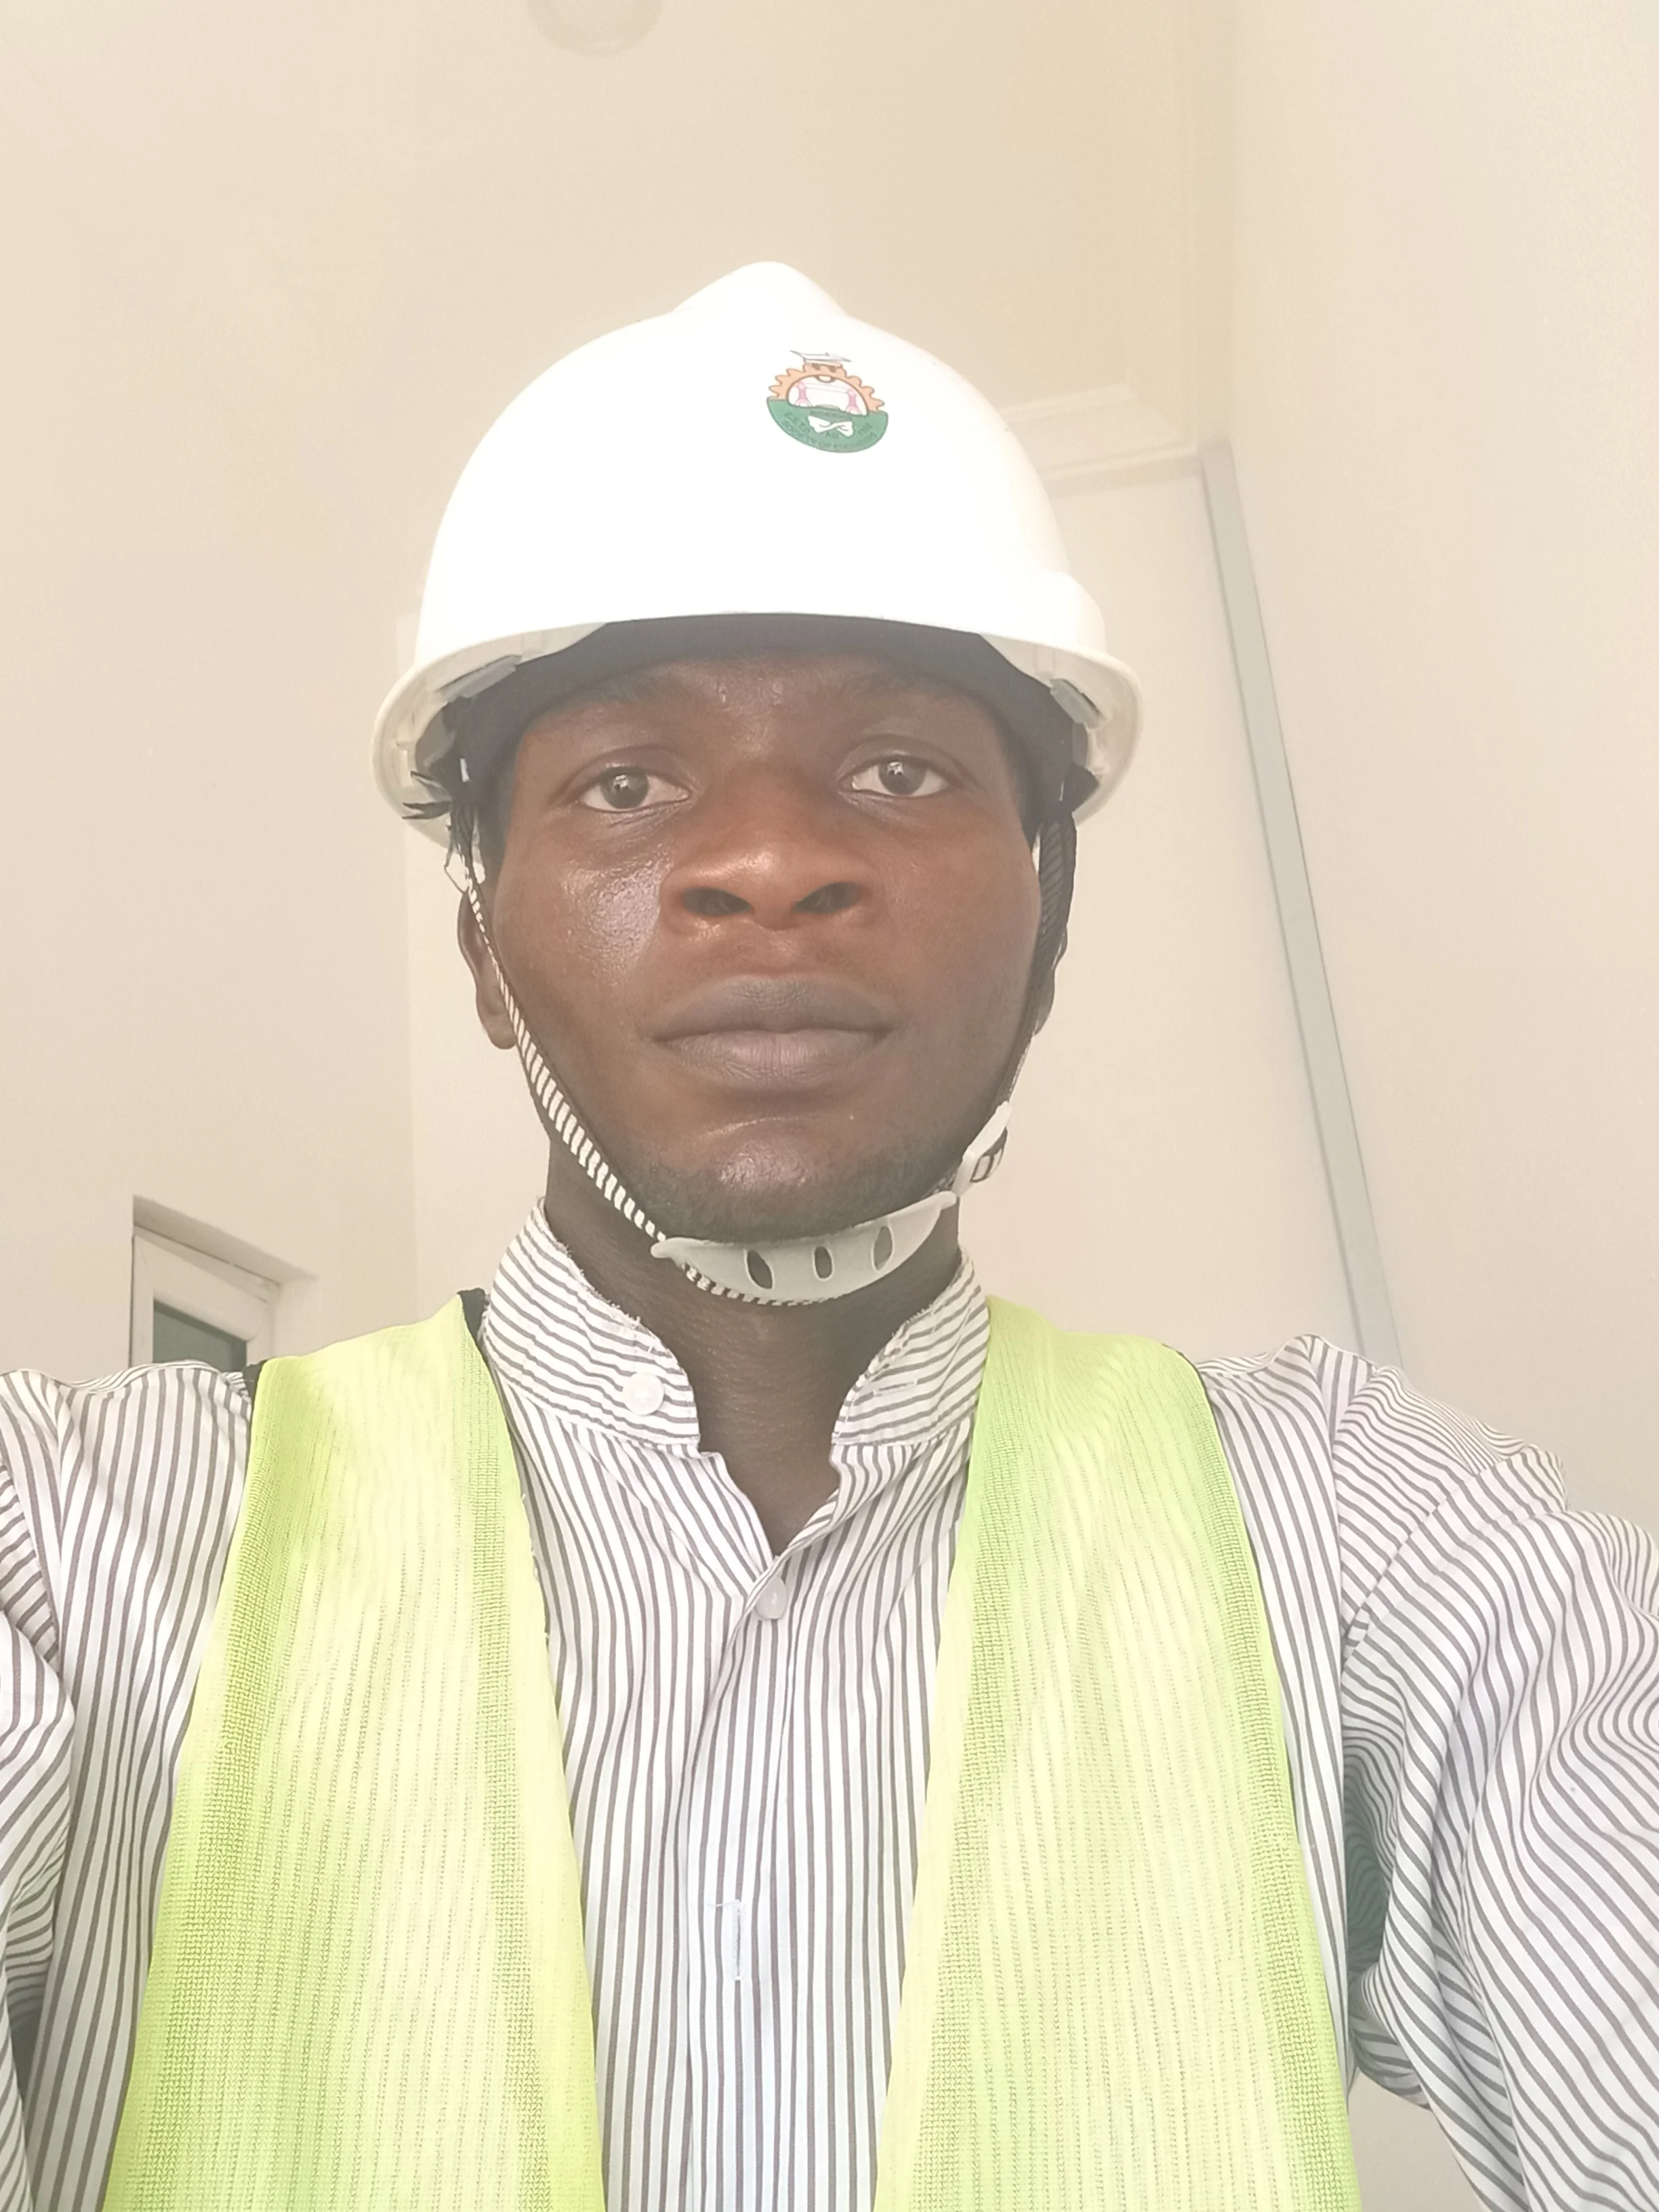
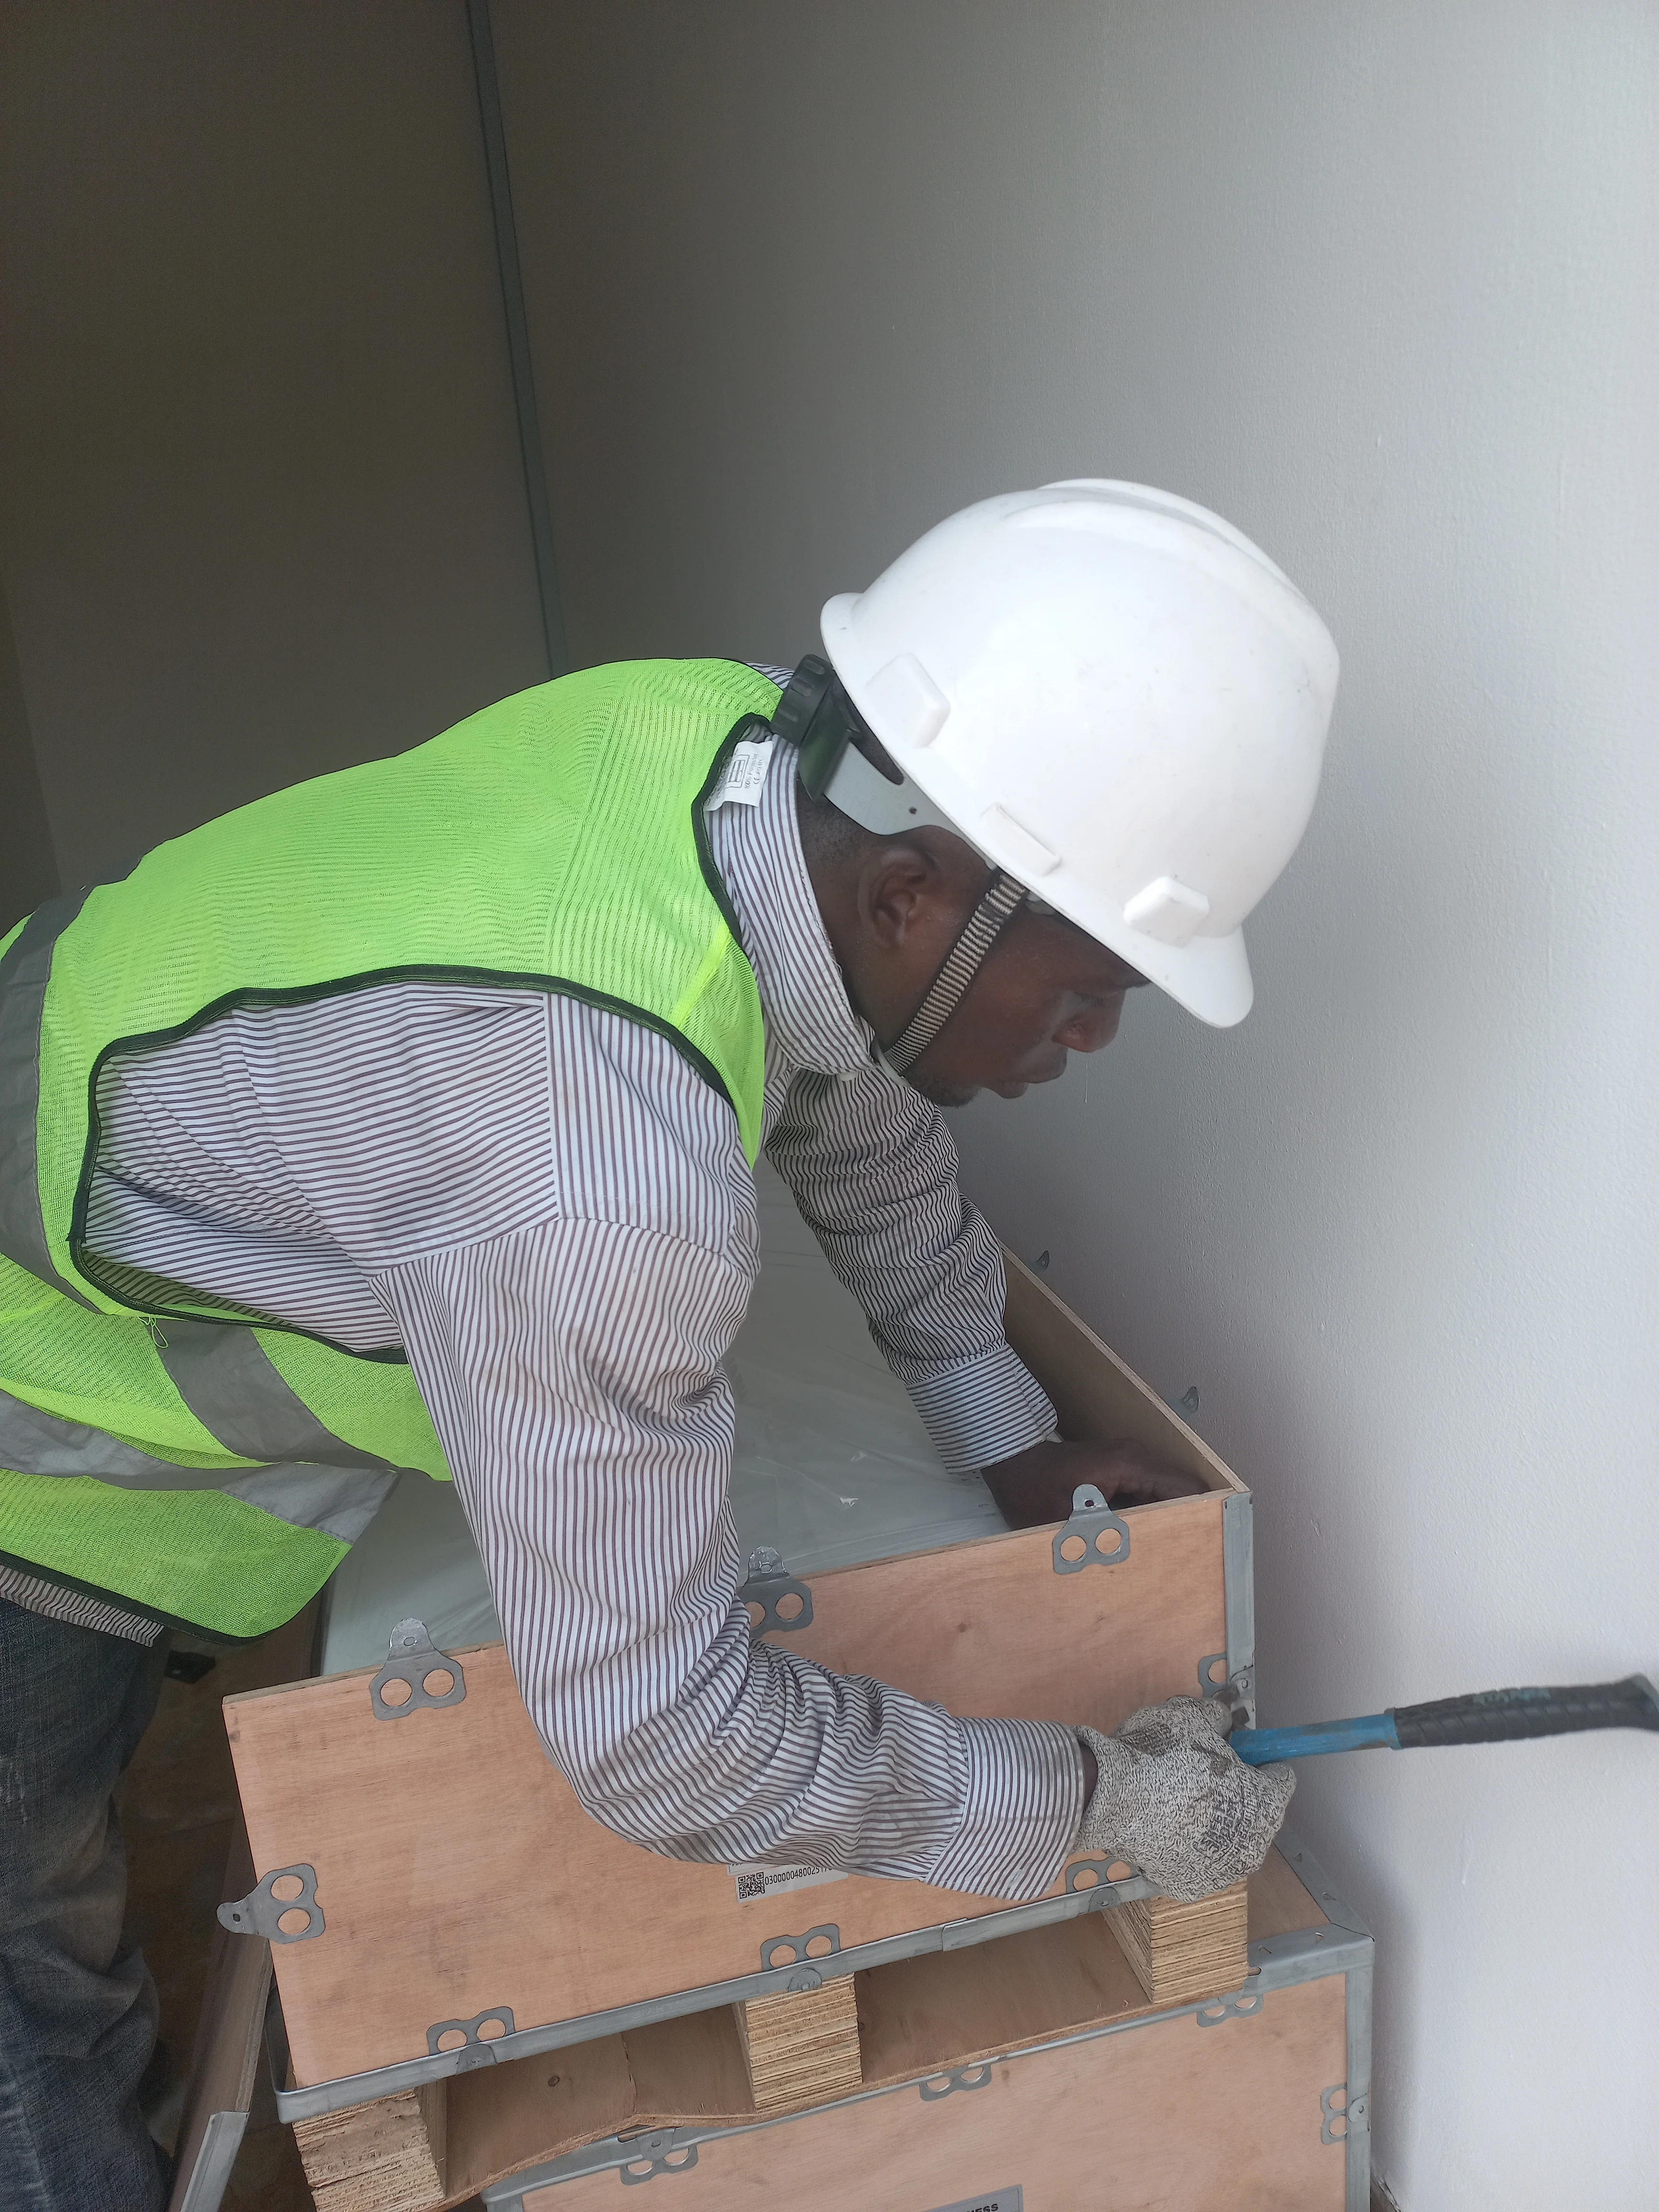
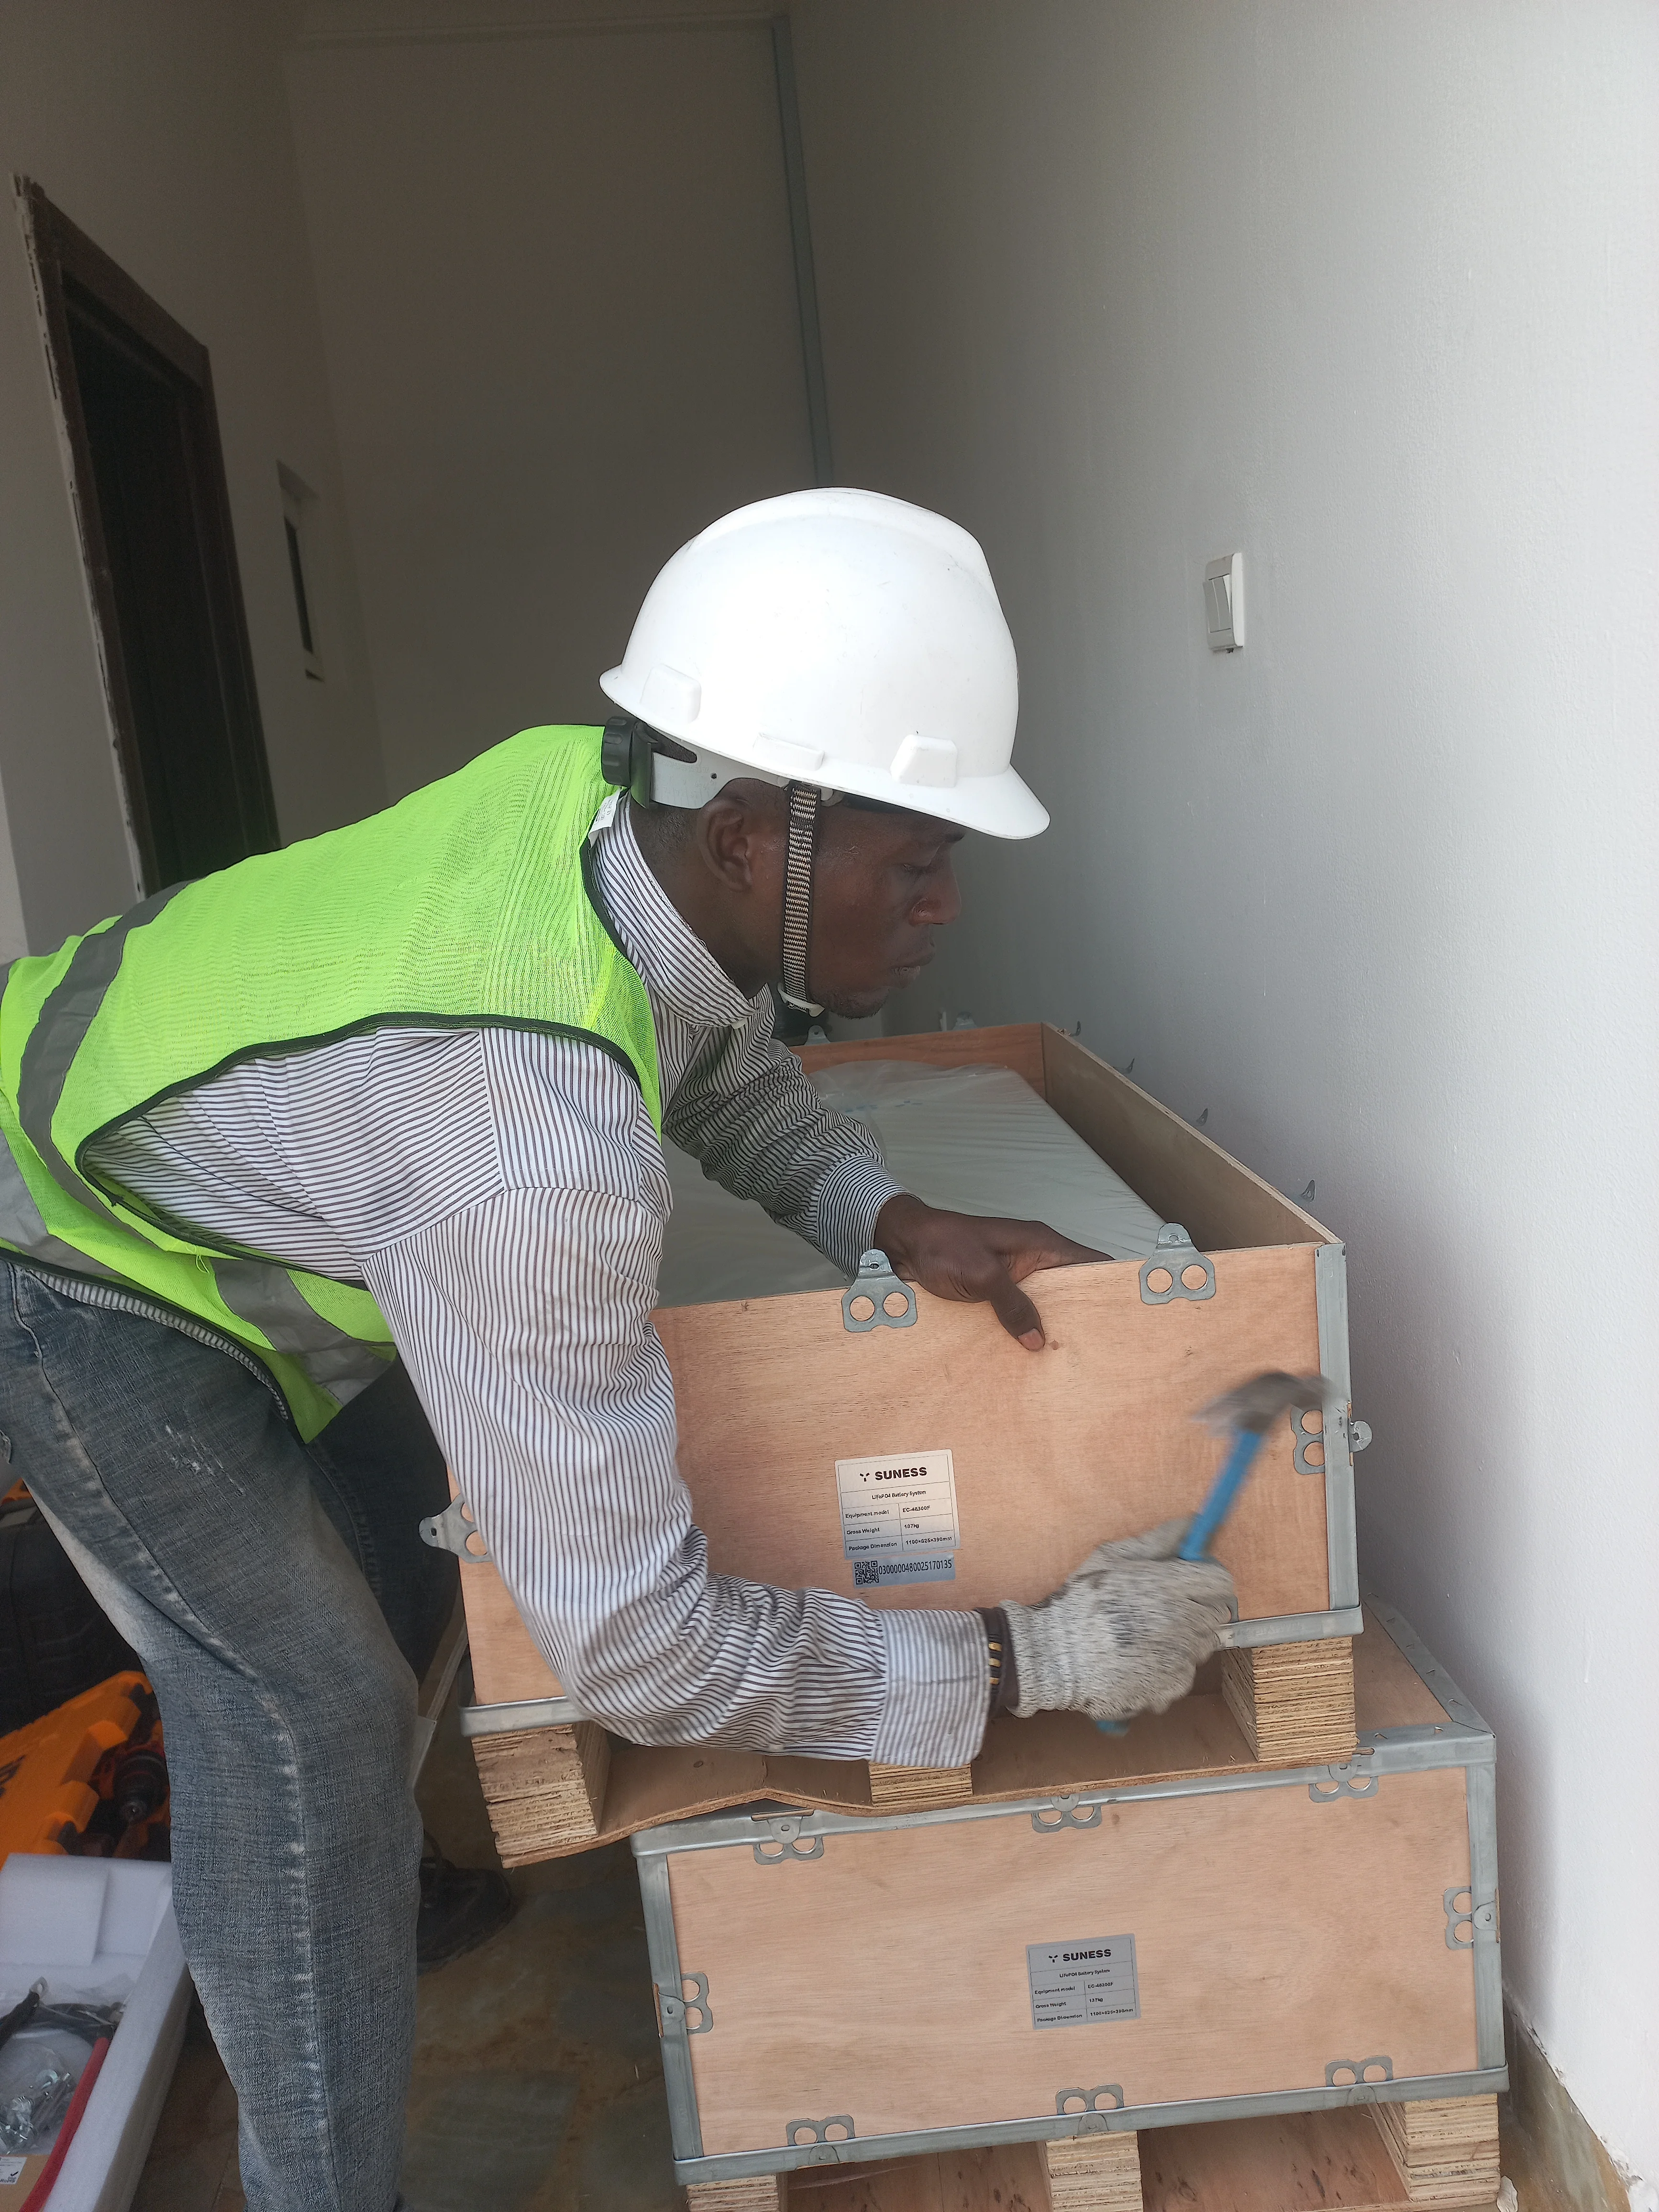
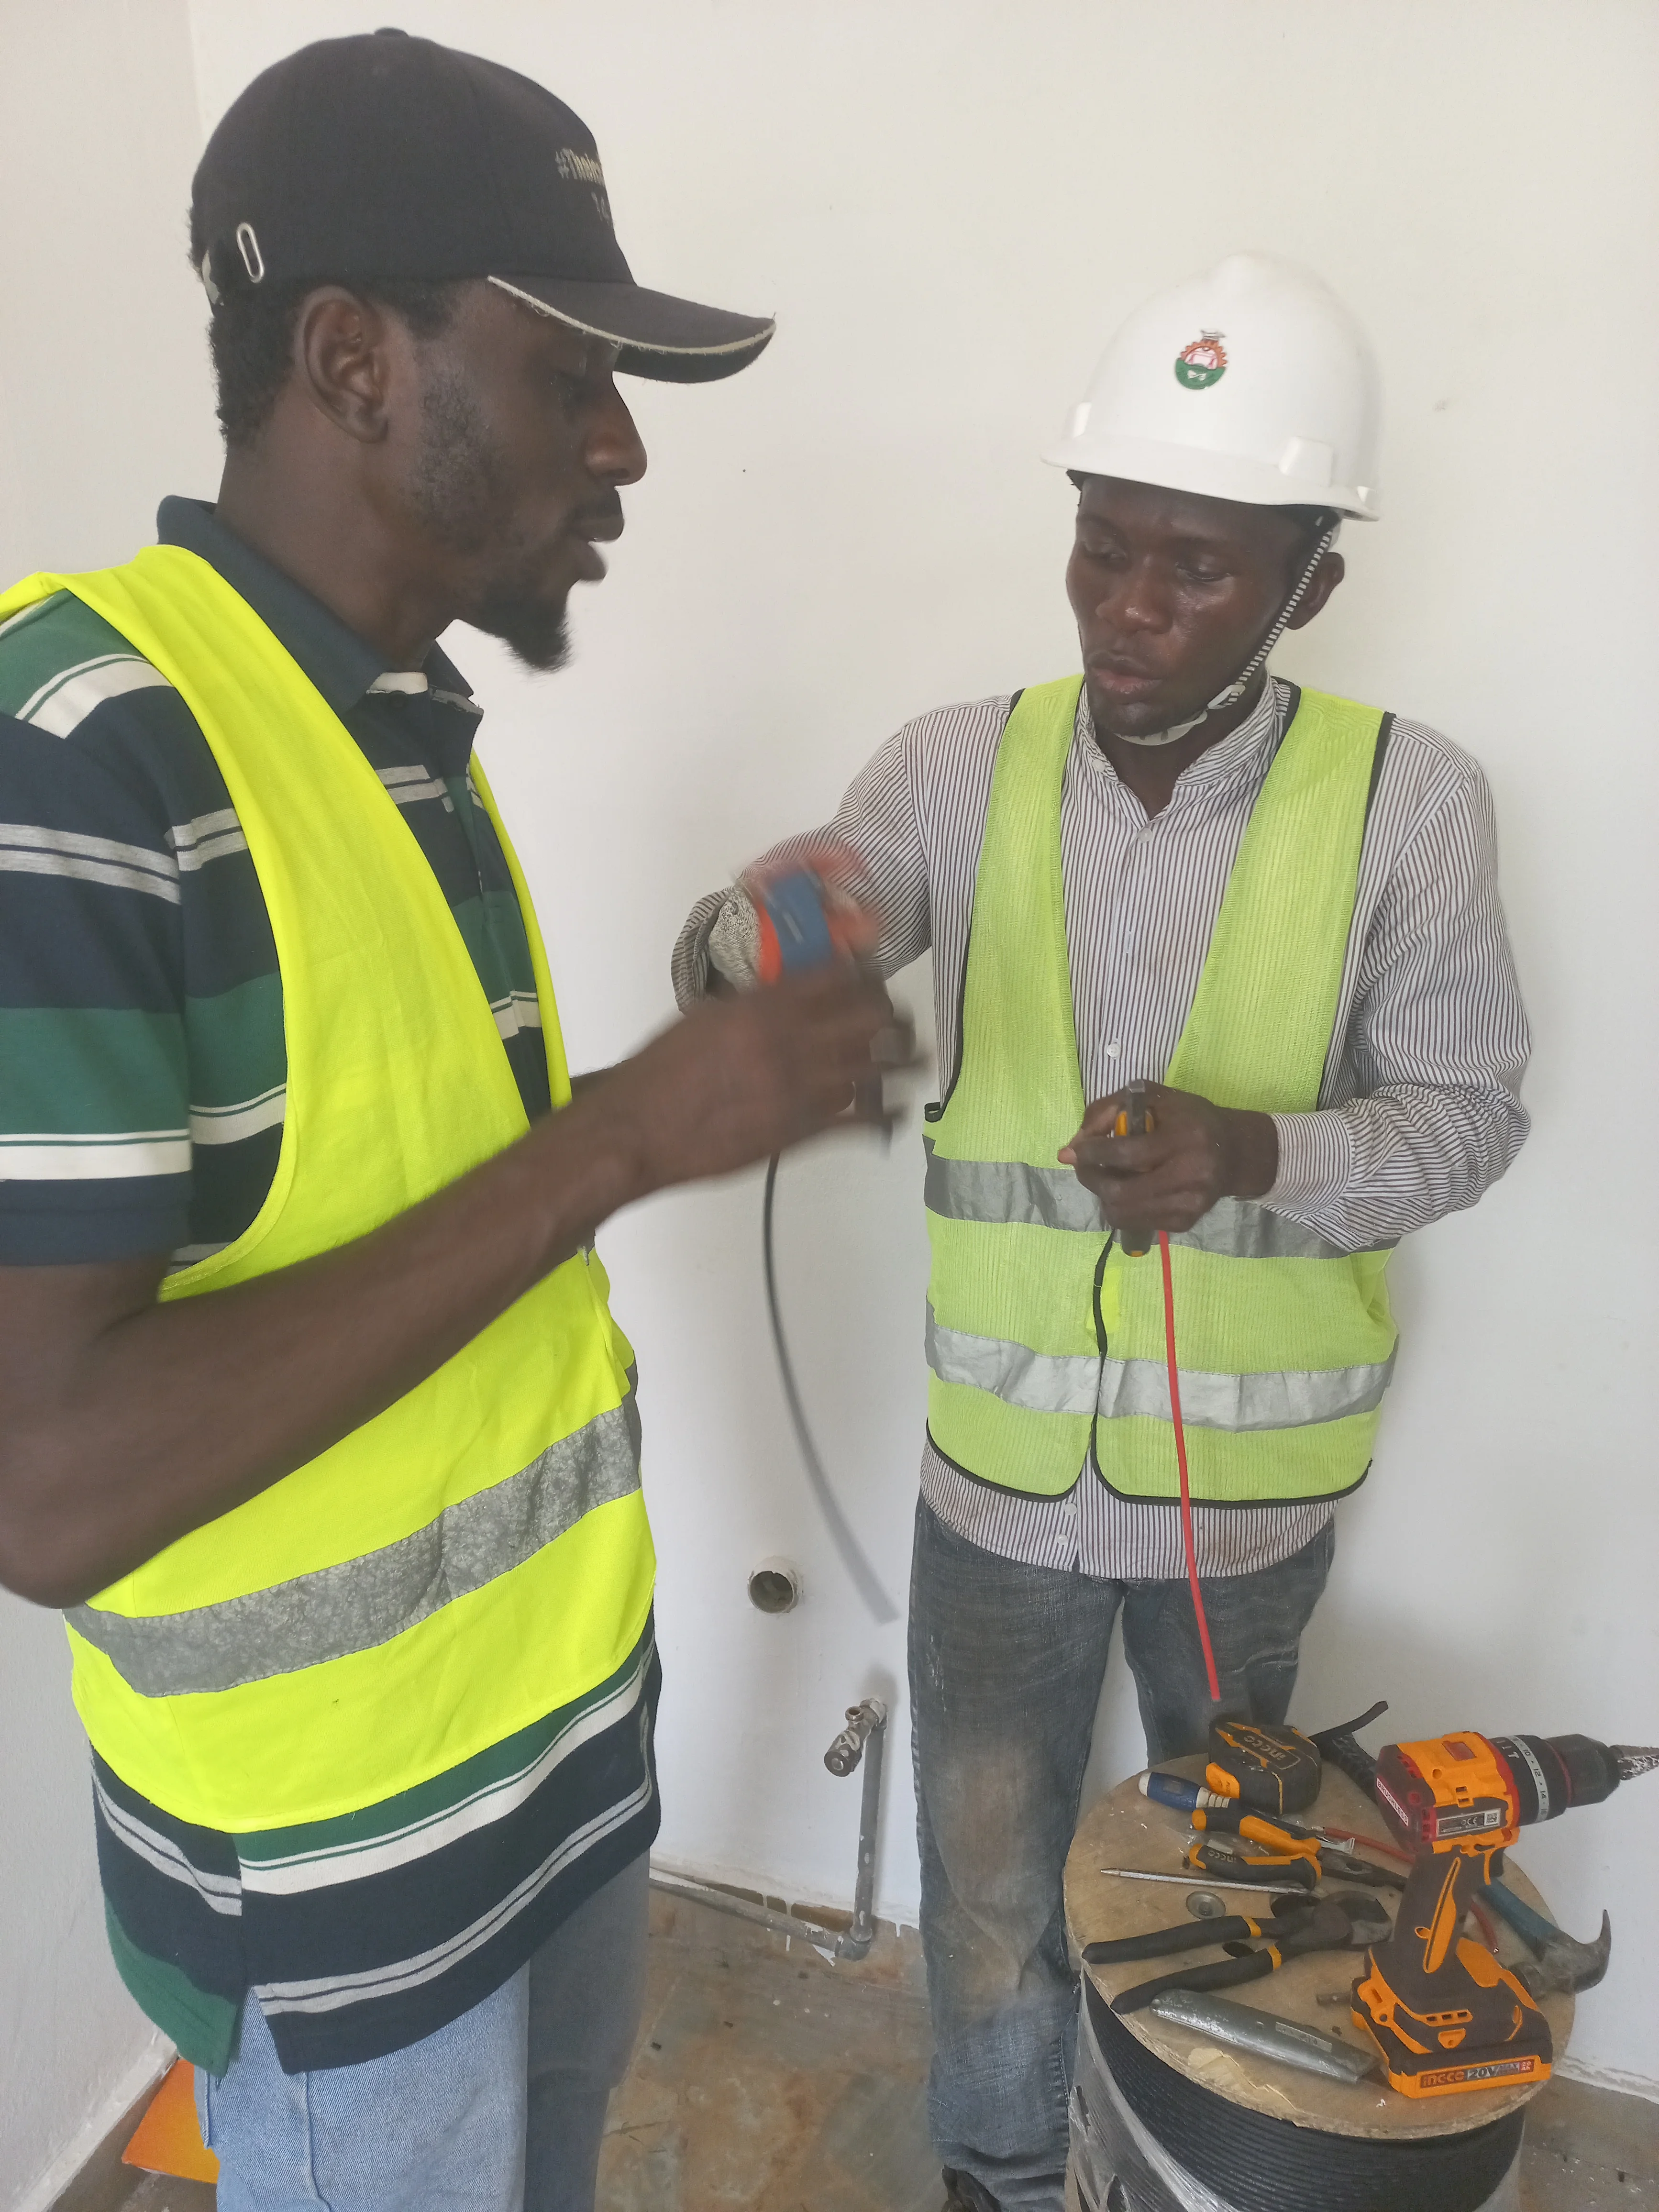
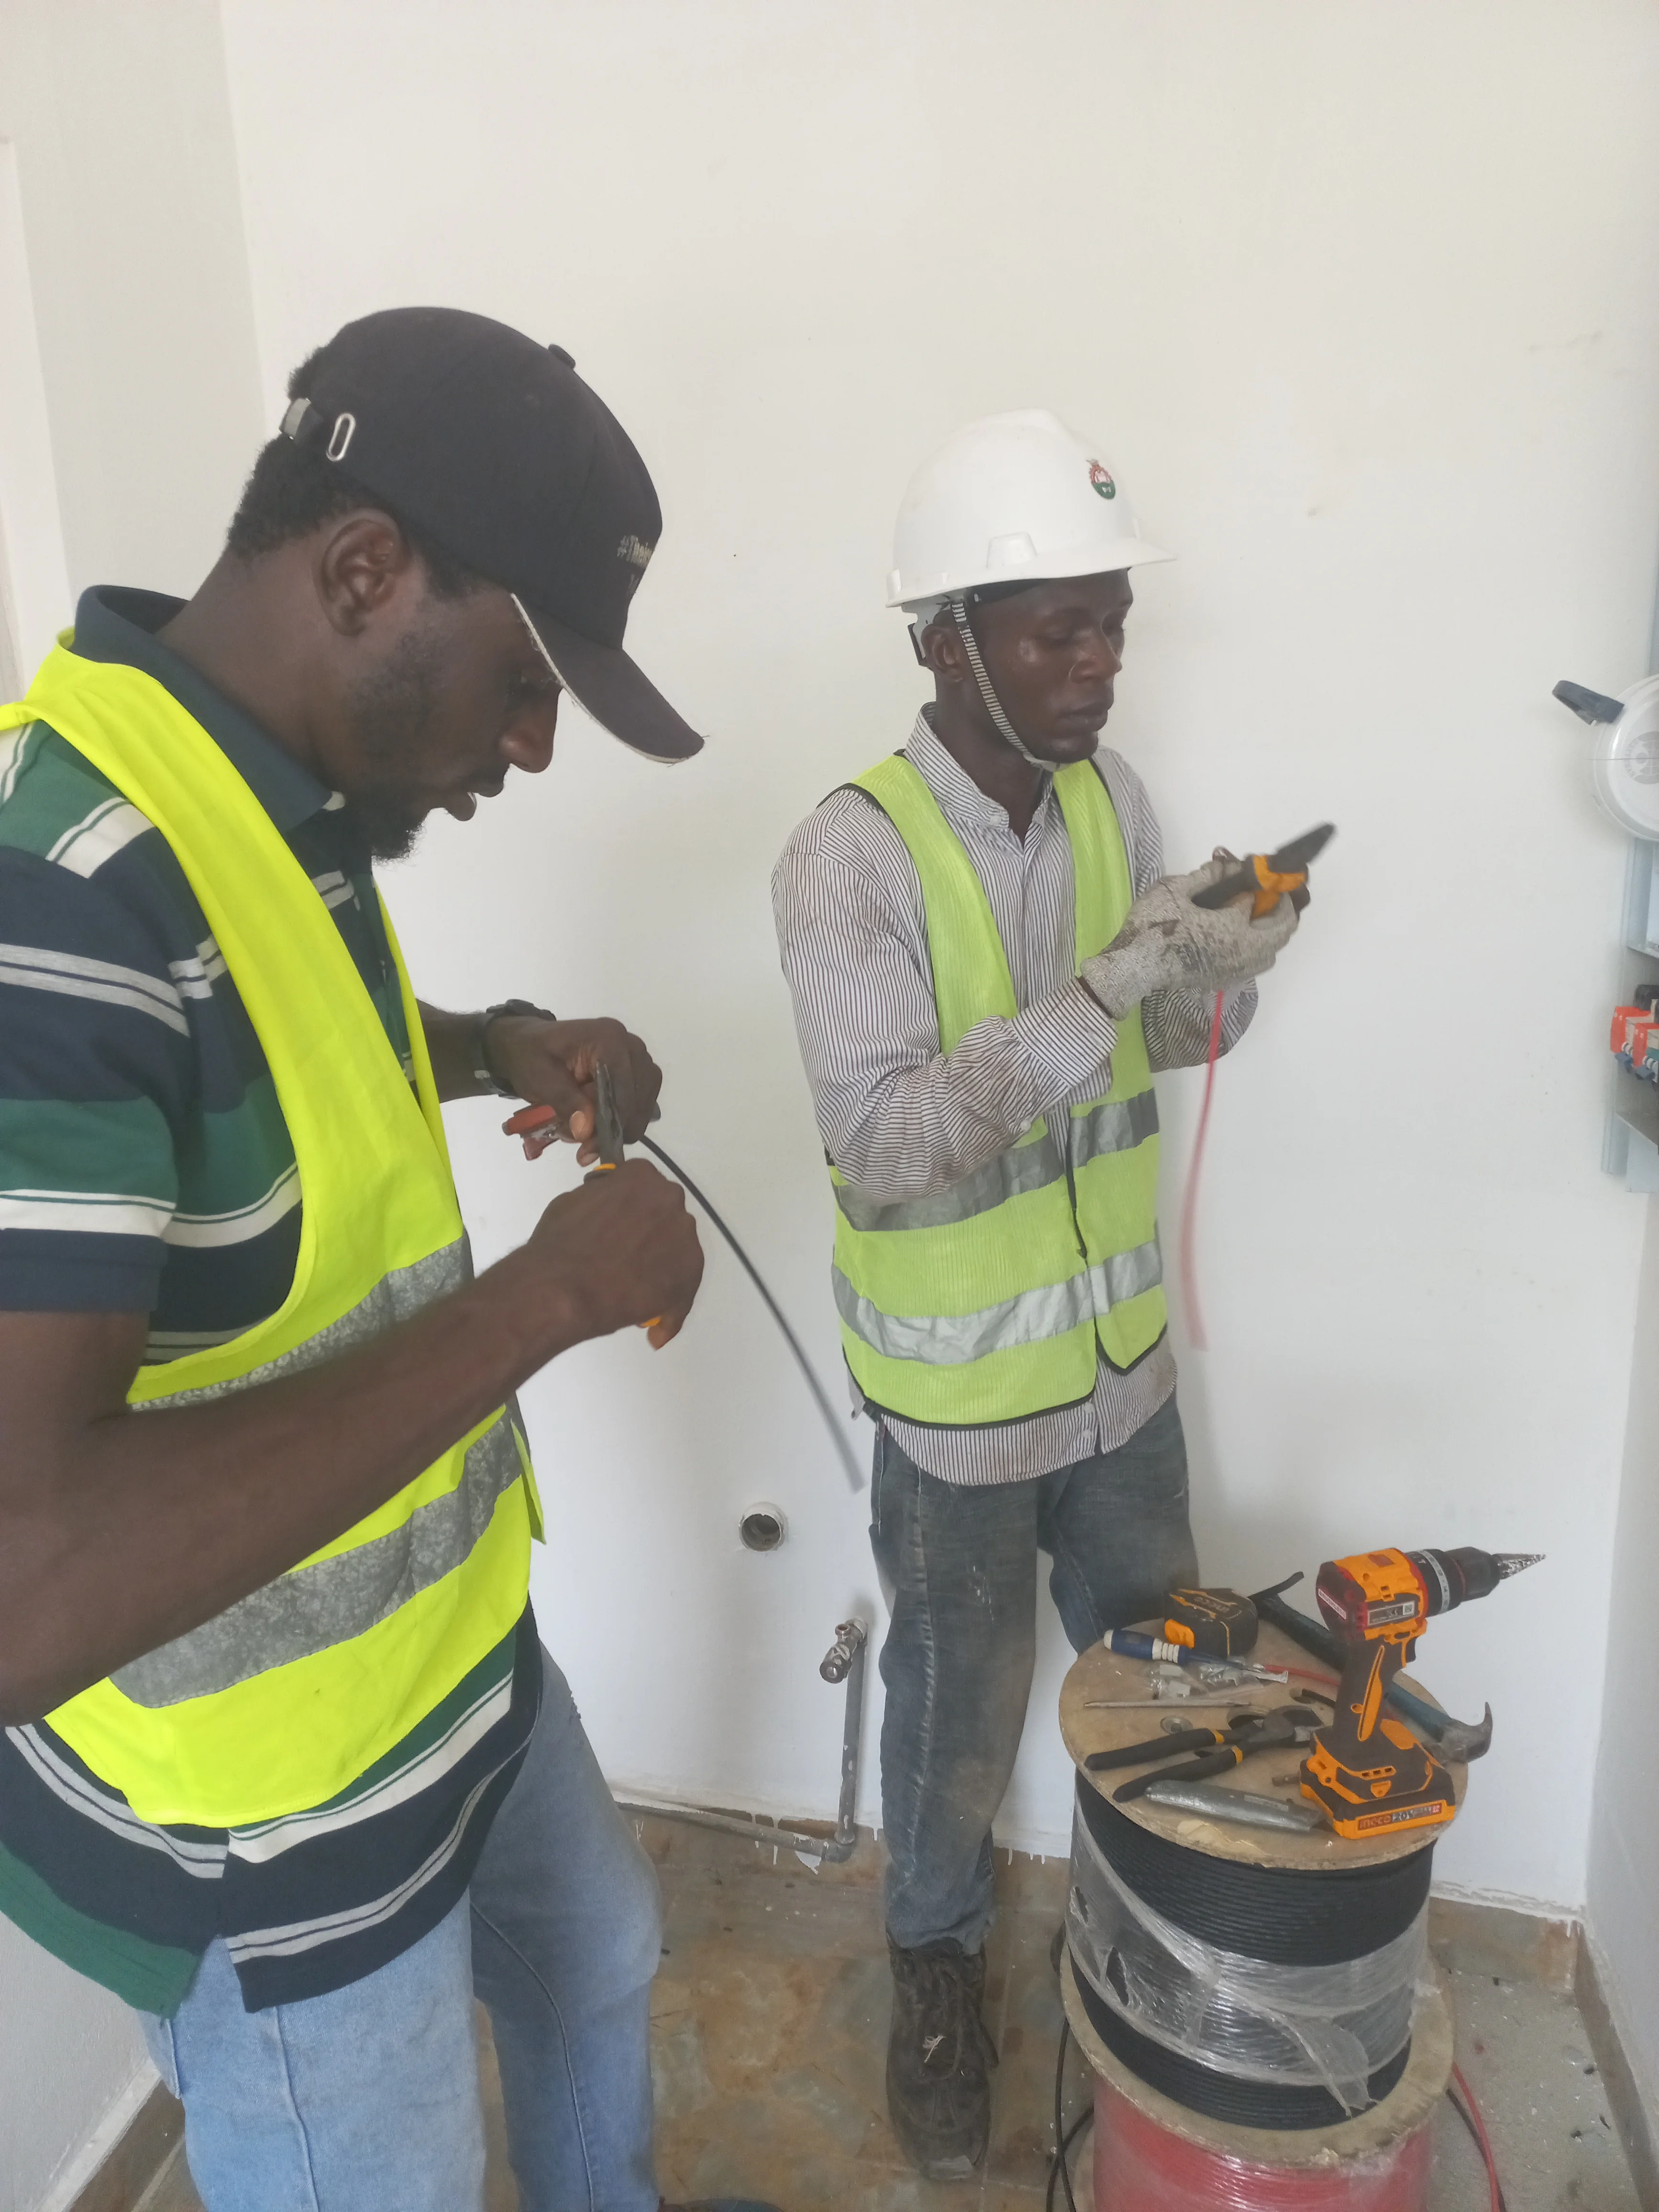
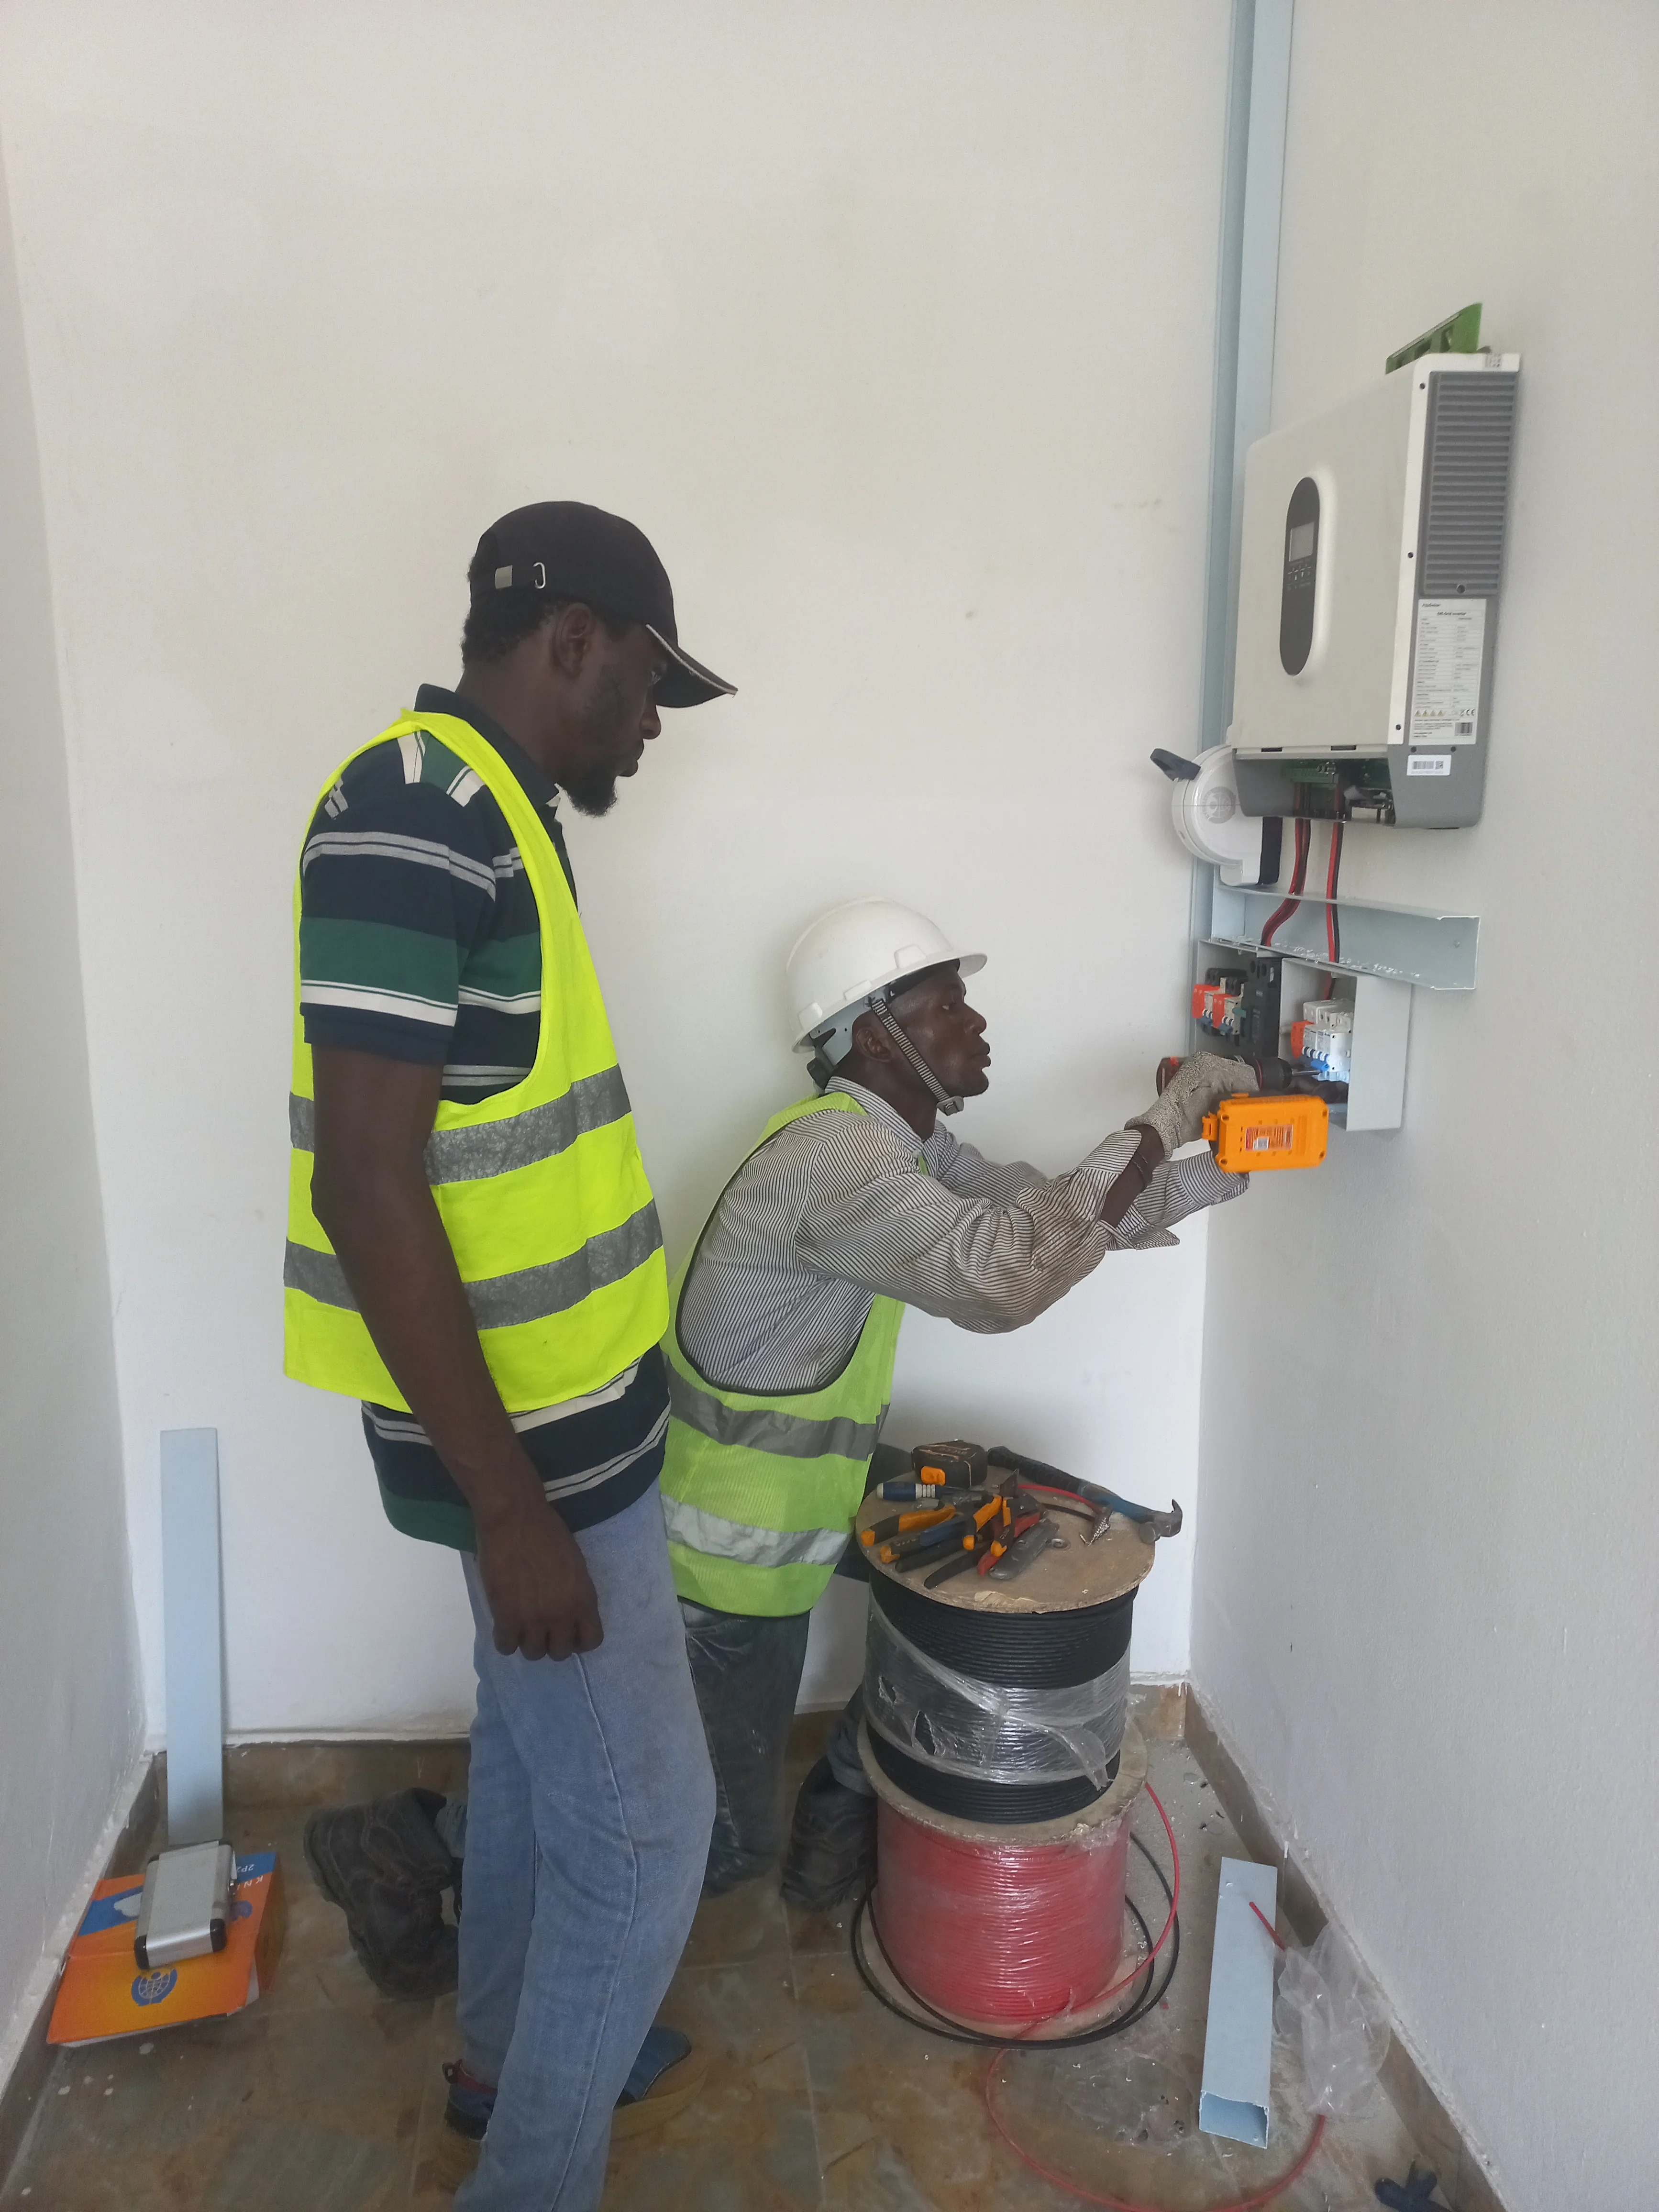
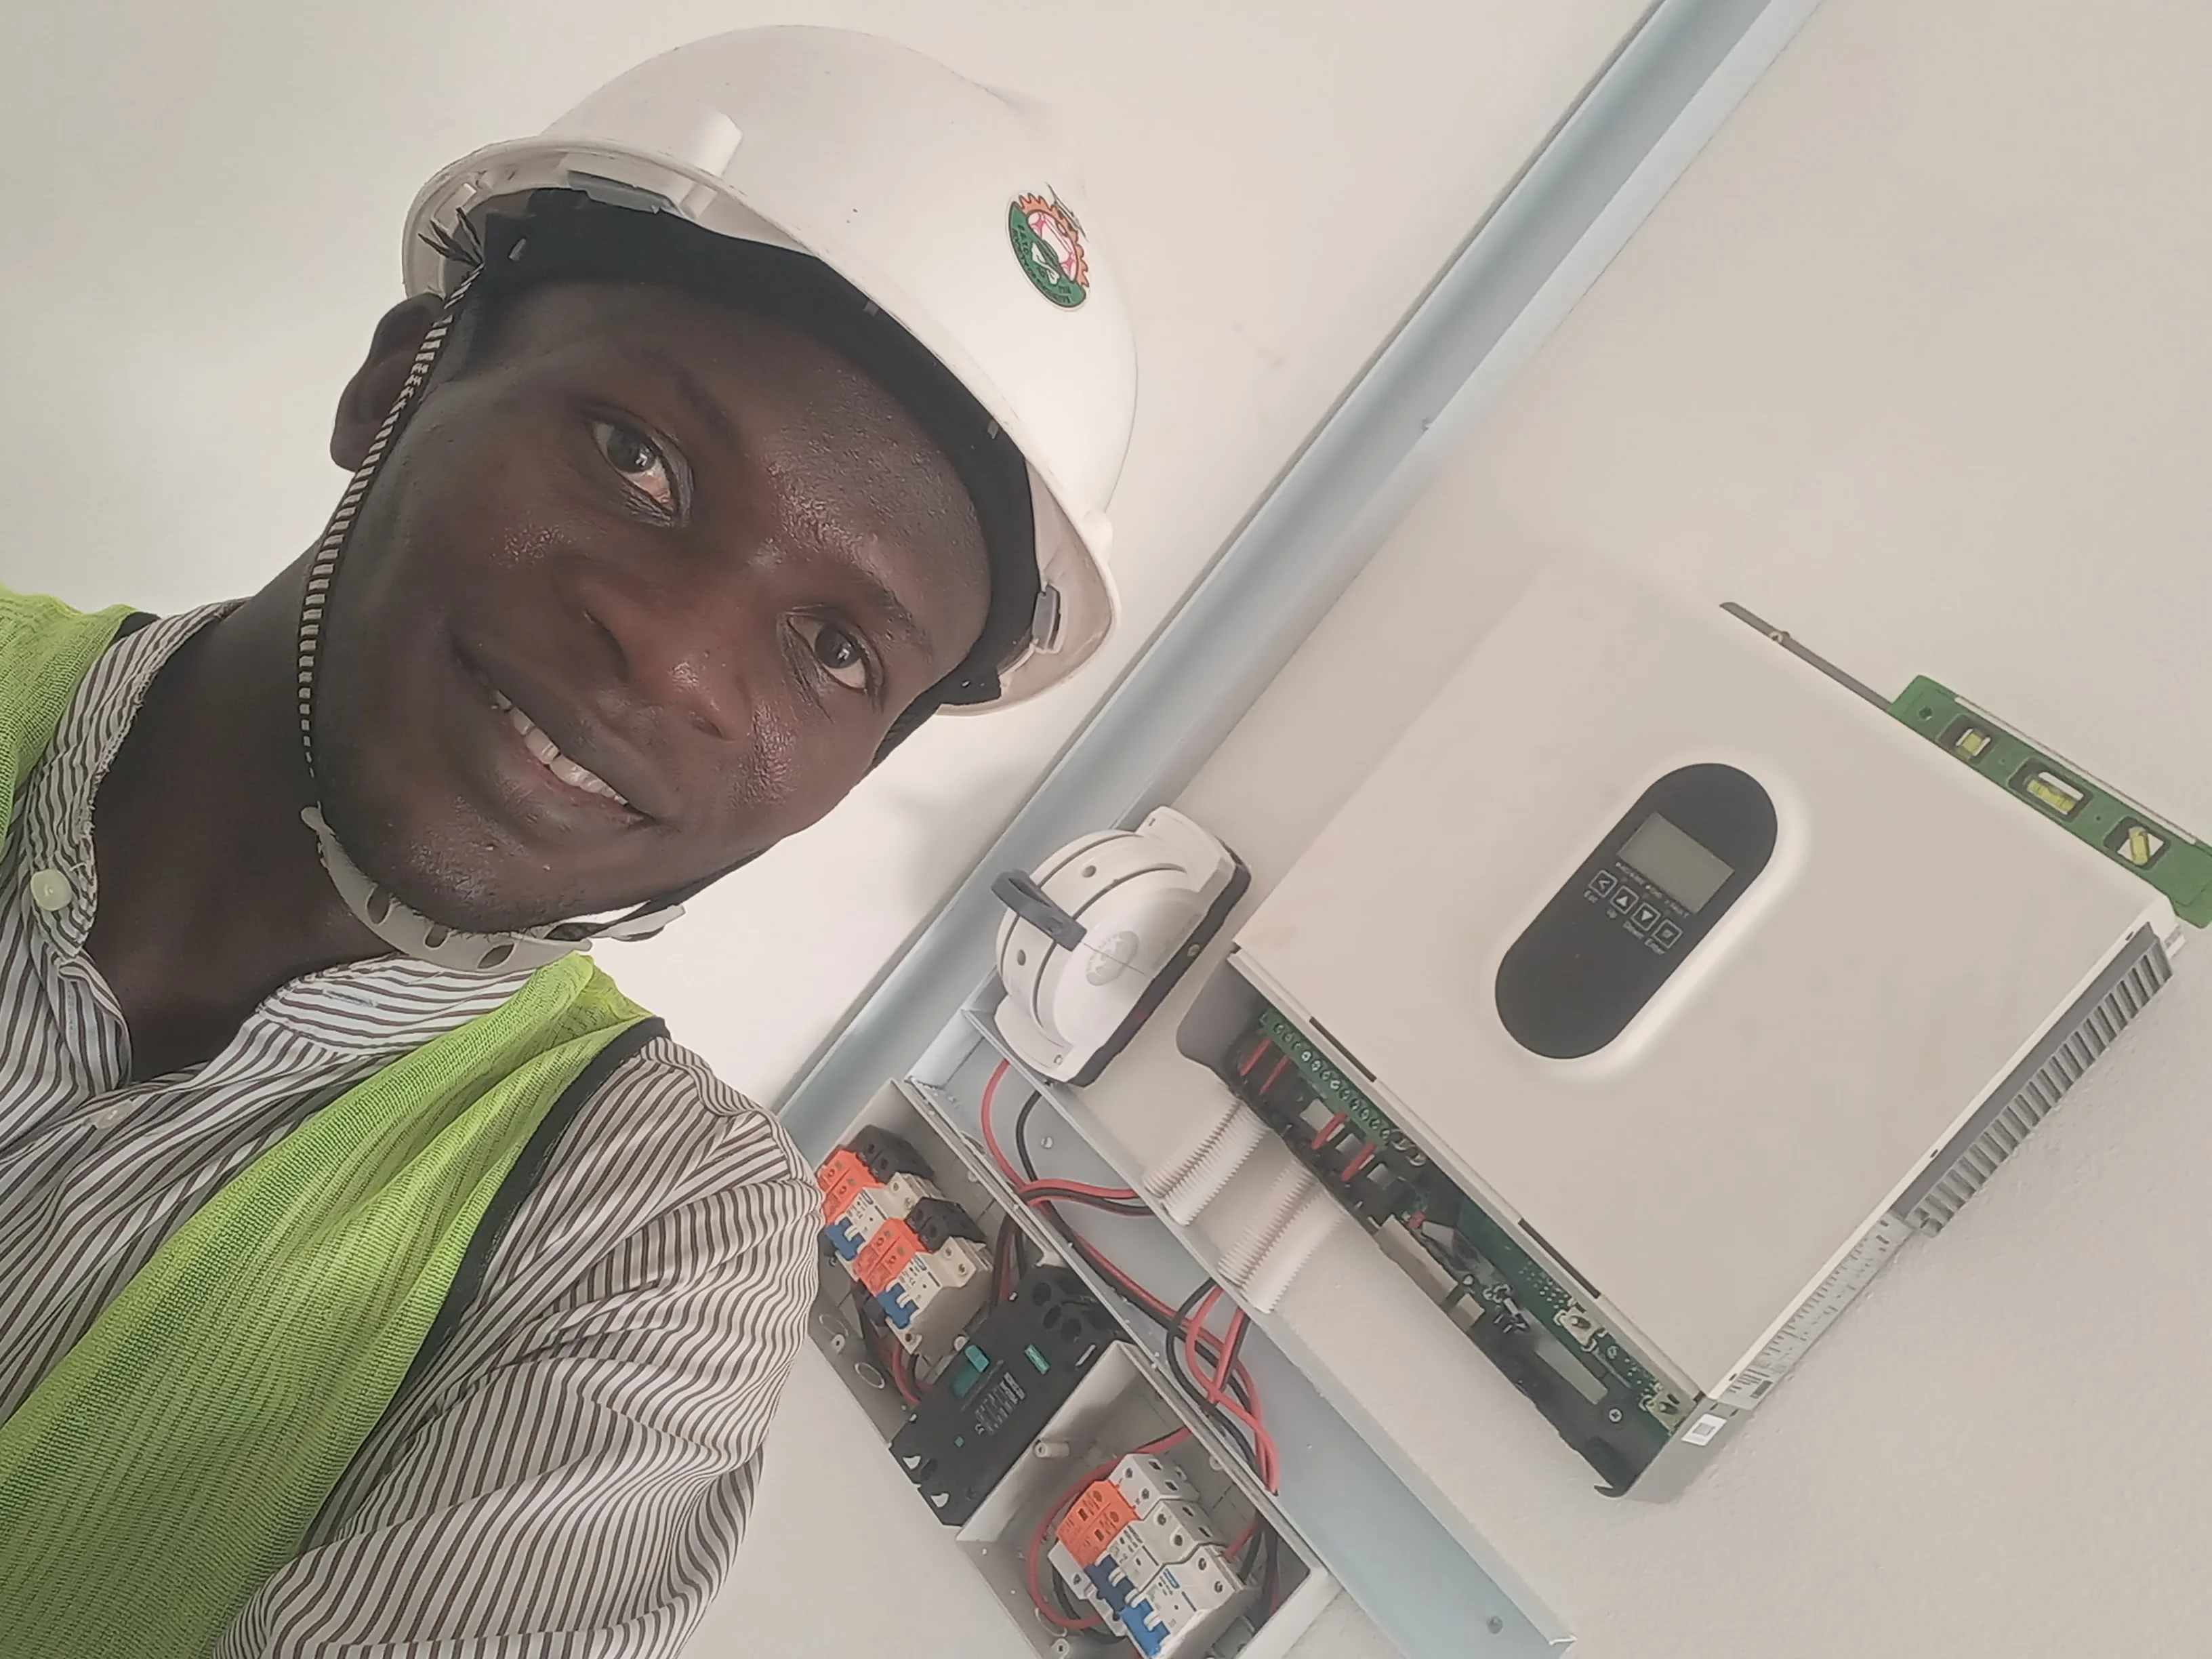
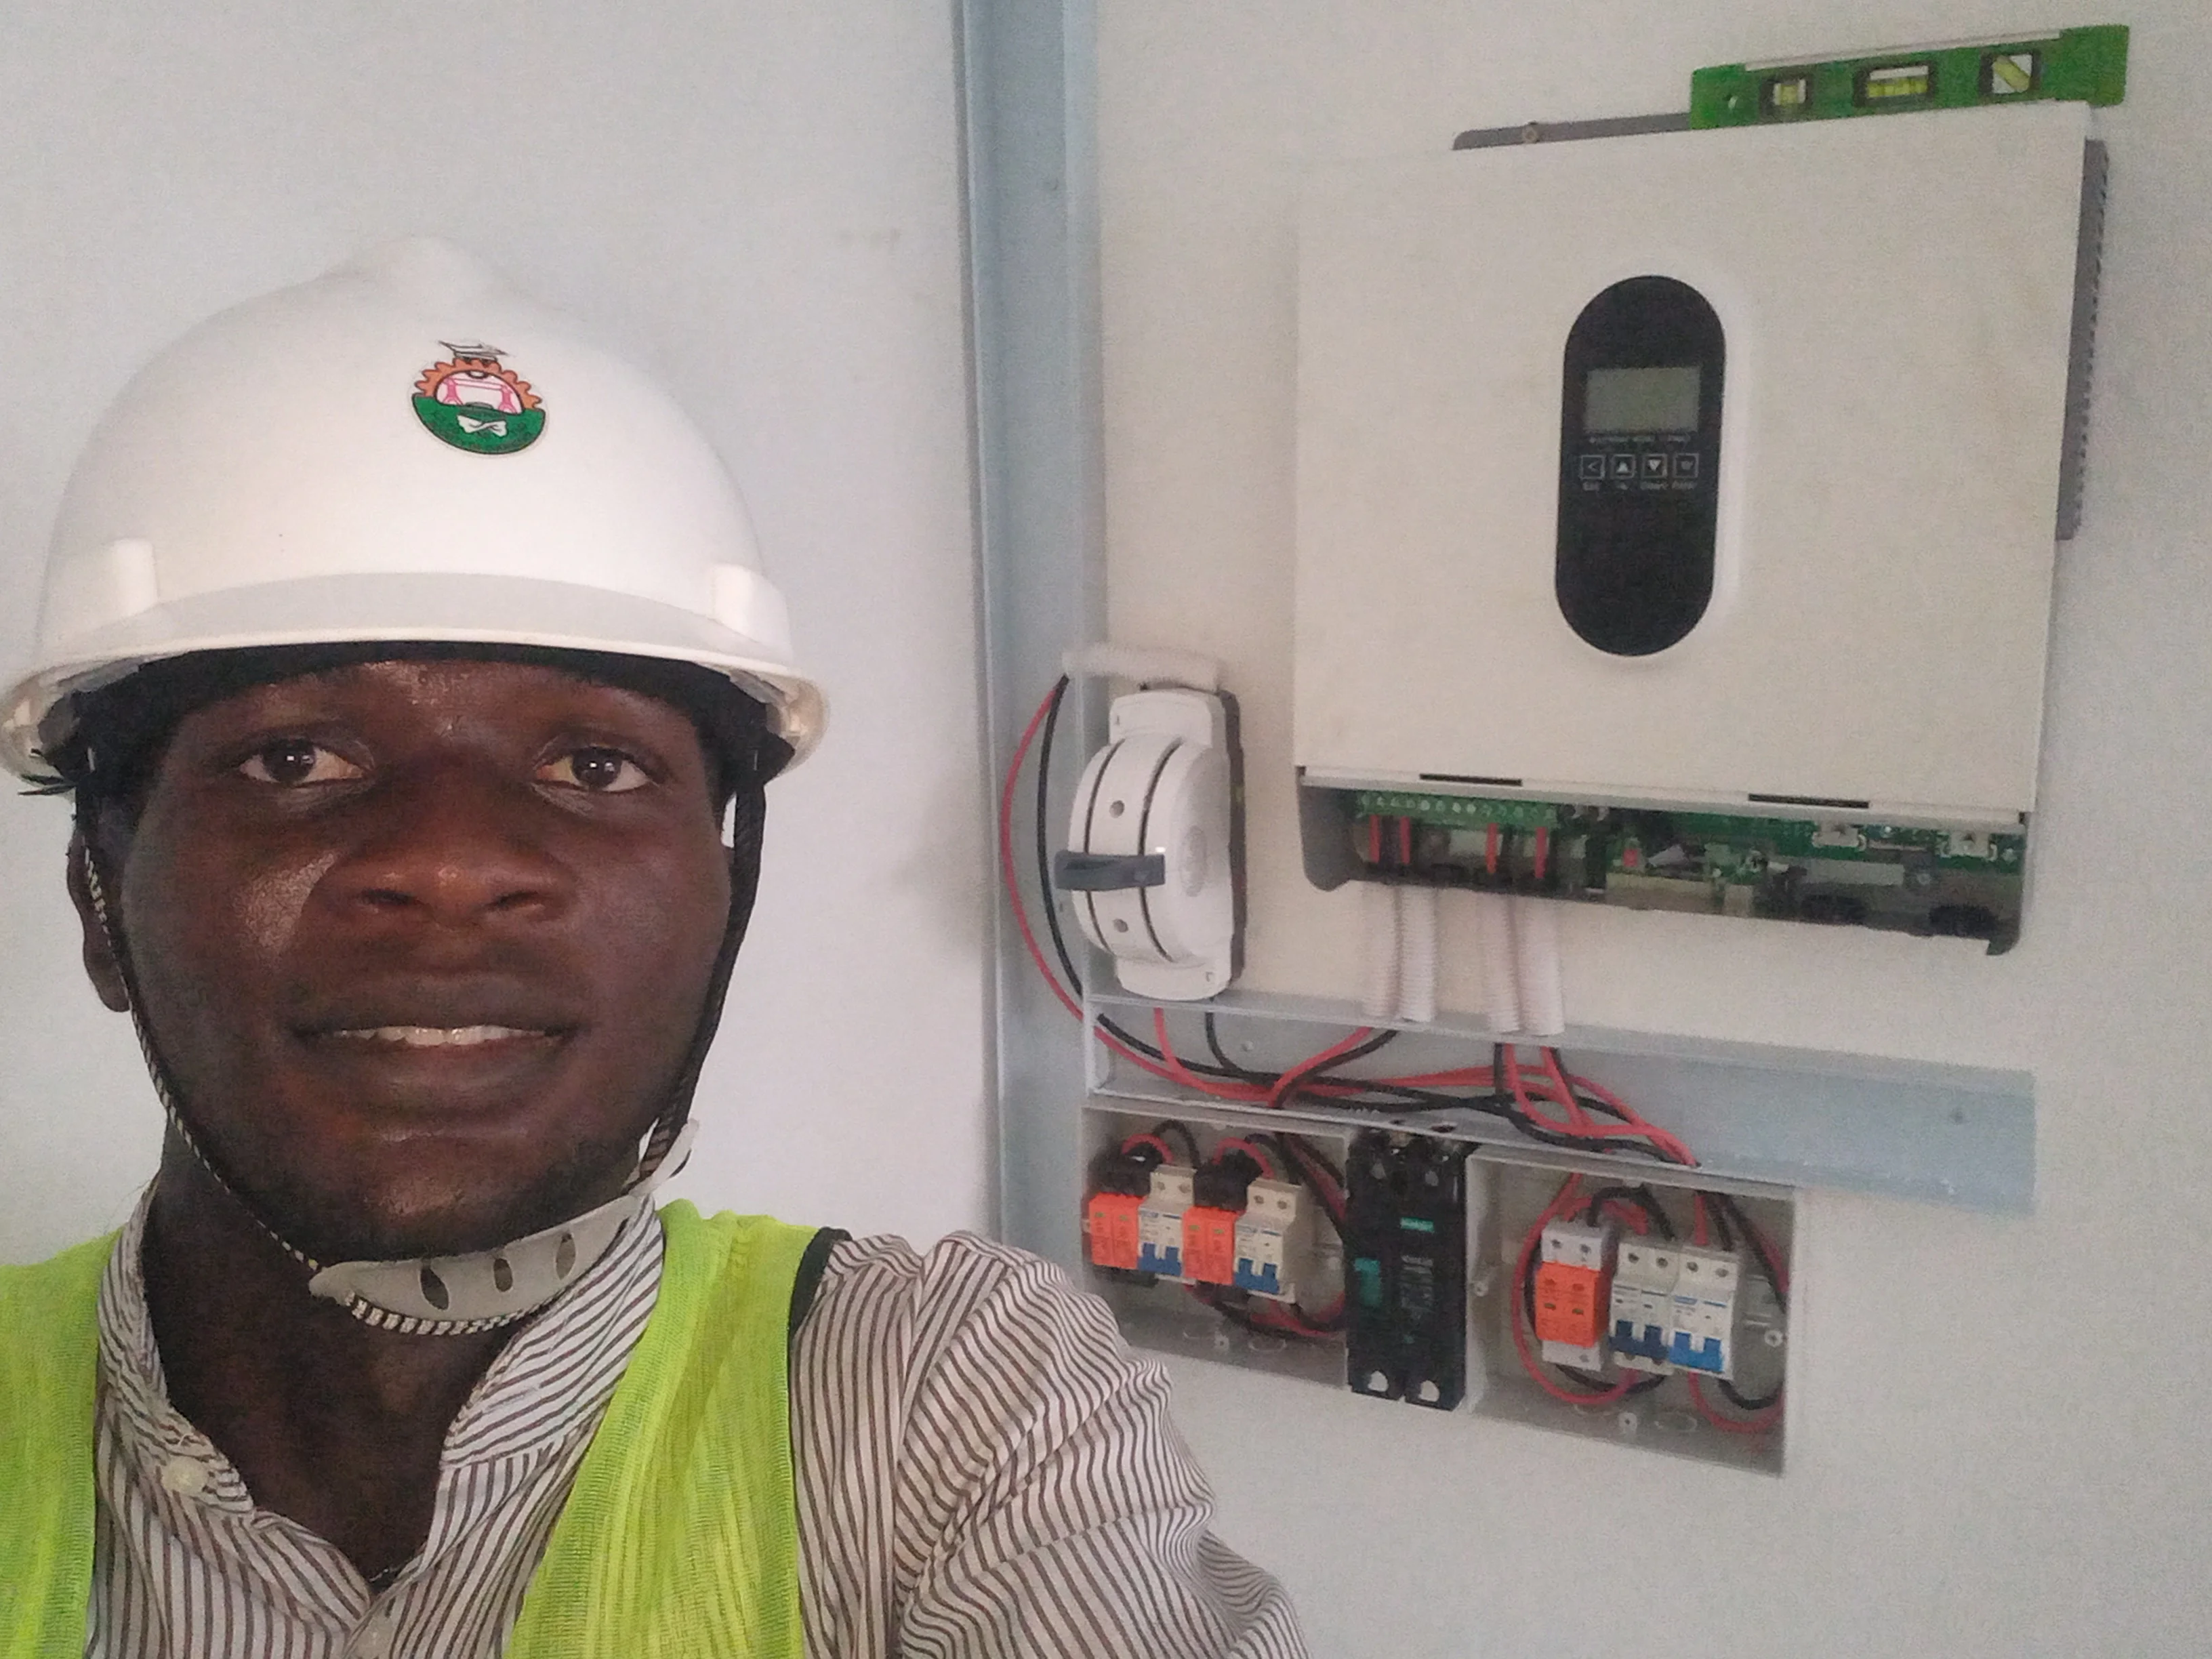
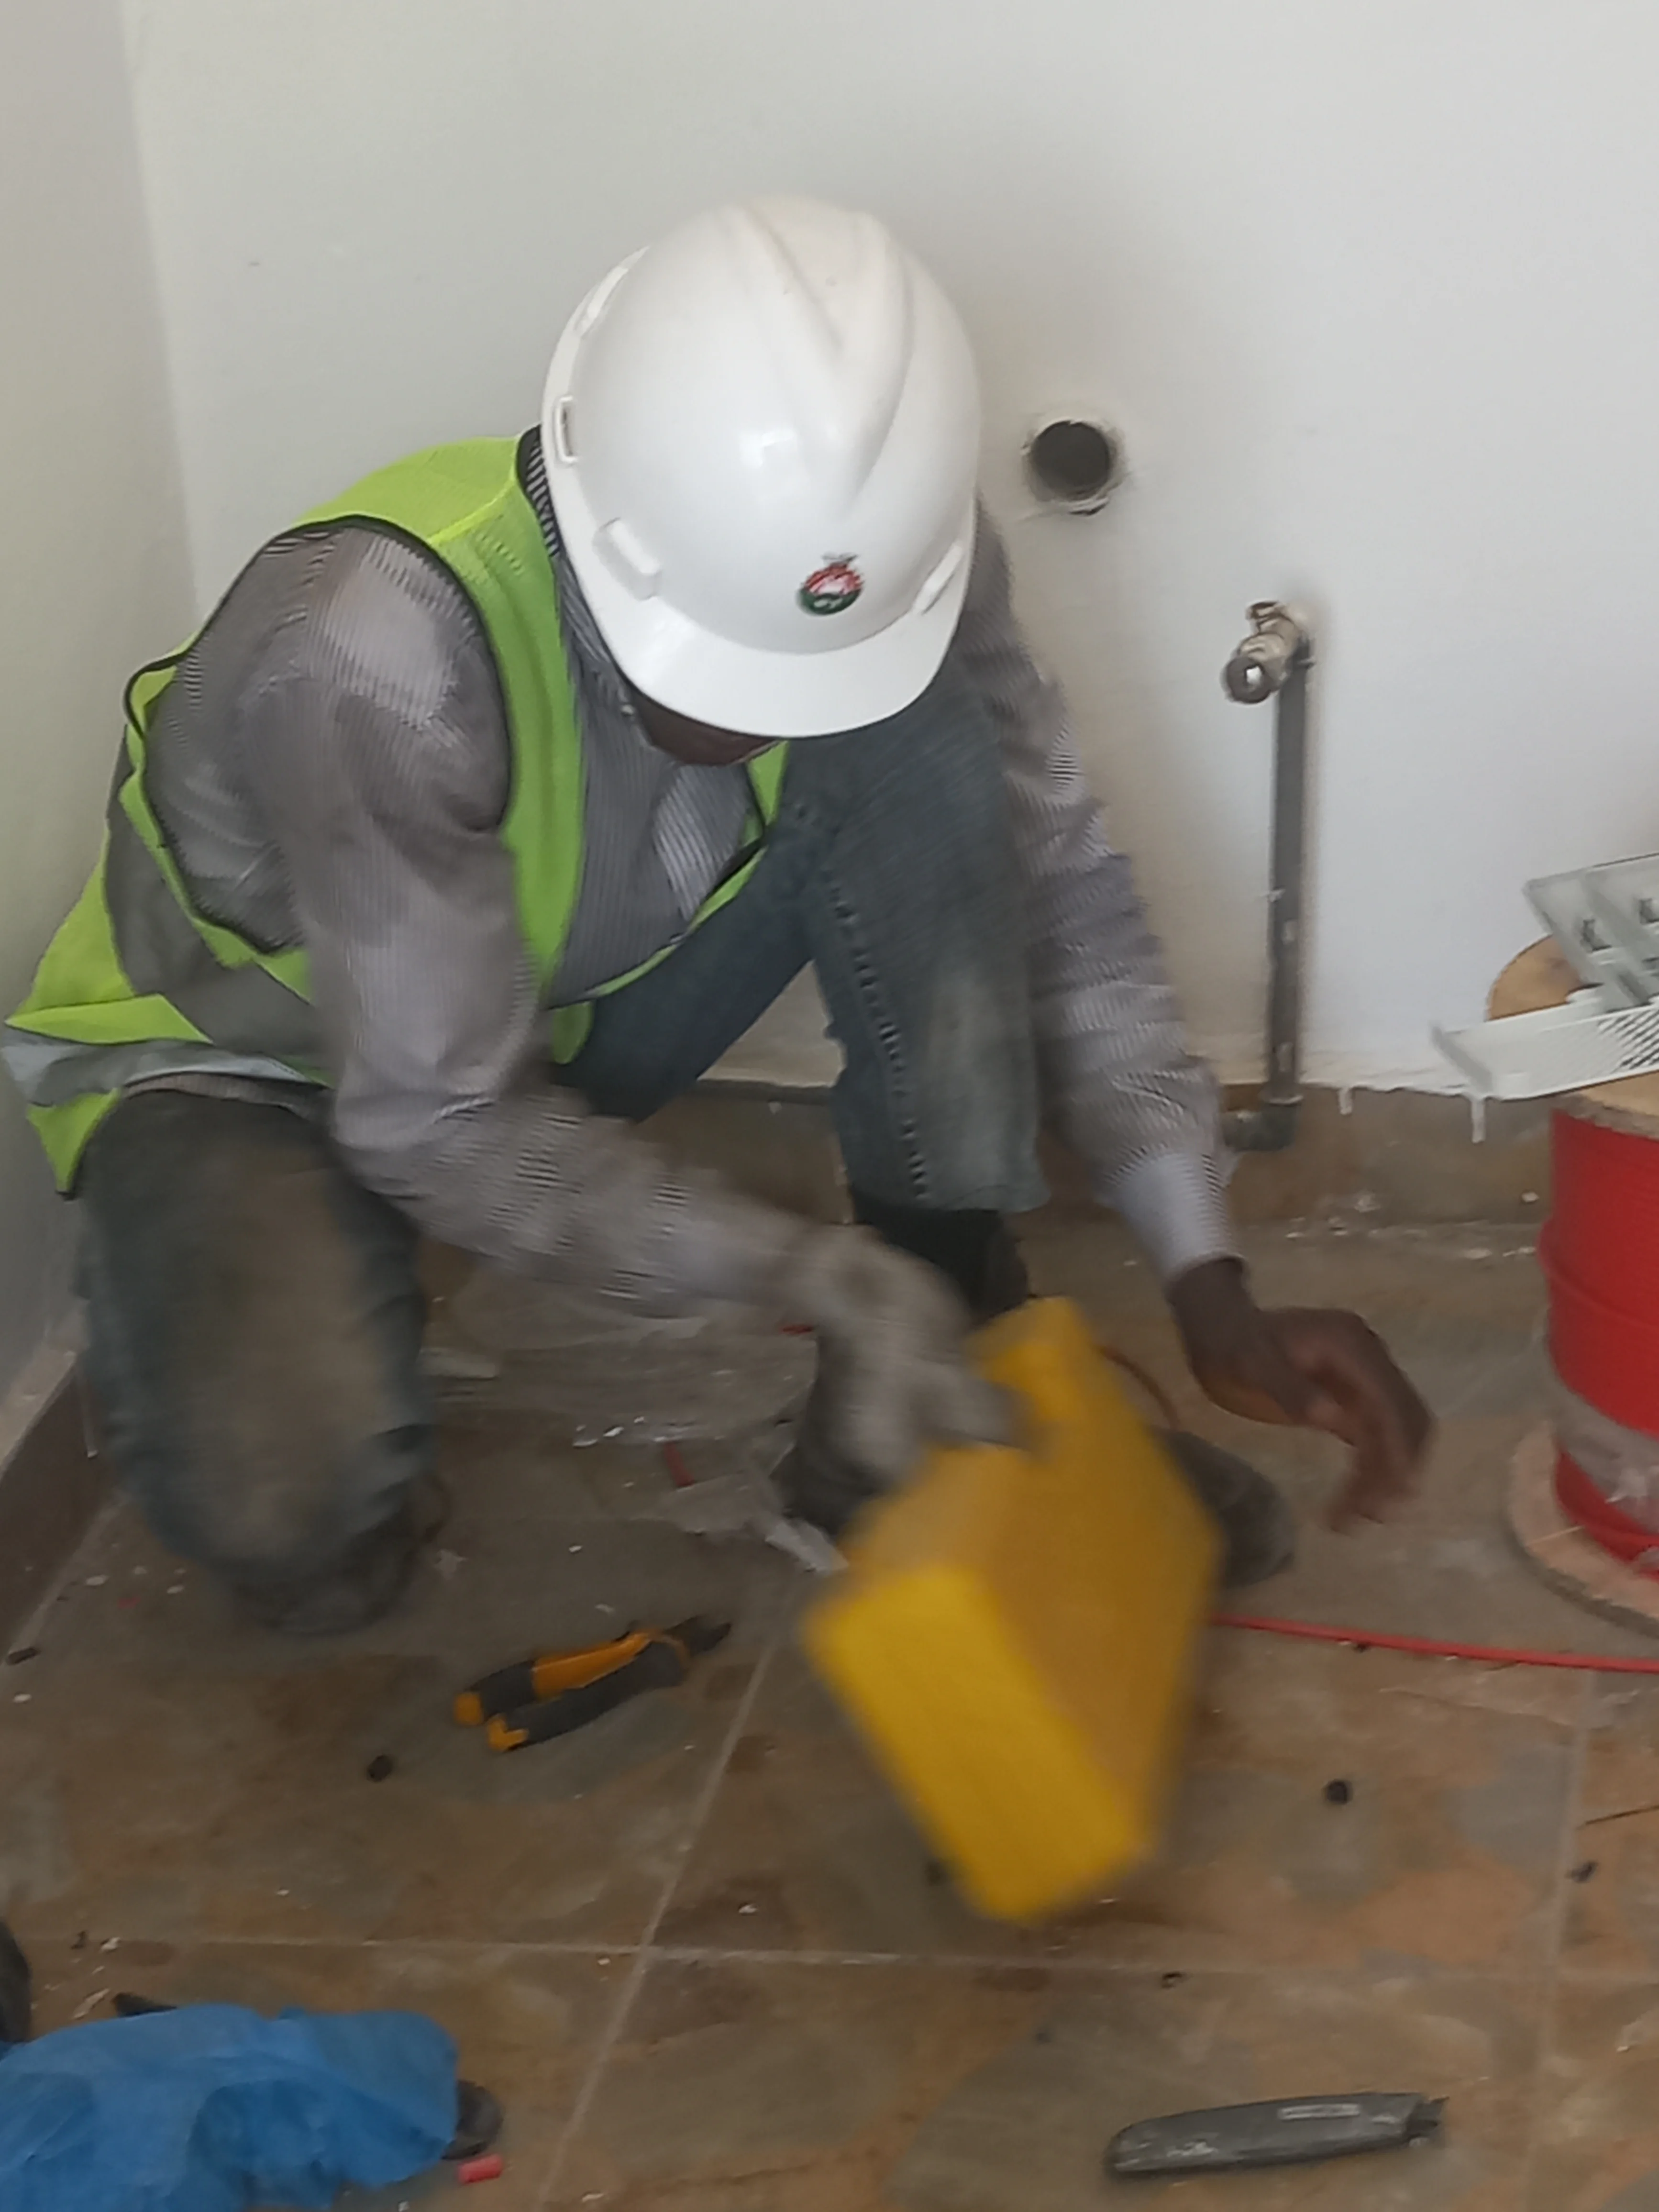
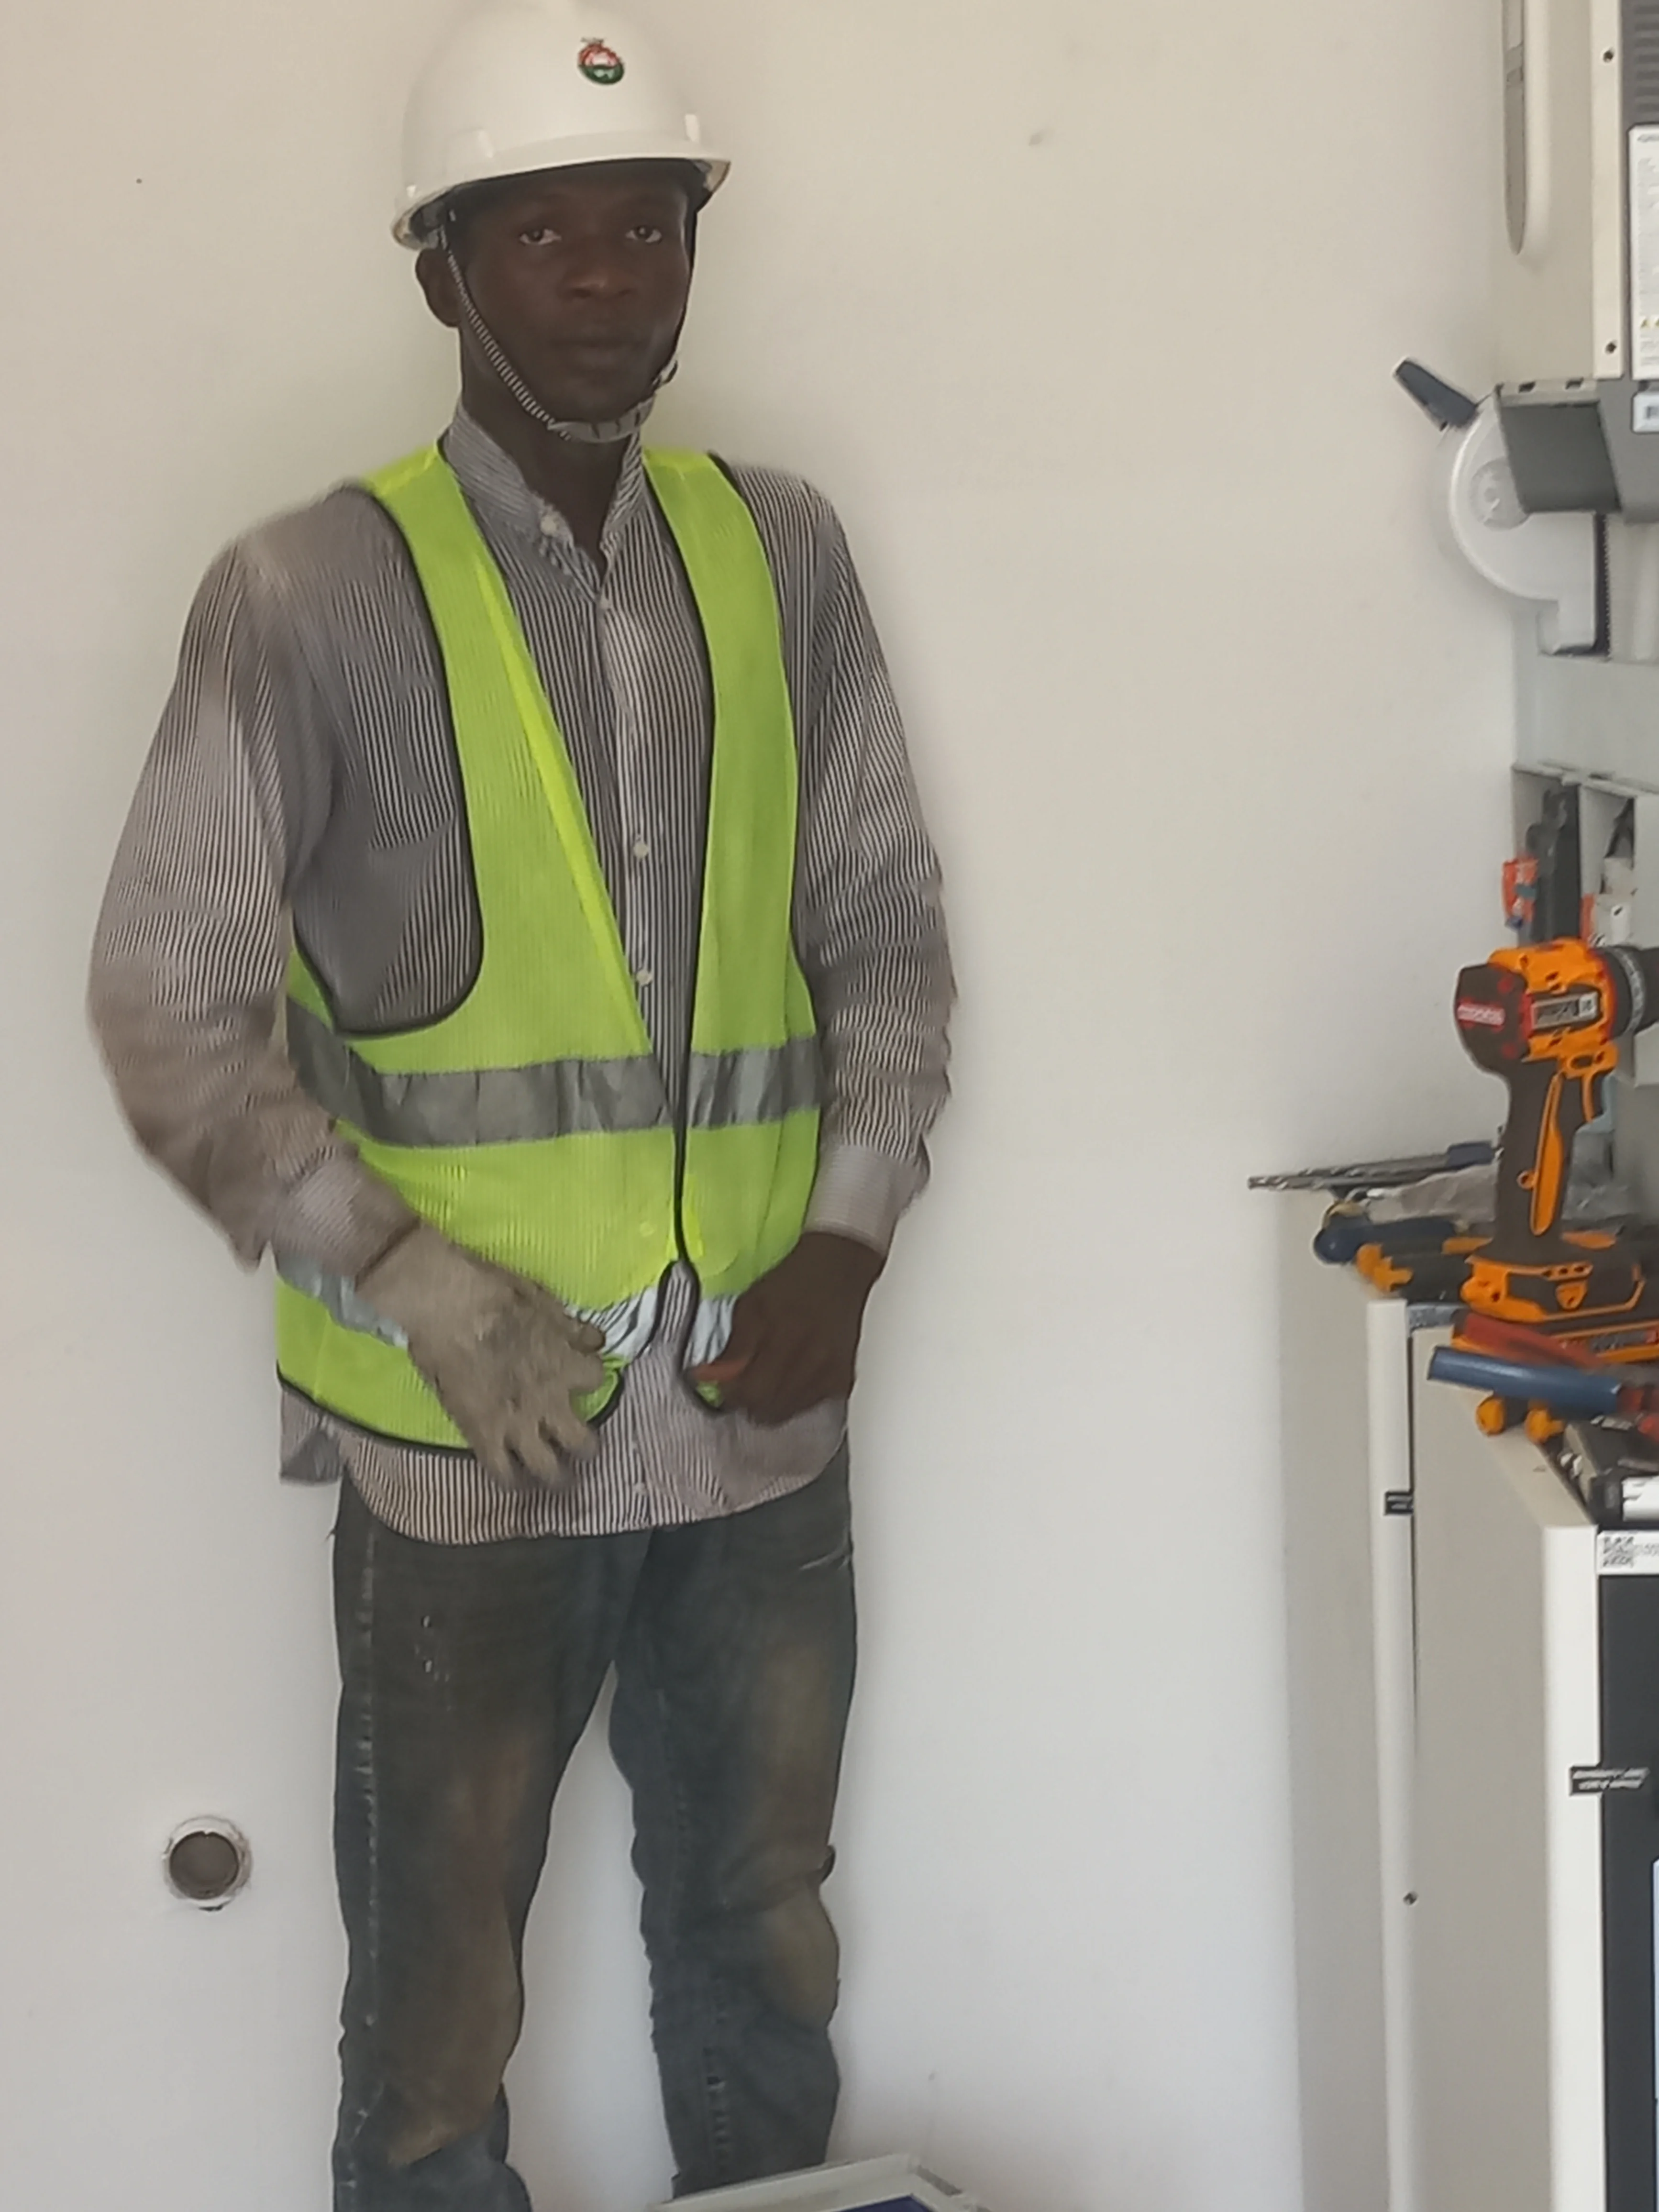
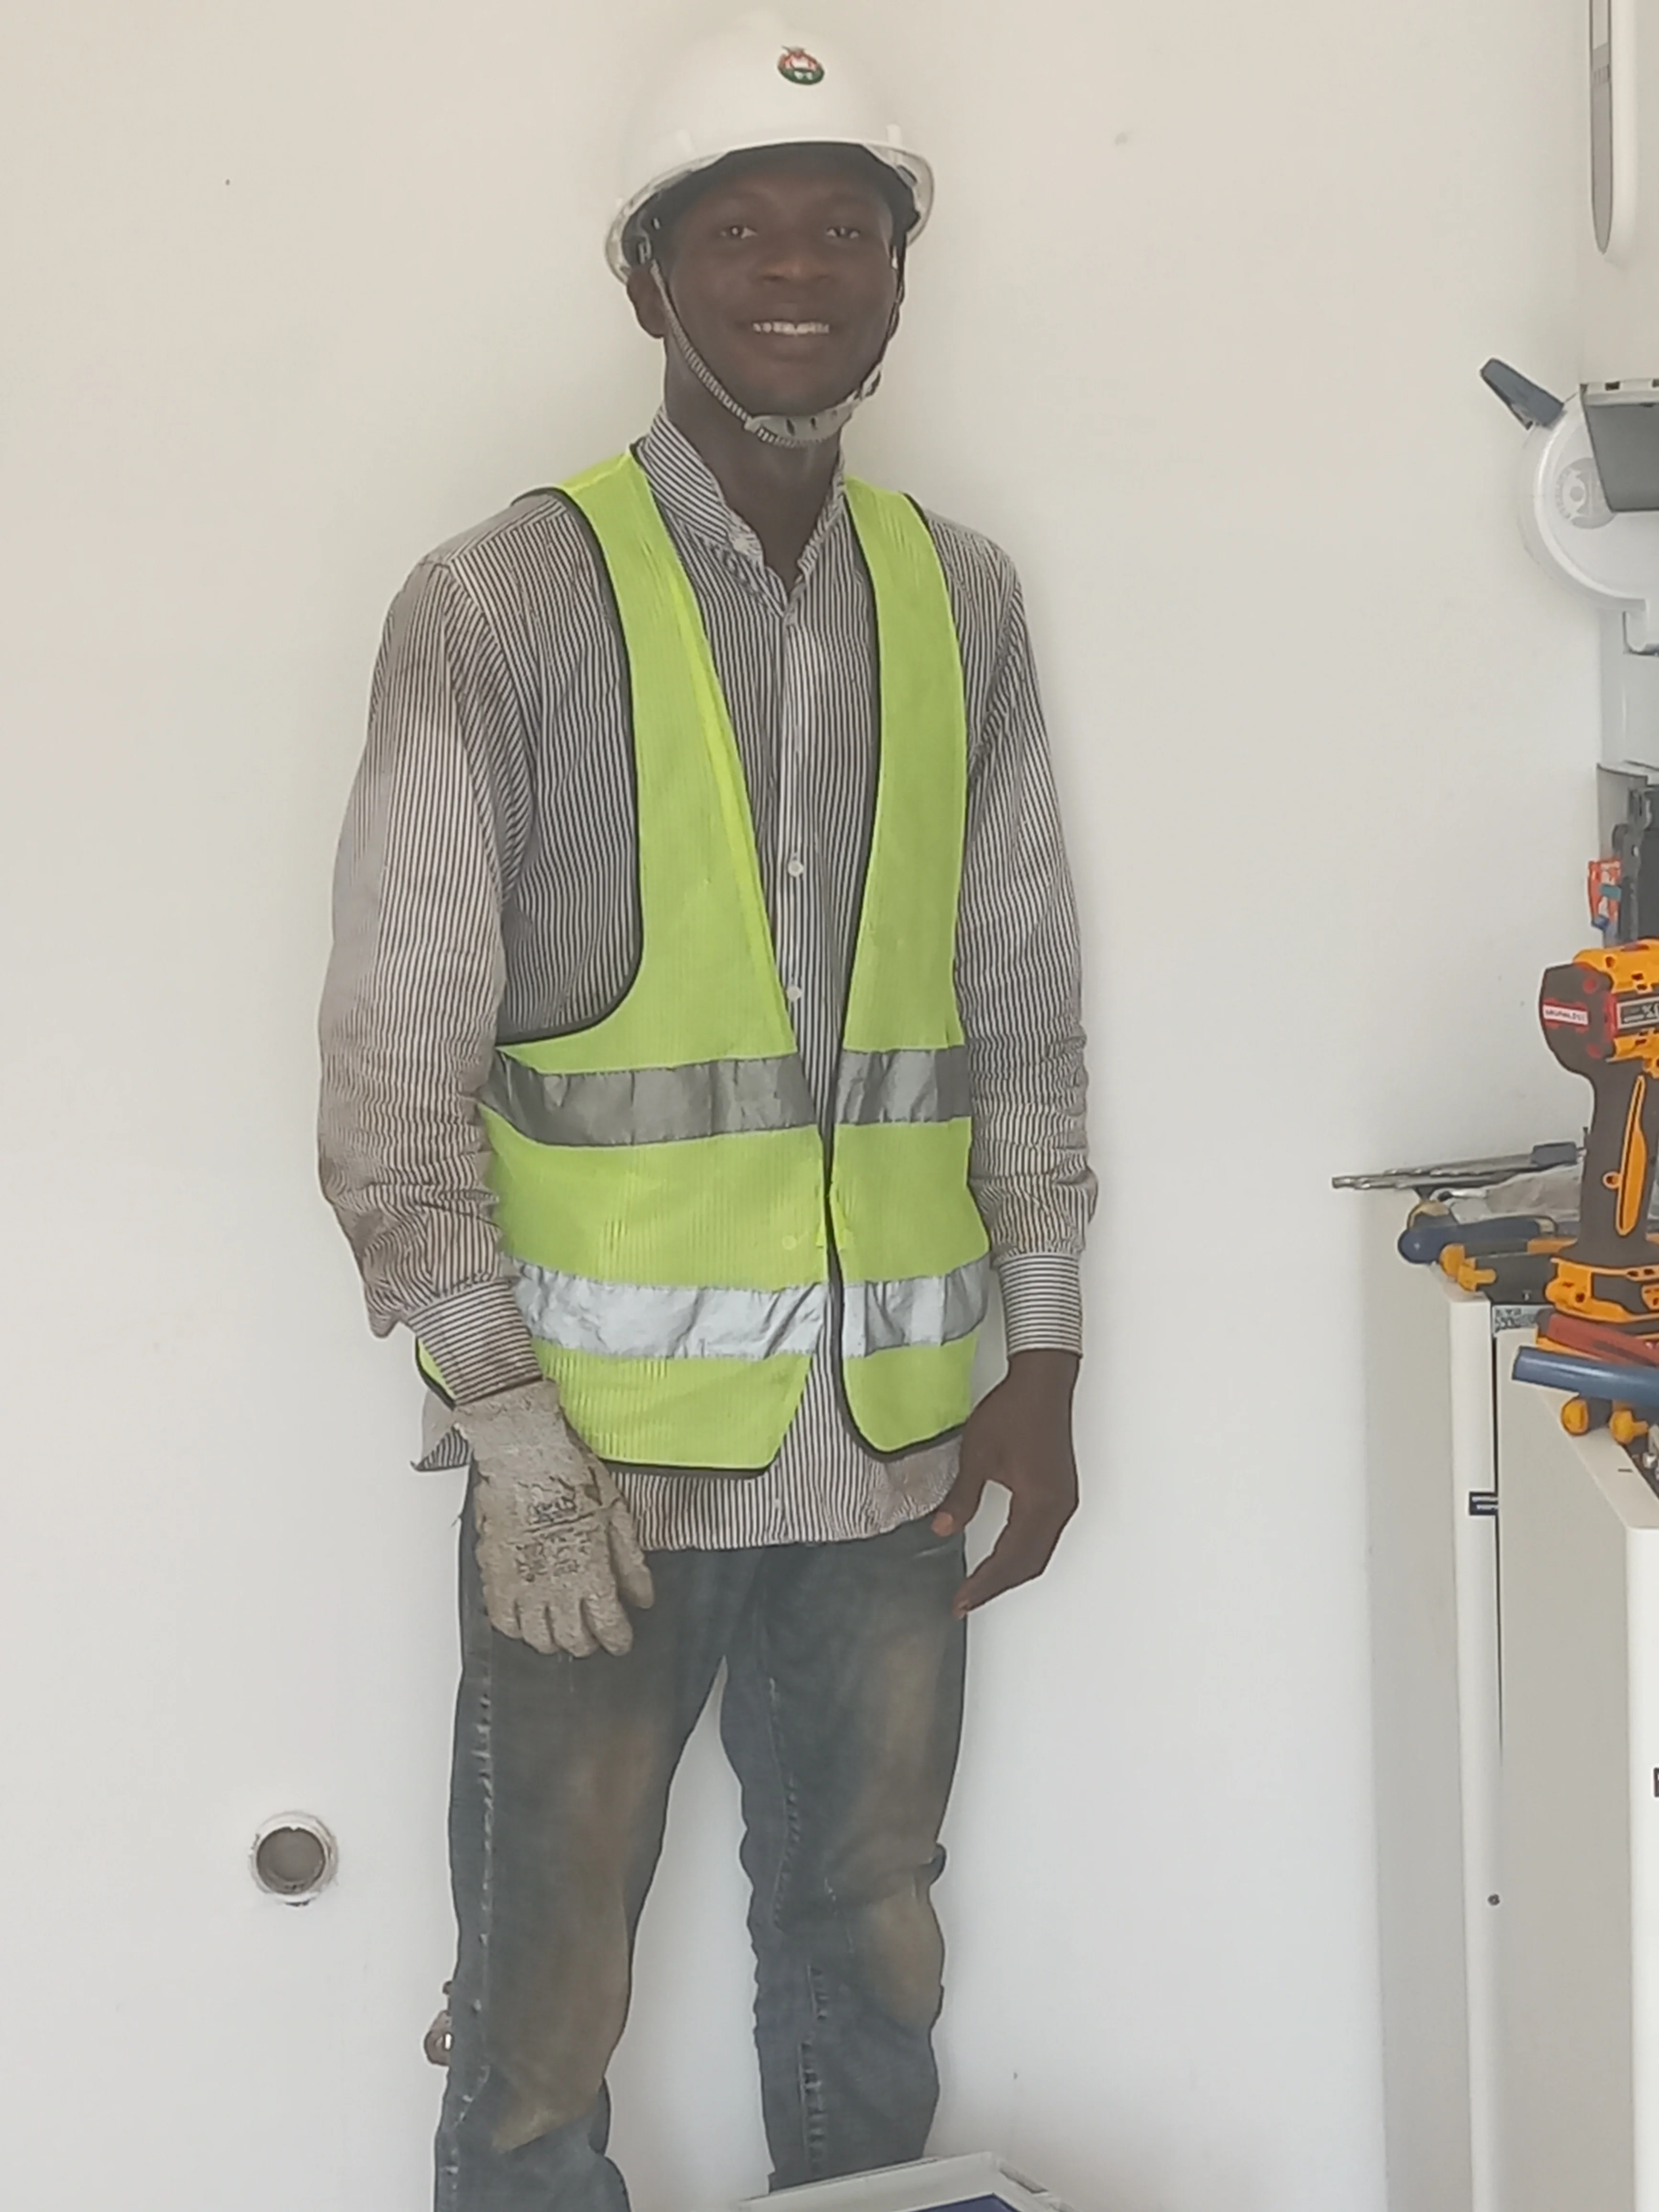
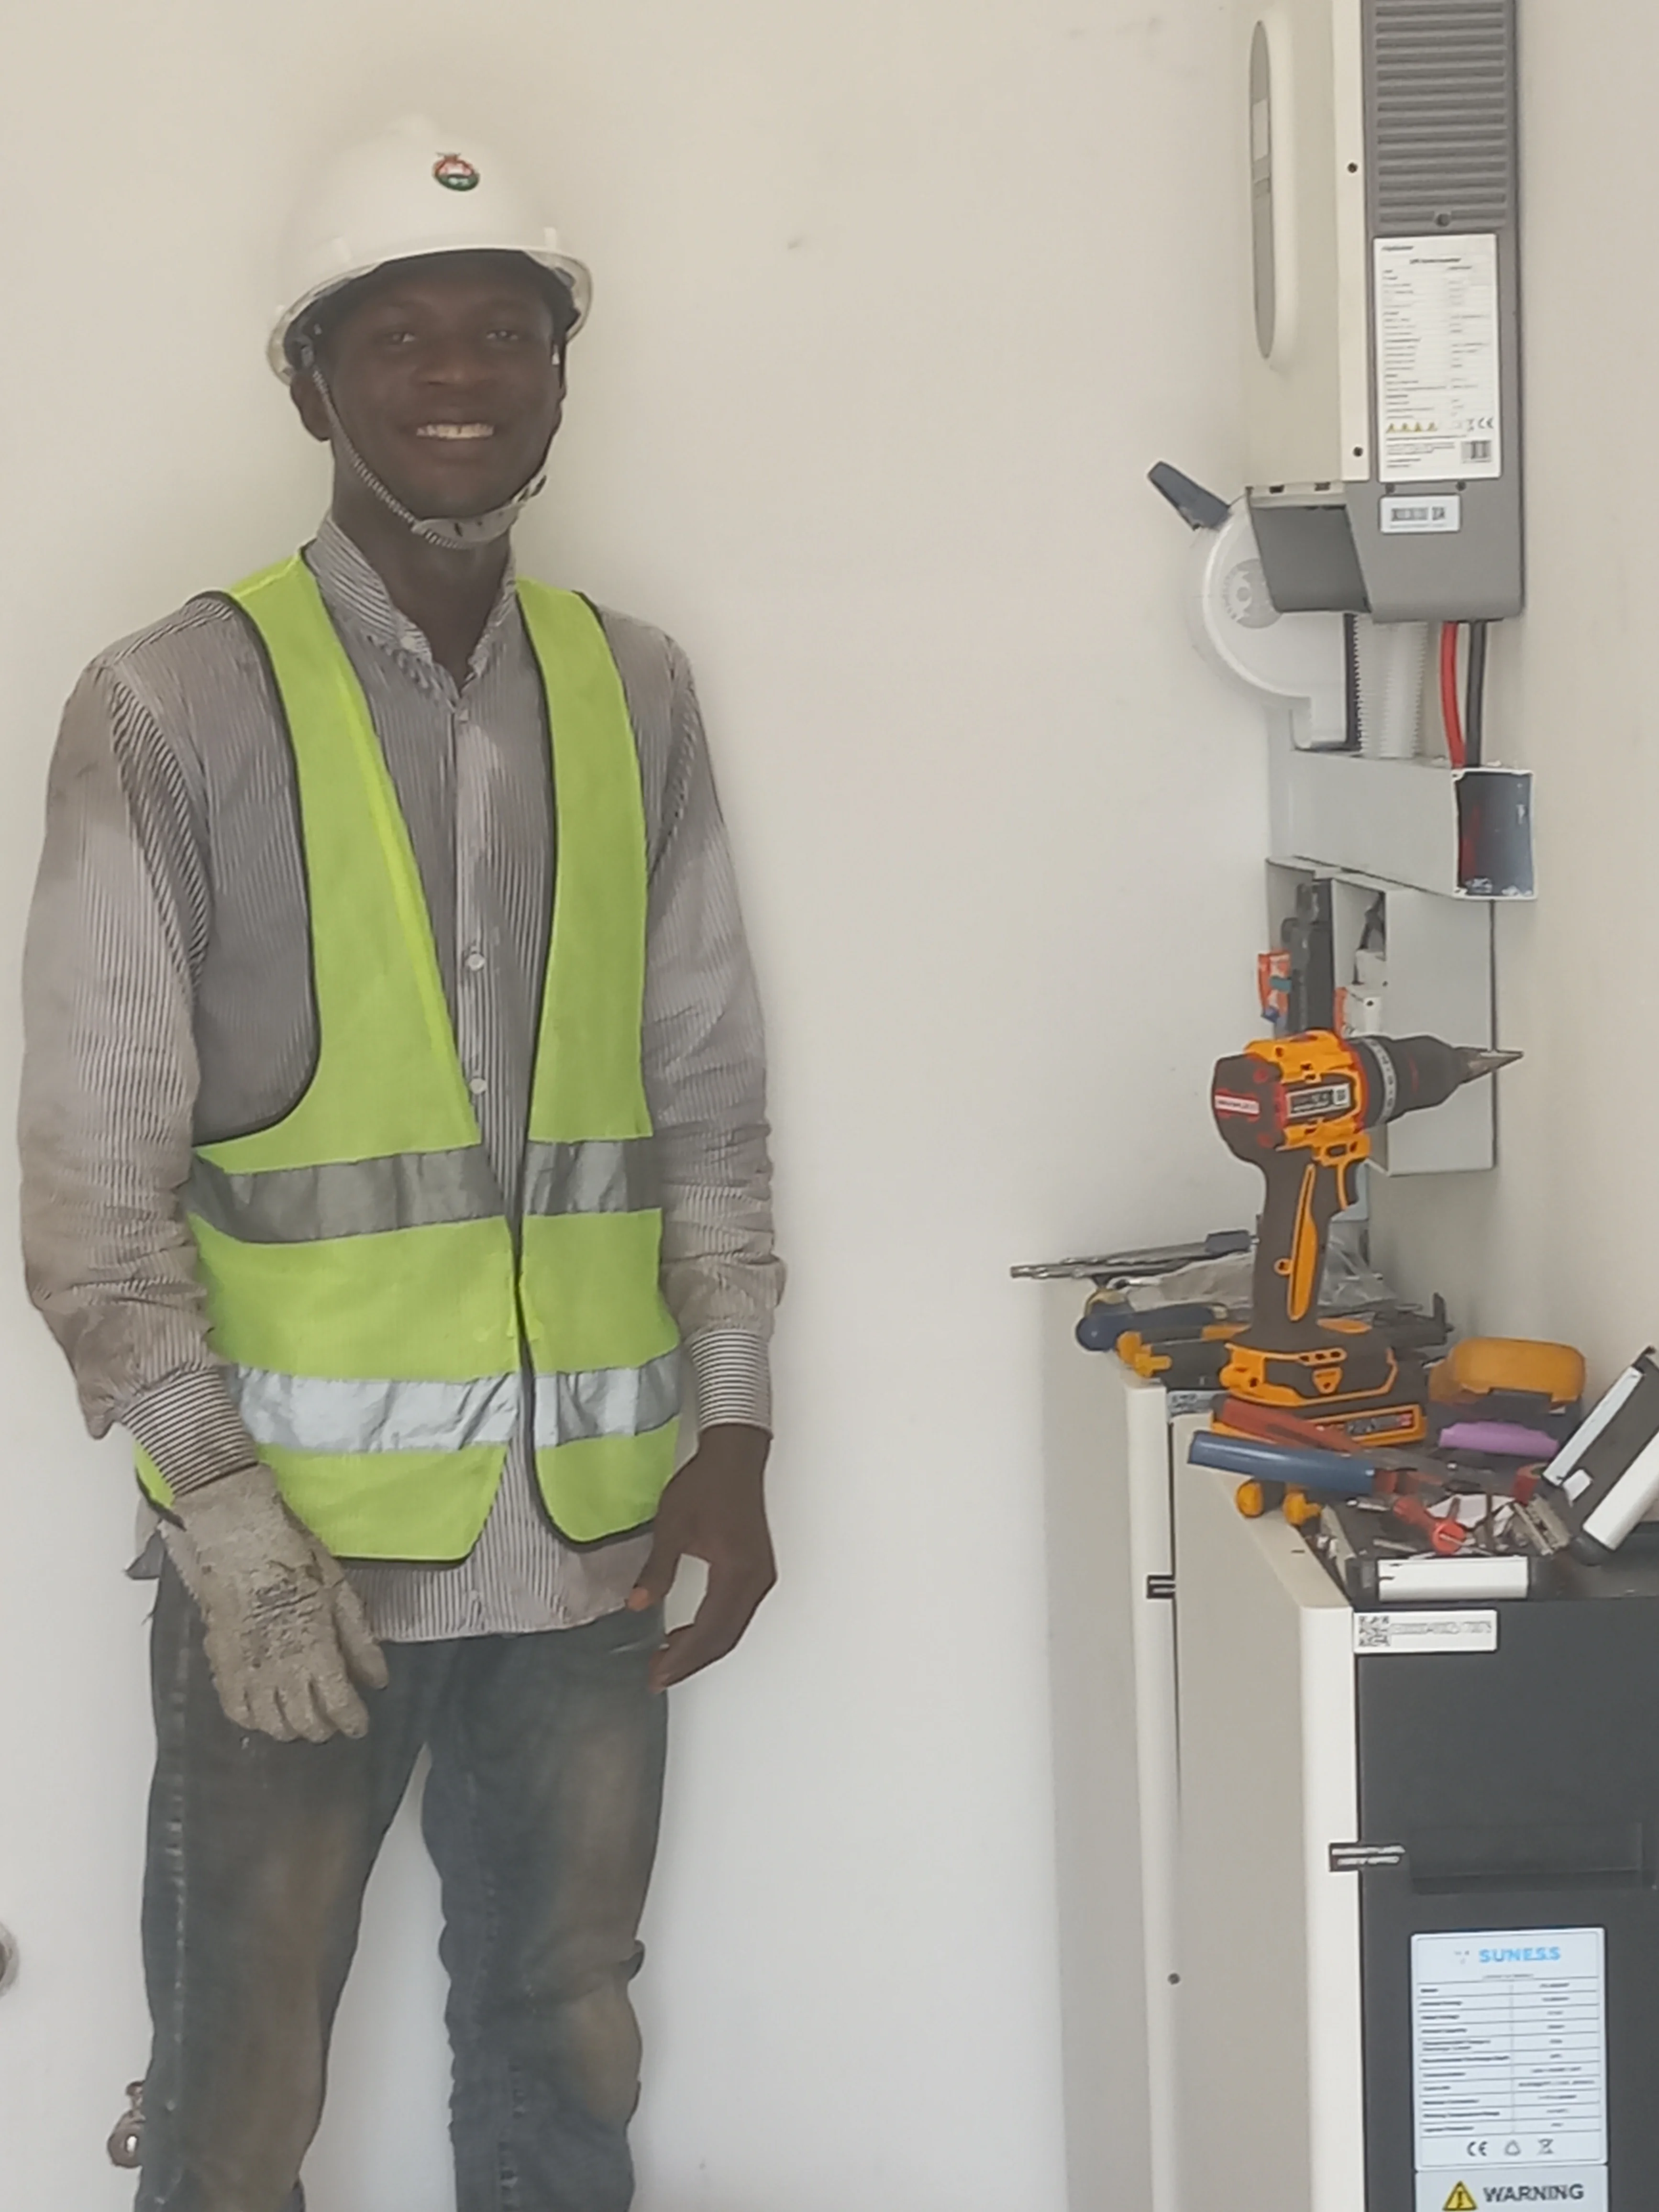
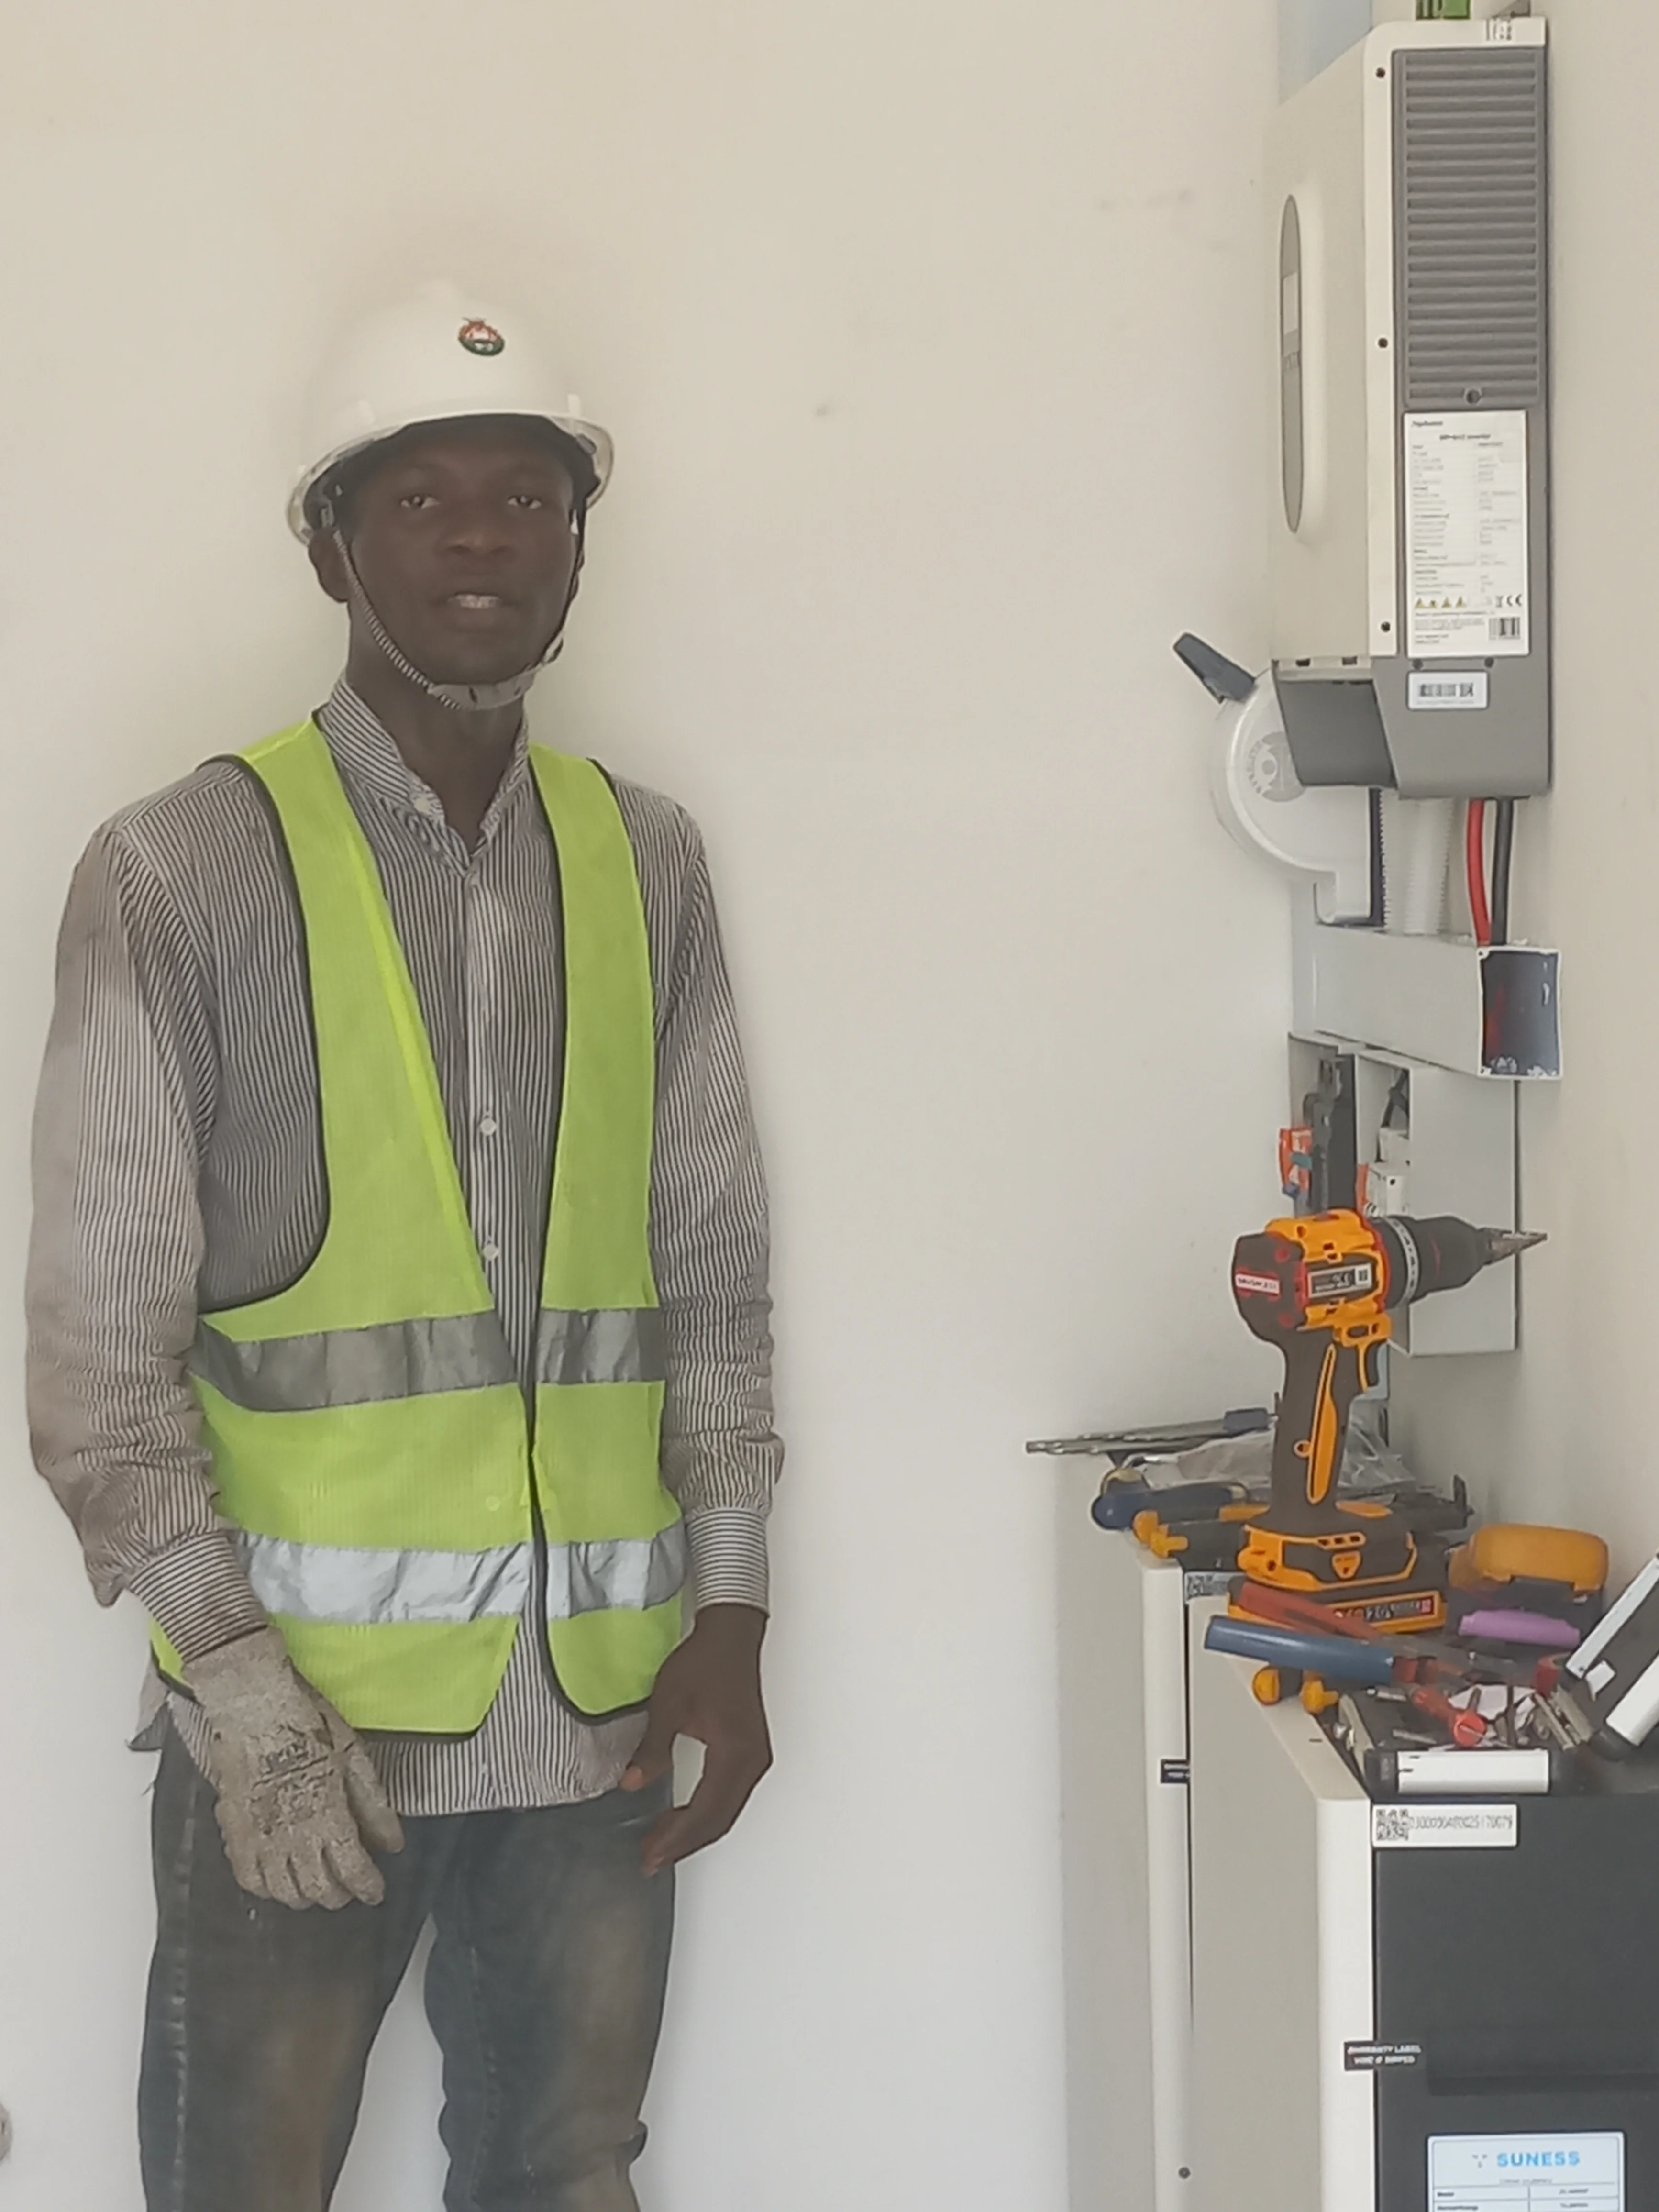
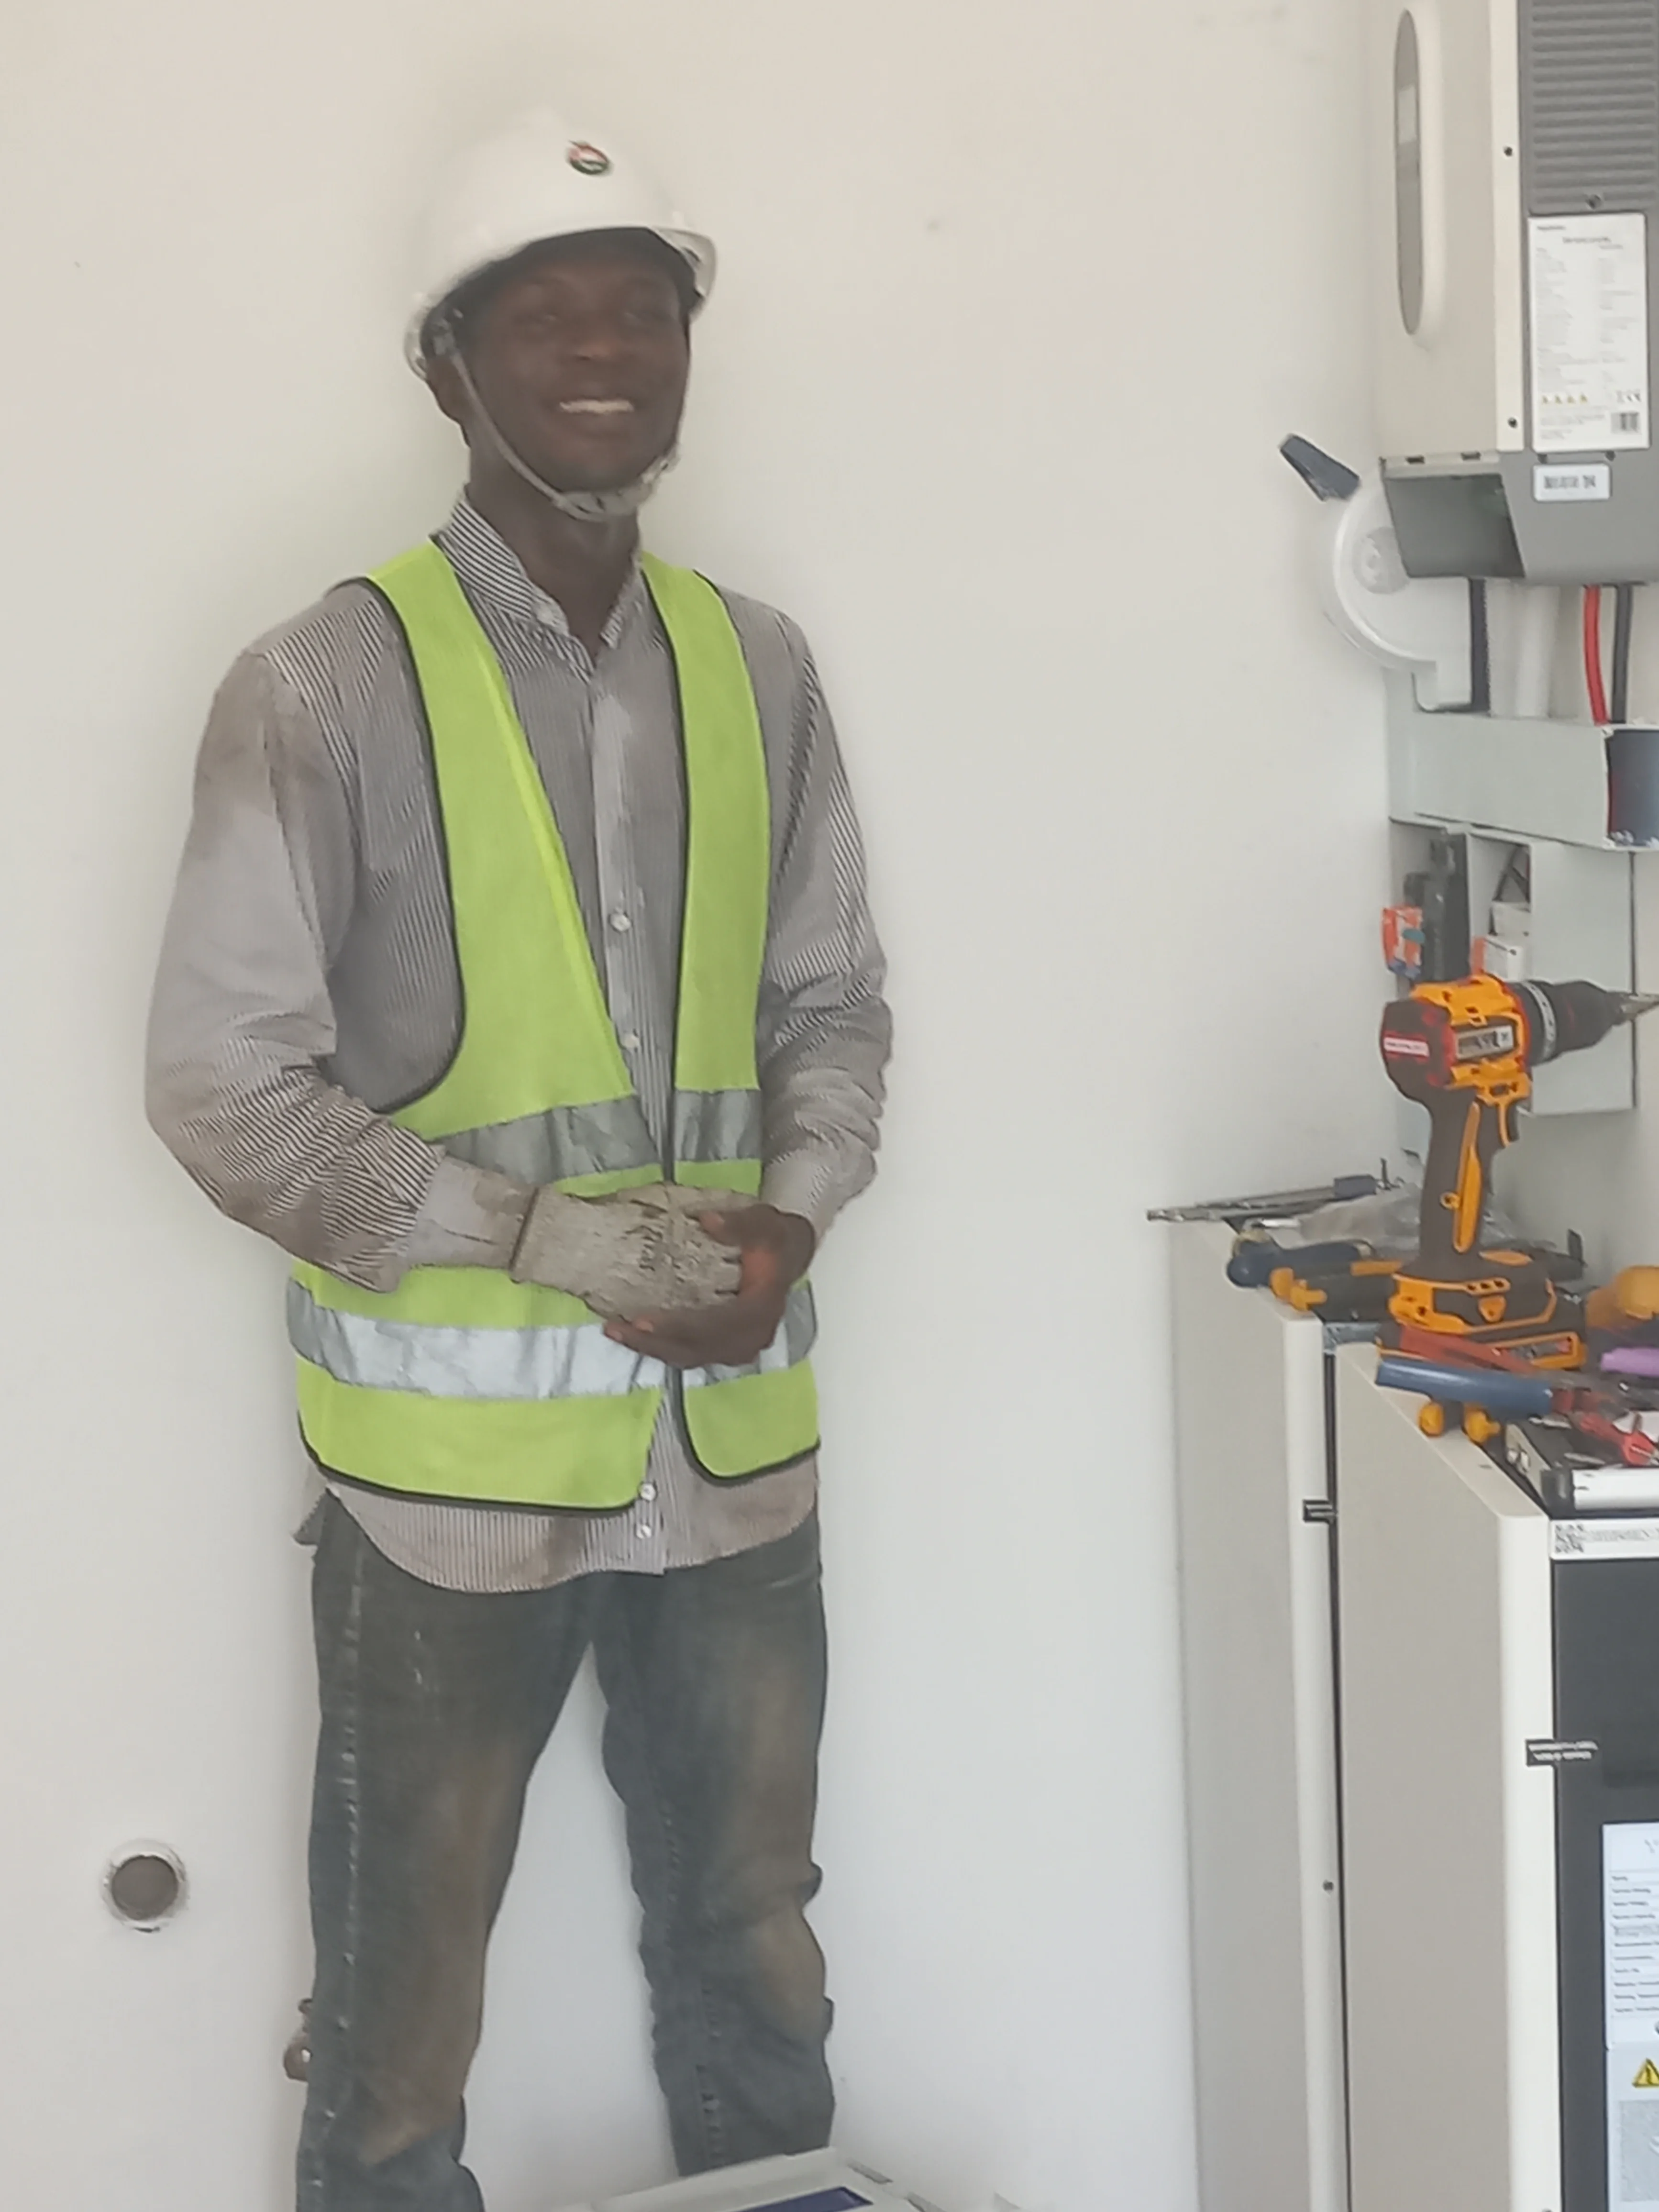
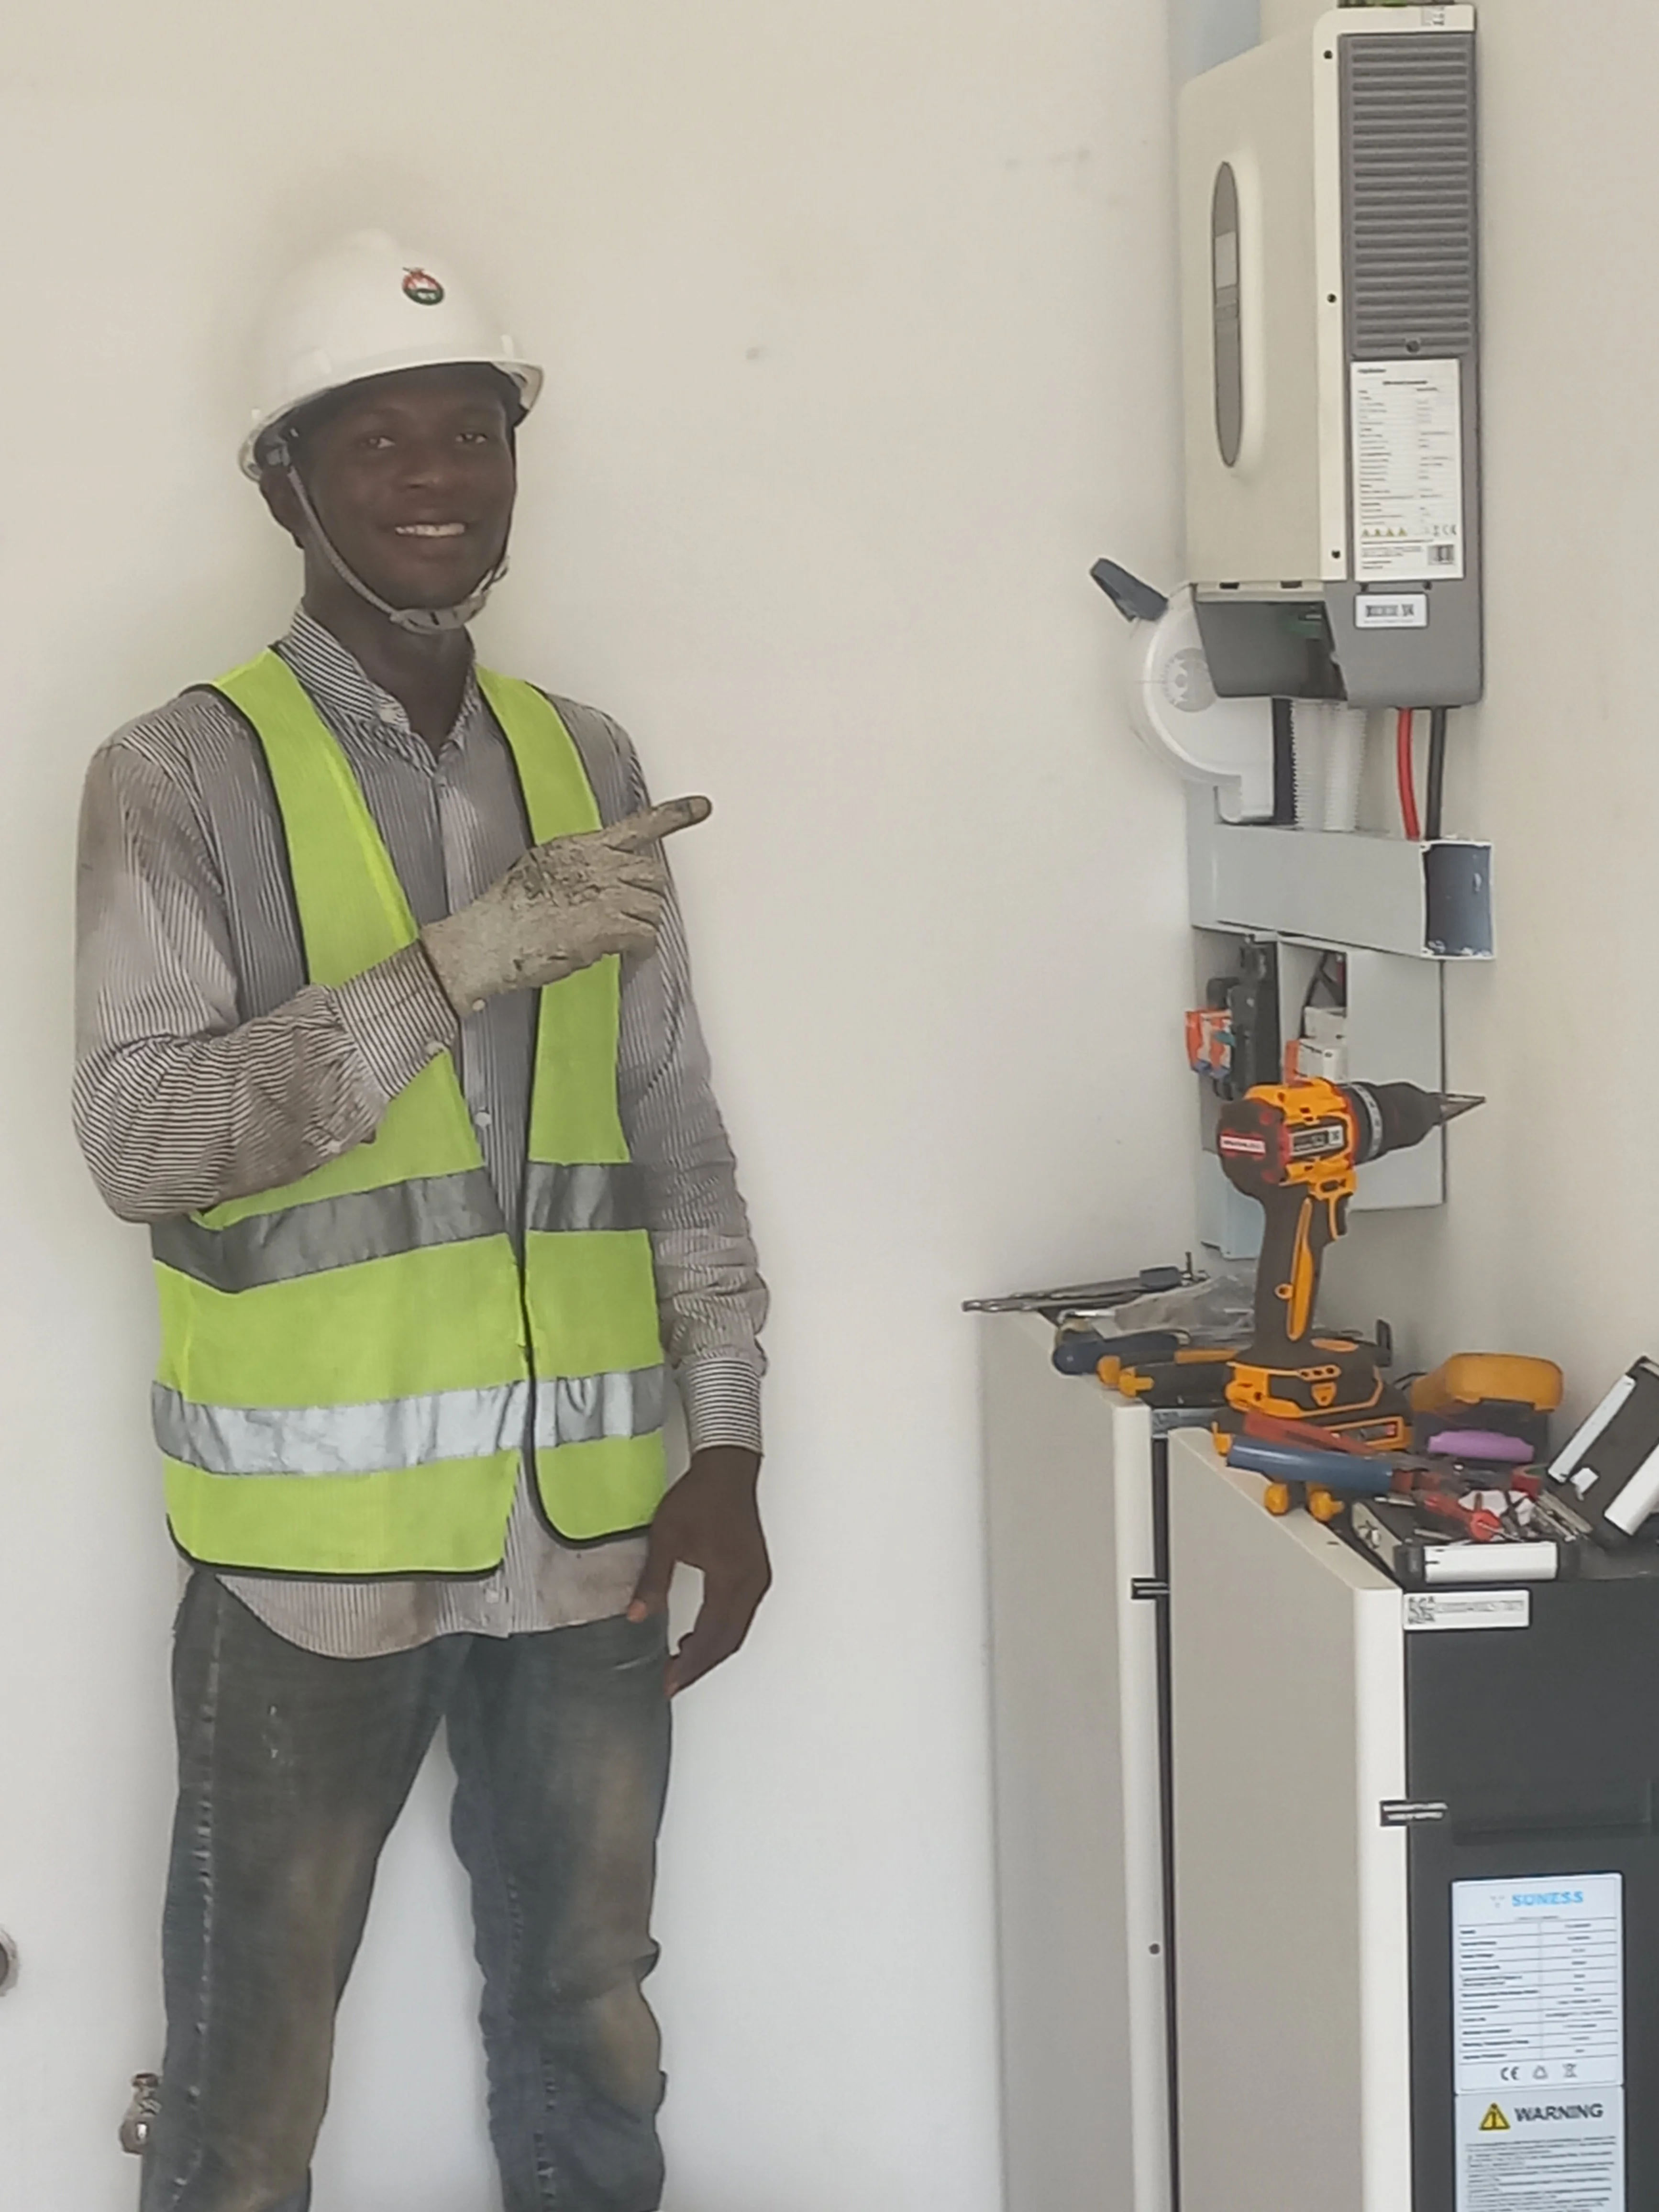
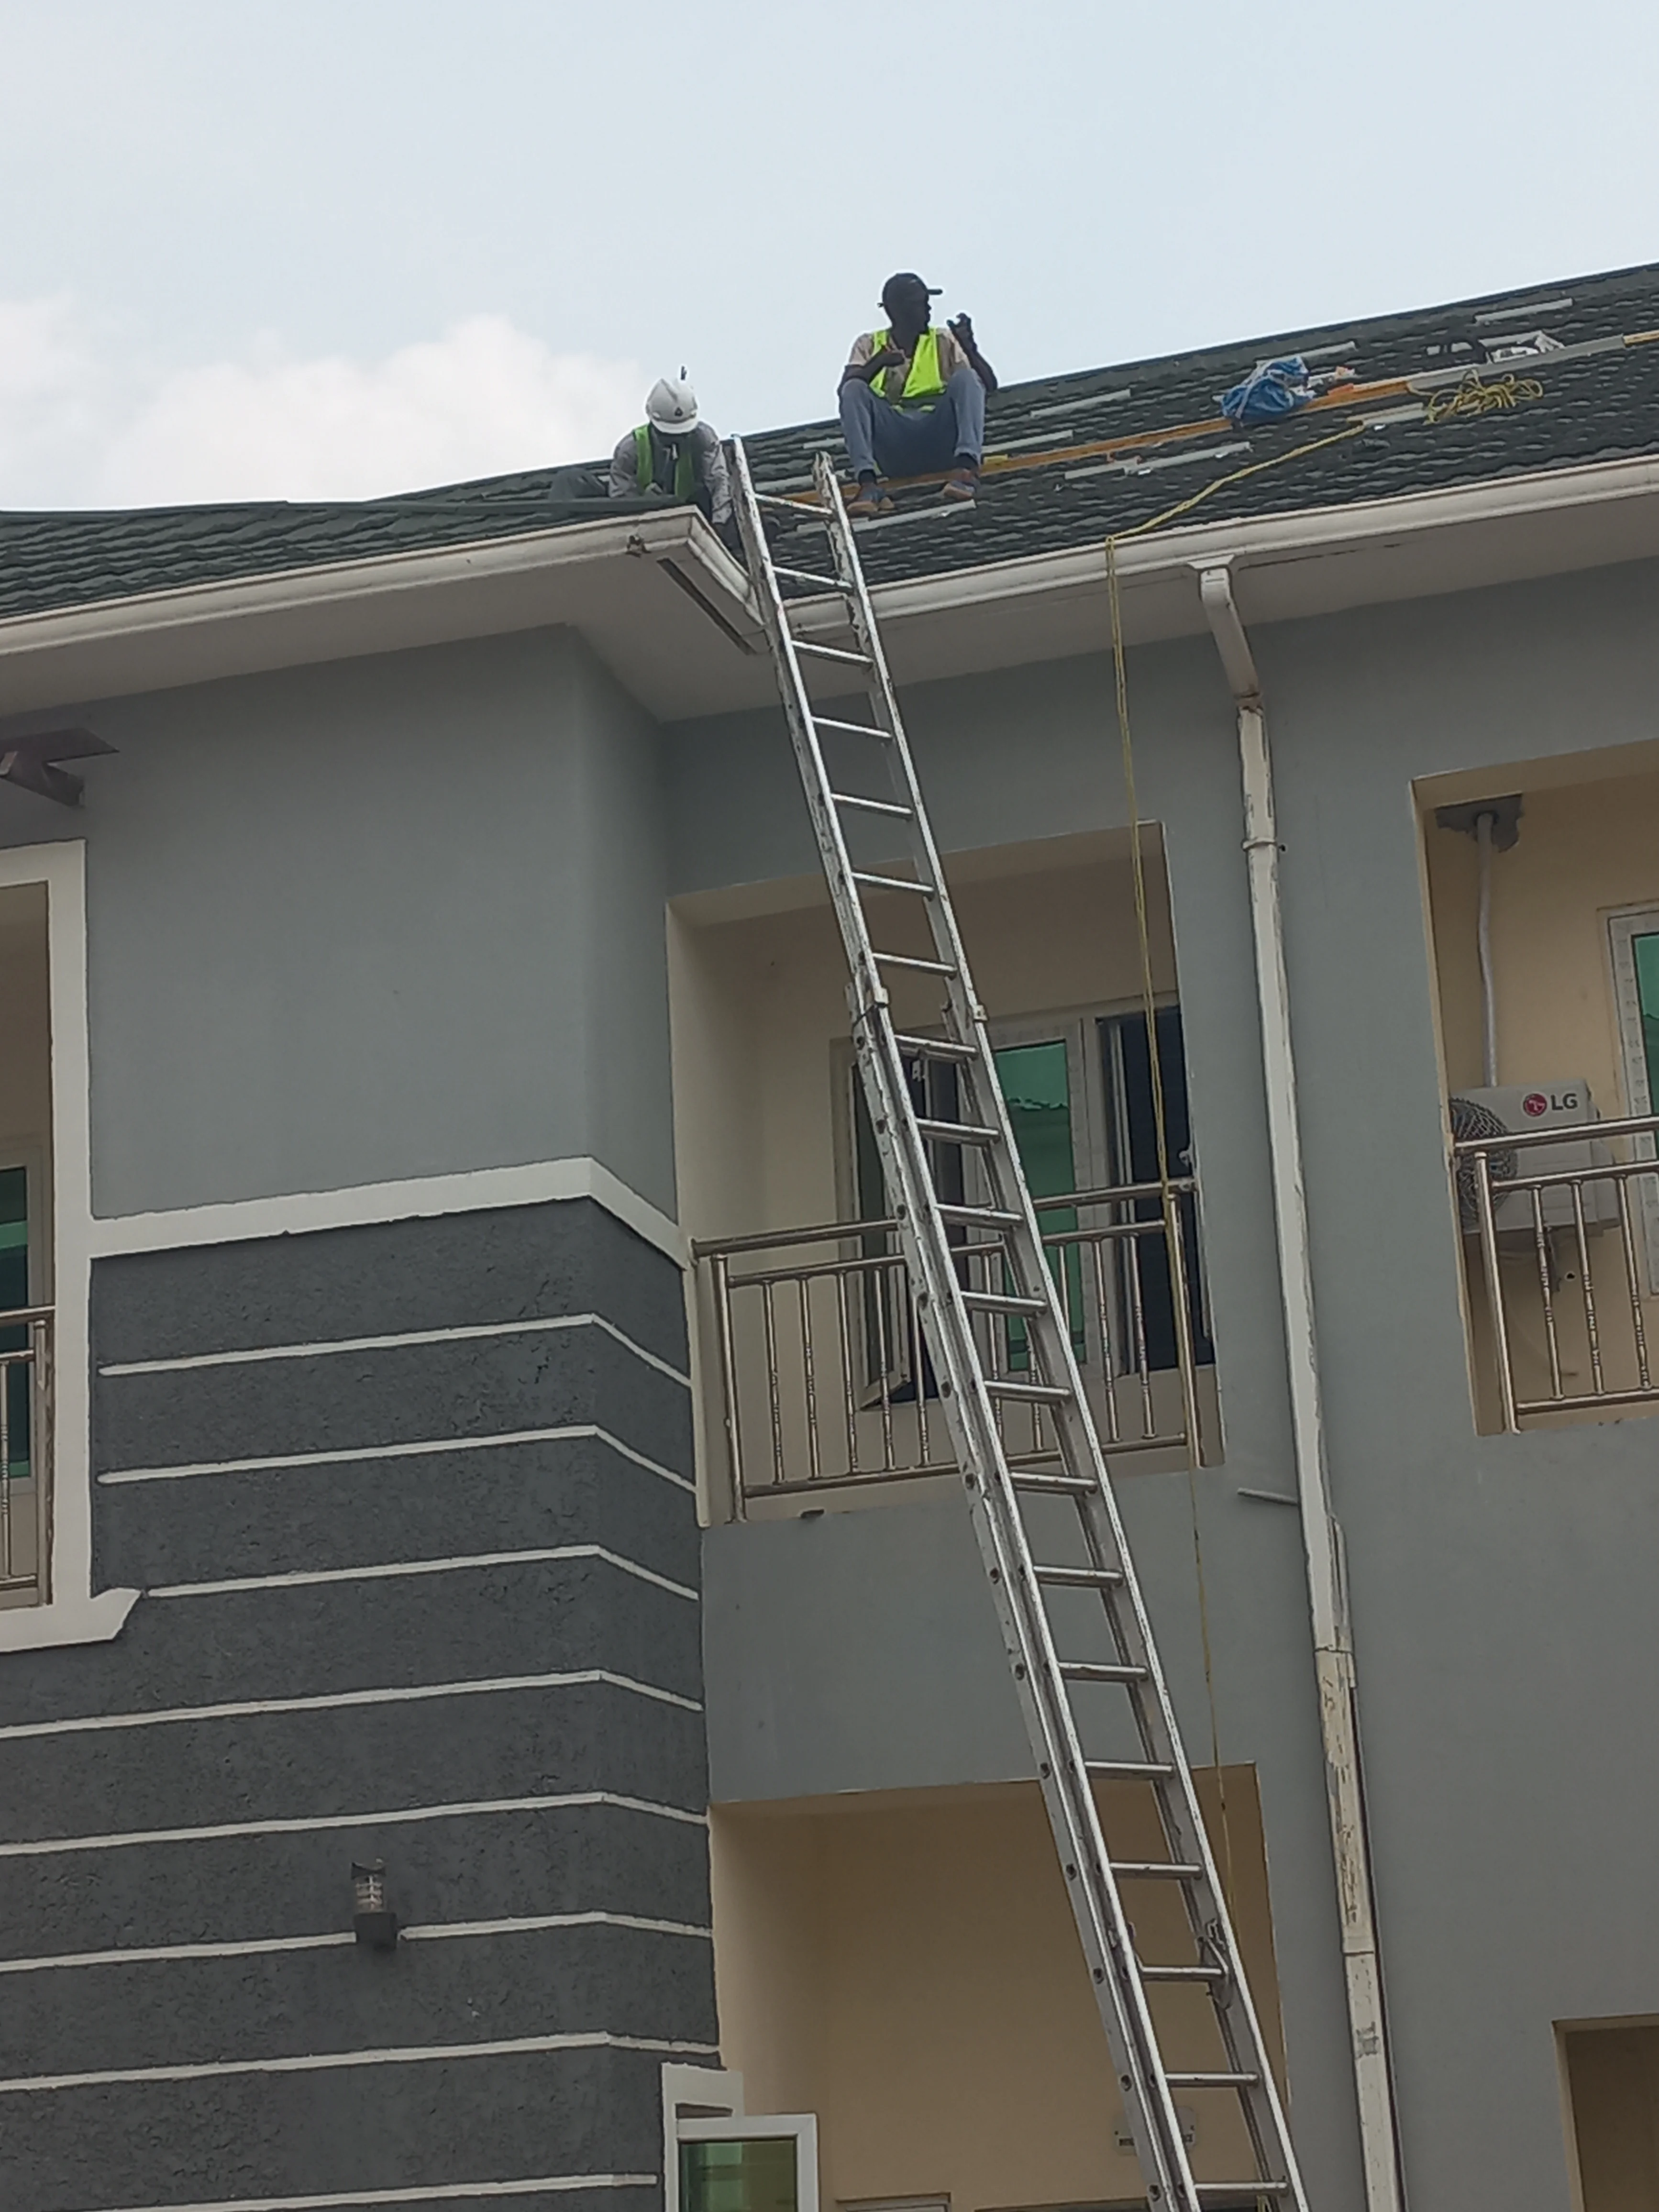
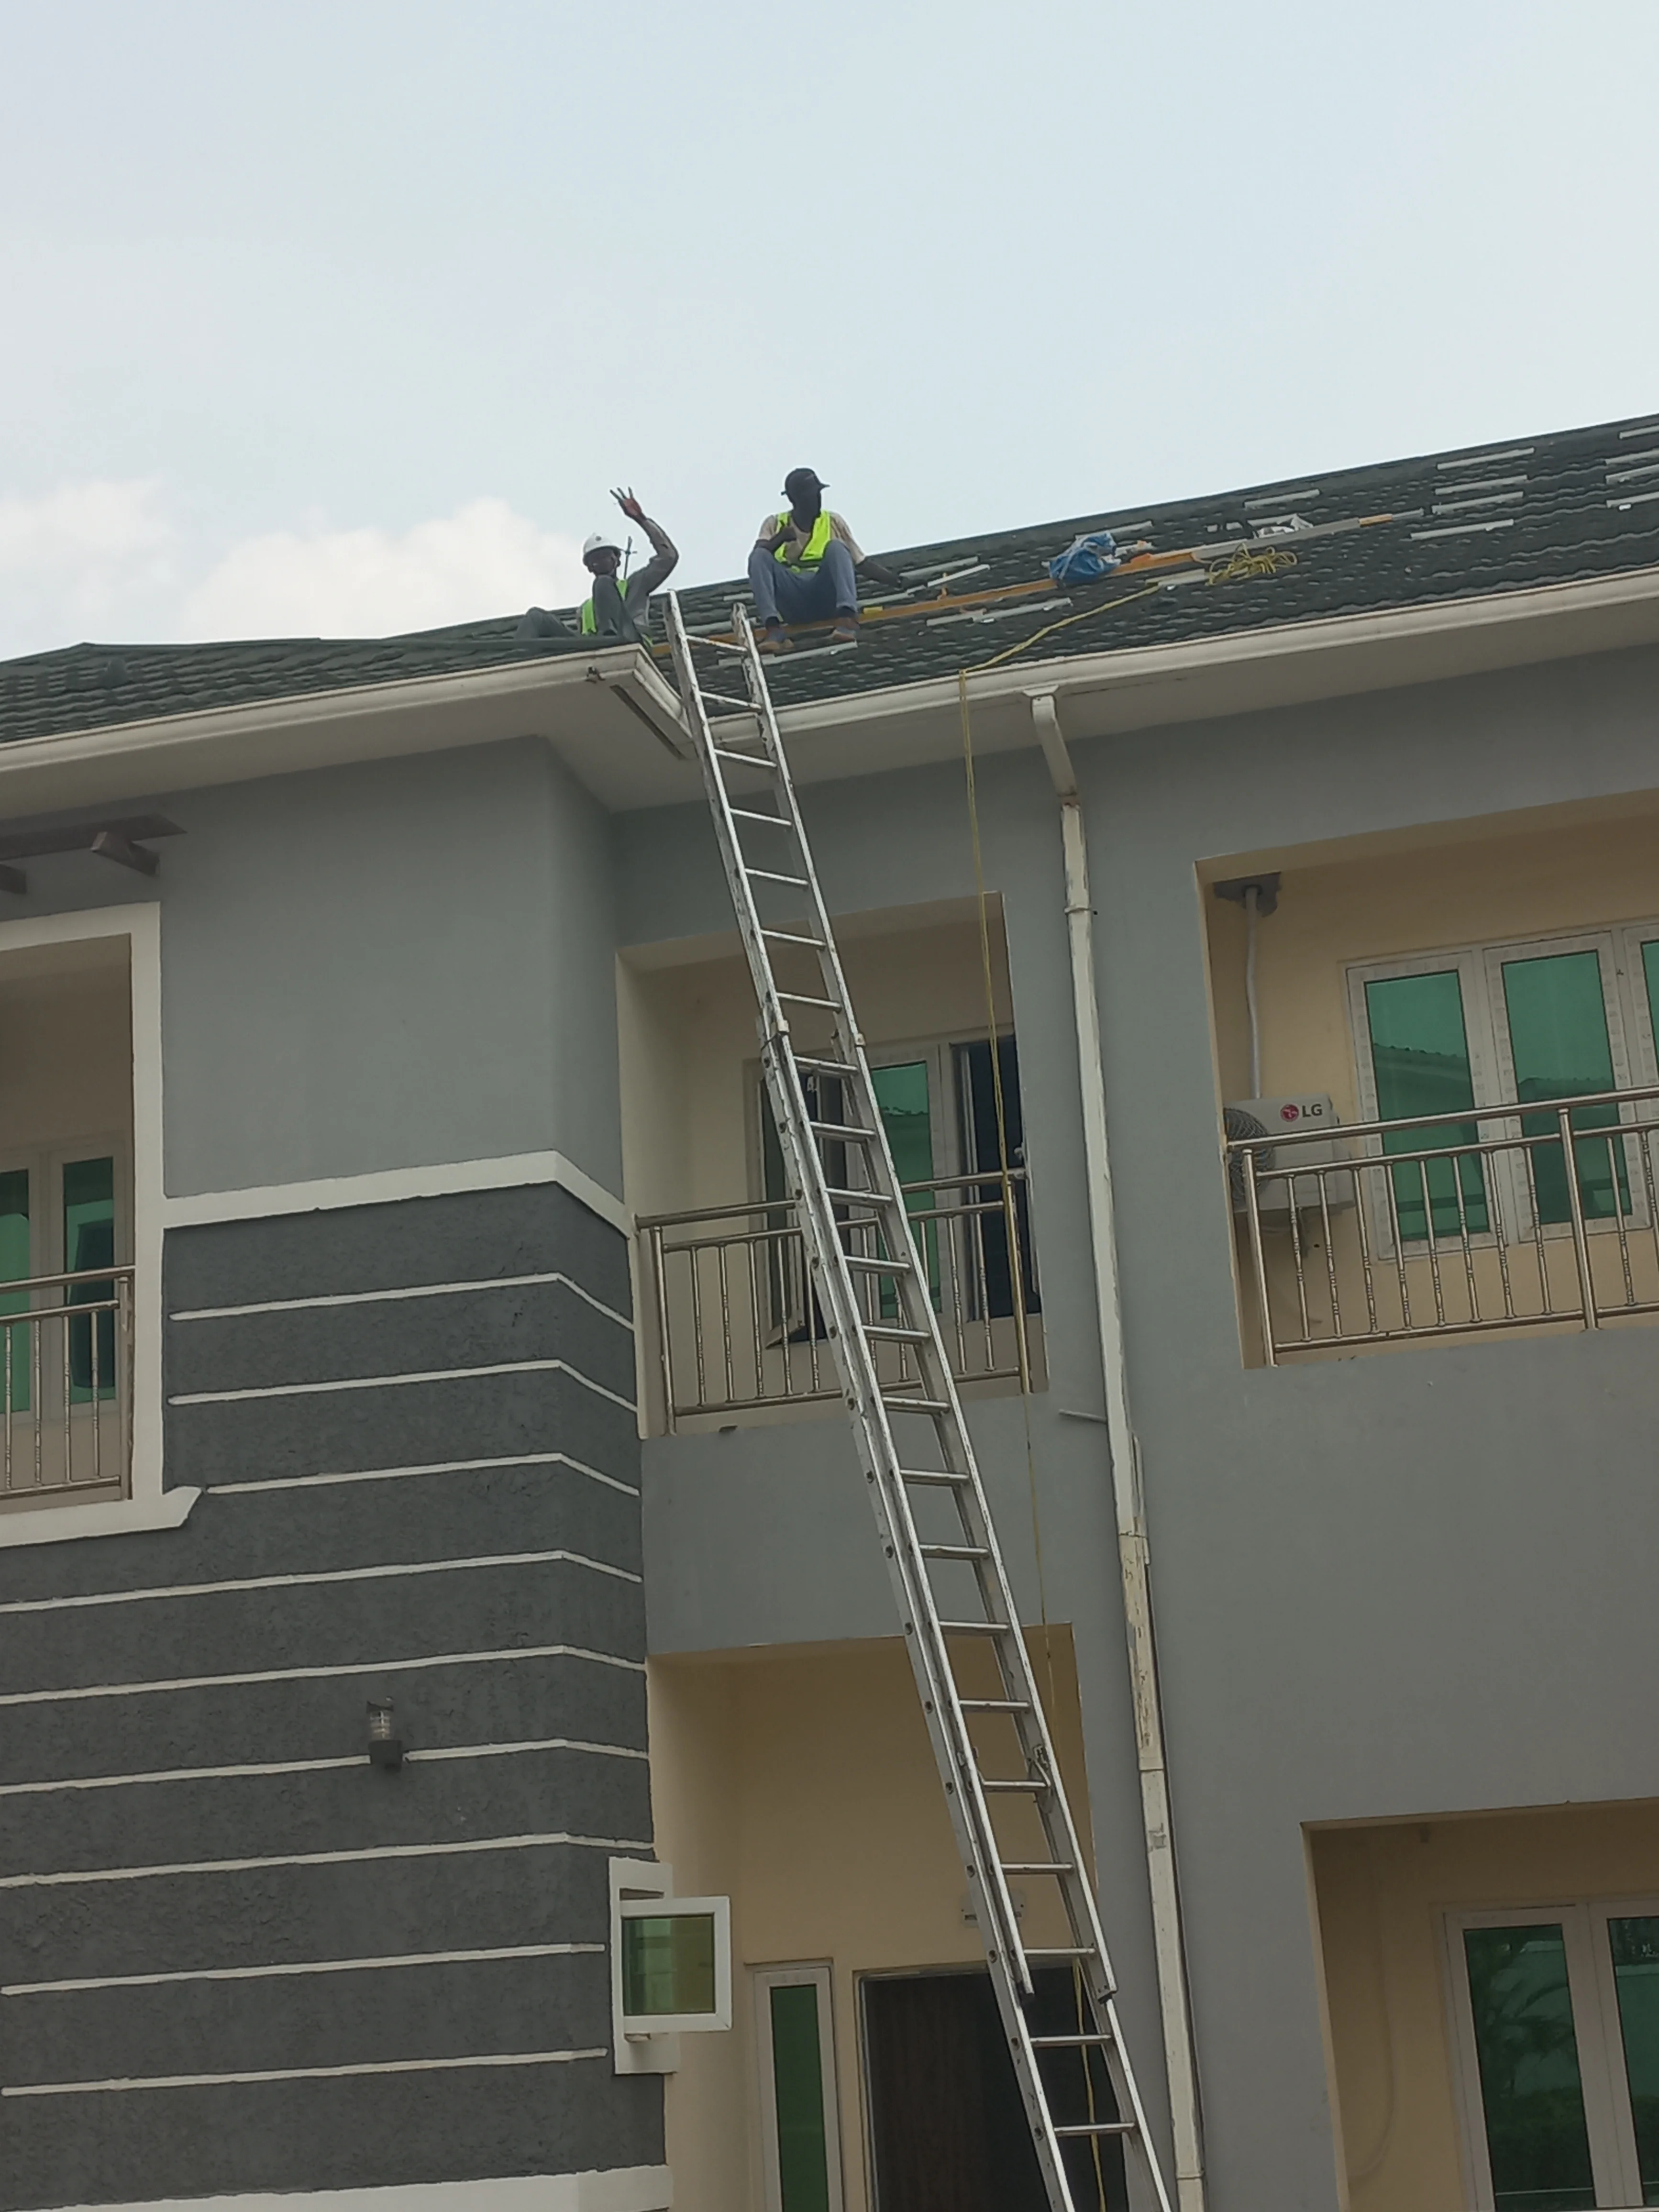
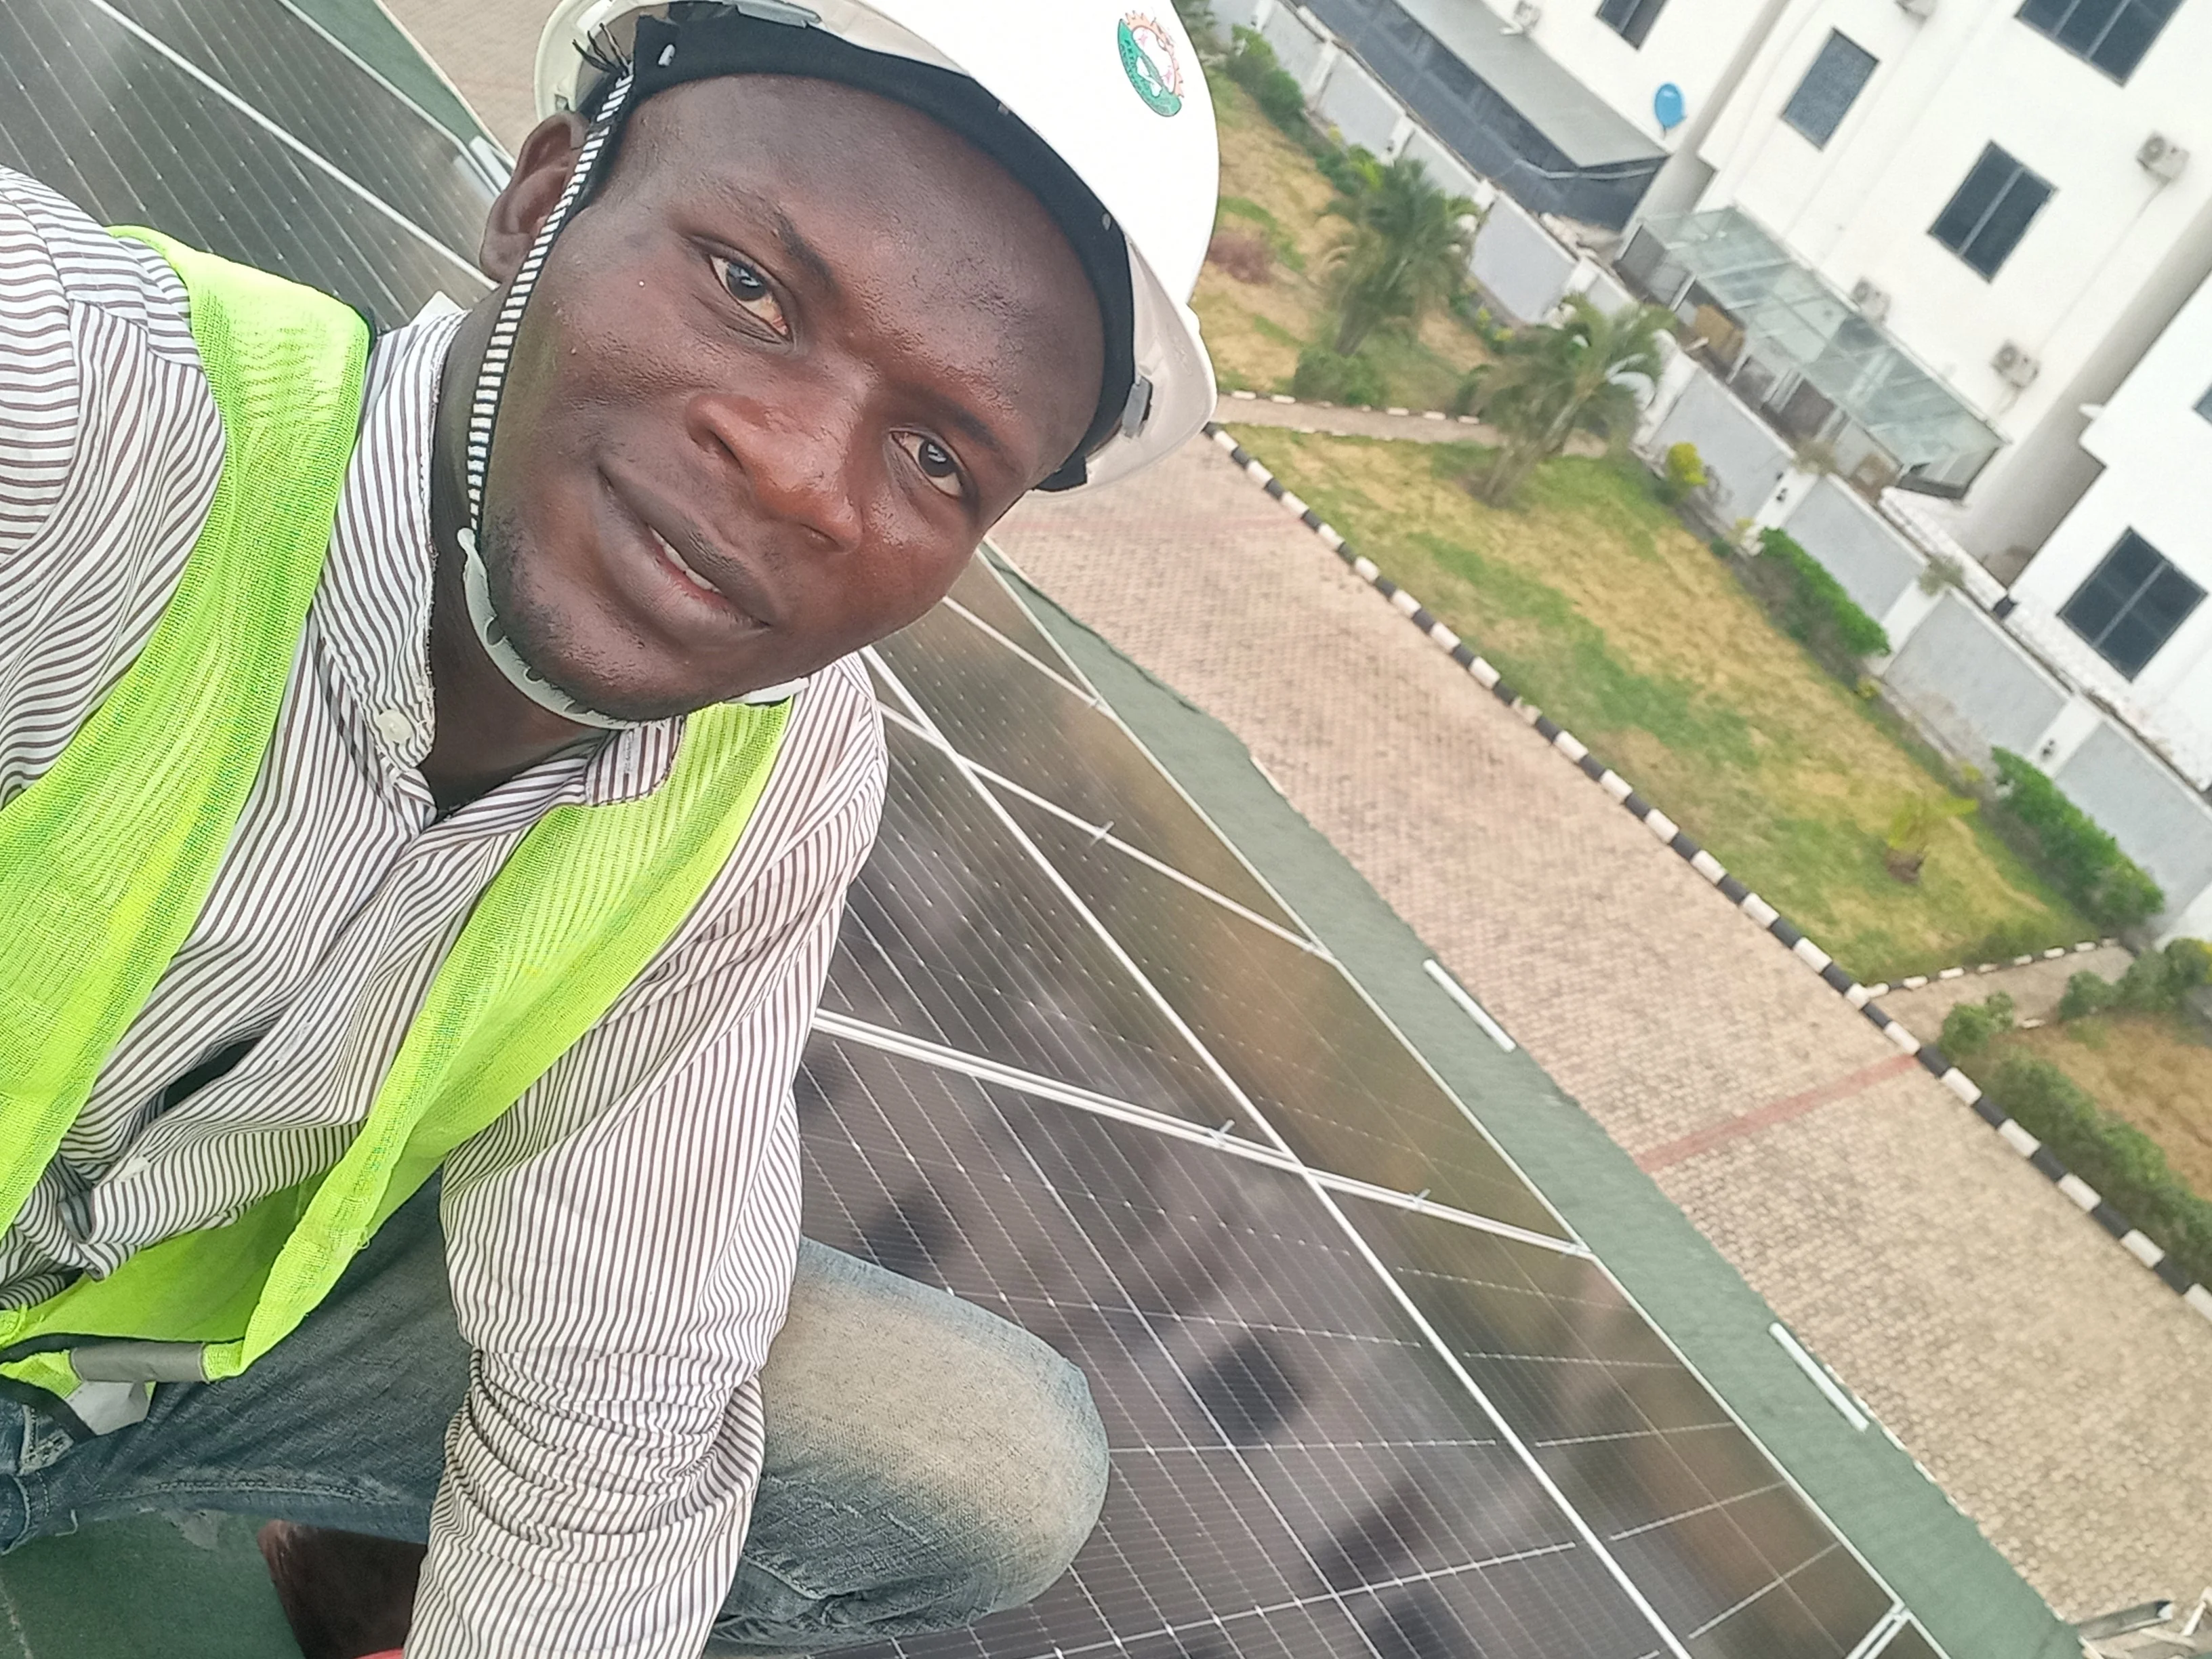
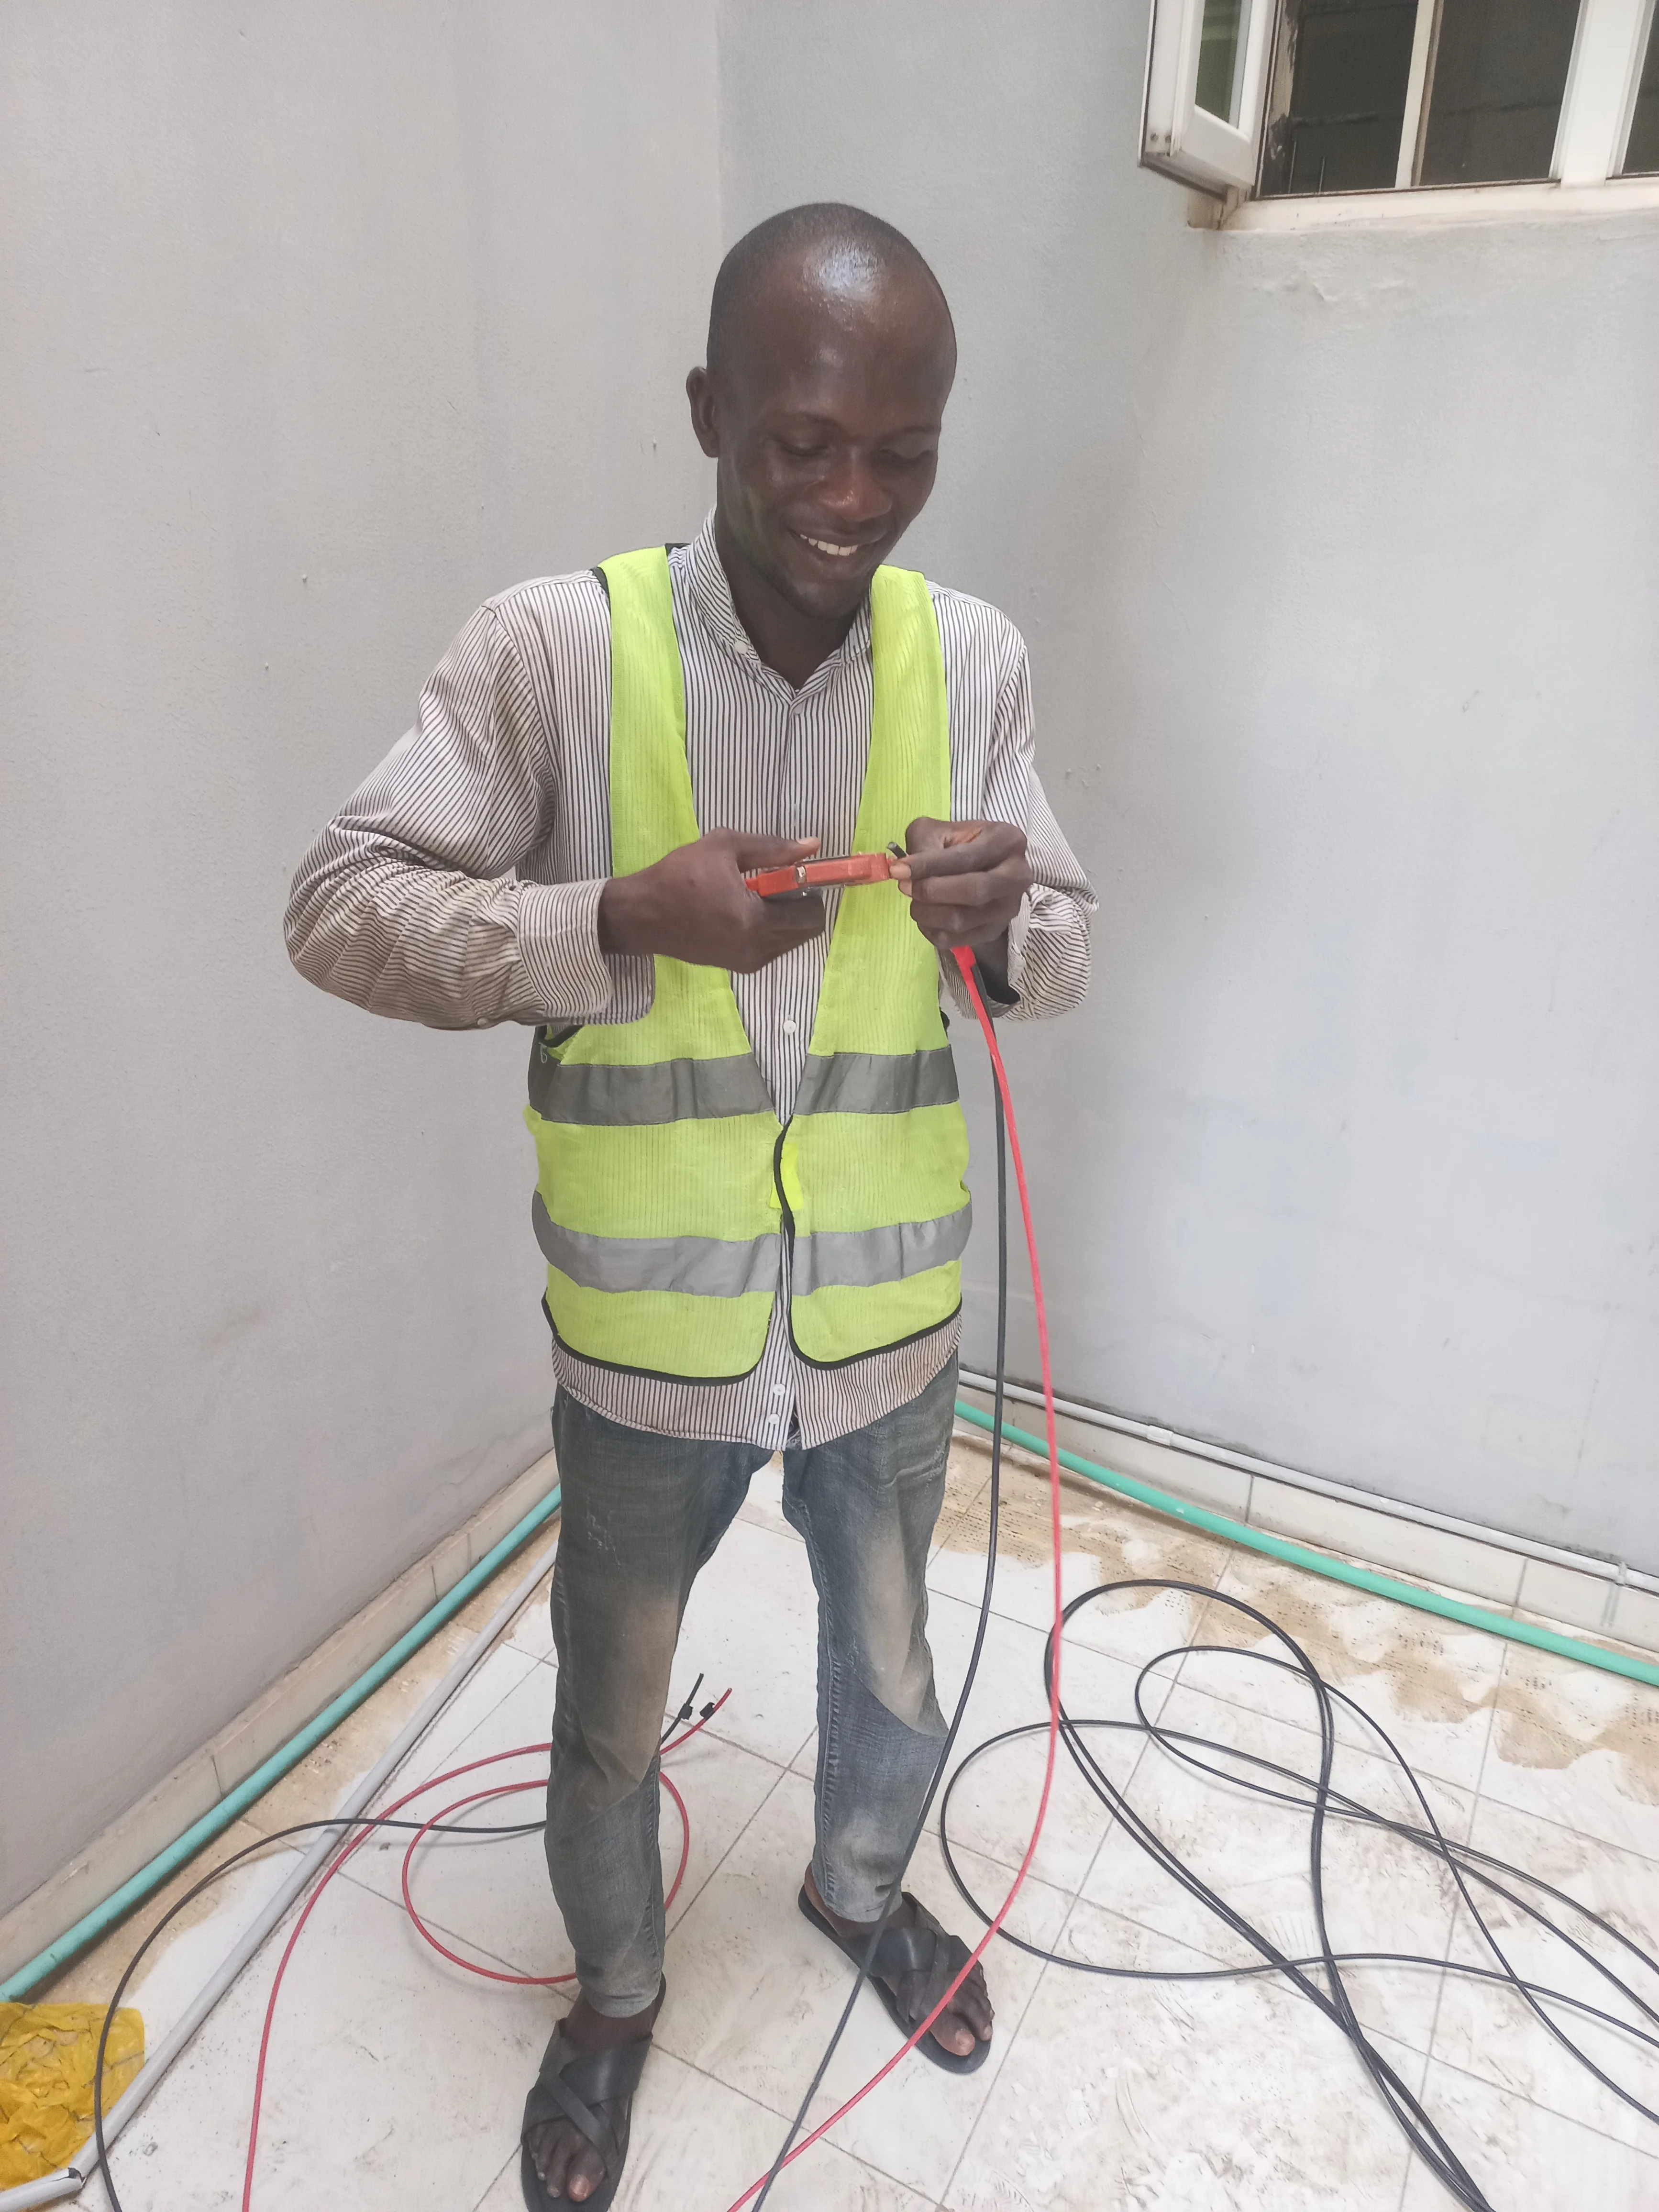
The installation was executed over two days (March 11-12, 2026) by a team of two — the lead installer and an assistant — both wearing proper PPE including hard hats and high-visibility vests throughout the process.
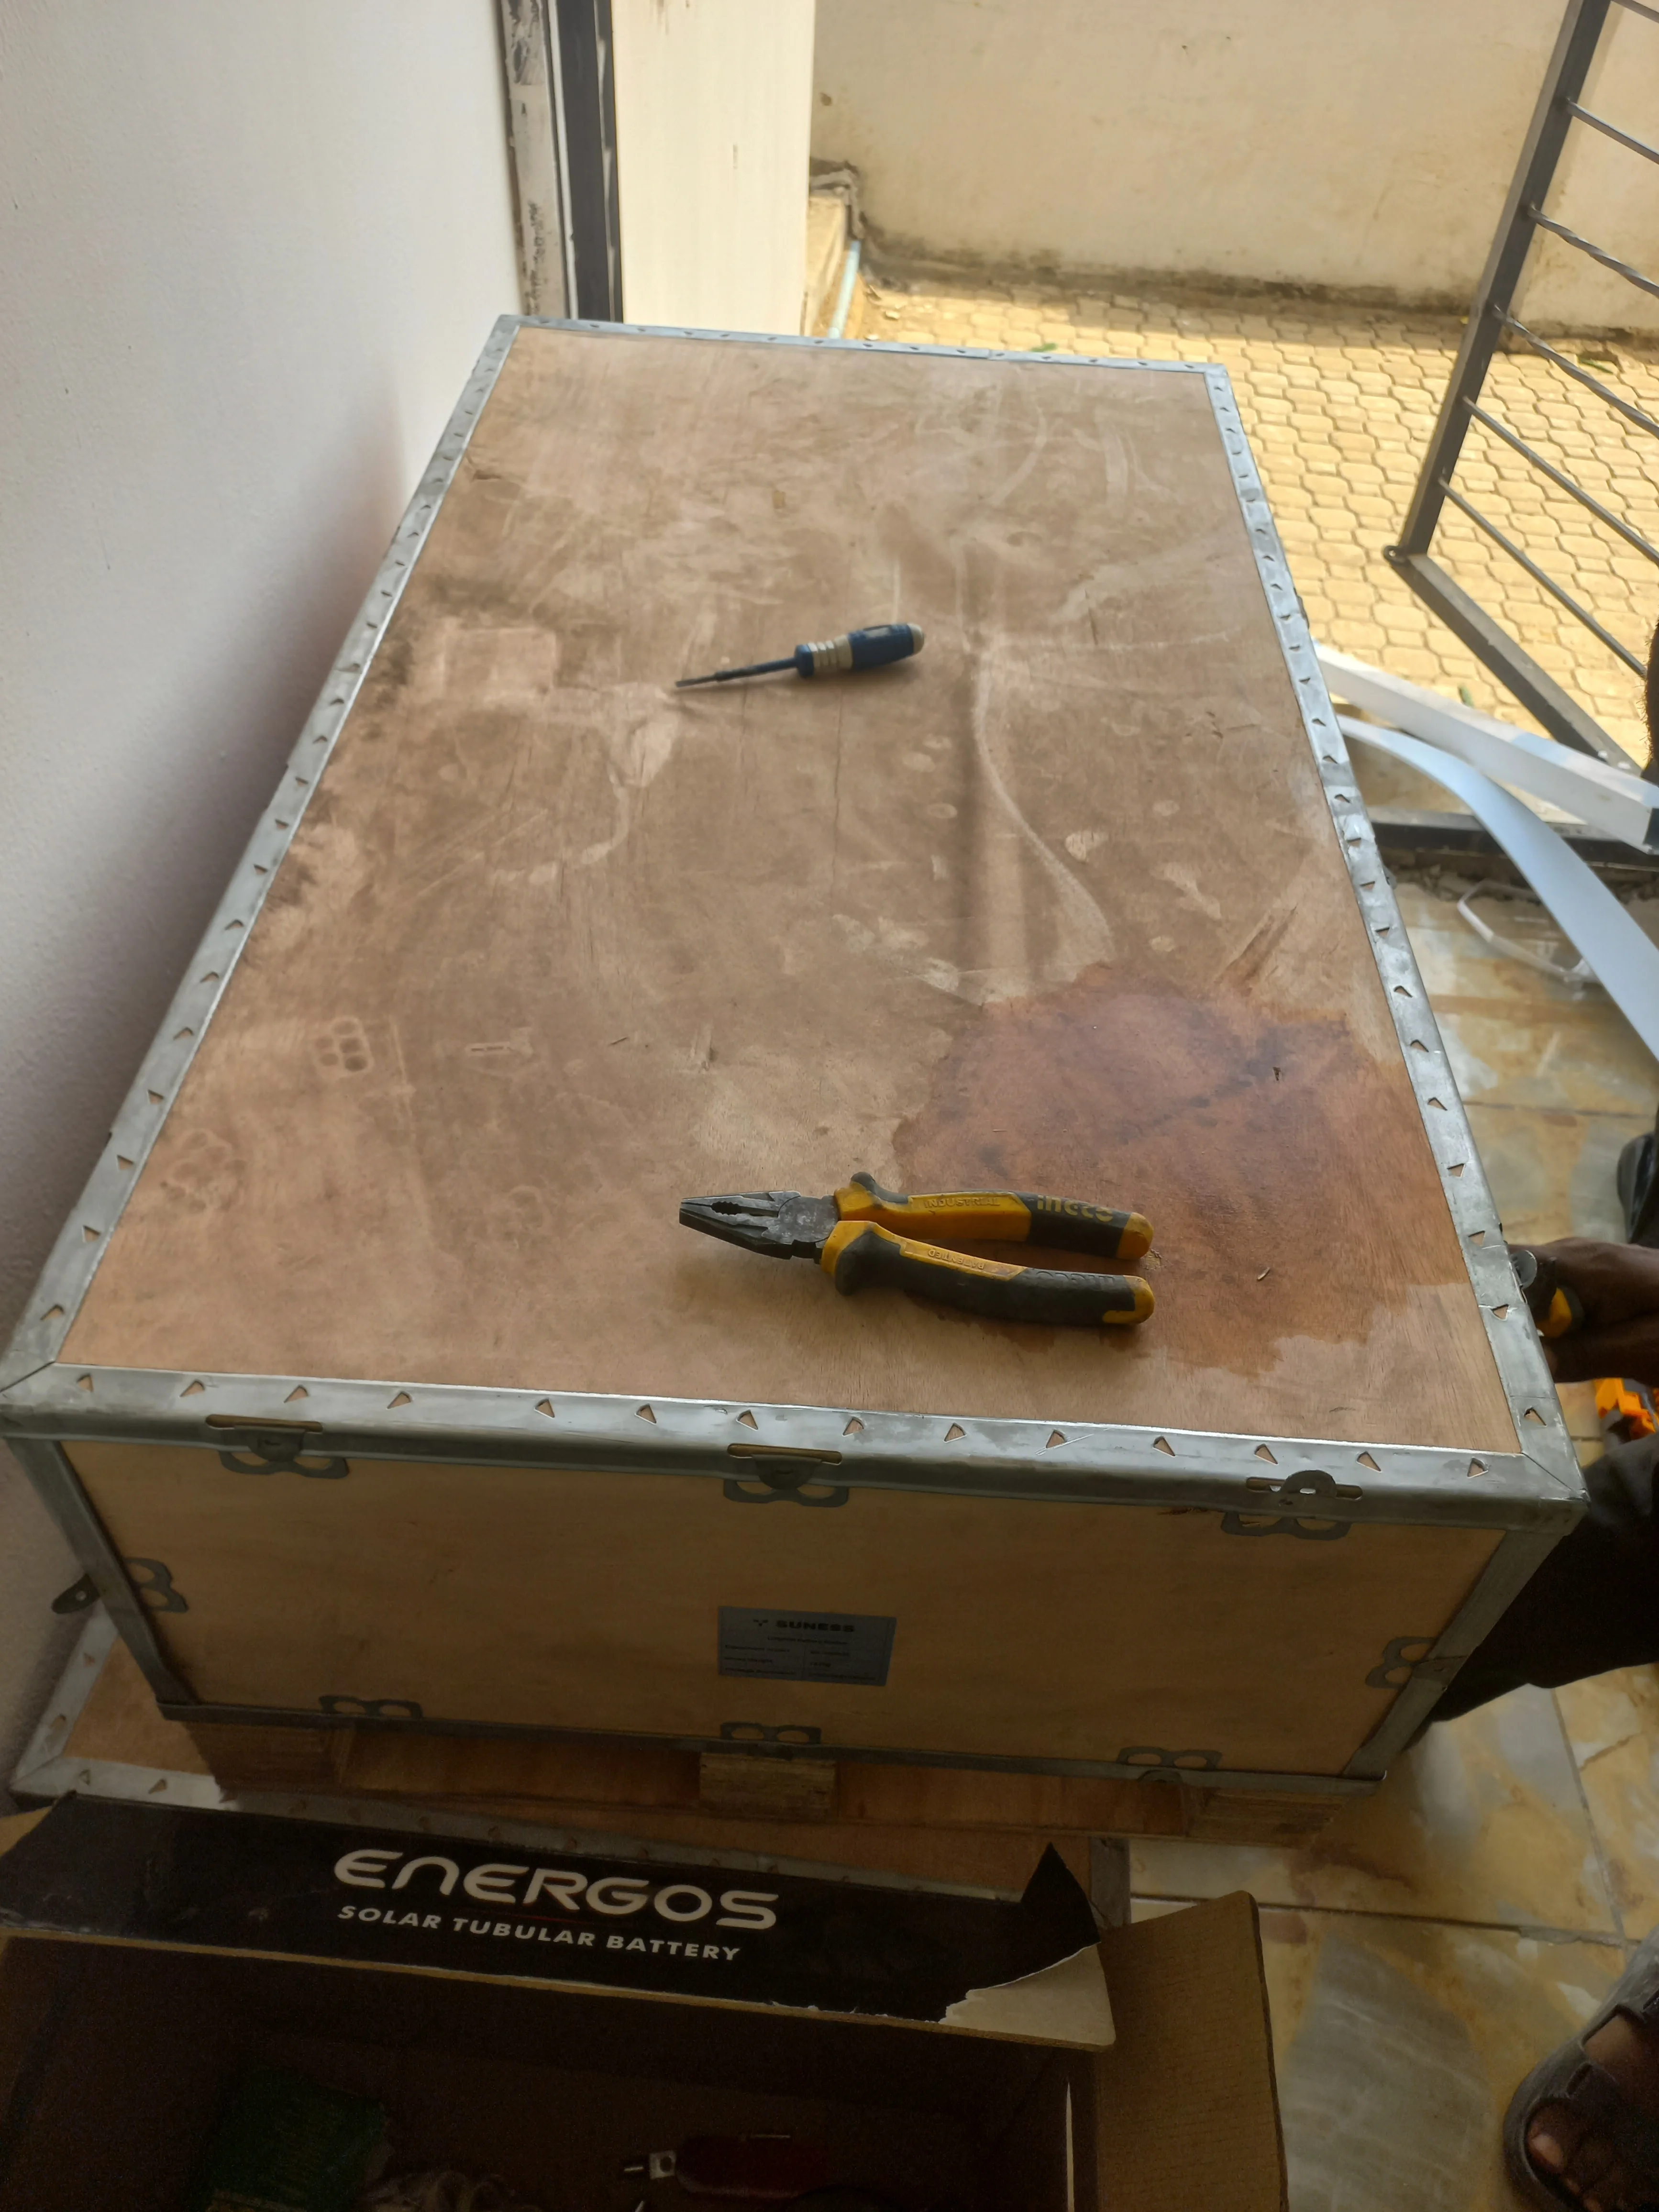
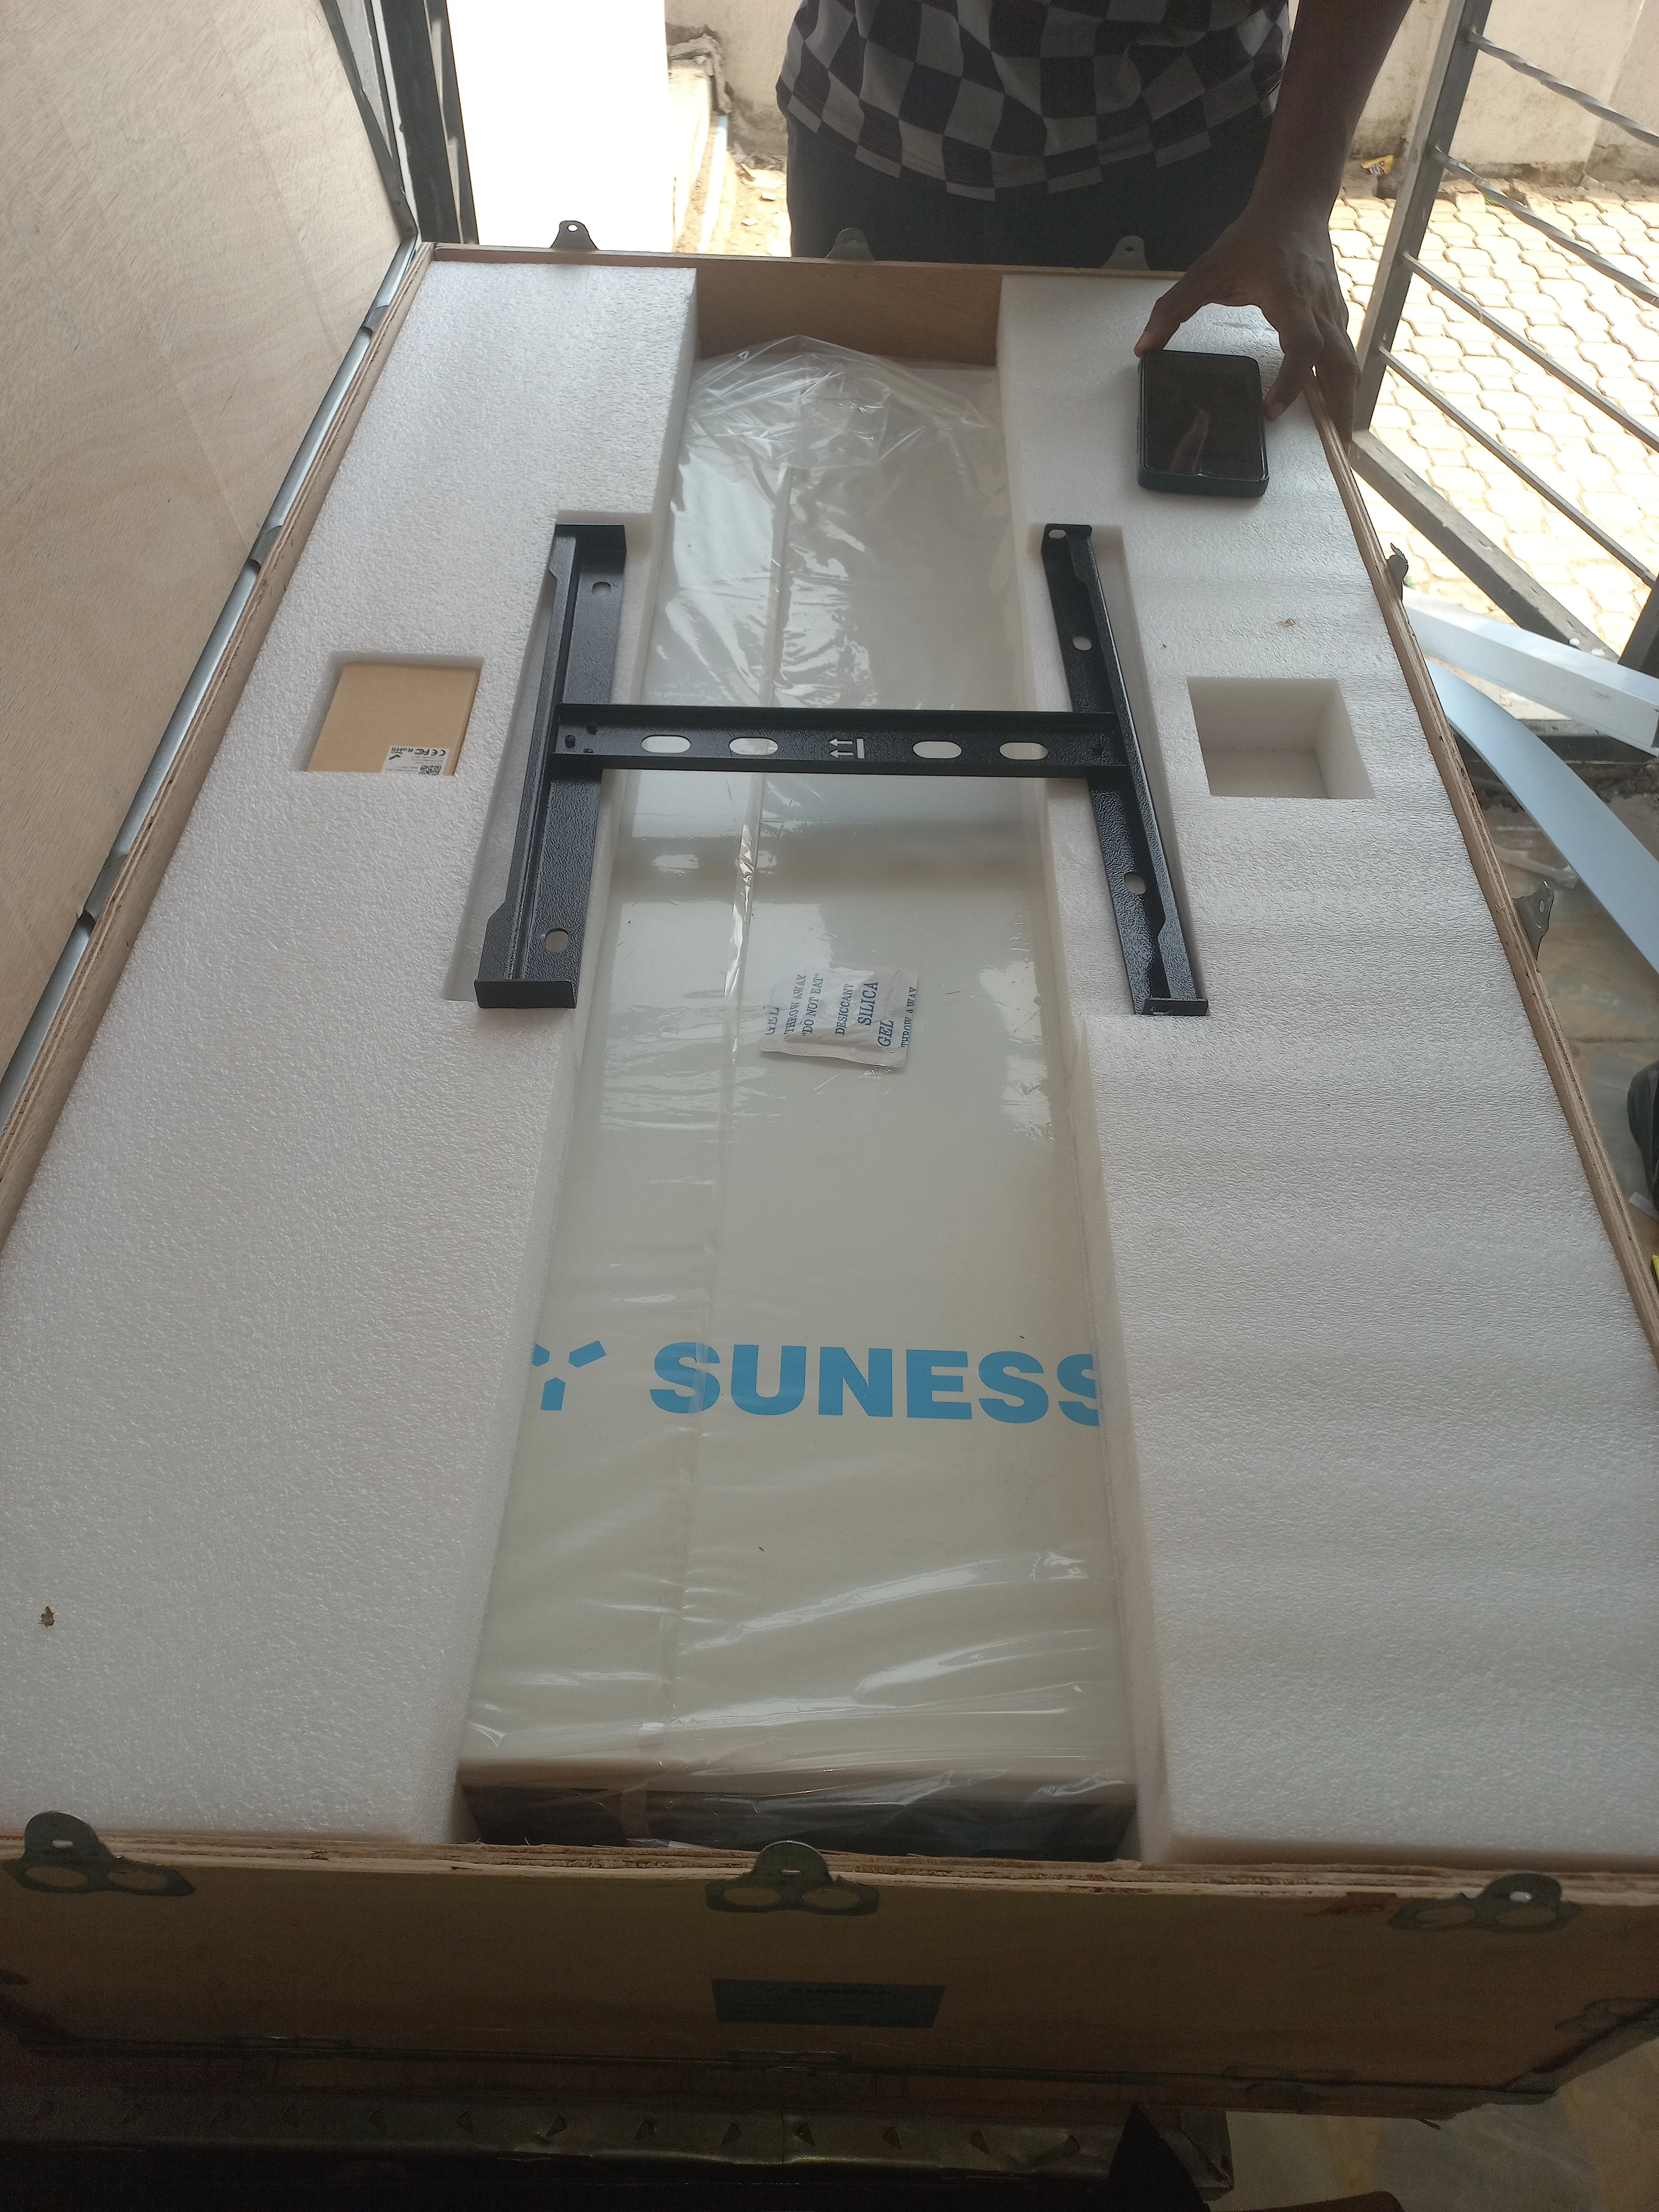
Phase 1: Equipment Delivery & Unboxing
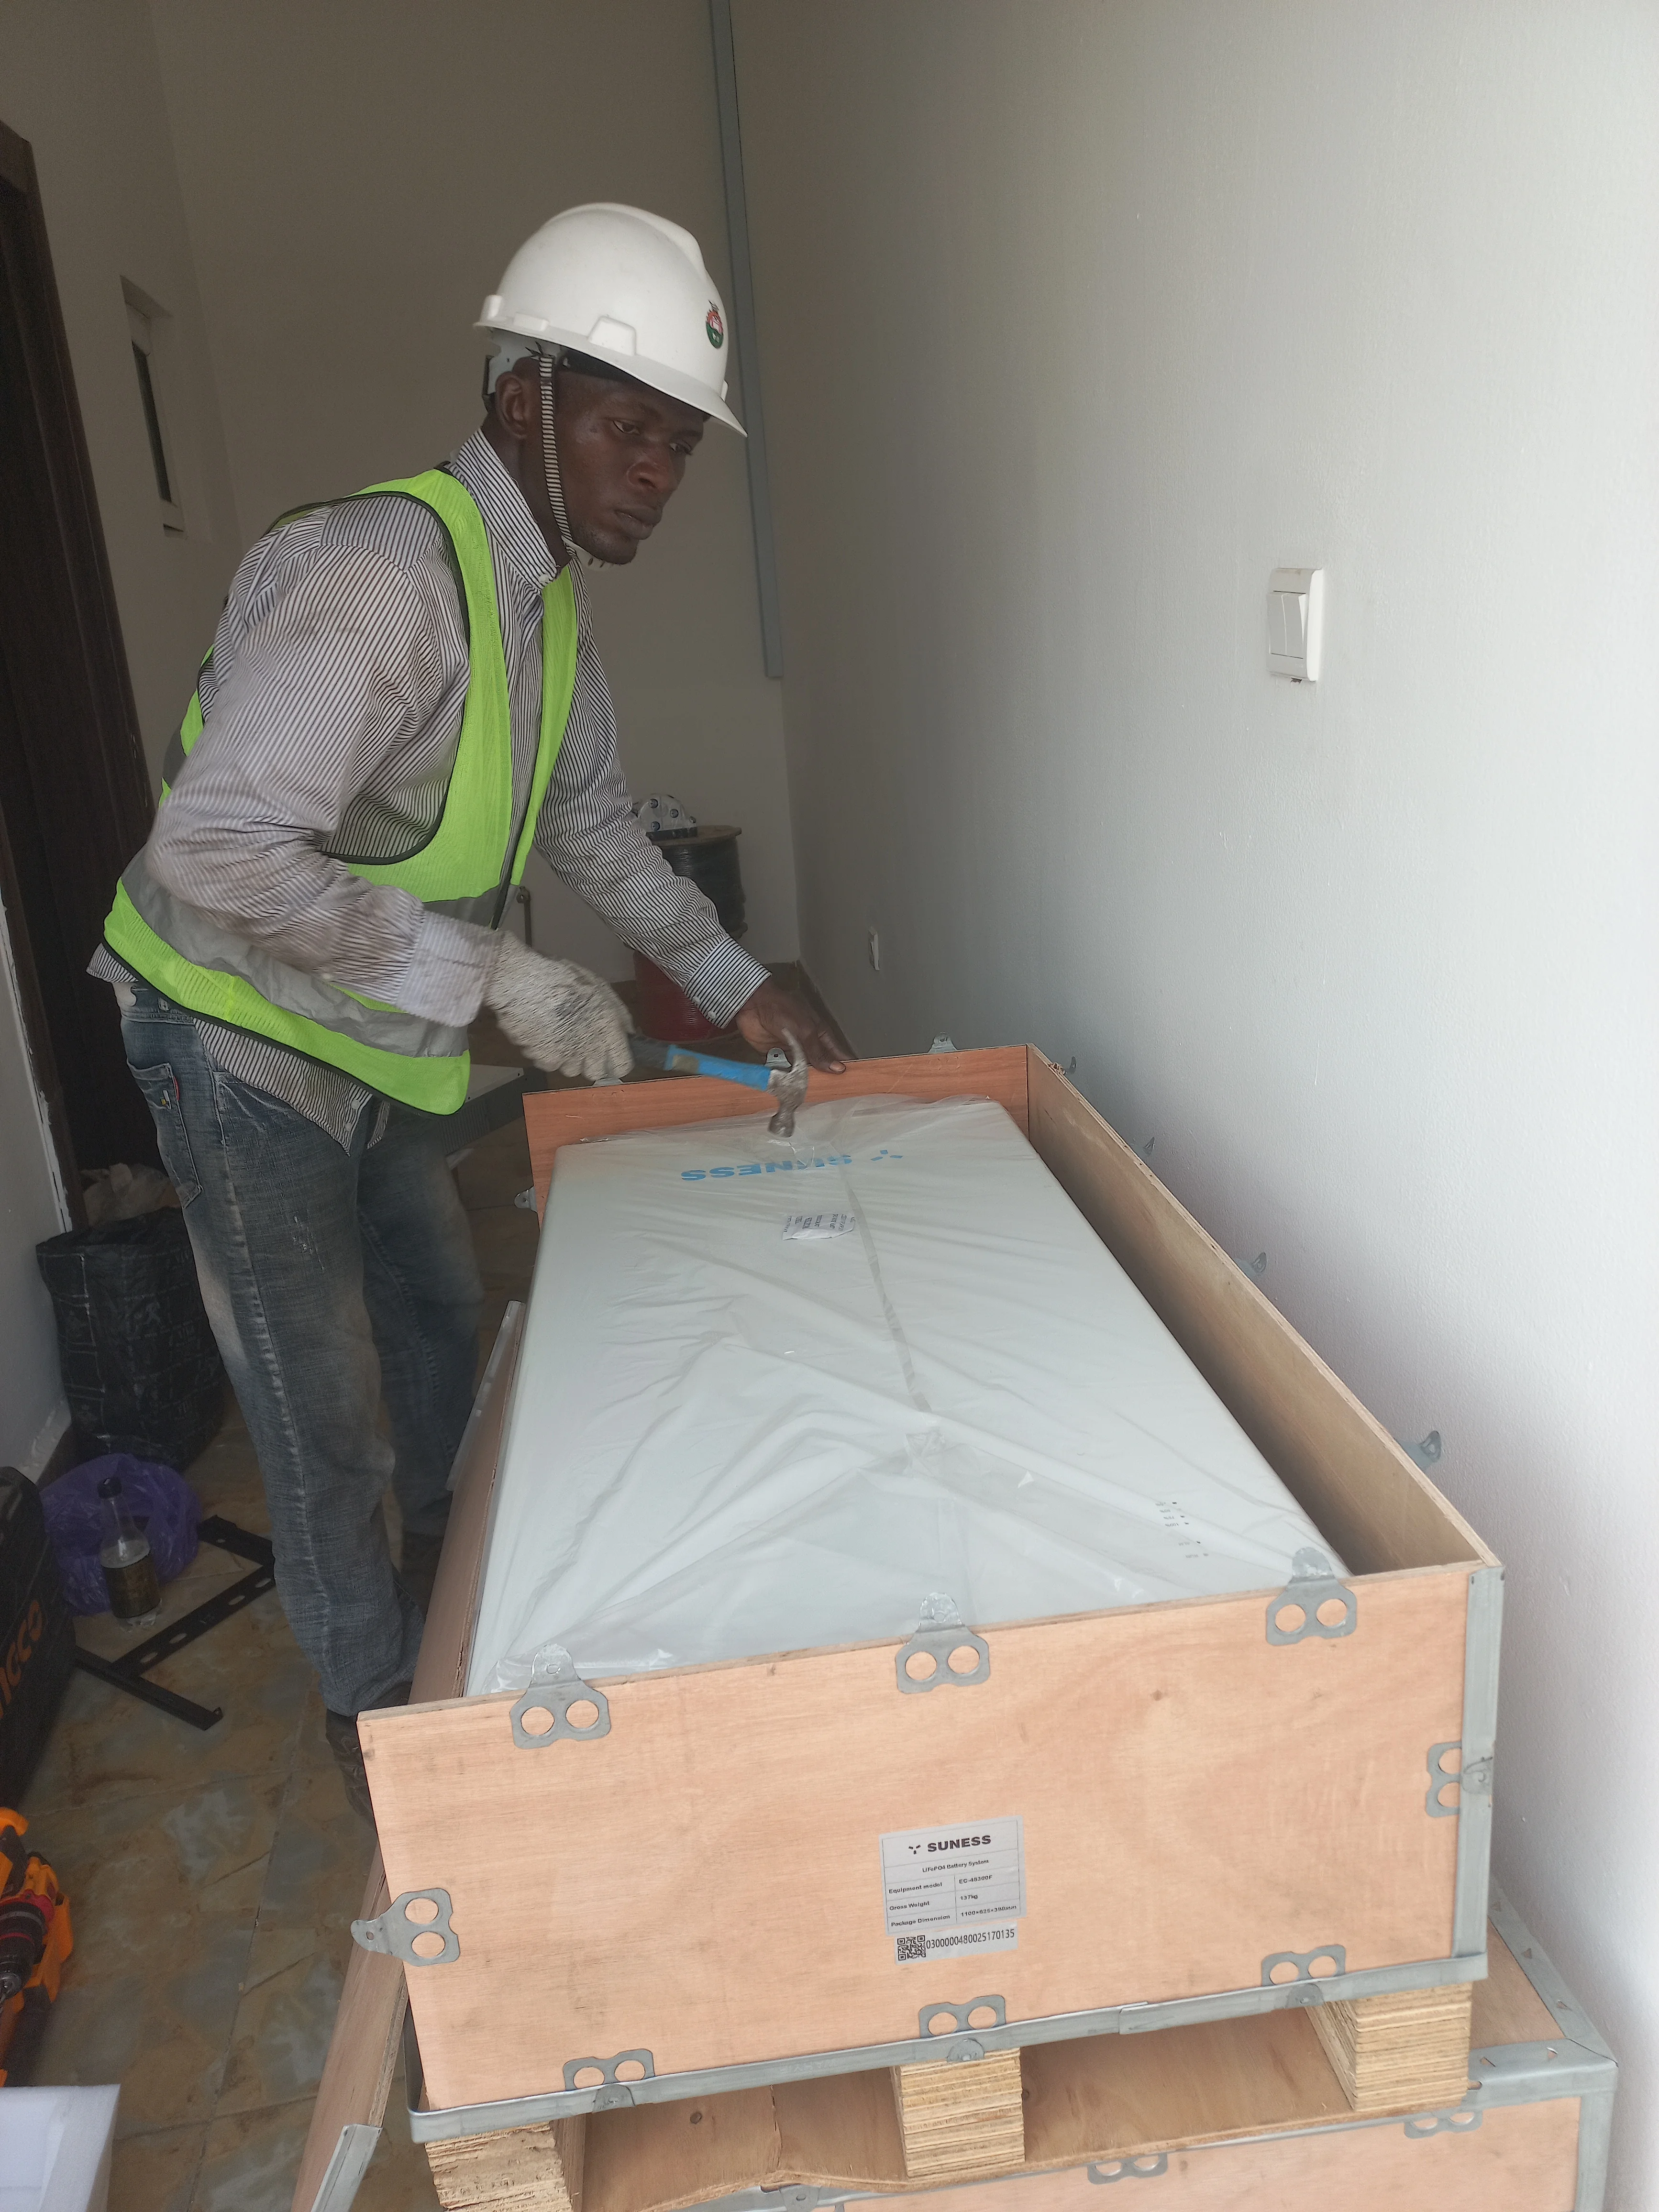
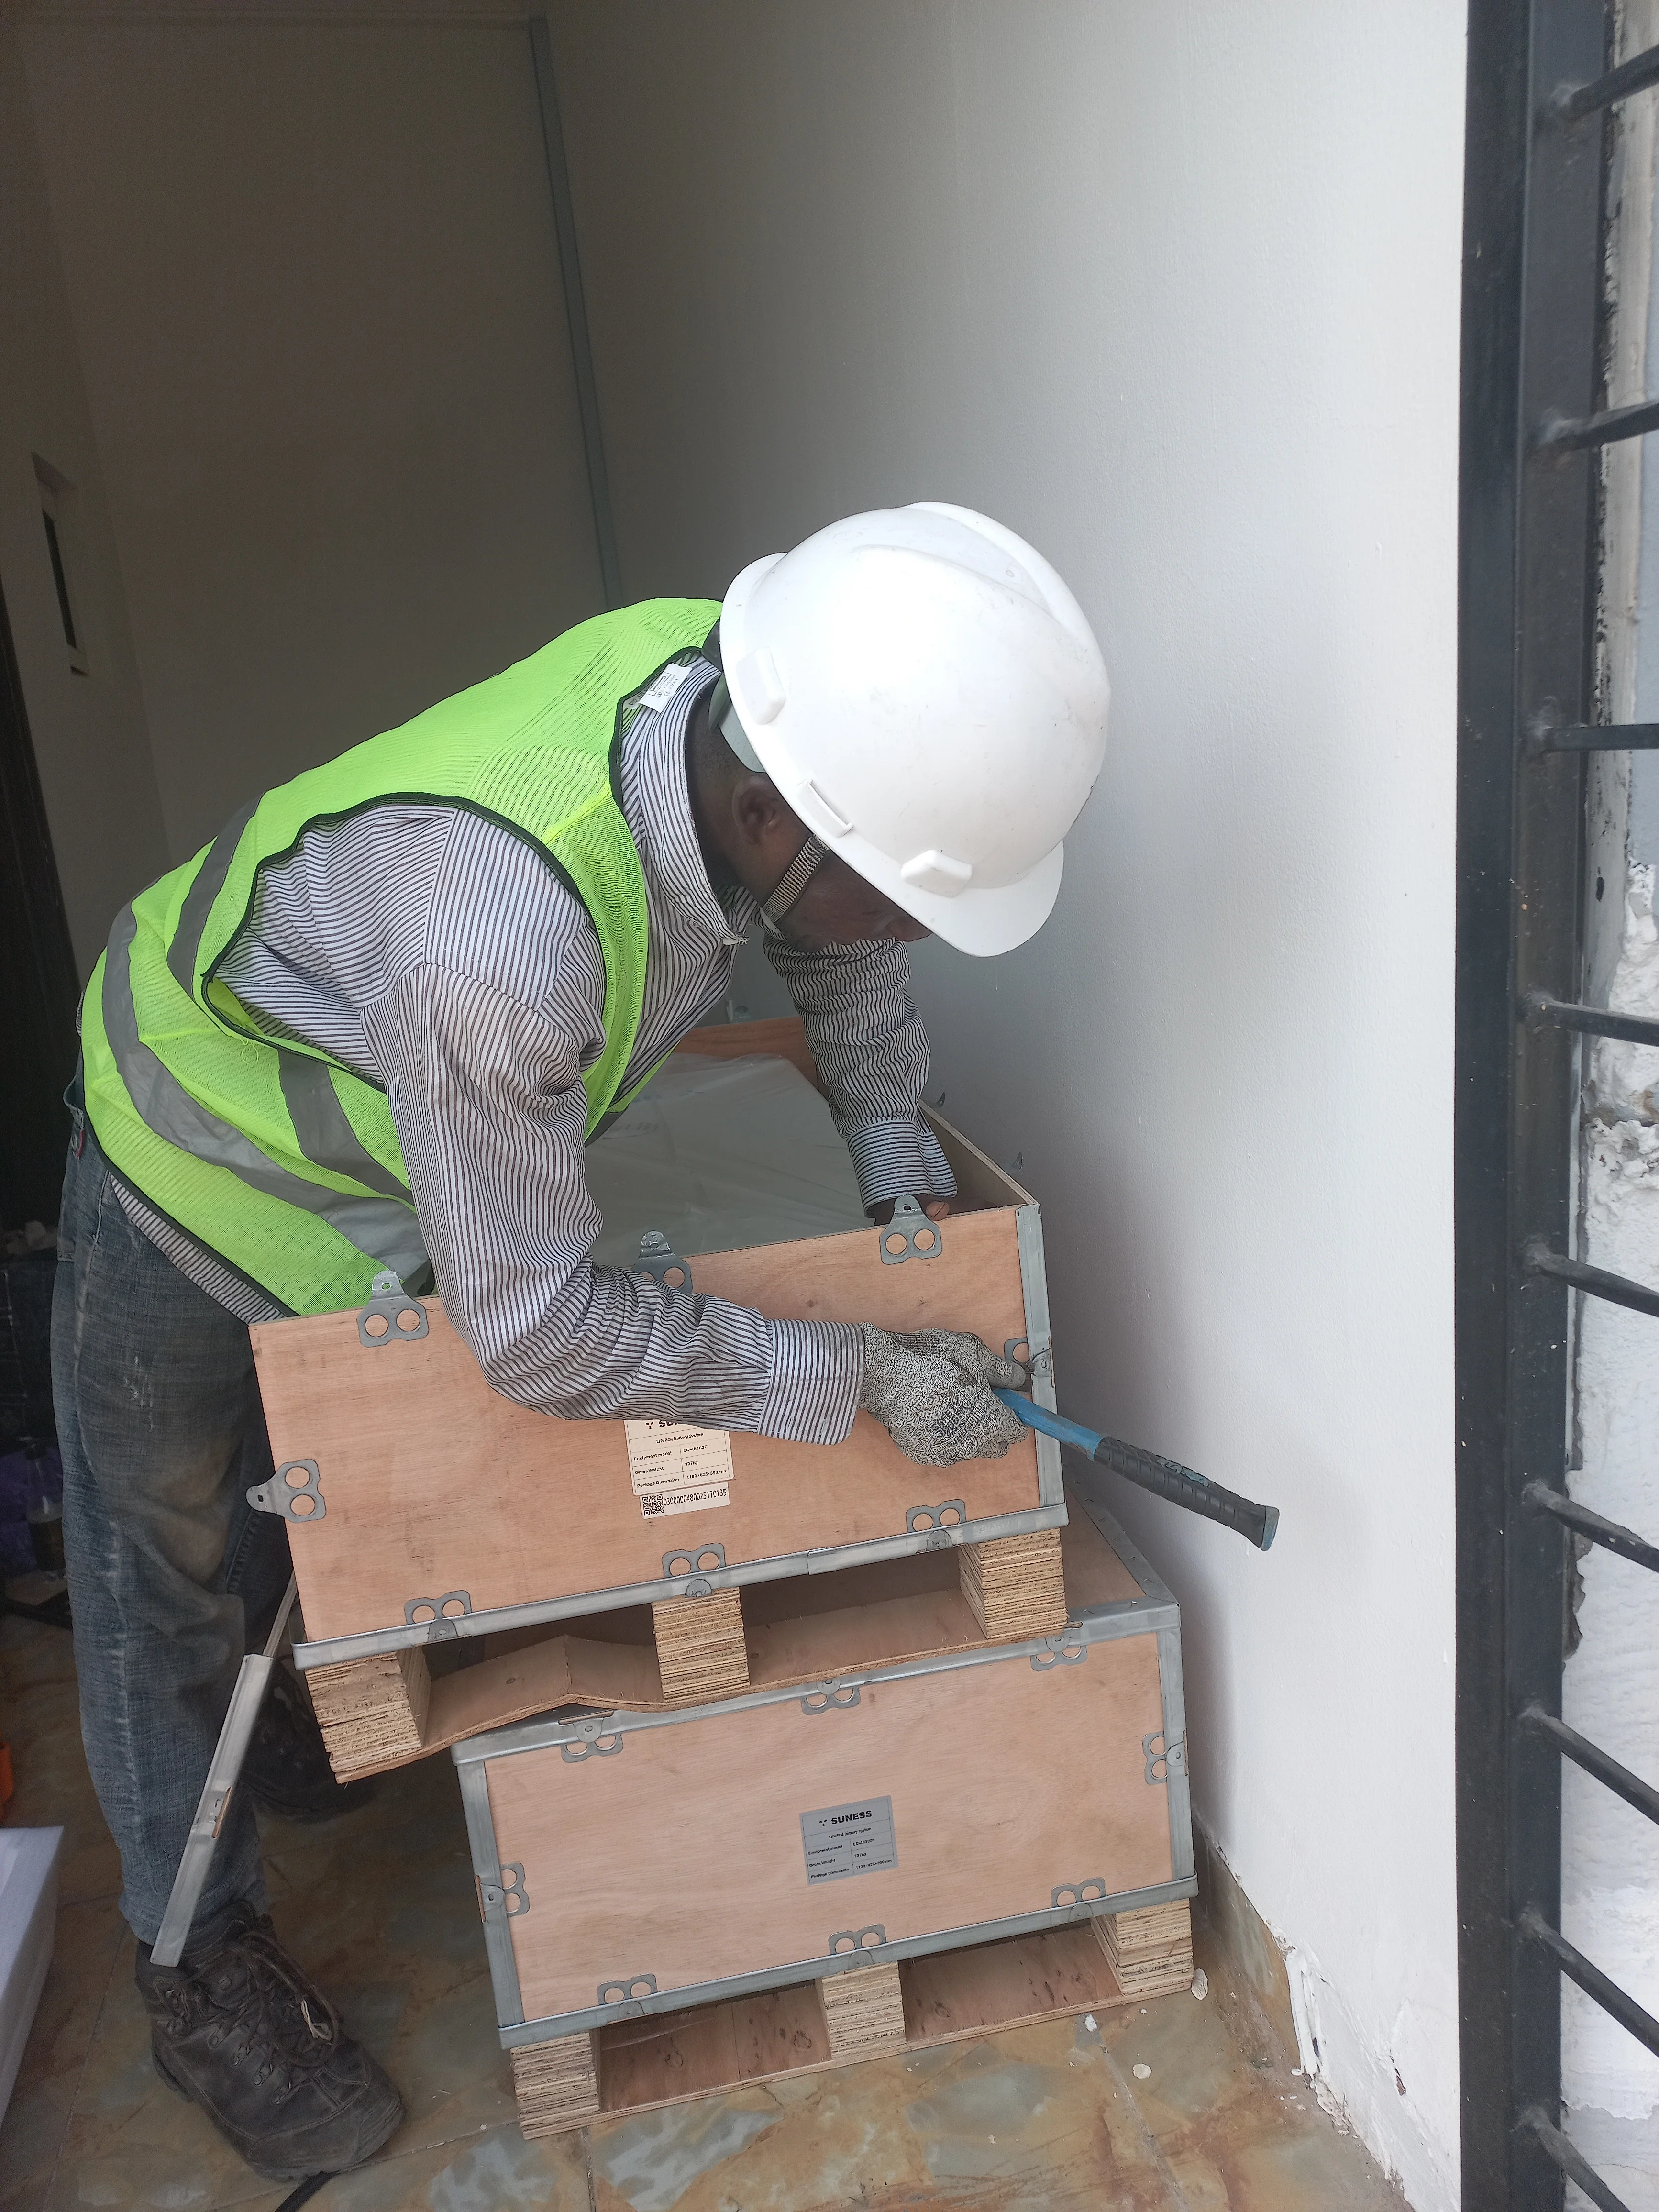
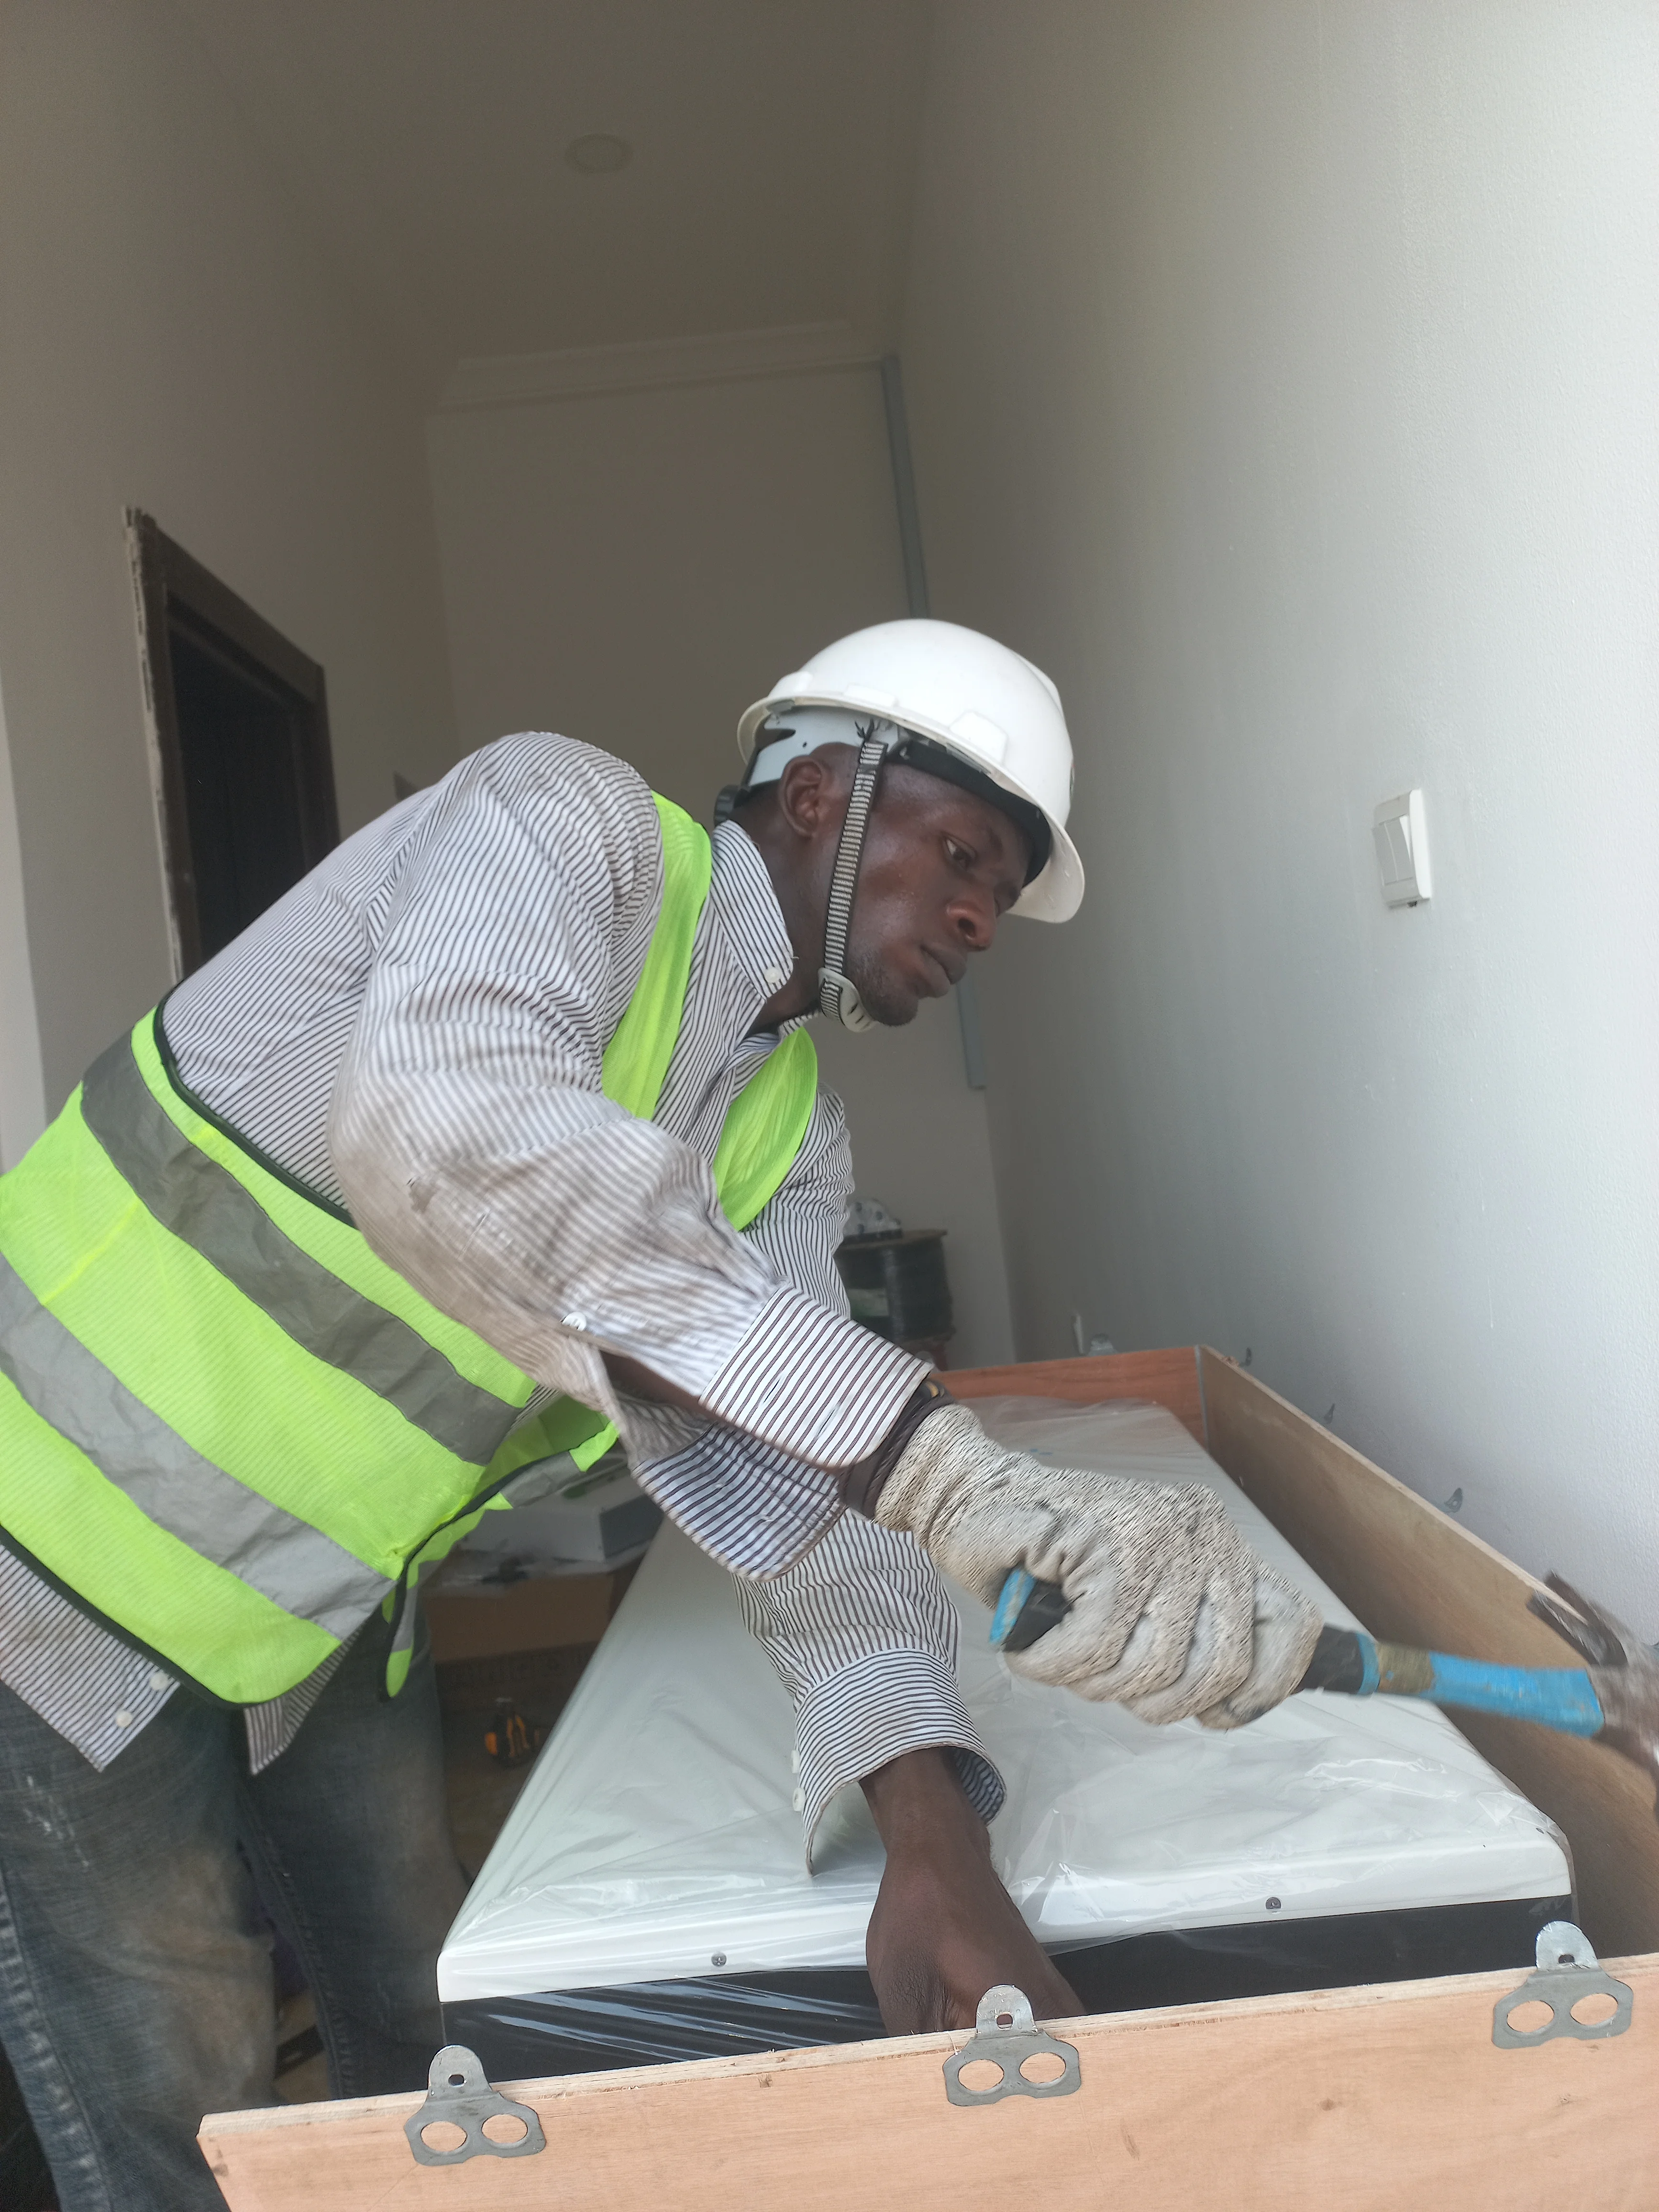
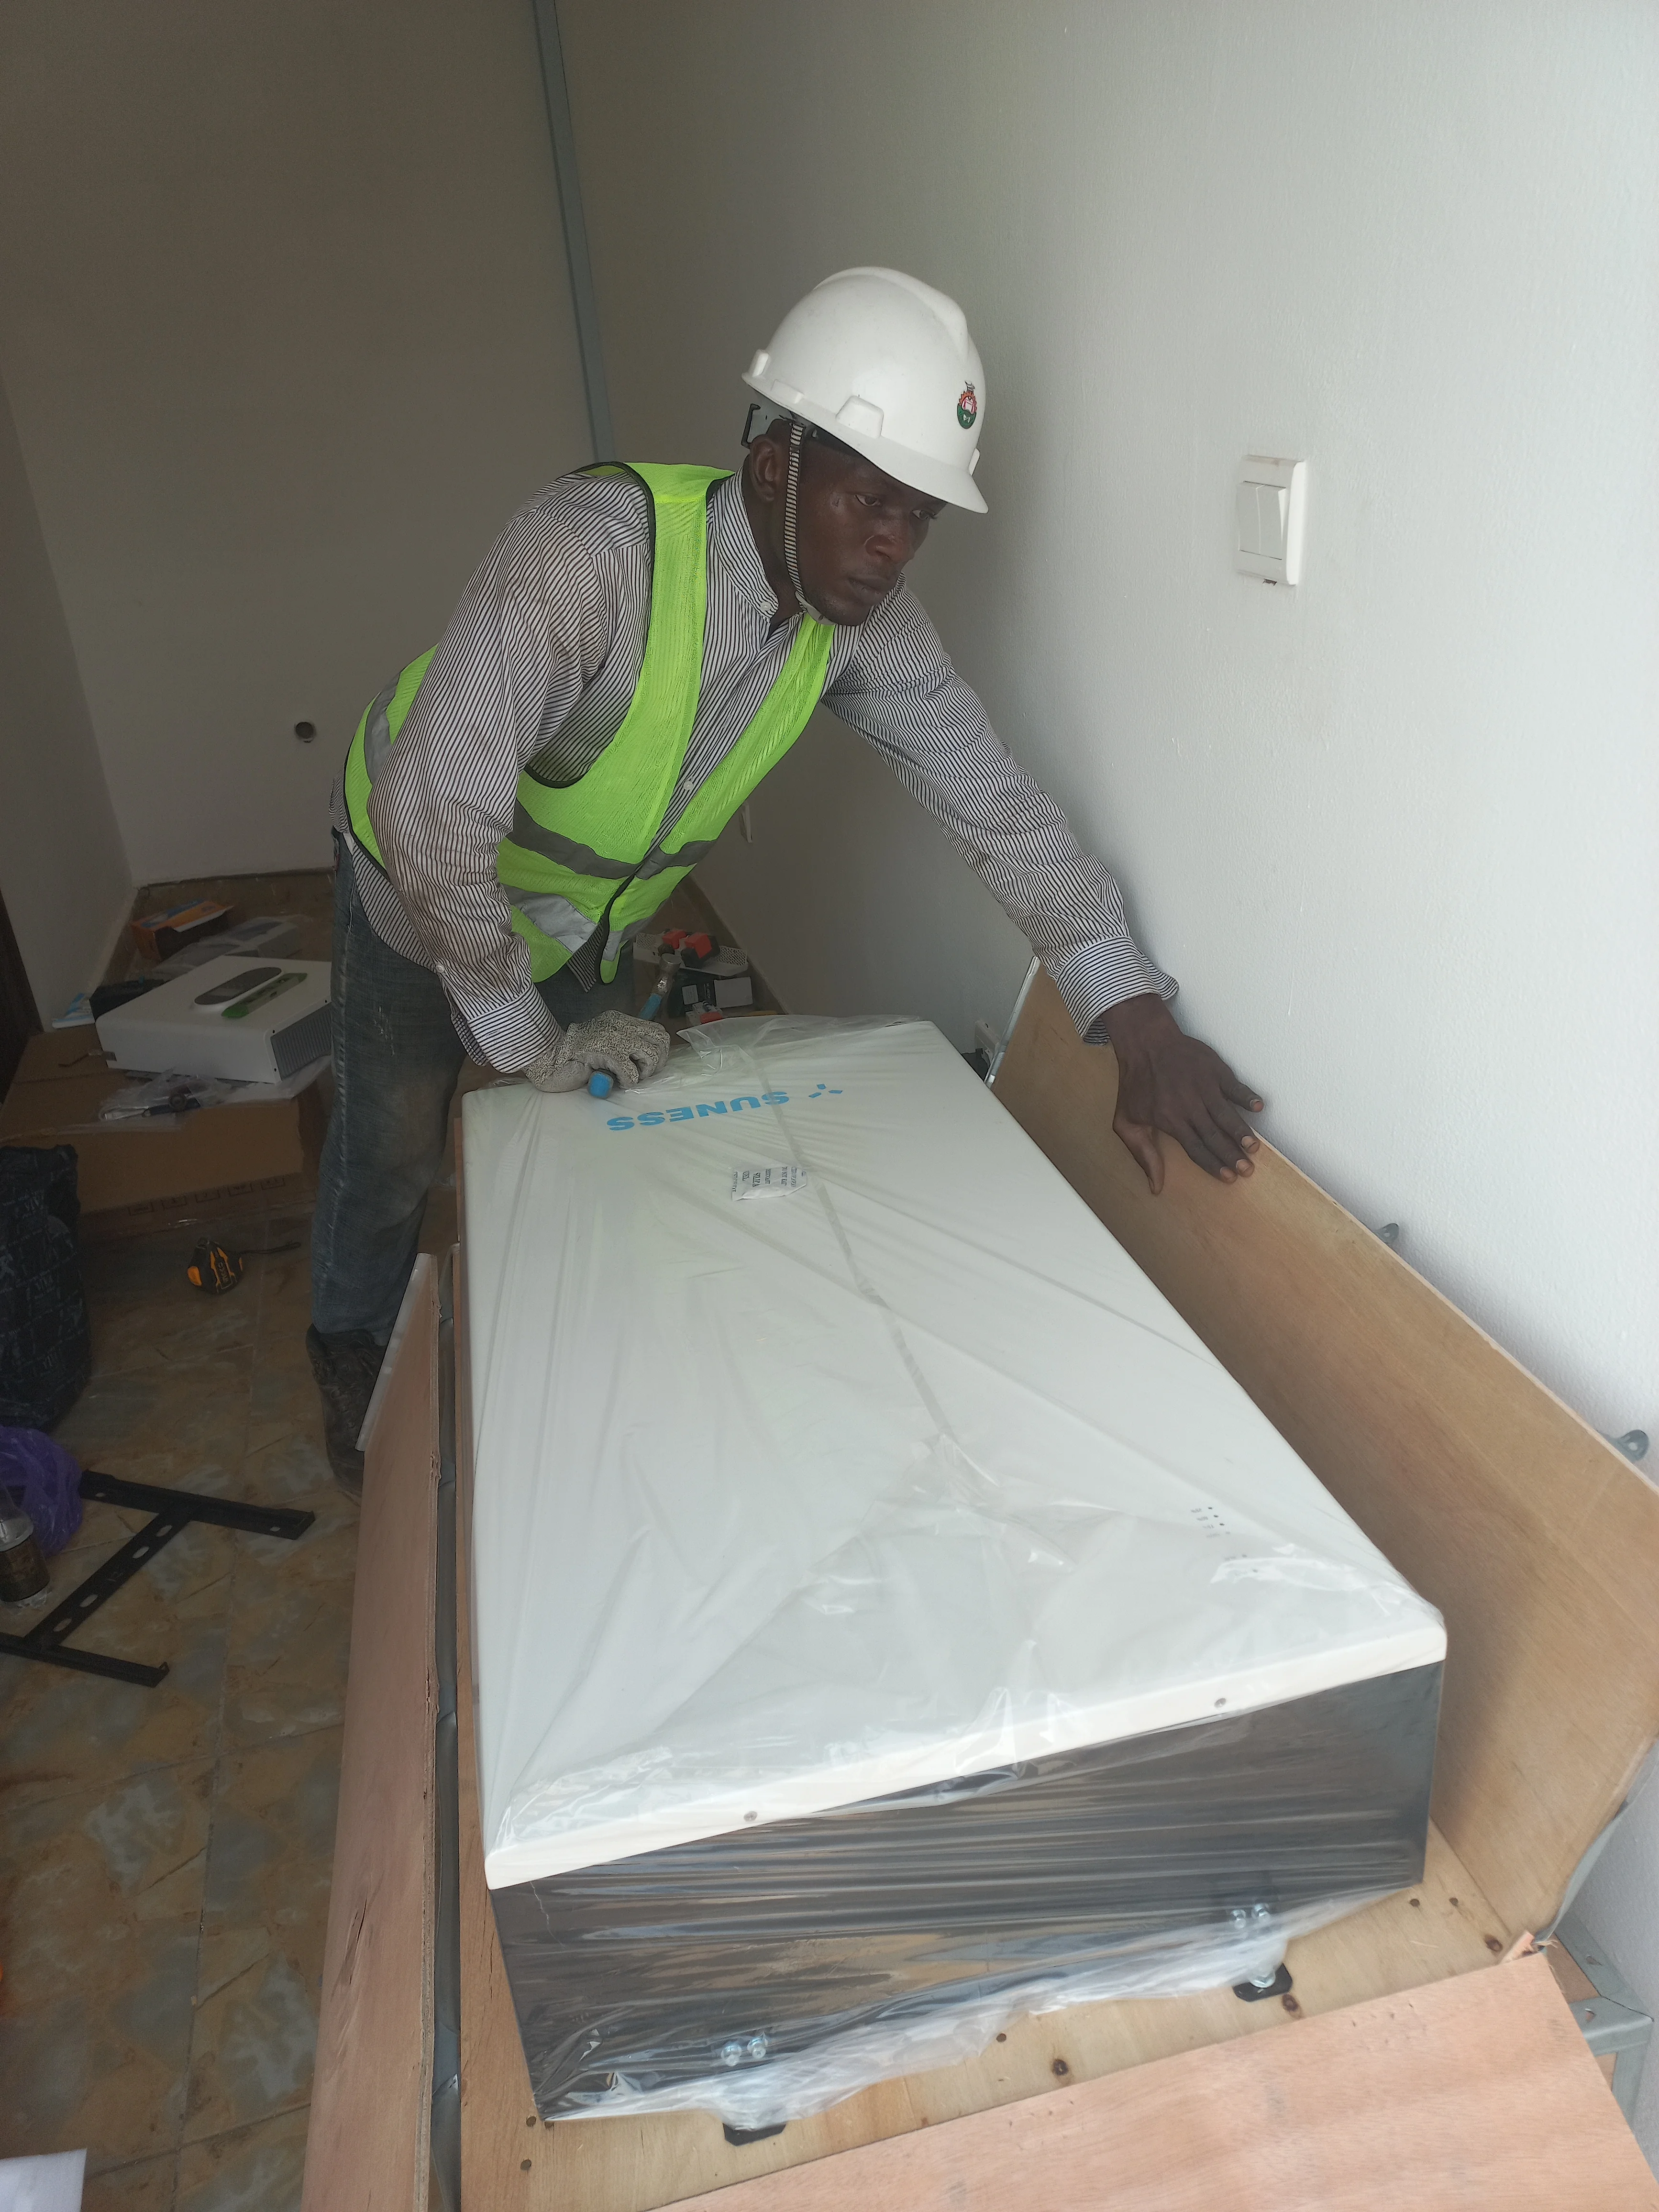
The SUNESS battery units arrived in heavy-duty wooden shipping crates (137kg each). The crates were carefully opened using hand tools (hammer and pry bar) to reveal the foam-packed battery units and mounting hardware. The AlpSolarr inverter was also unboxed, revealing the wall-mounting bracket and hardware accessories.

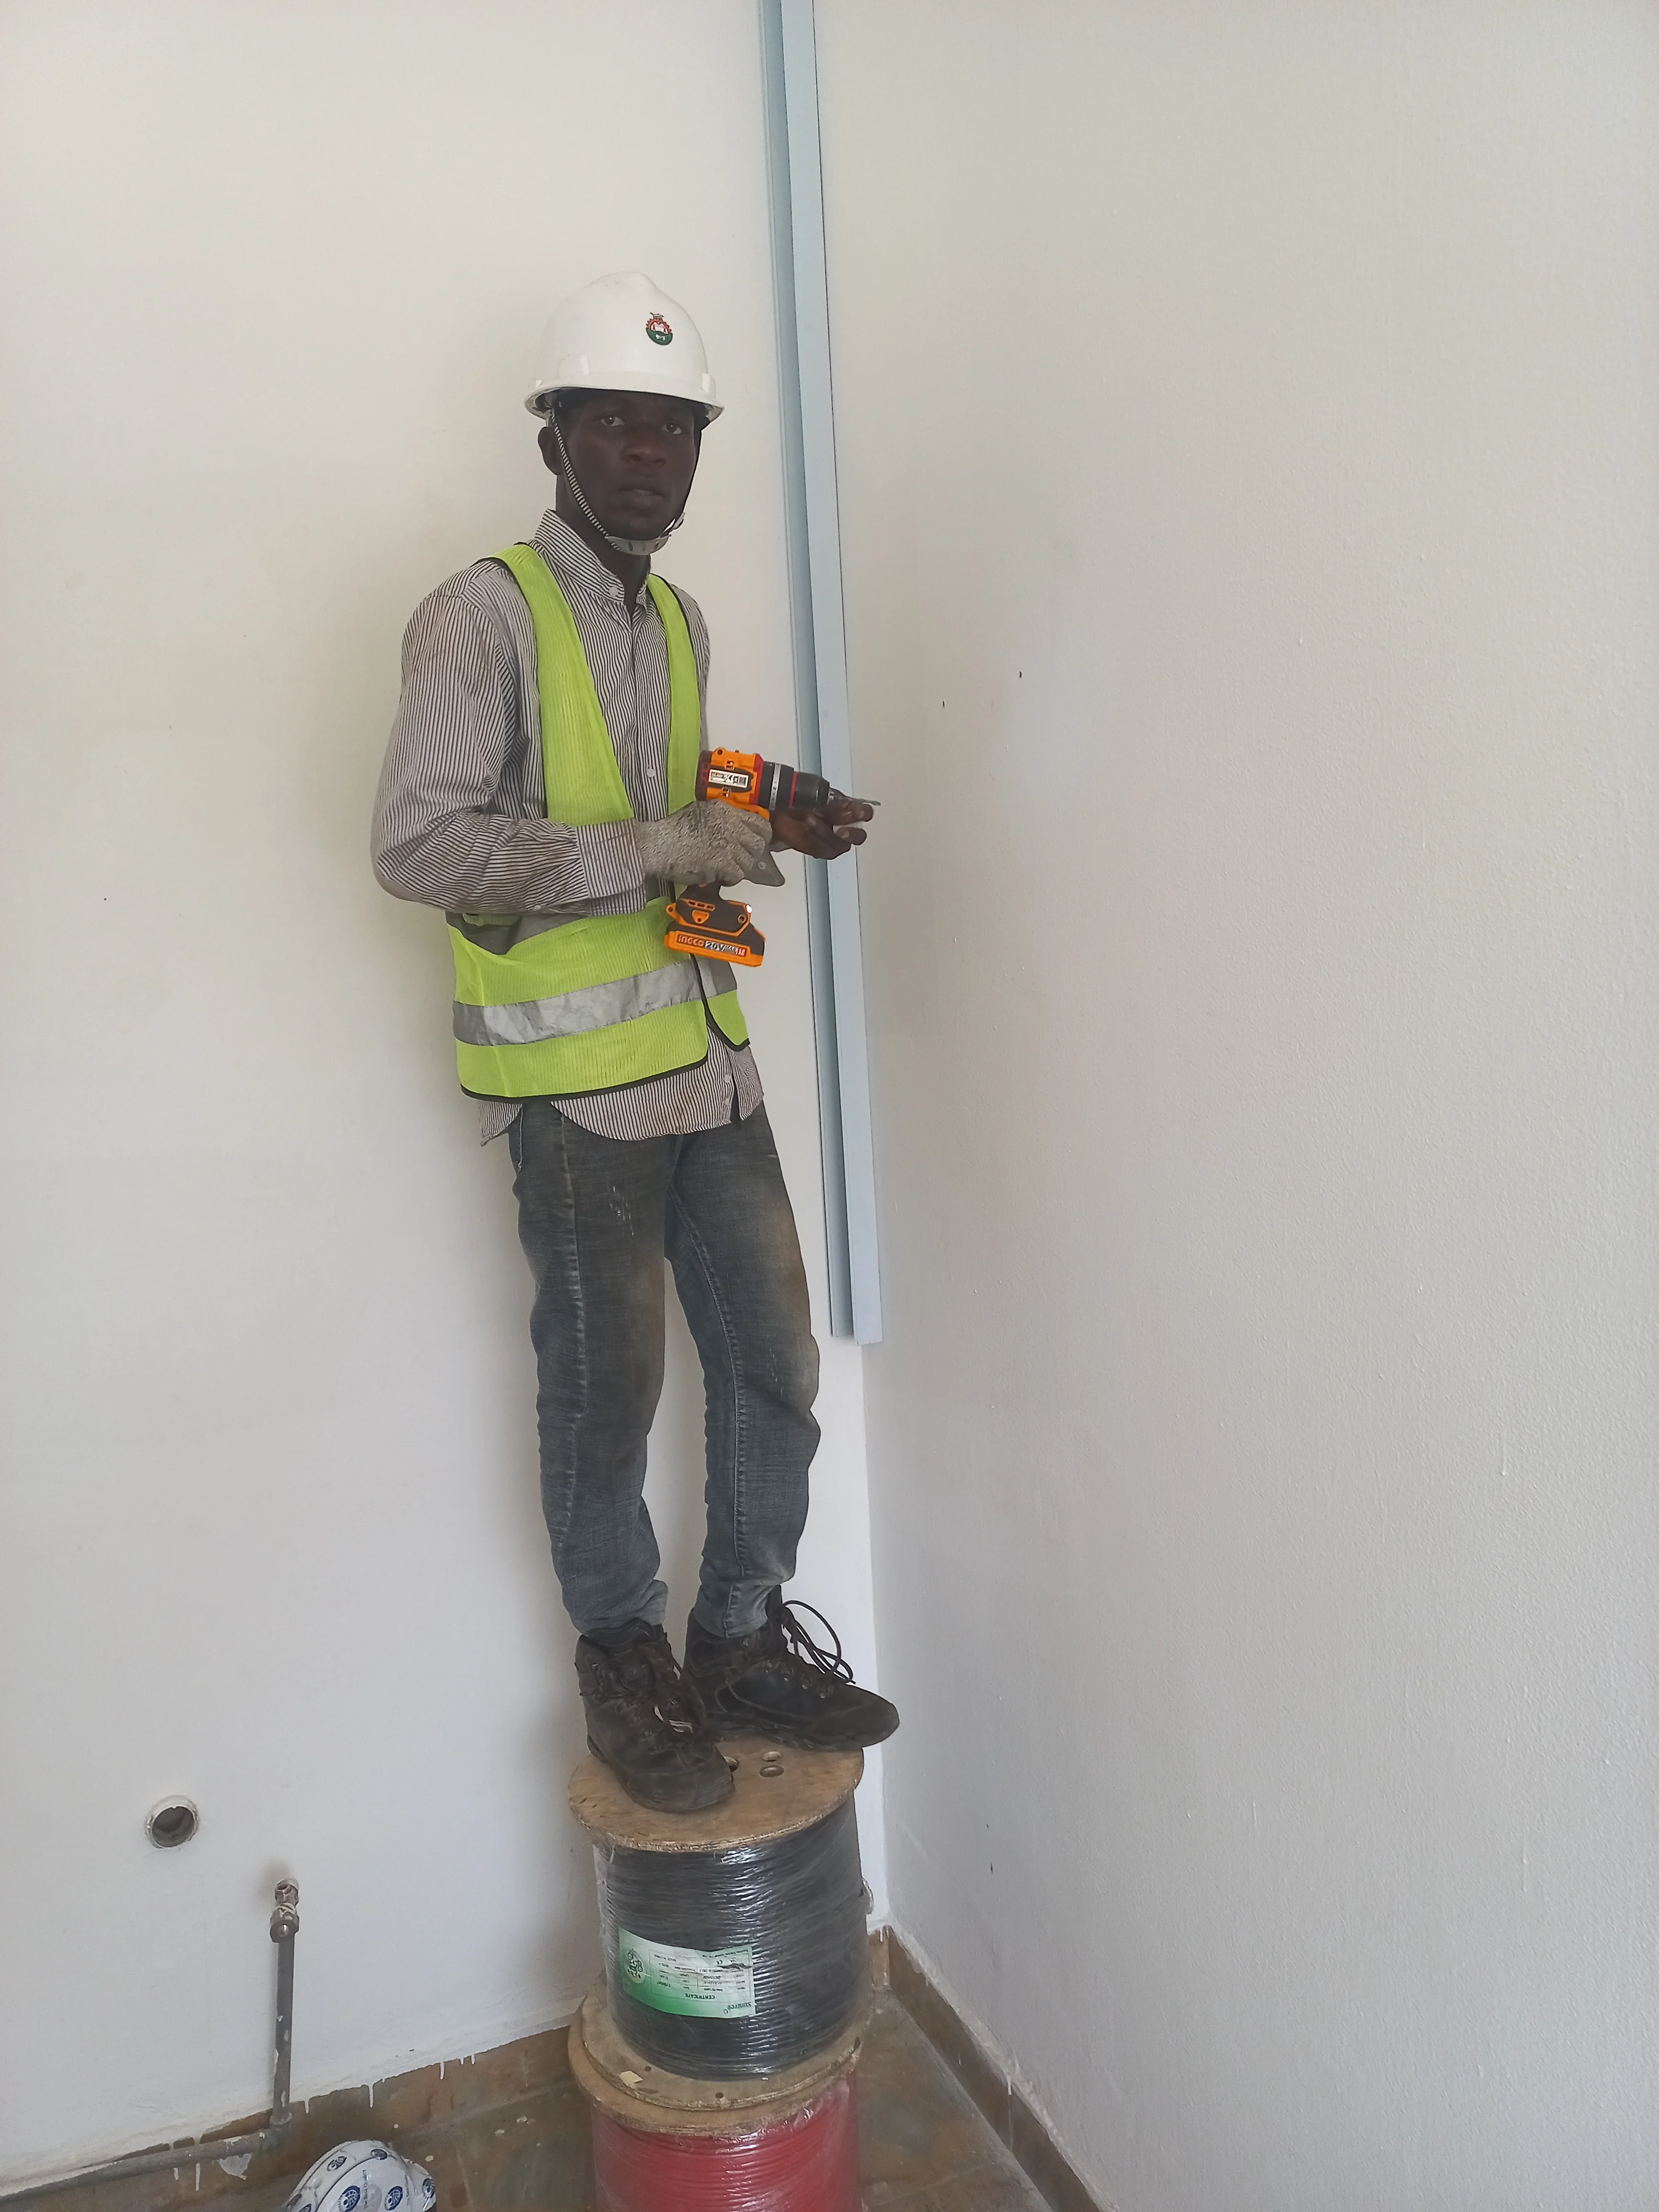
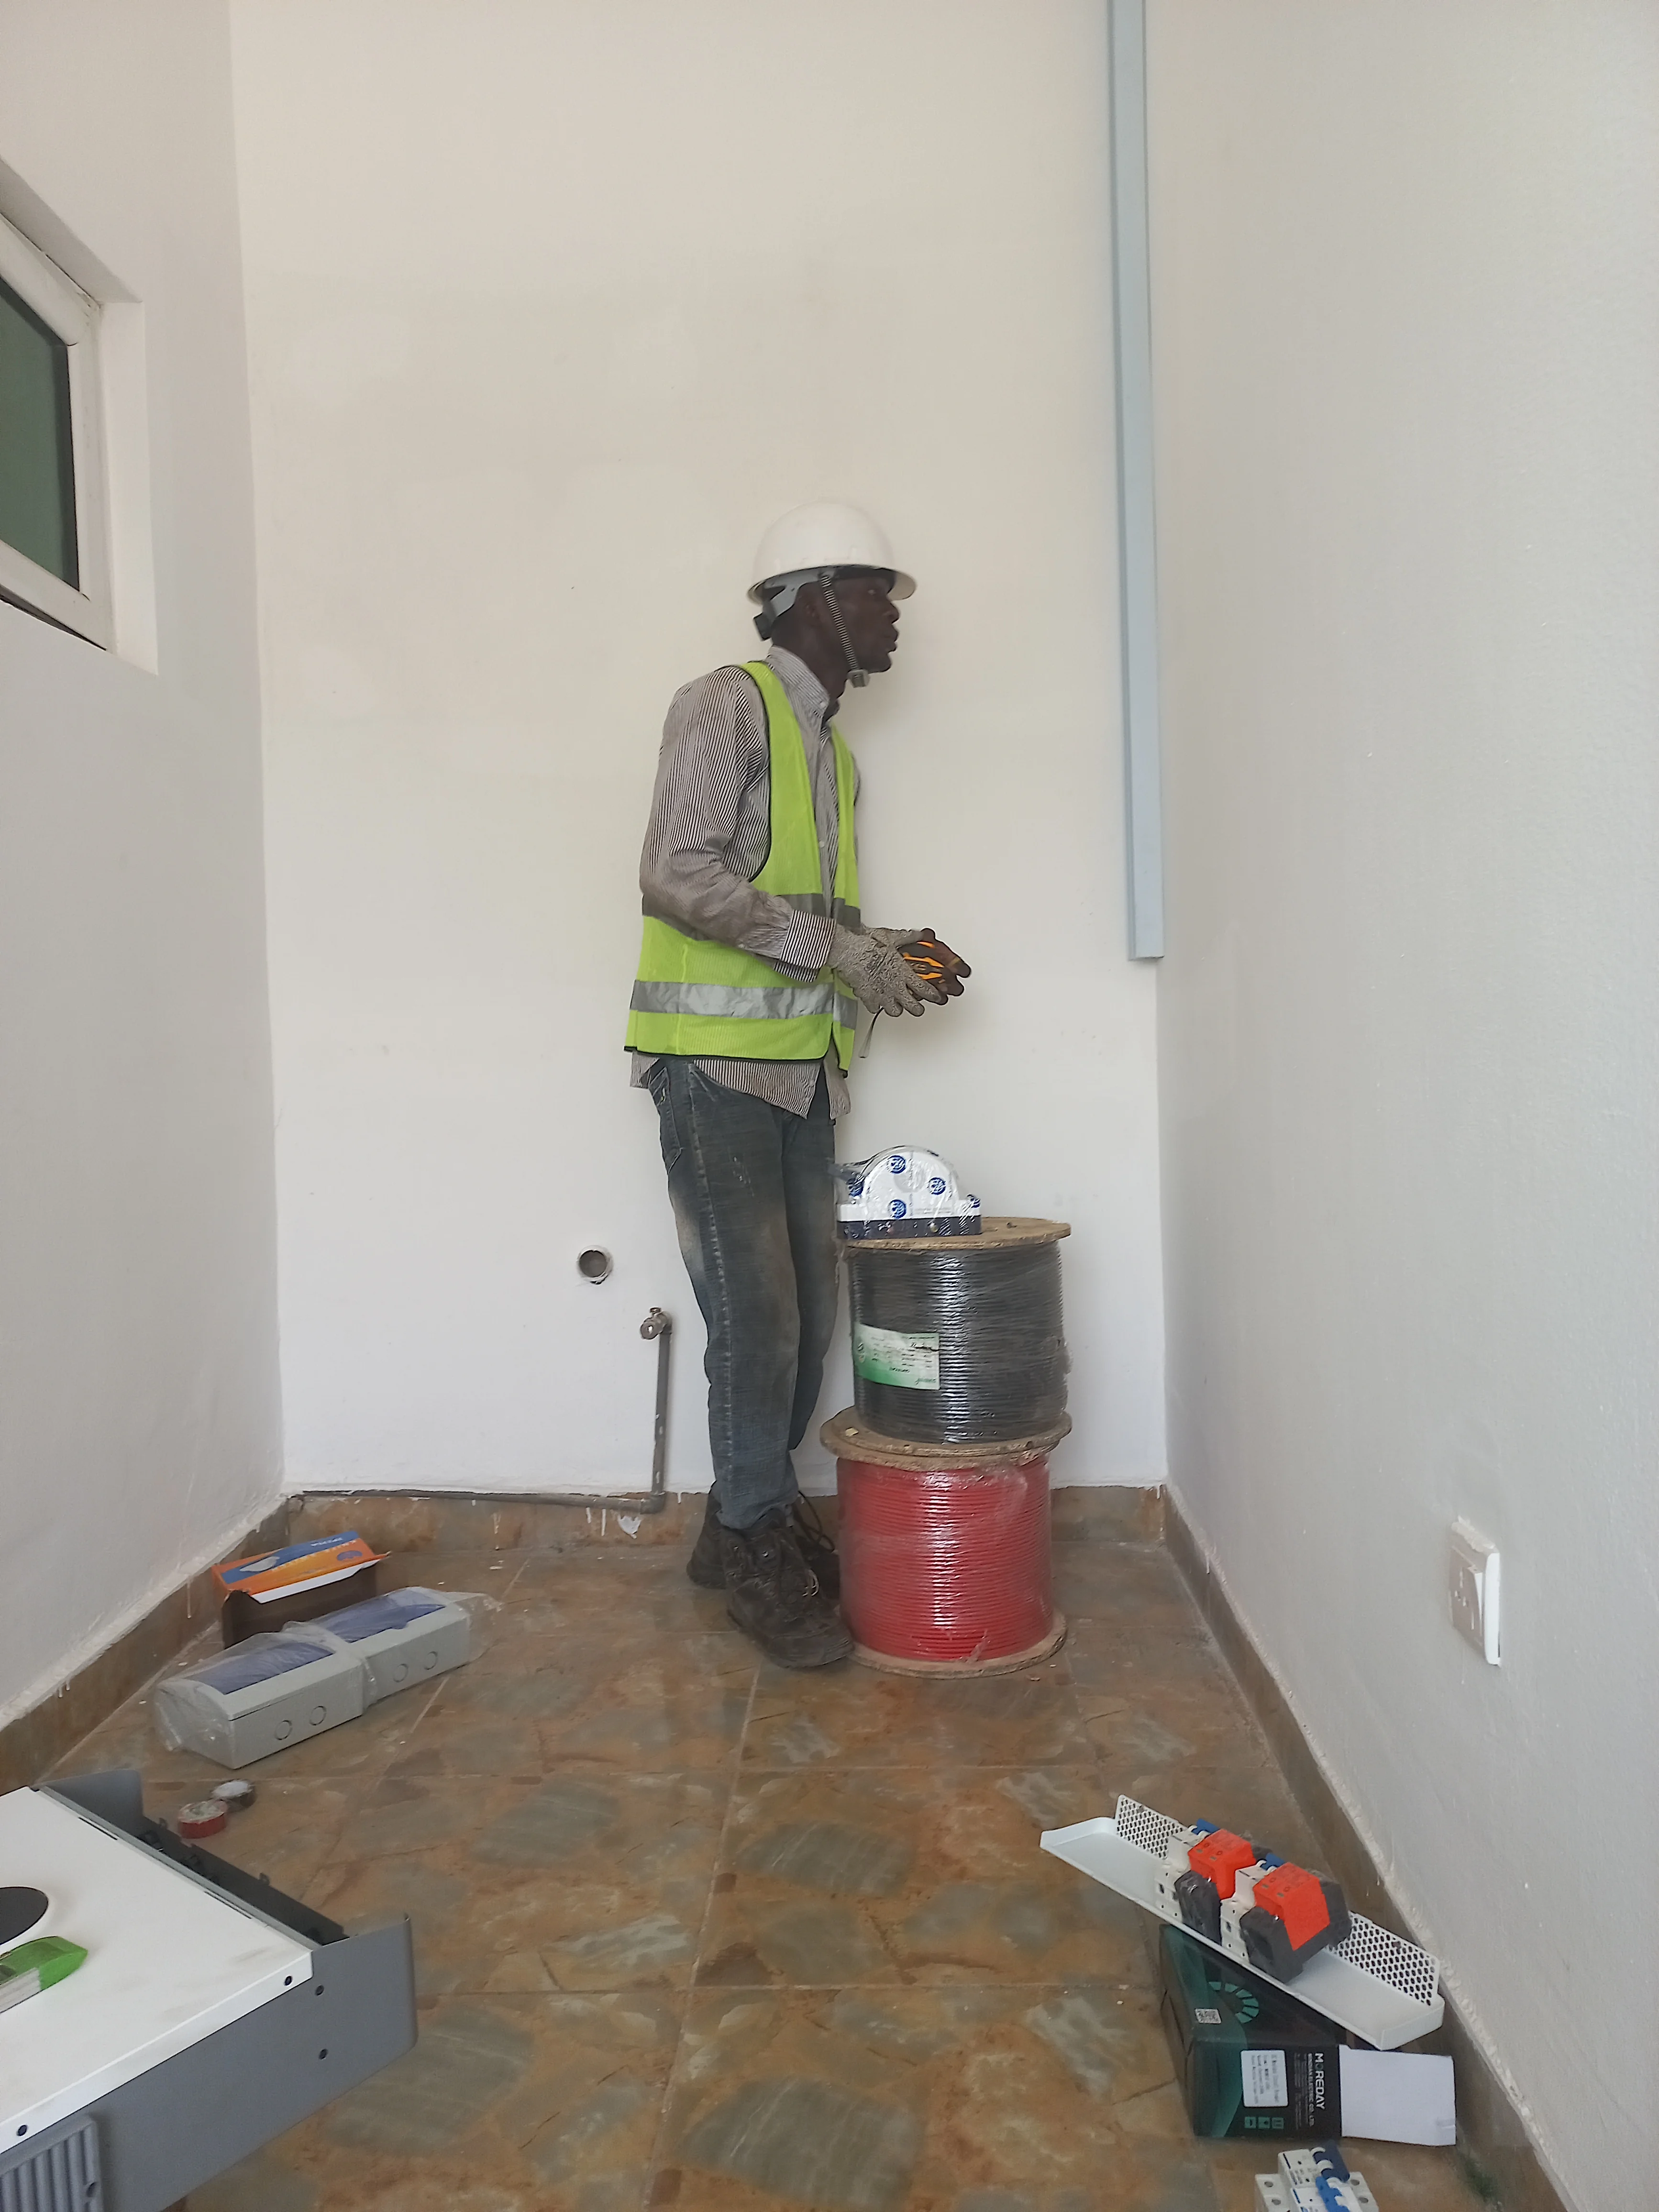
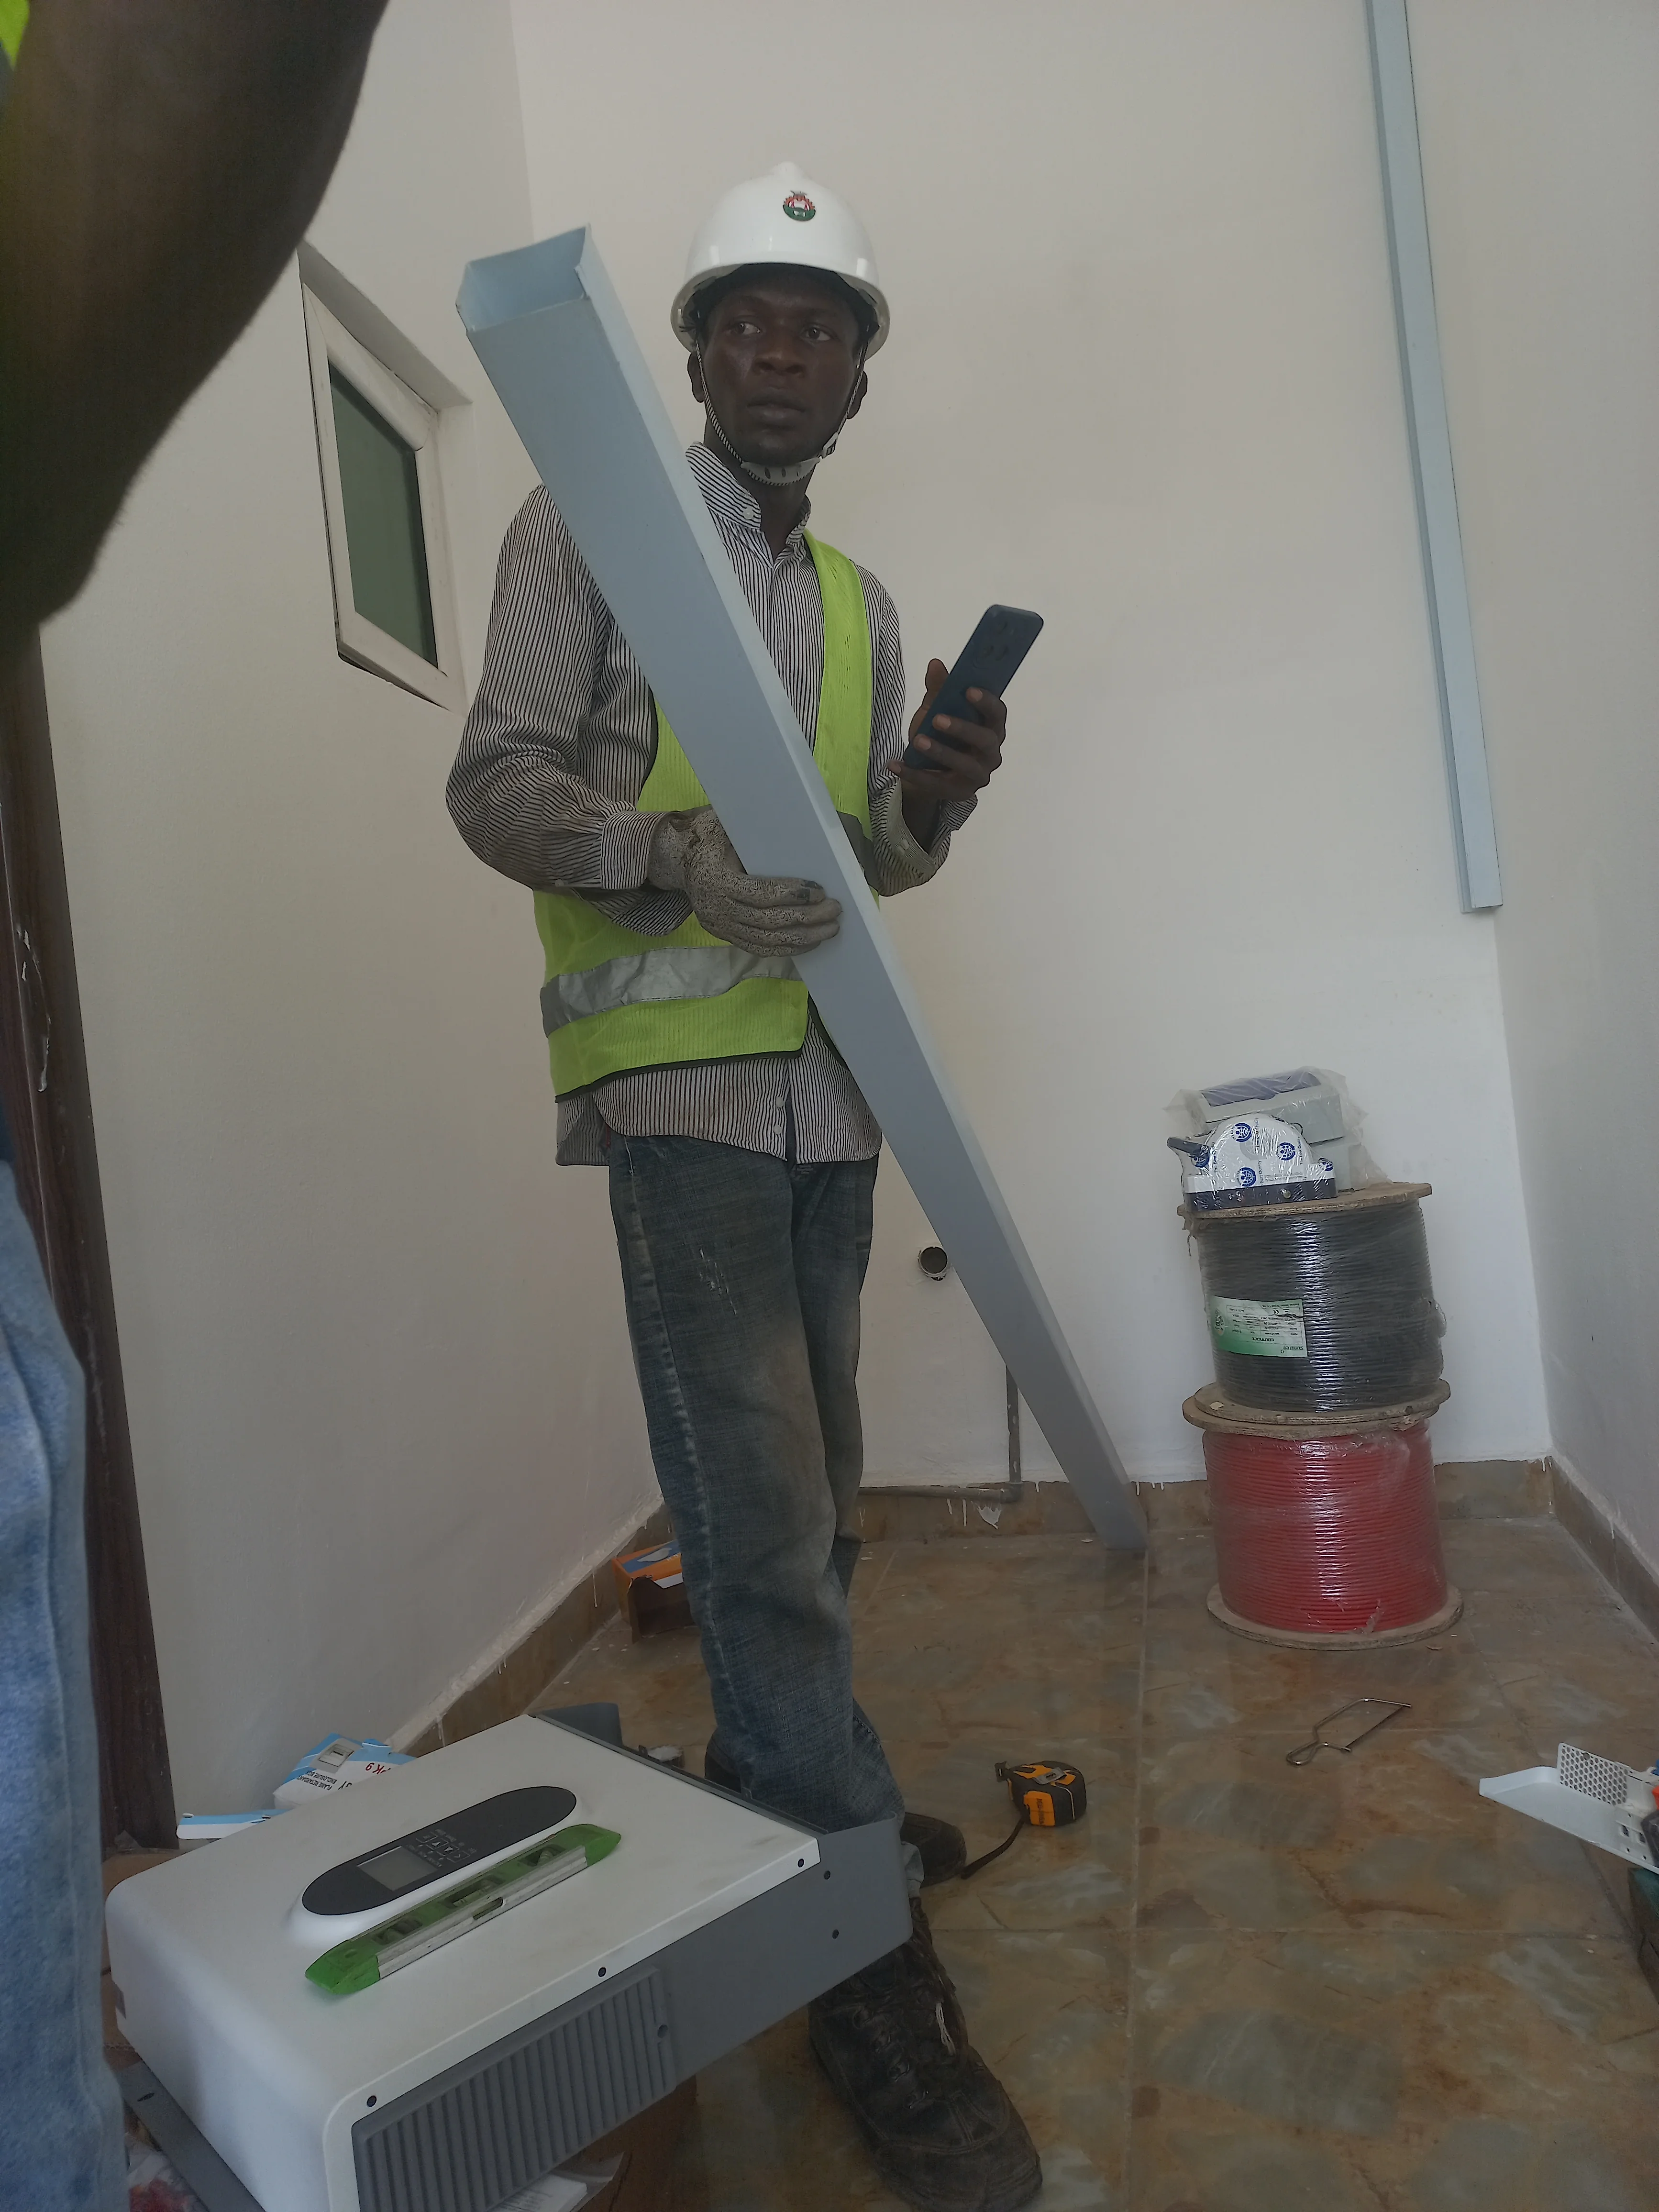
Phase 2: Indoor Electrical Infrastructure
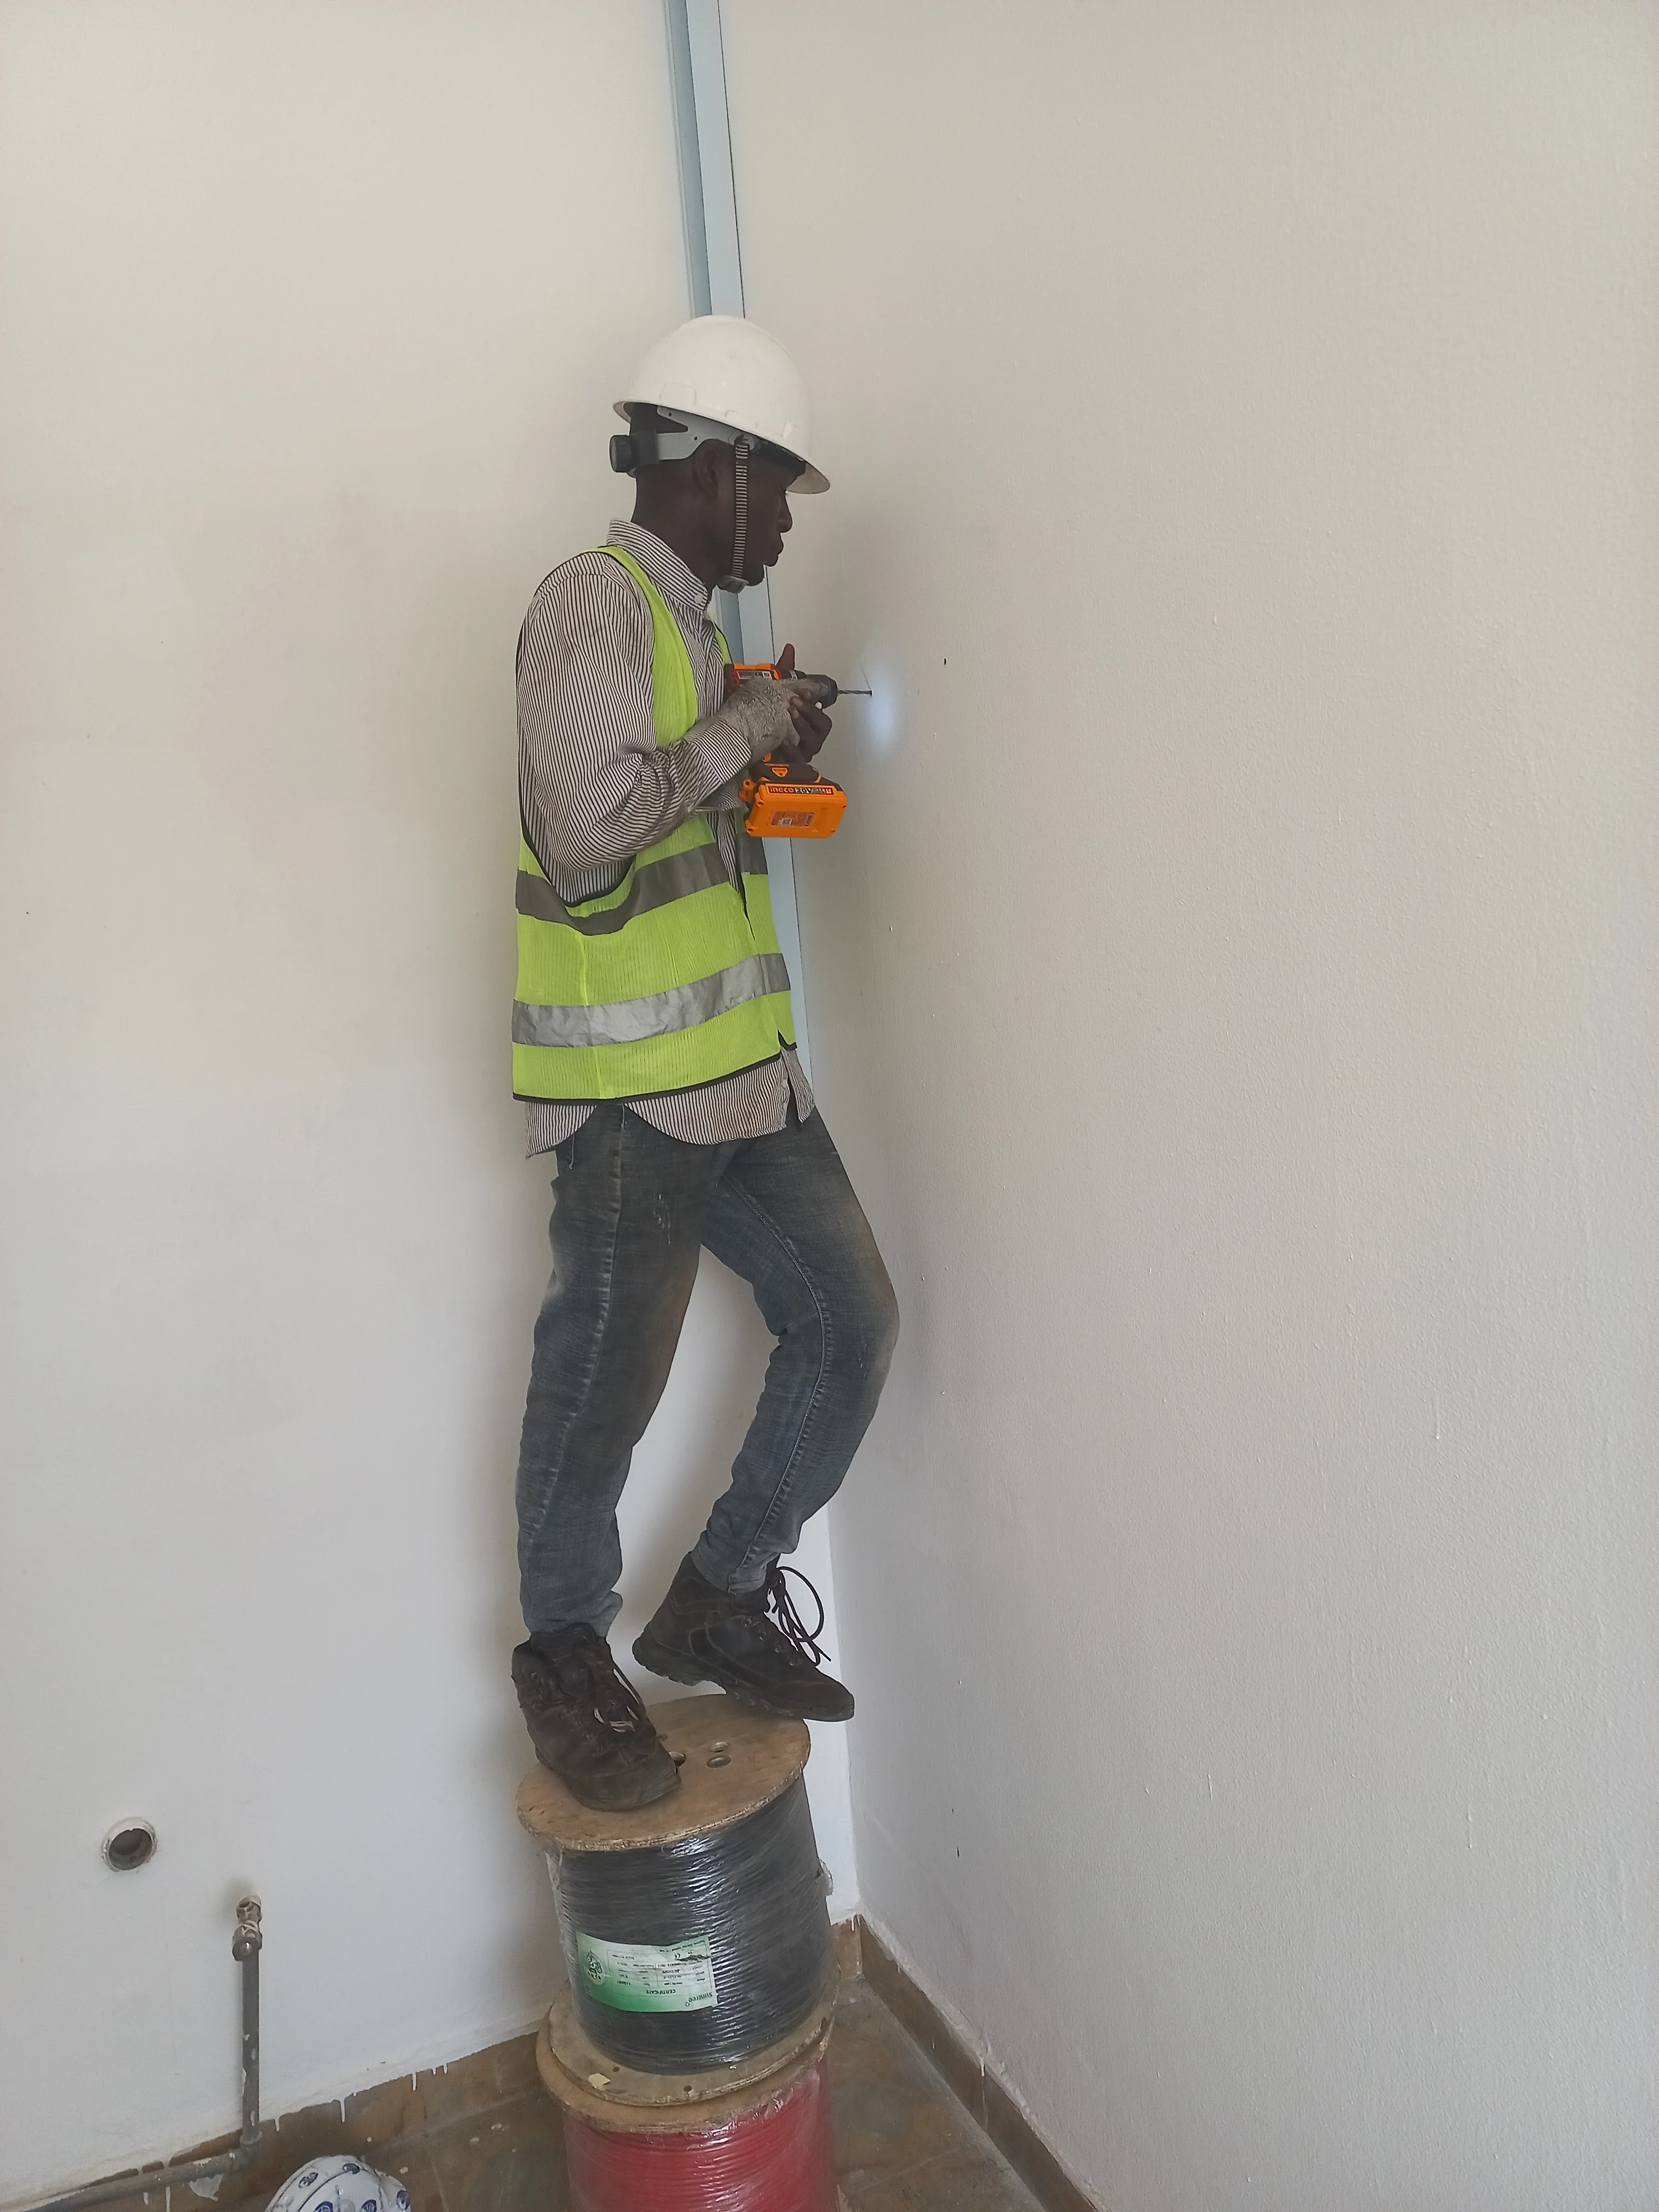
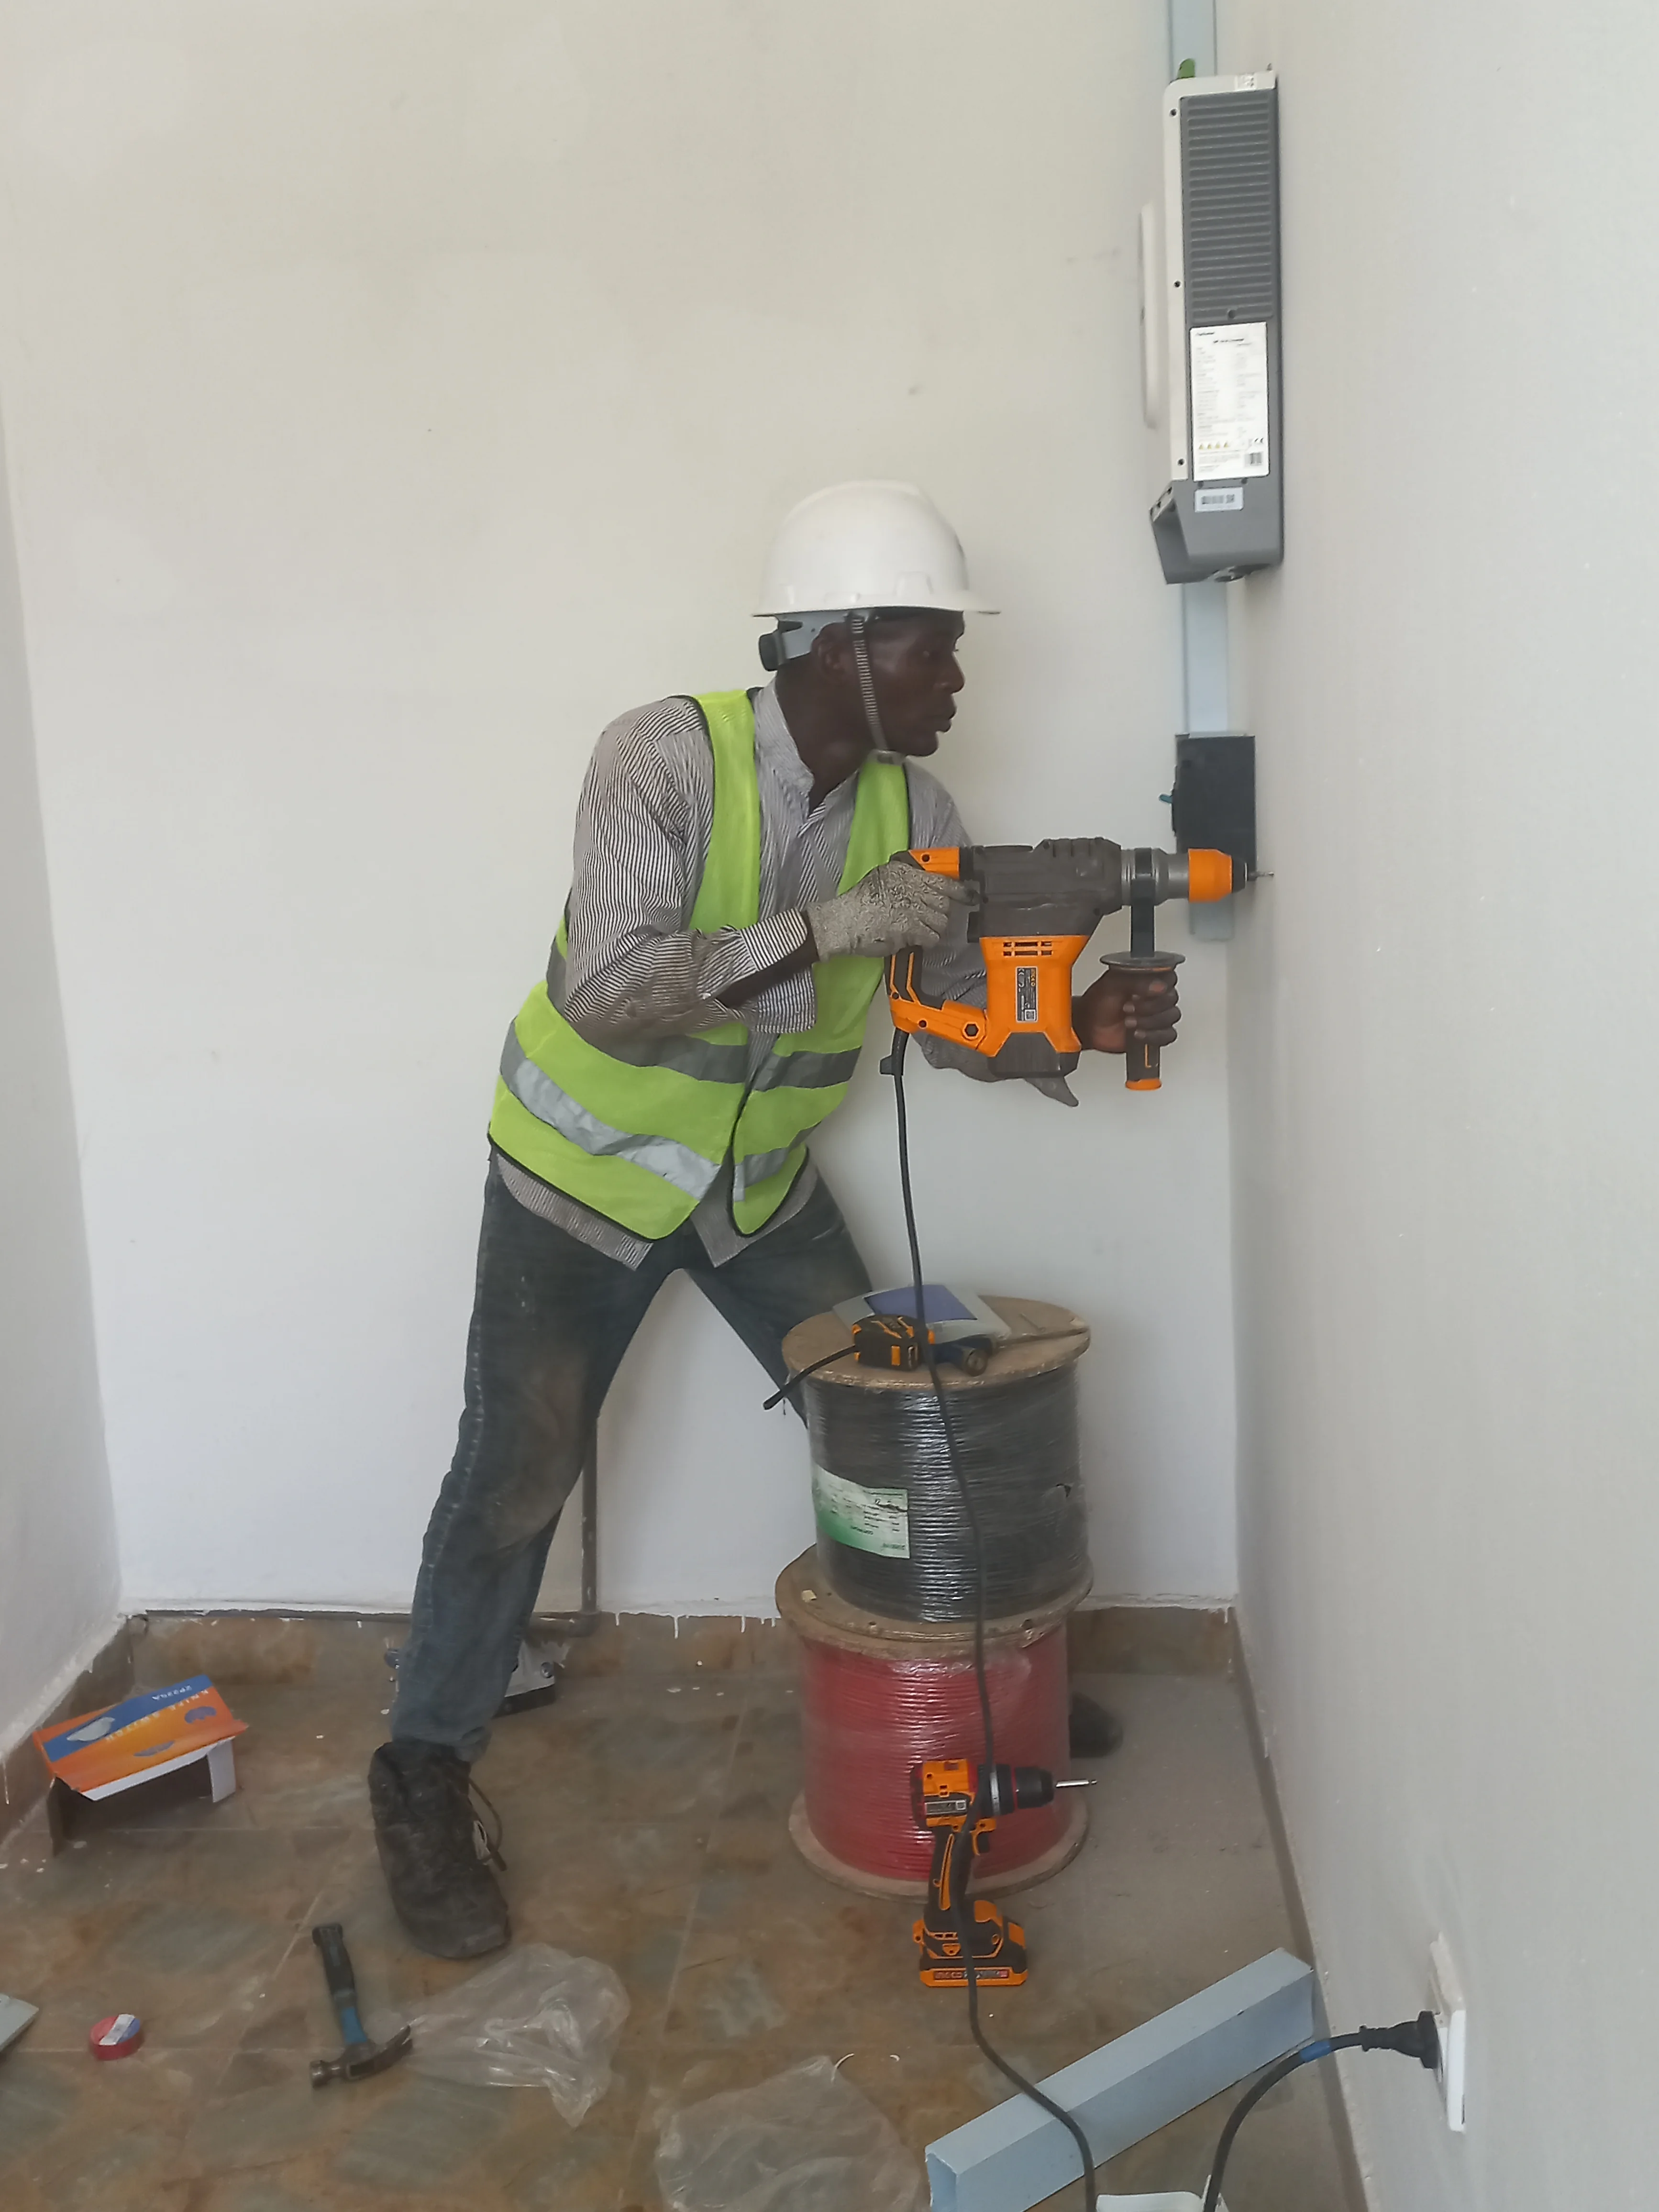
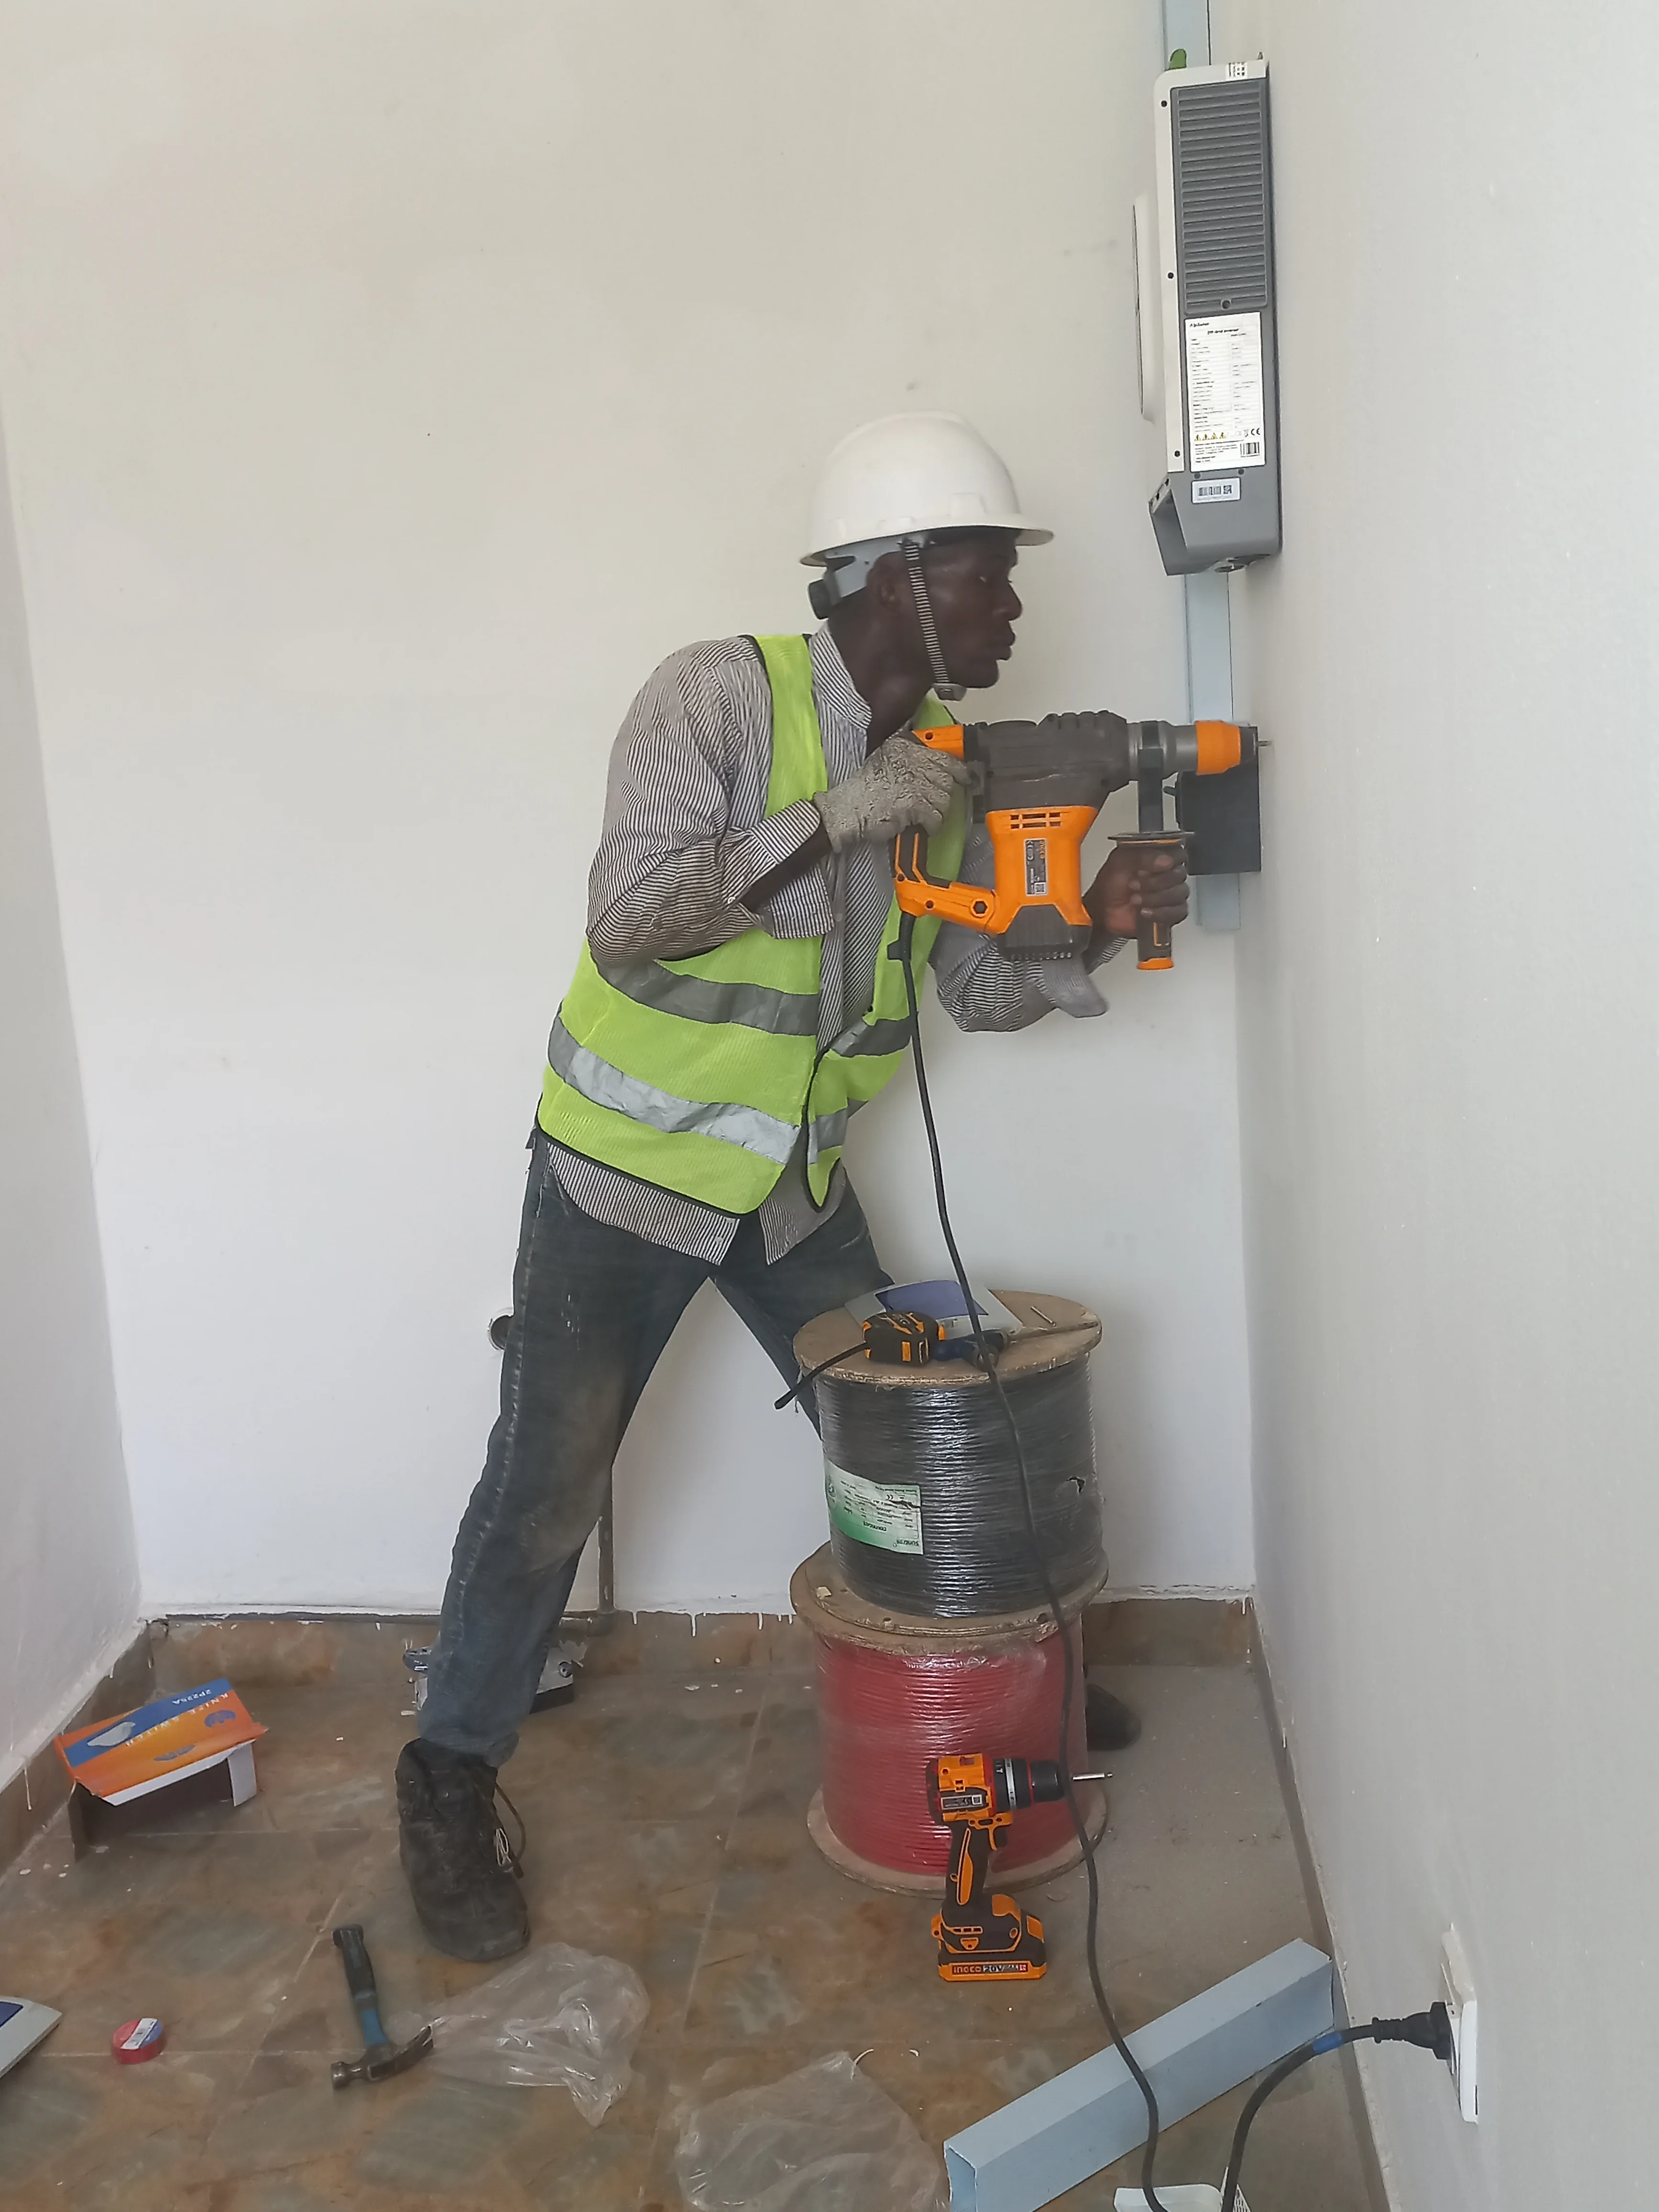
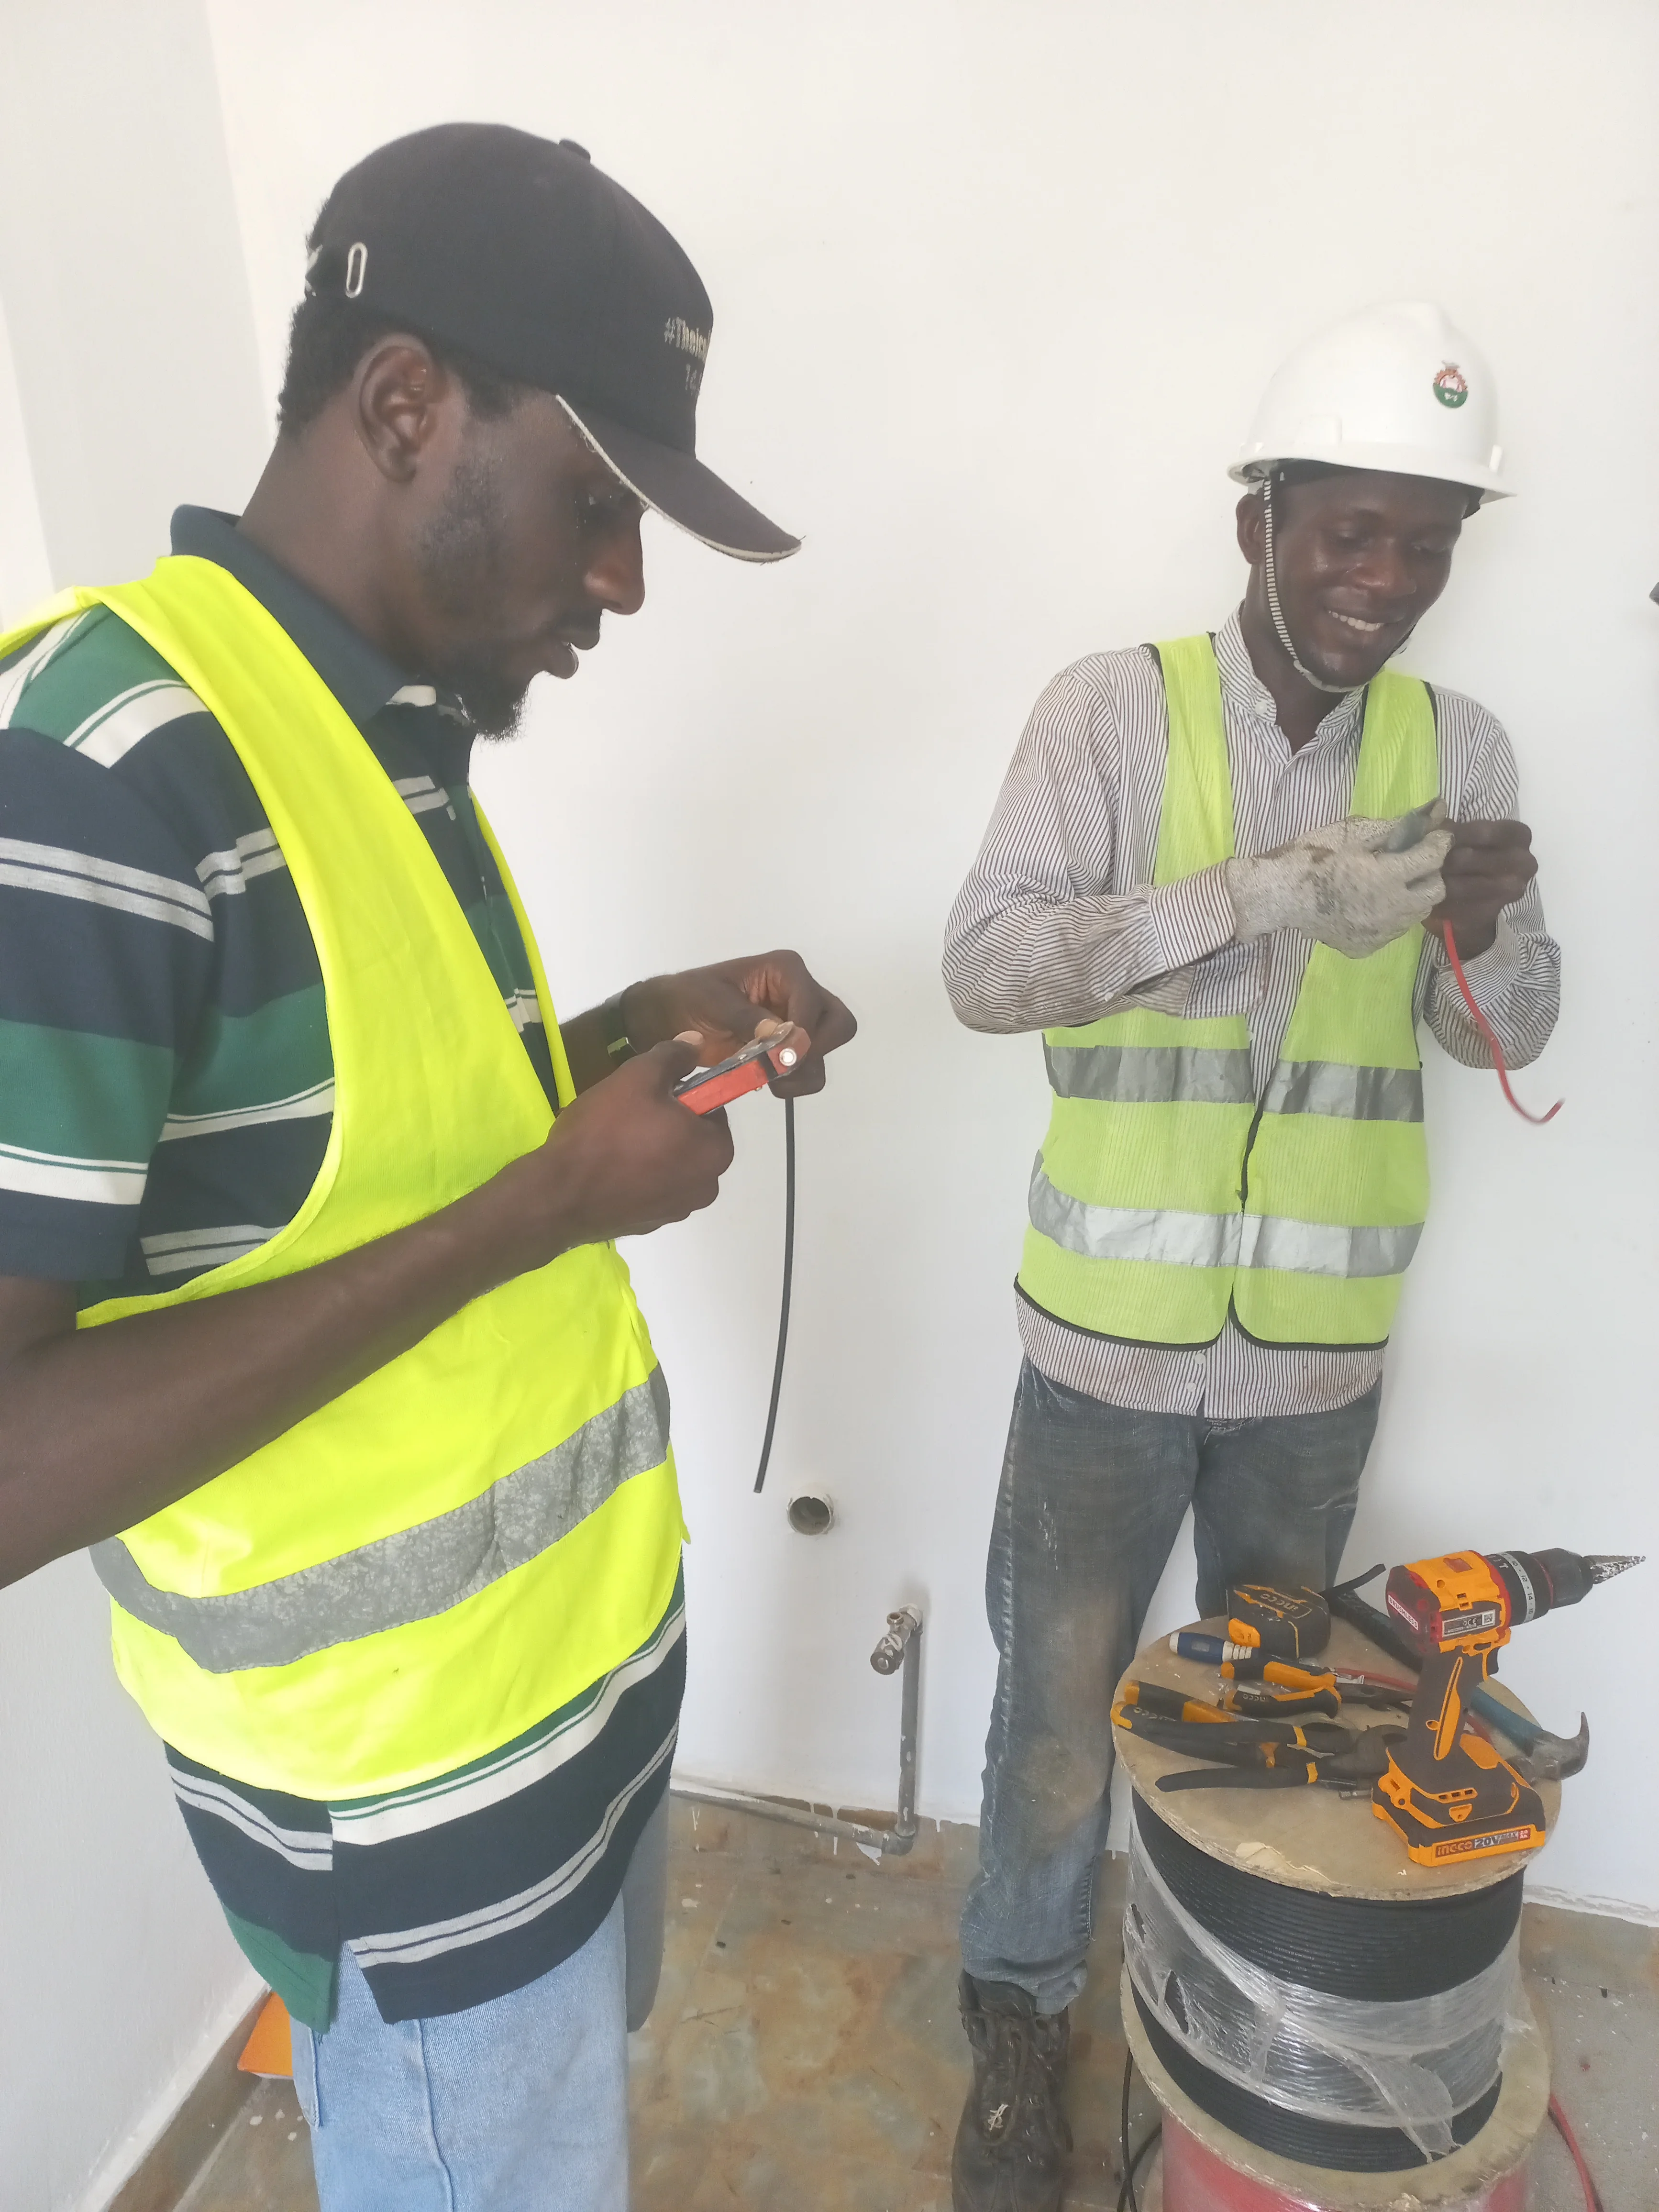
Cable trunking was measured, cut, and installed vertically on the designated equipment wall using a hammer drill. This provided the backbone for mounting the inverter and routing cables neatly. Spools of red (positive) and black (negative) DC cable were prepared for the PV string connections.

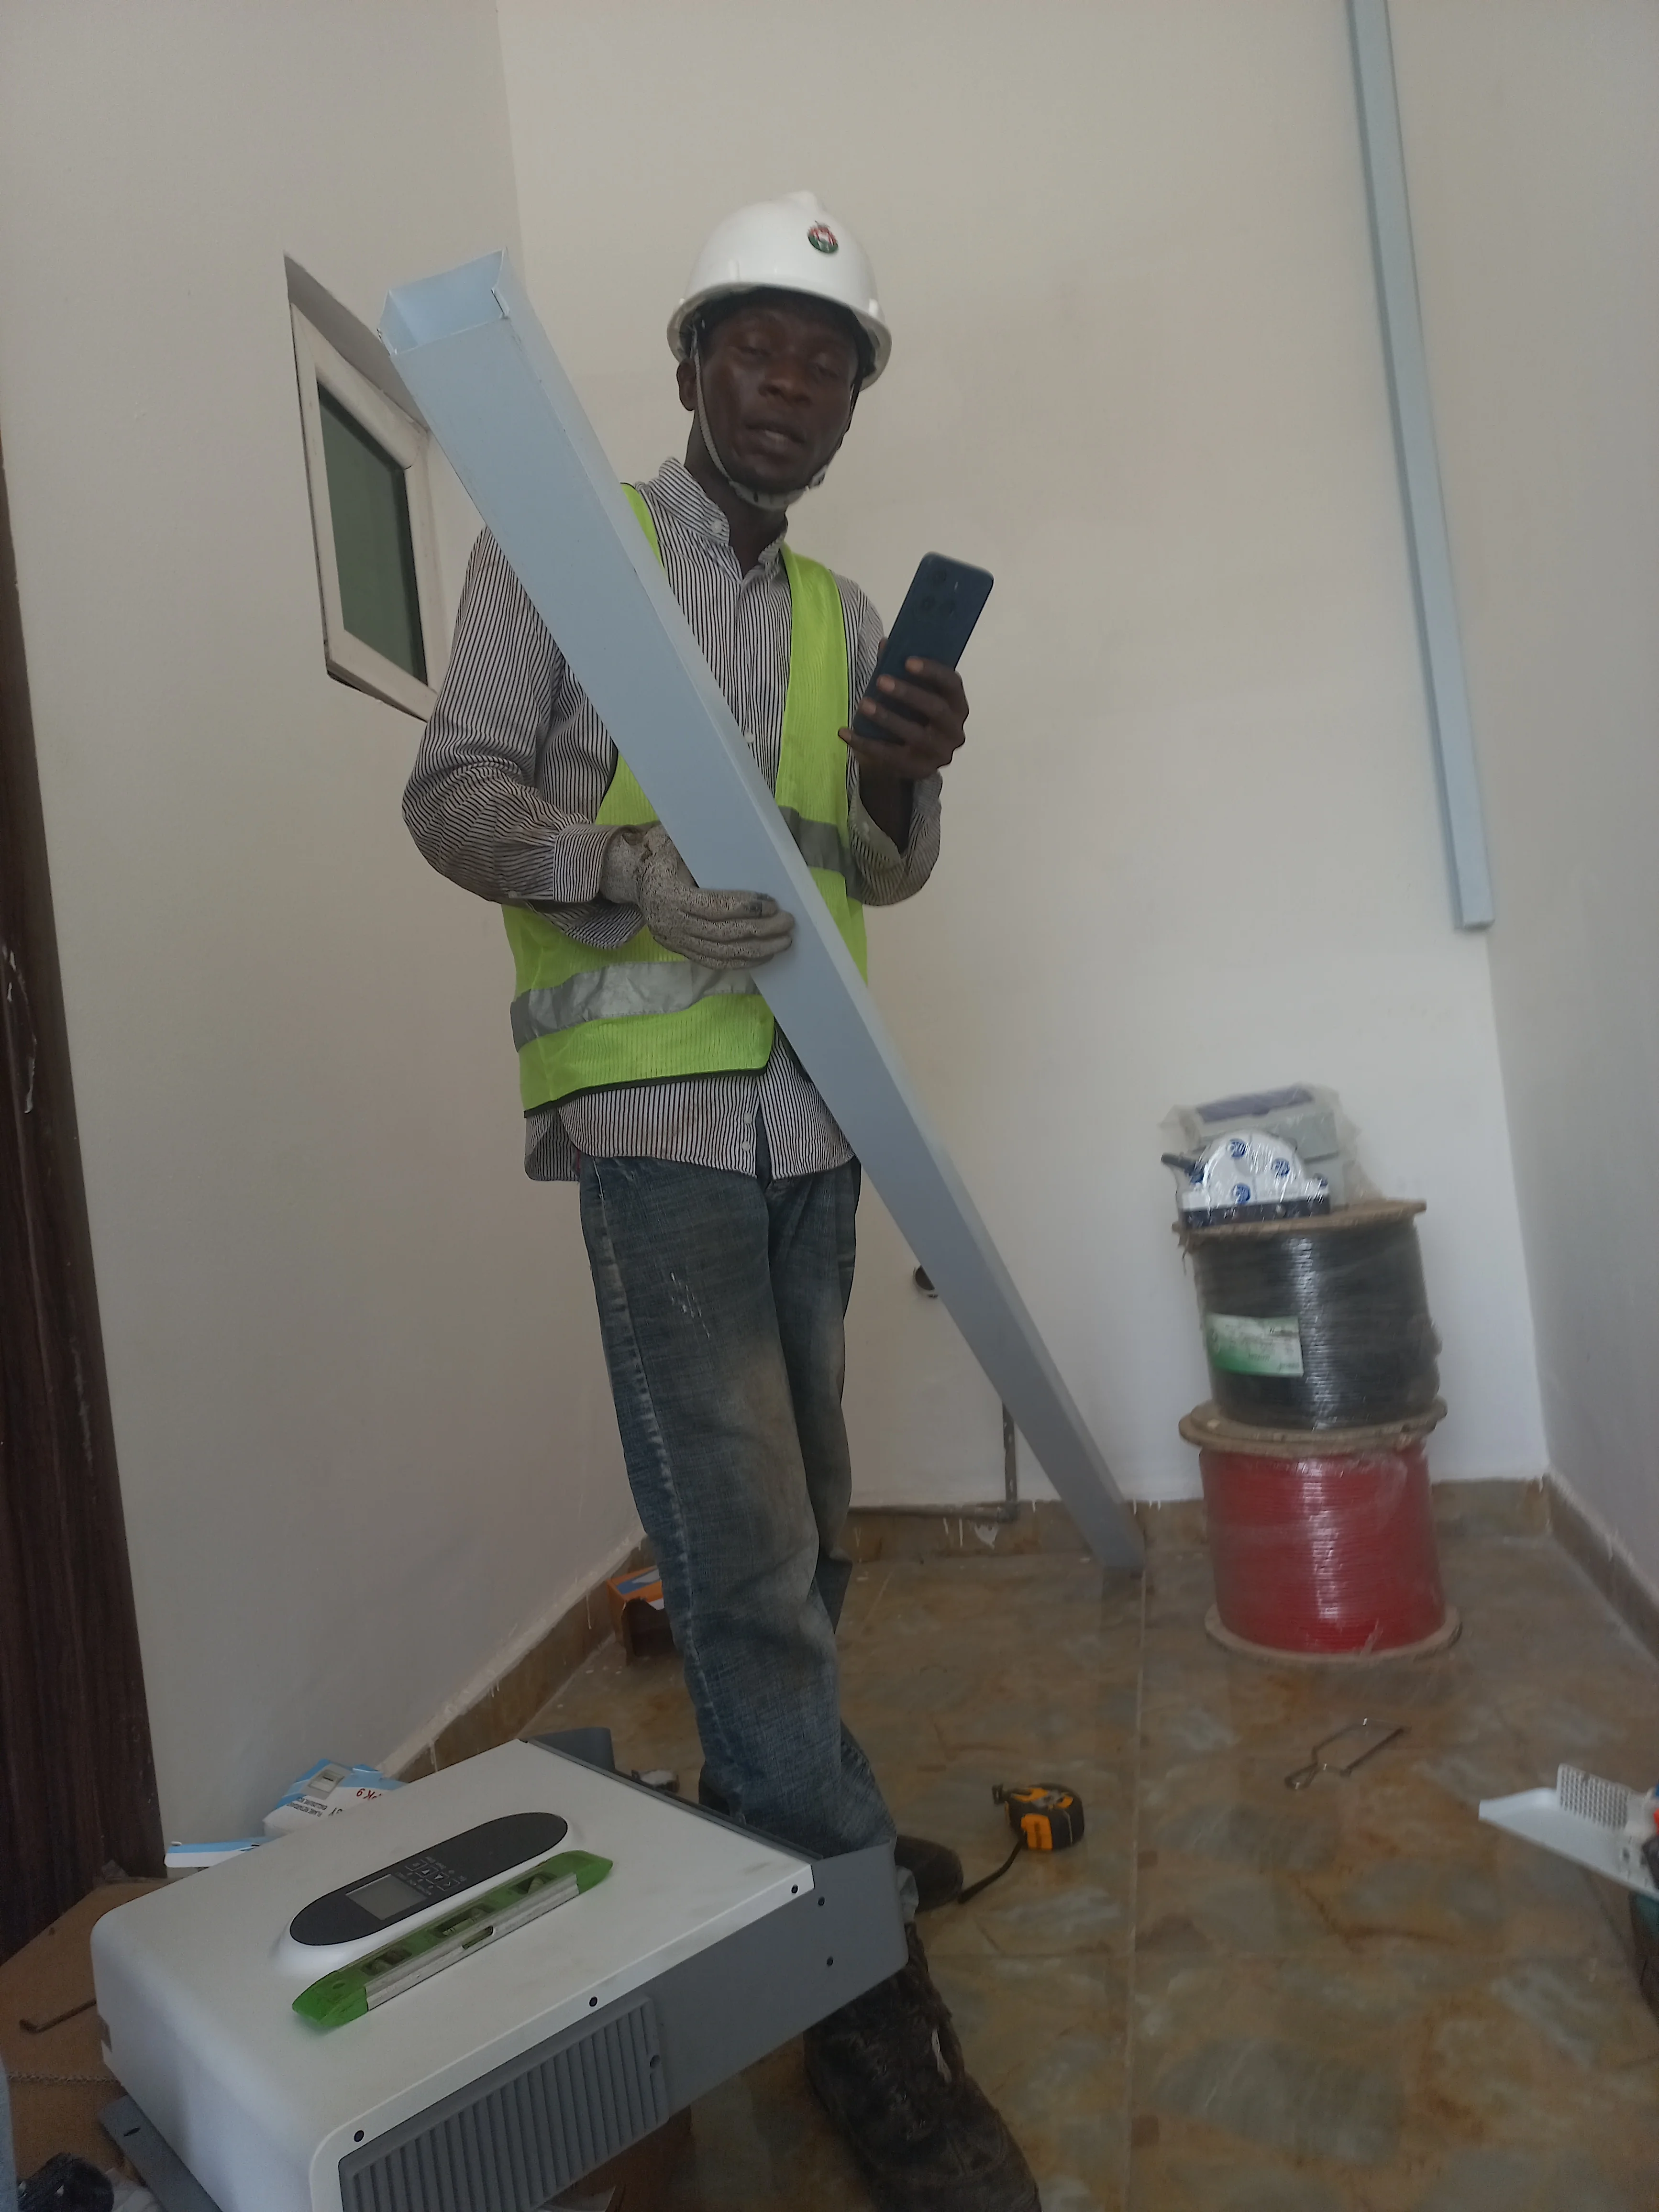
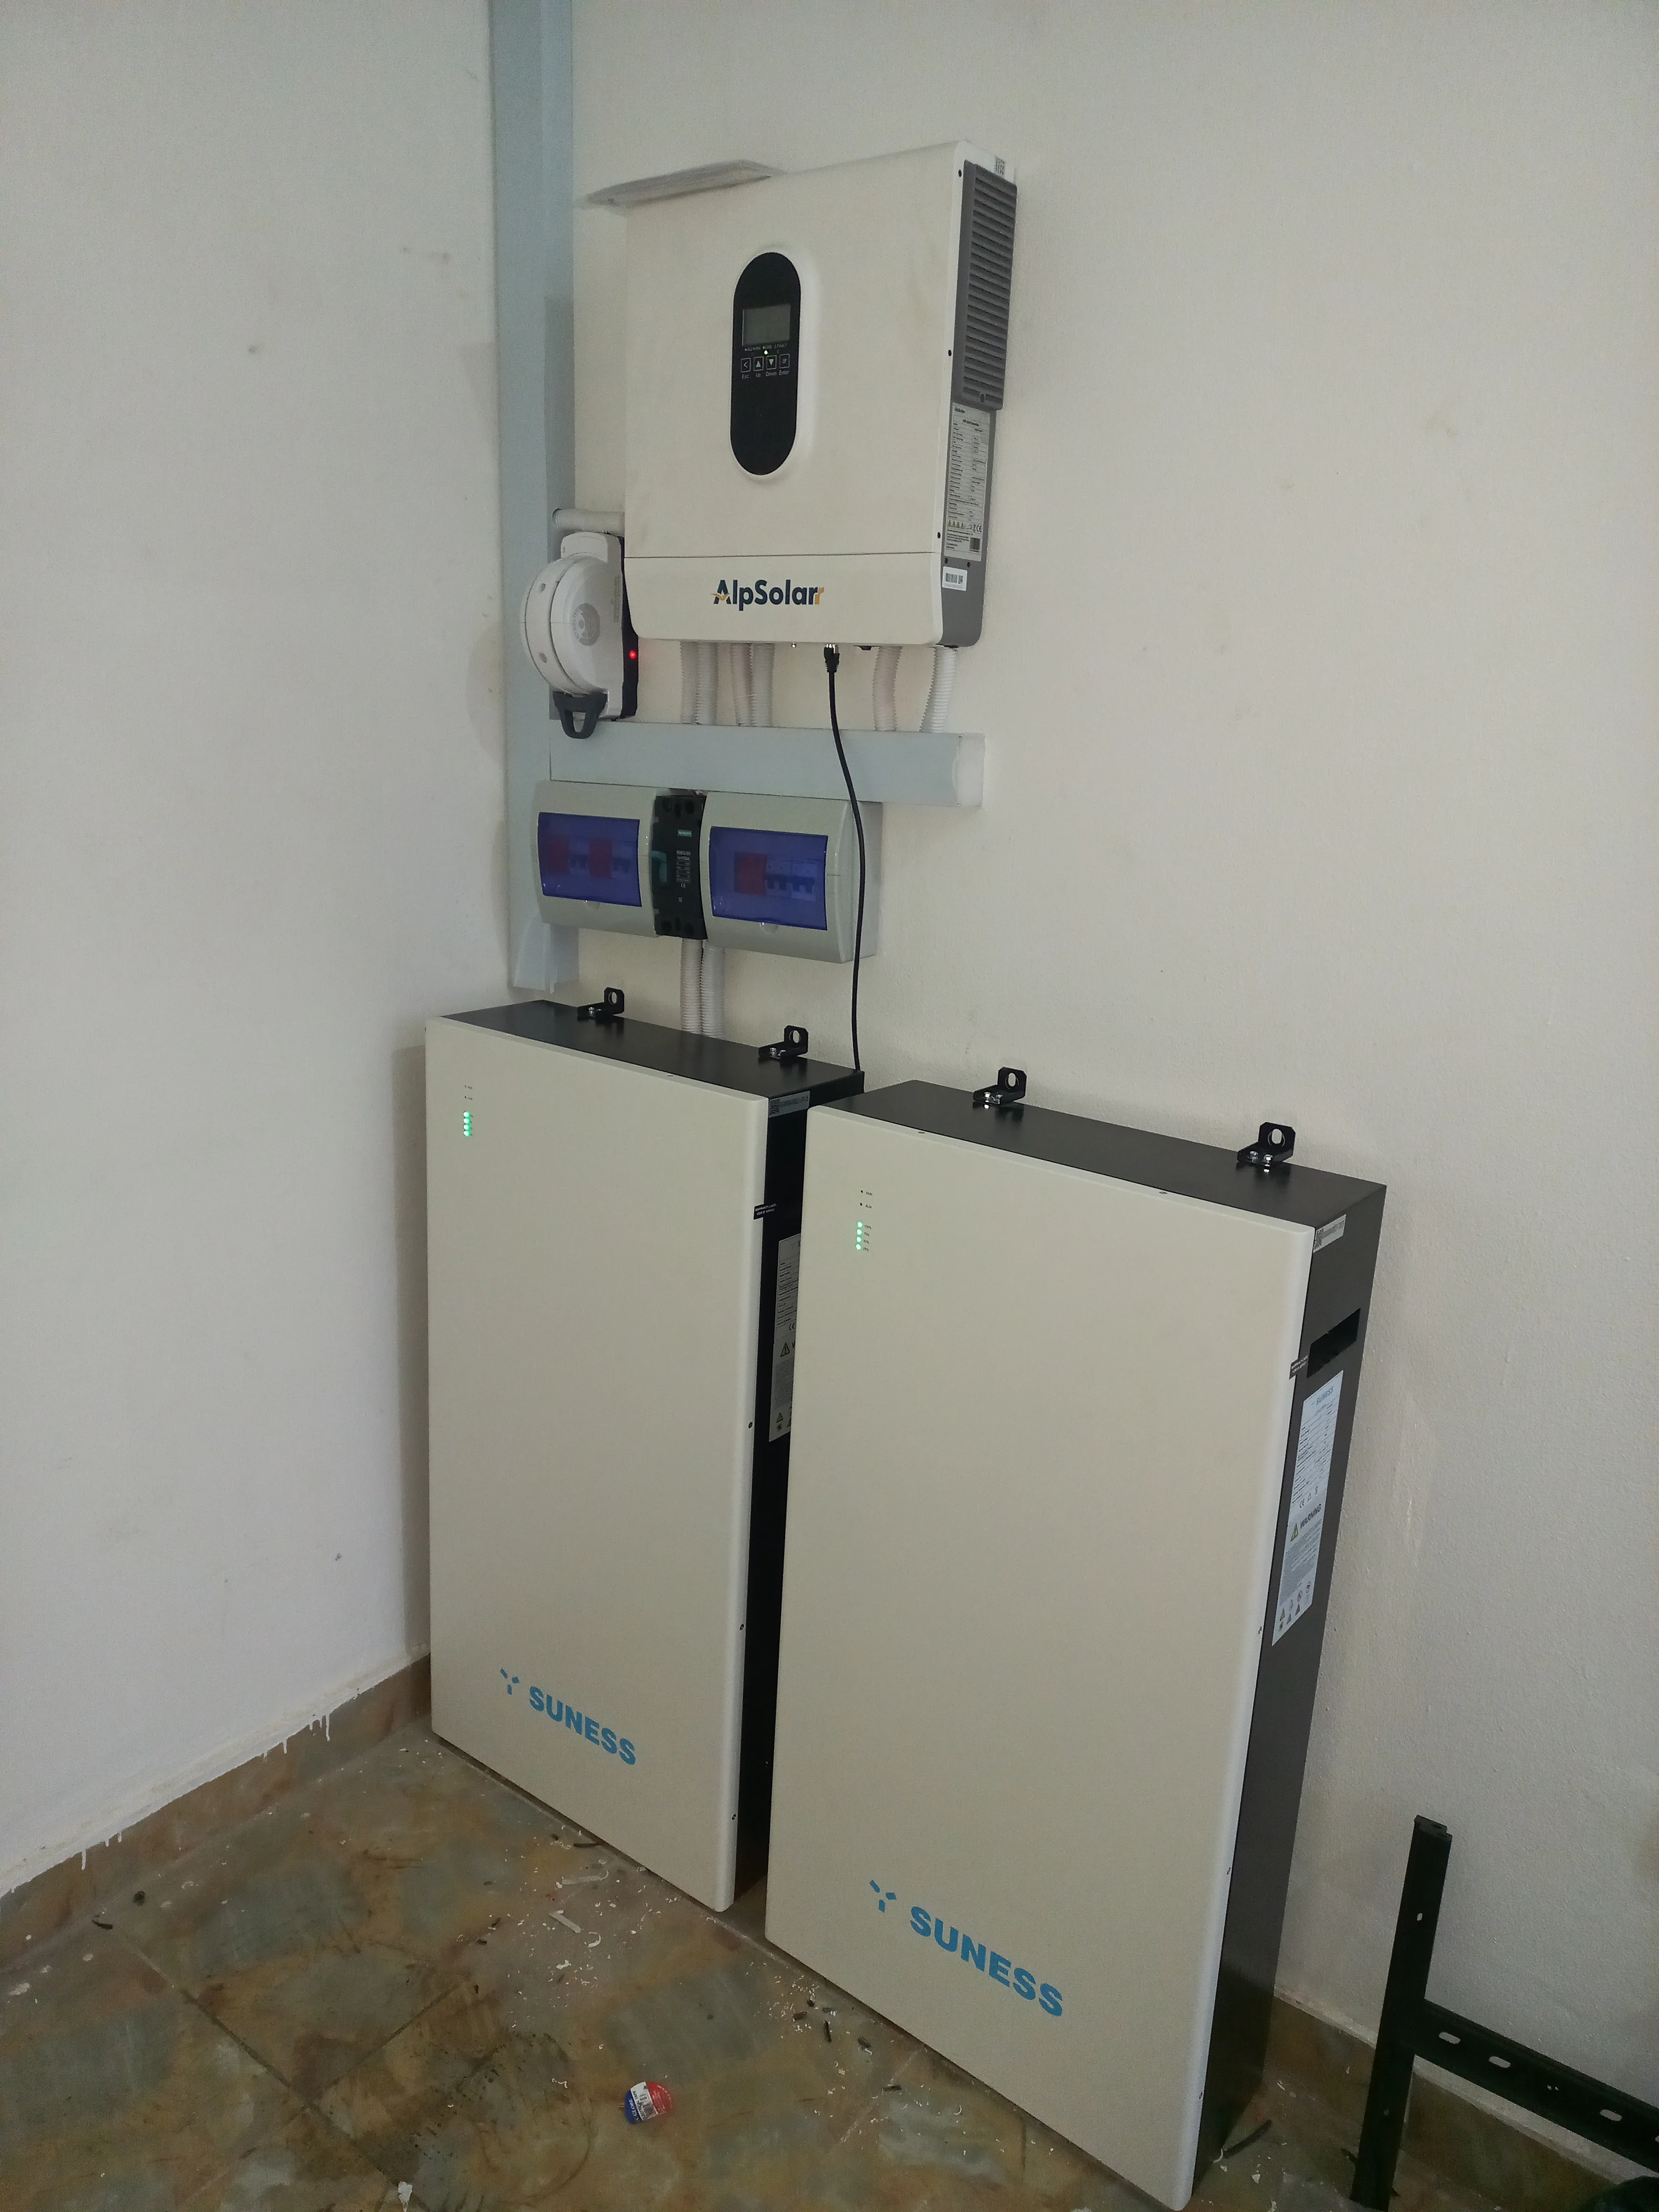
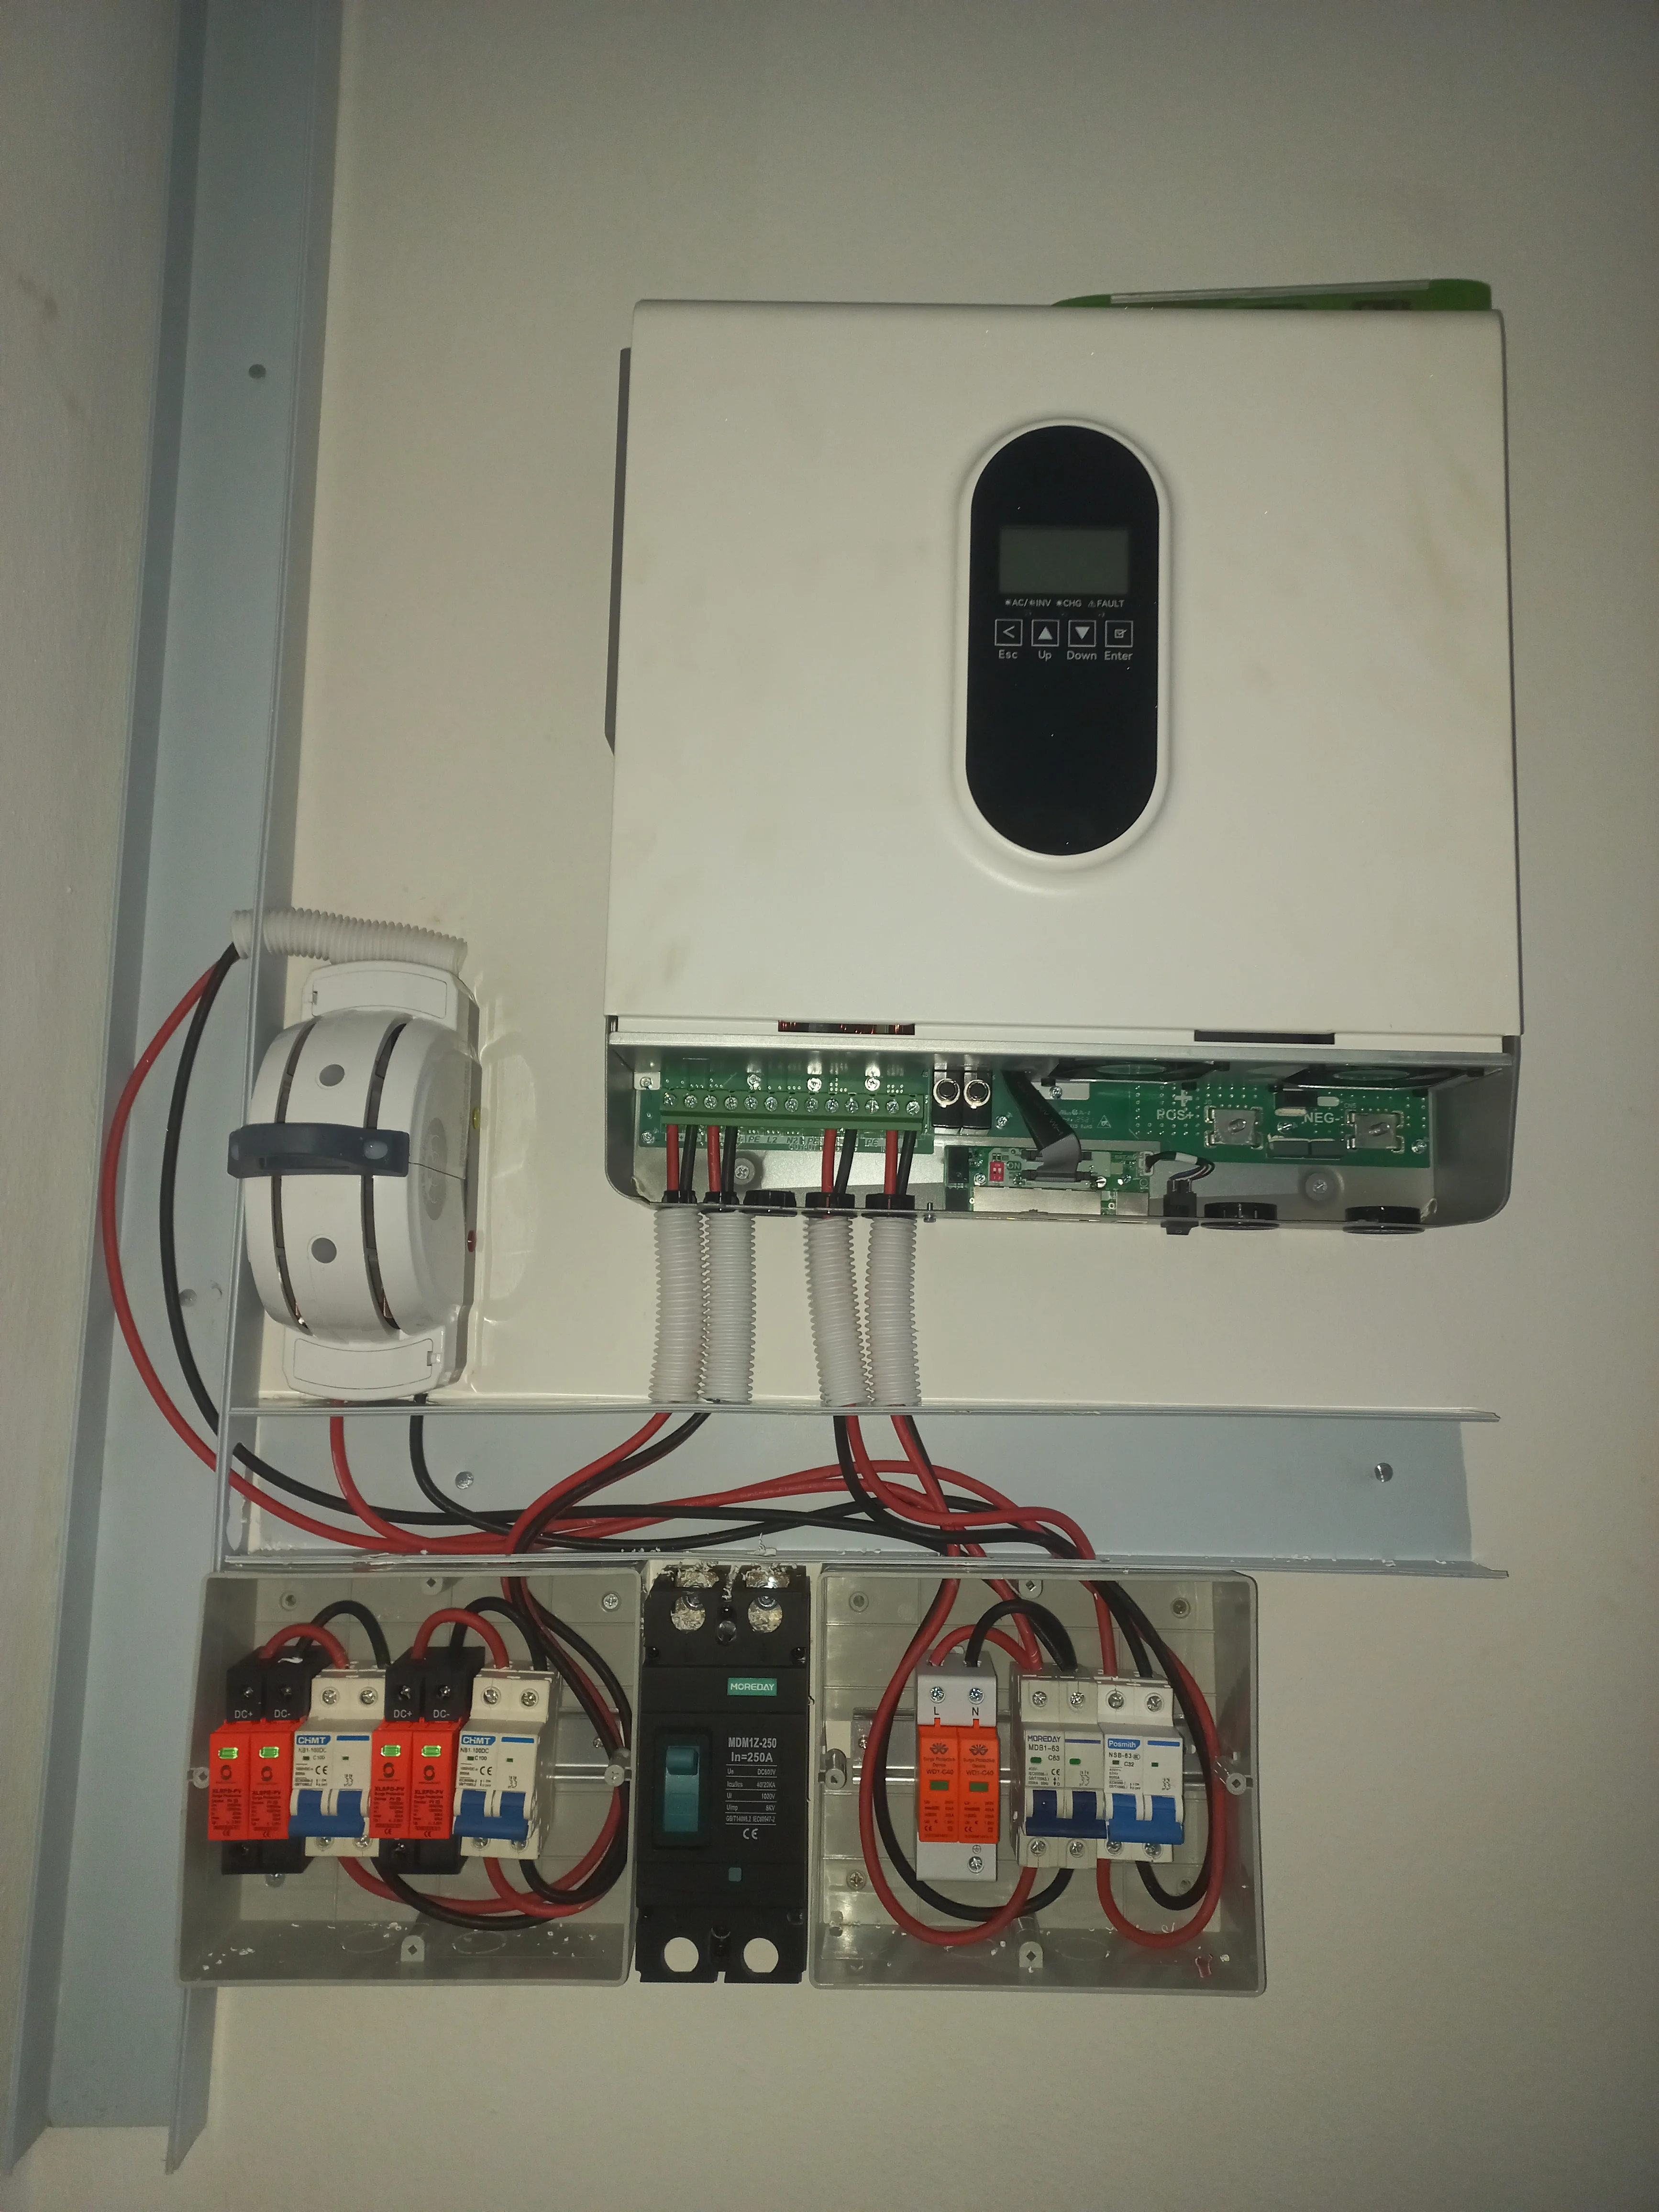
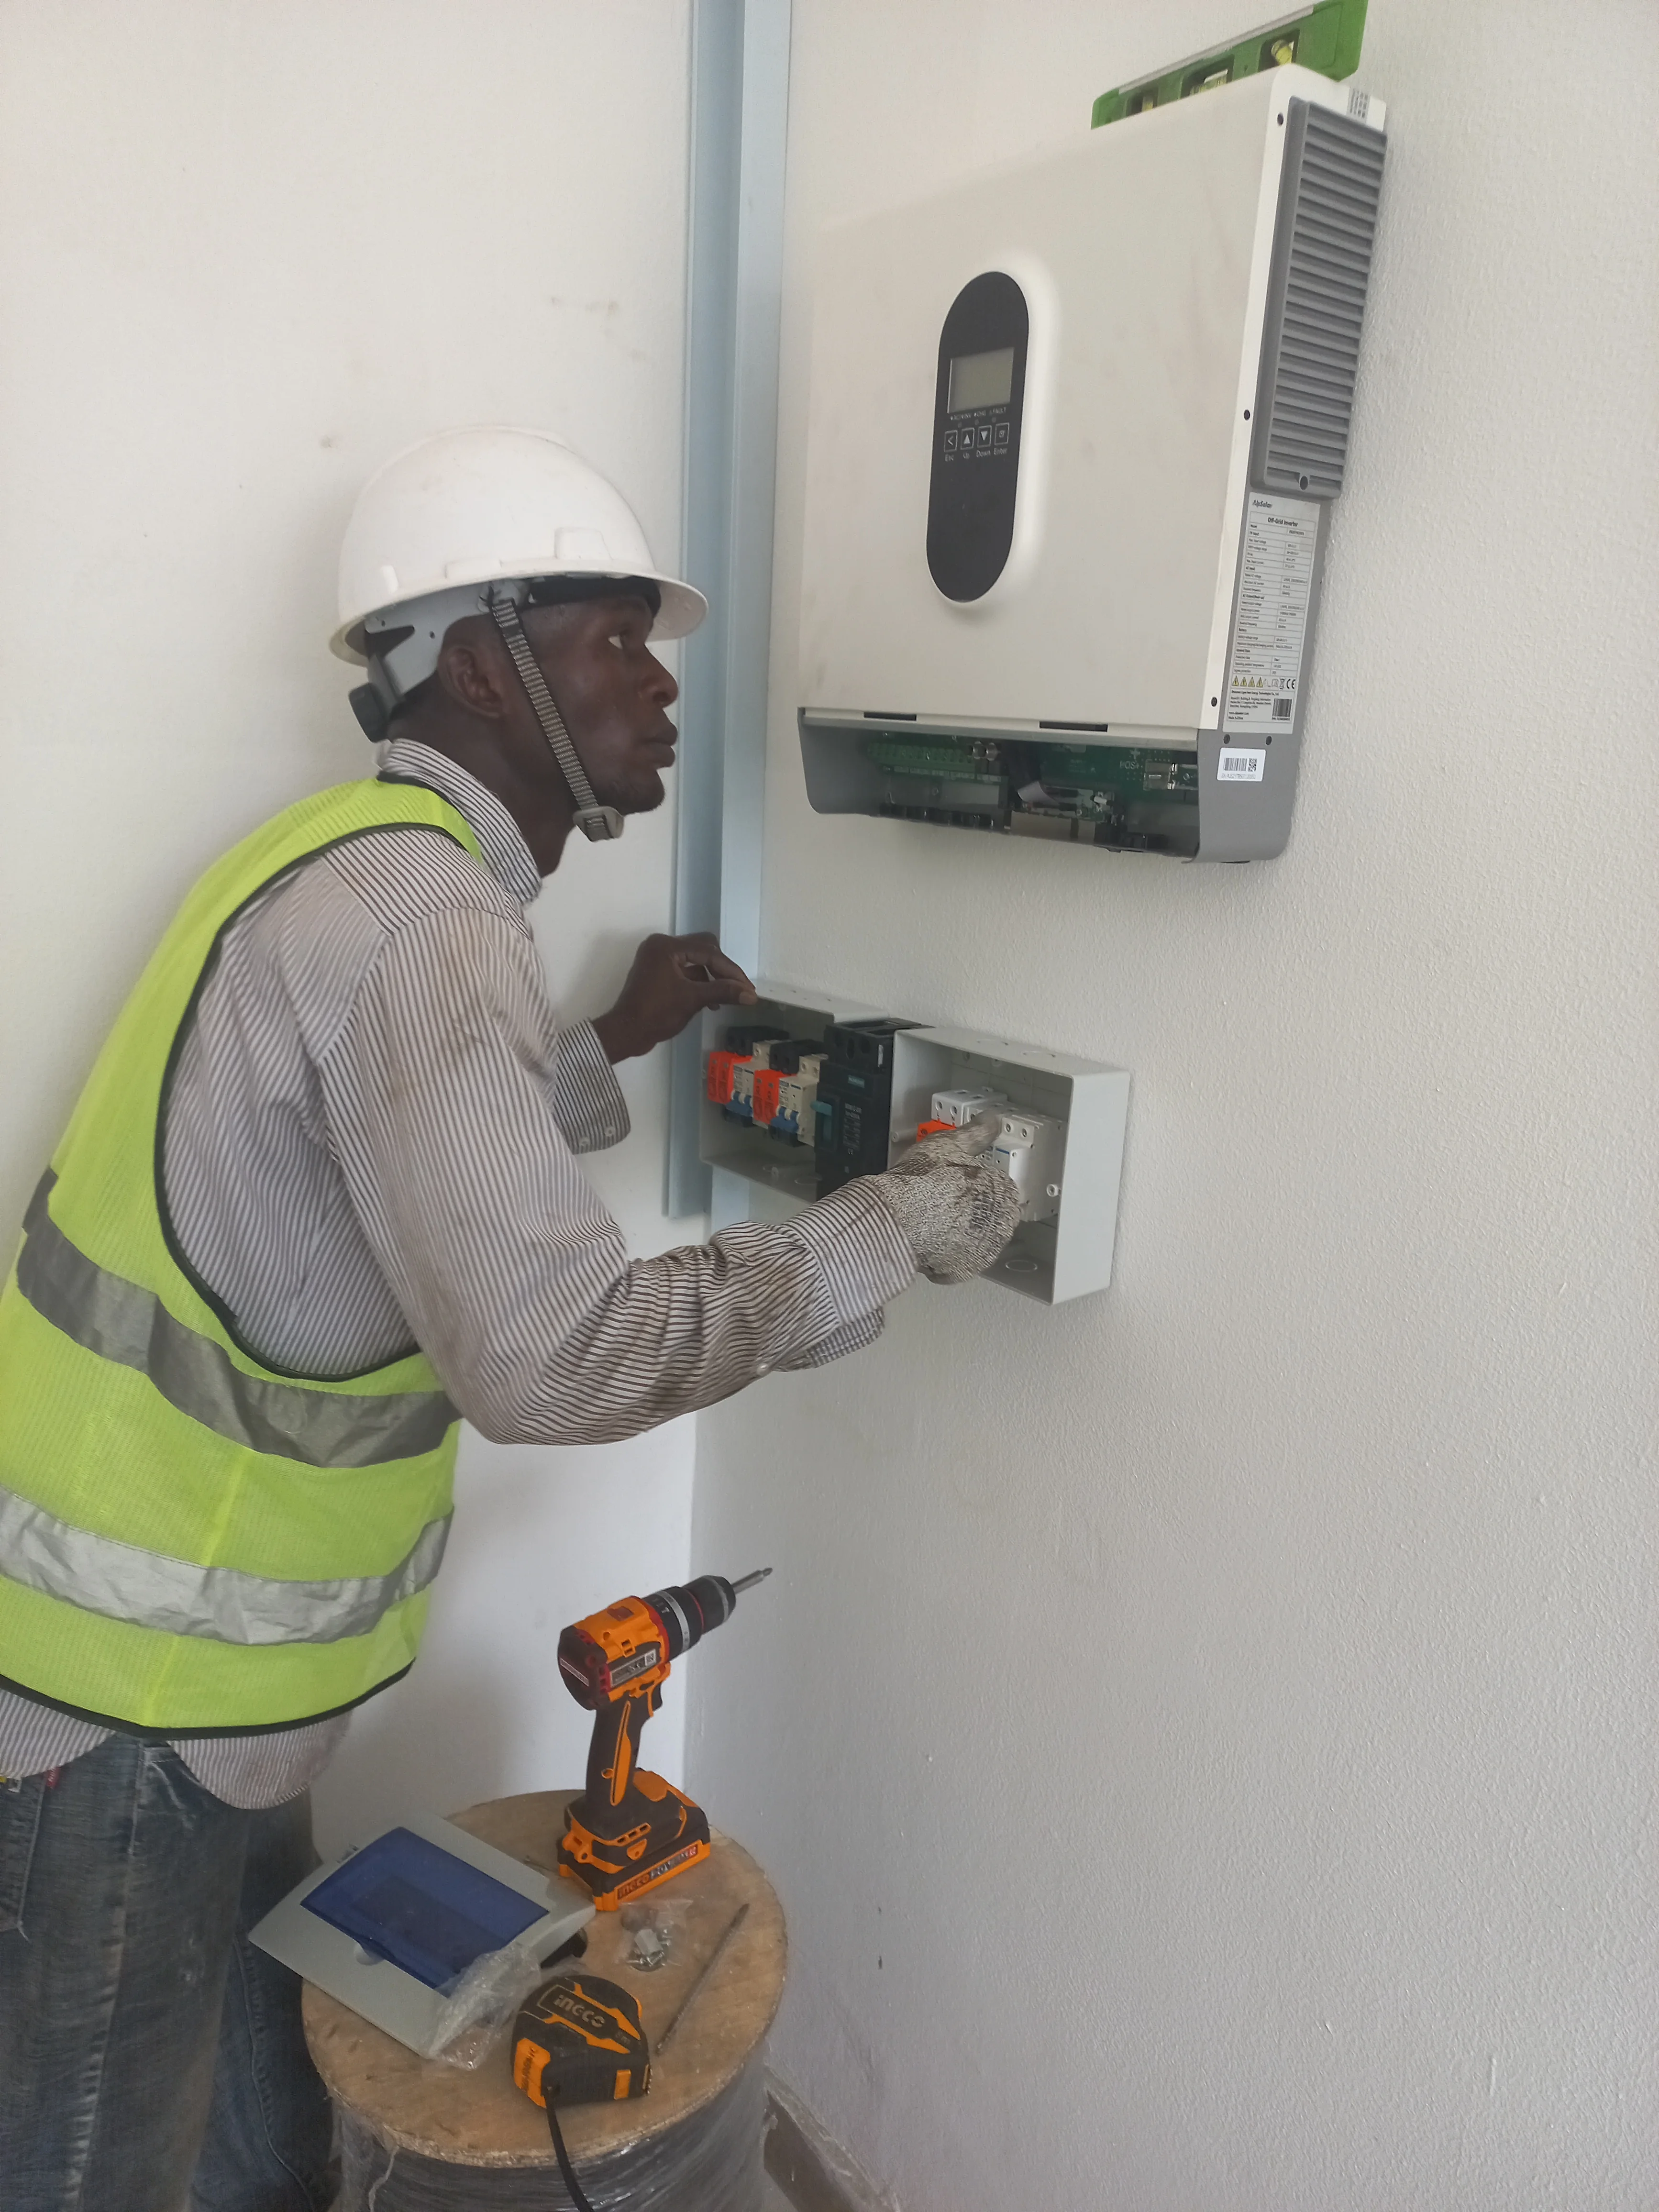
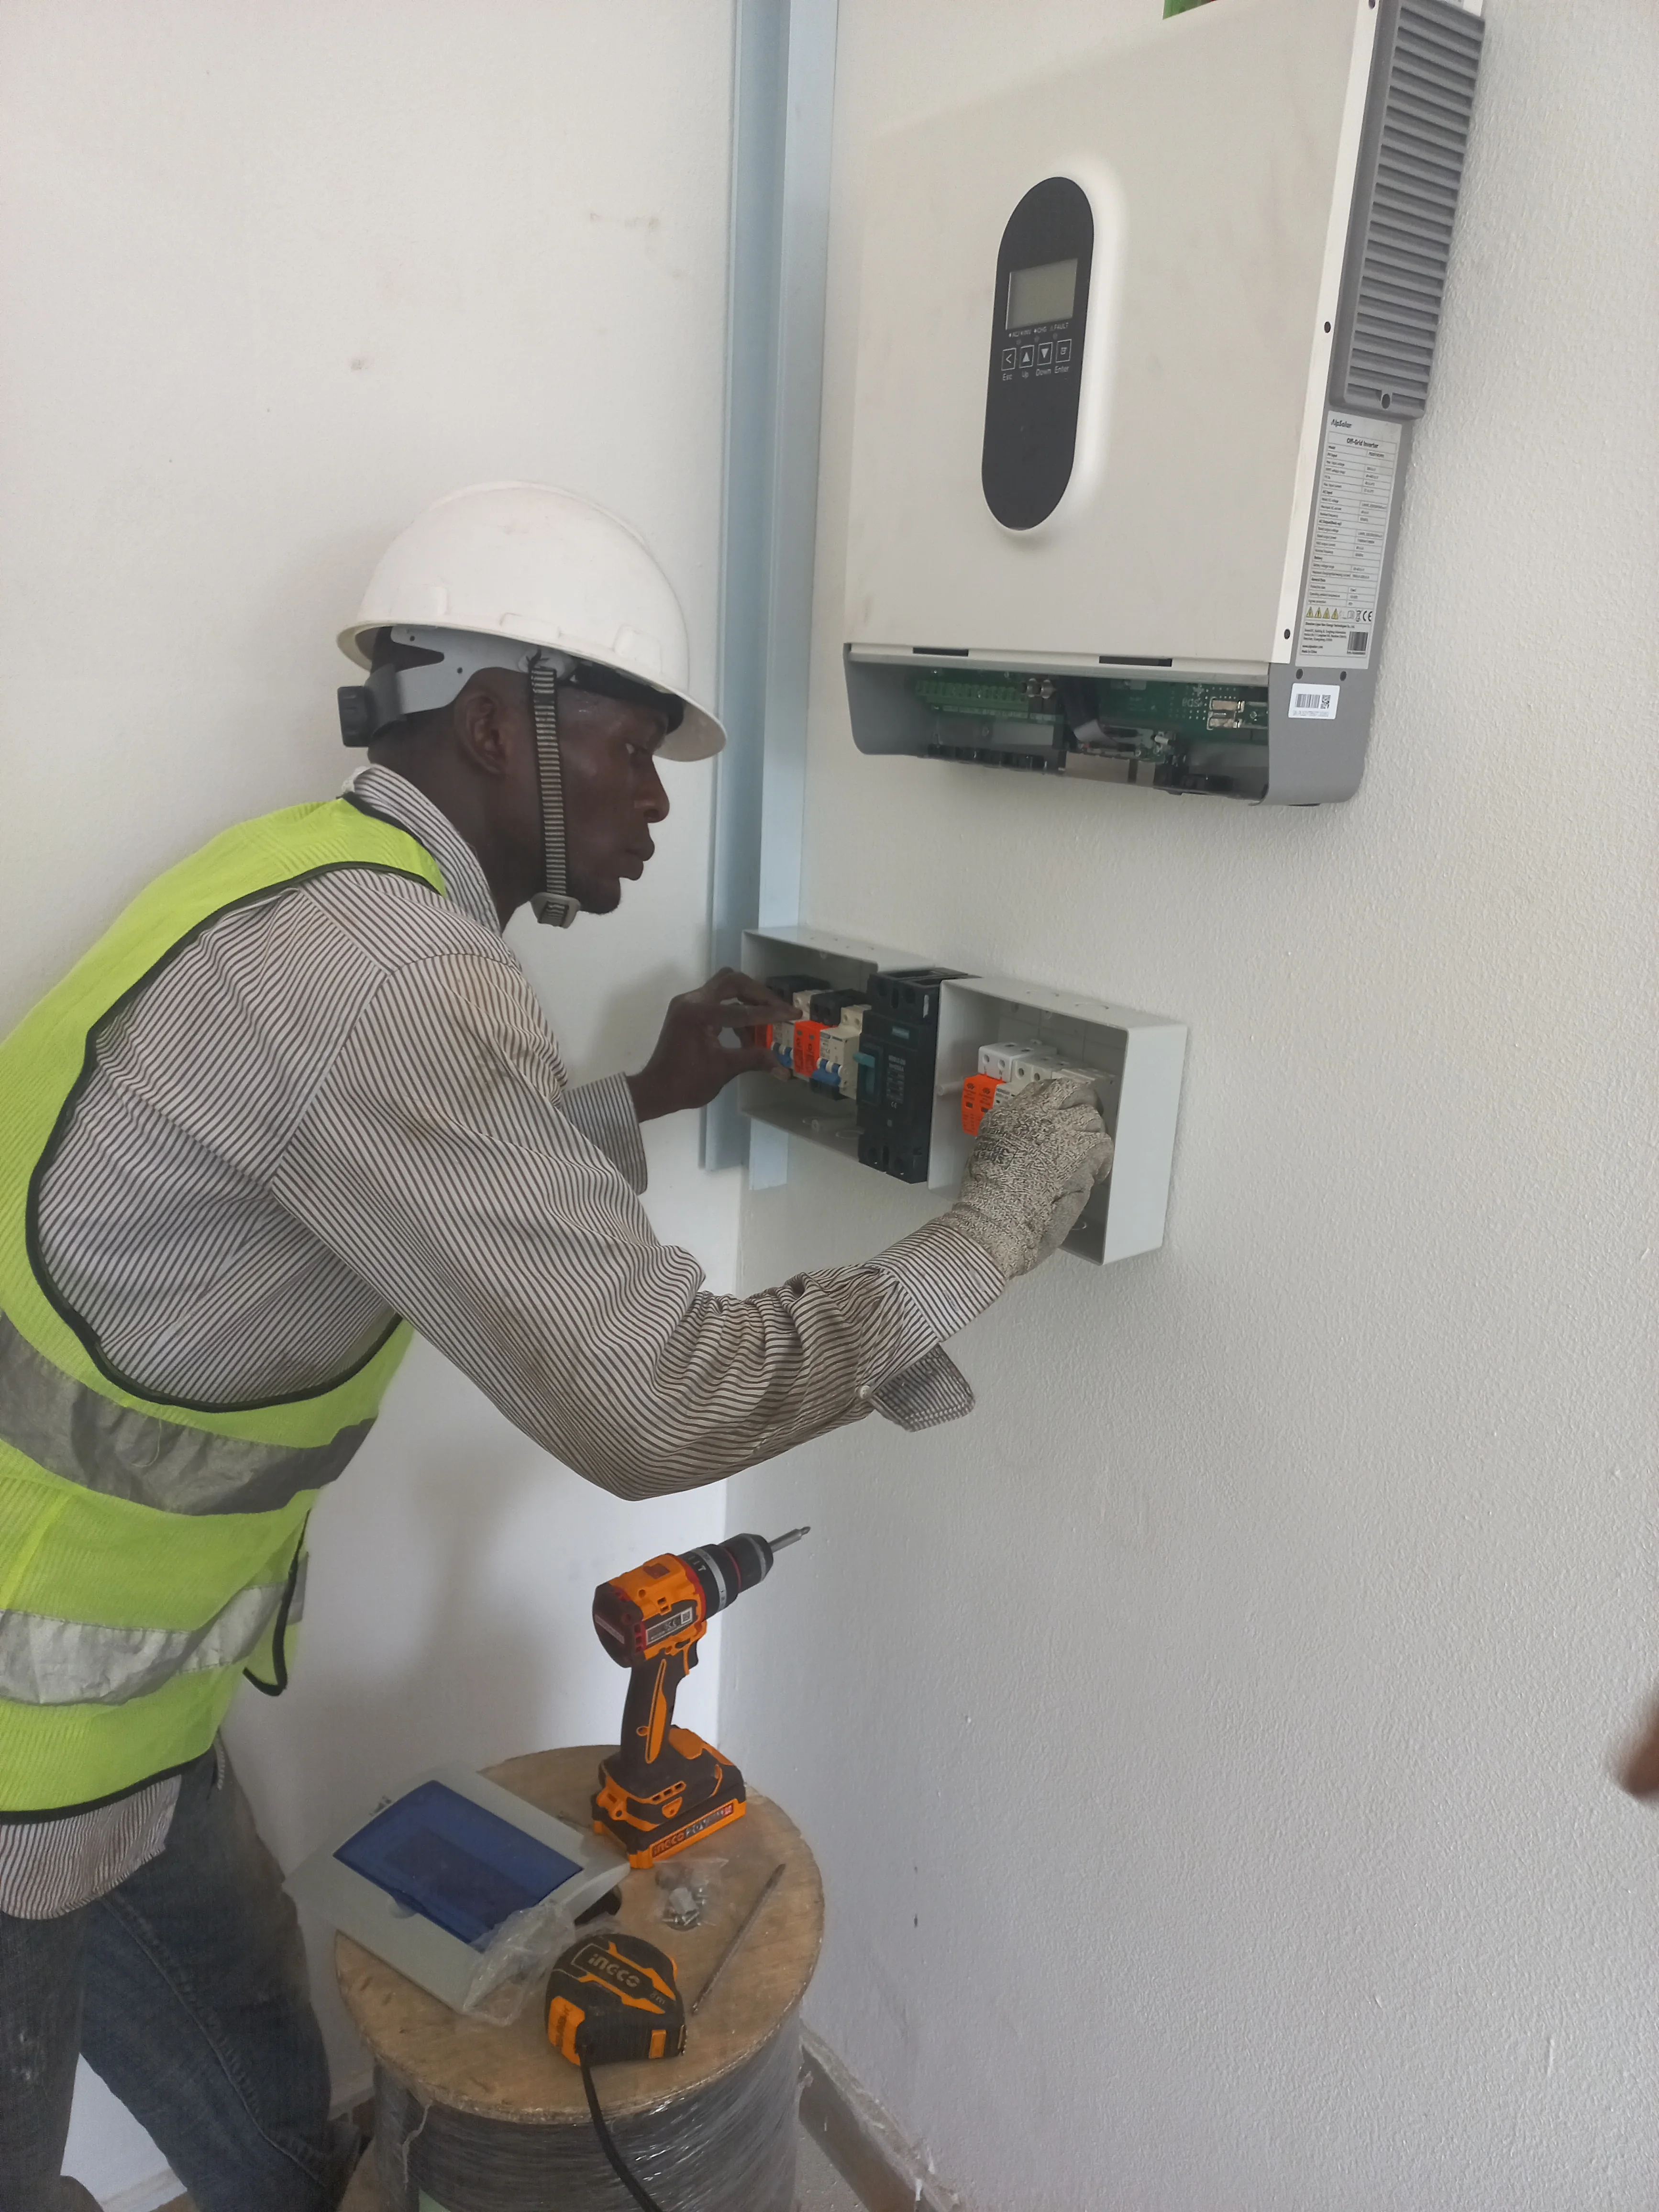
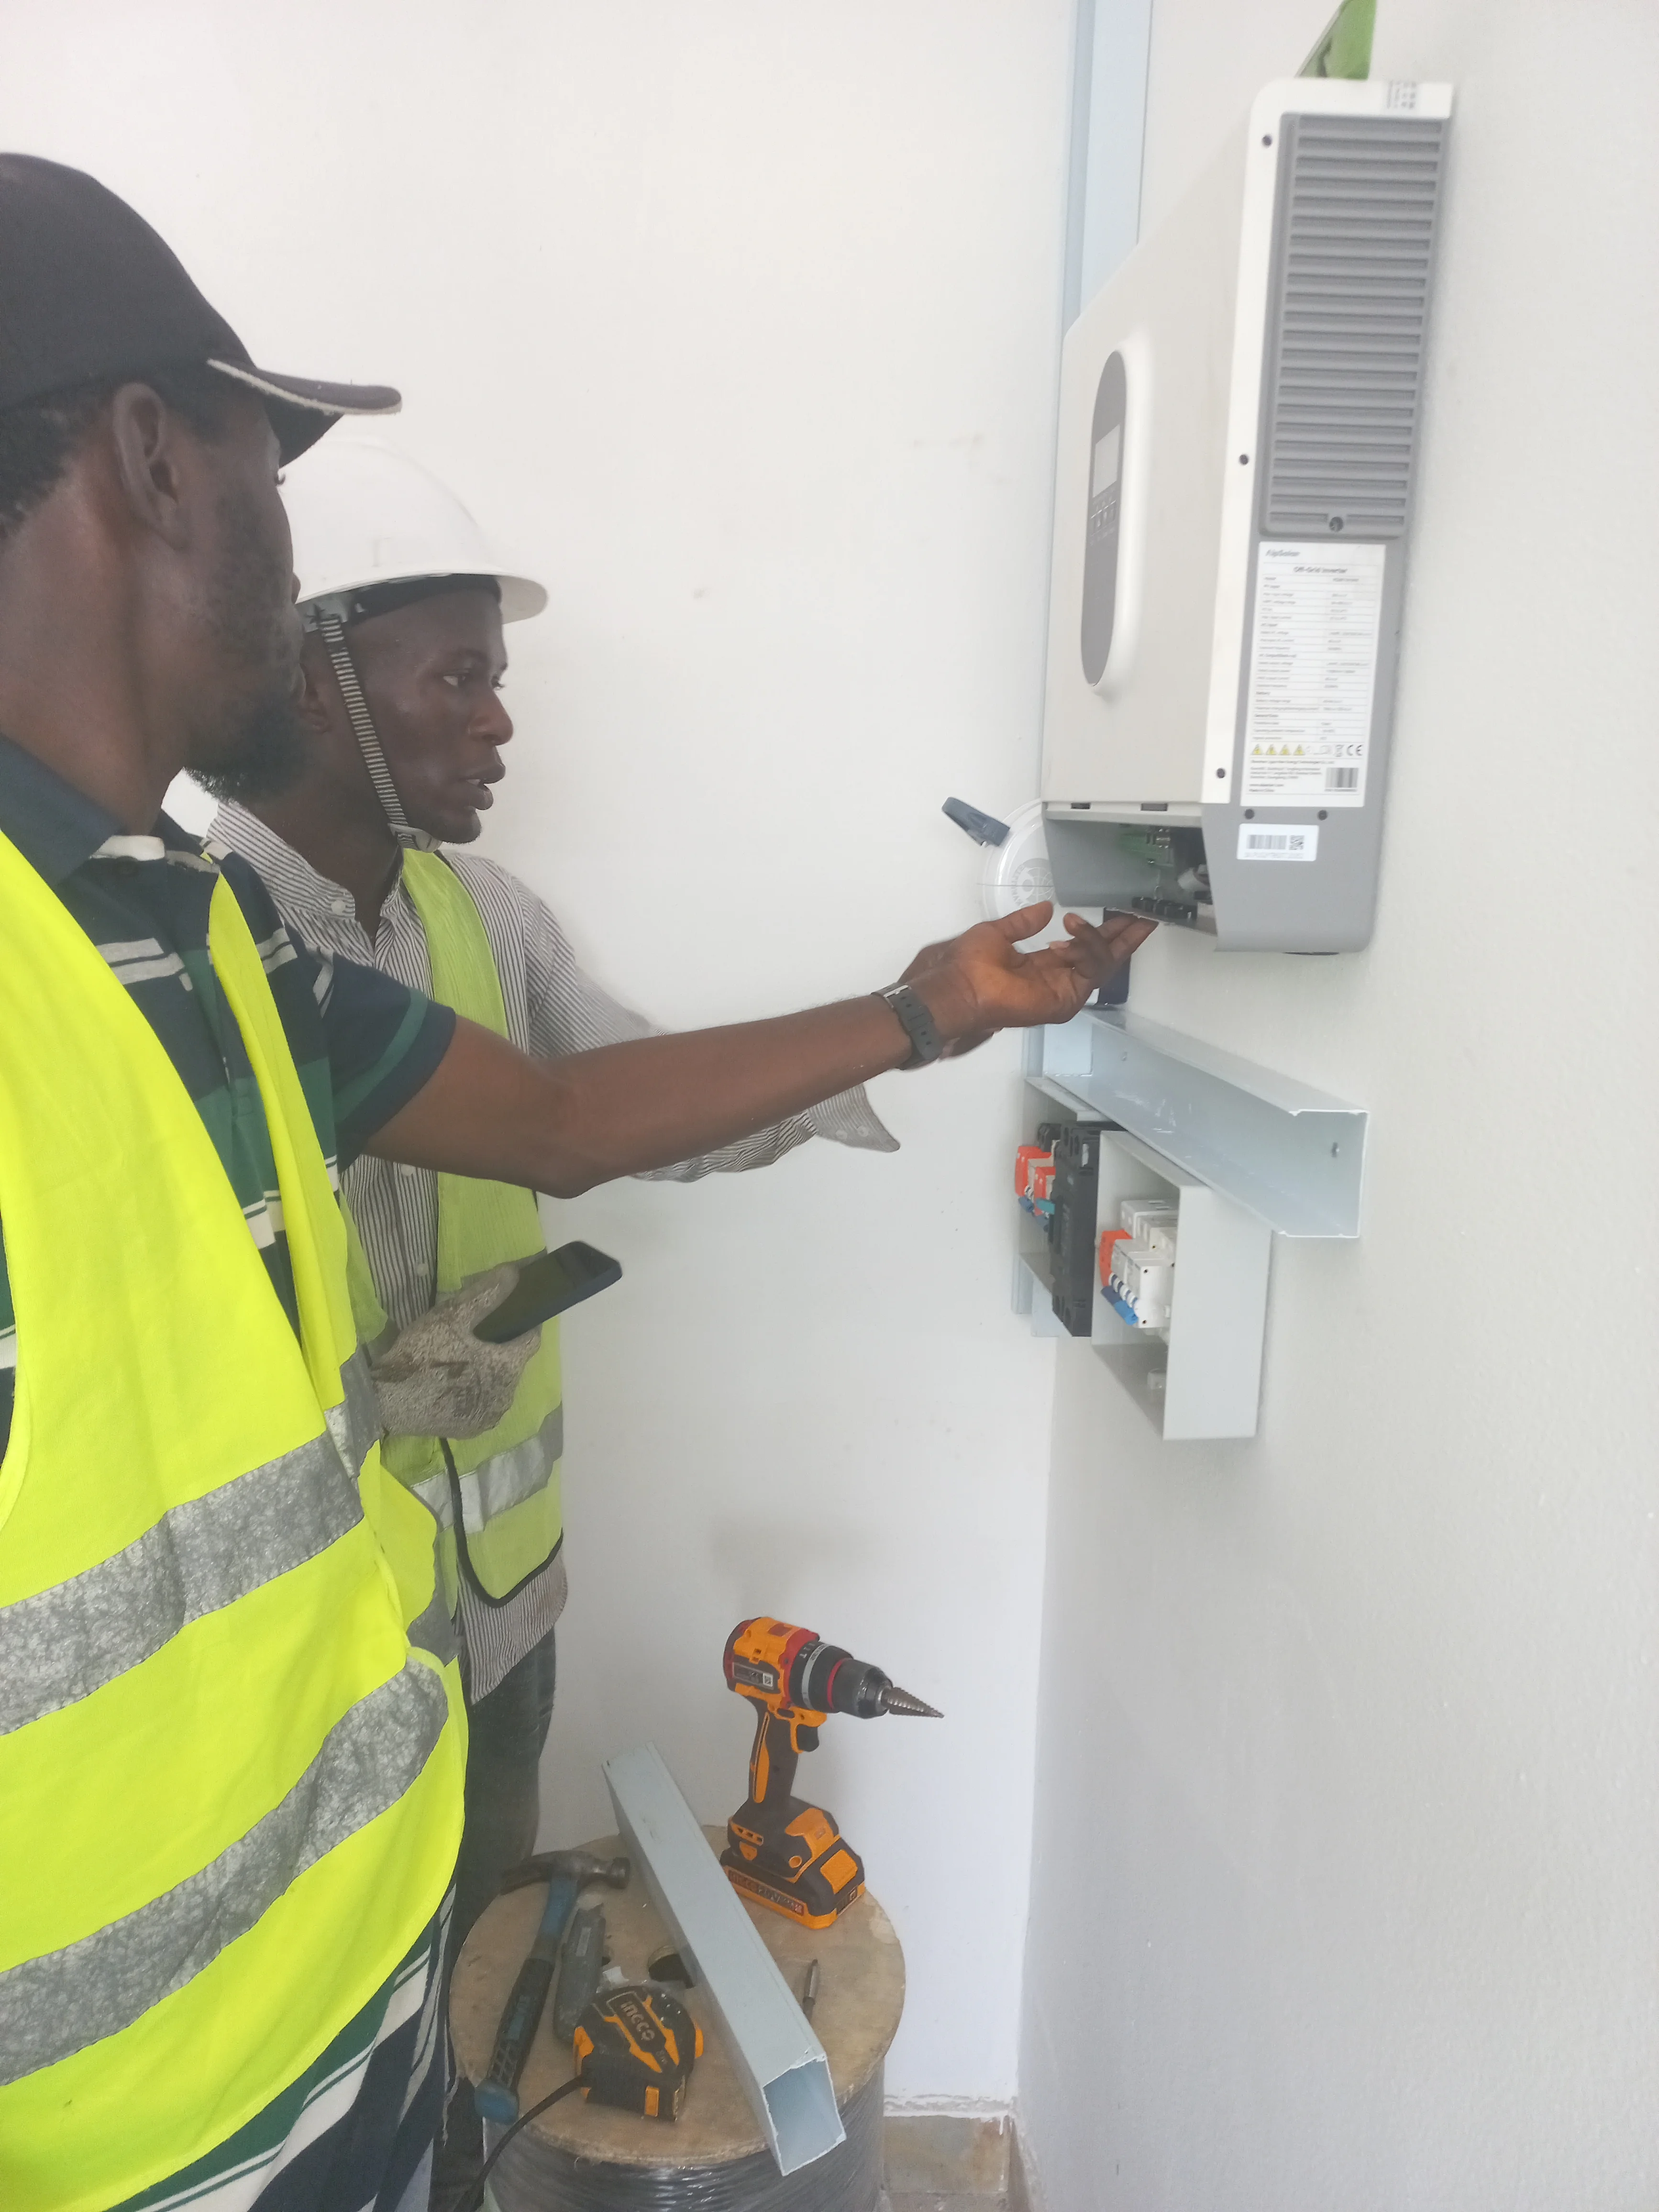
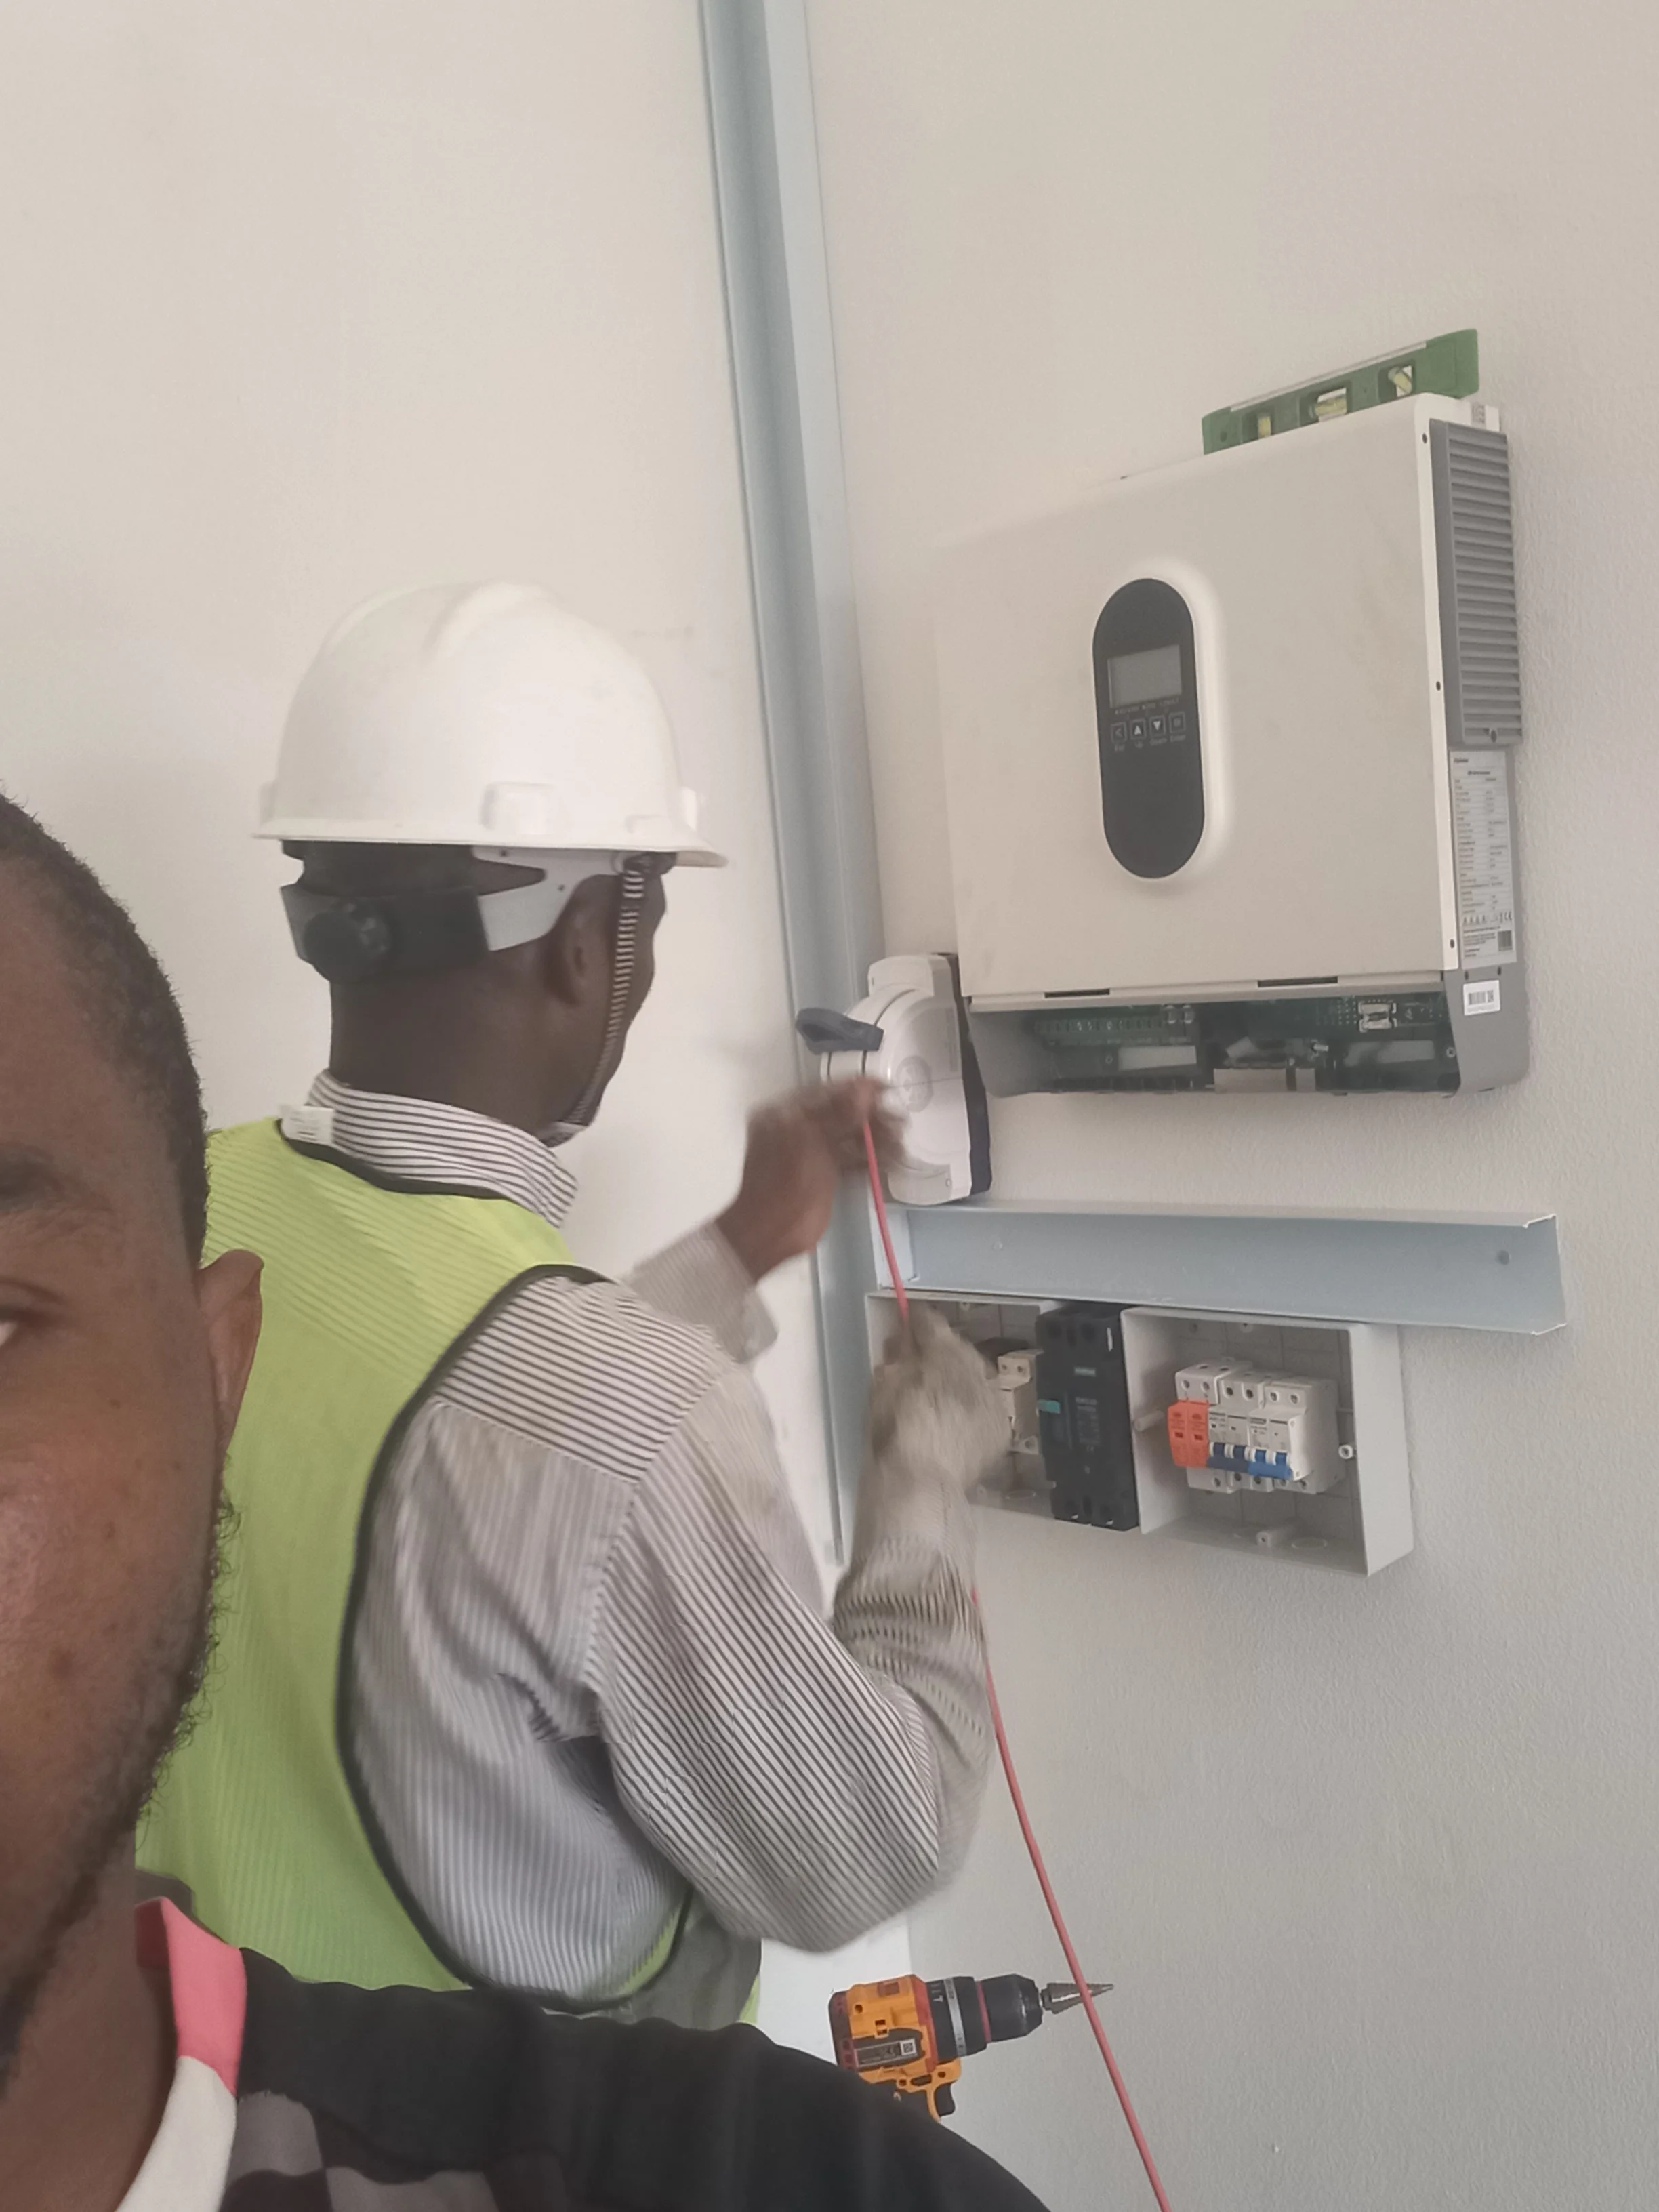
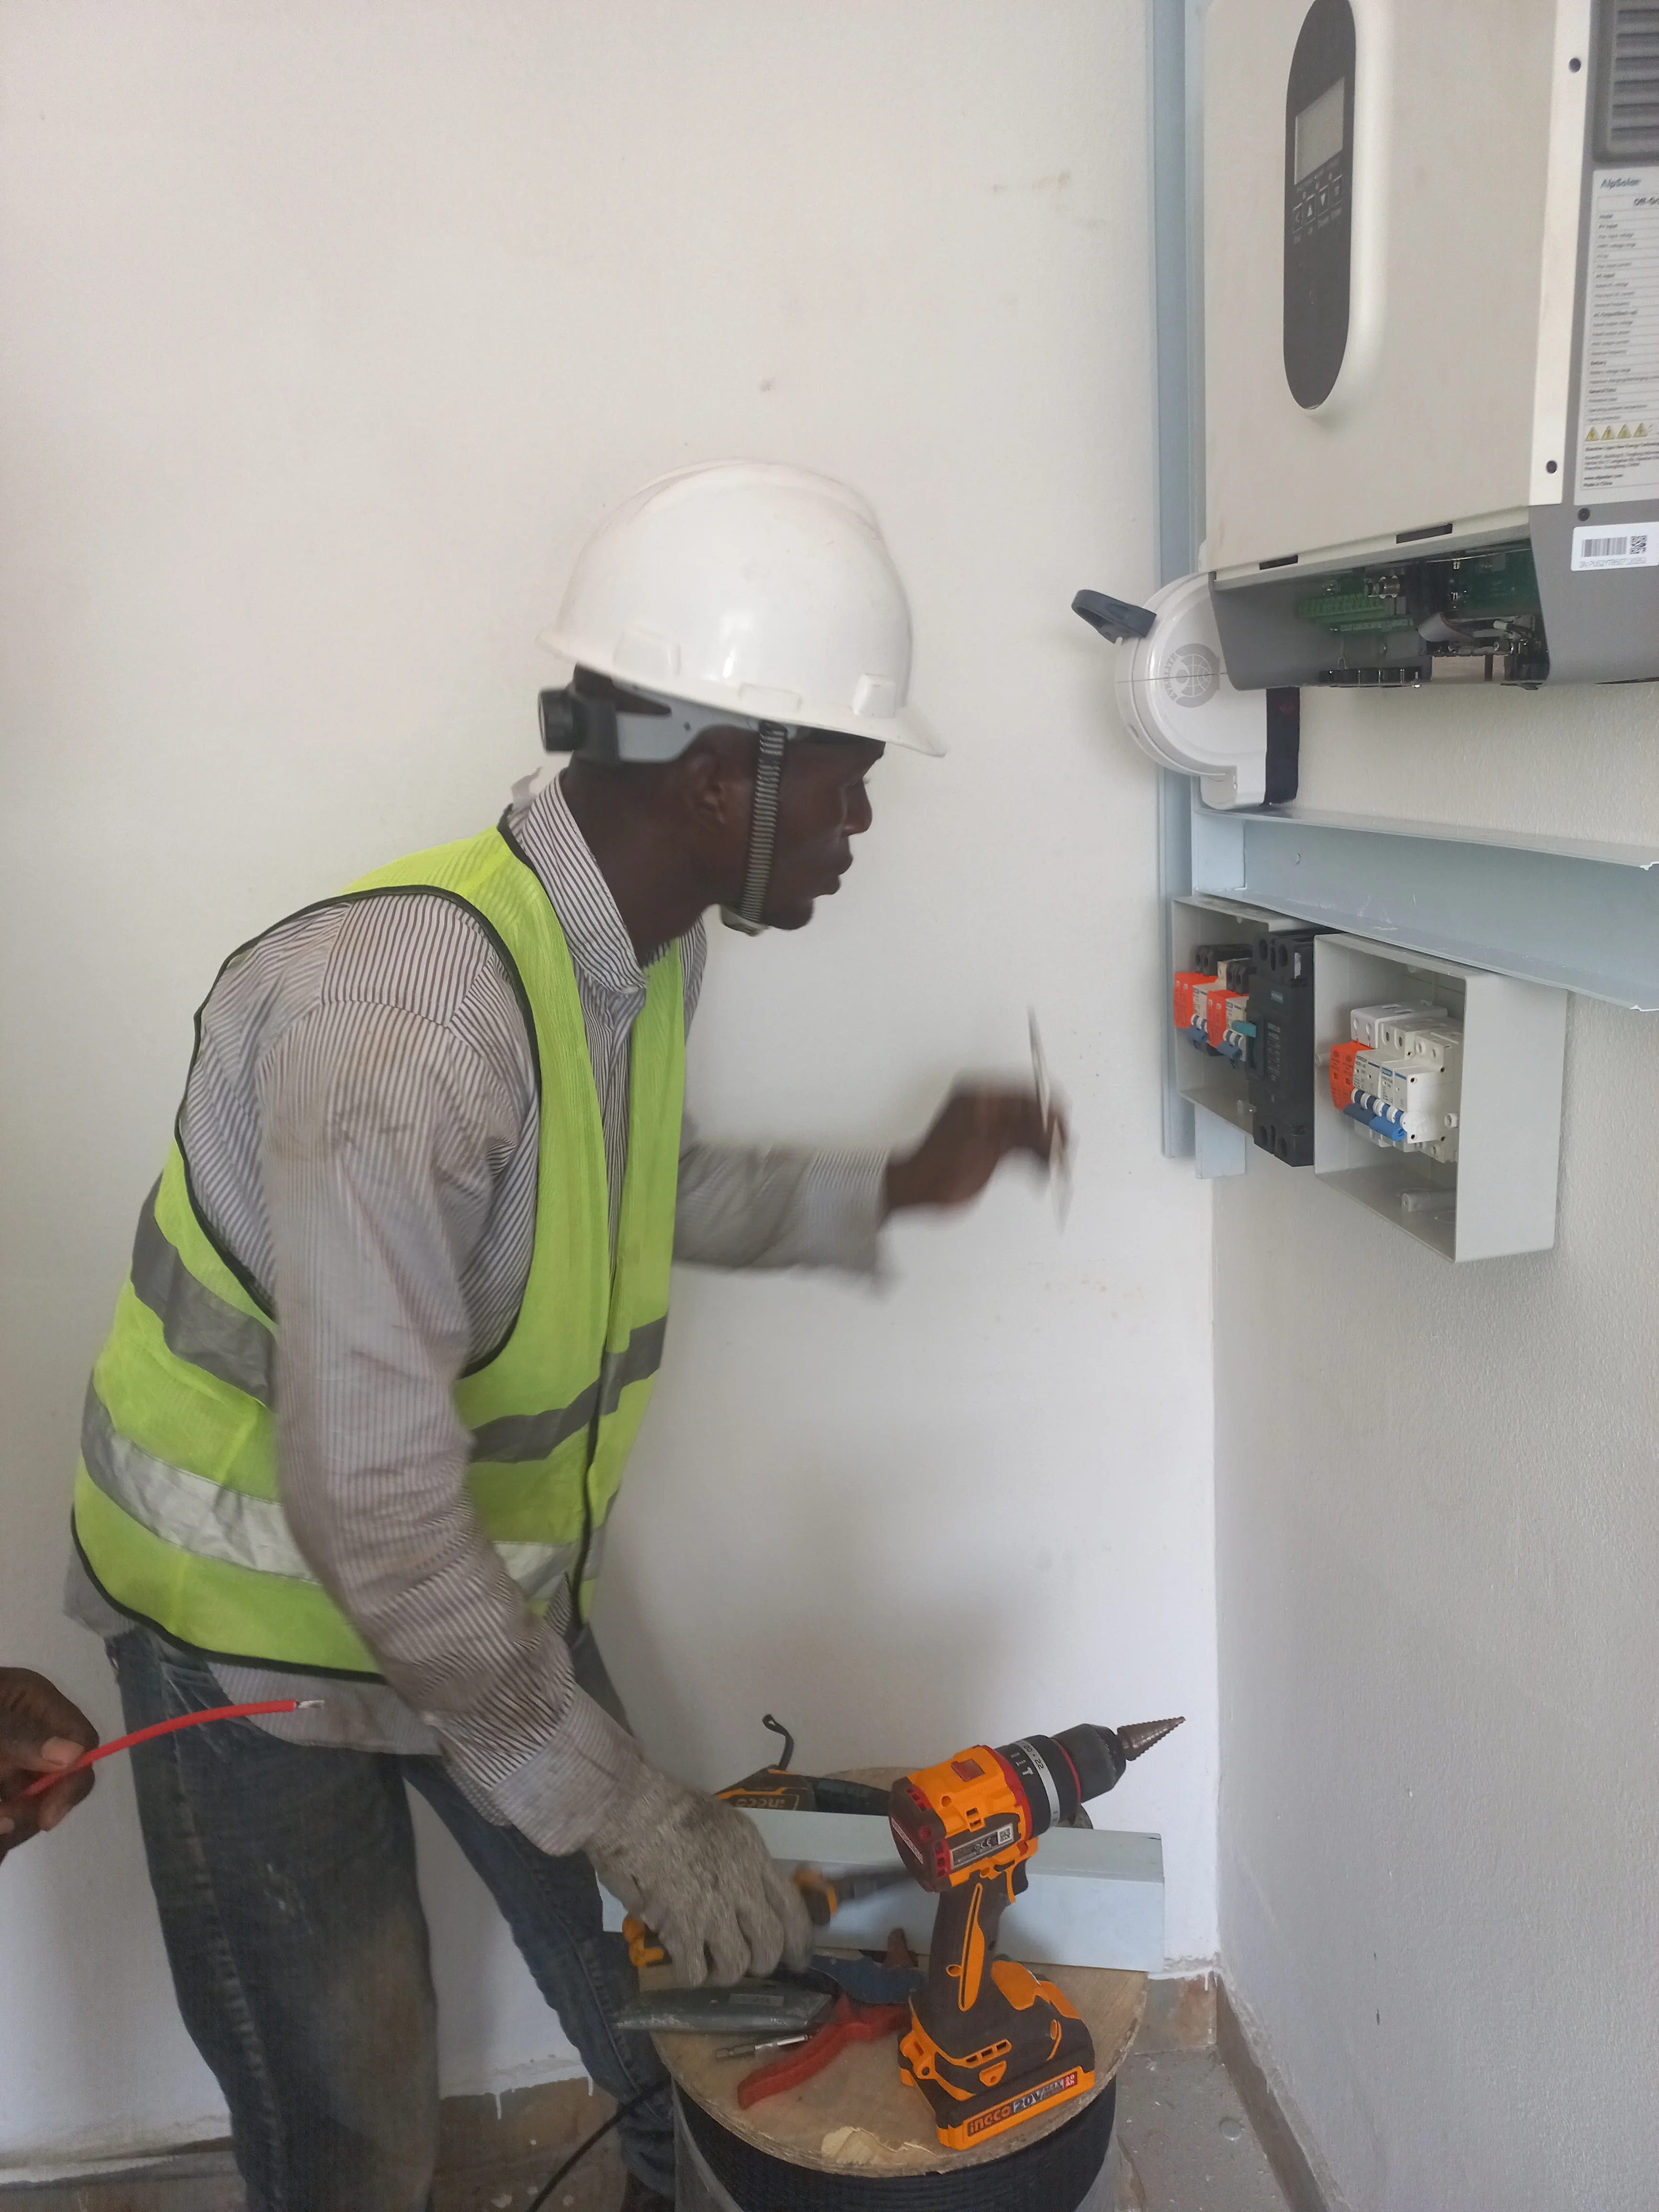
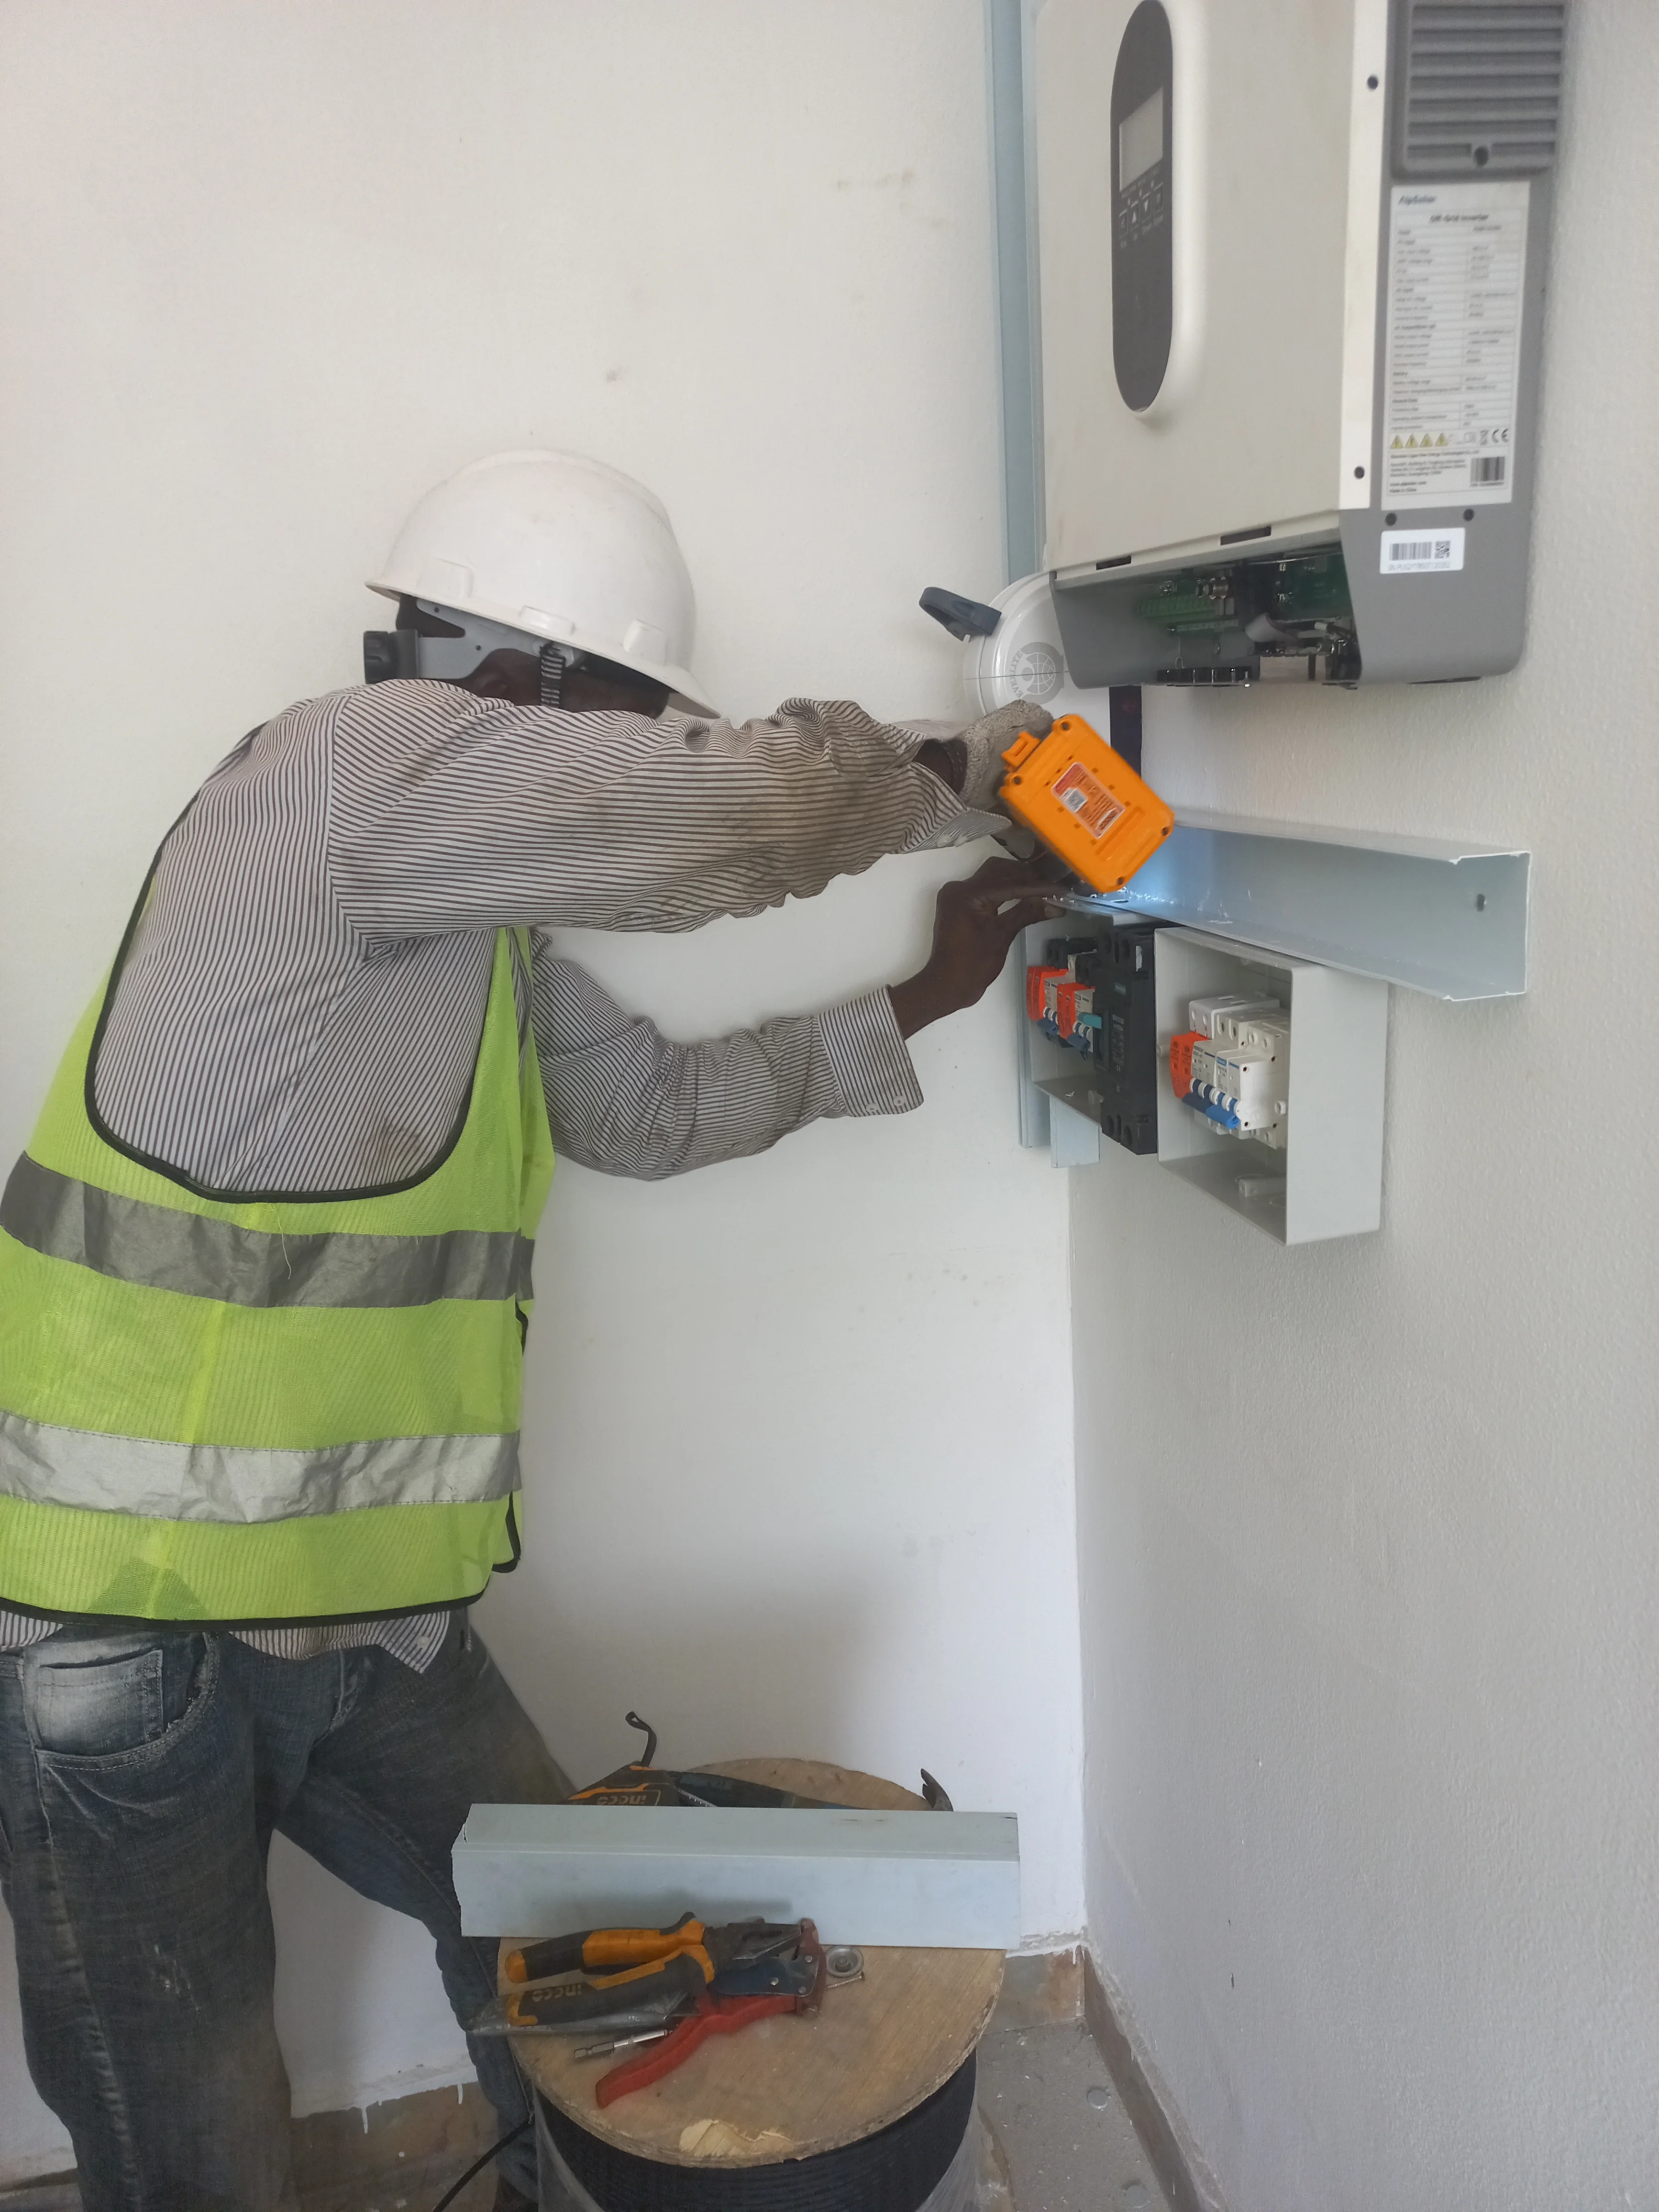
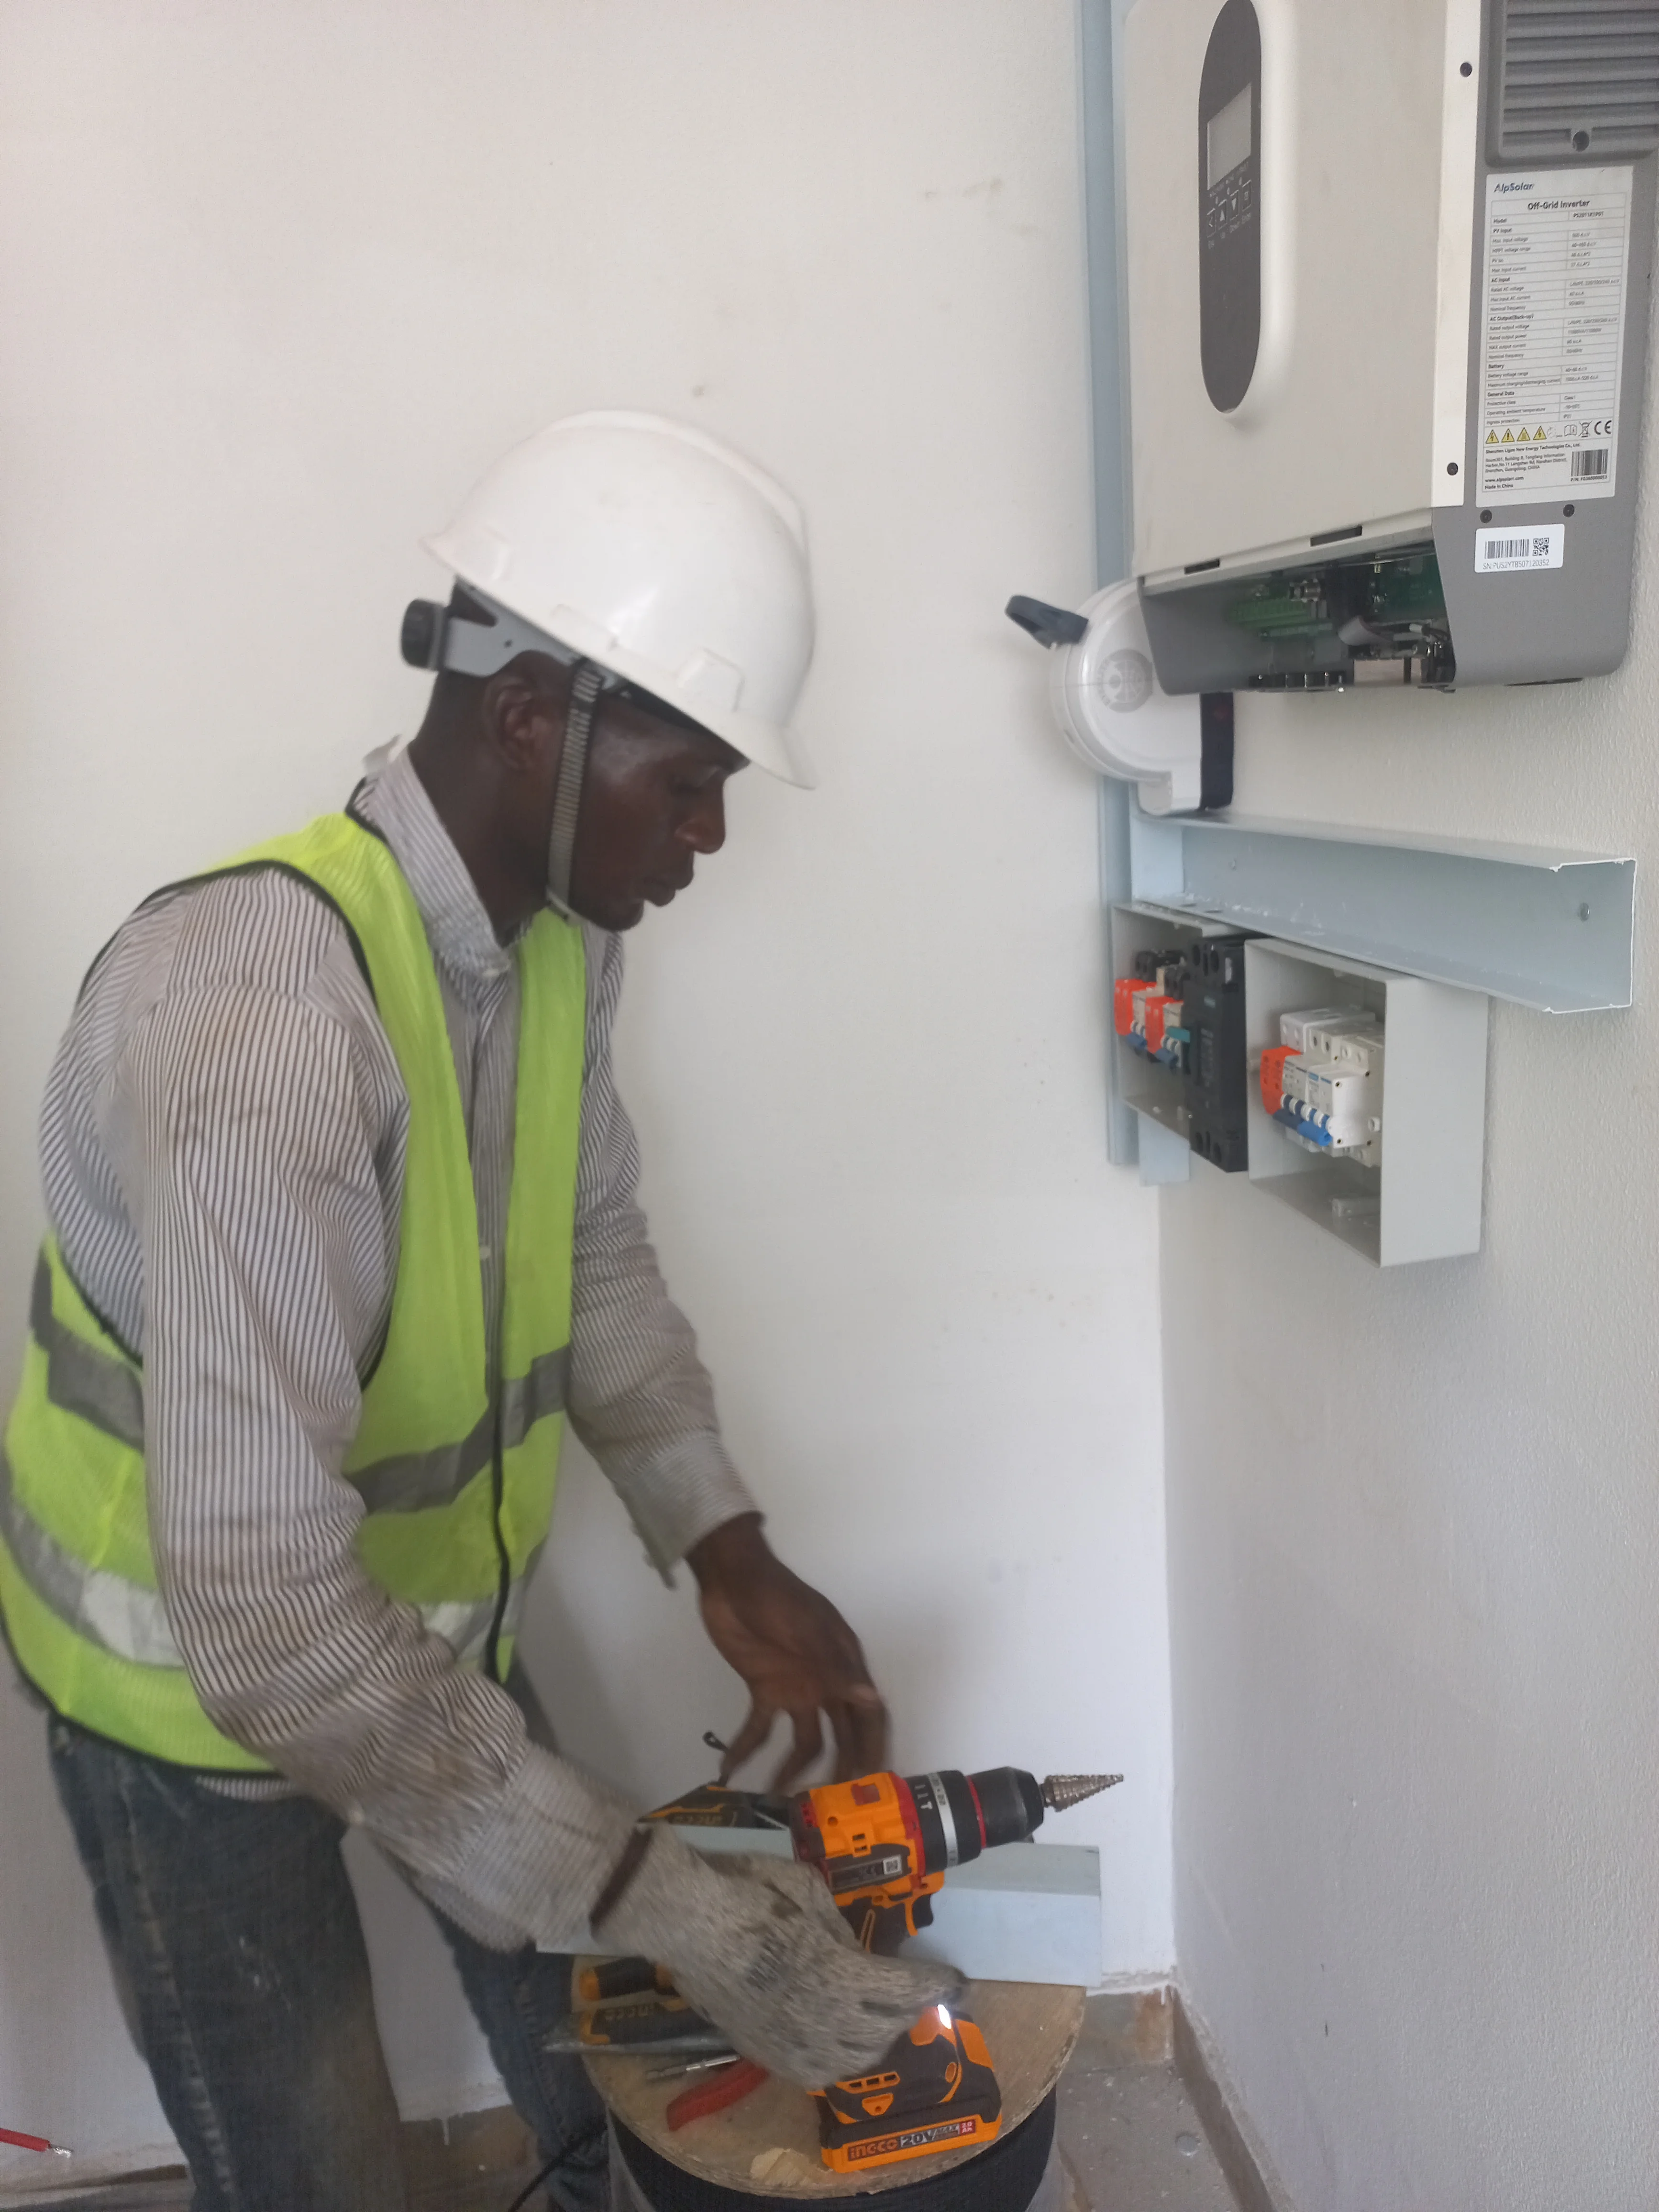
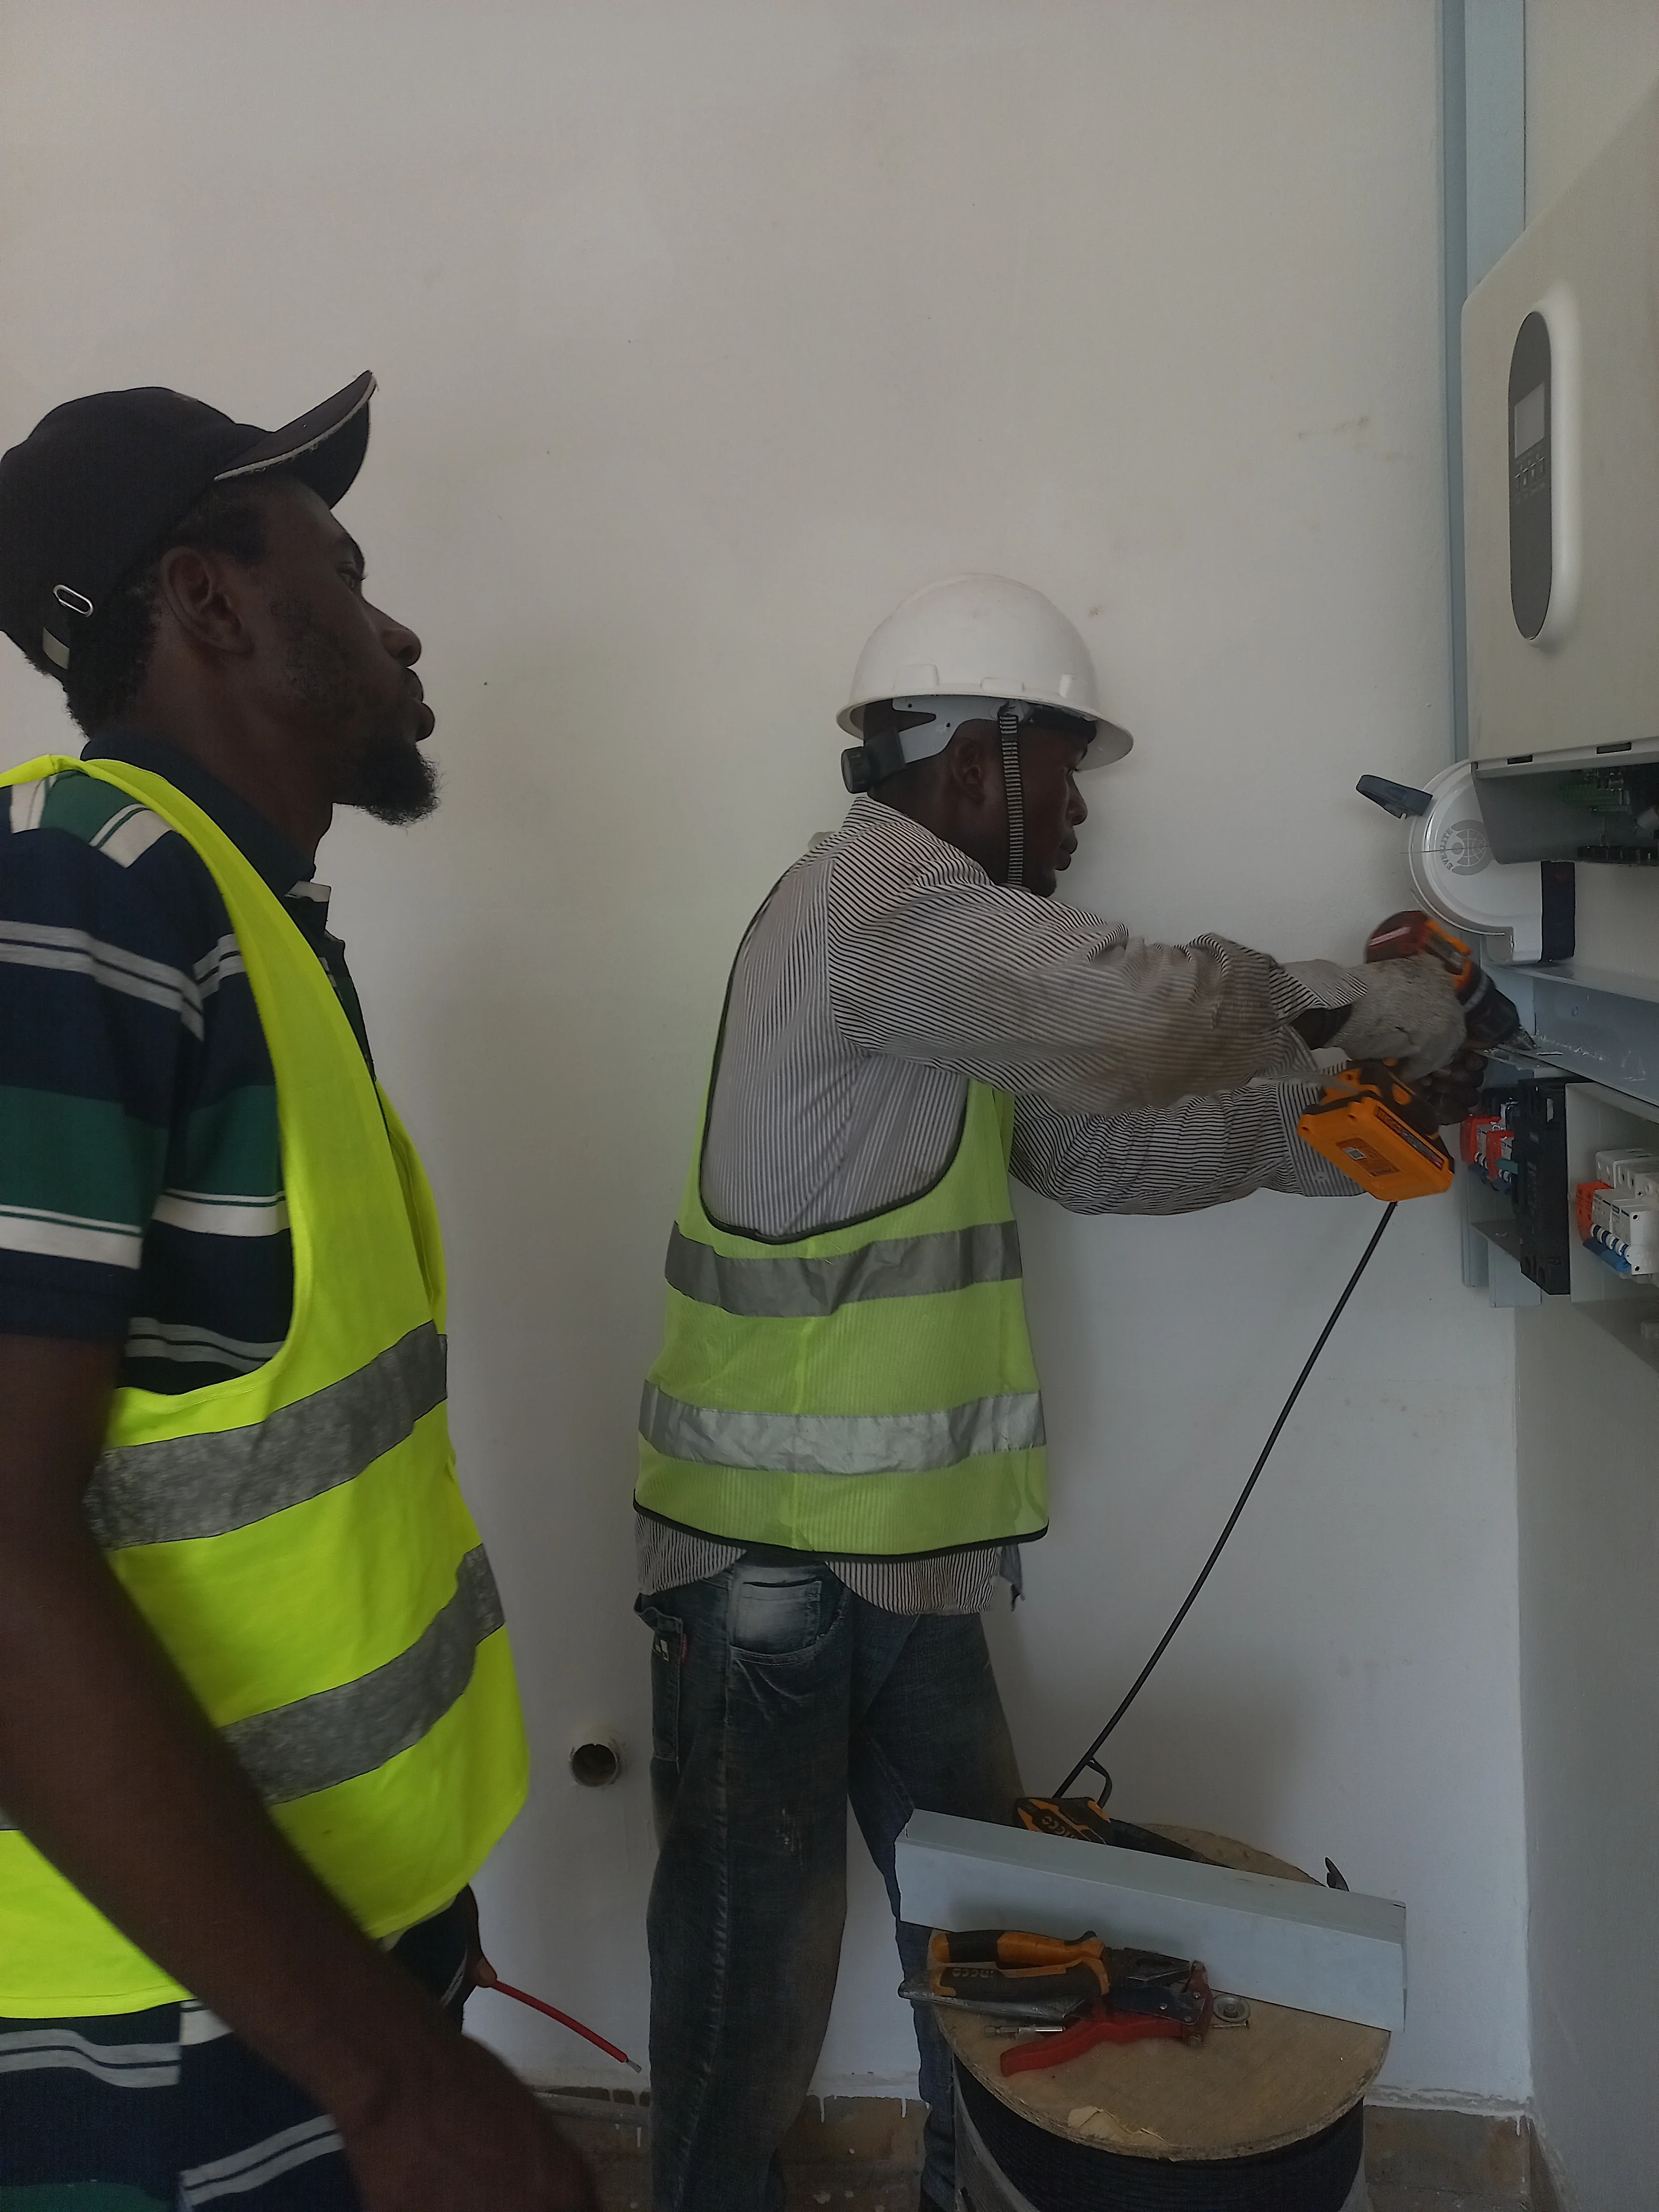
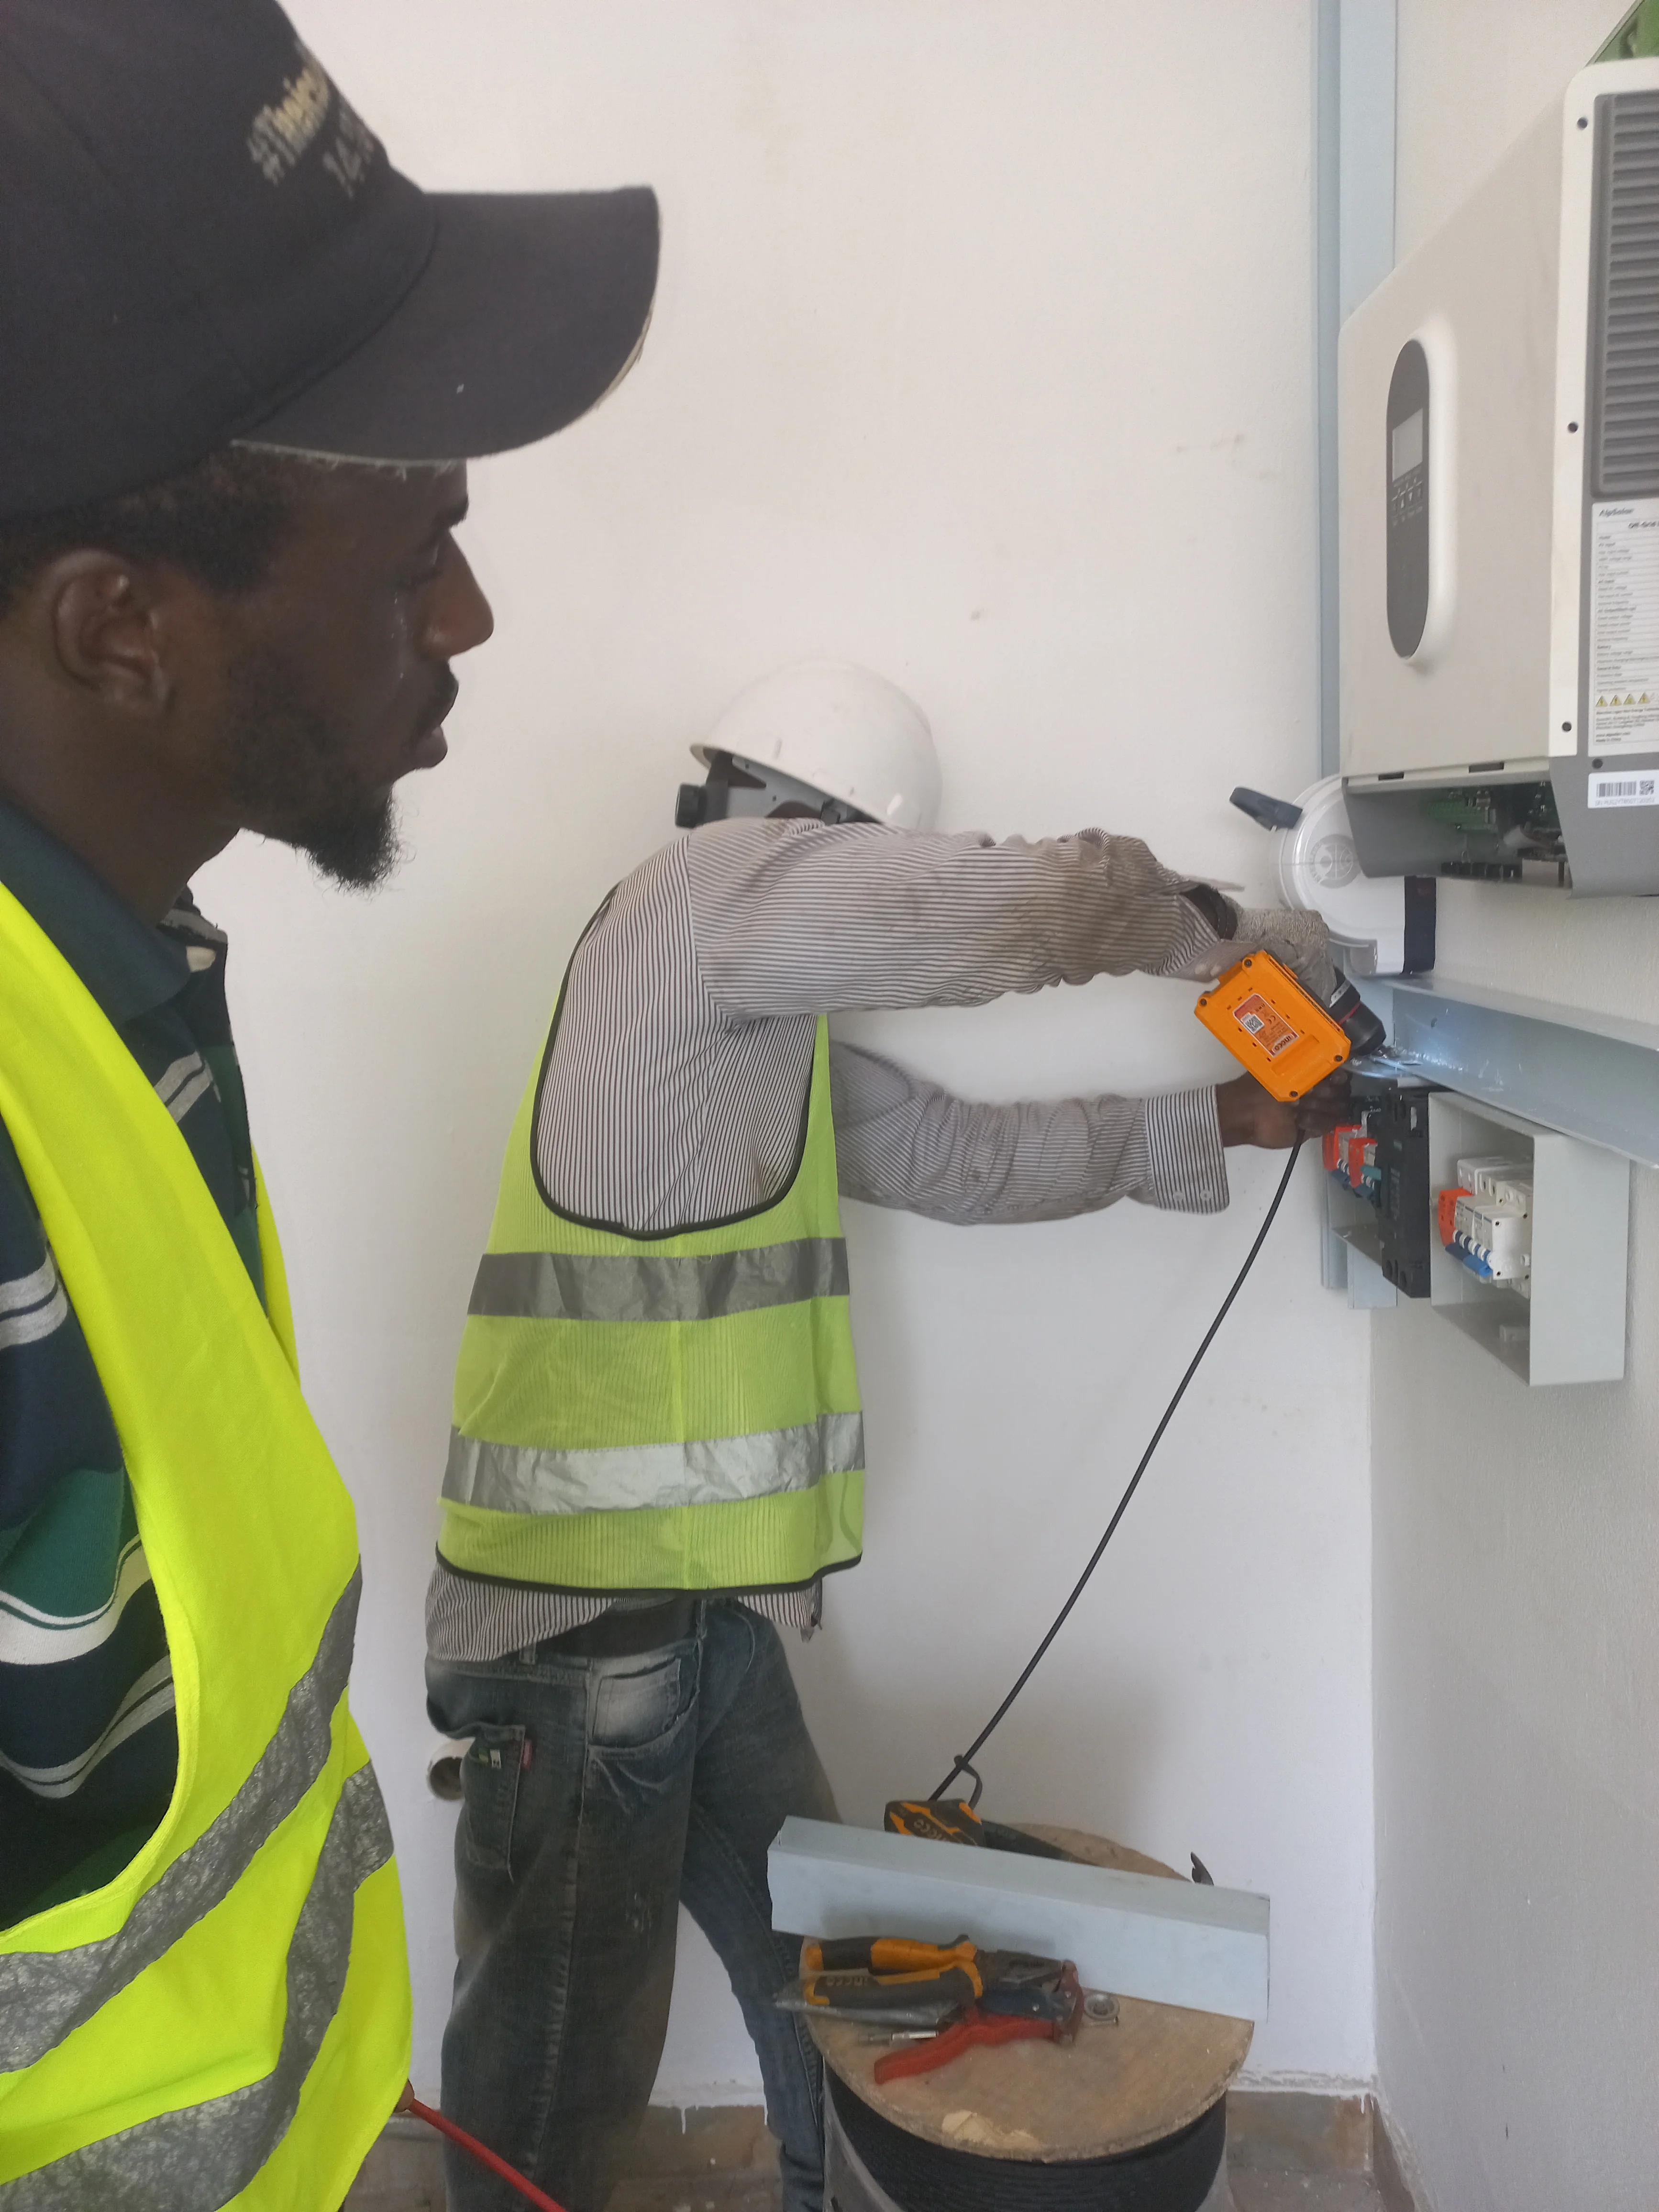
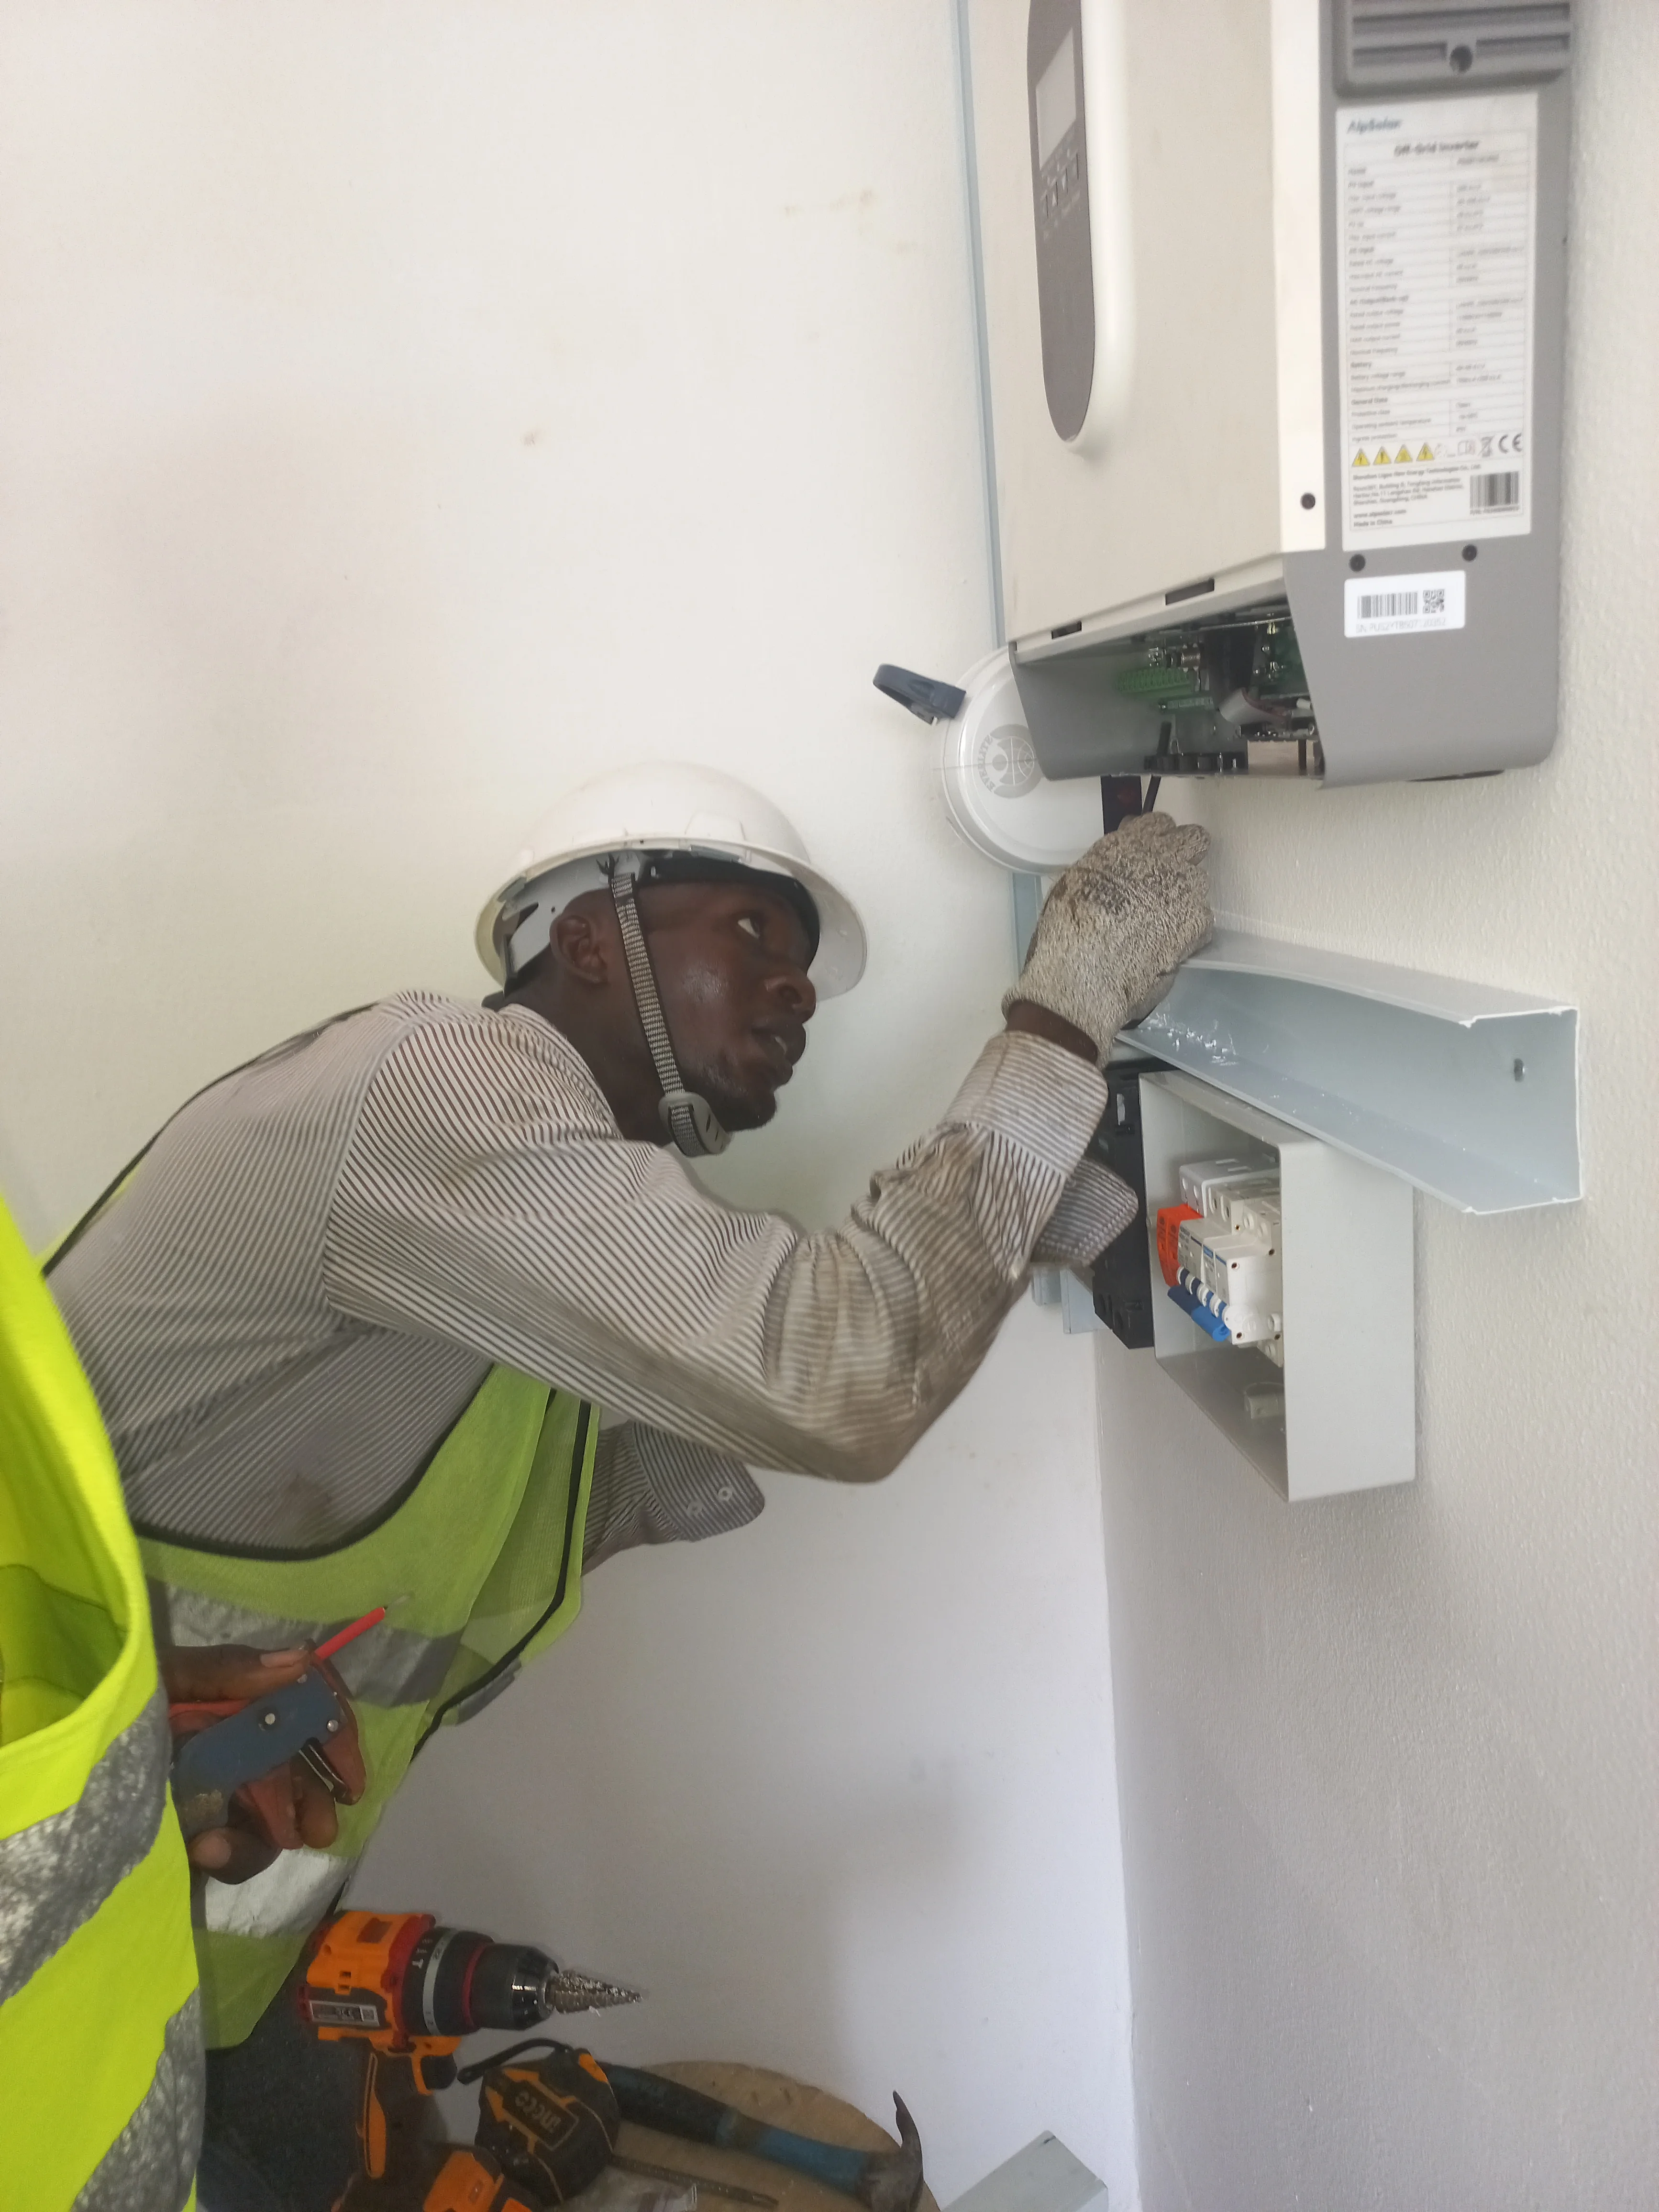
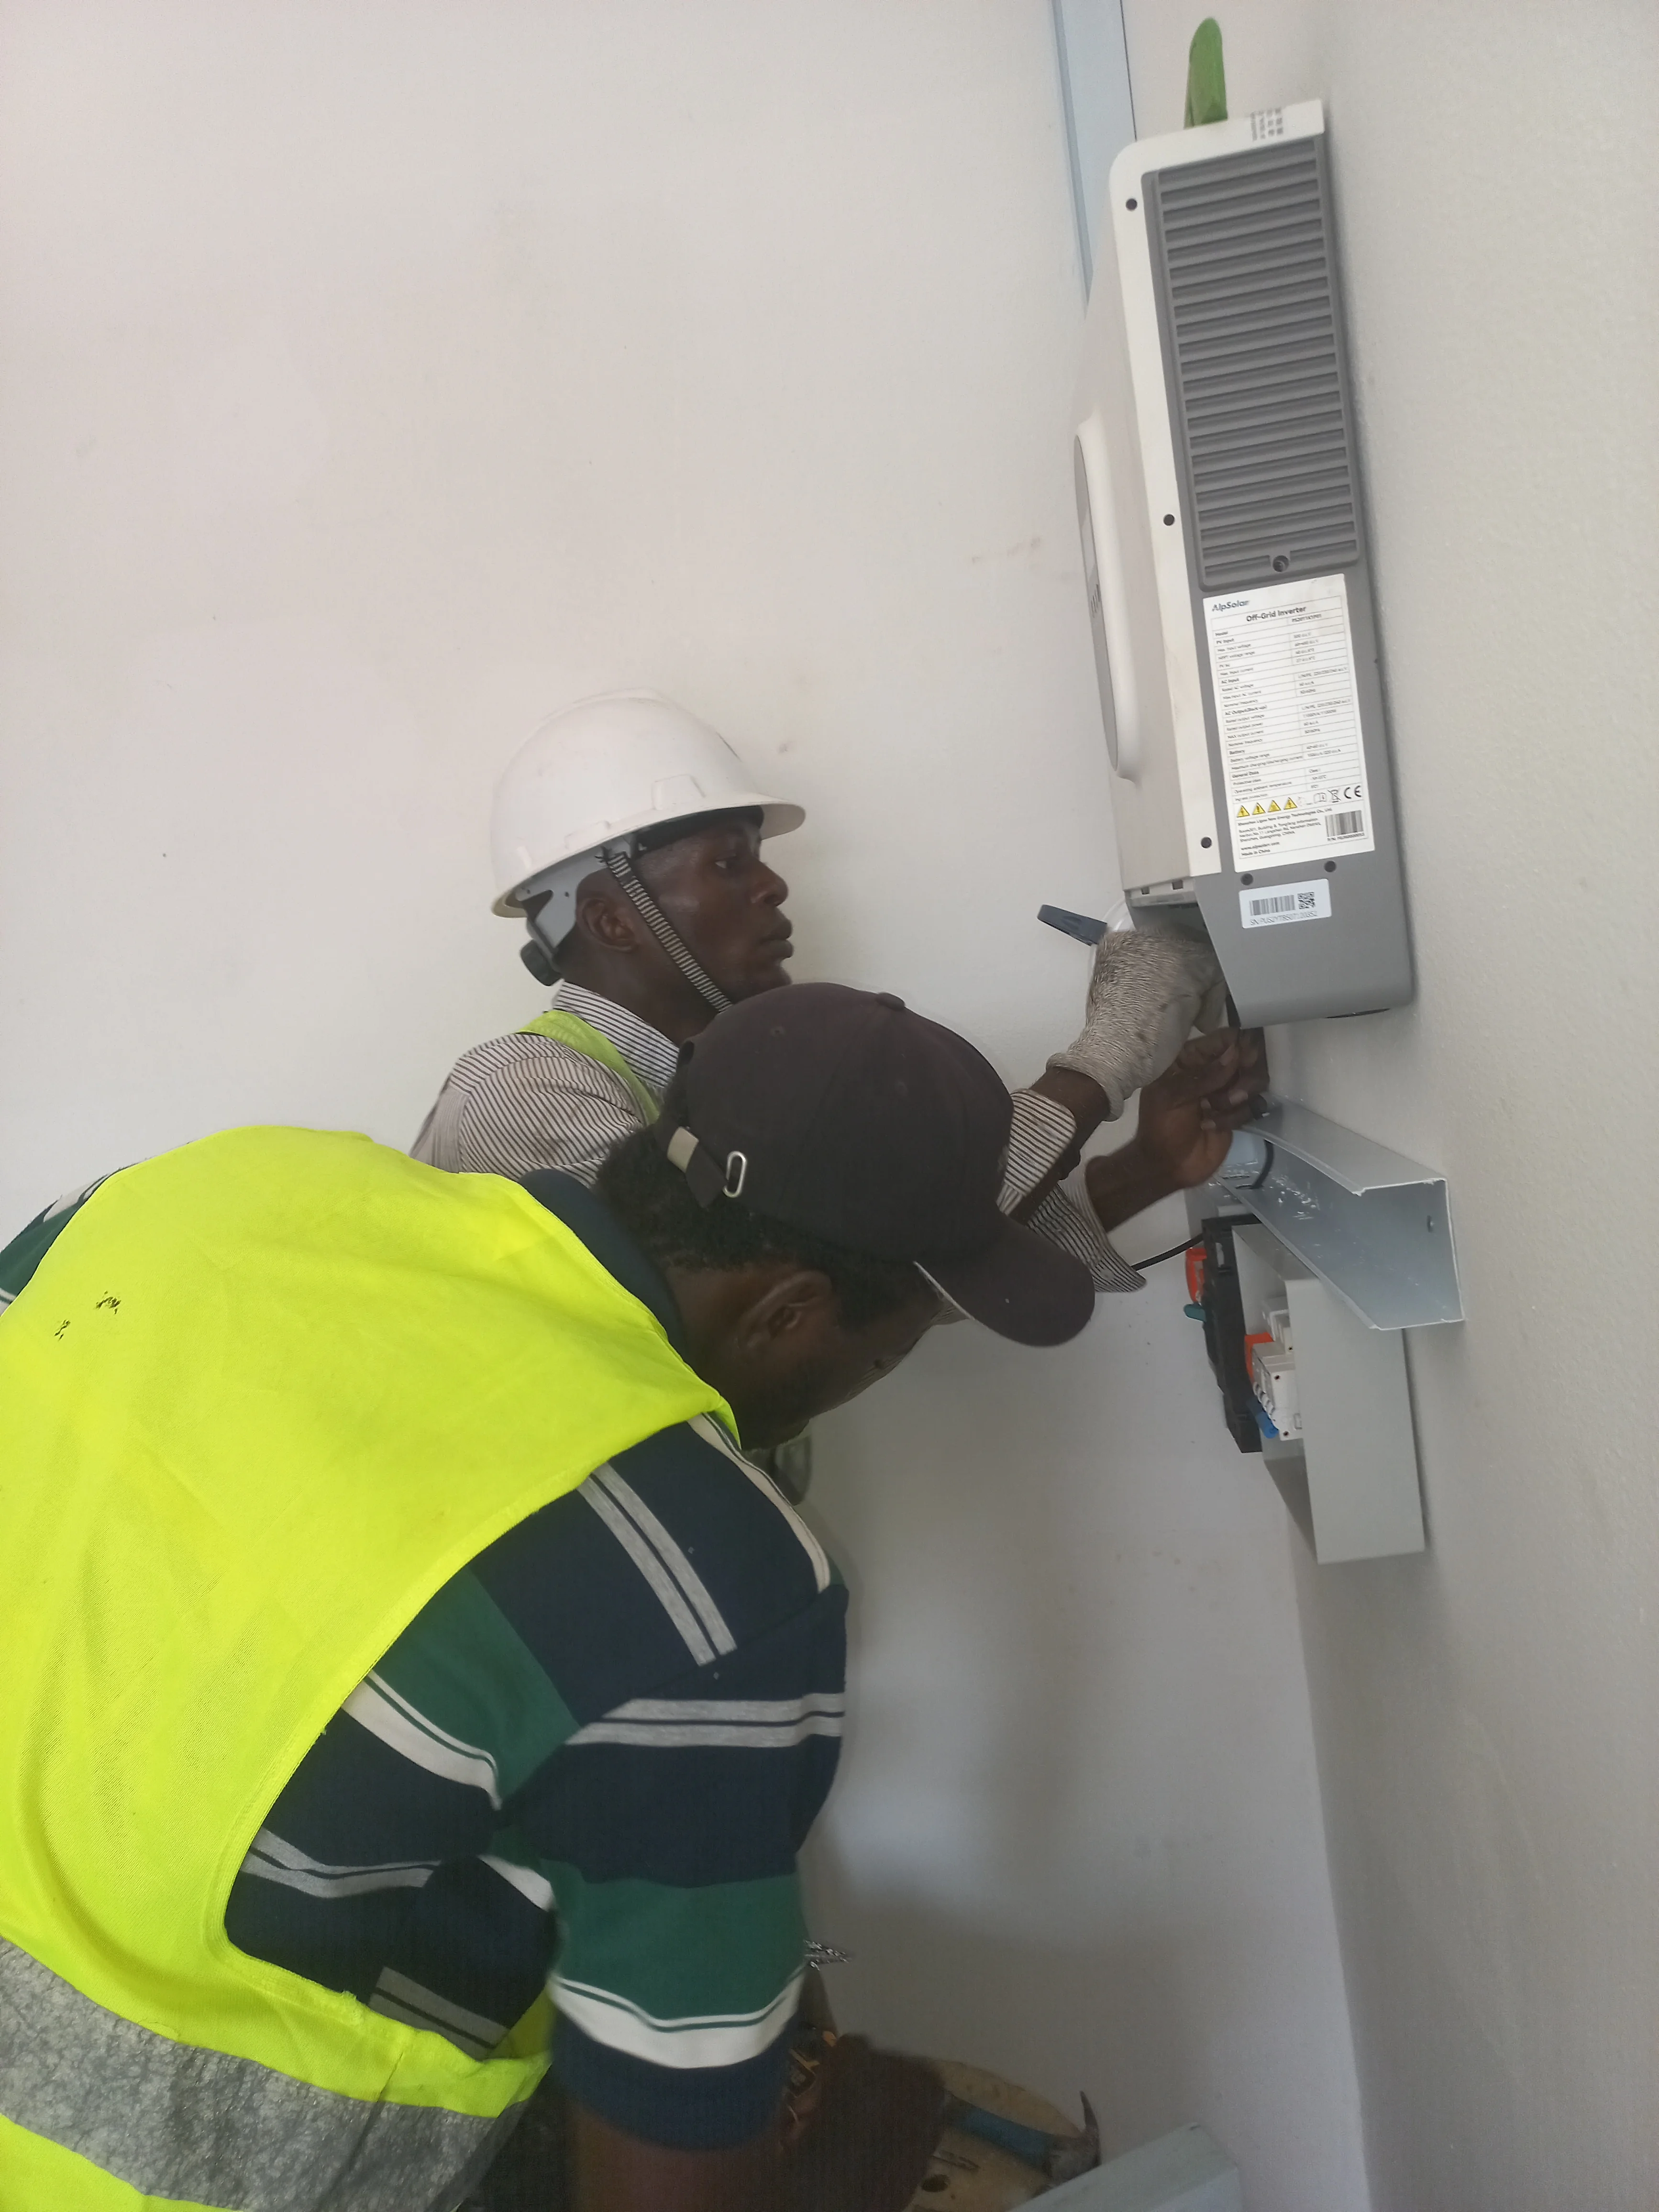
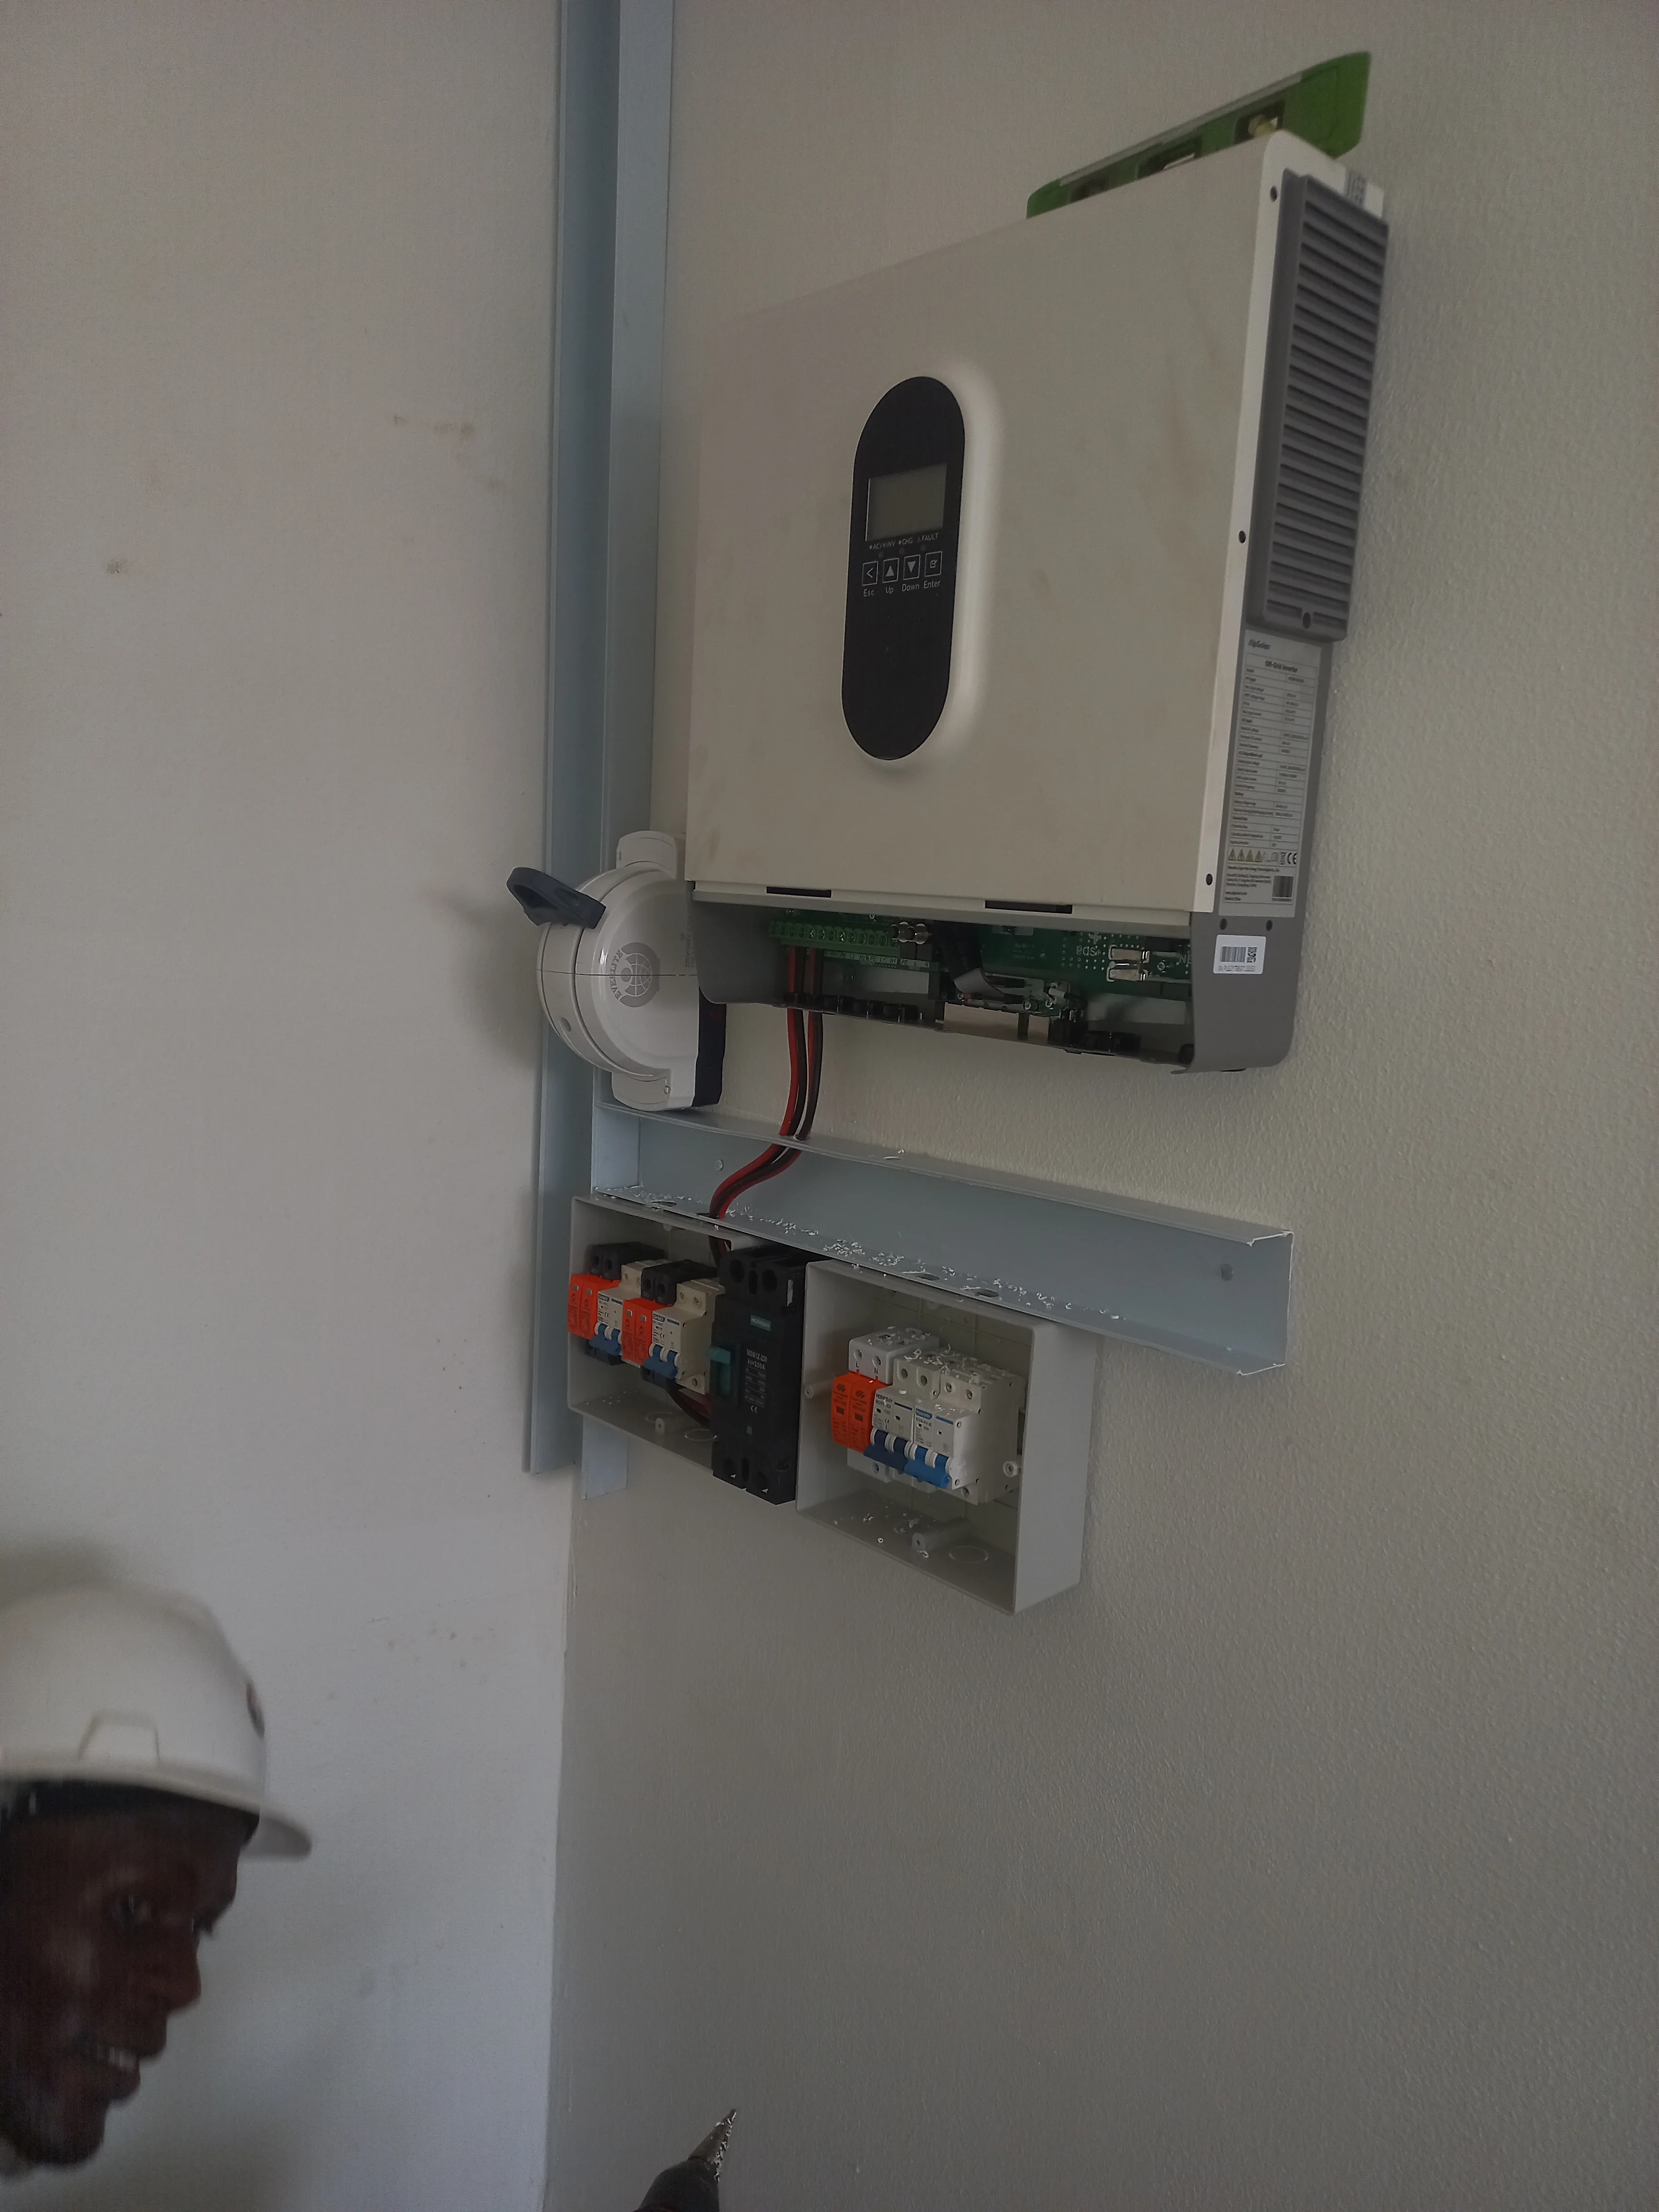
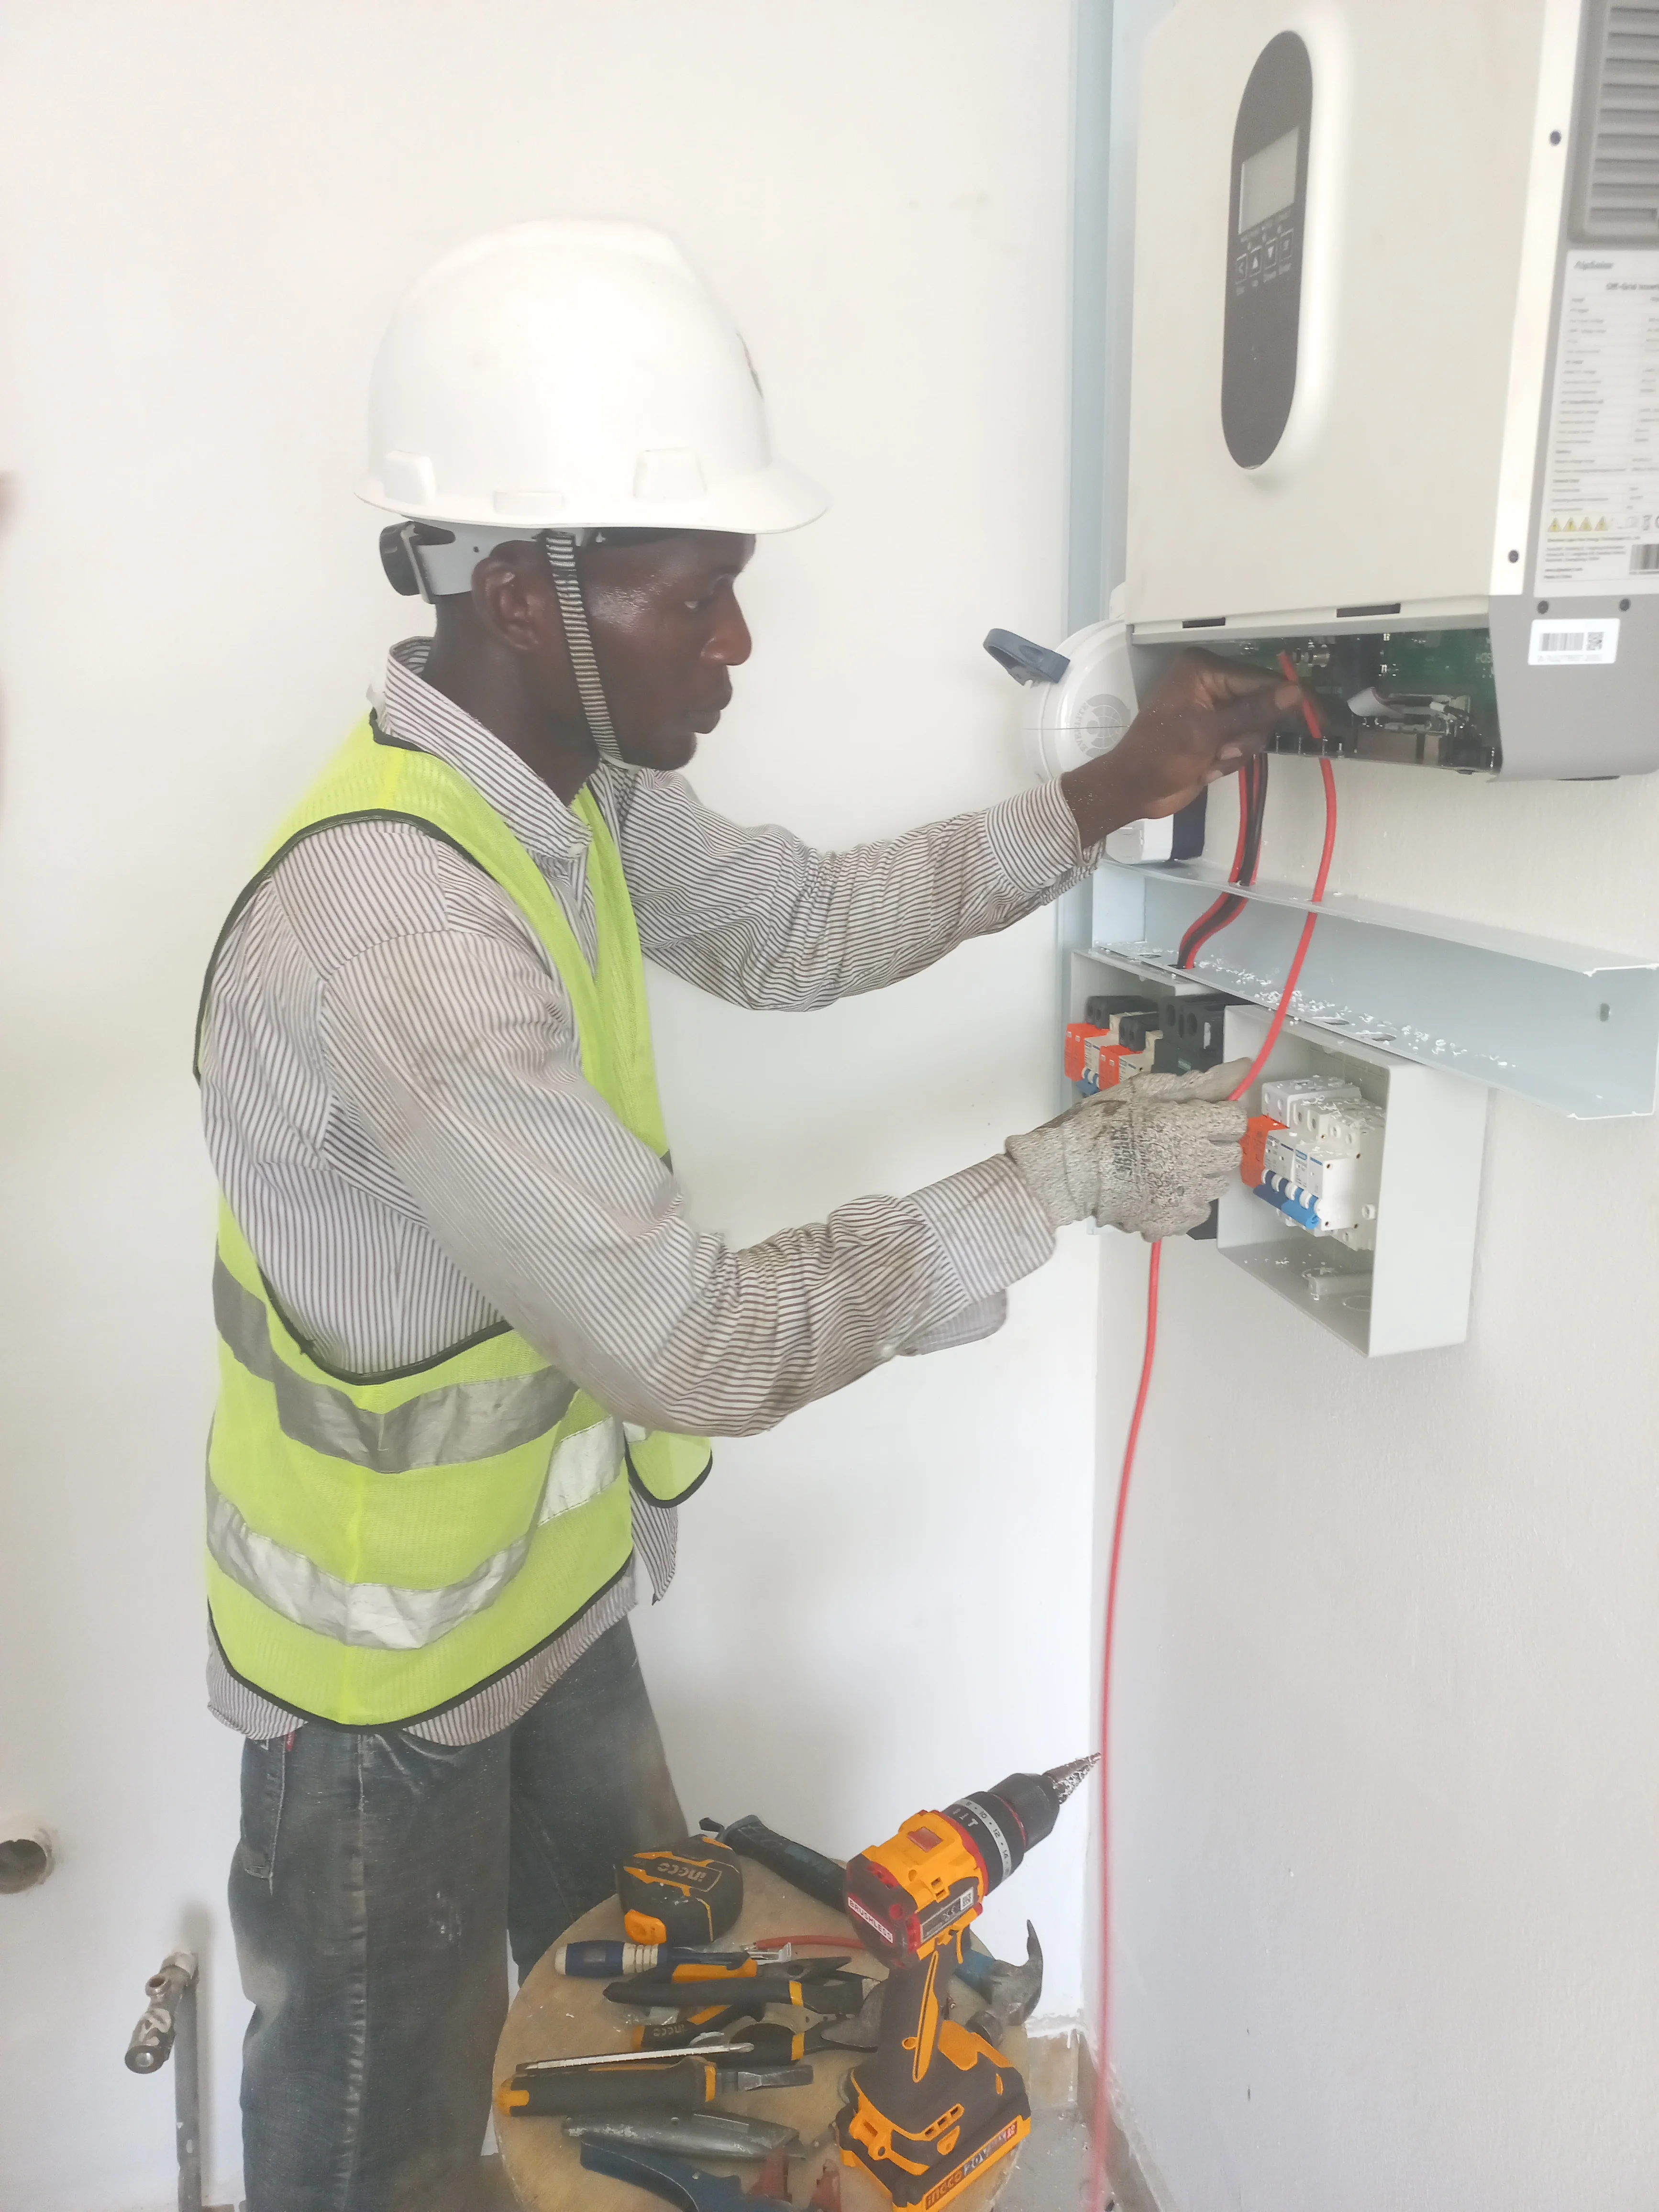
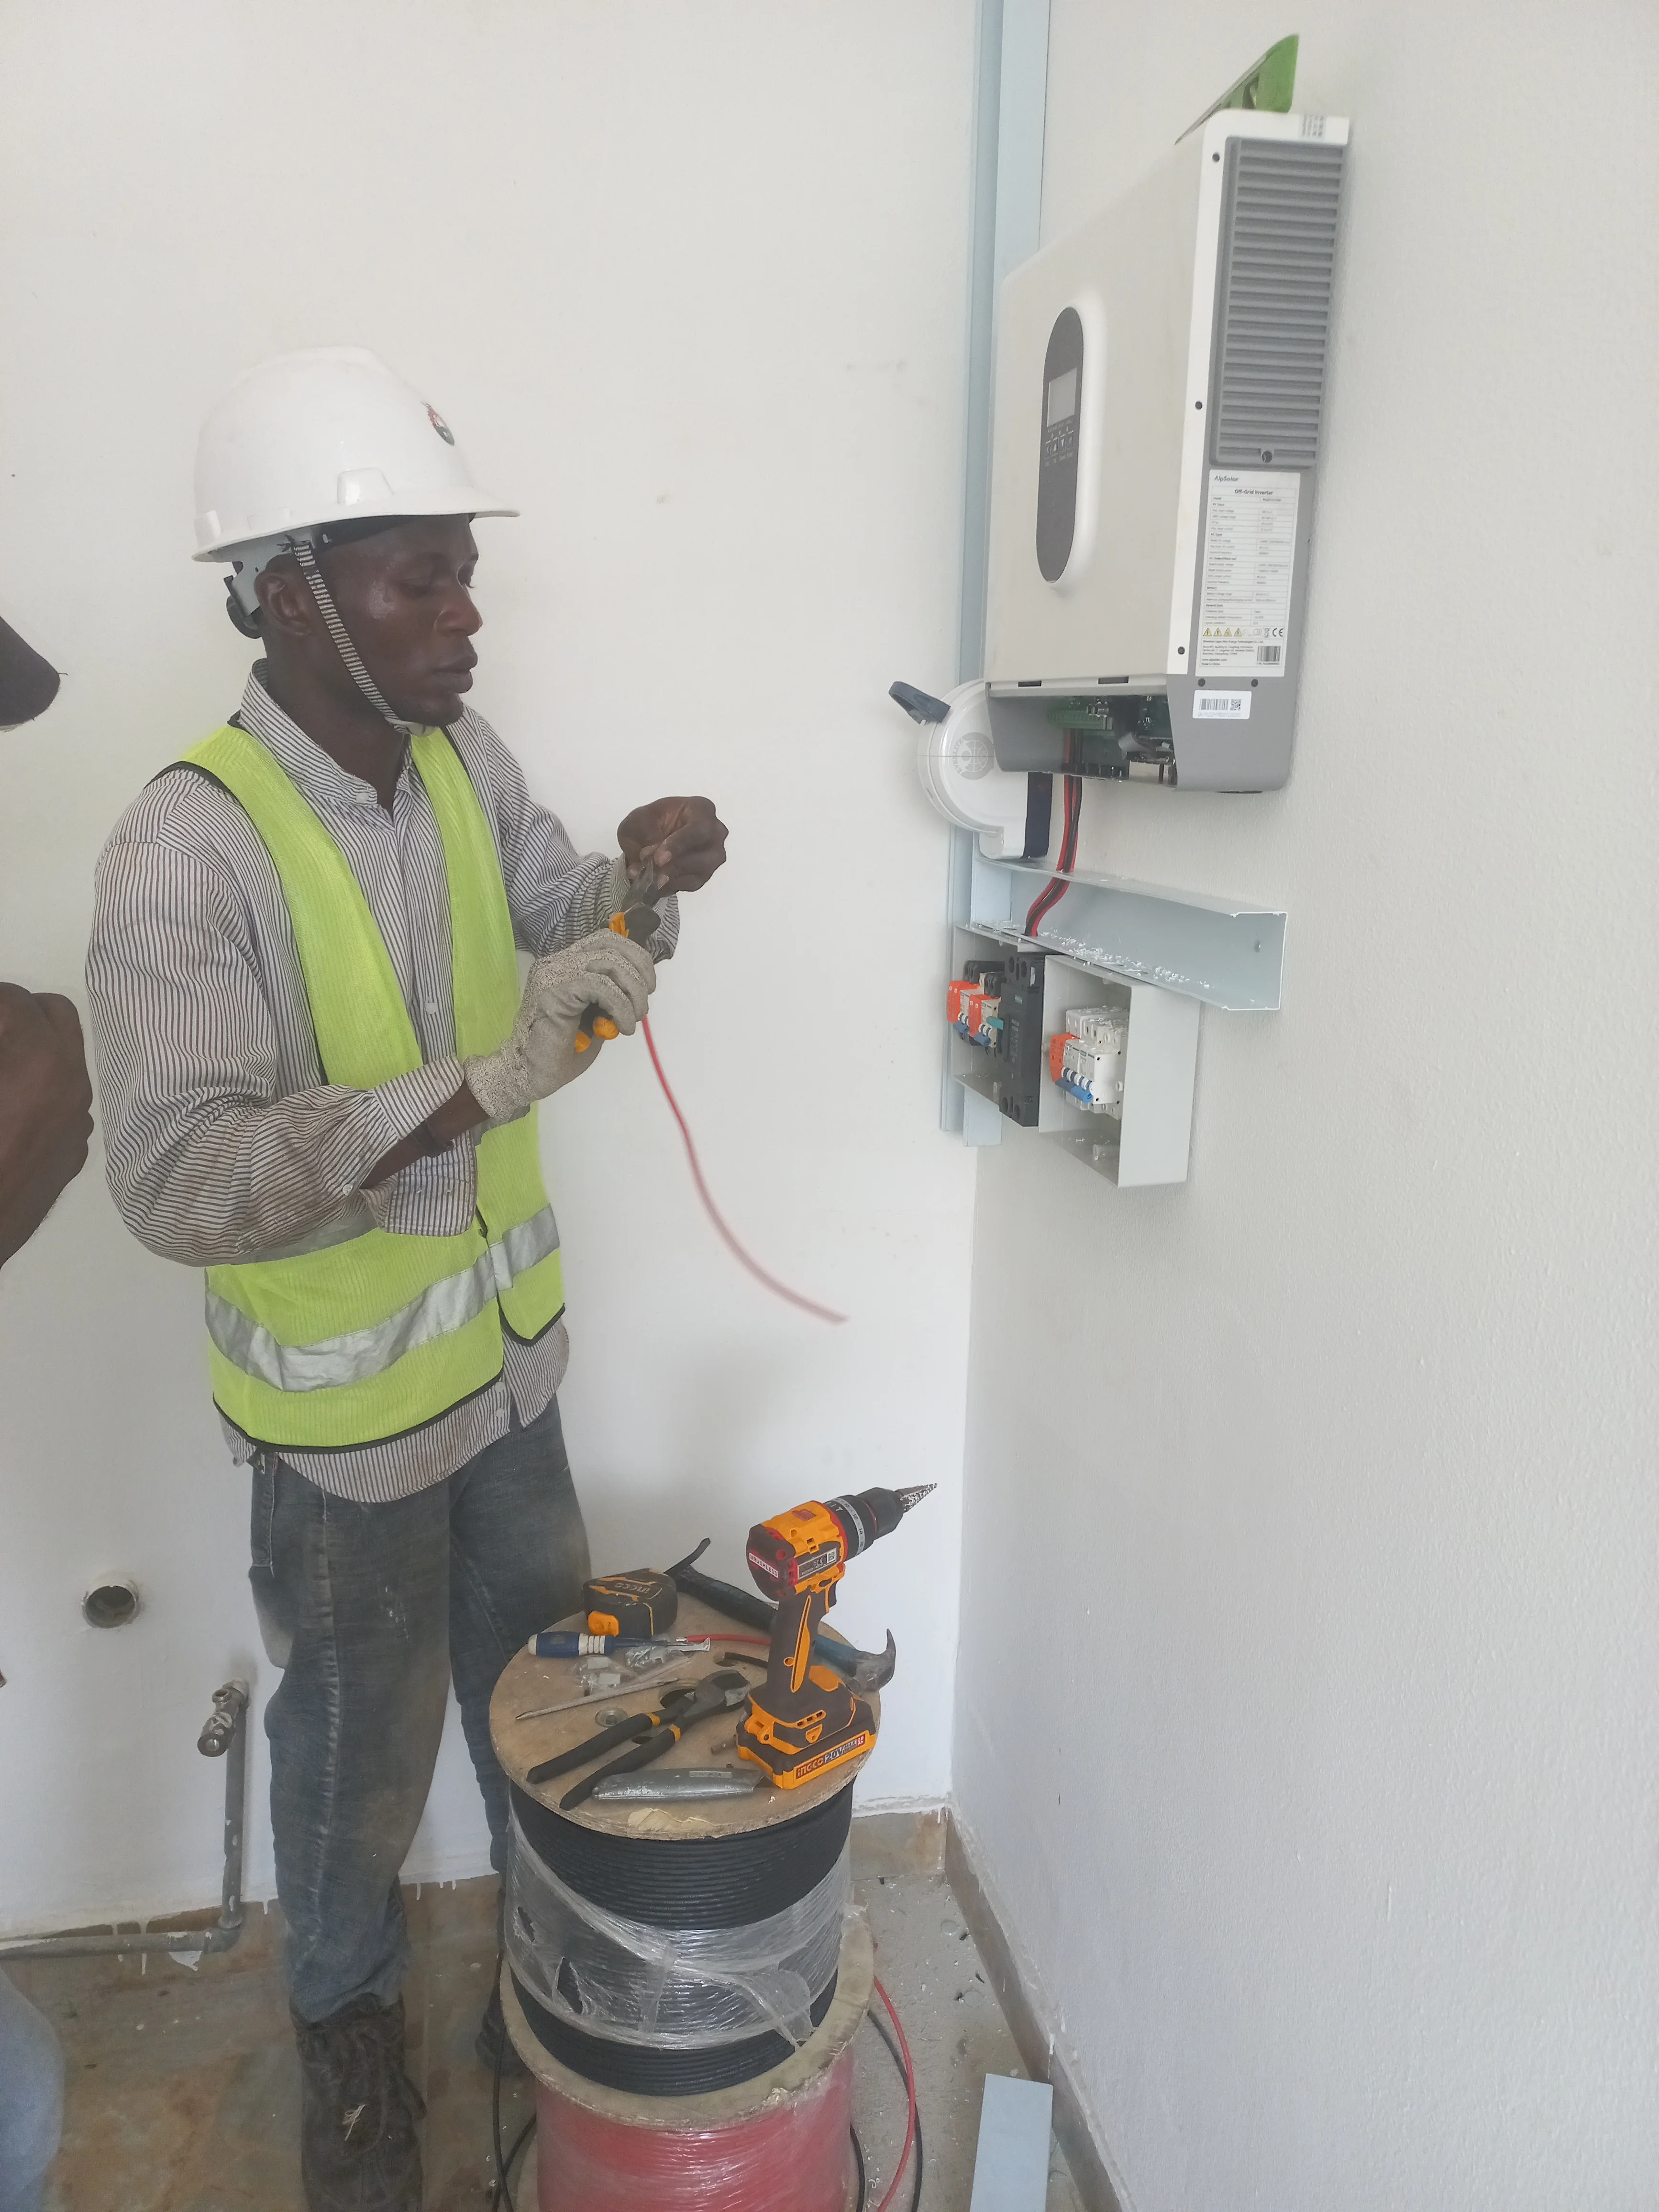
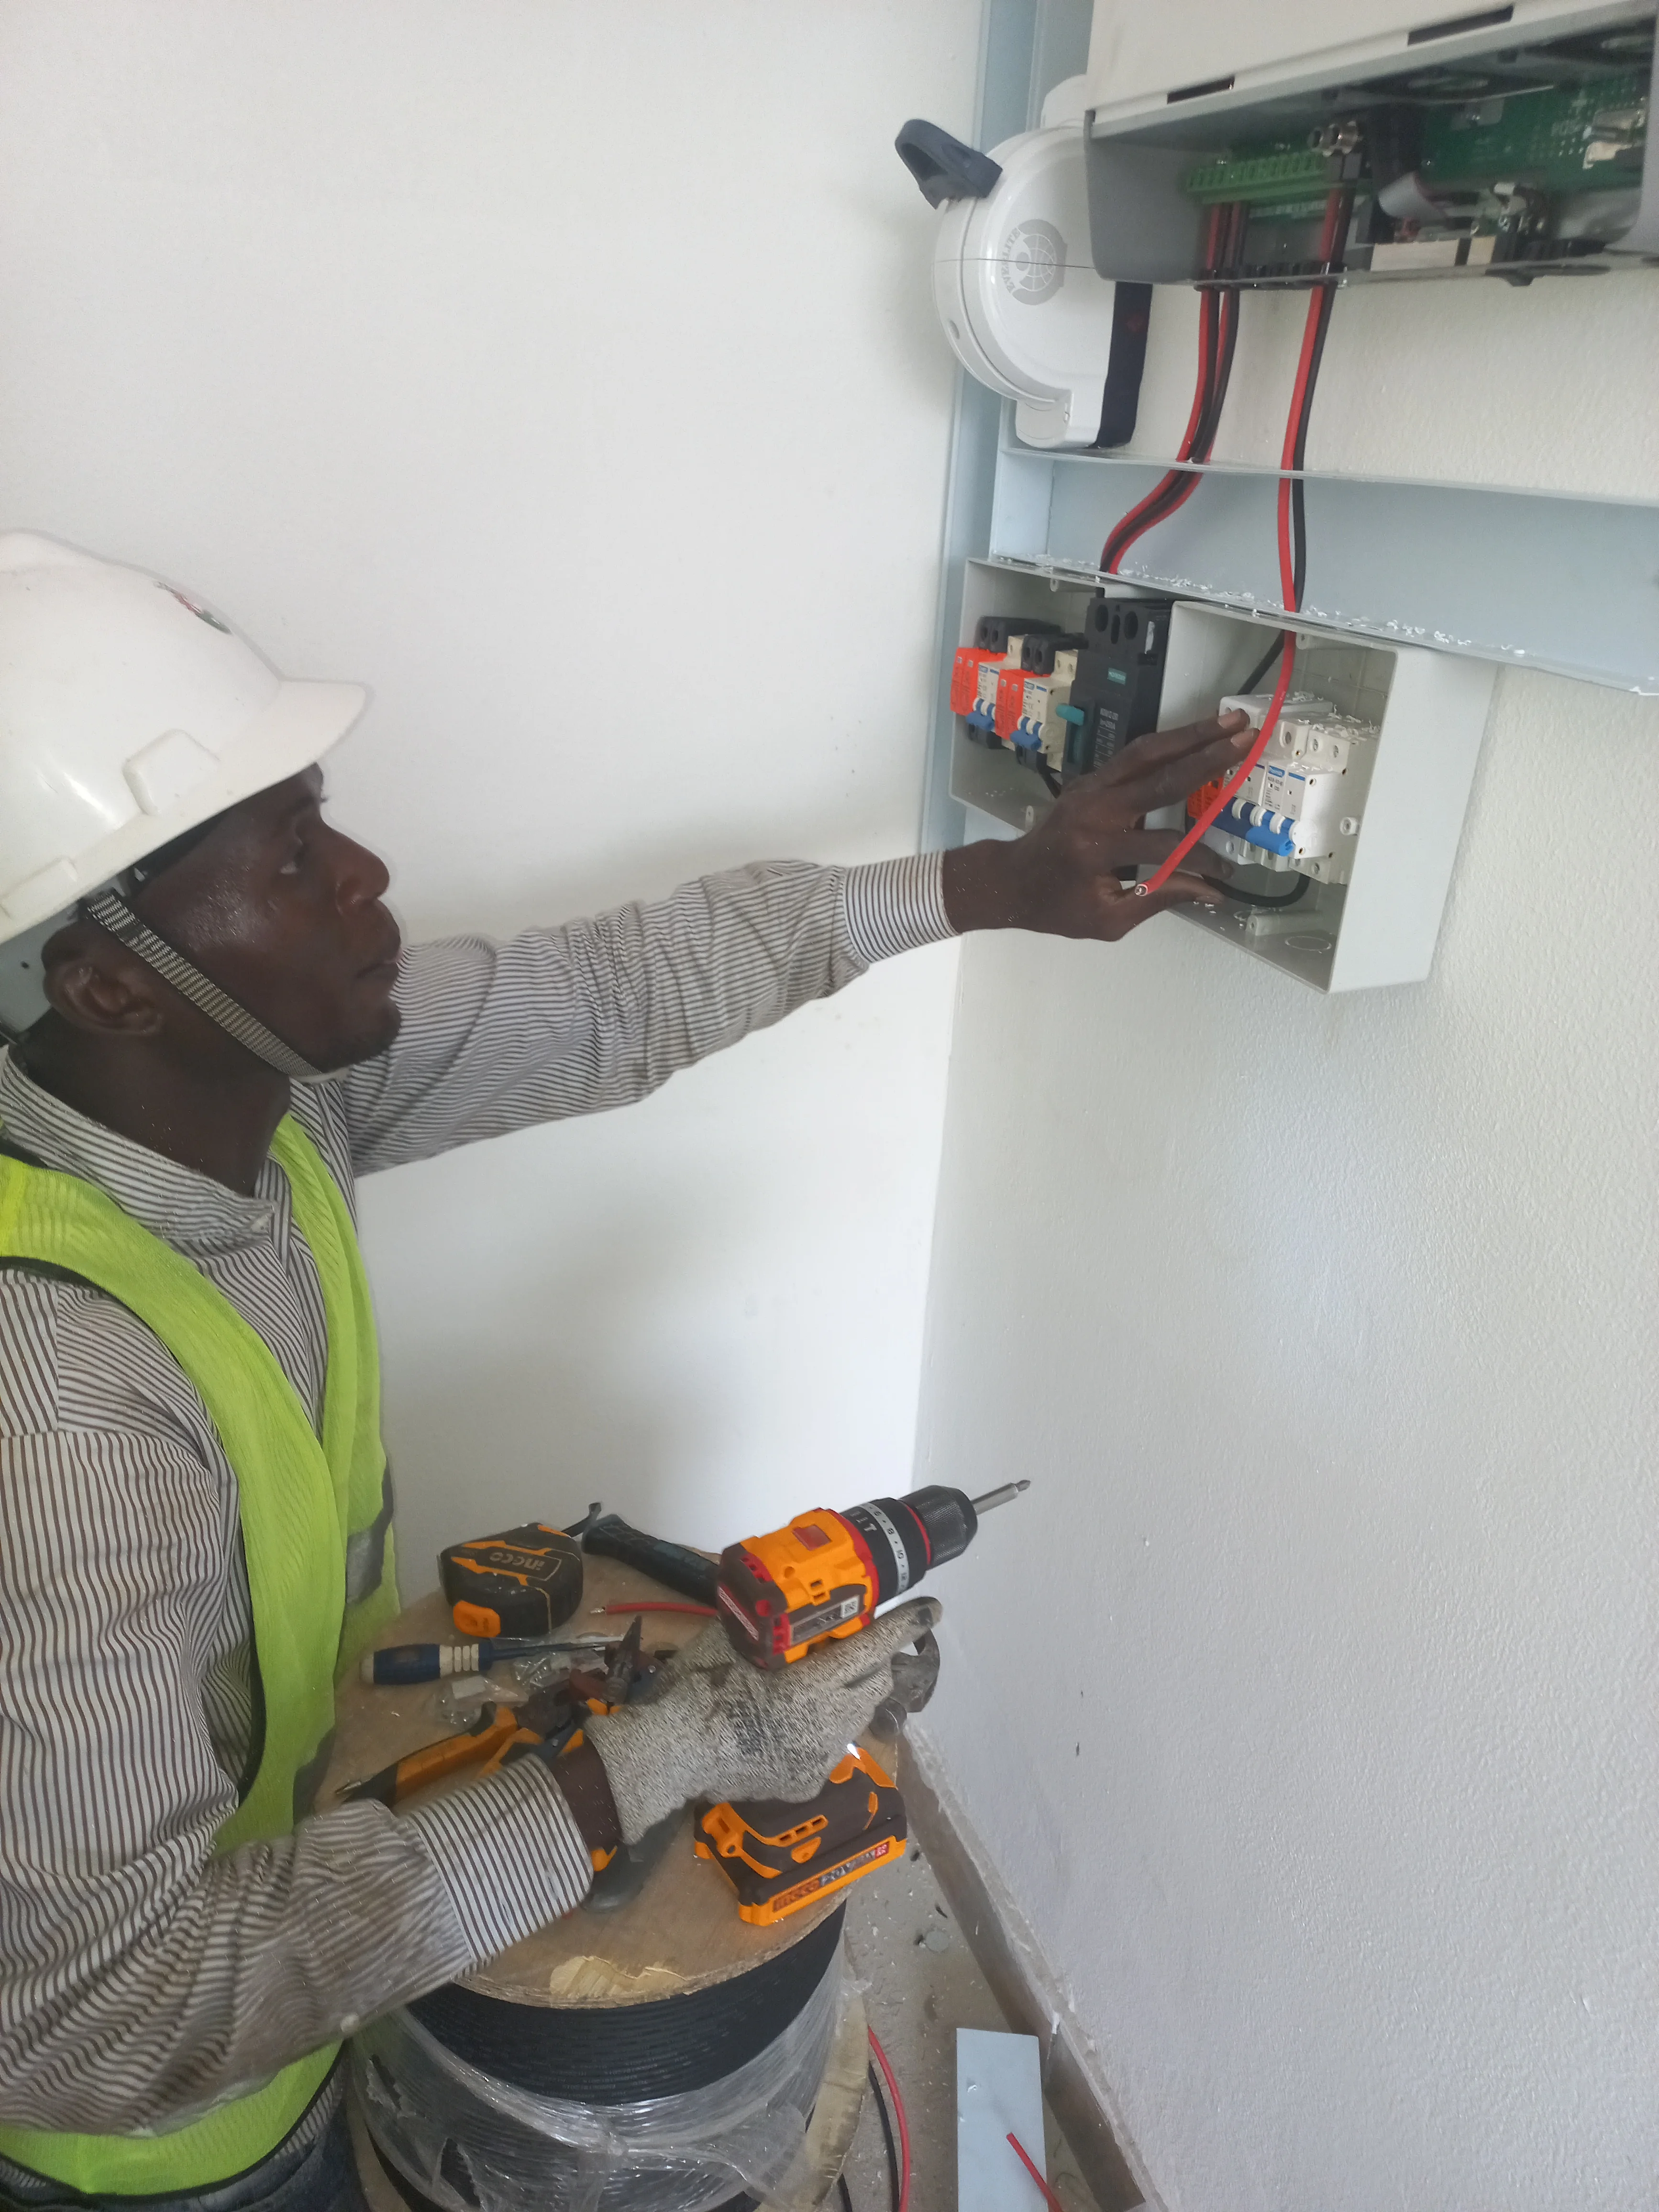
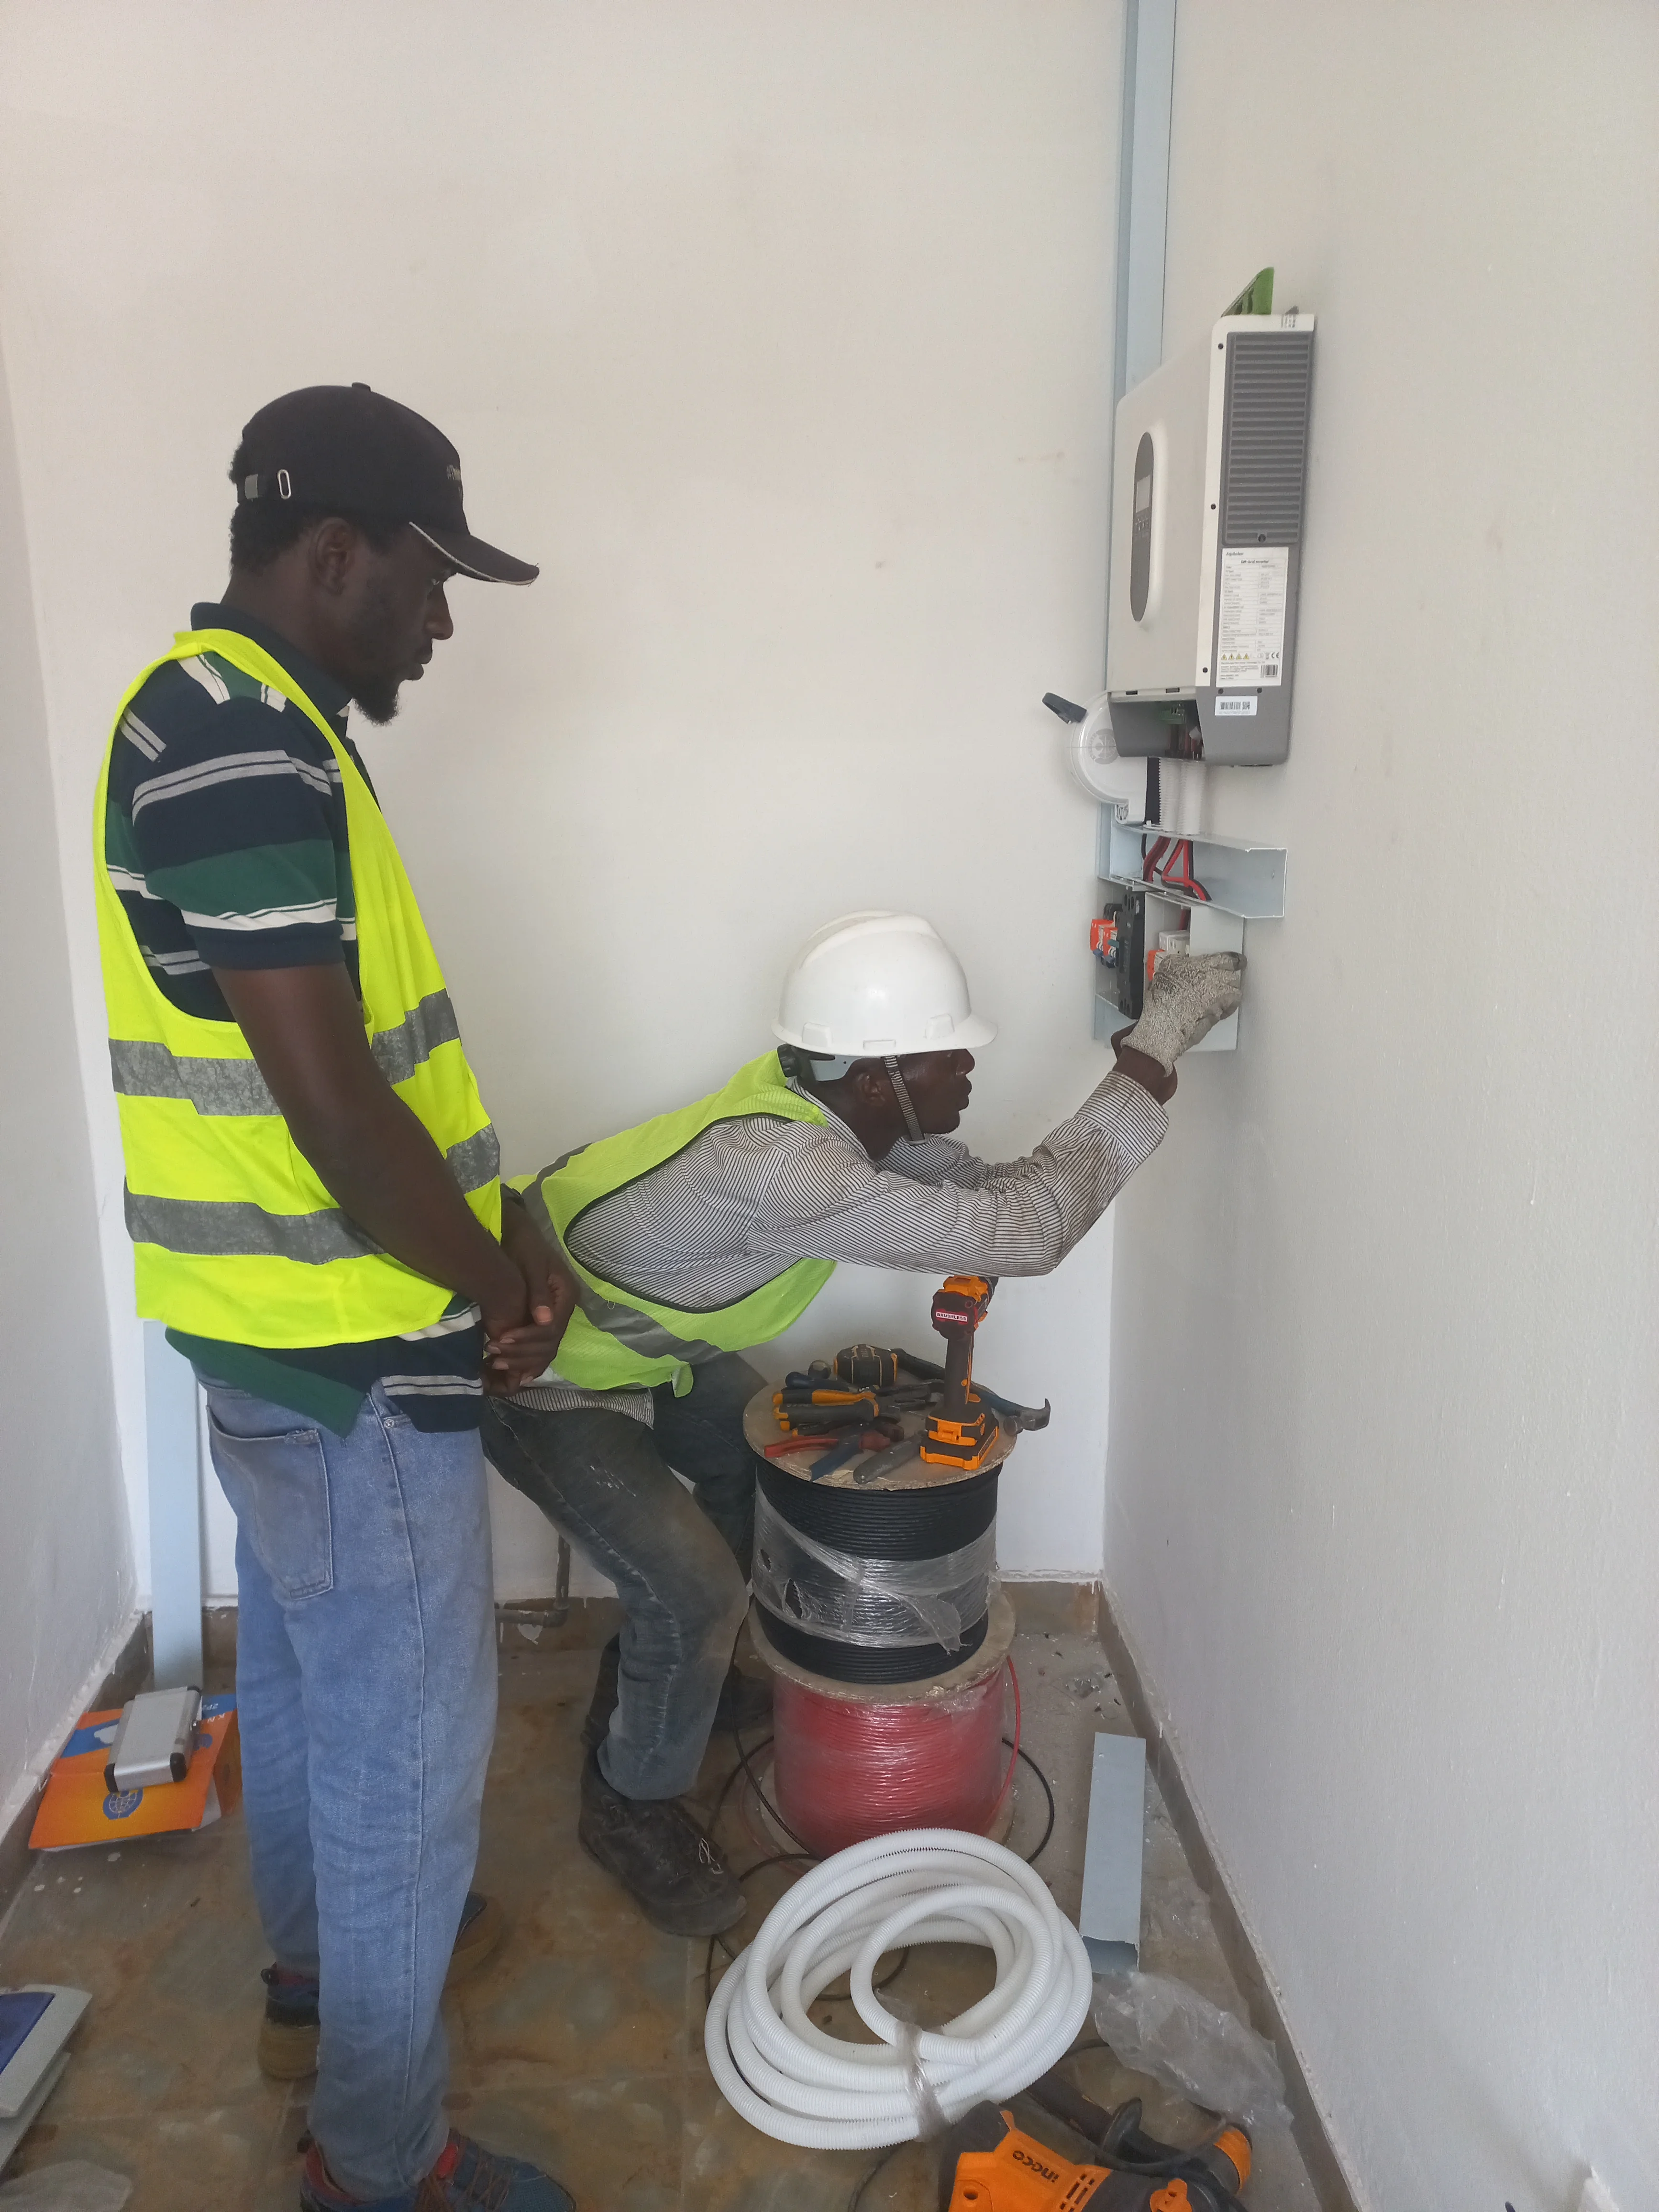
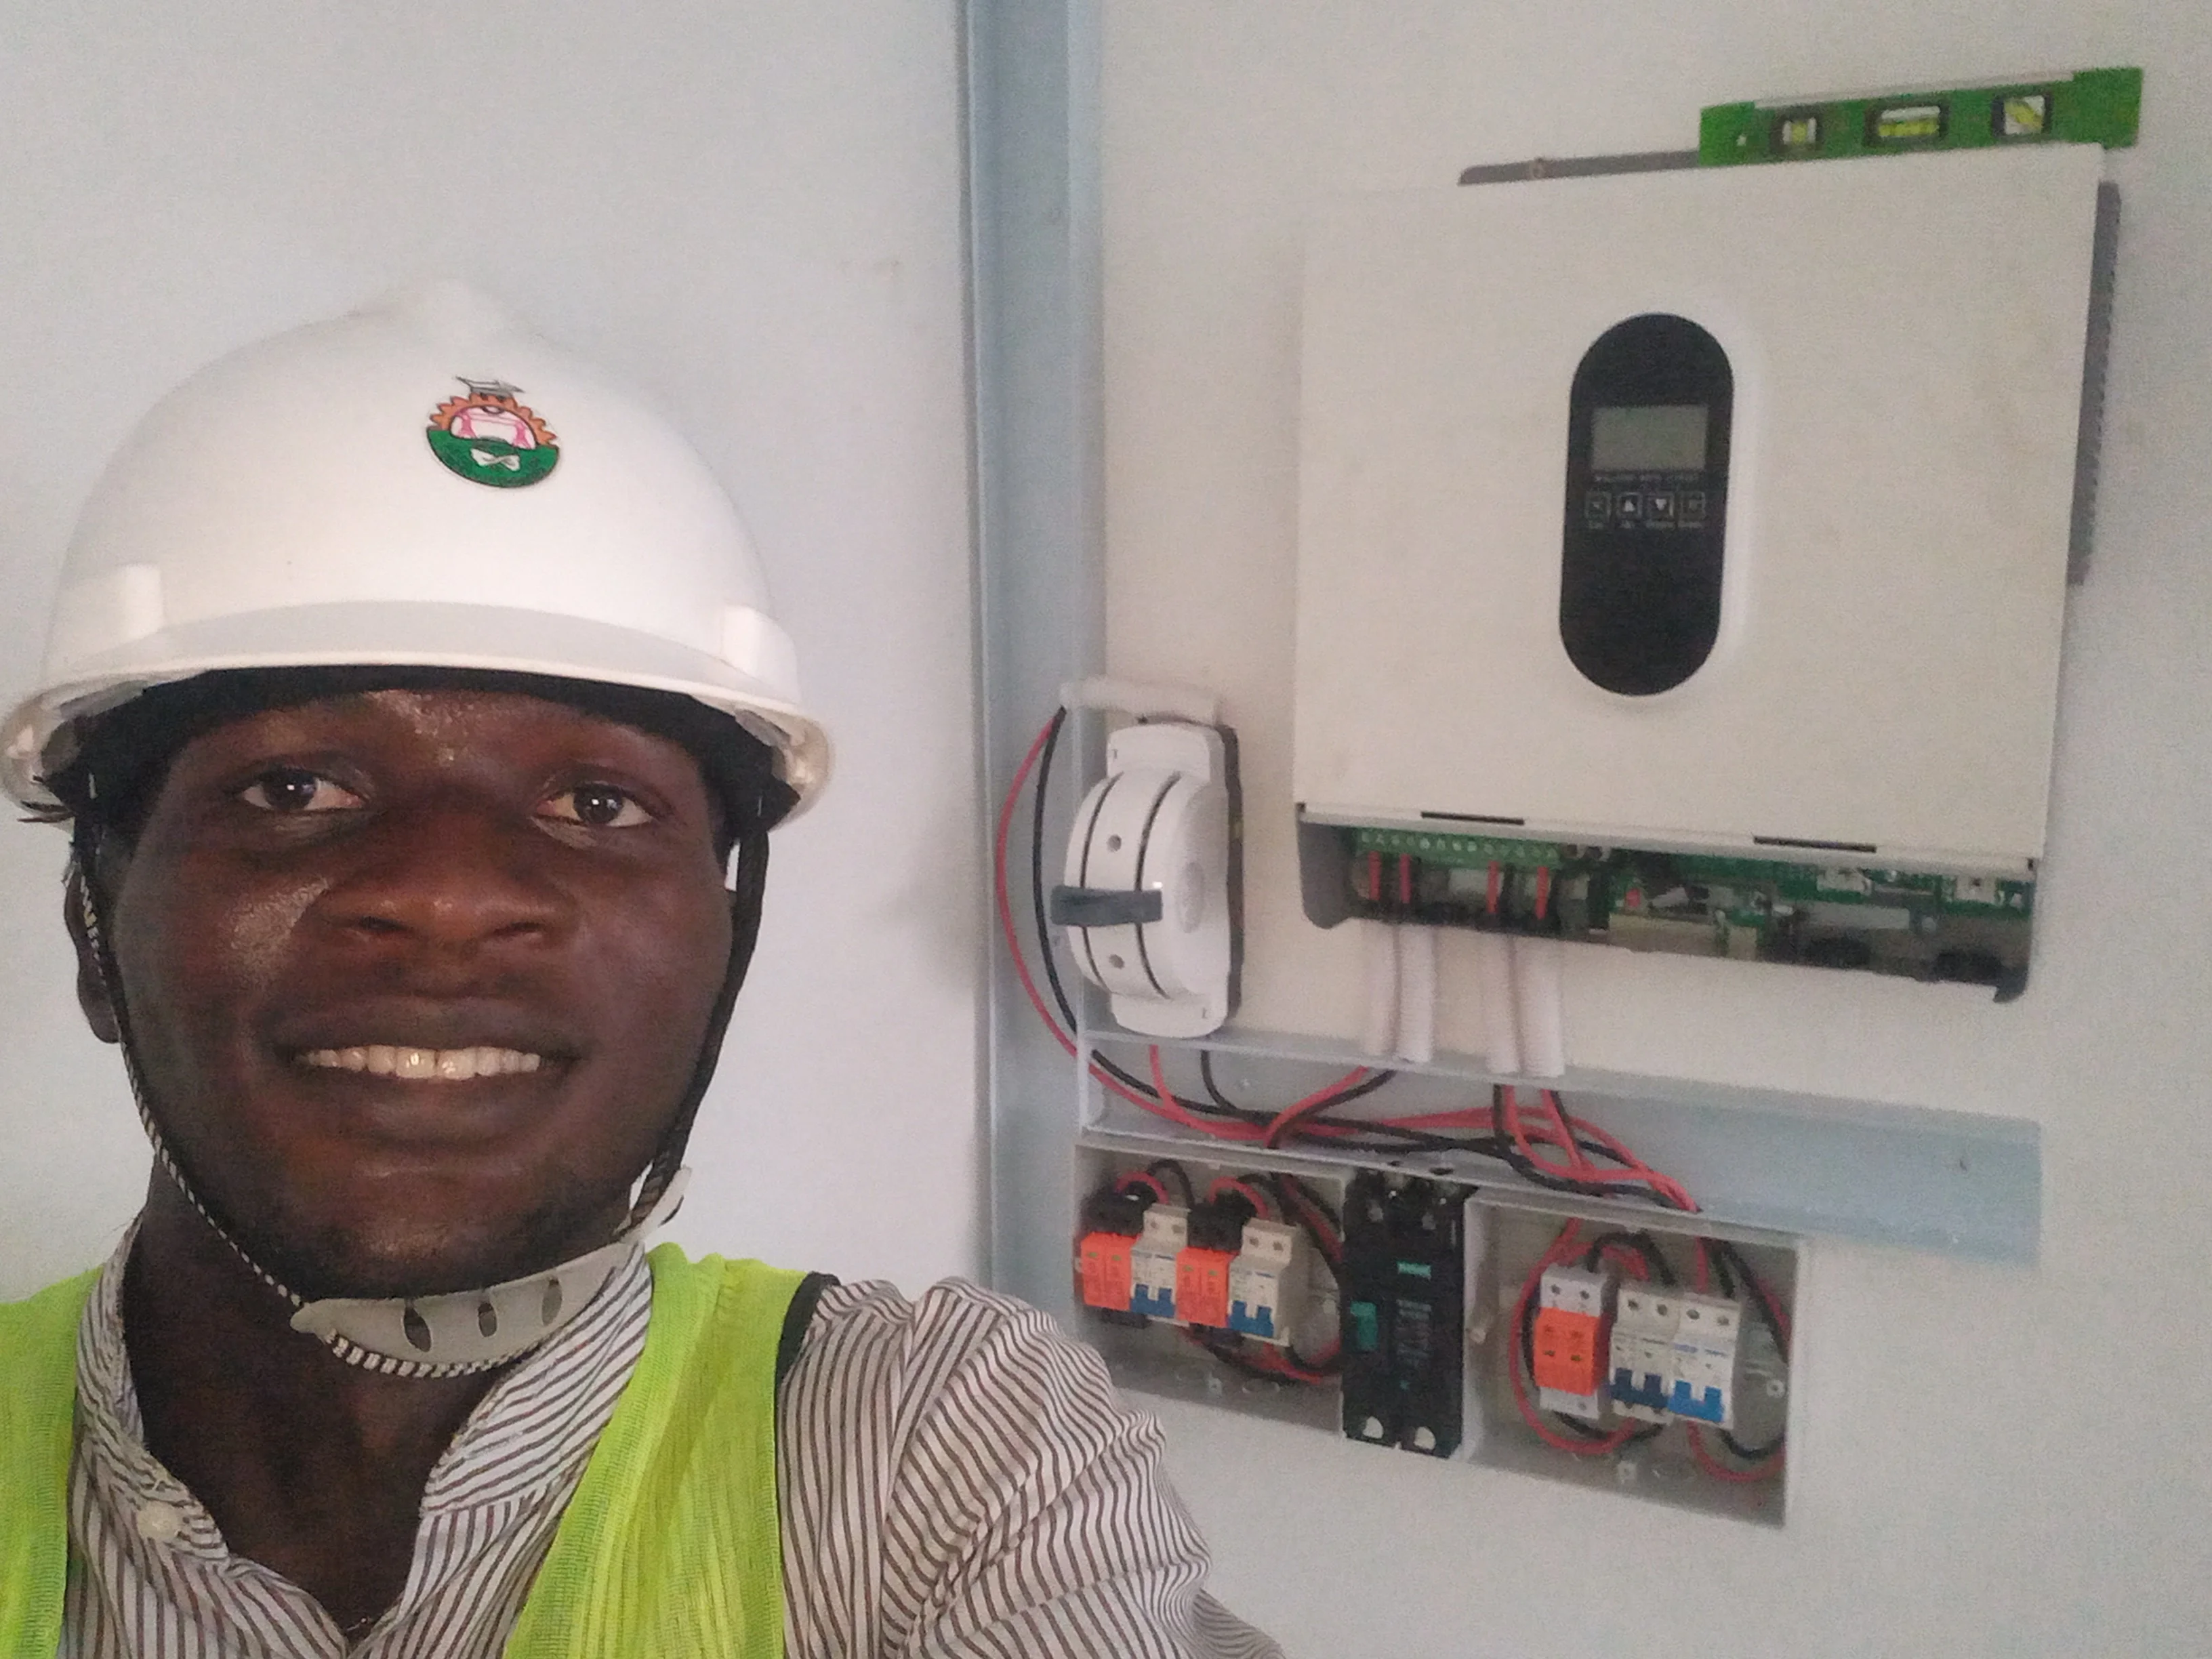
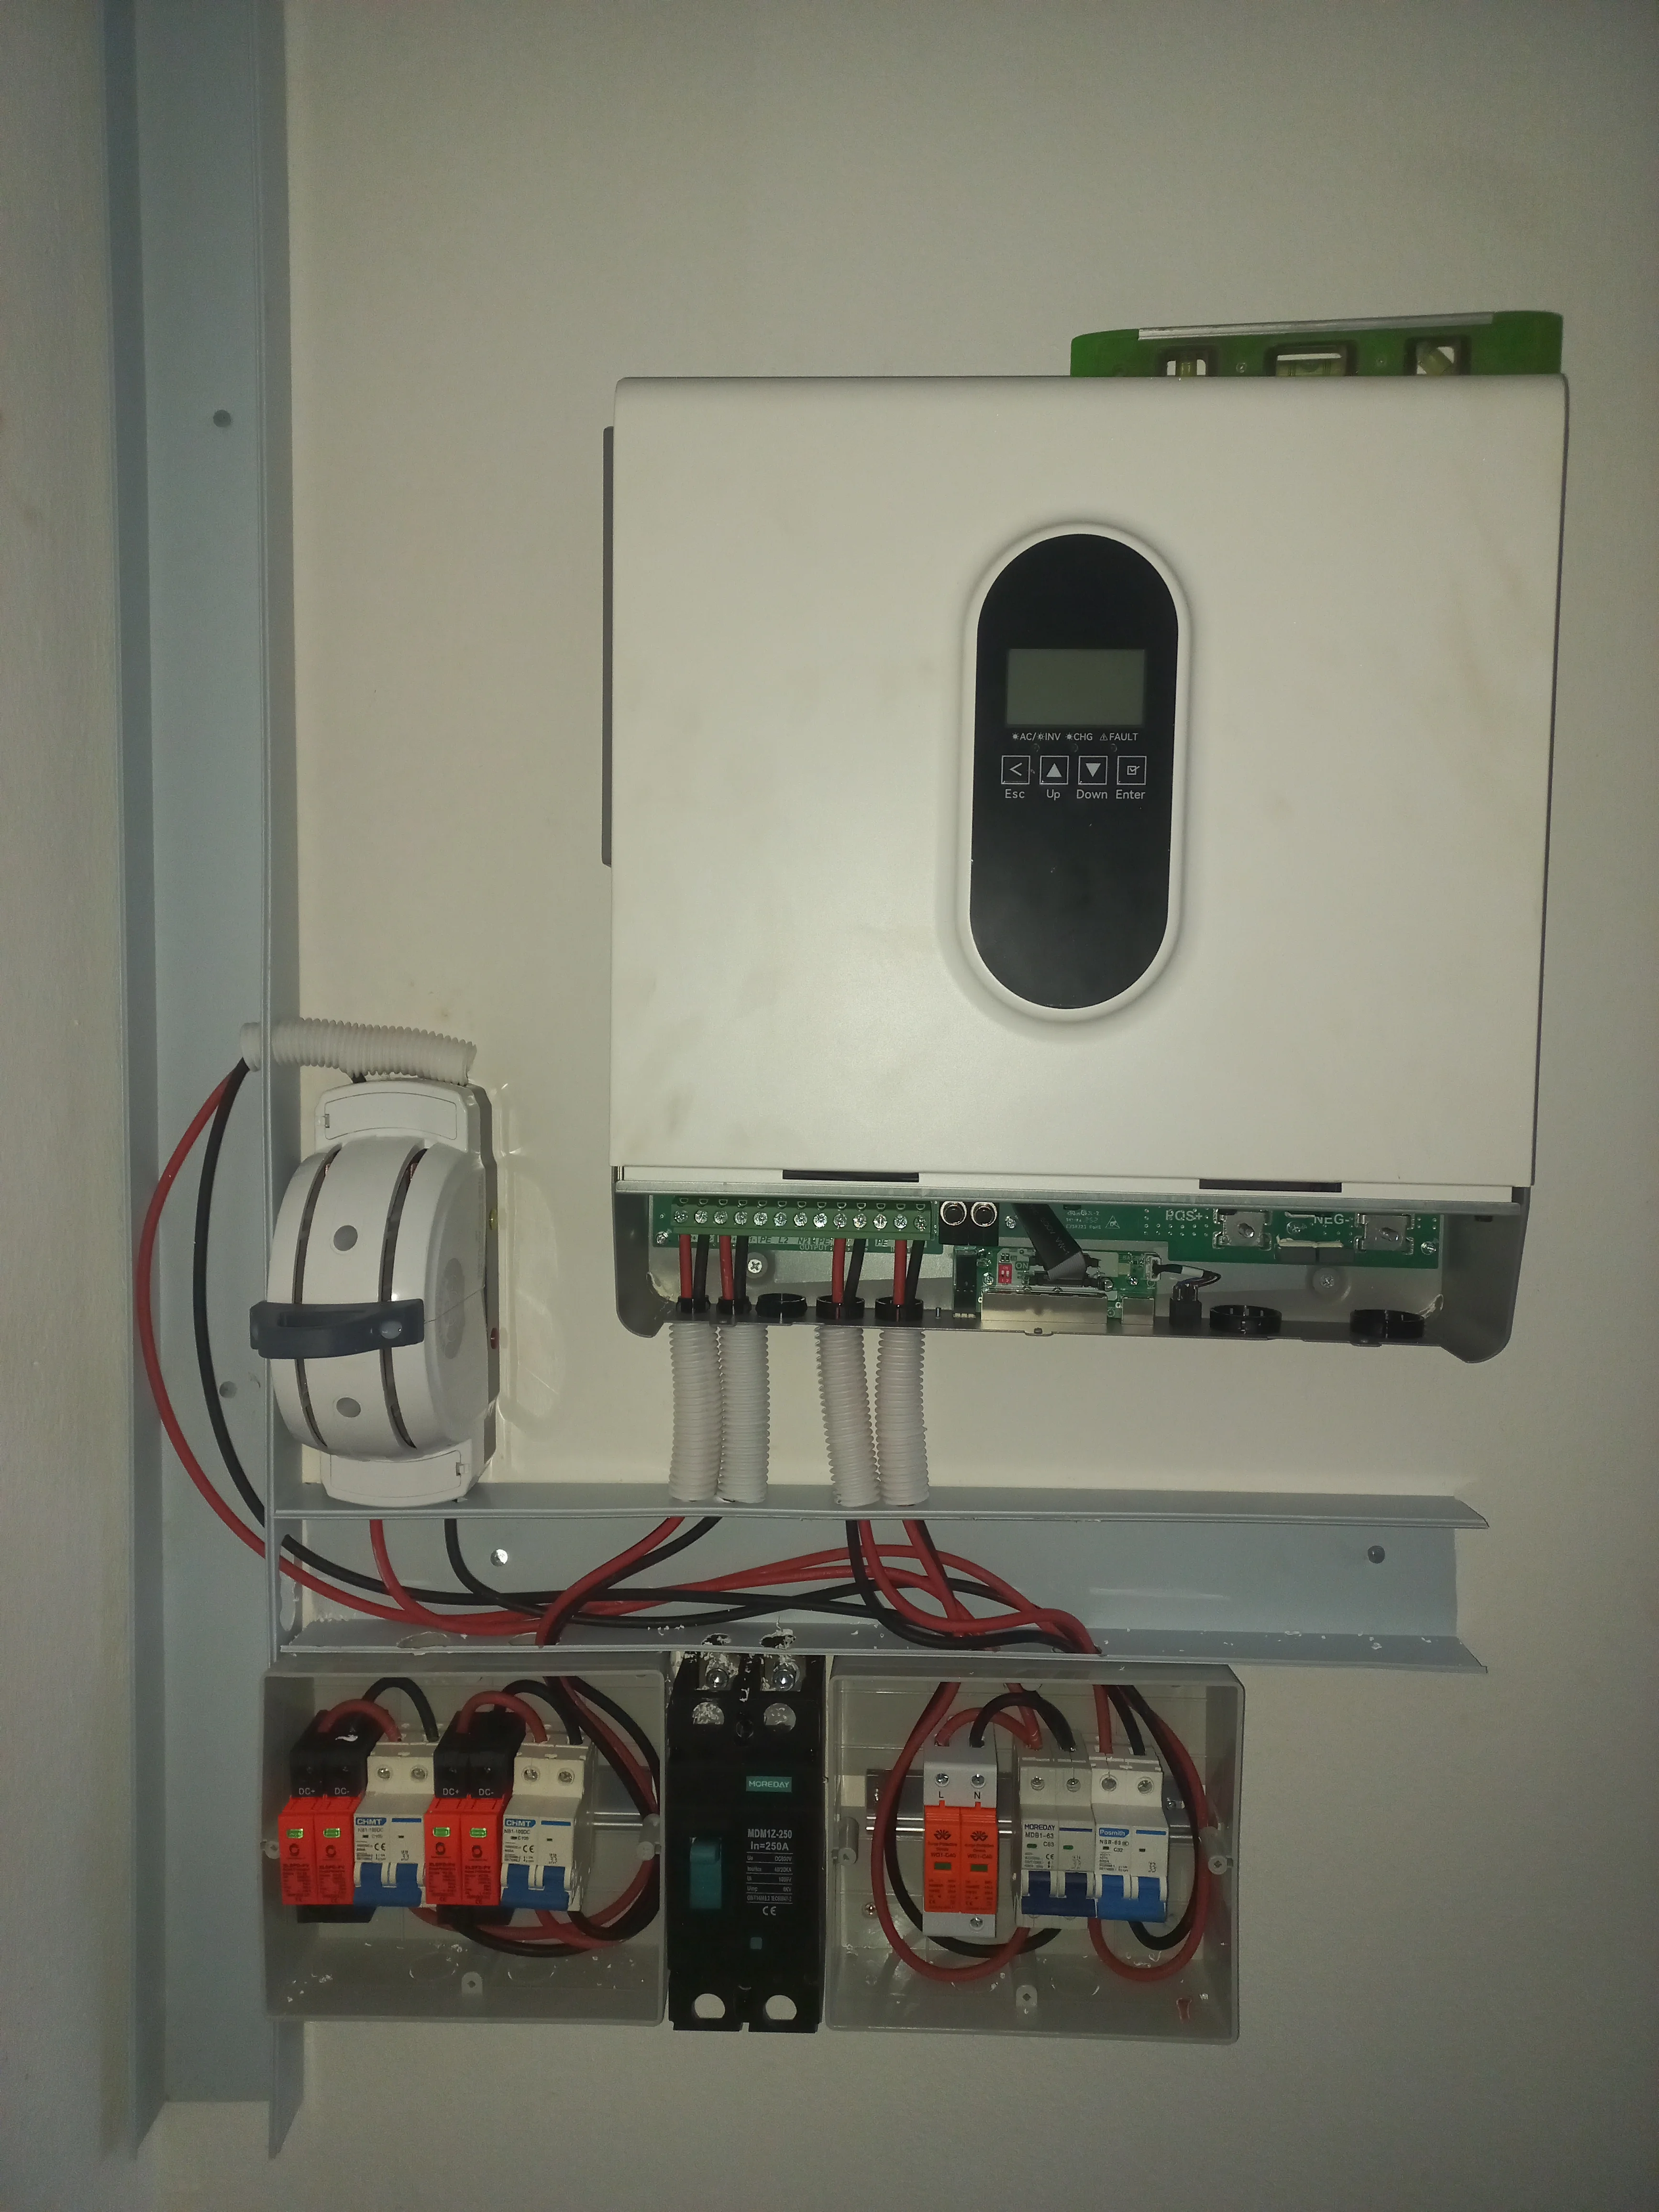
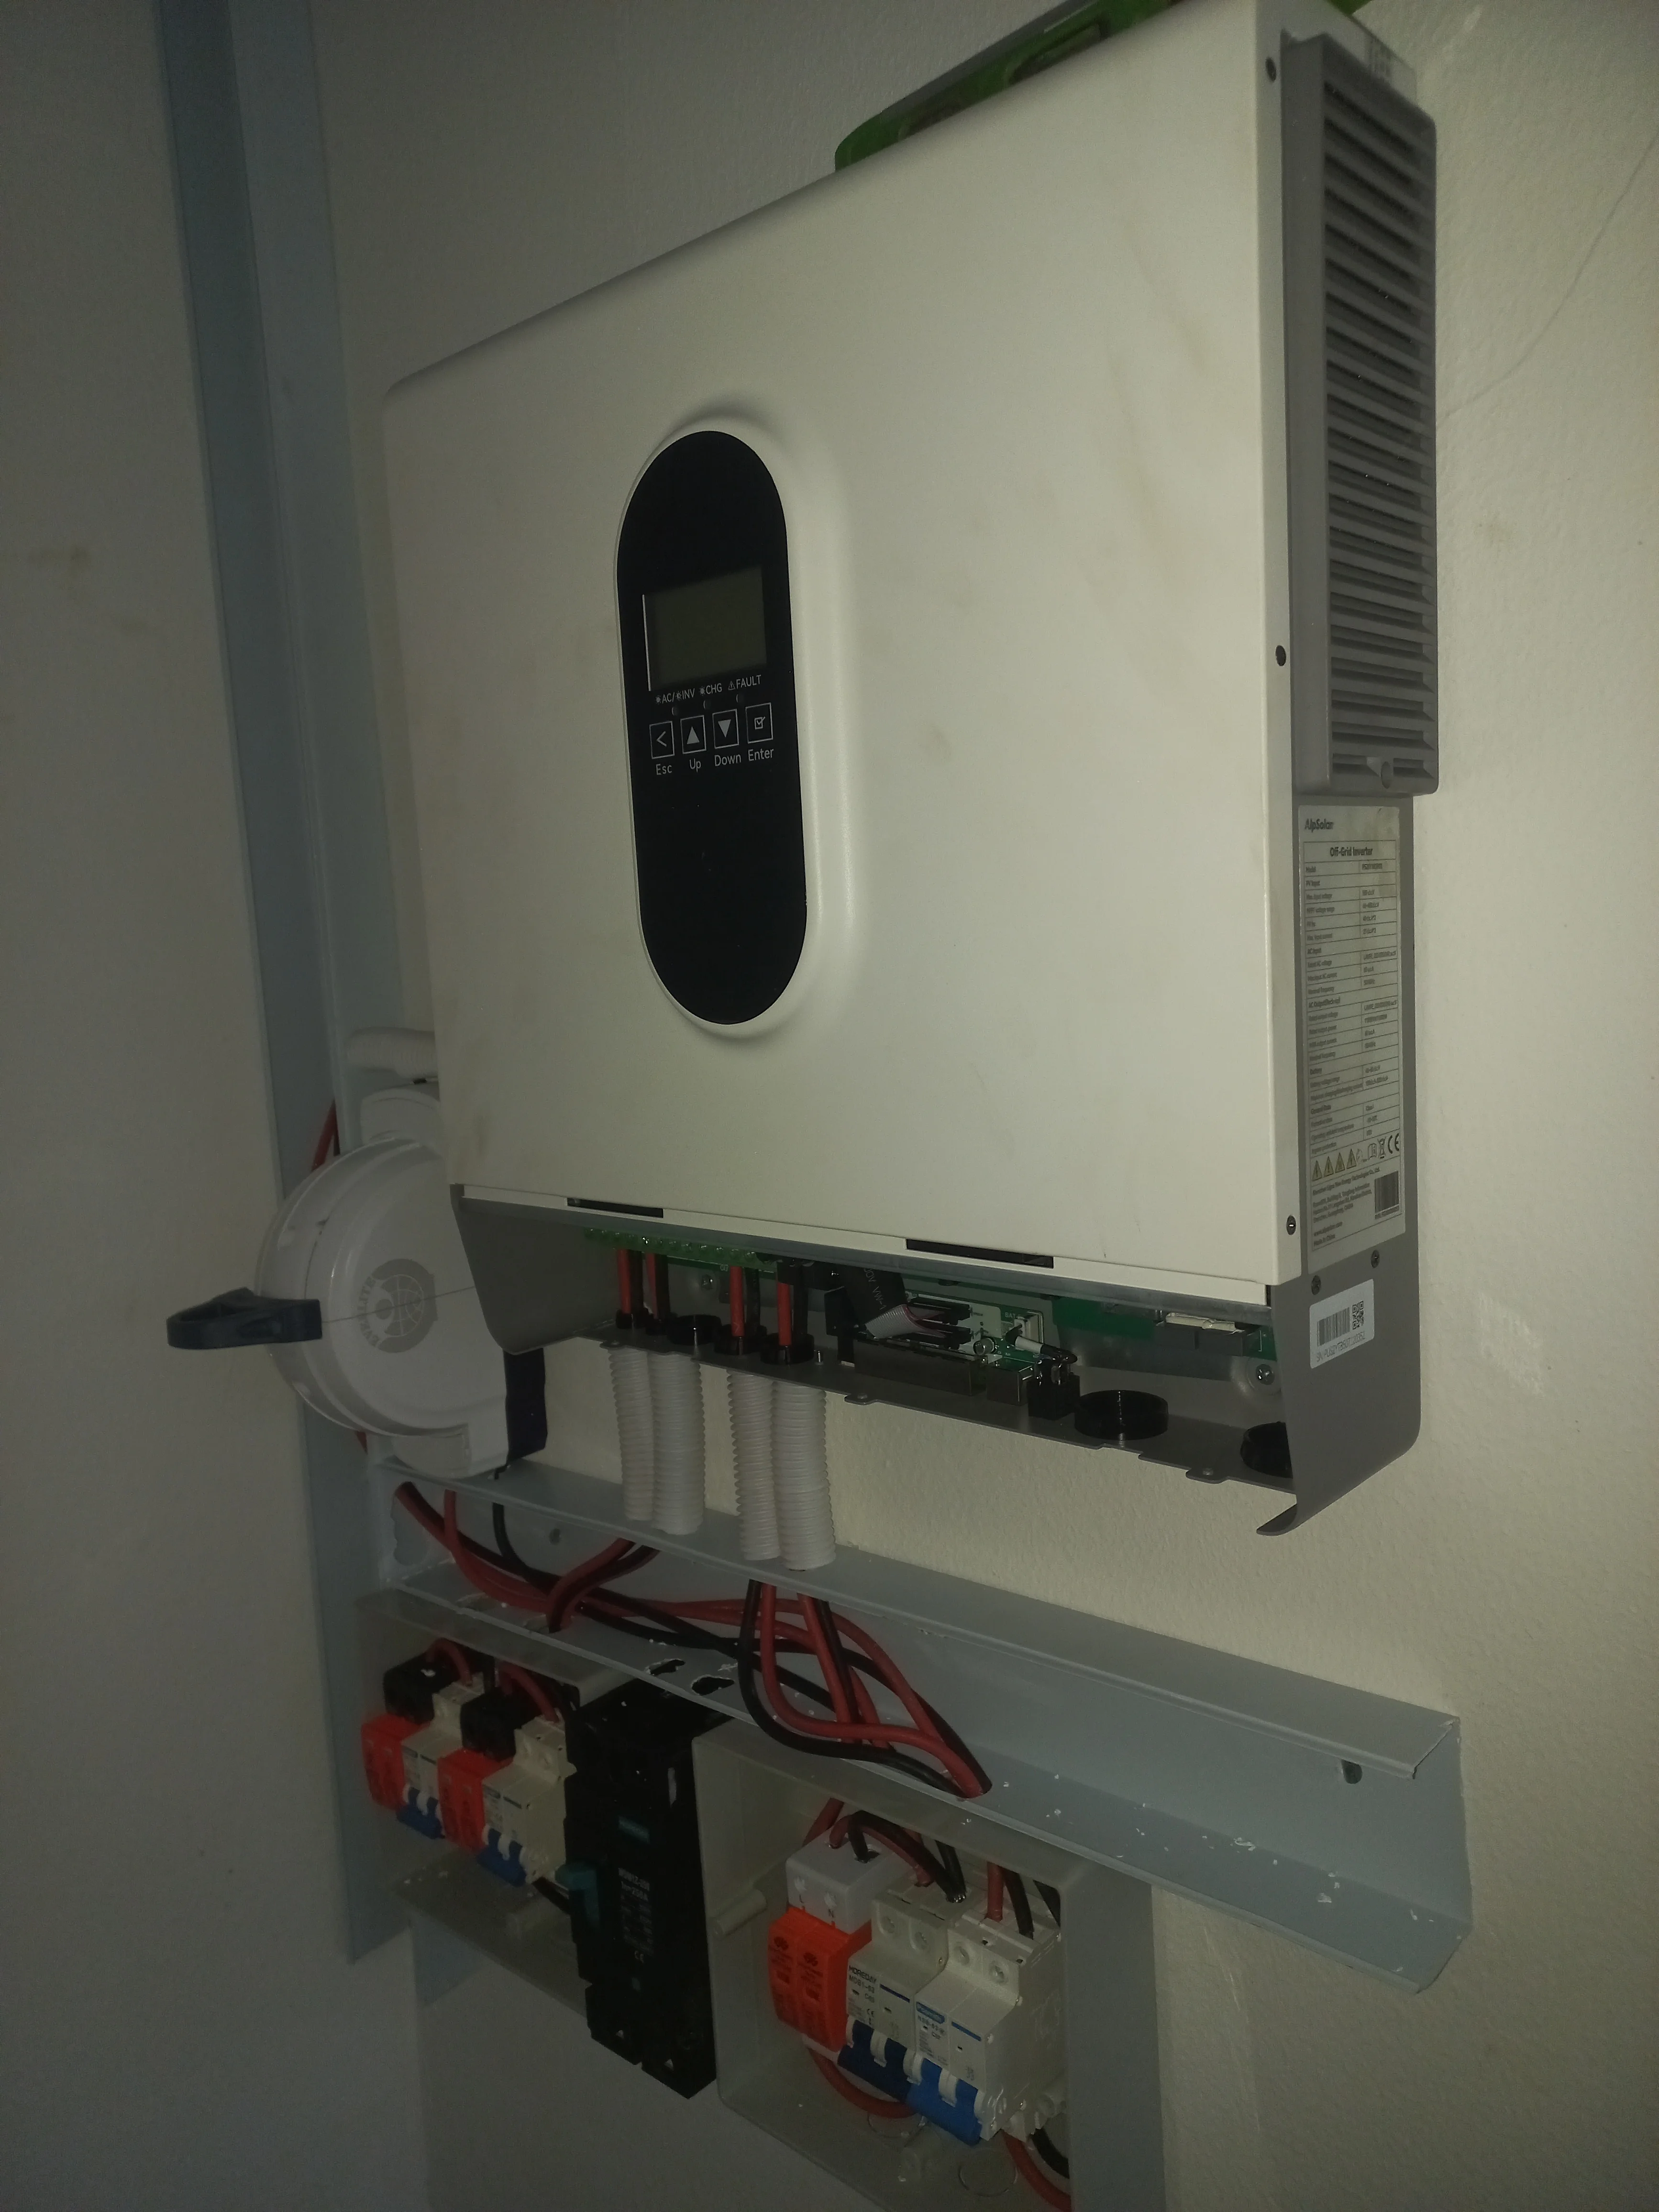
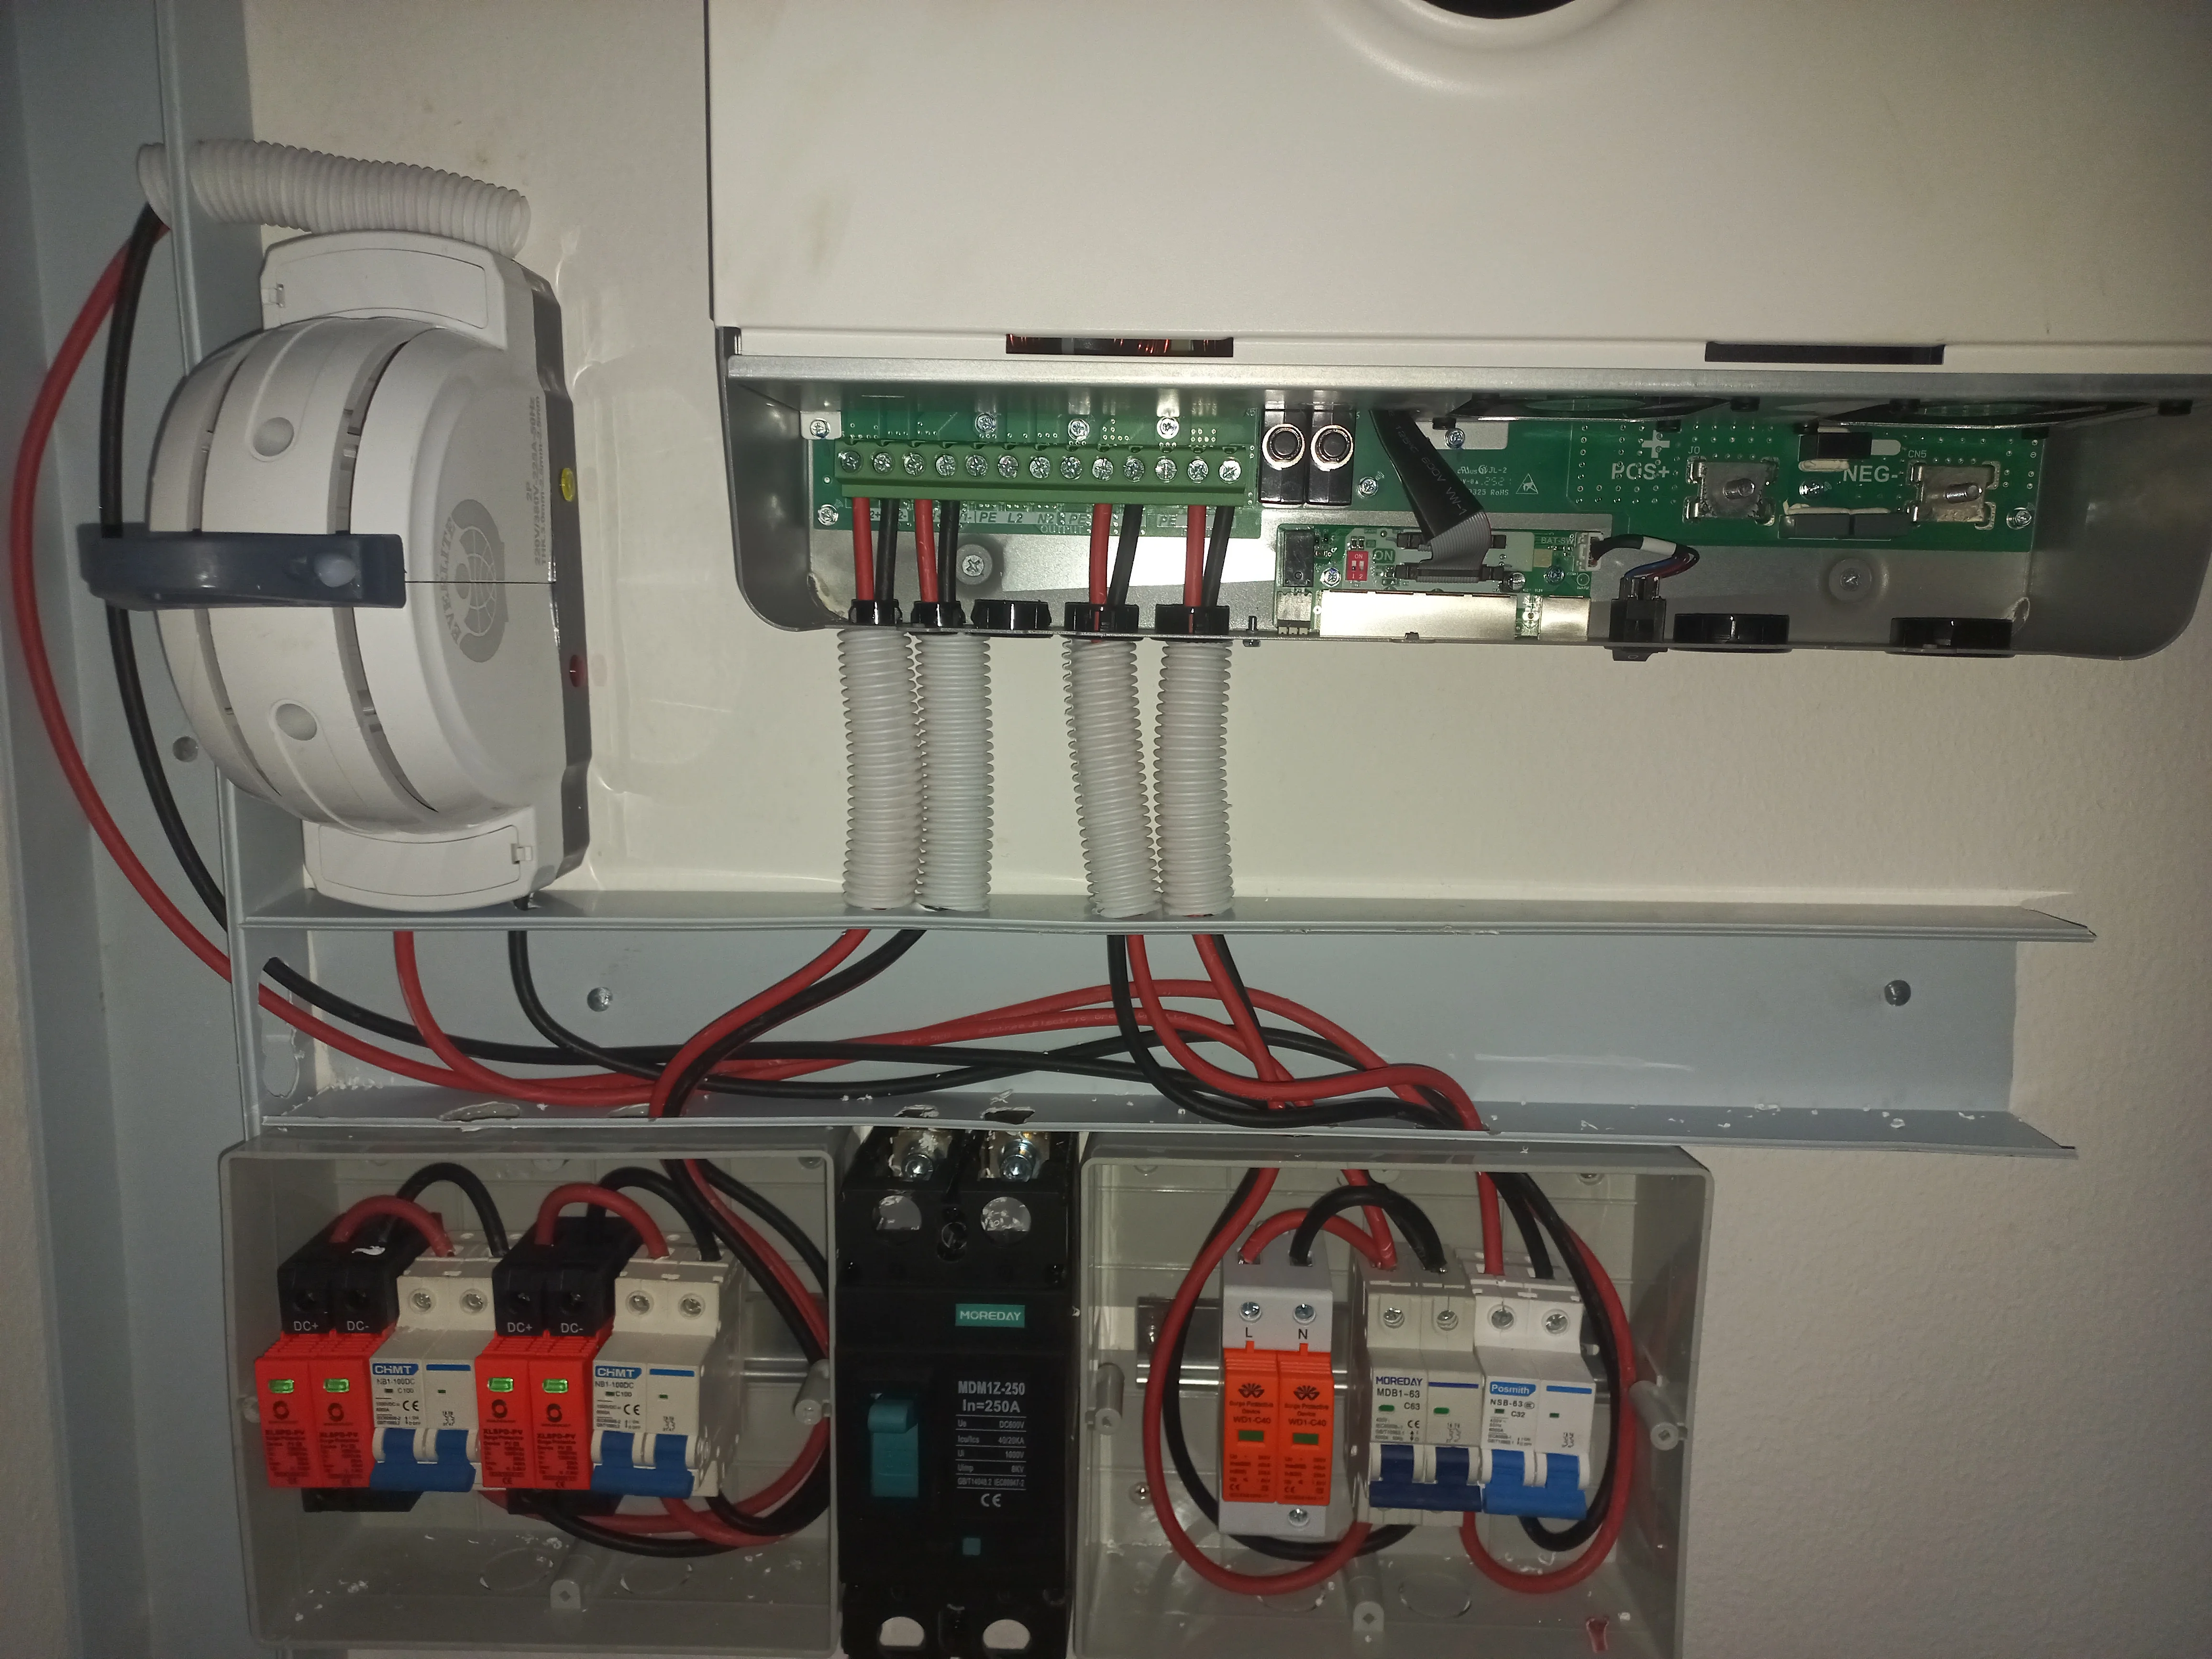
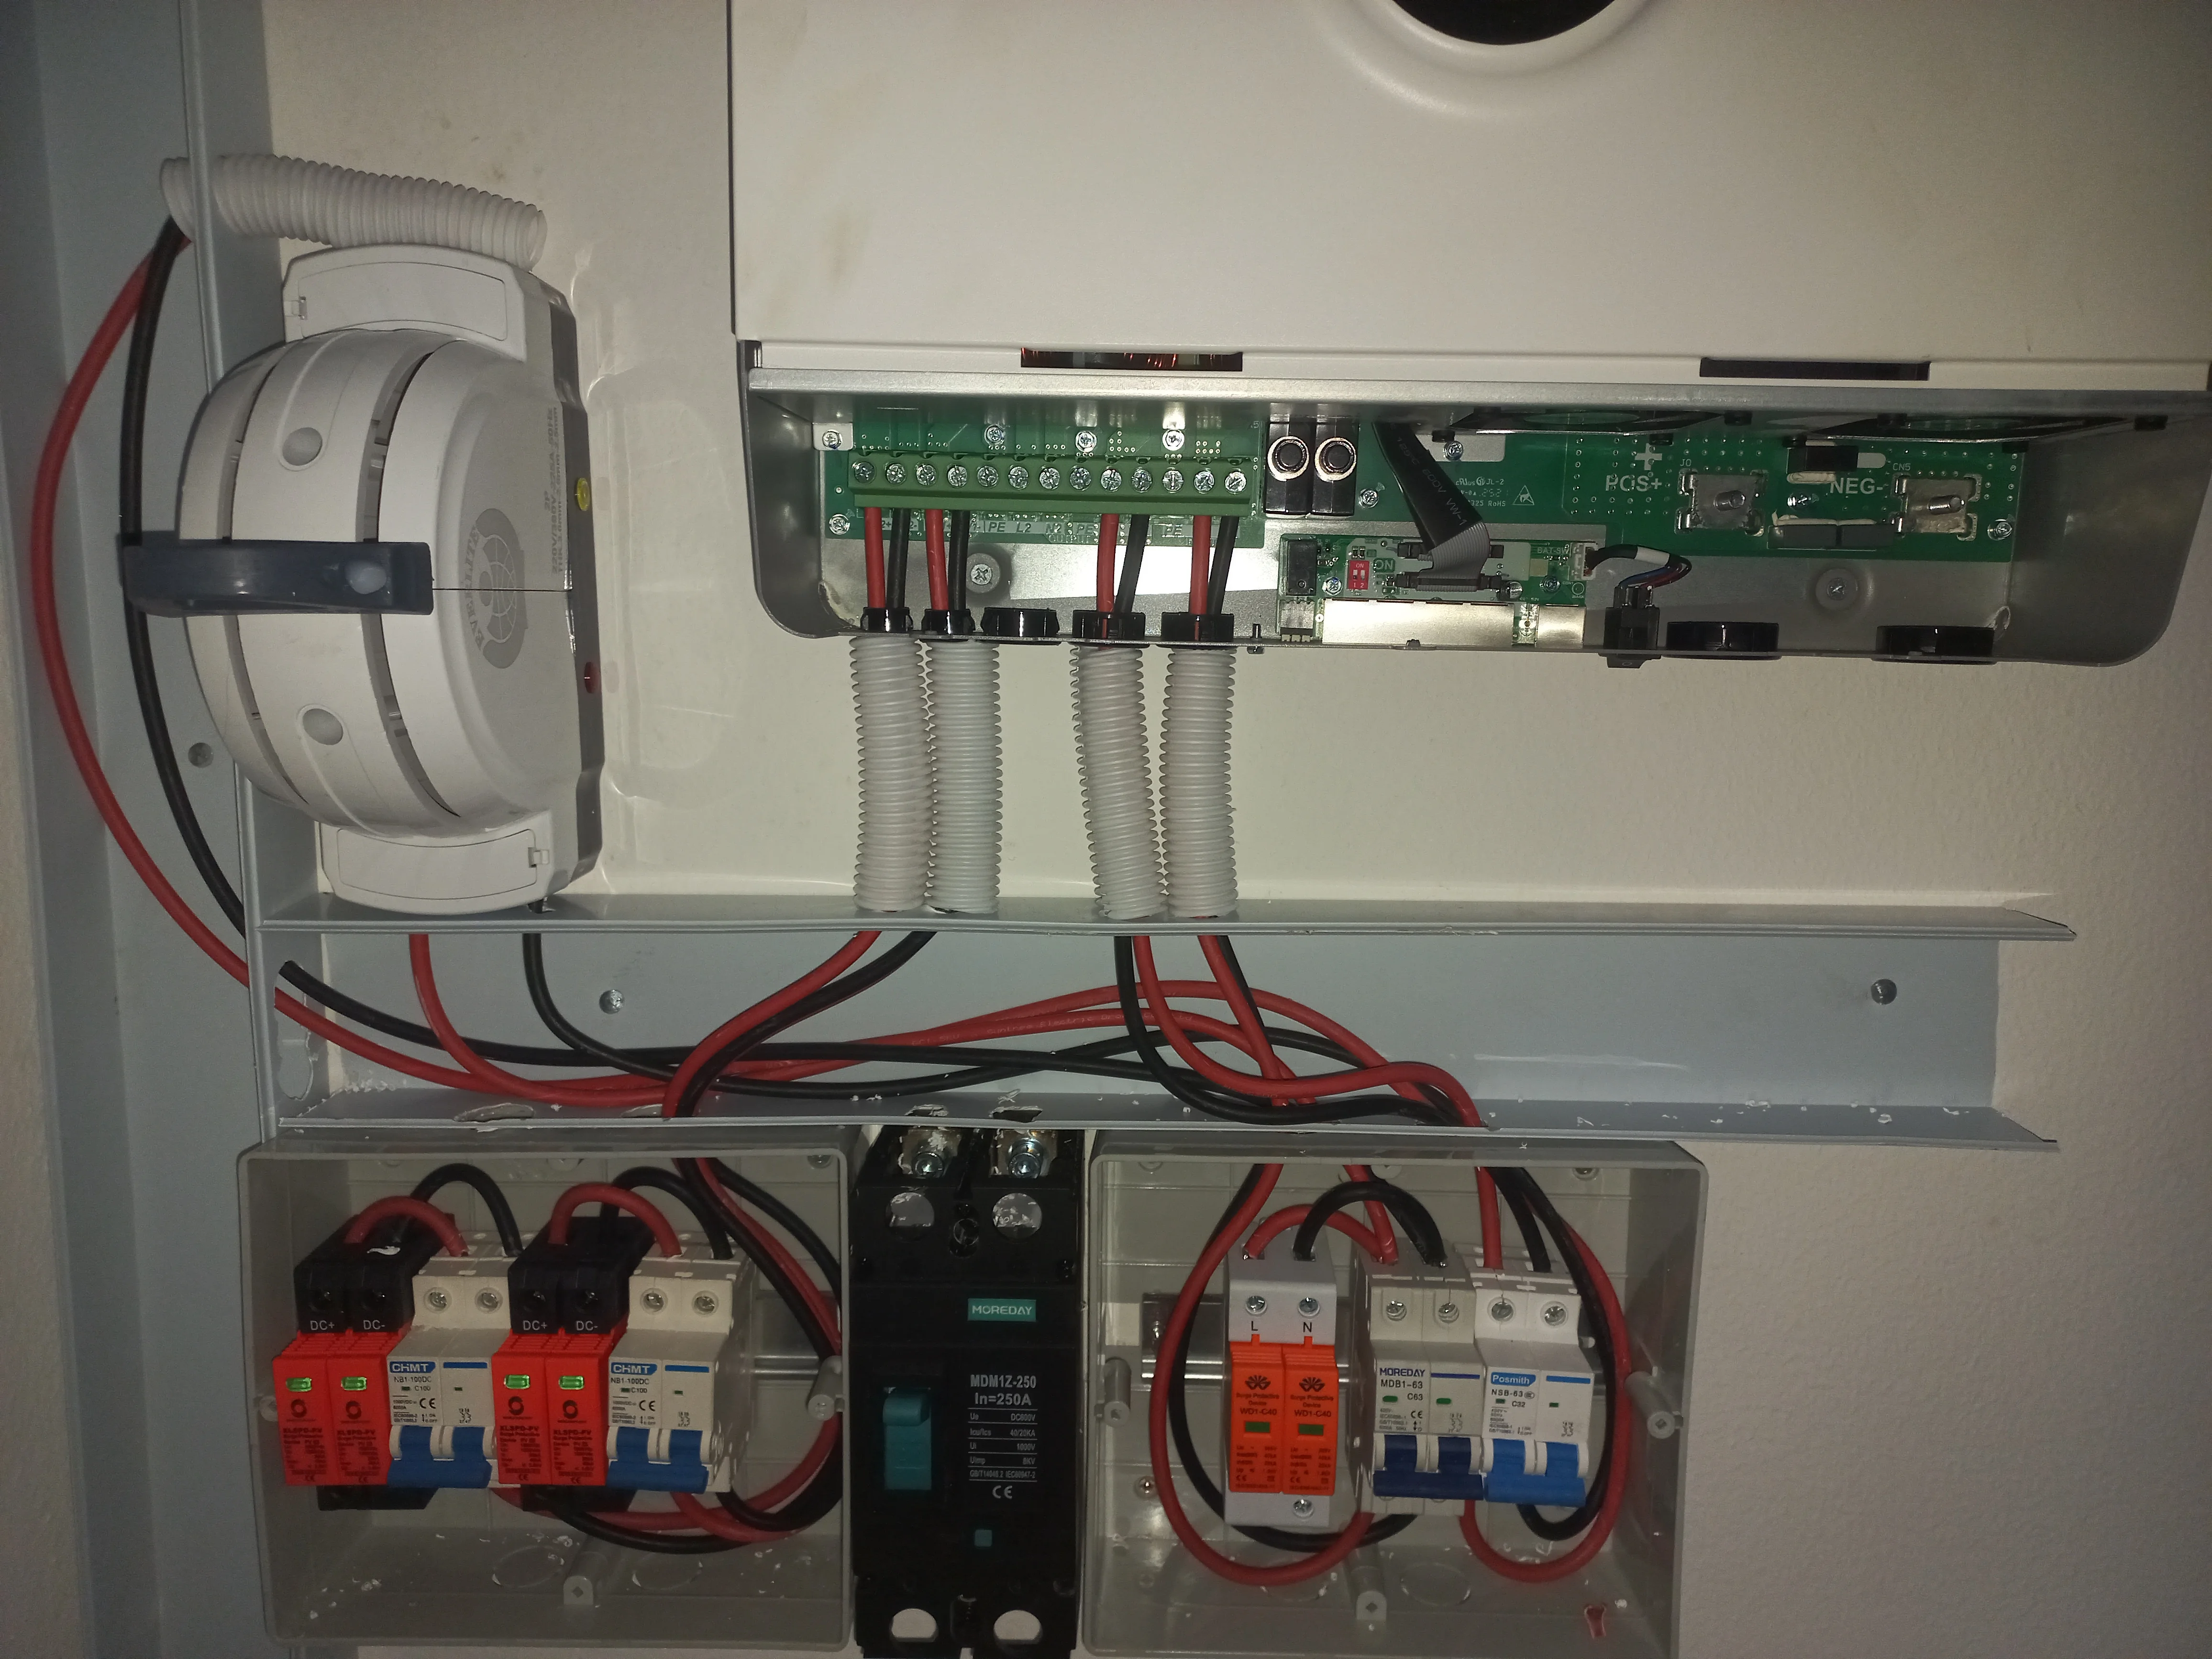
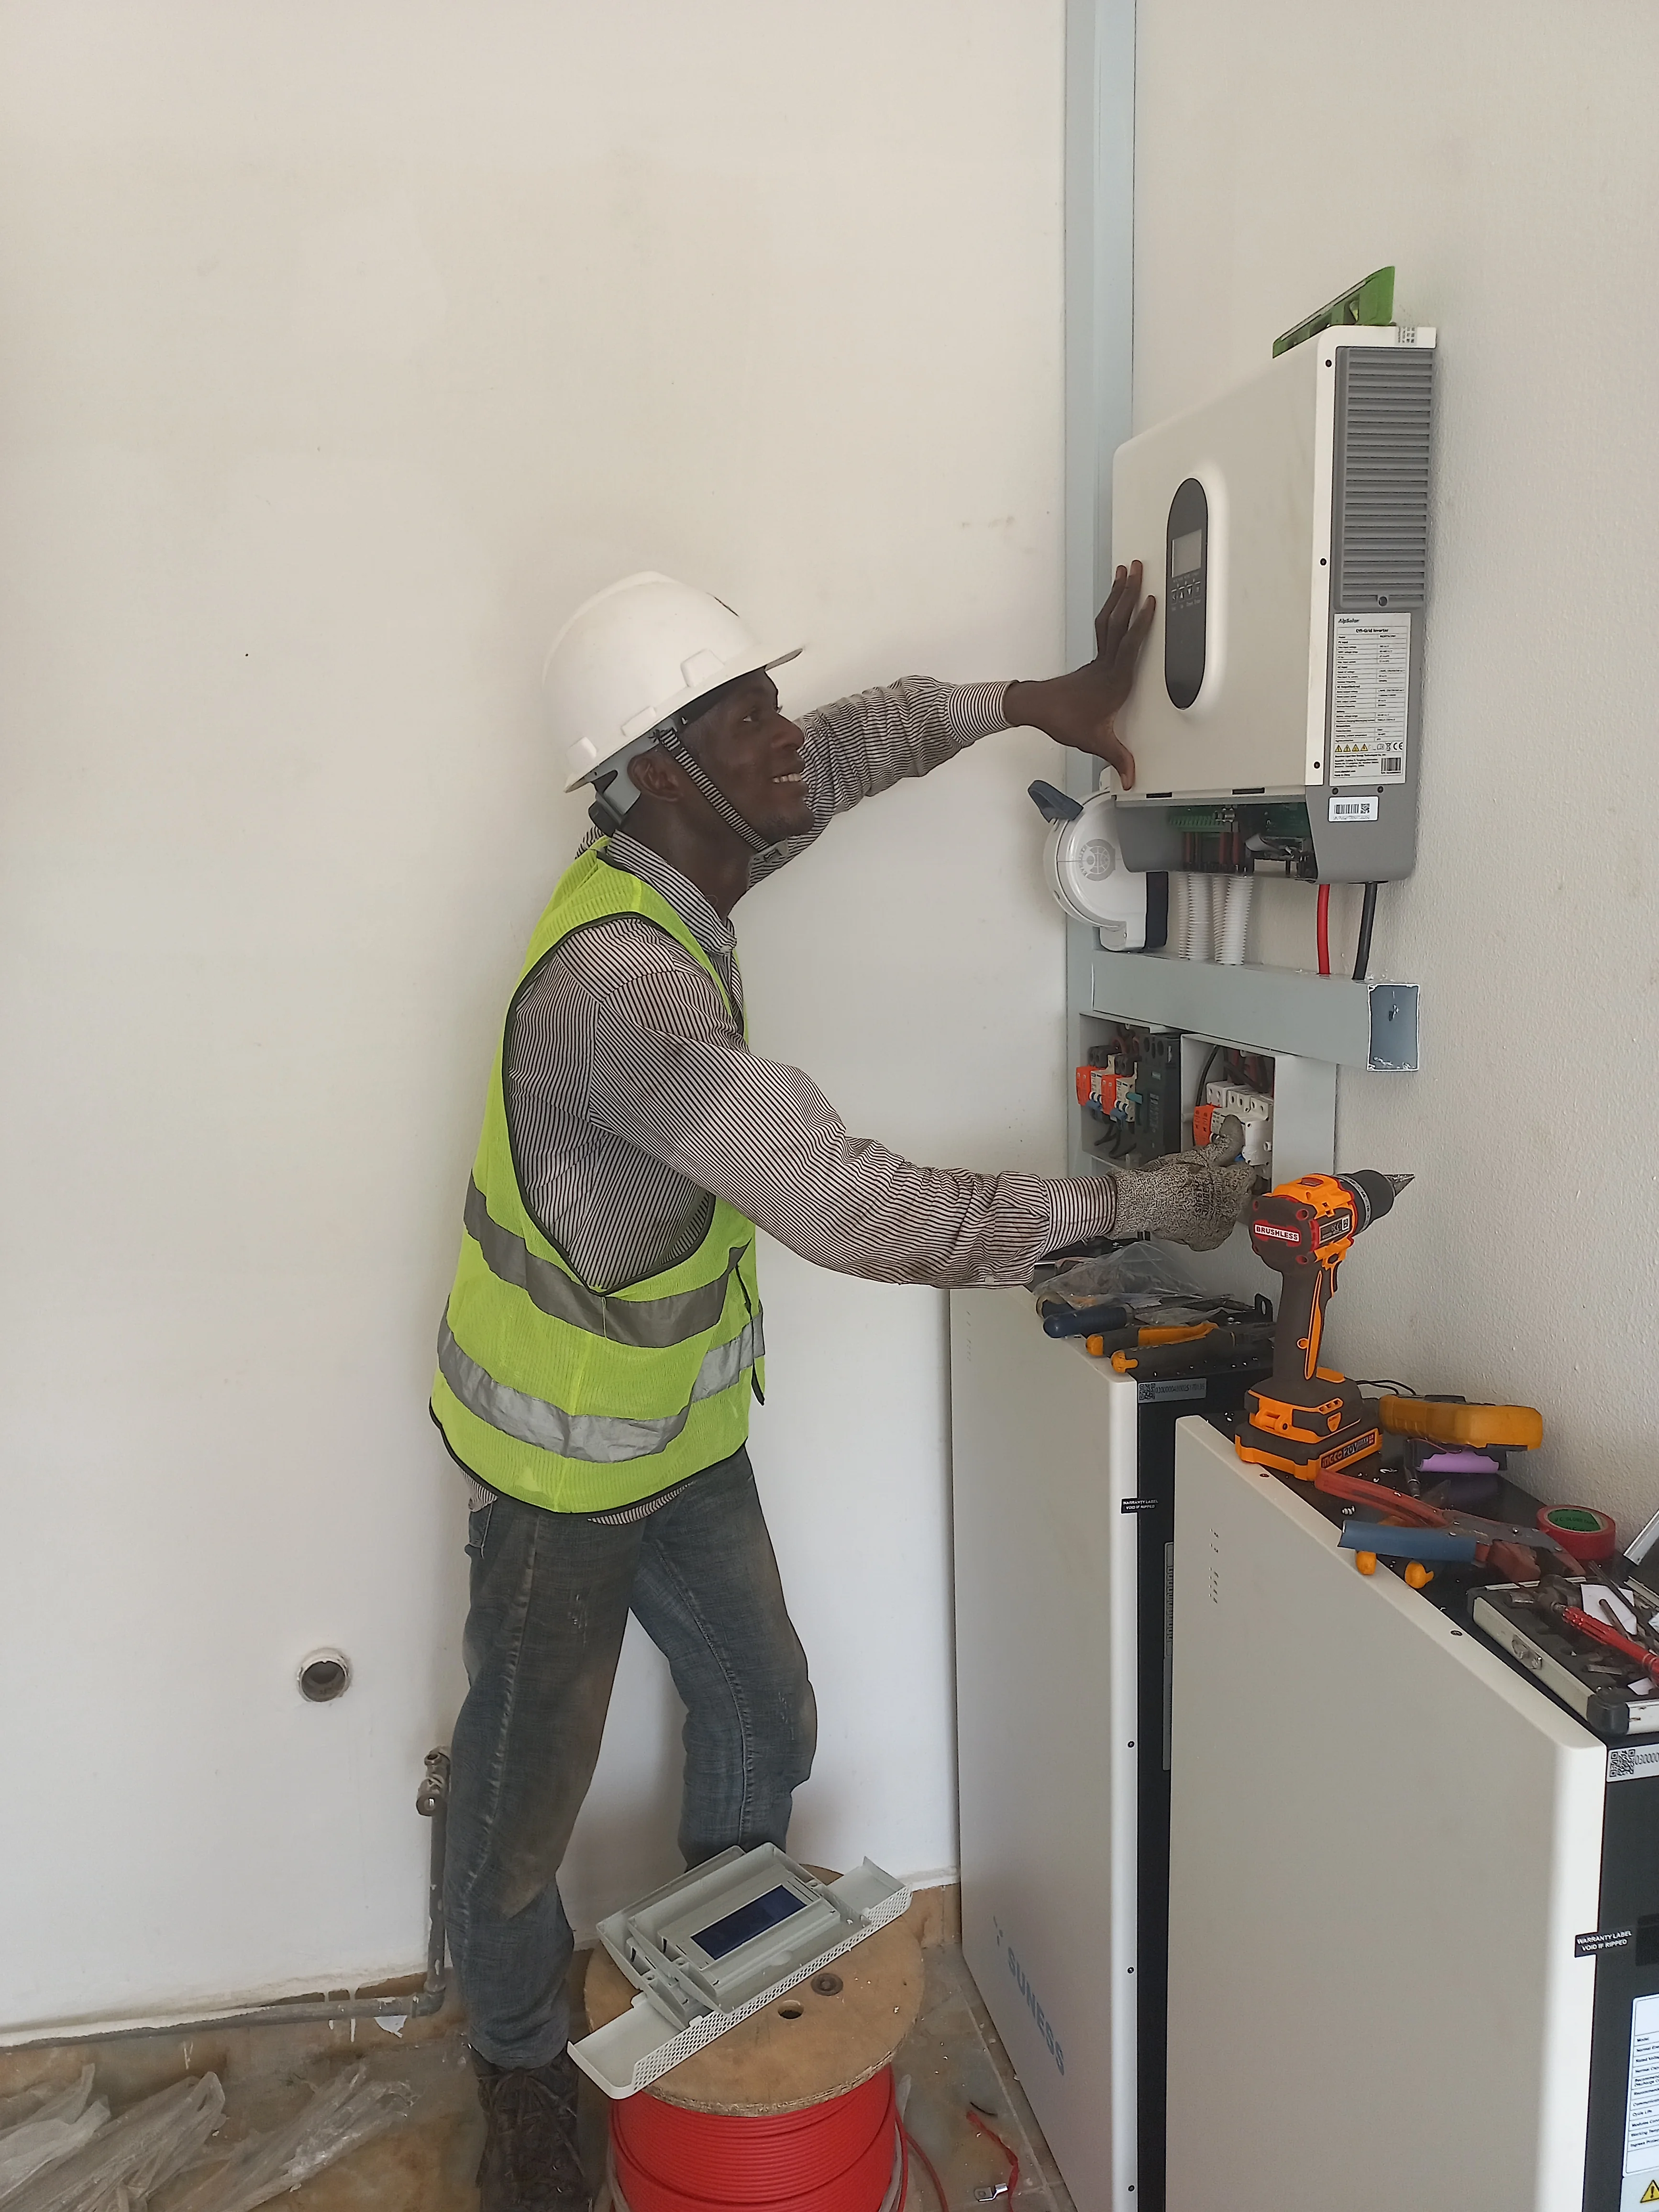
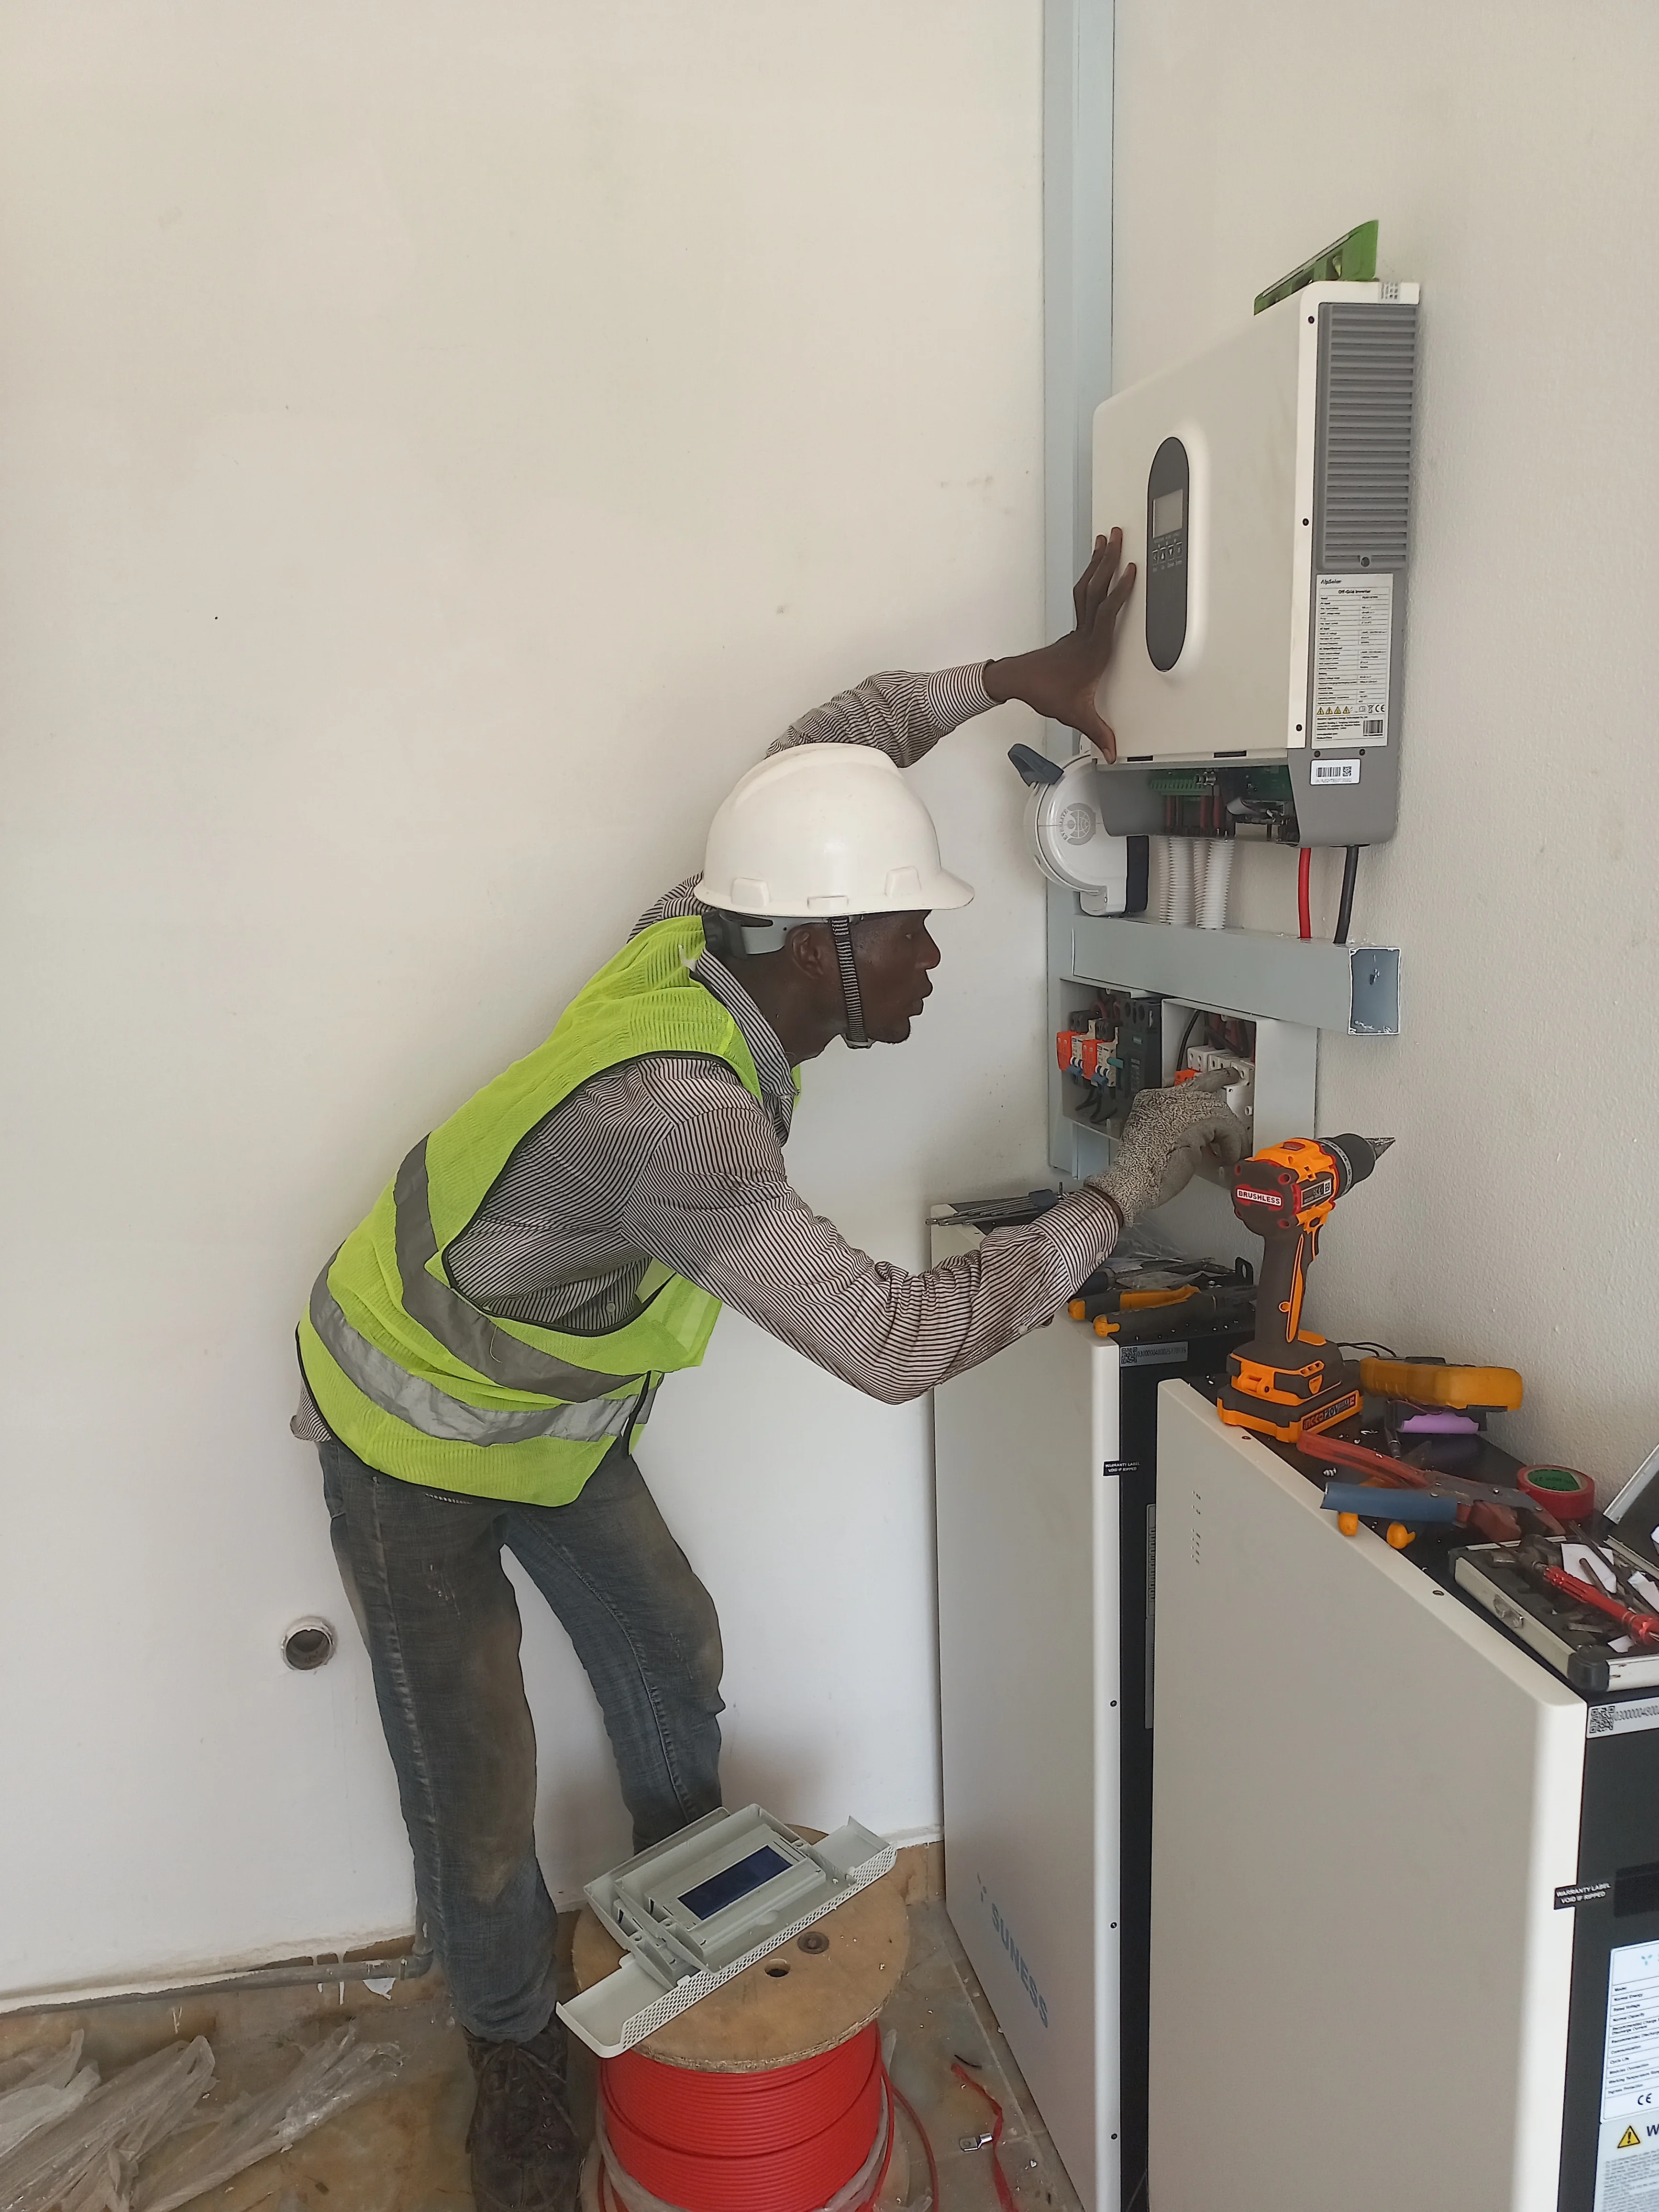
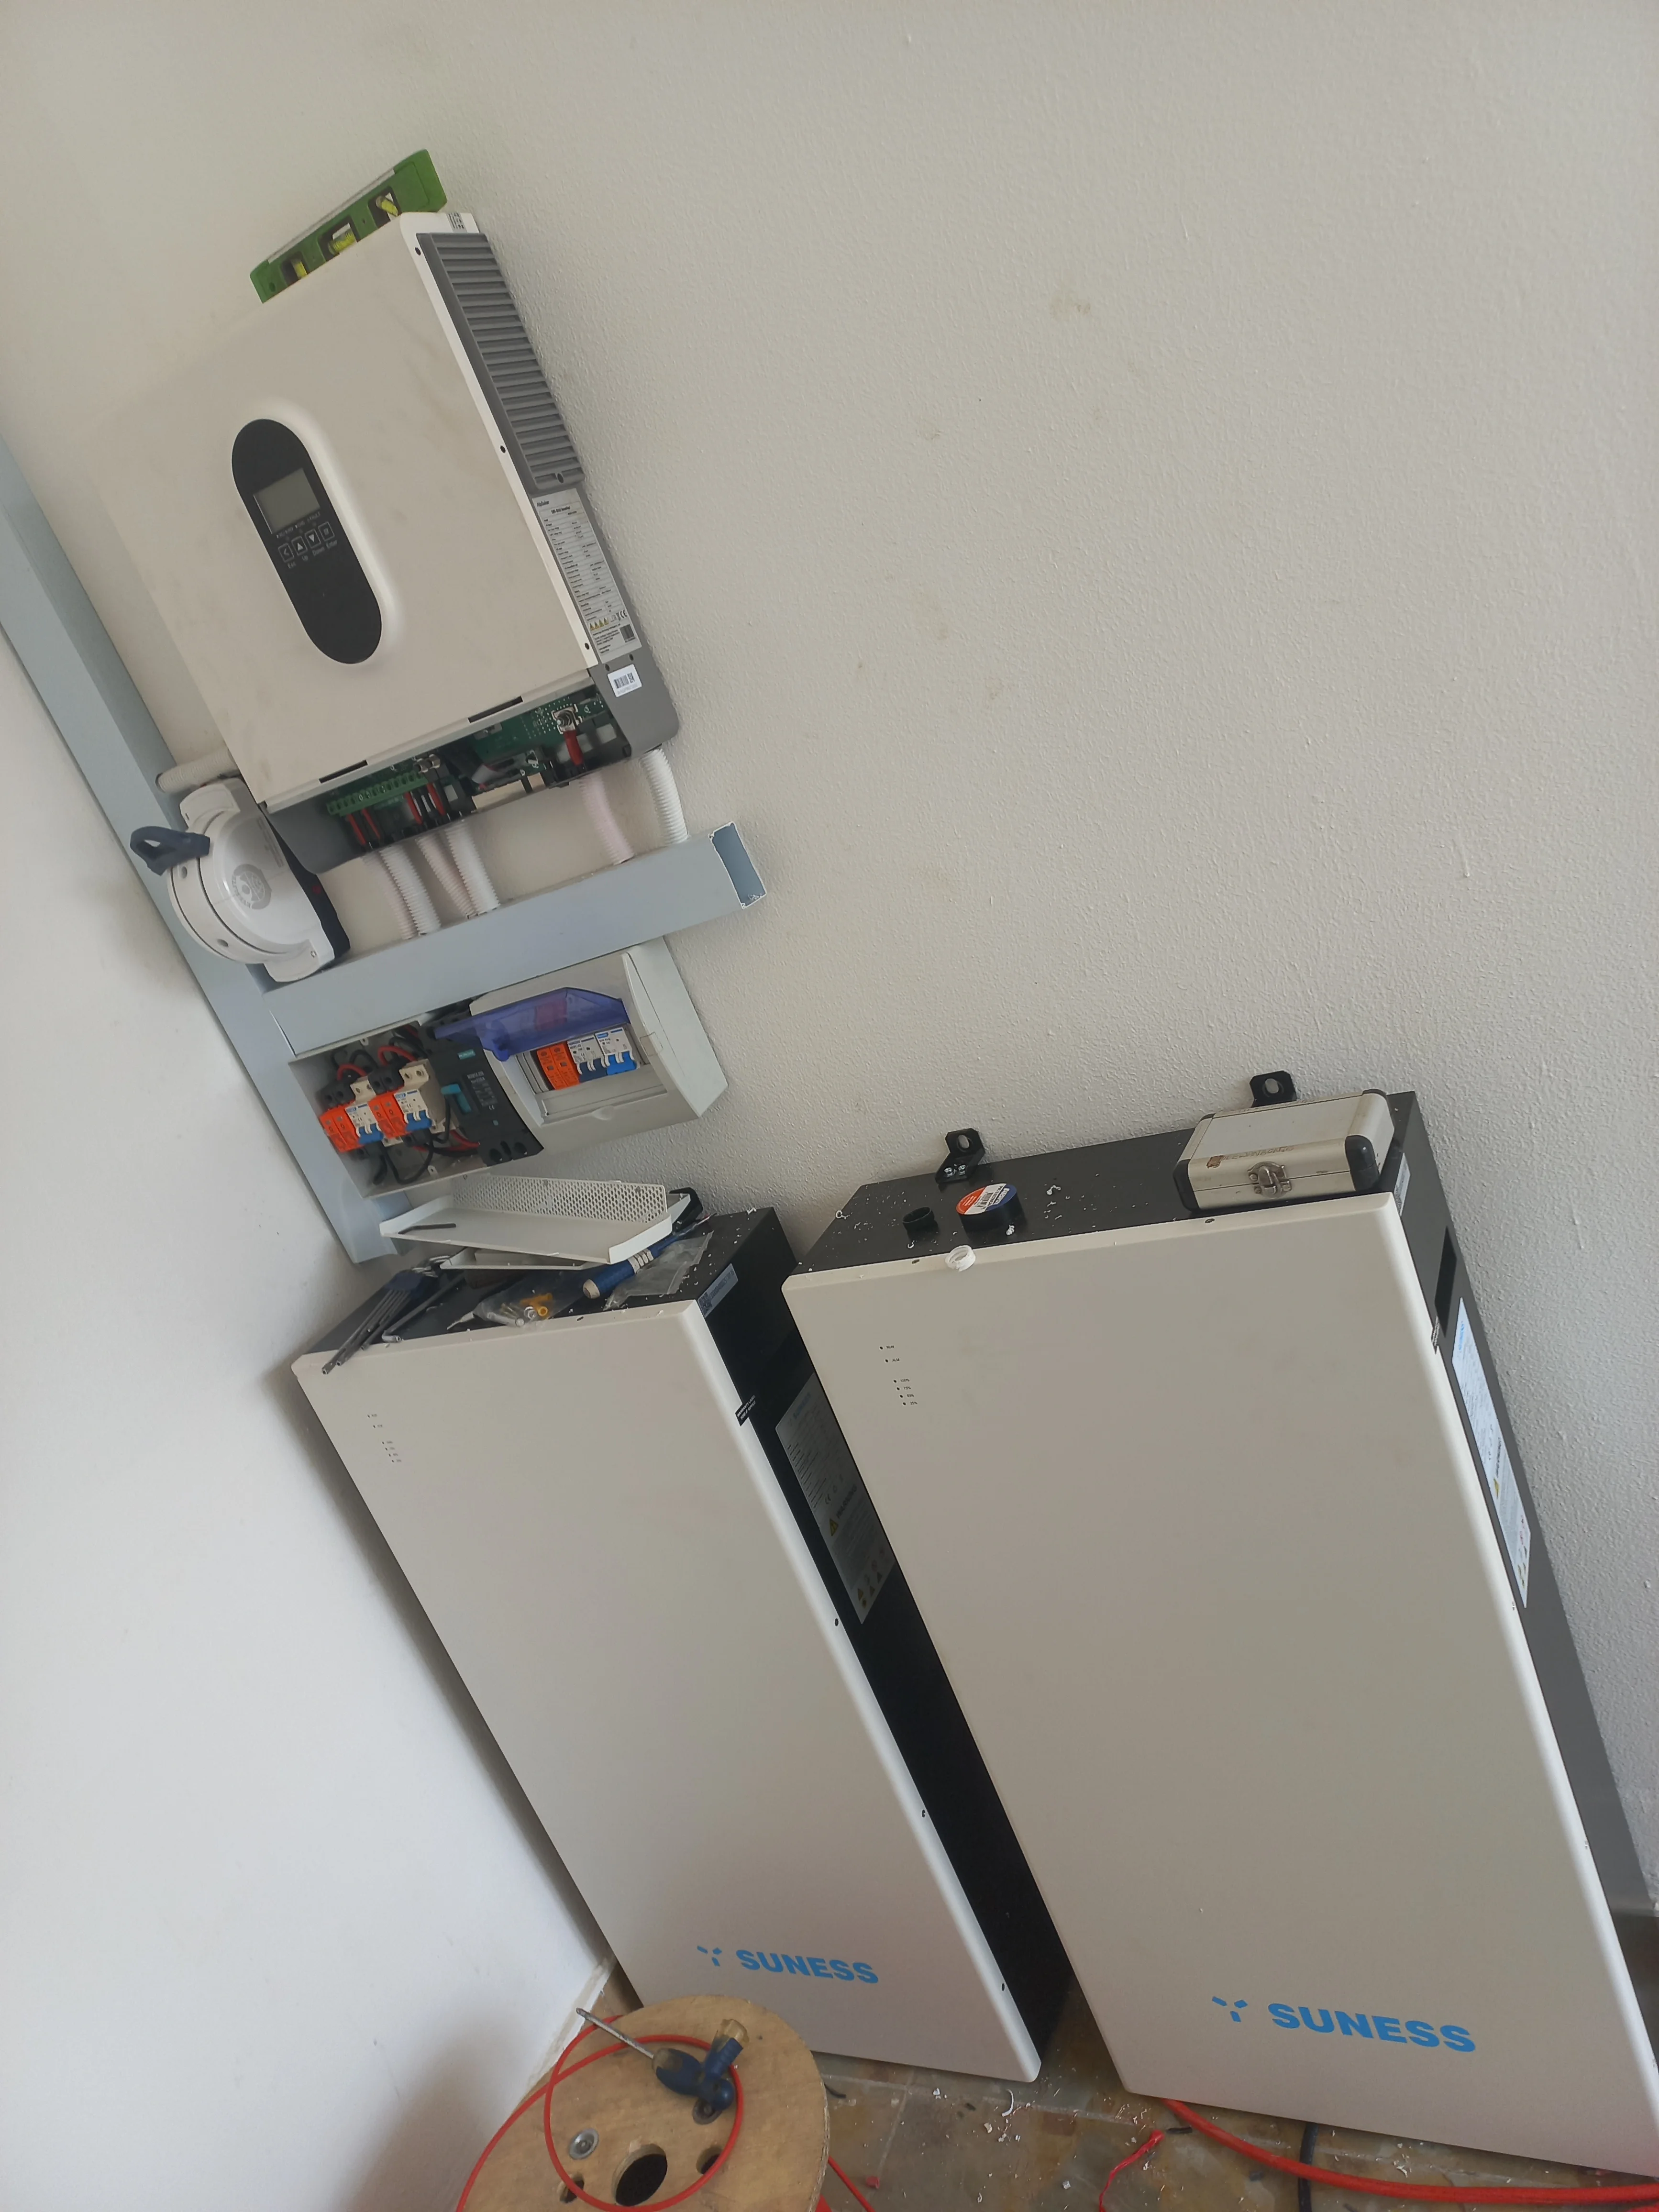
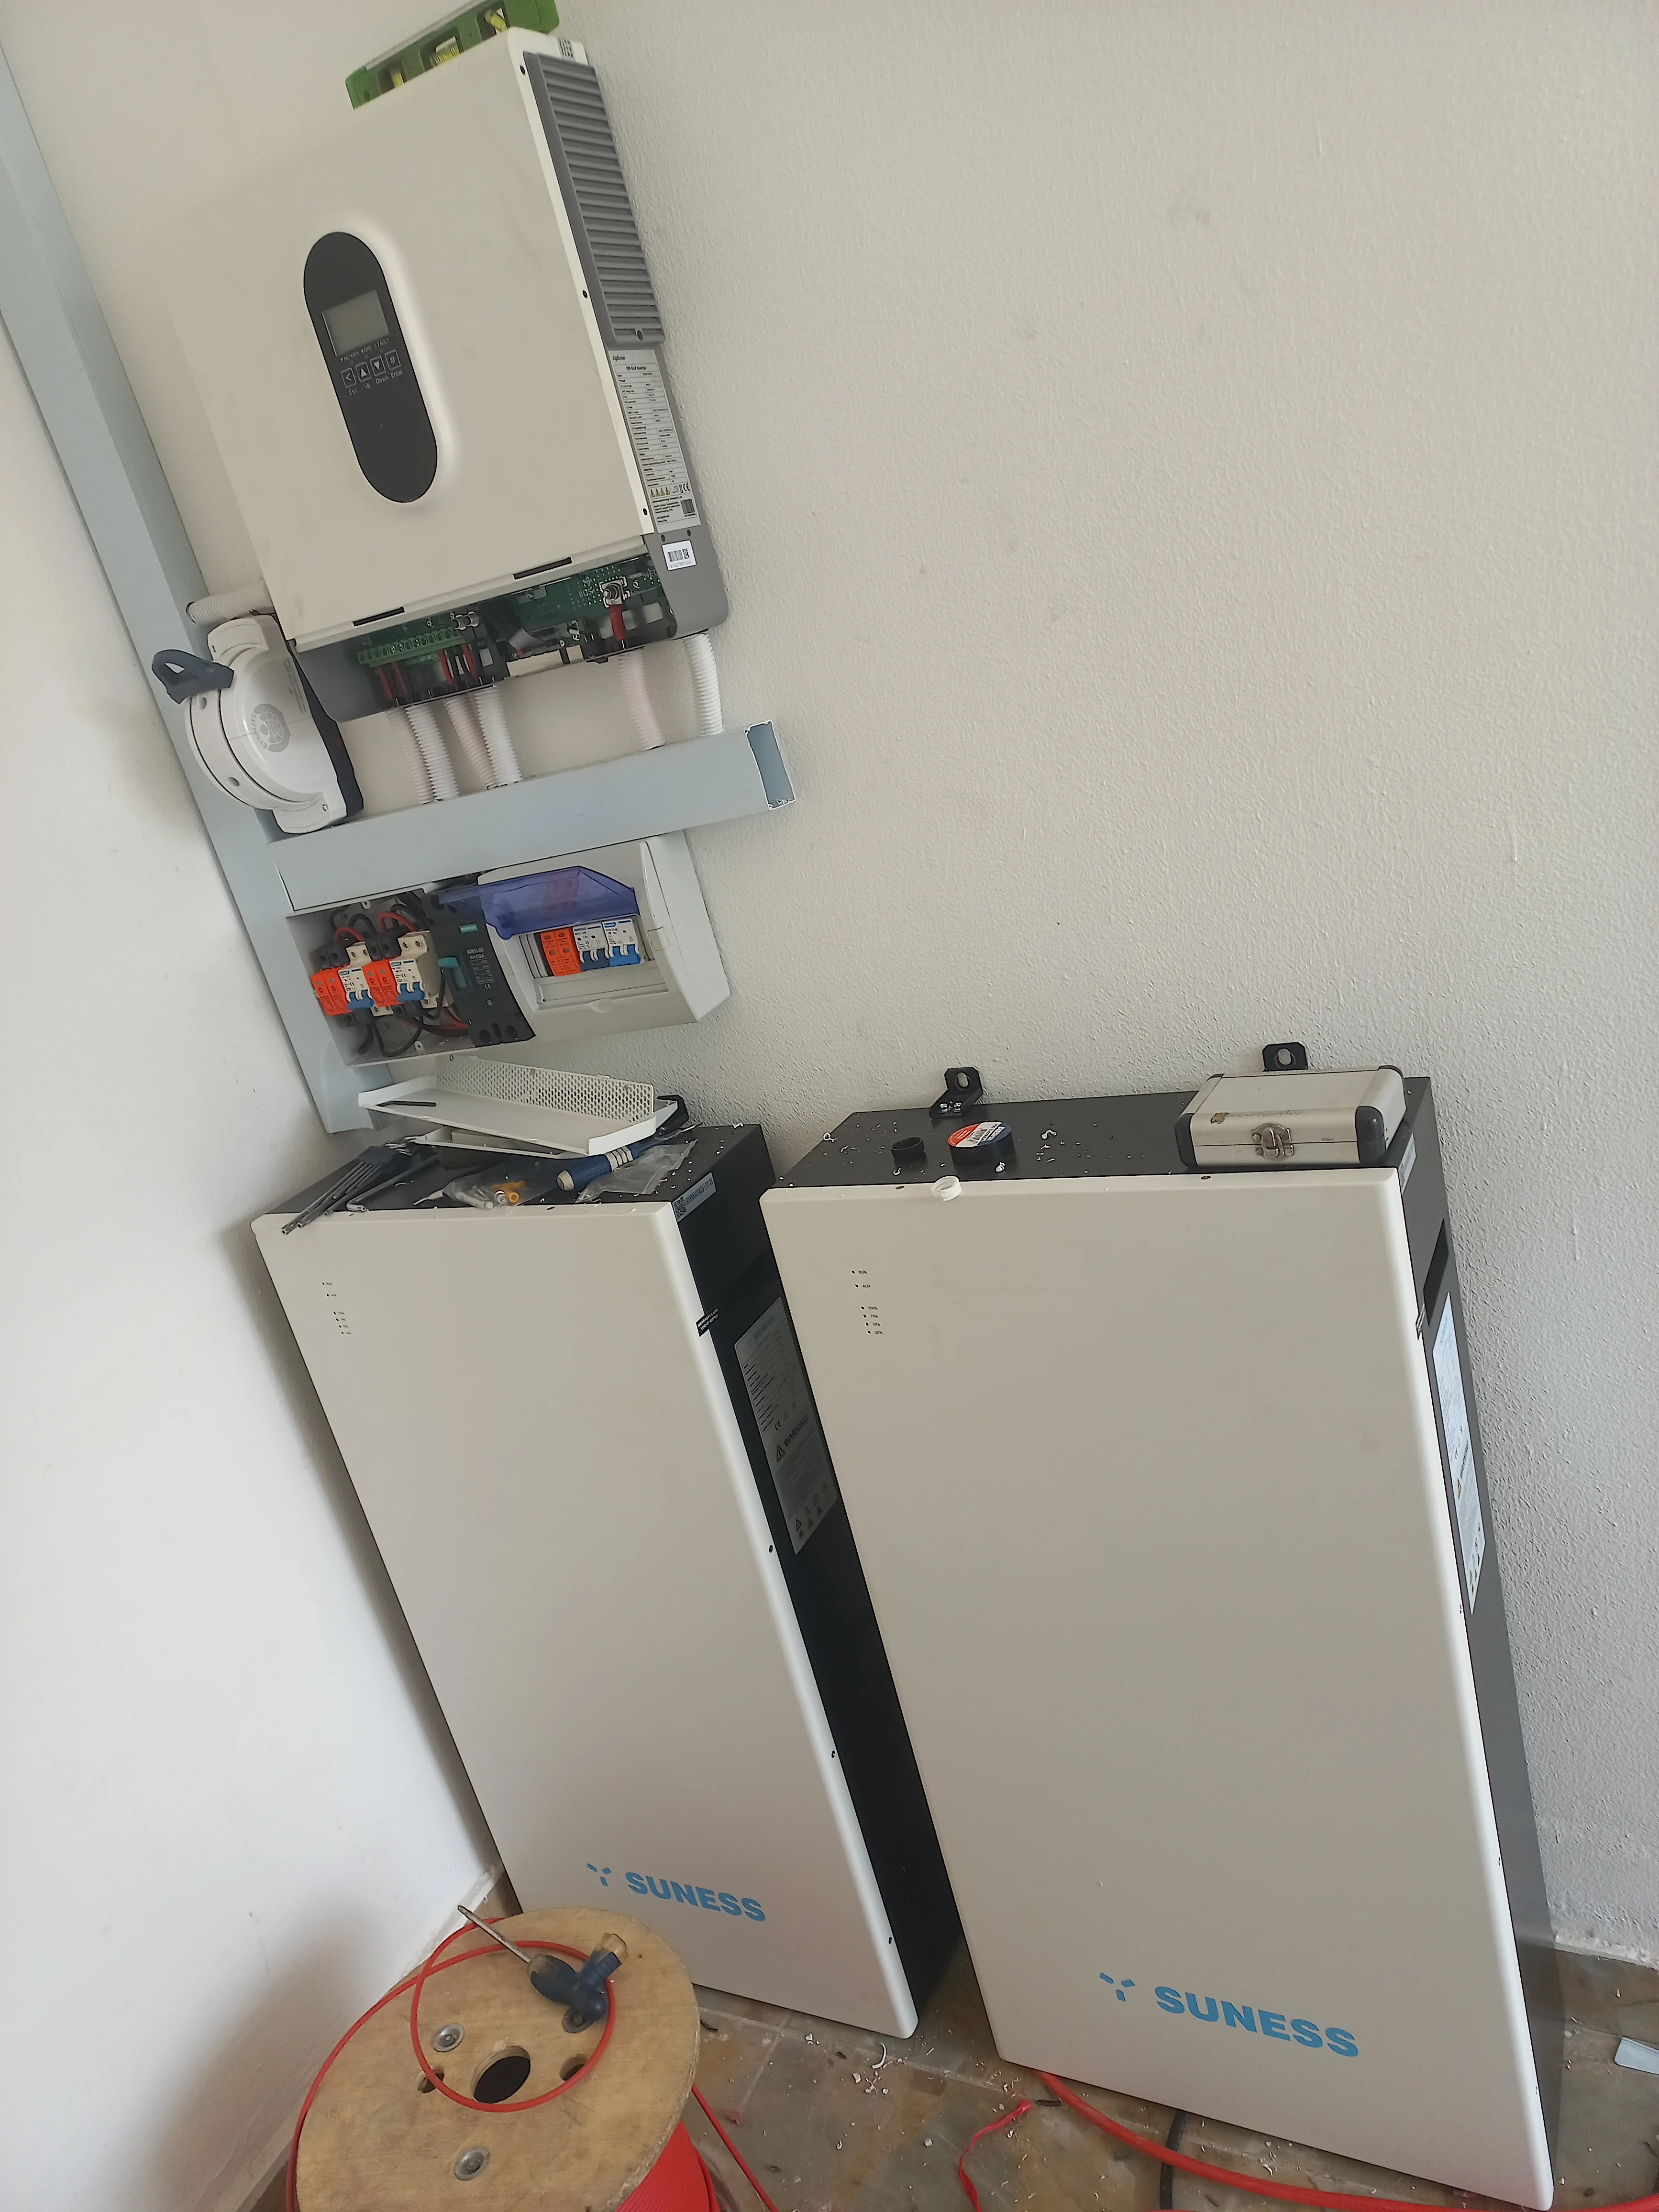
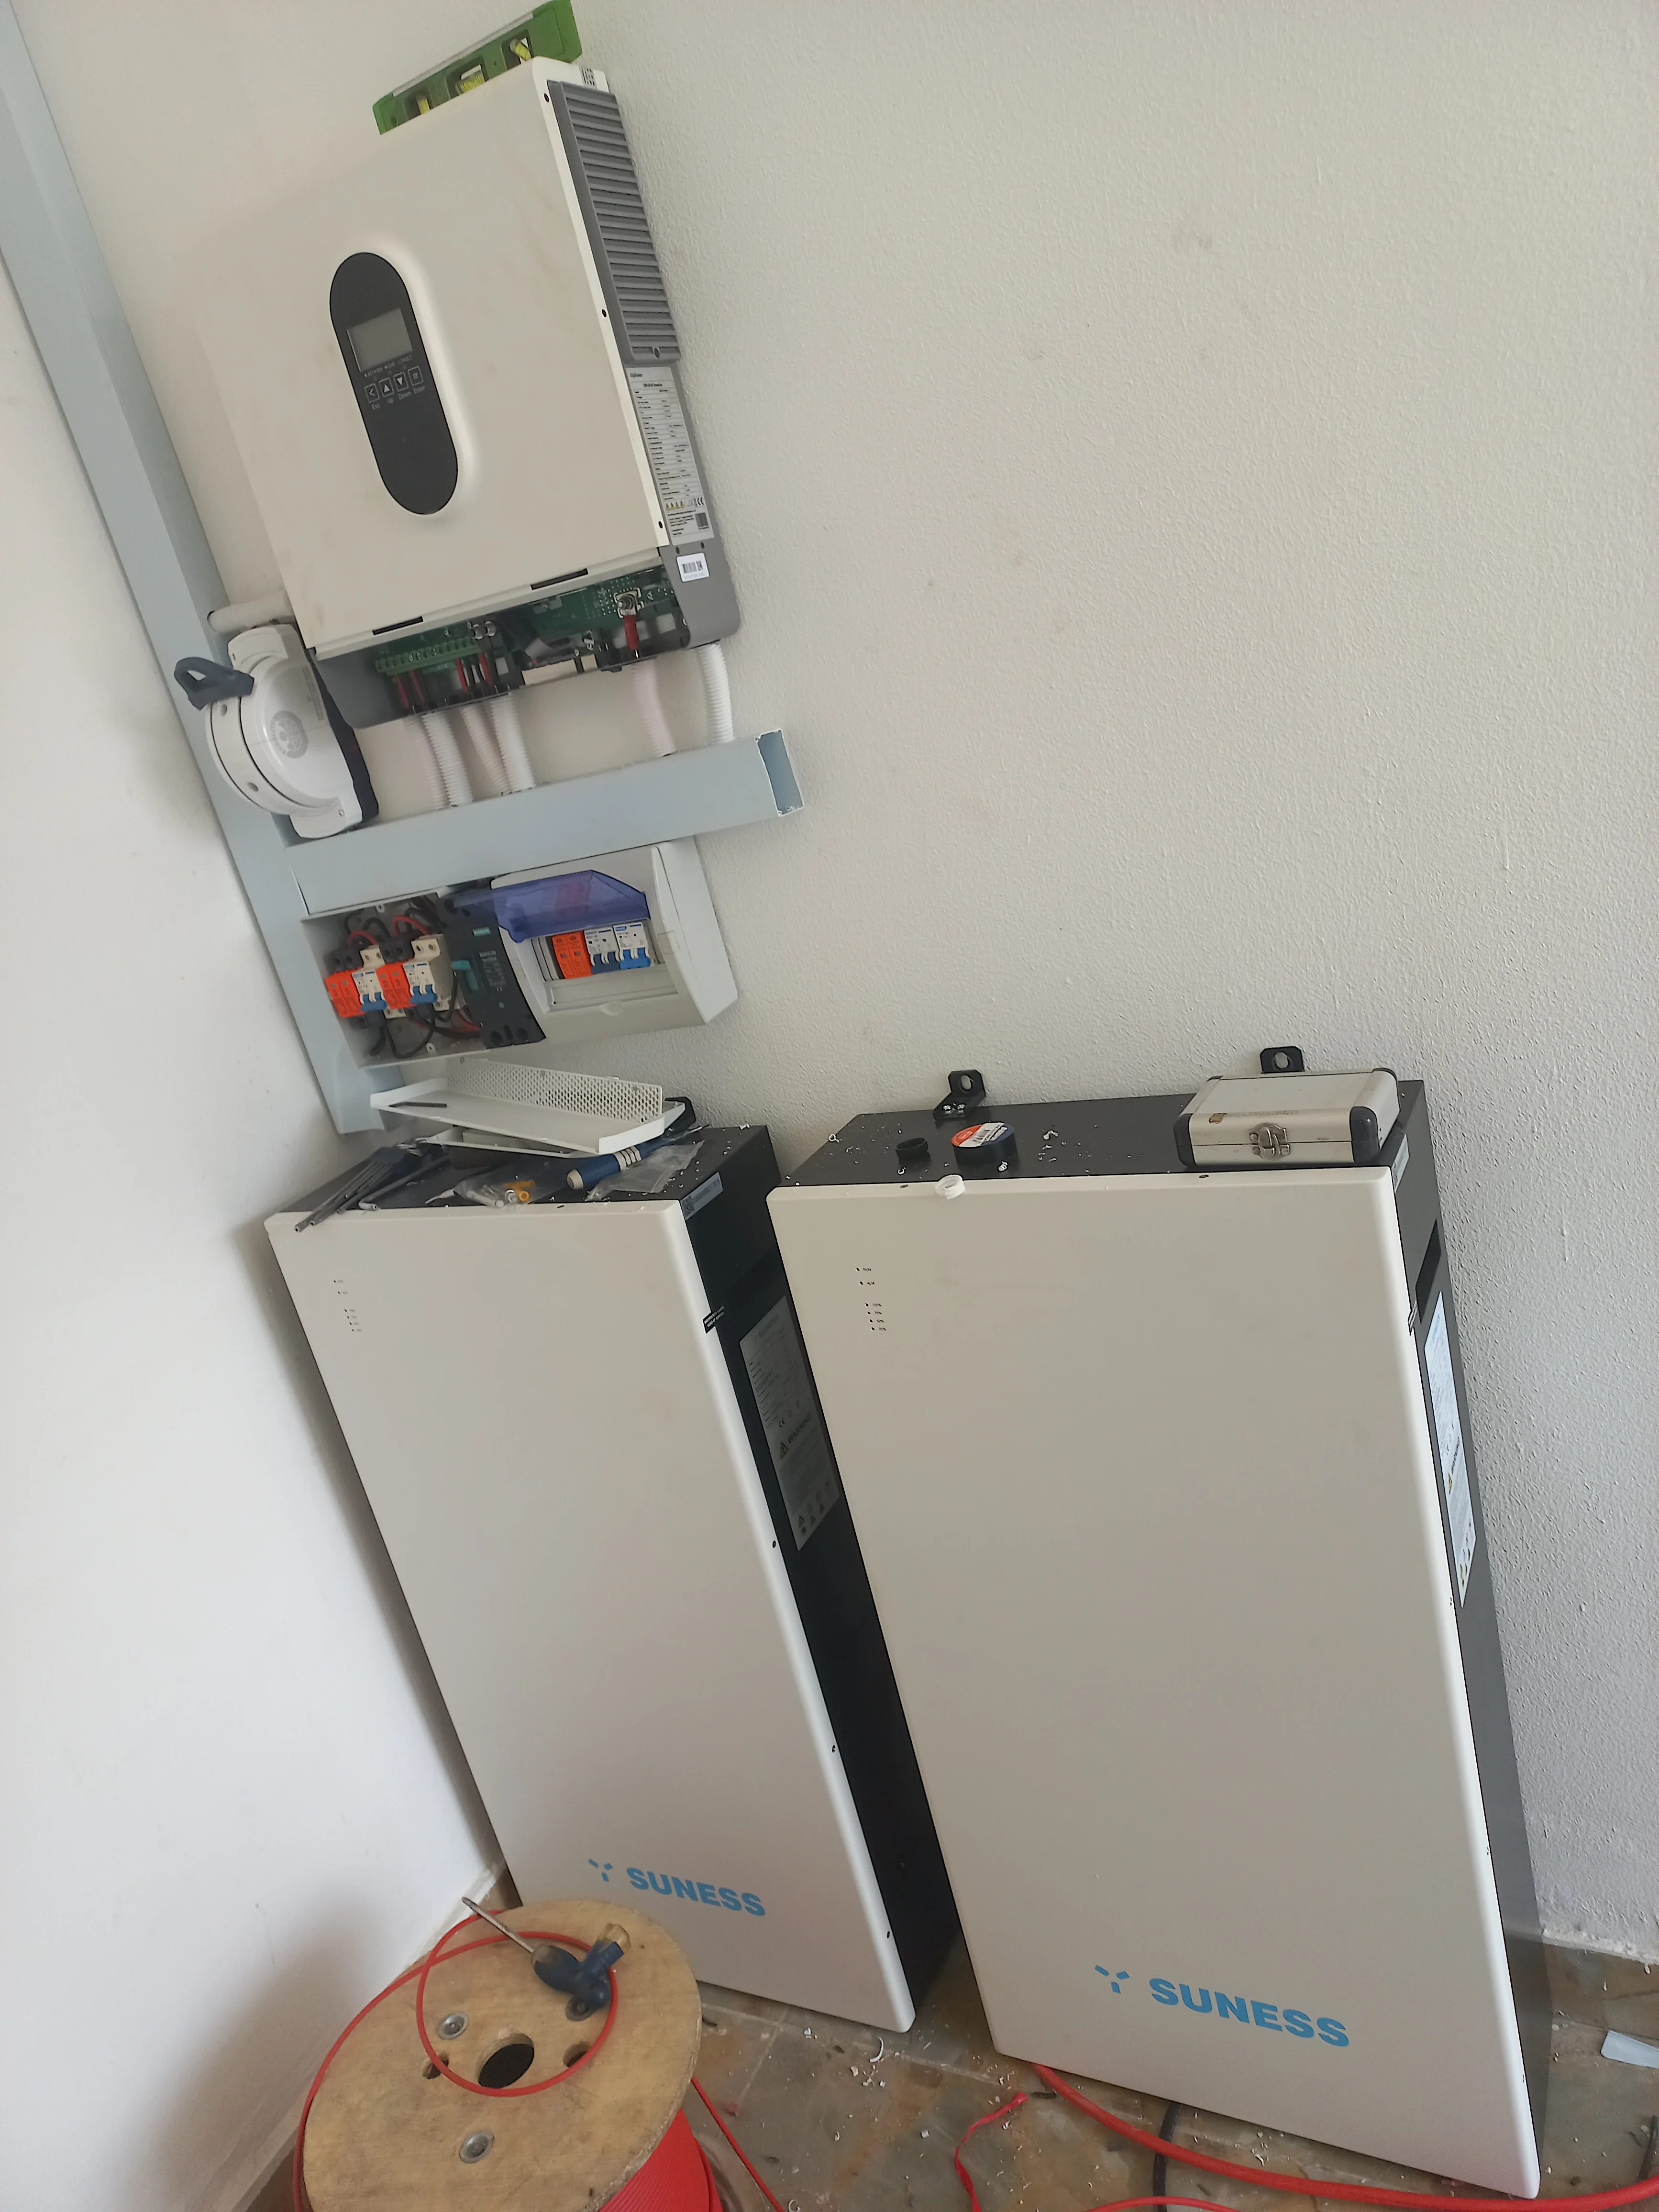
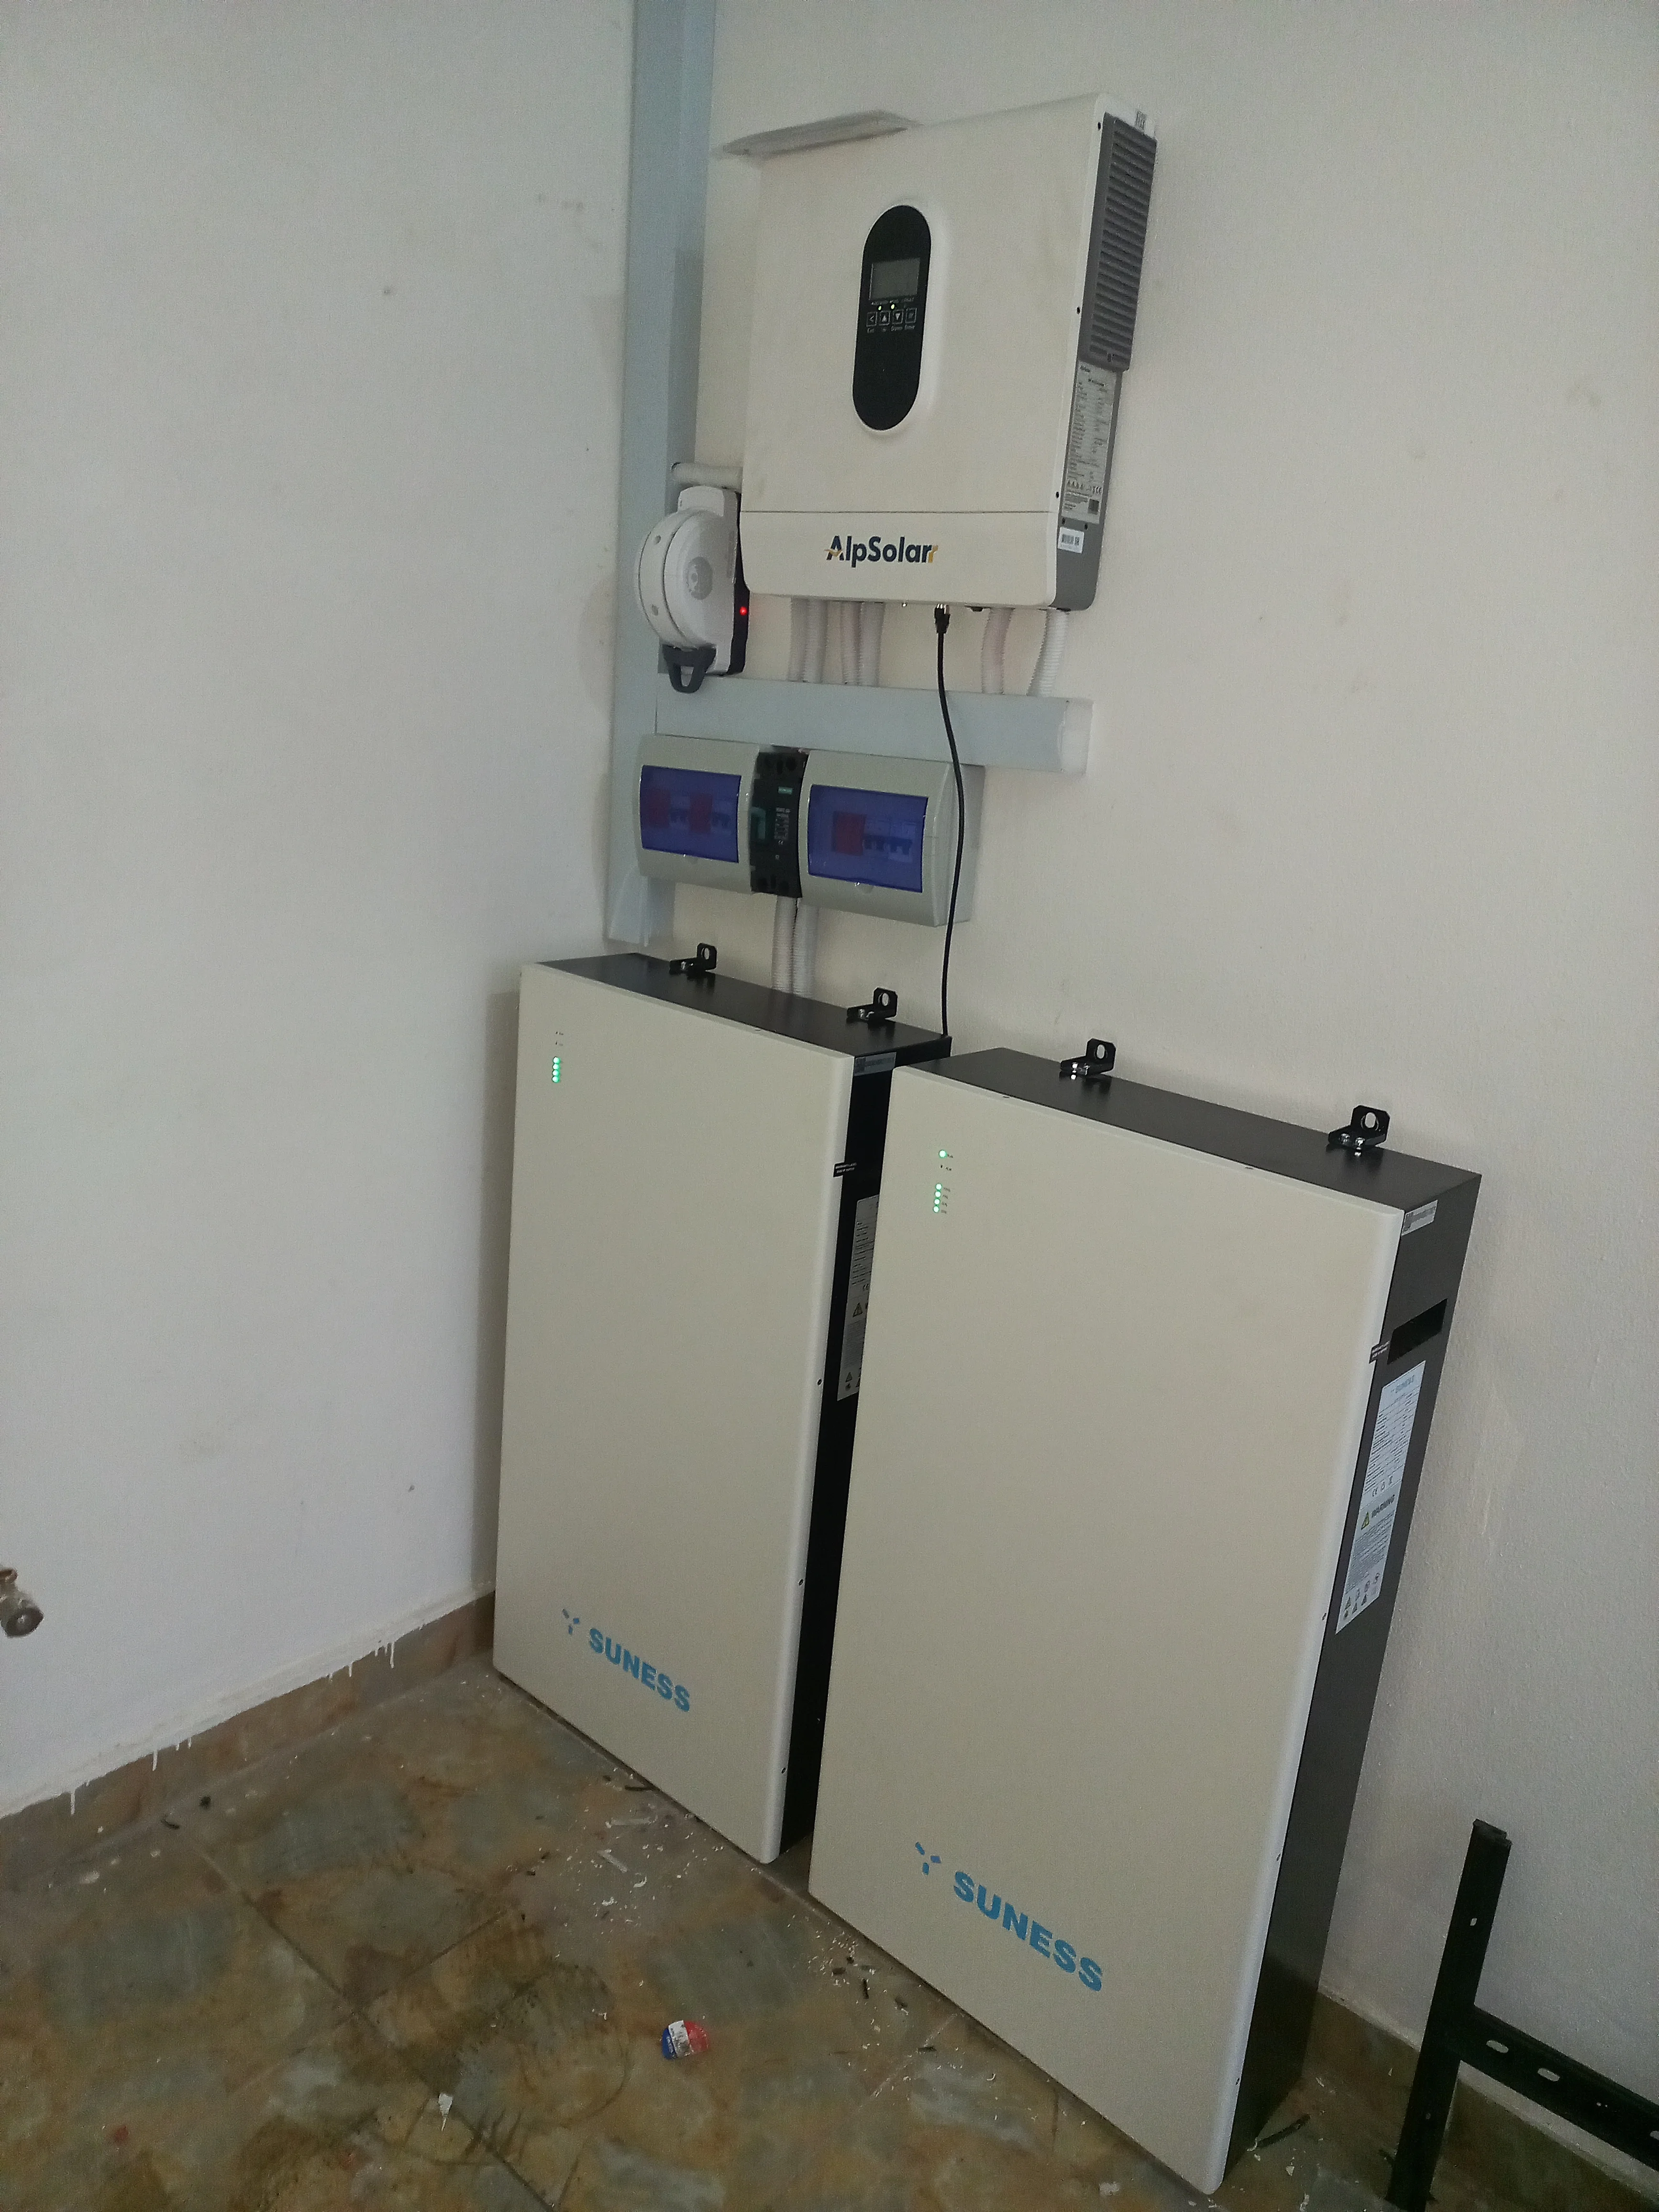
Phase 3: Inverter & Distribution Board Installation
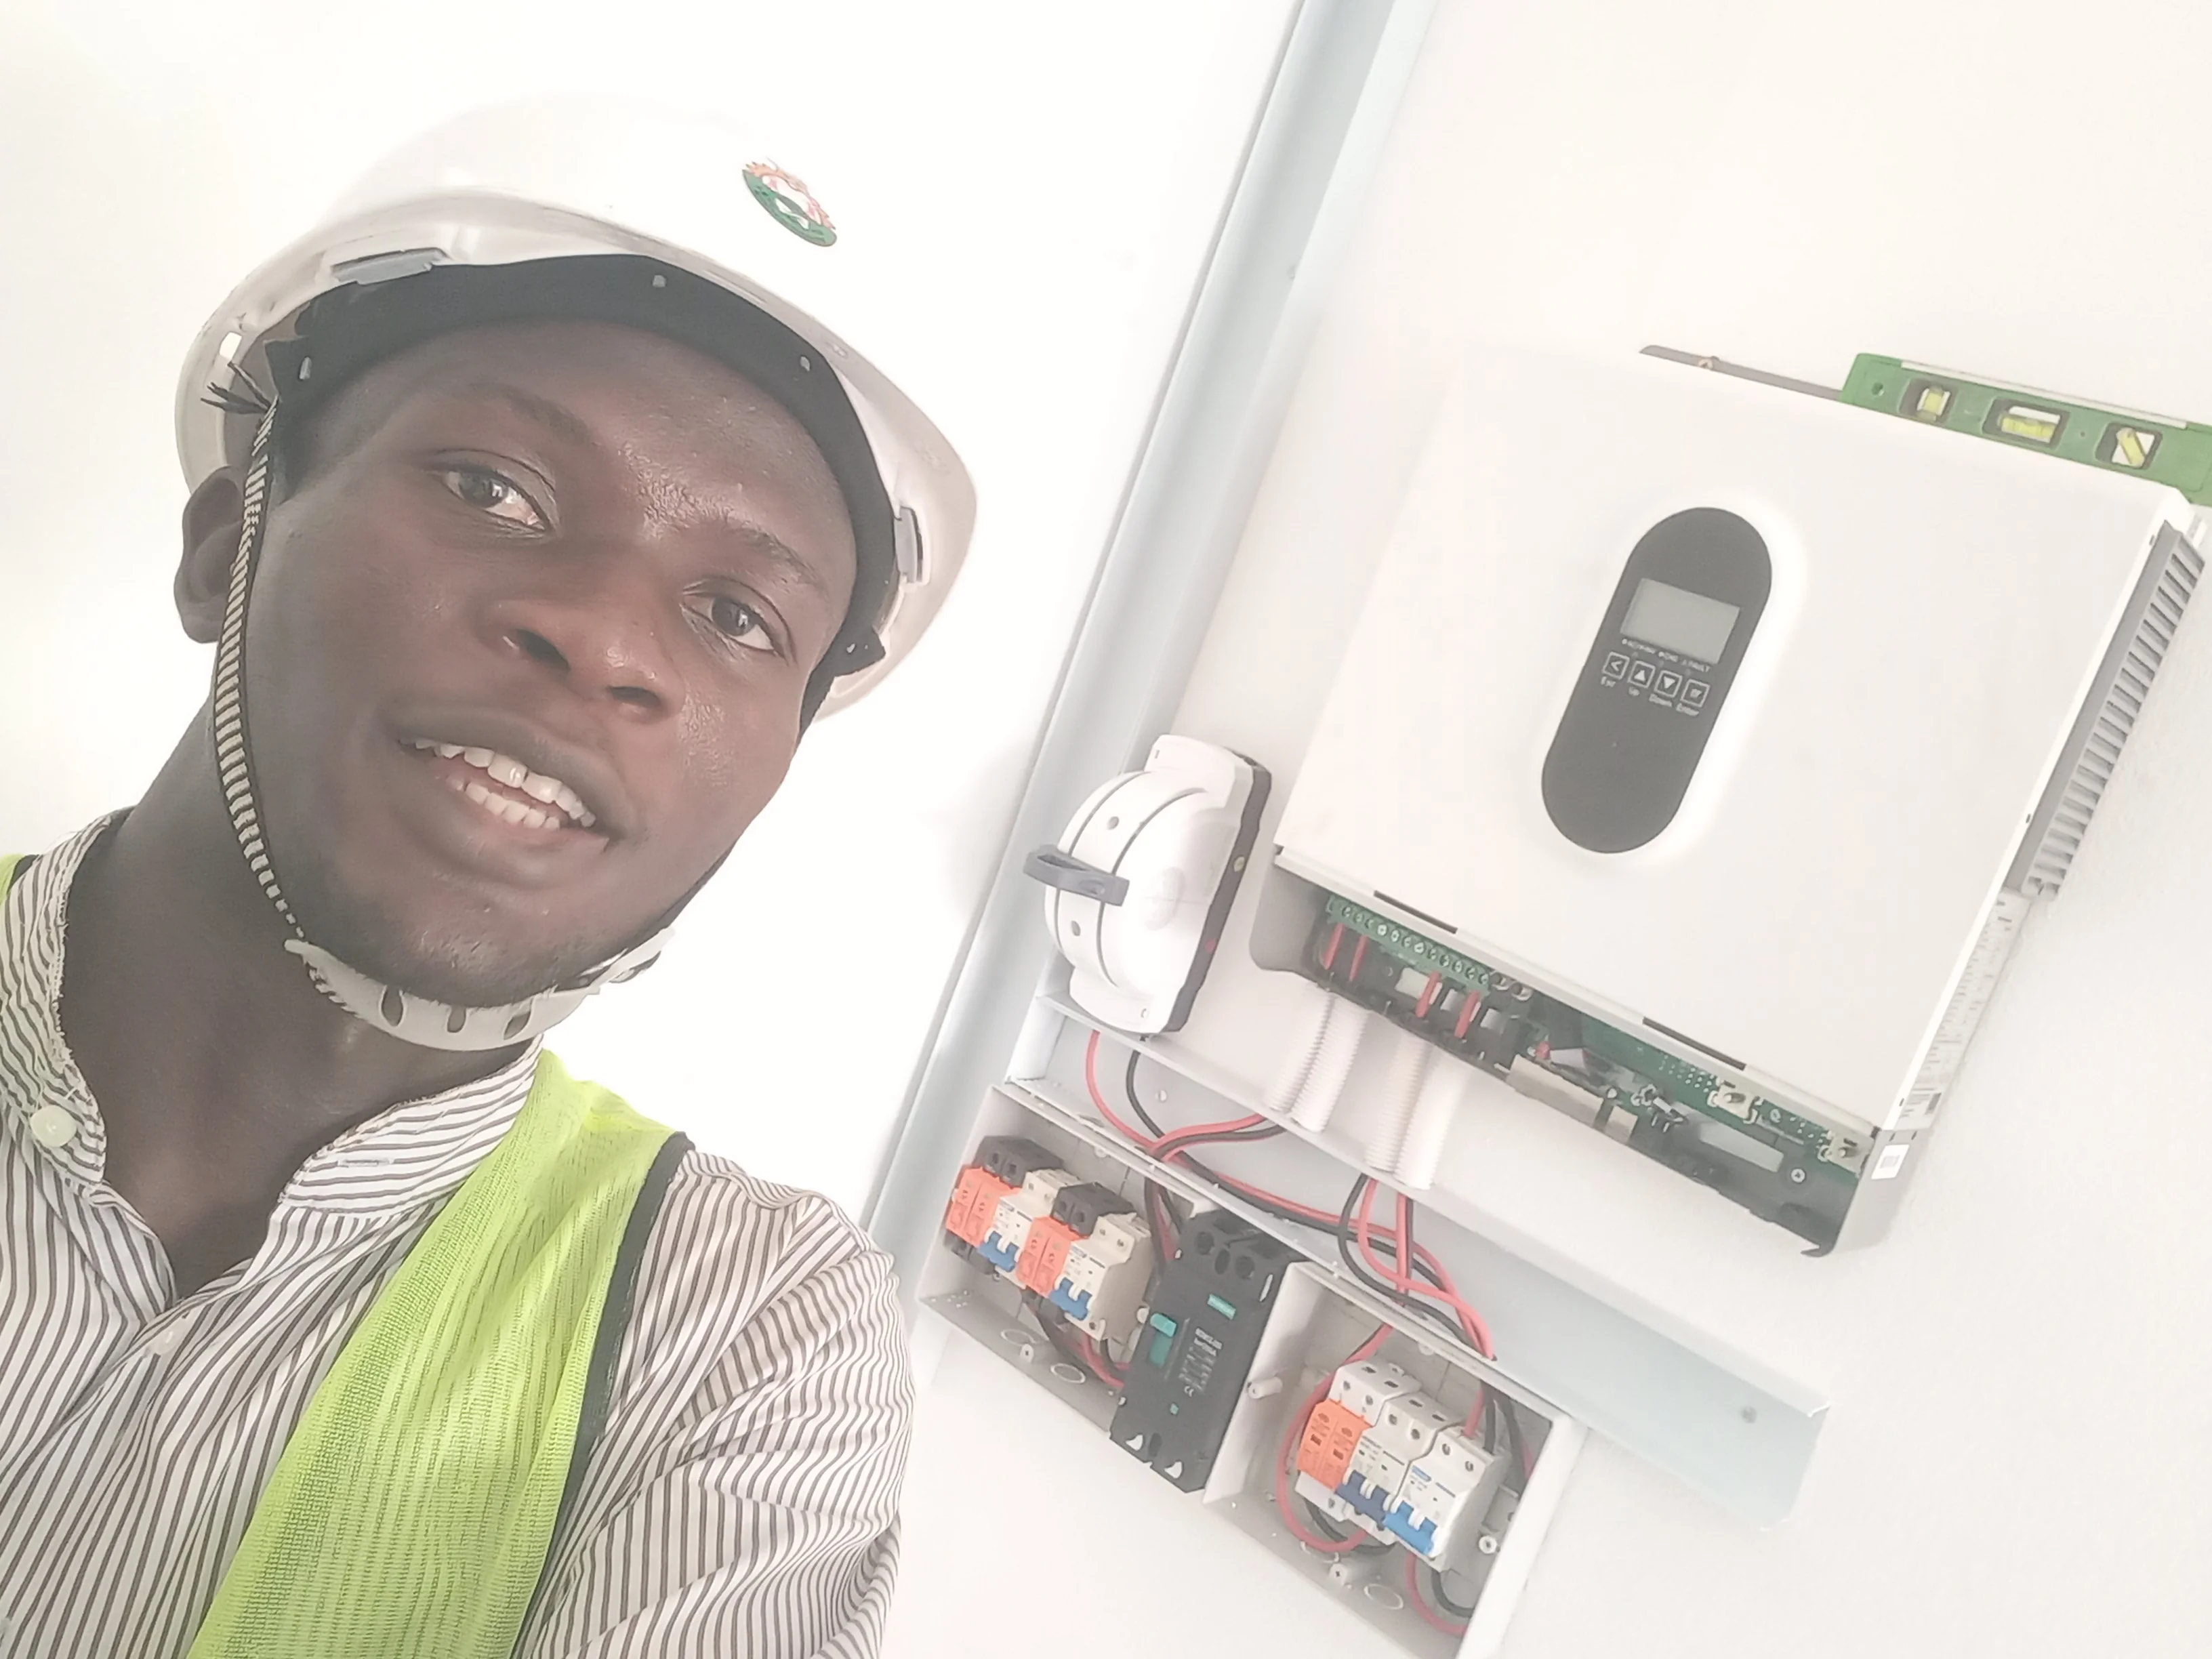
The AlpSolarr 11kW hybrid inverter was wall-mounted on the cable trunking rail. Below it, a distribution board was assembled containing the CHINT DC surge protectors for both PV strings, the MDM1Z-250 (250A) main circuit breaker, and the HOREDAY AC surge protector and MCBs. All wiring was routed through flexible conduit from the inverter's PCB connection board down to the distribution panel. The CT (current transformer) sensor was also installed for energy monitoring.
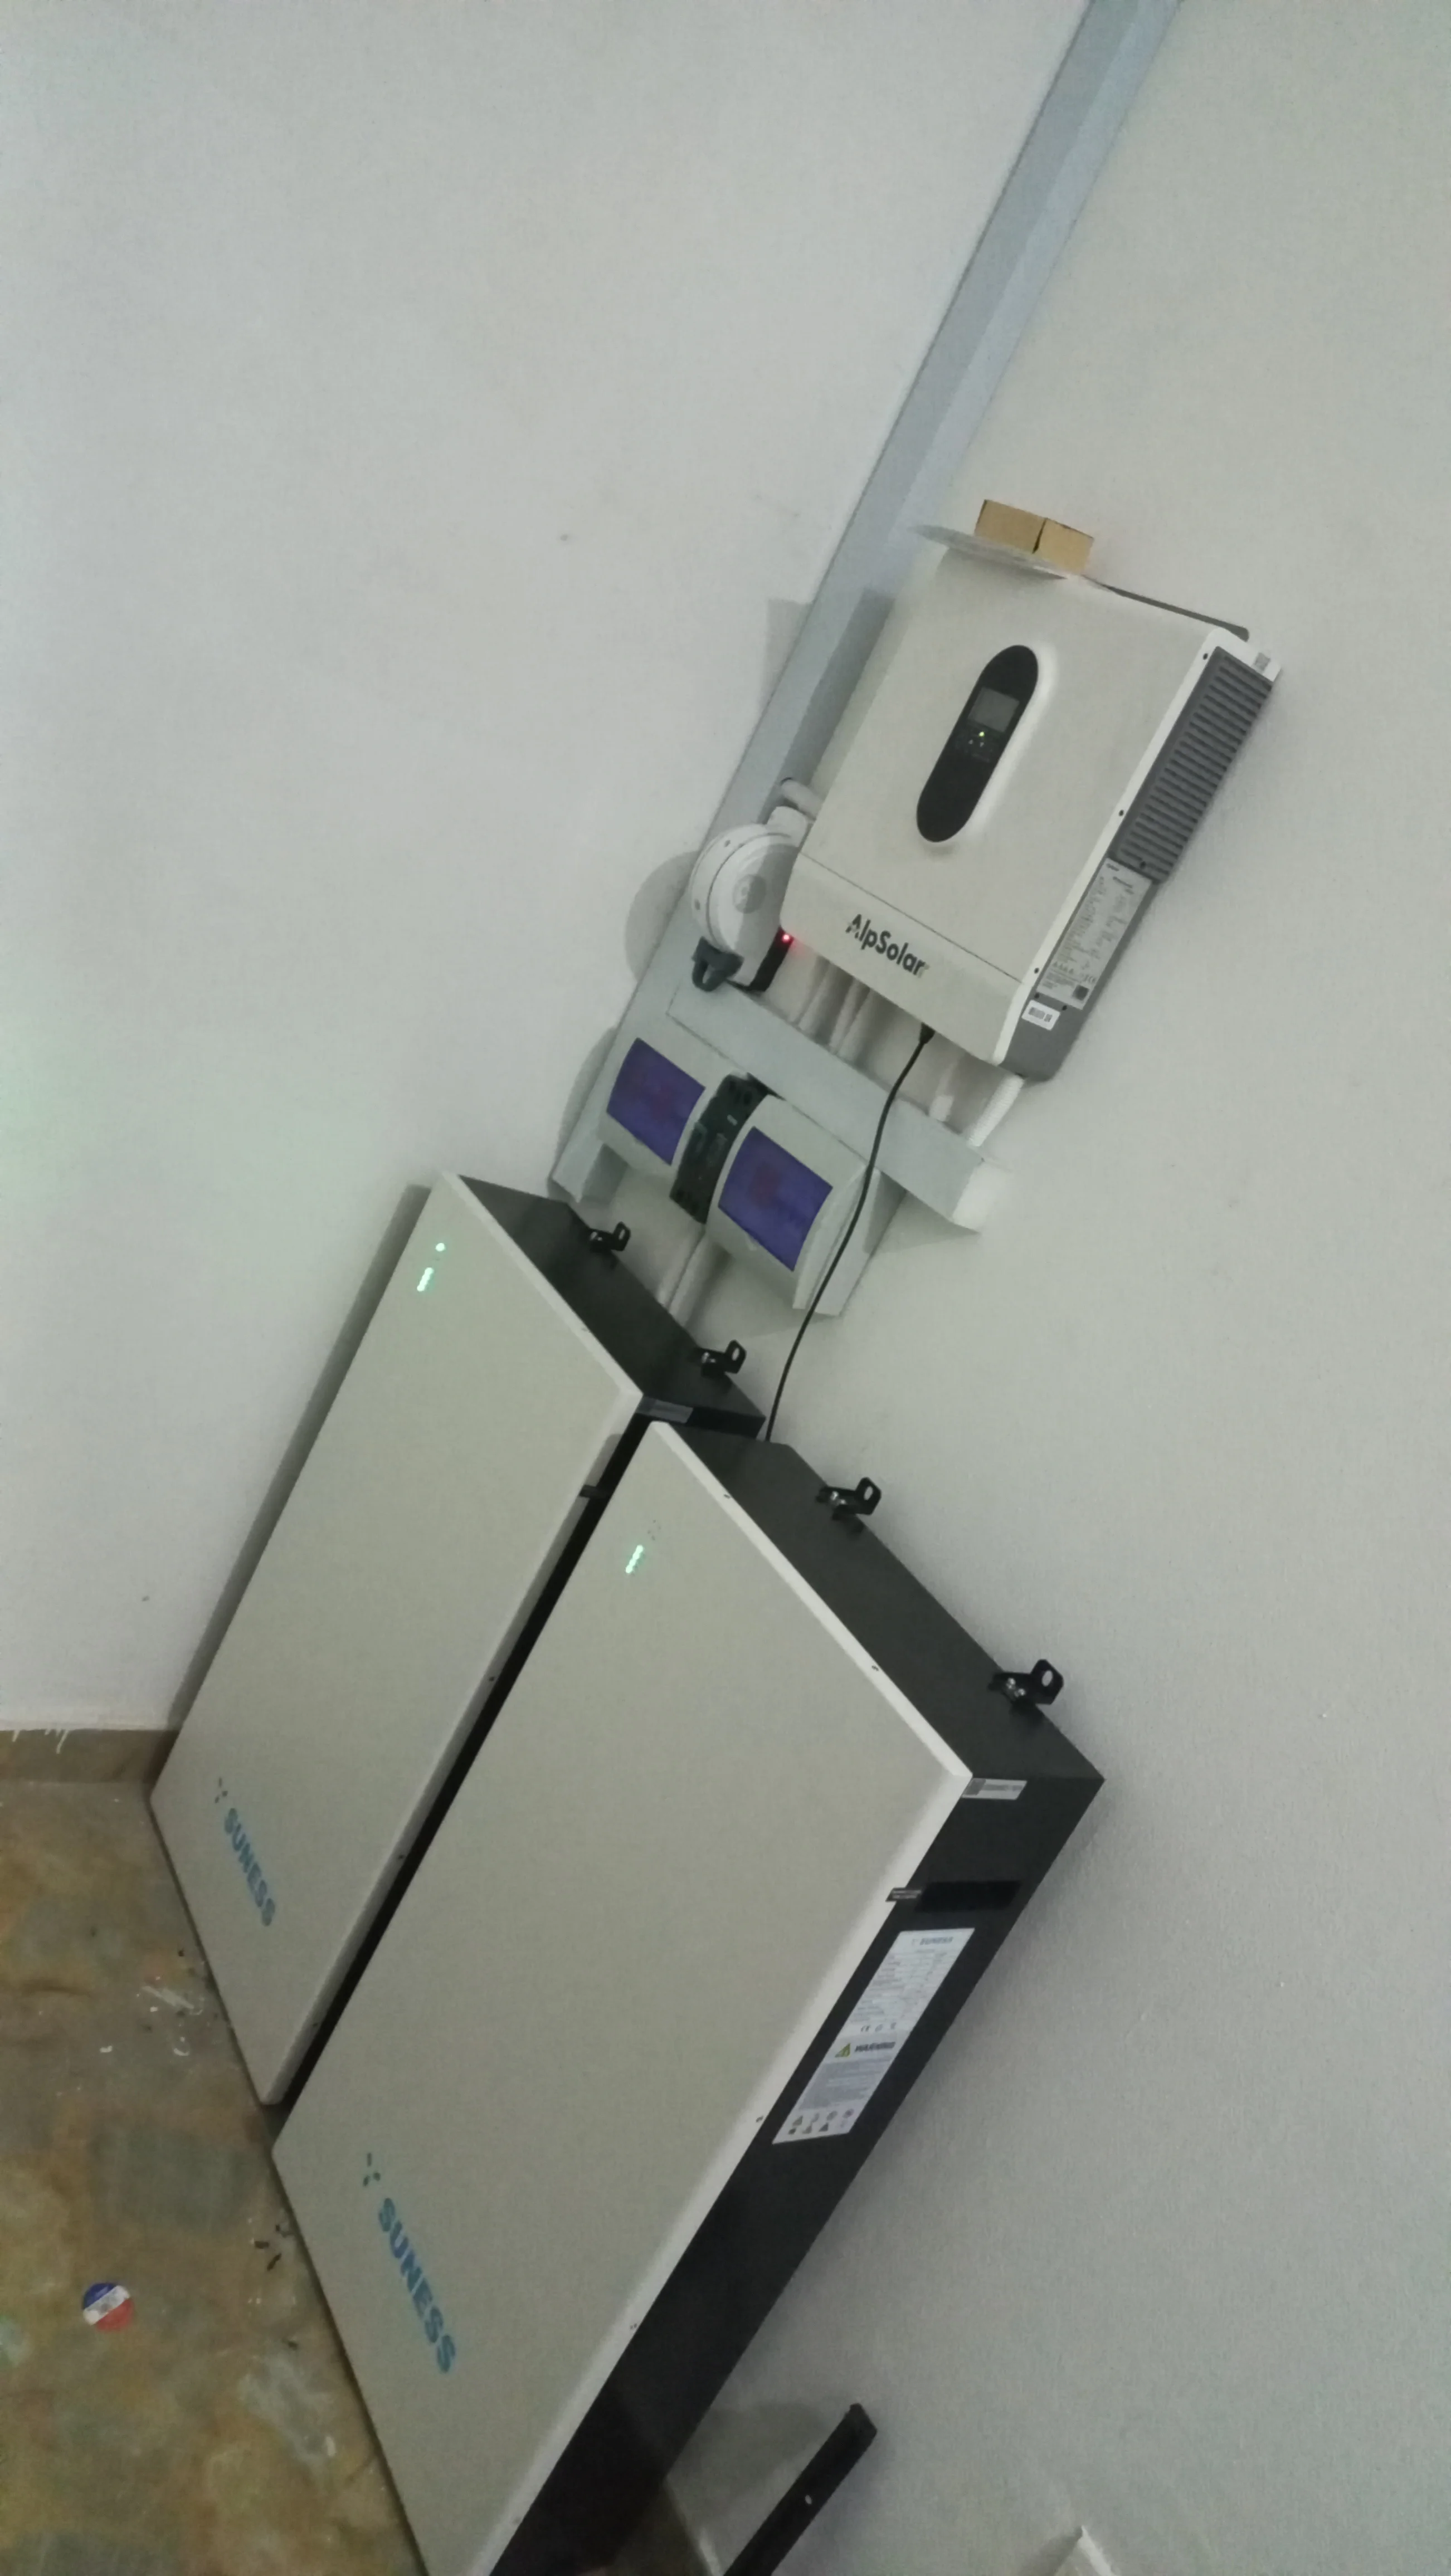
Phase 4: Battery Setup
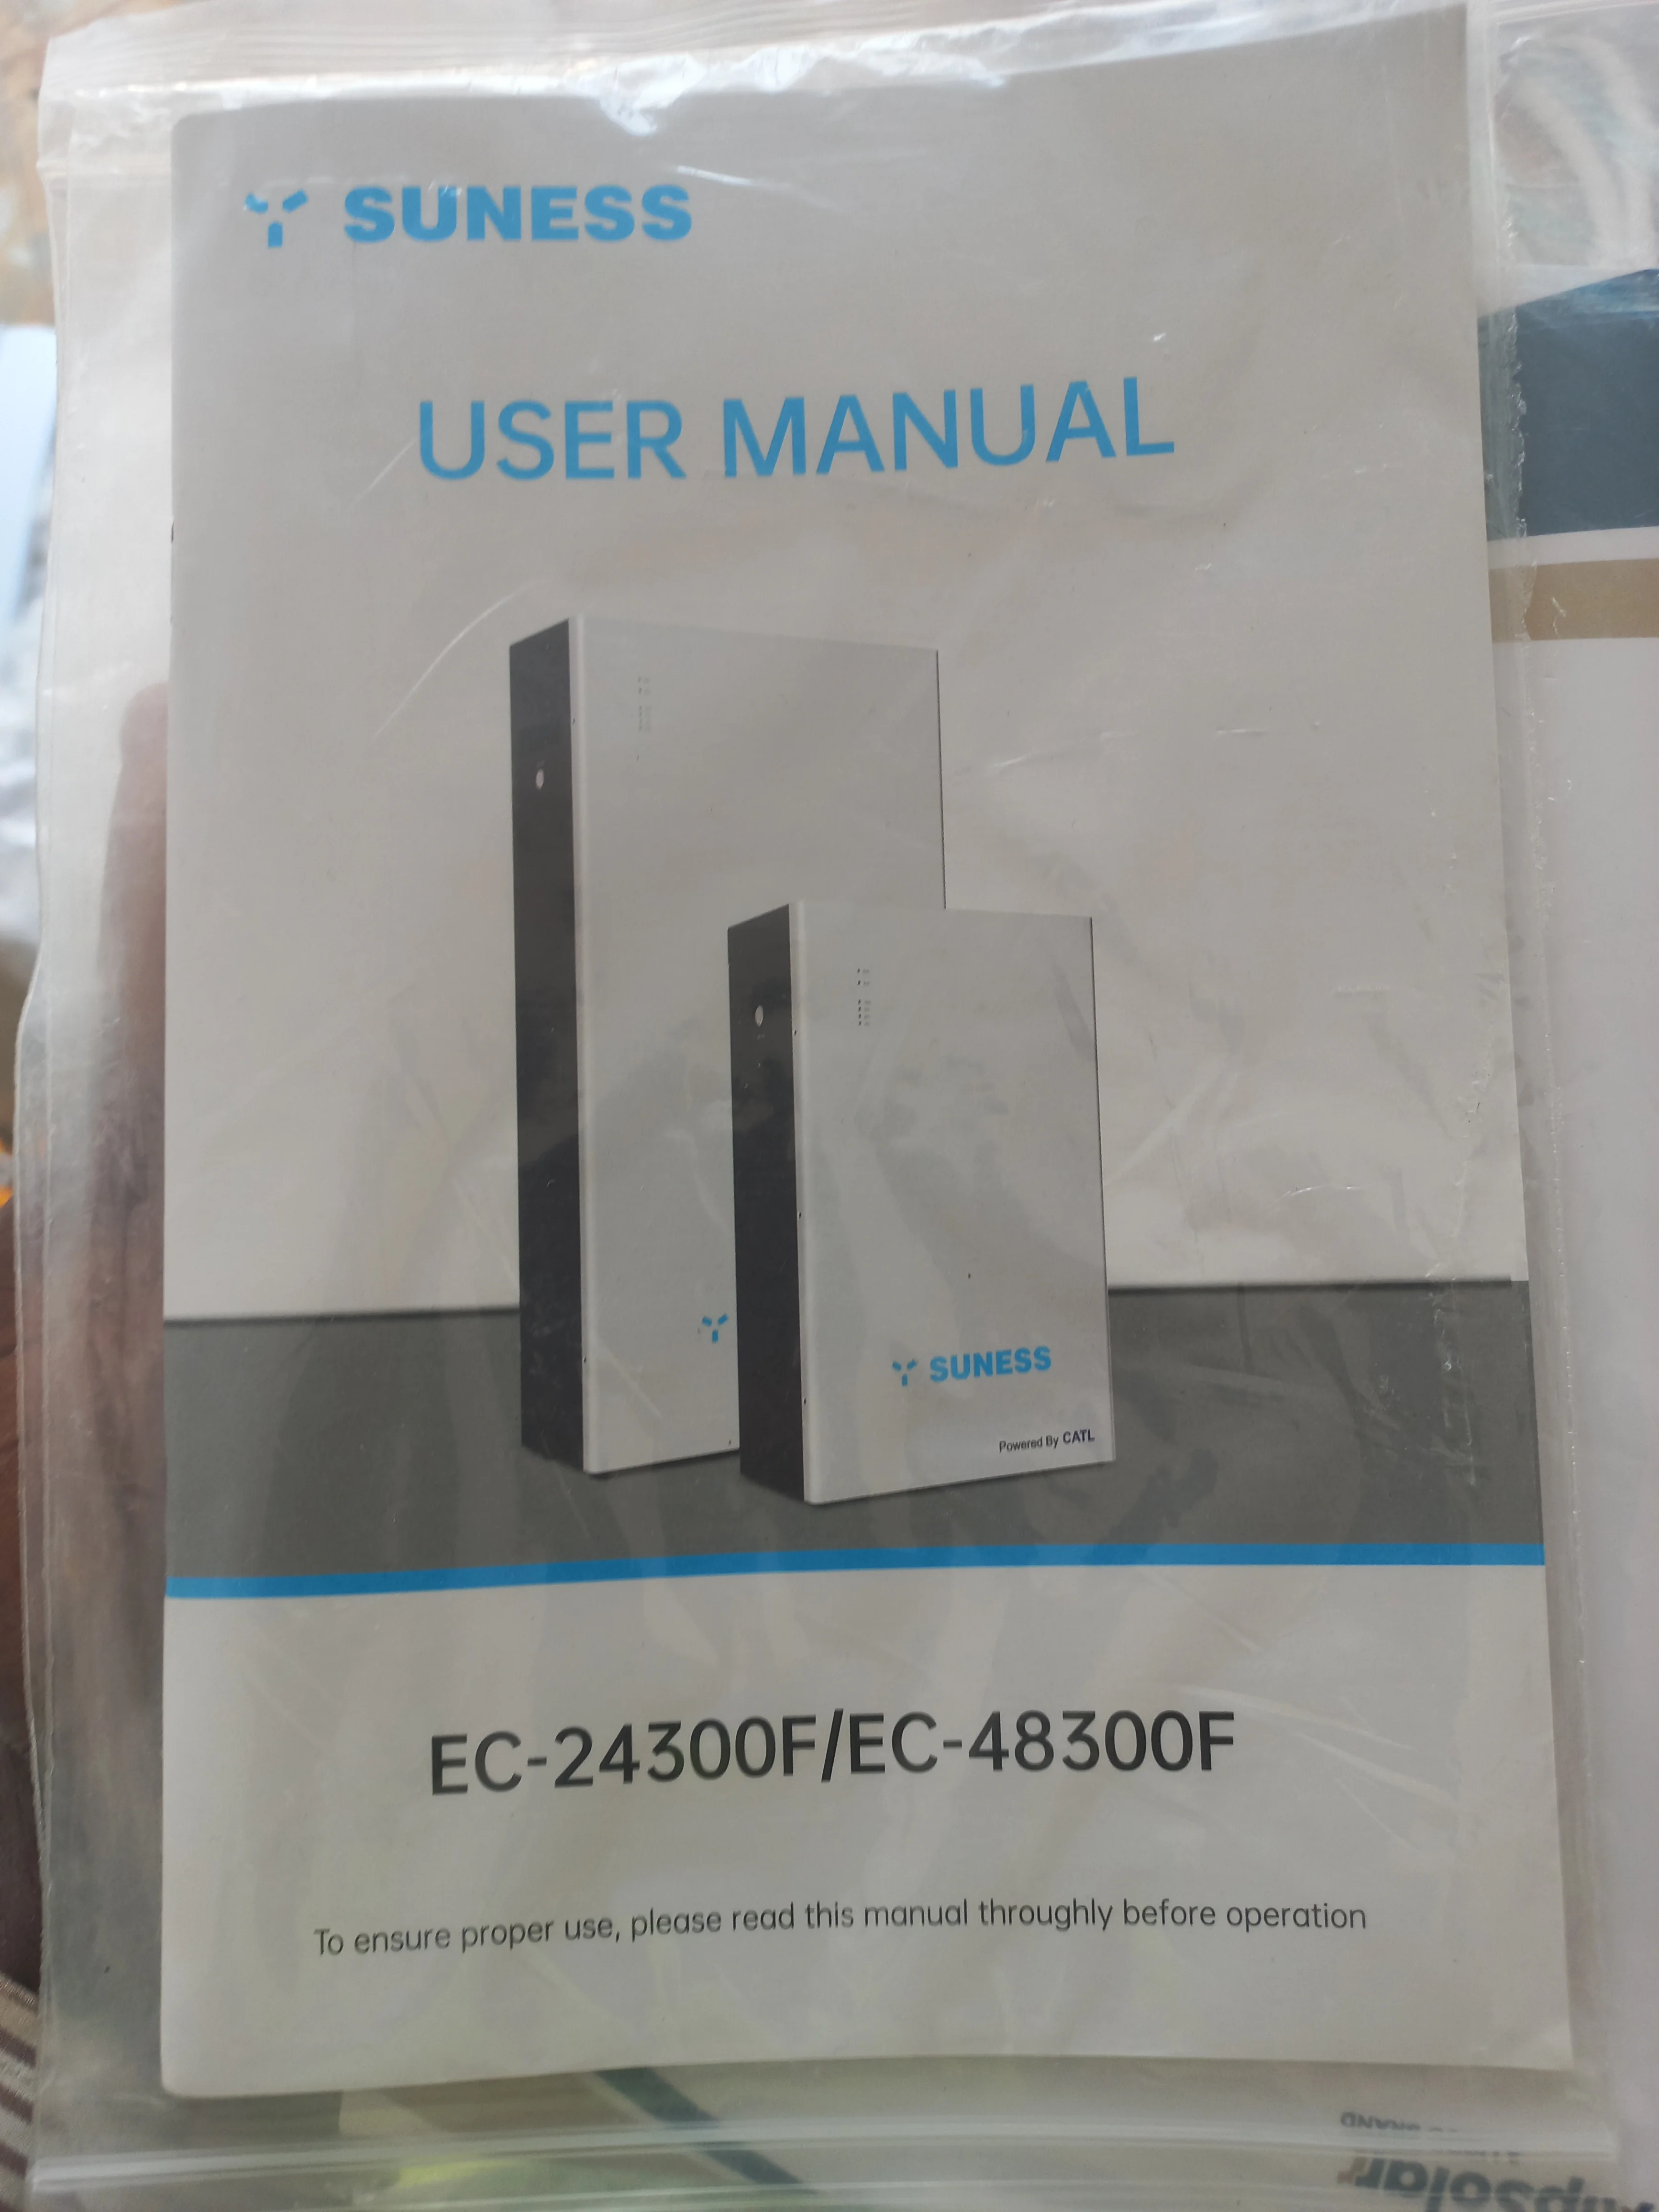
The two SUNESS EC-48300F LiFePO4 battery units were positioned on floor-standing metal bracket stands adjacent to the inverter wall. DC cables were routed from the batteries to the inverter's battery terminals. Upon powering on, both units displayed green LED indicators confirming proper BMS communication and charge status.
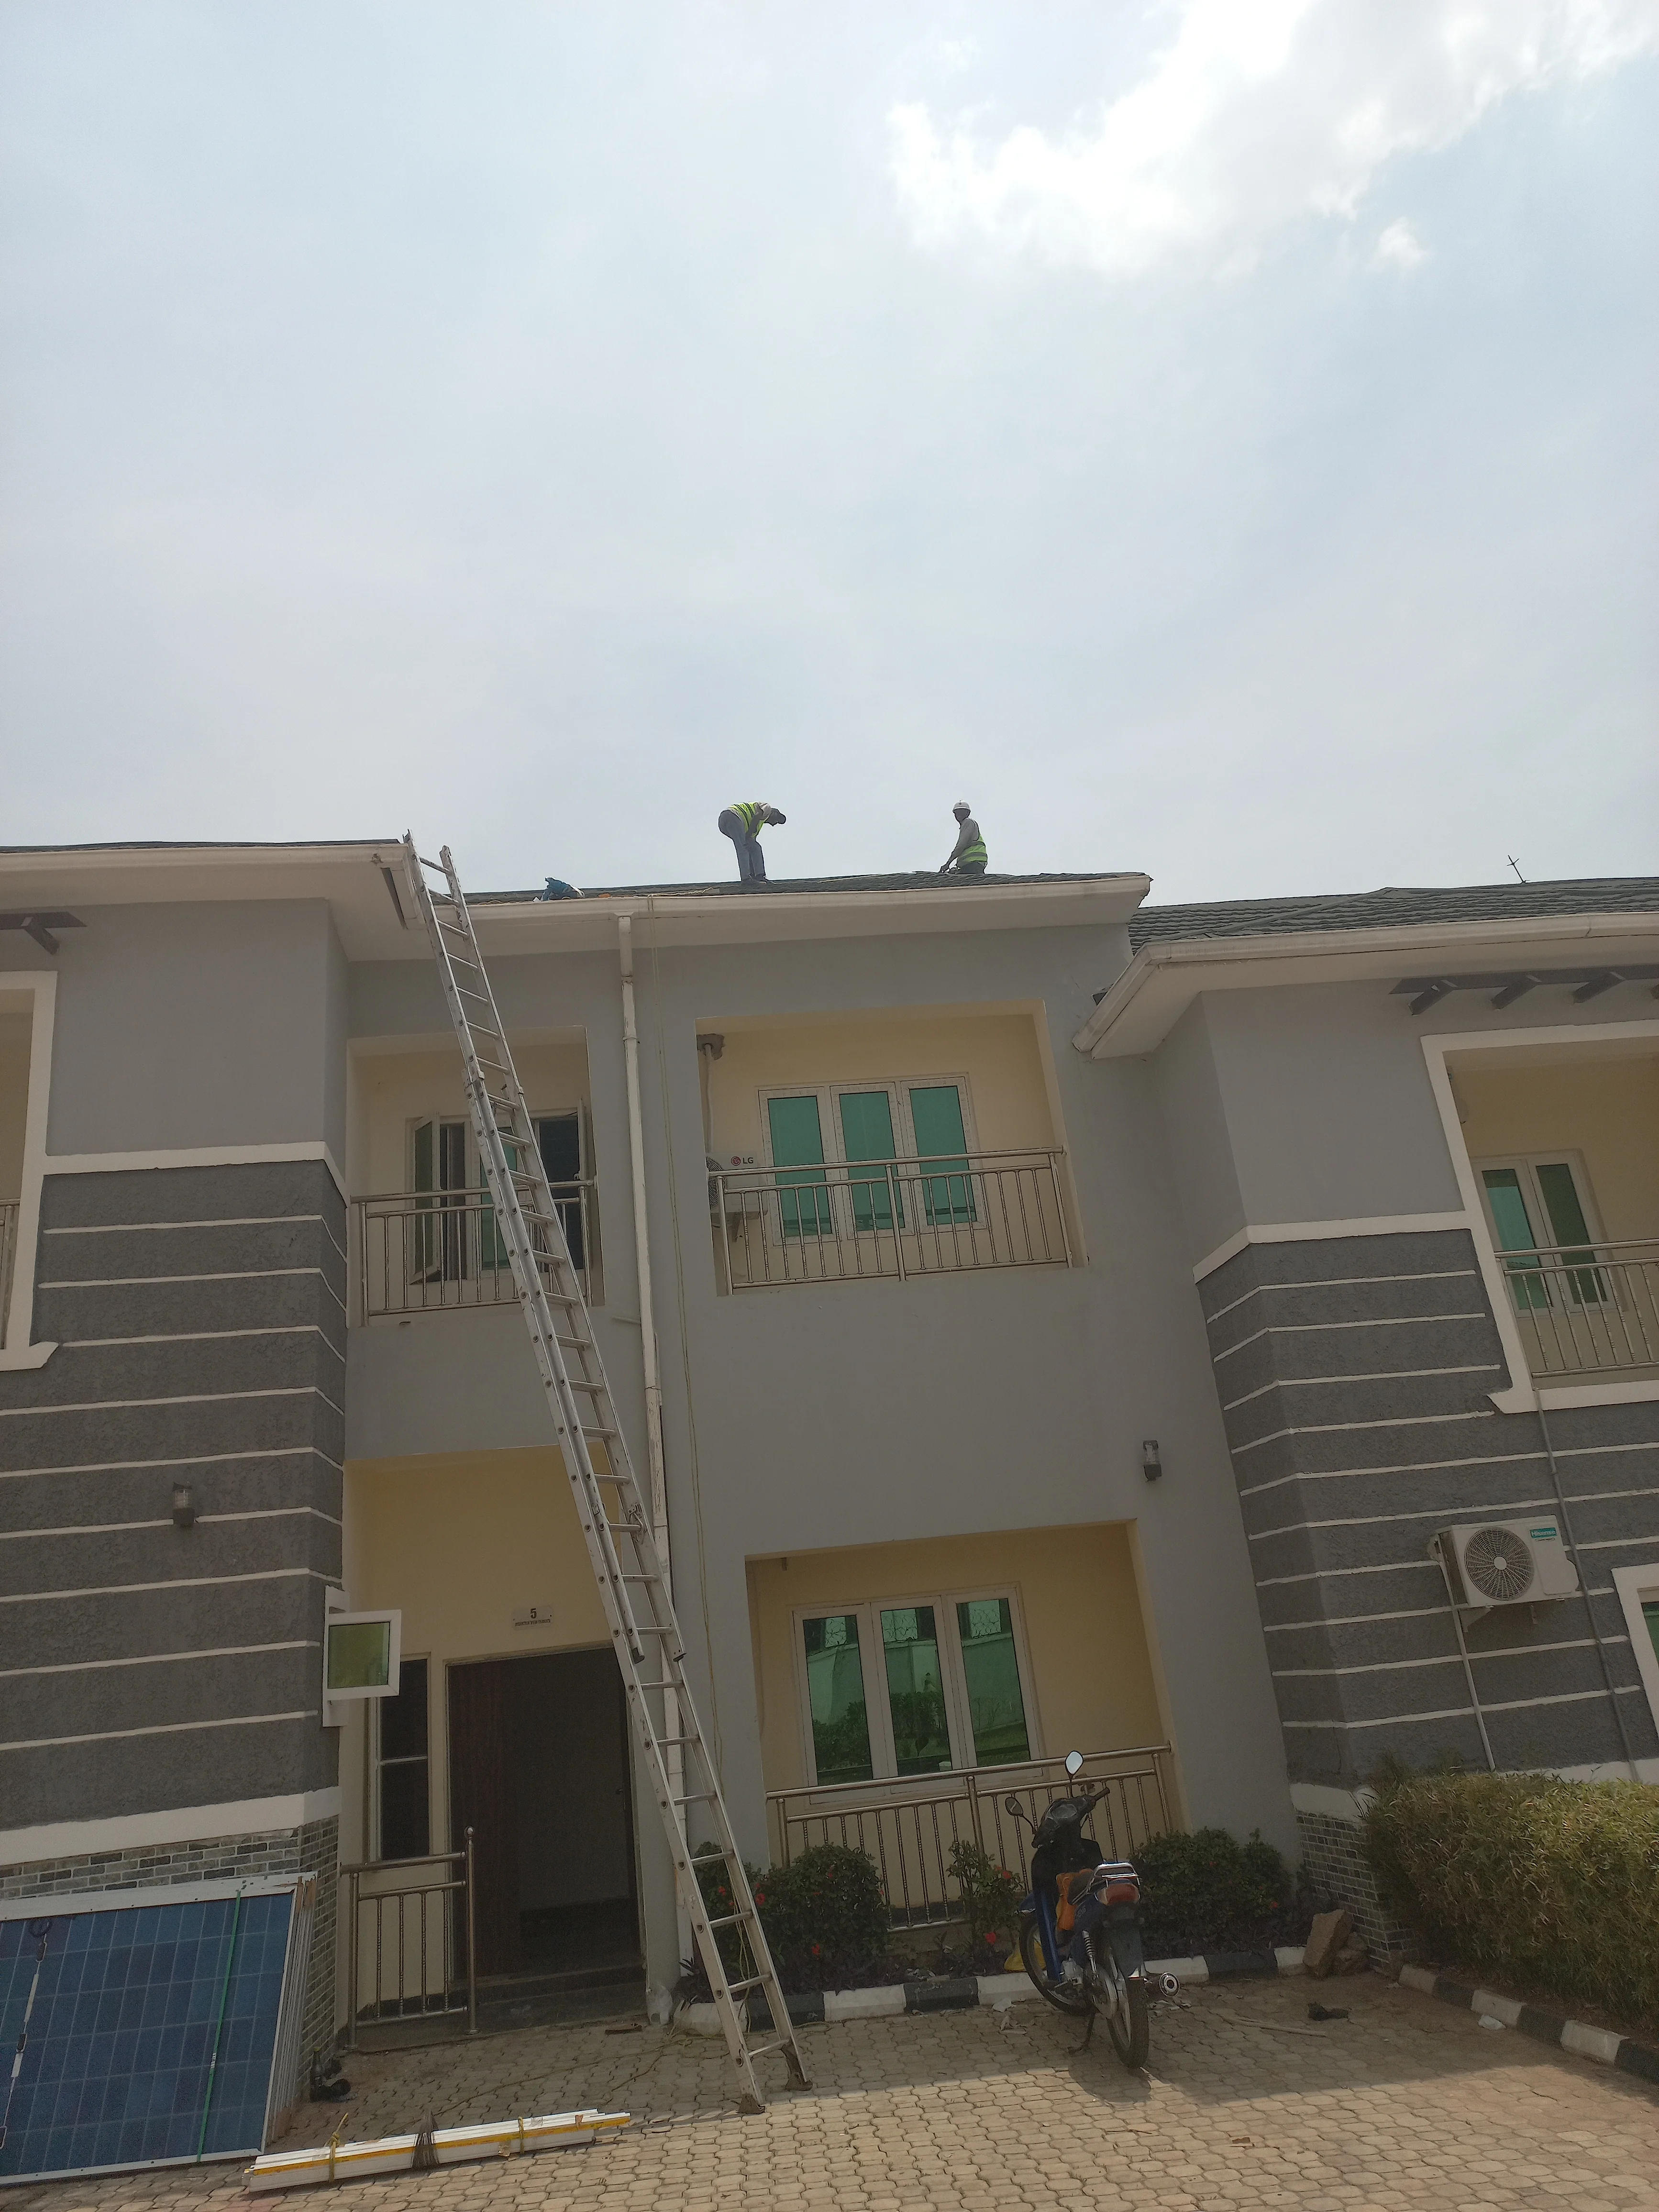
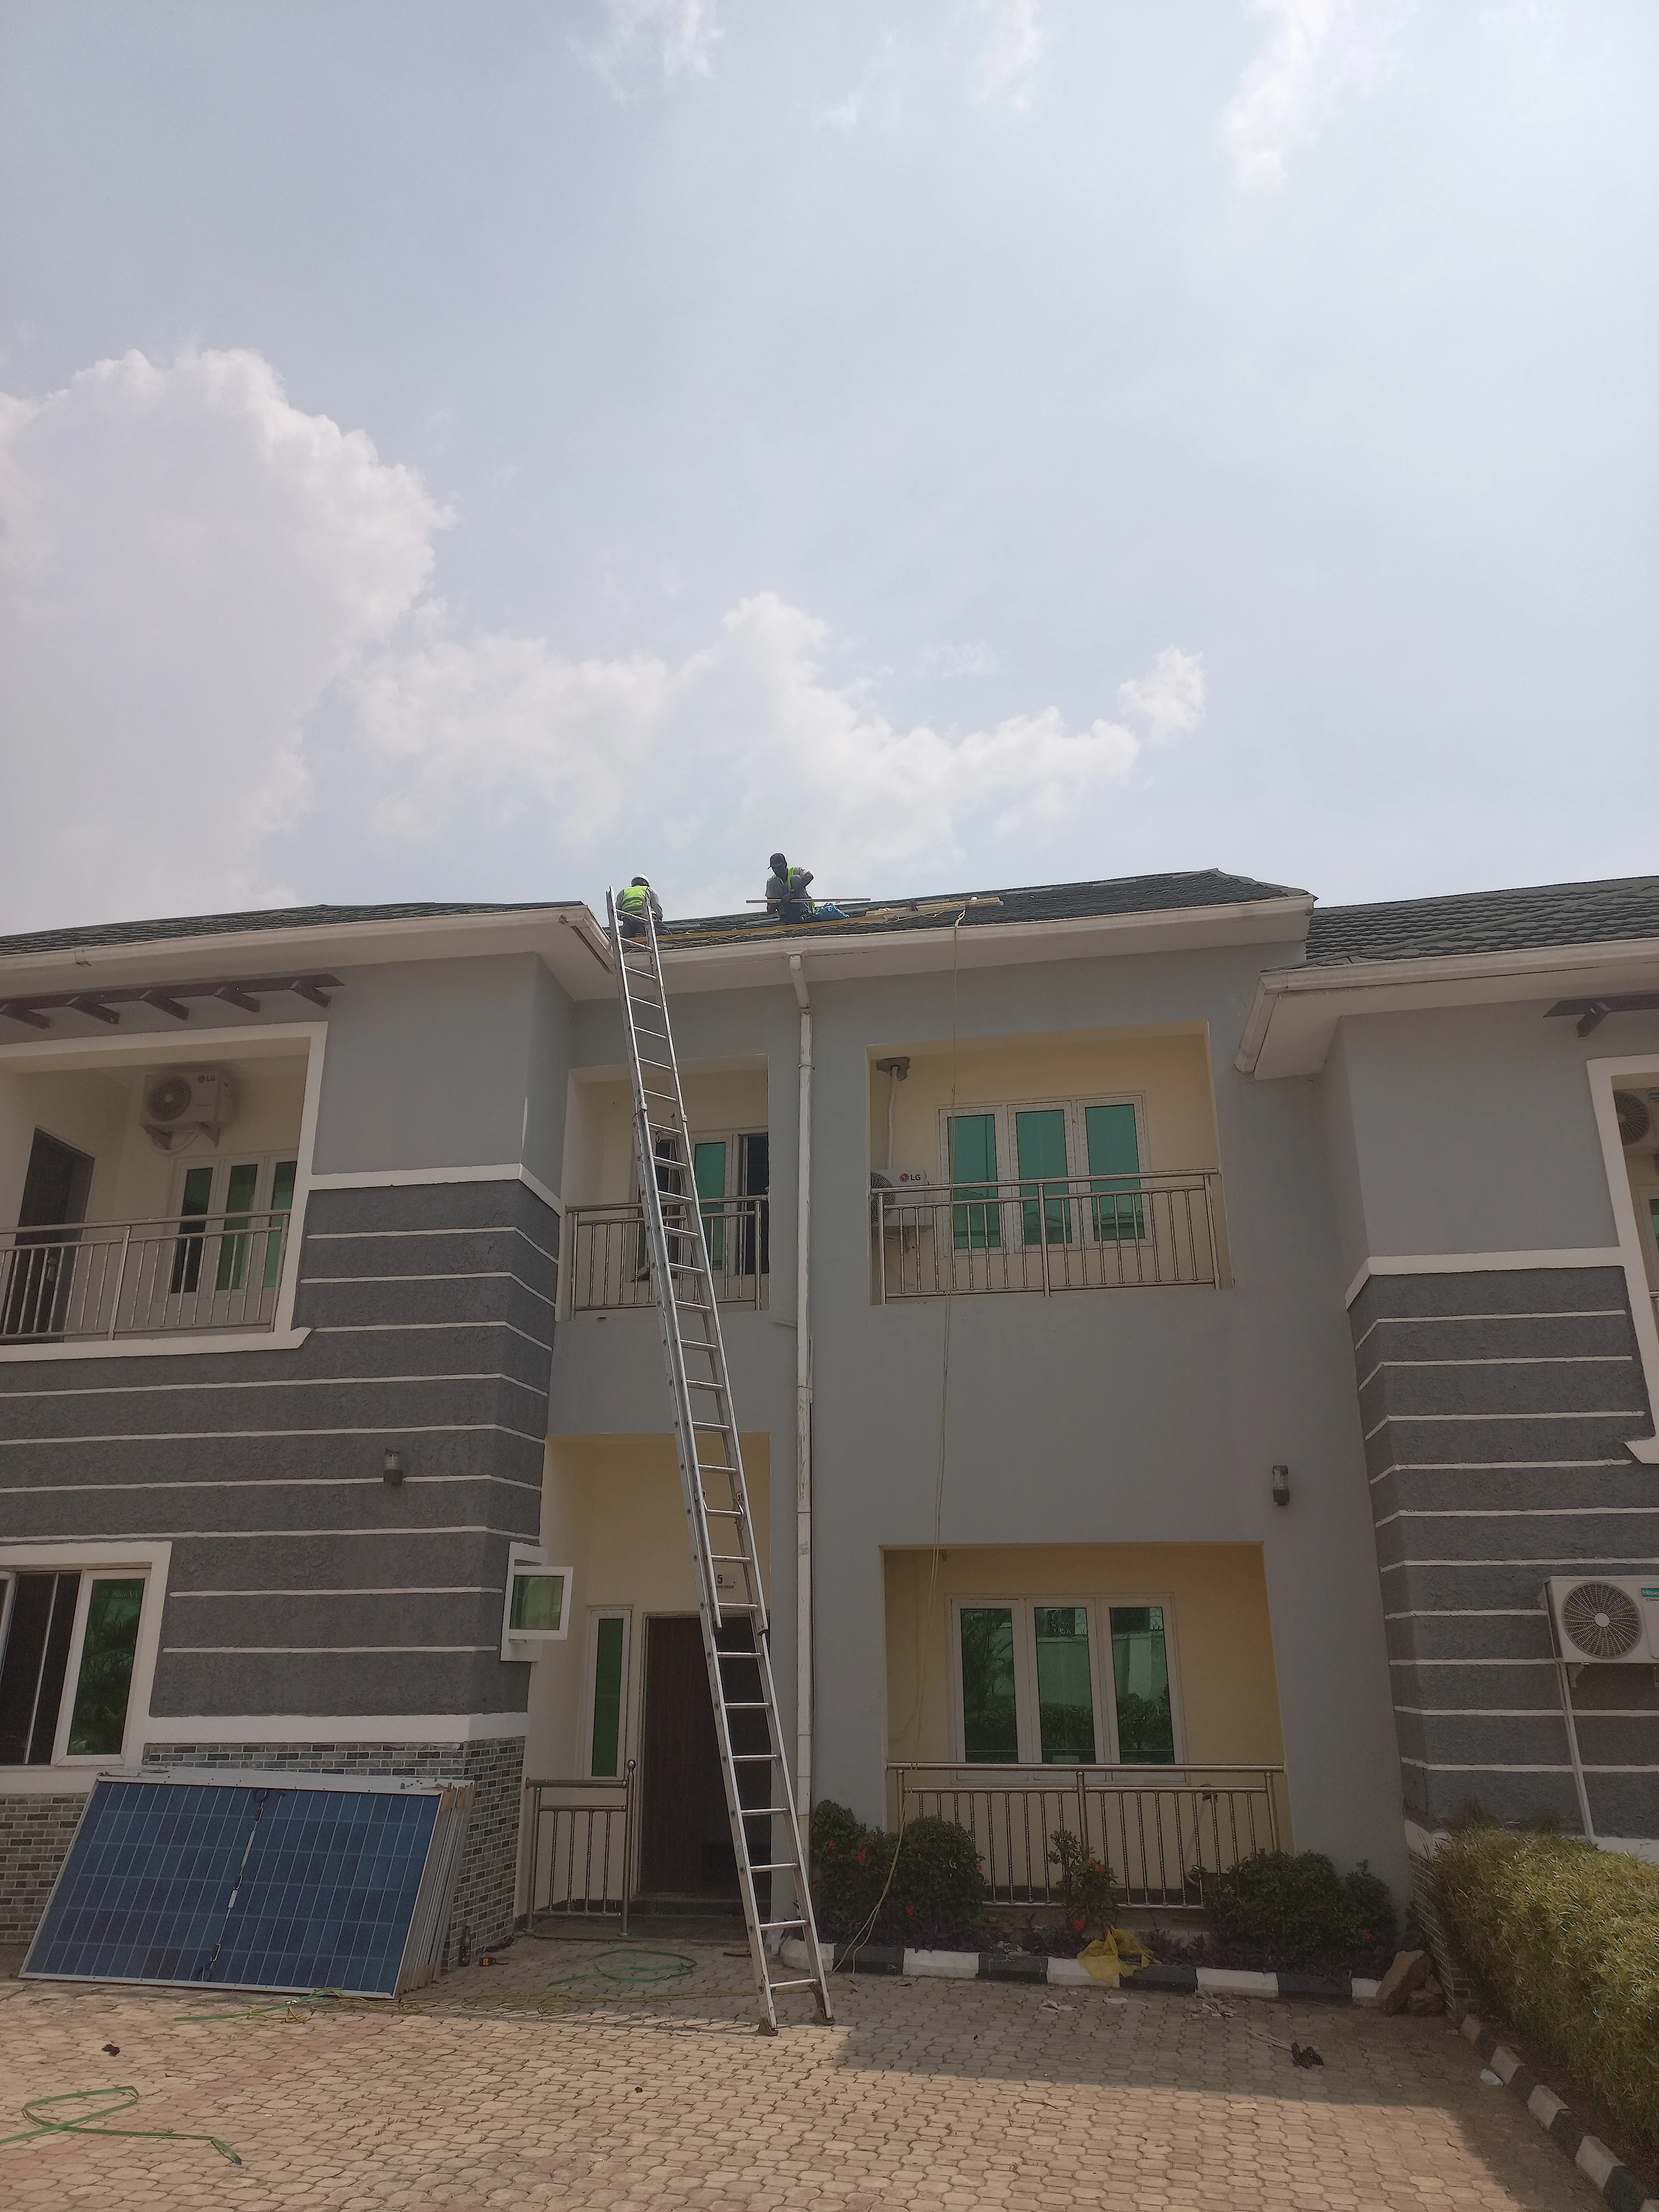
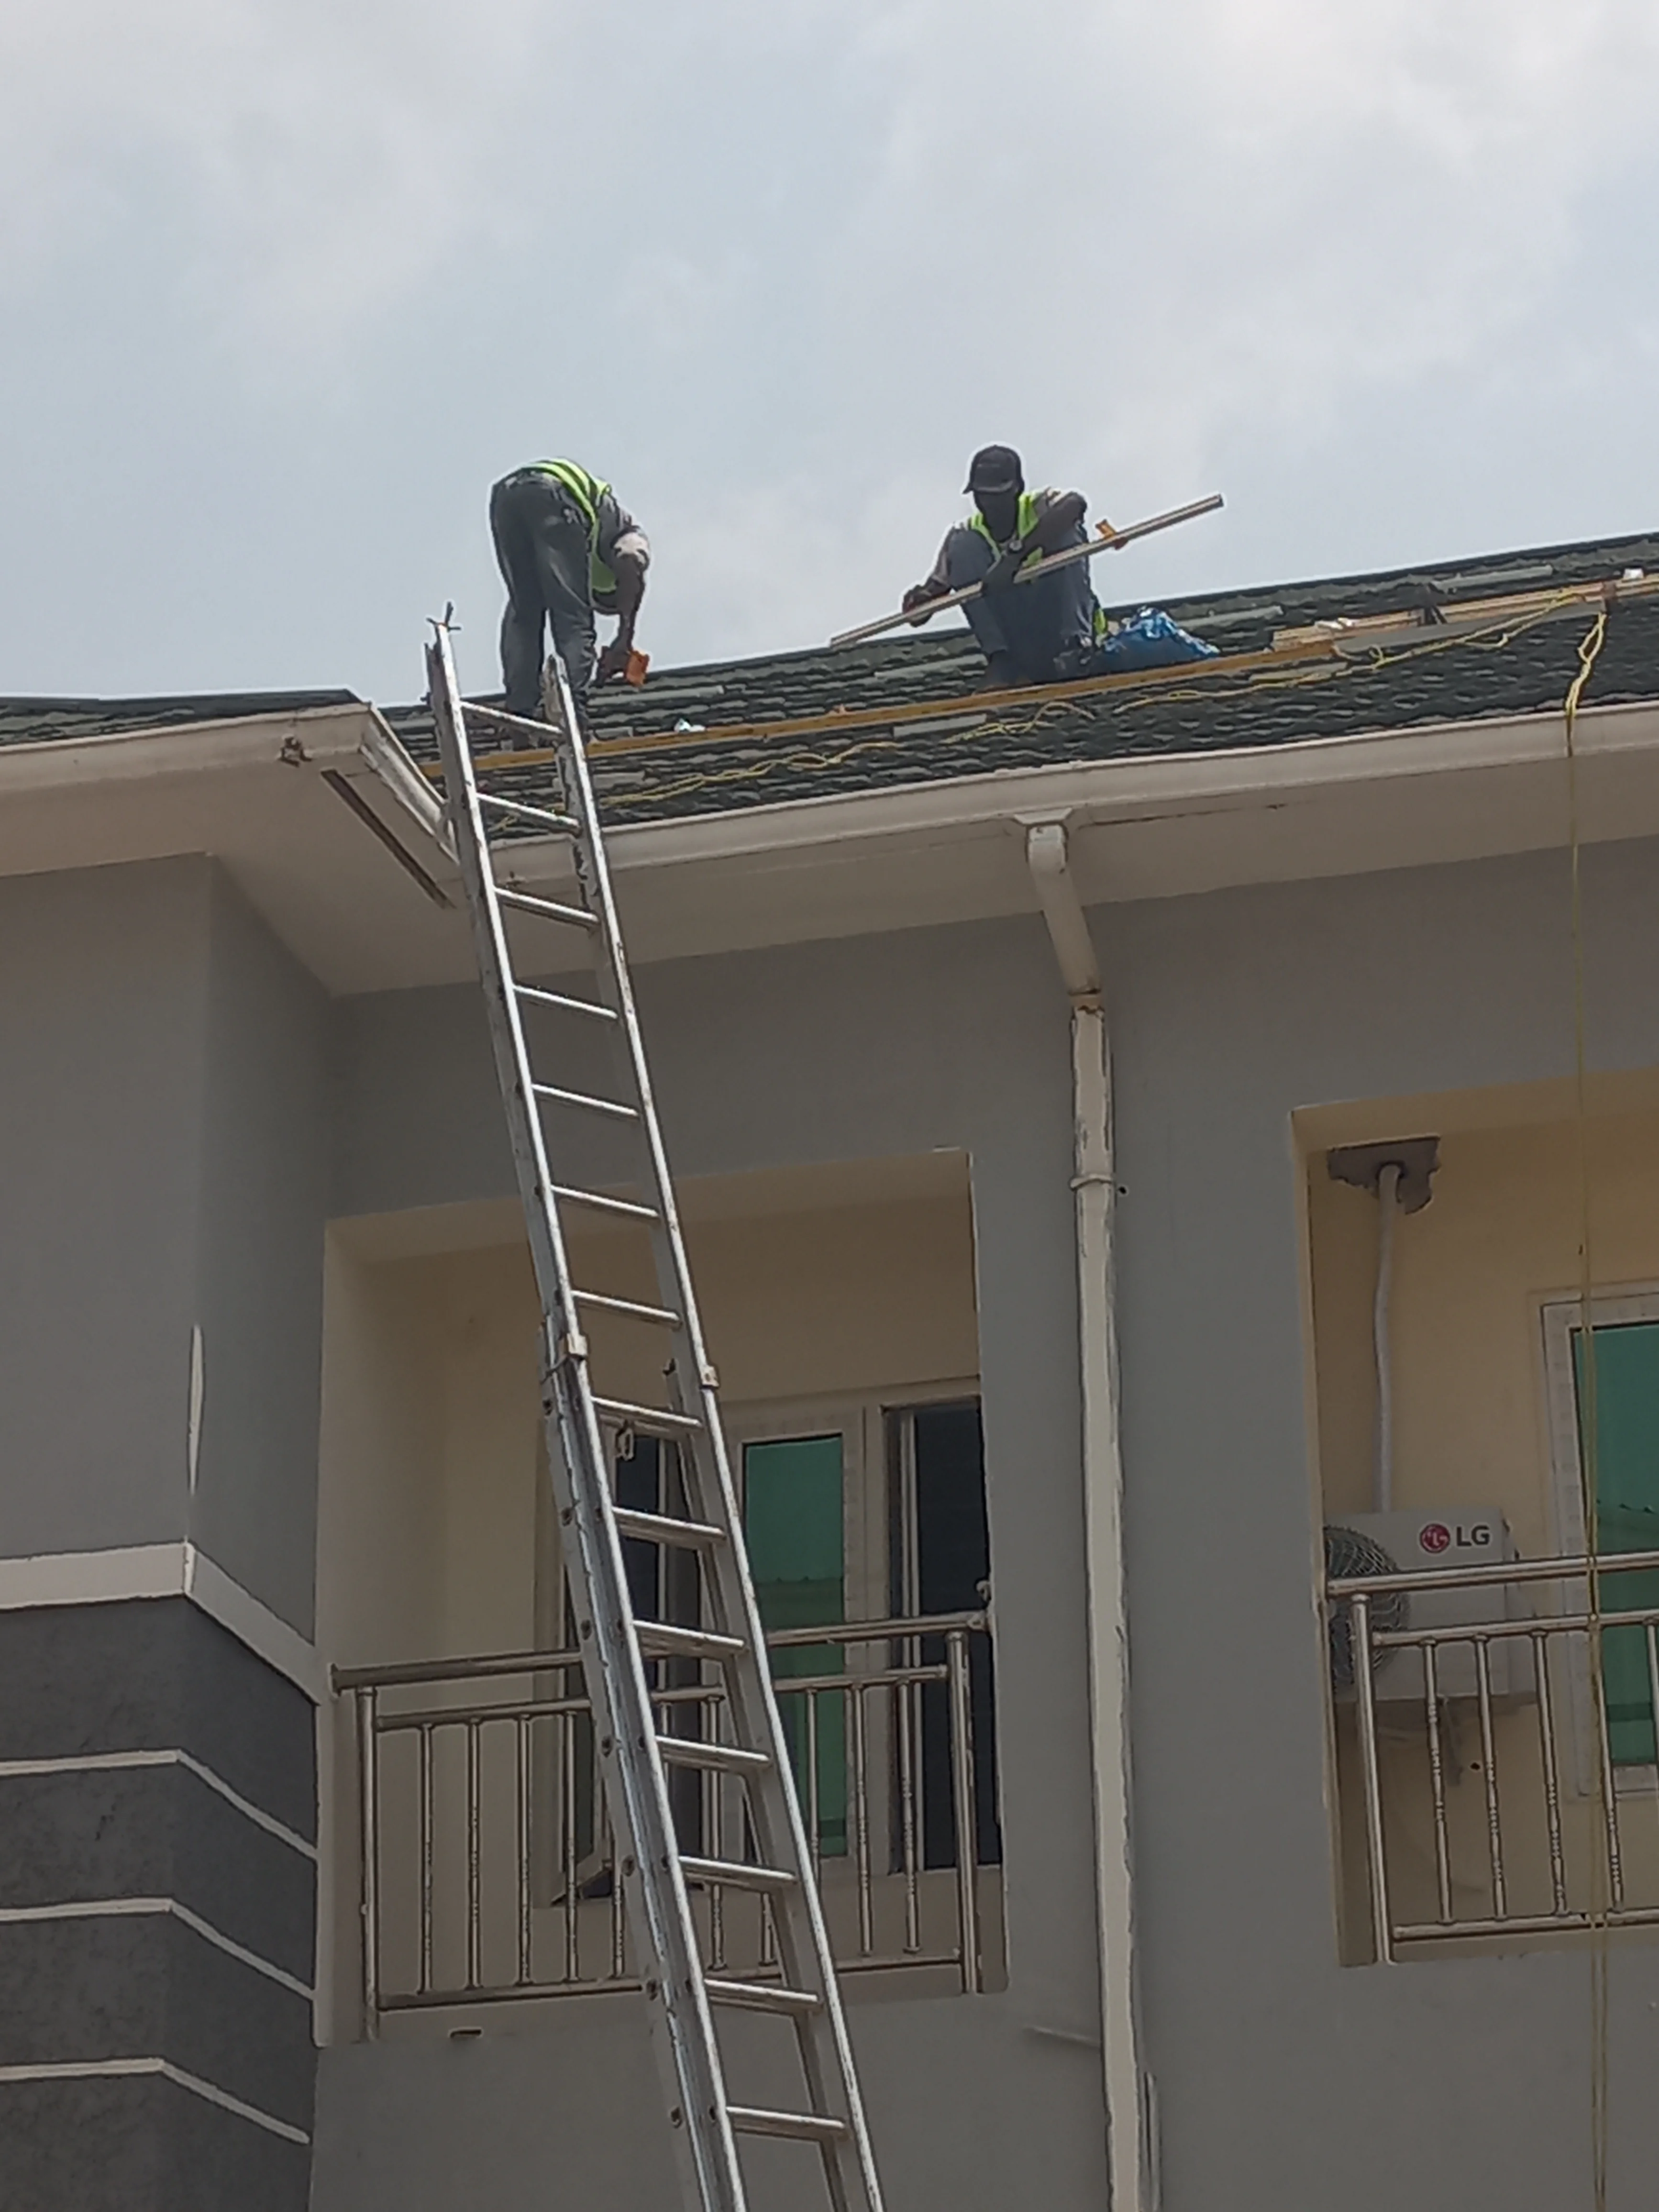
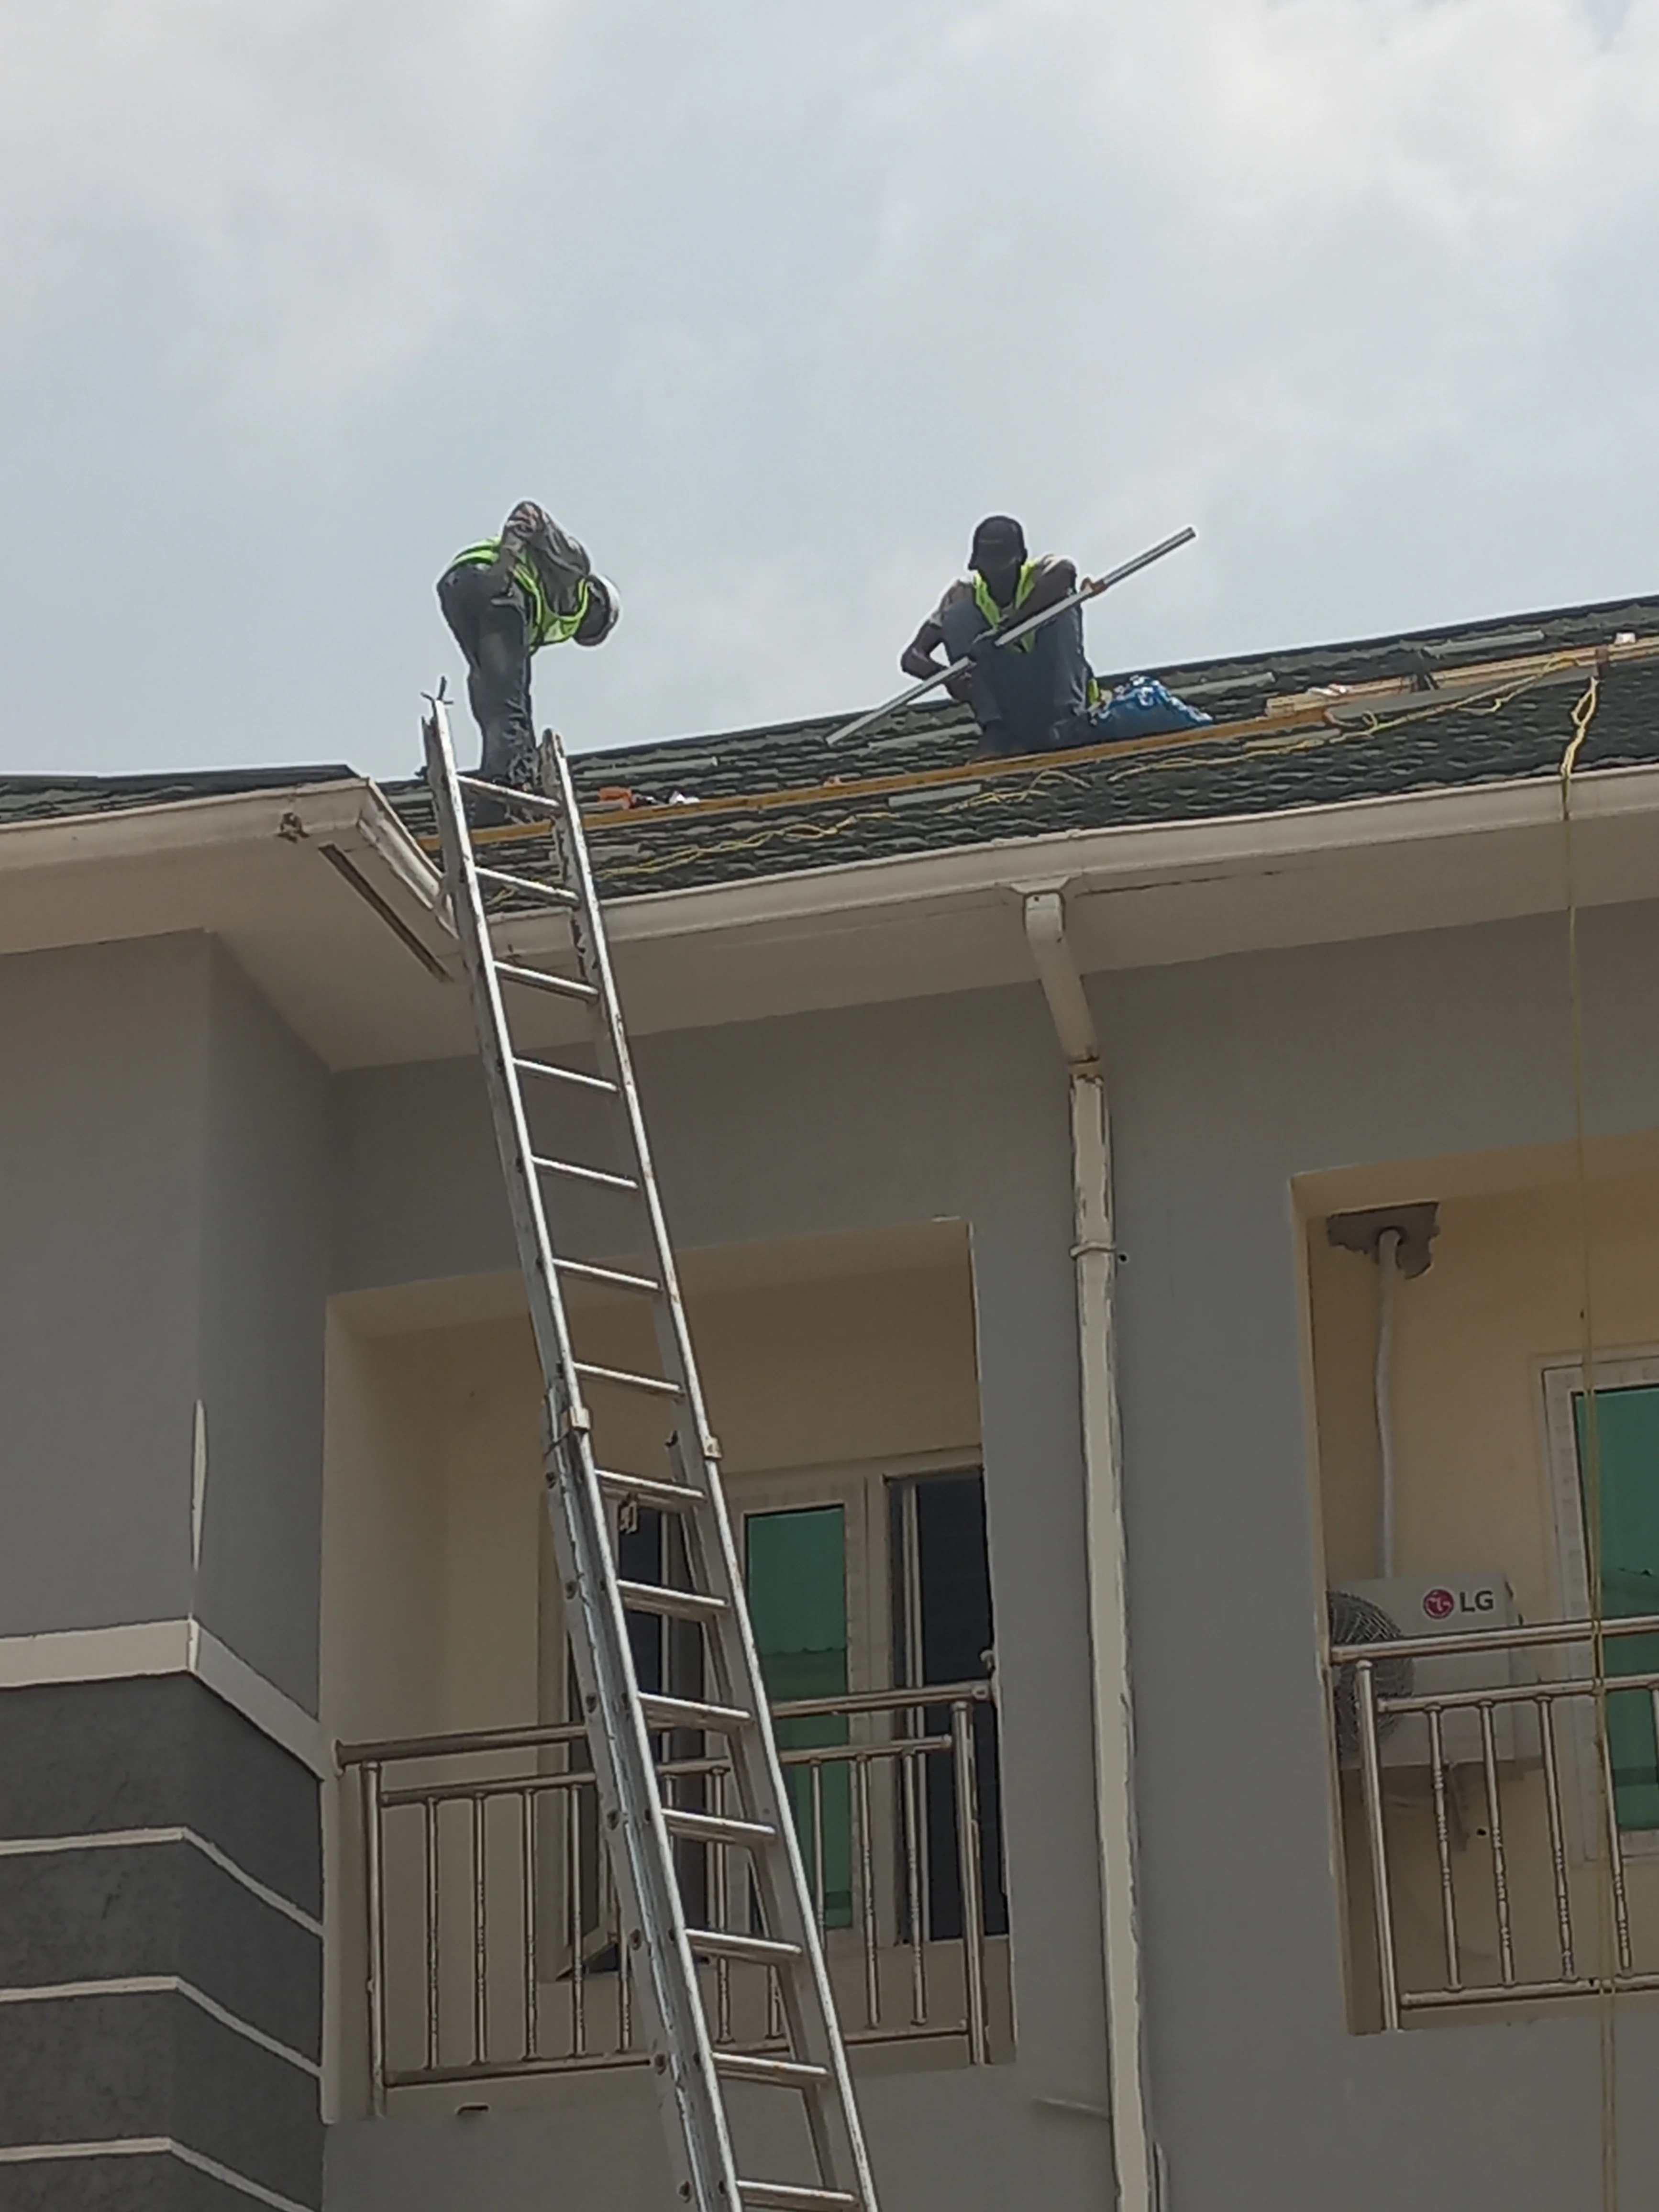
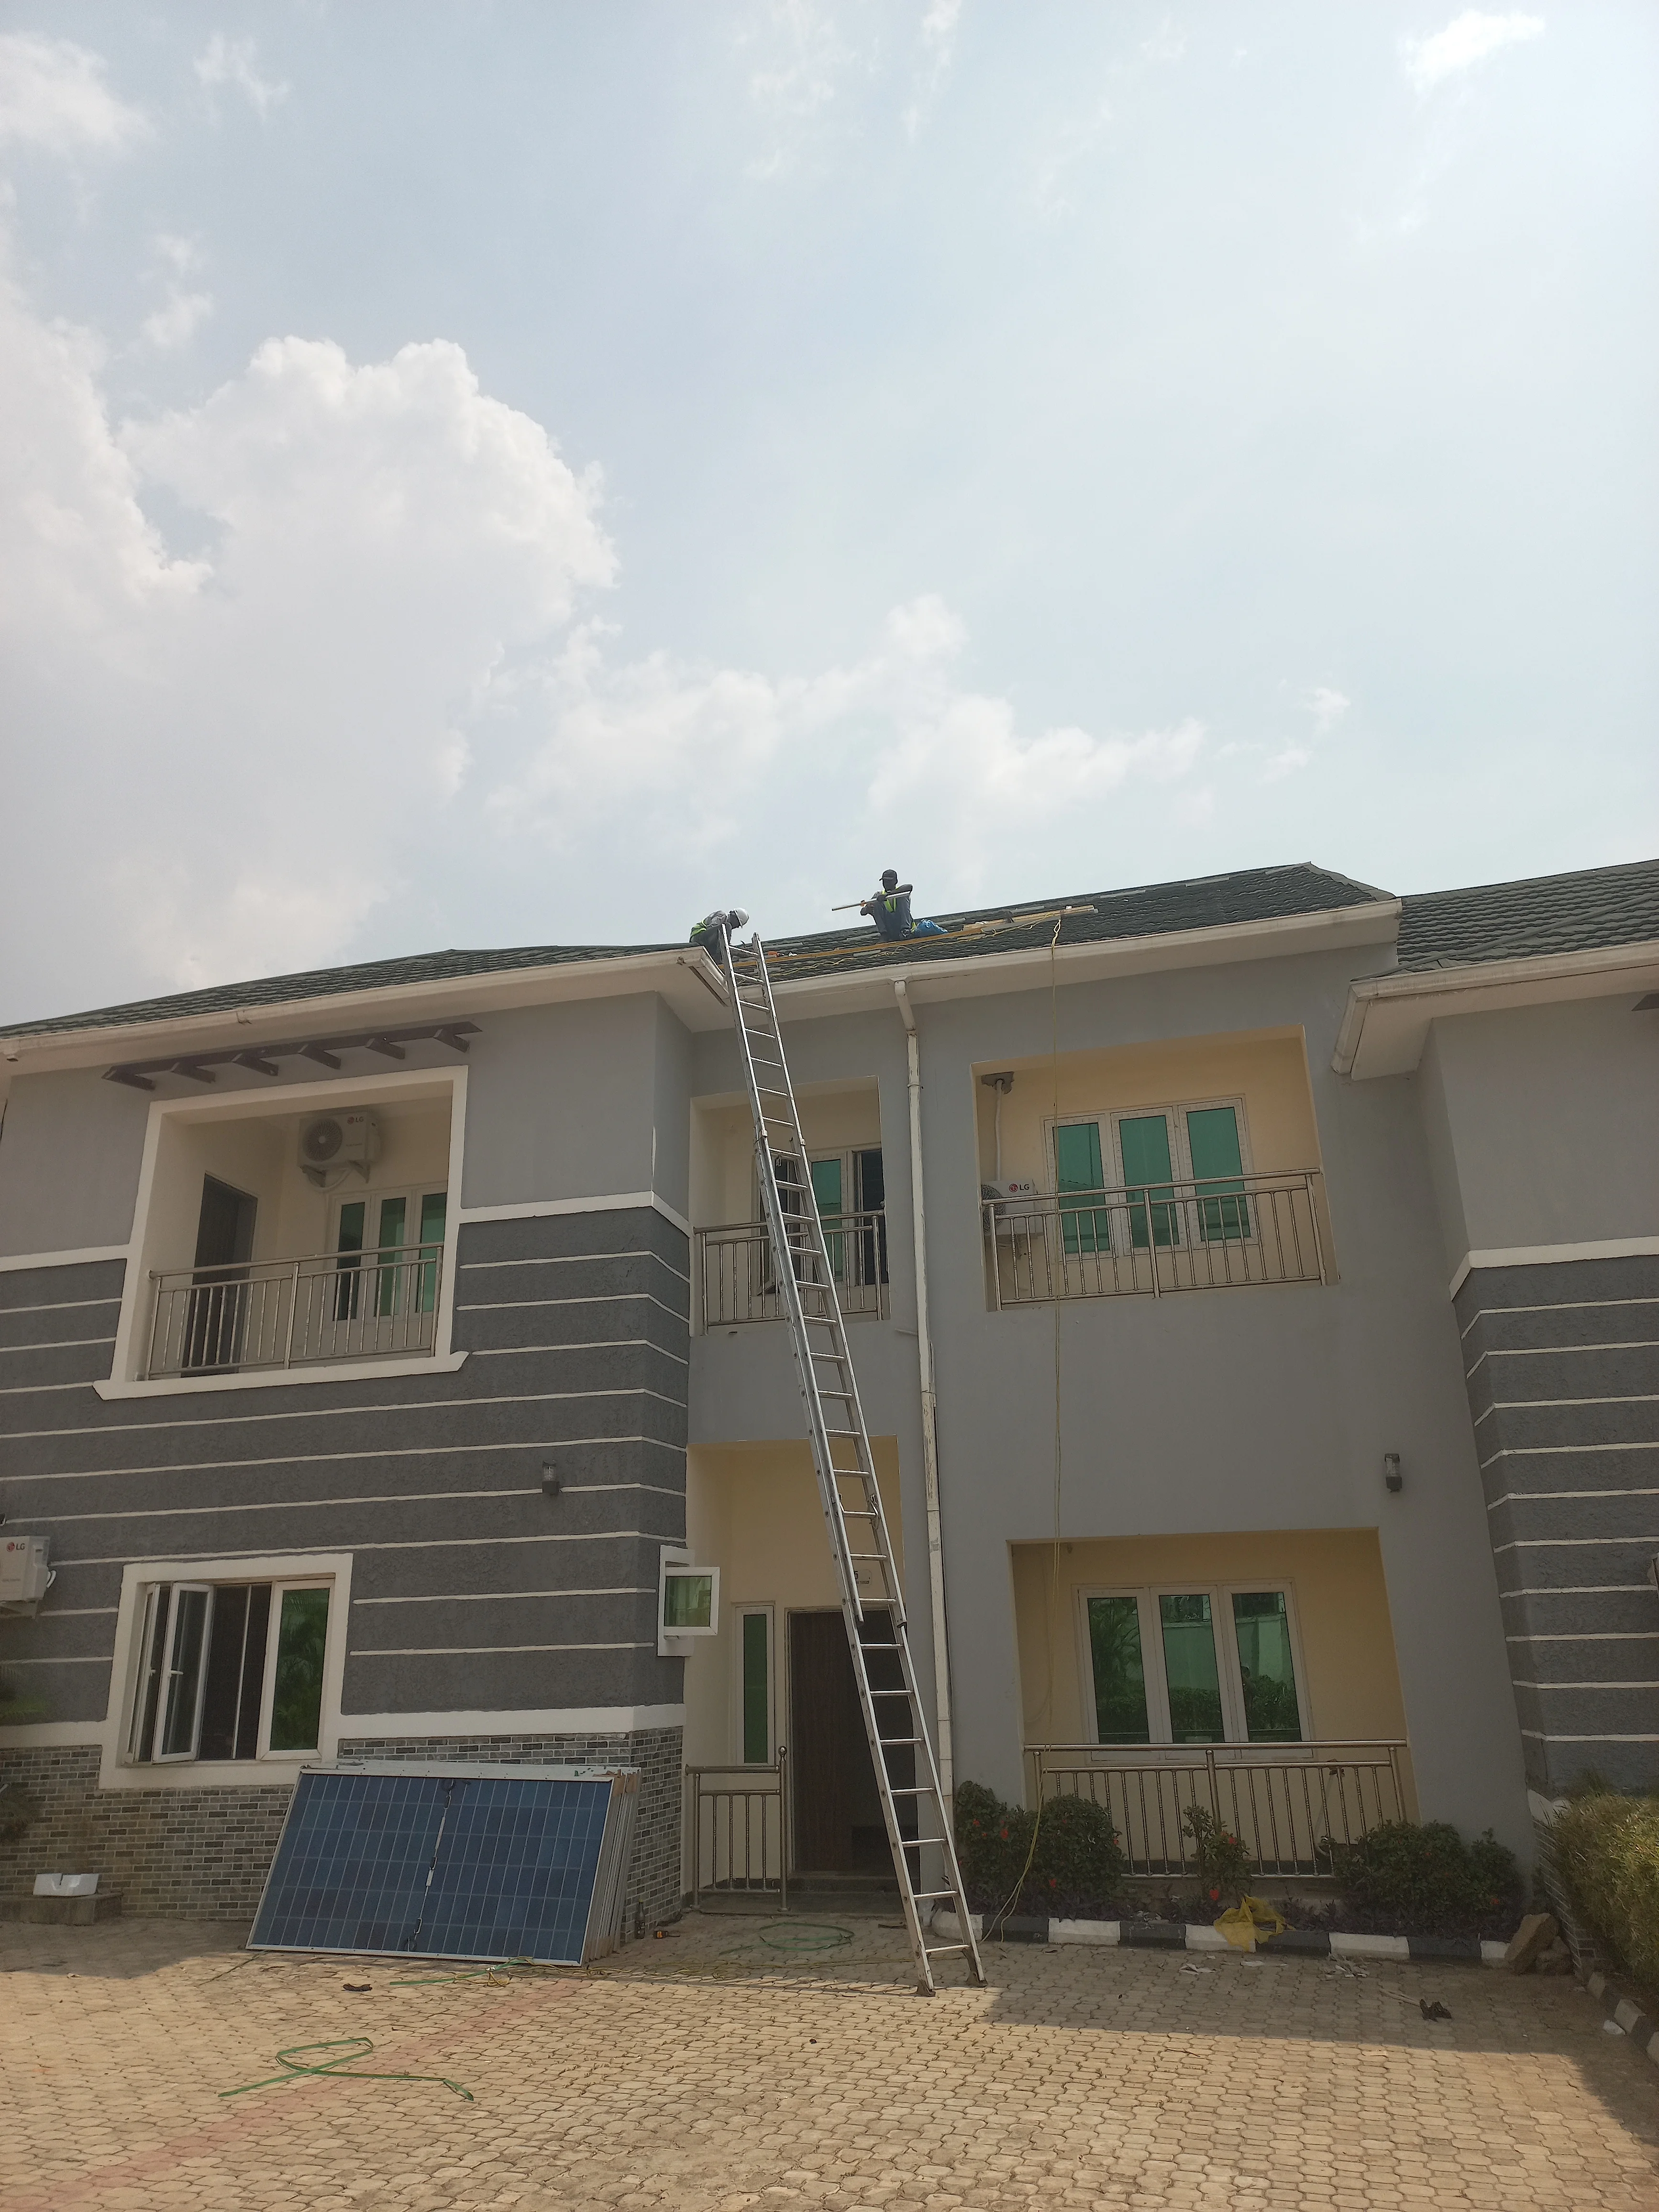
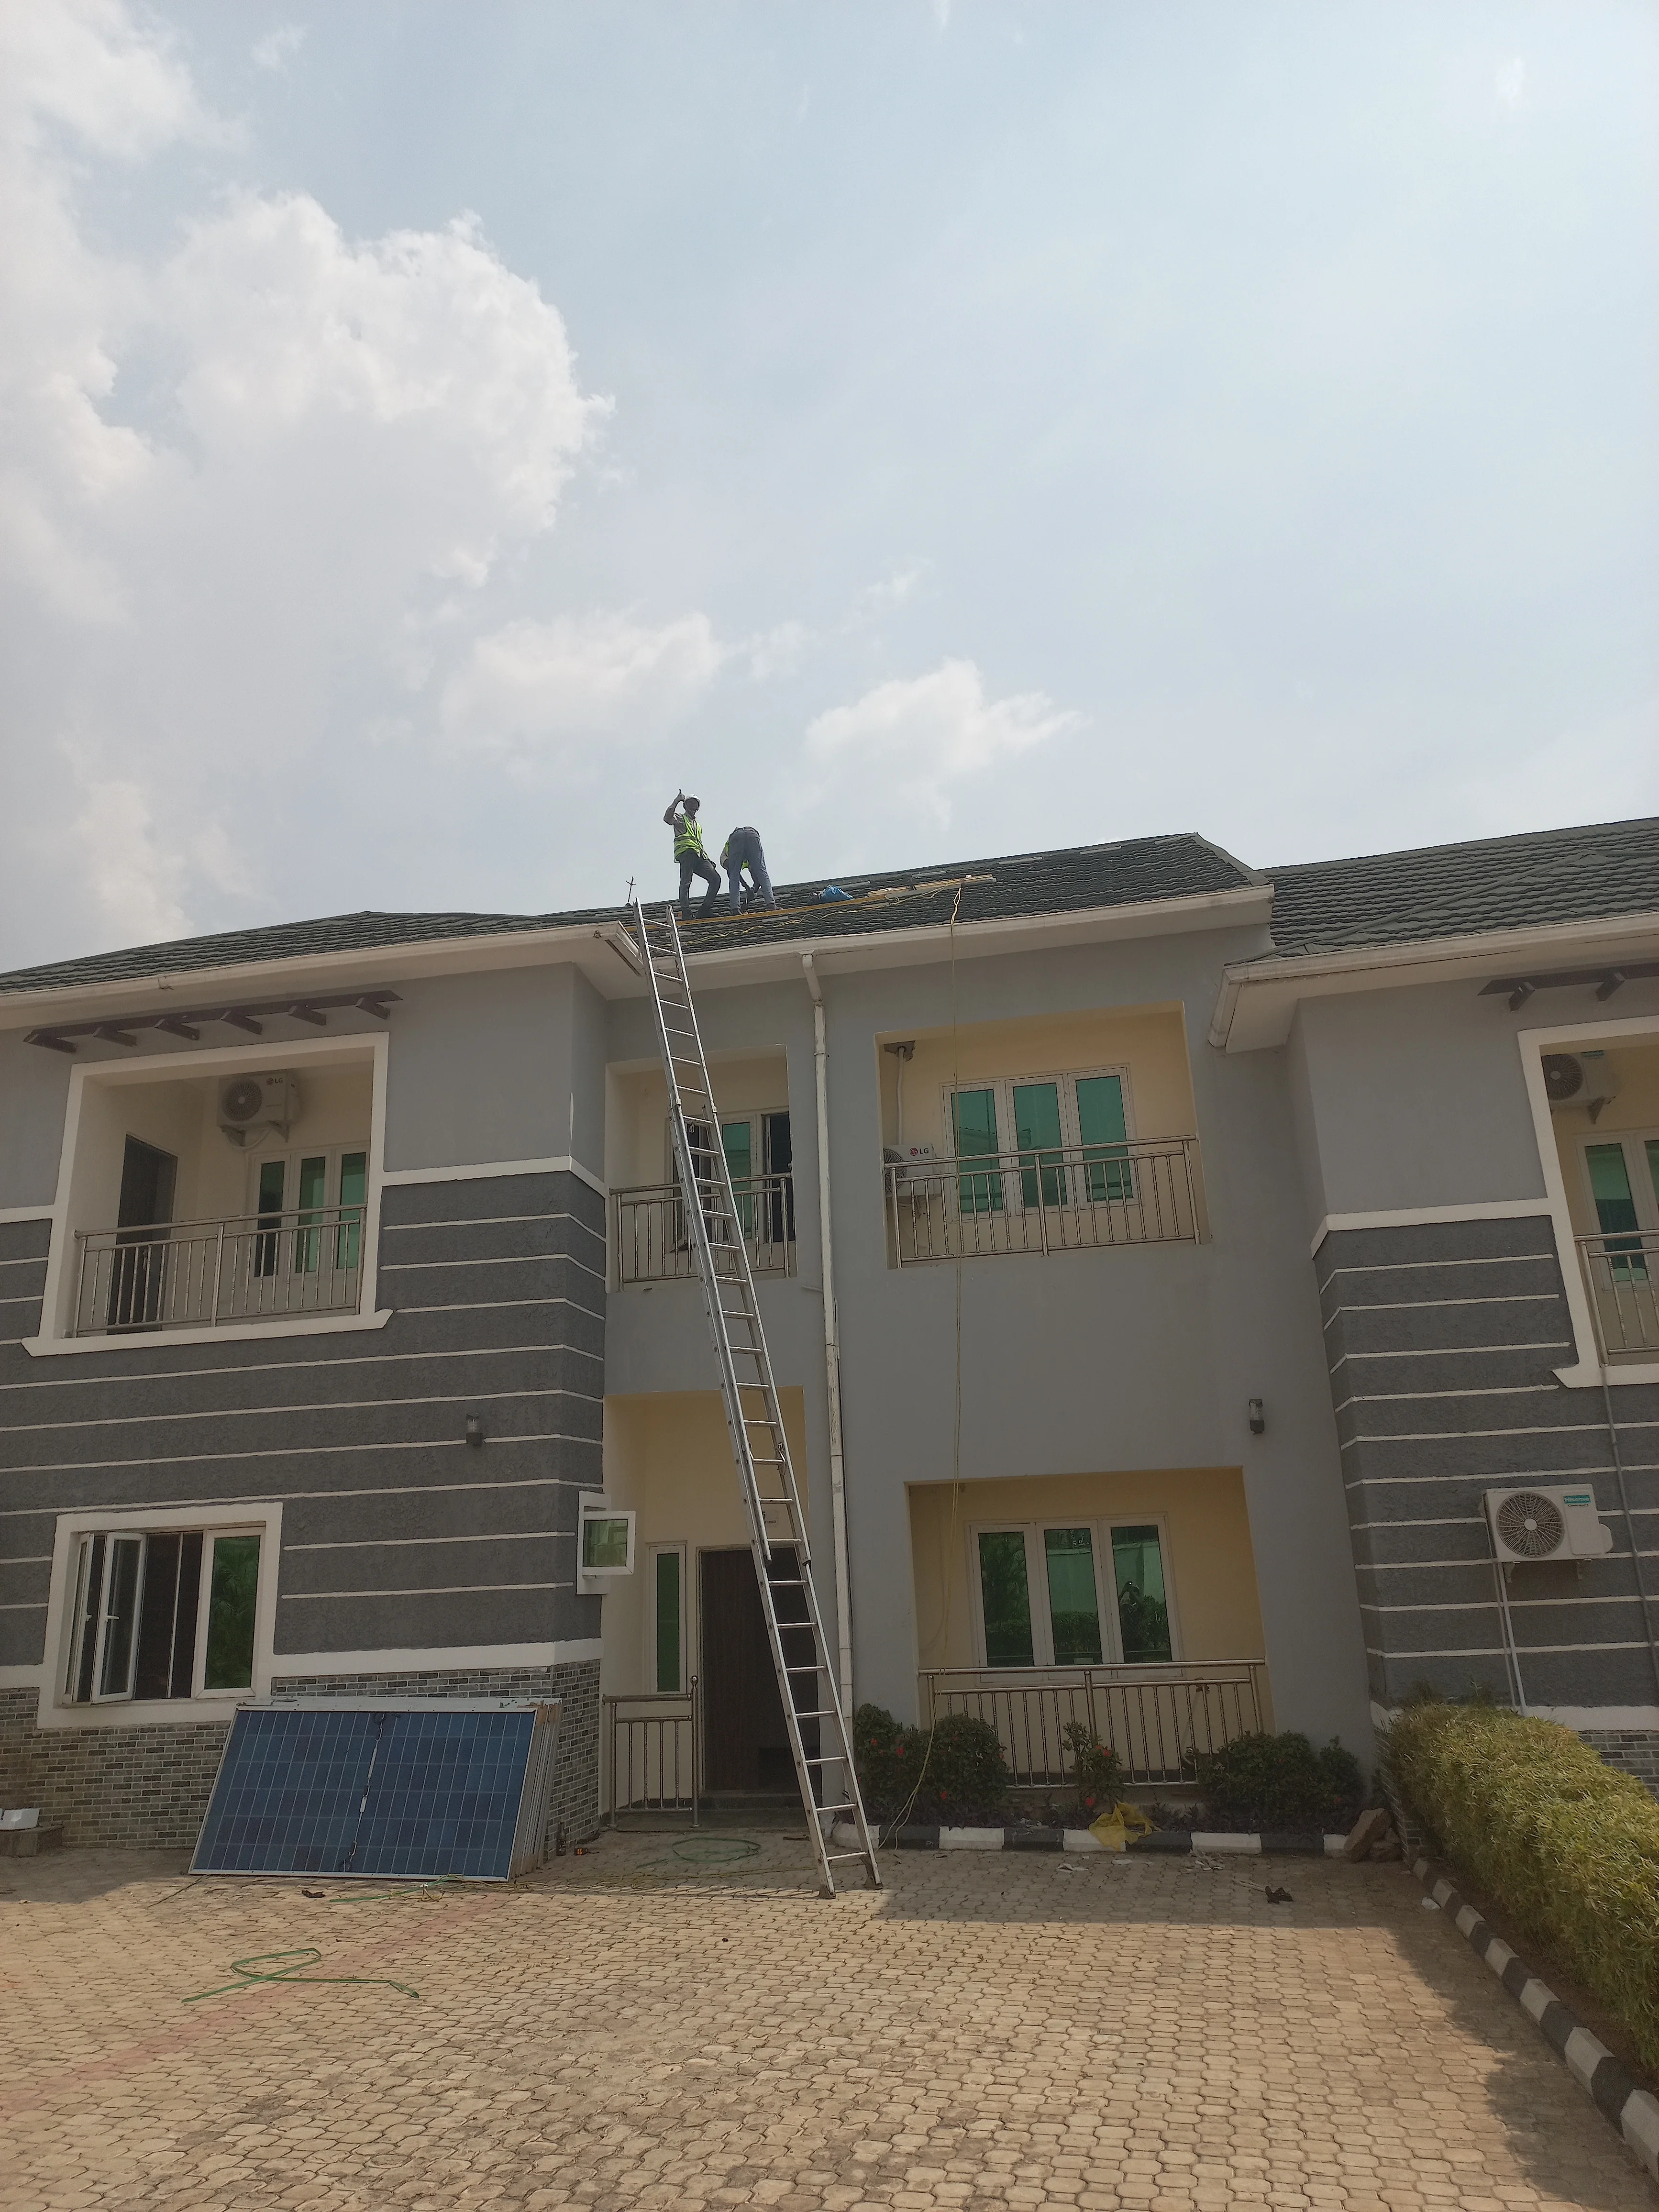
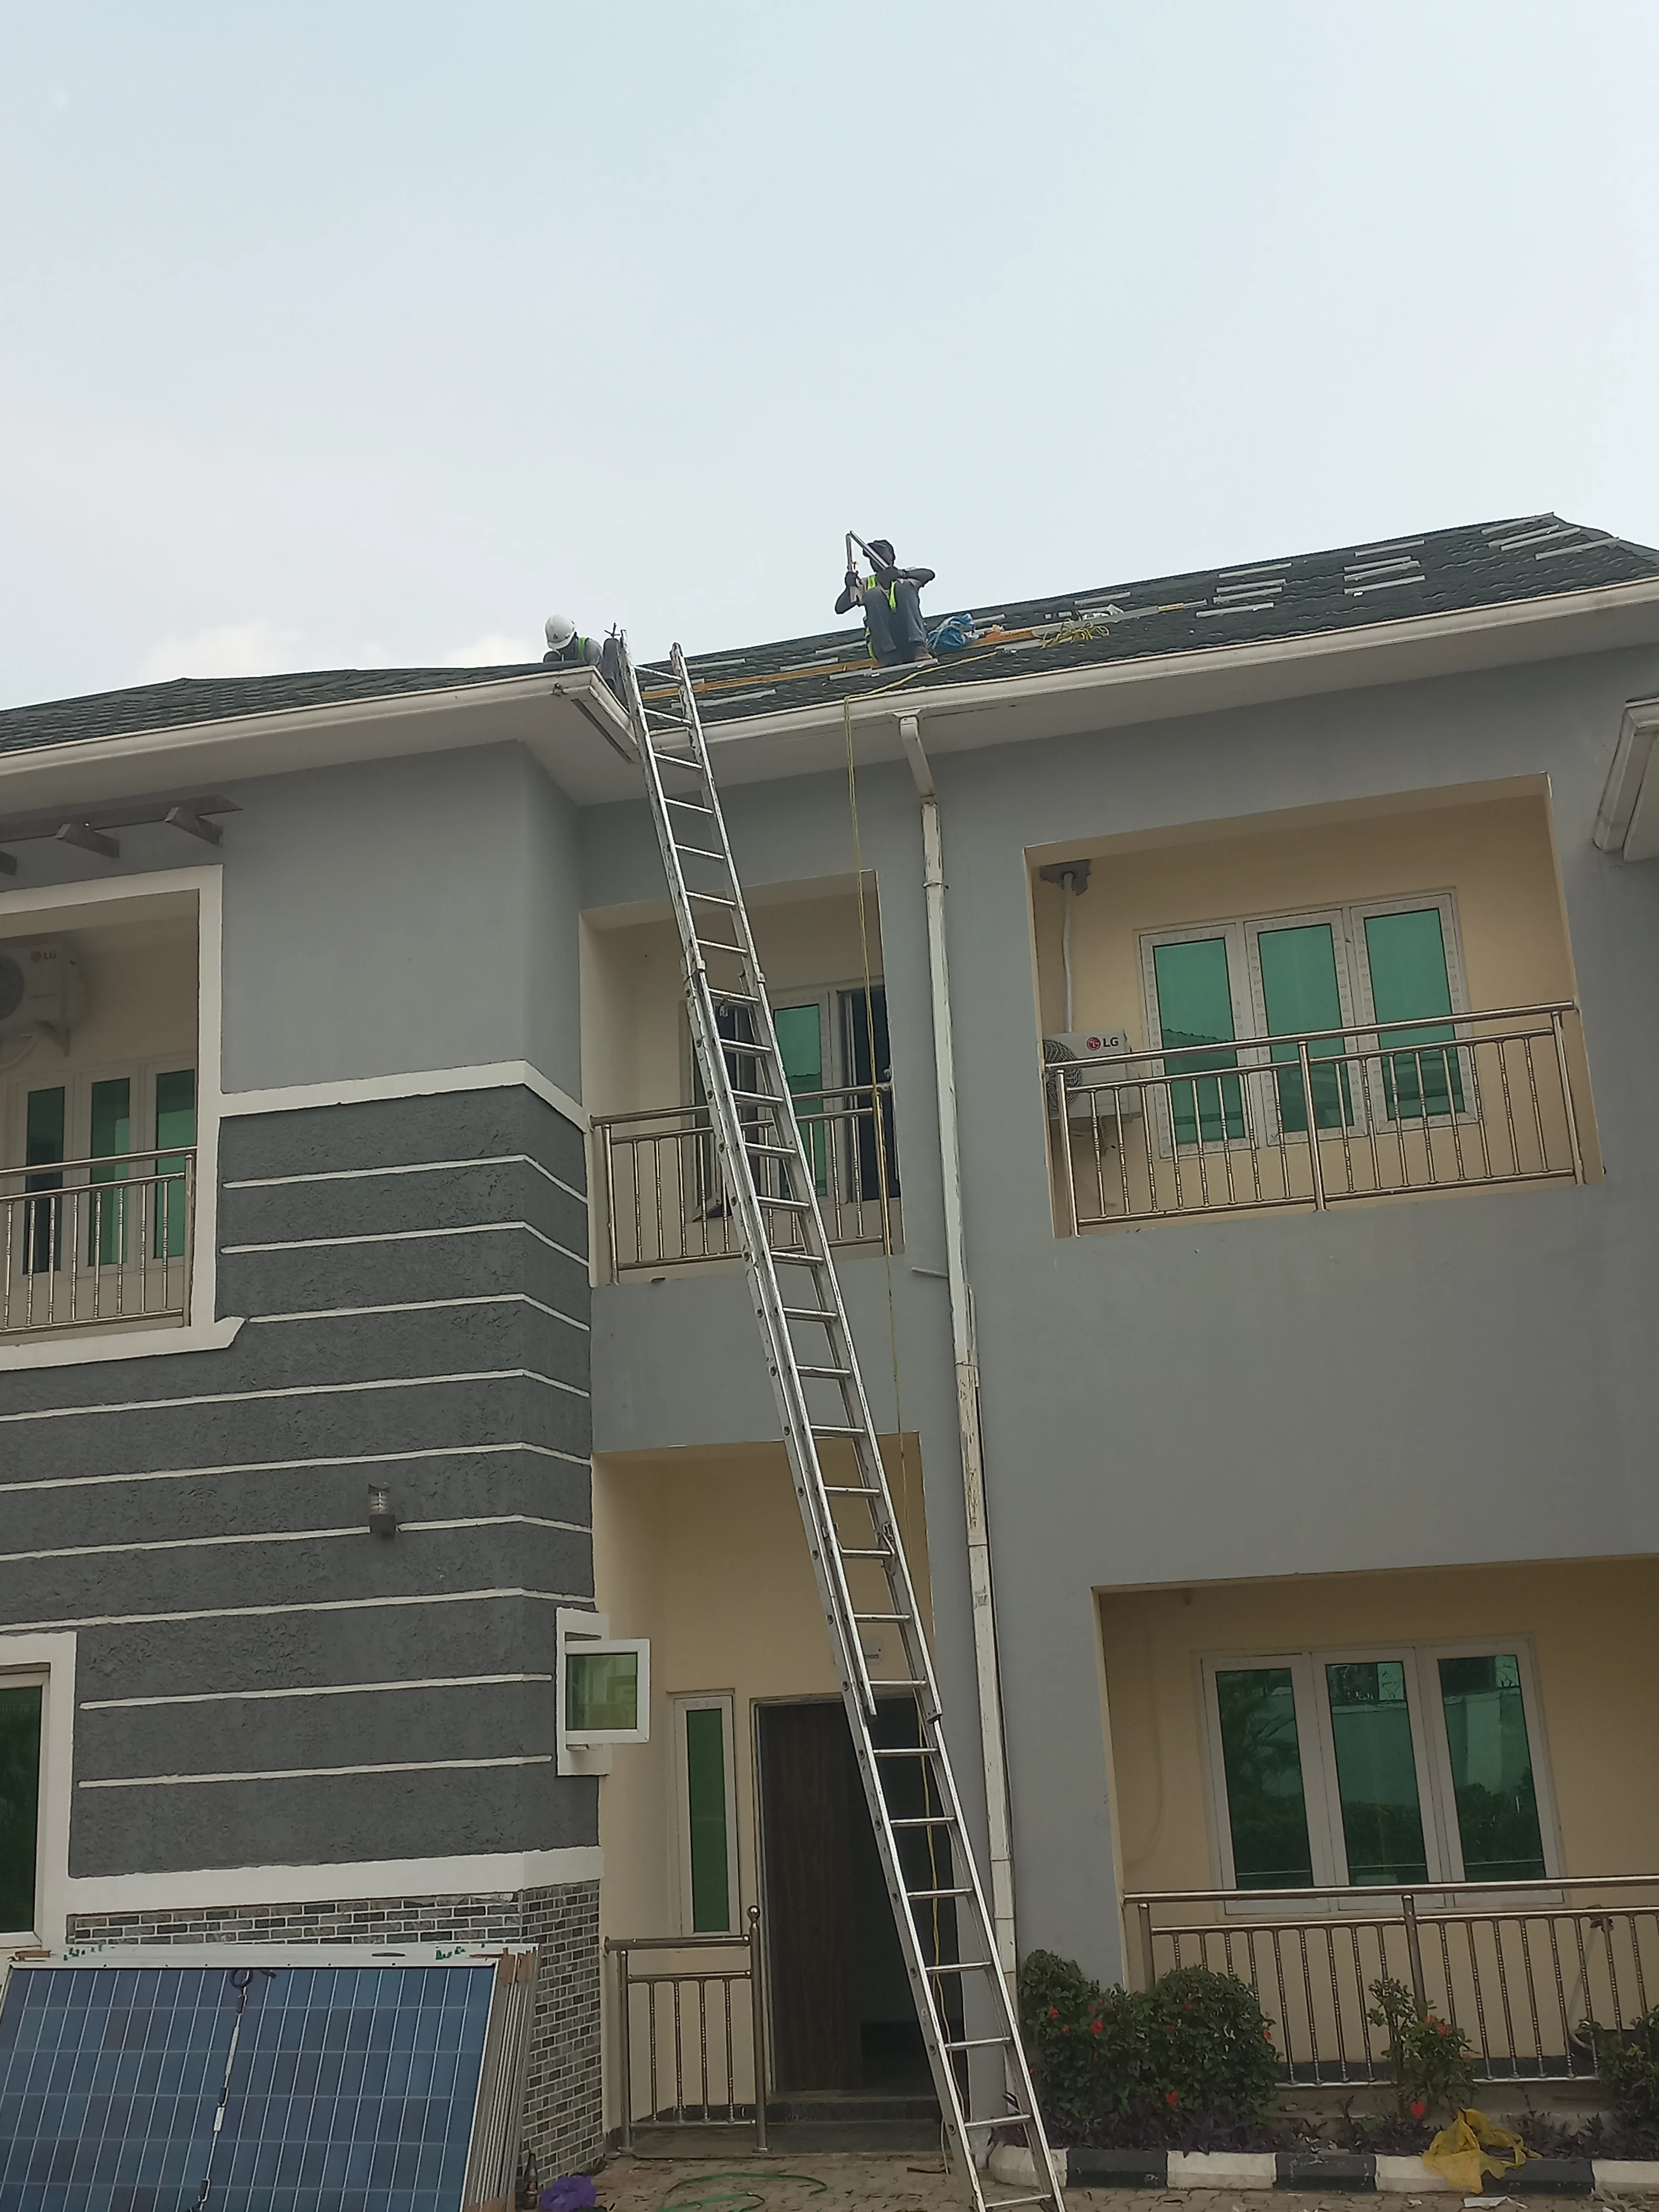
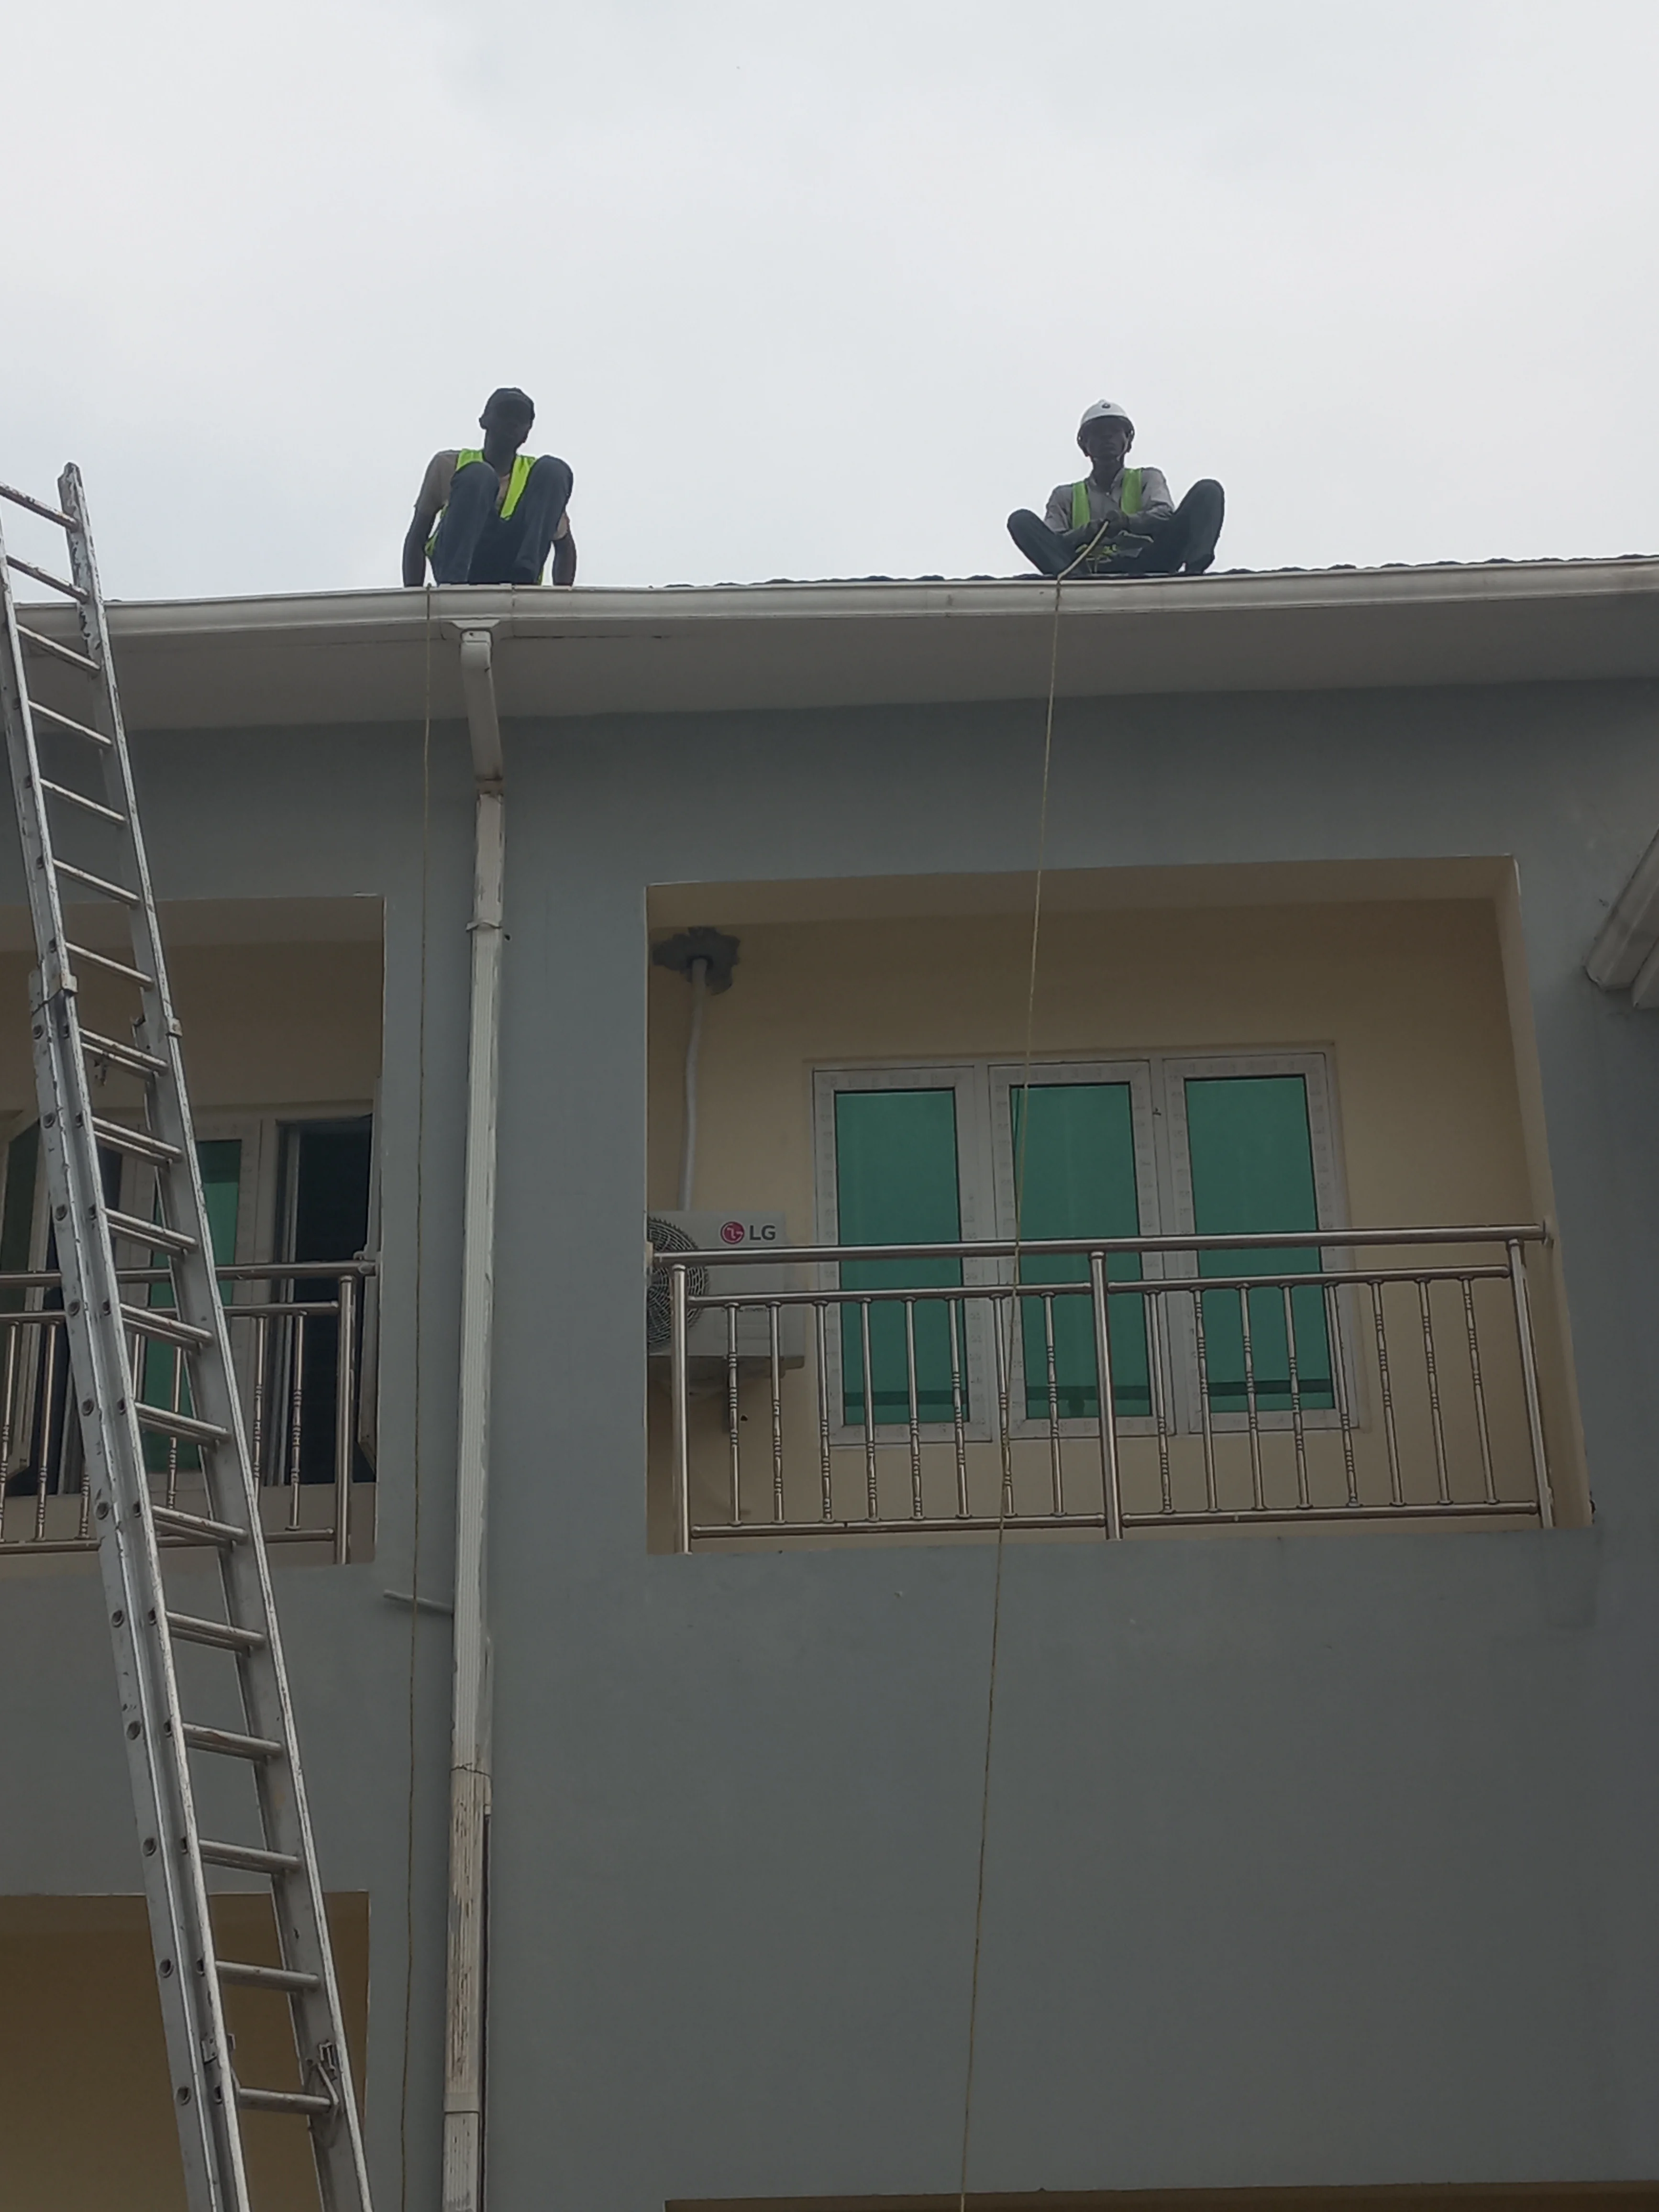
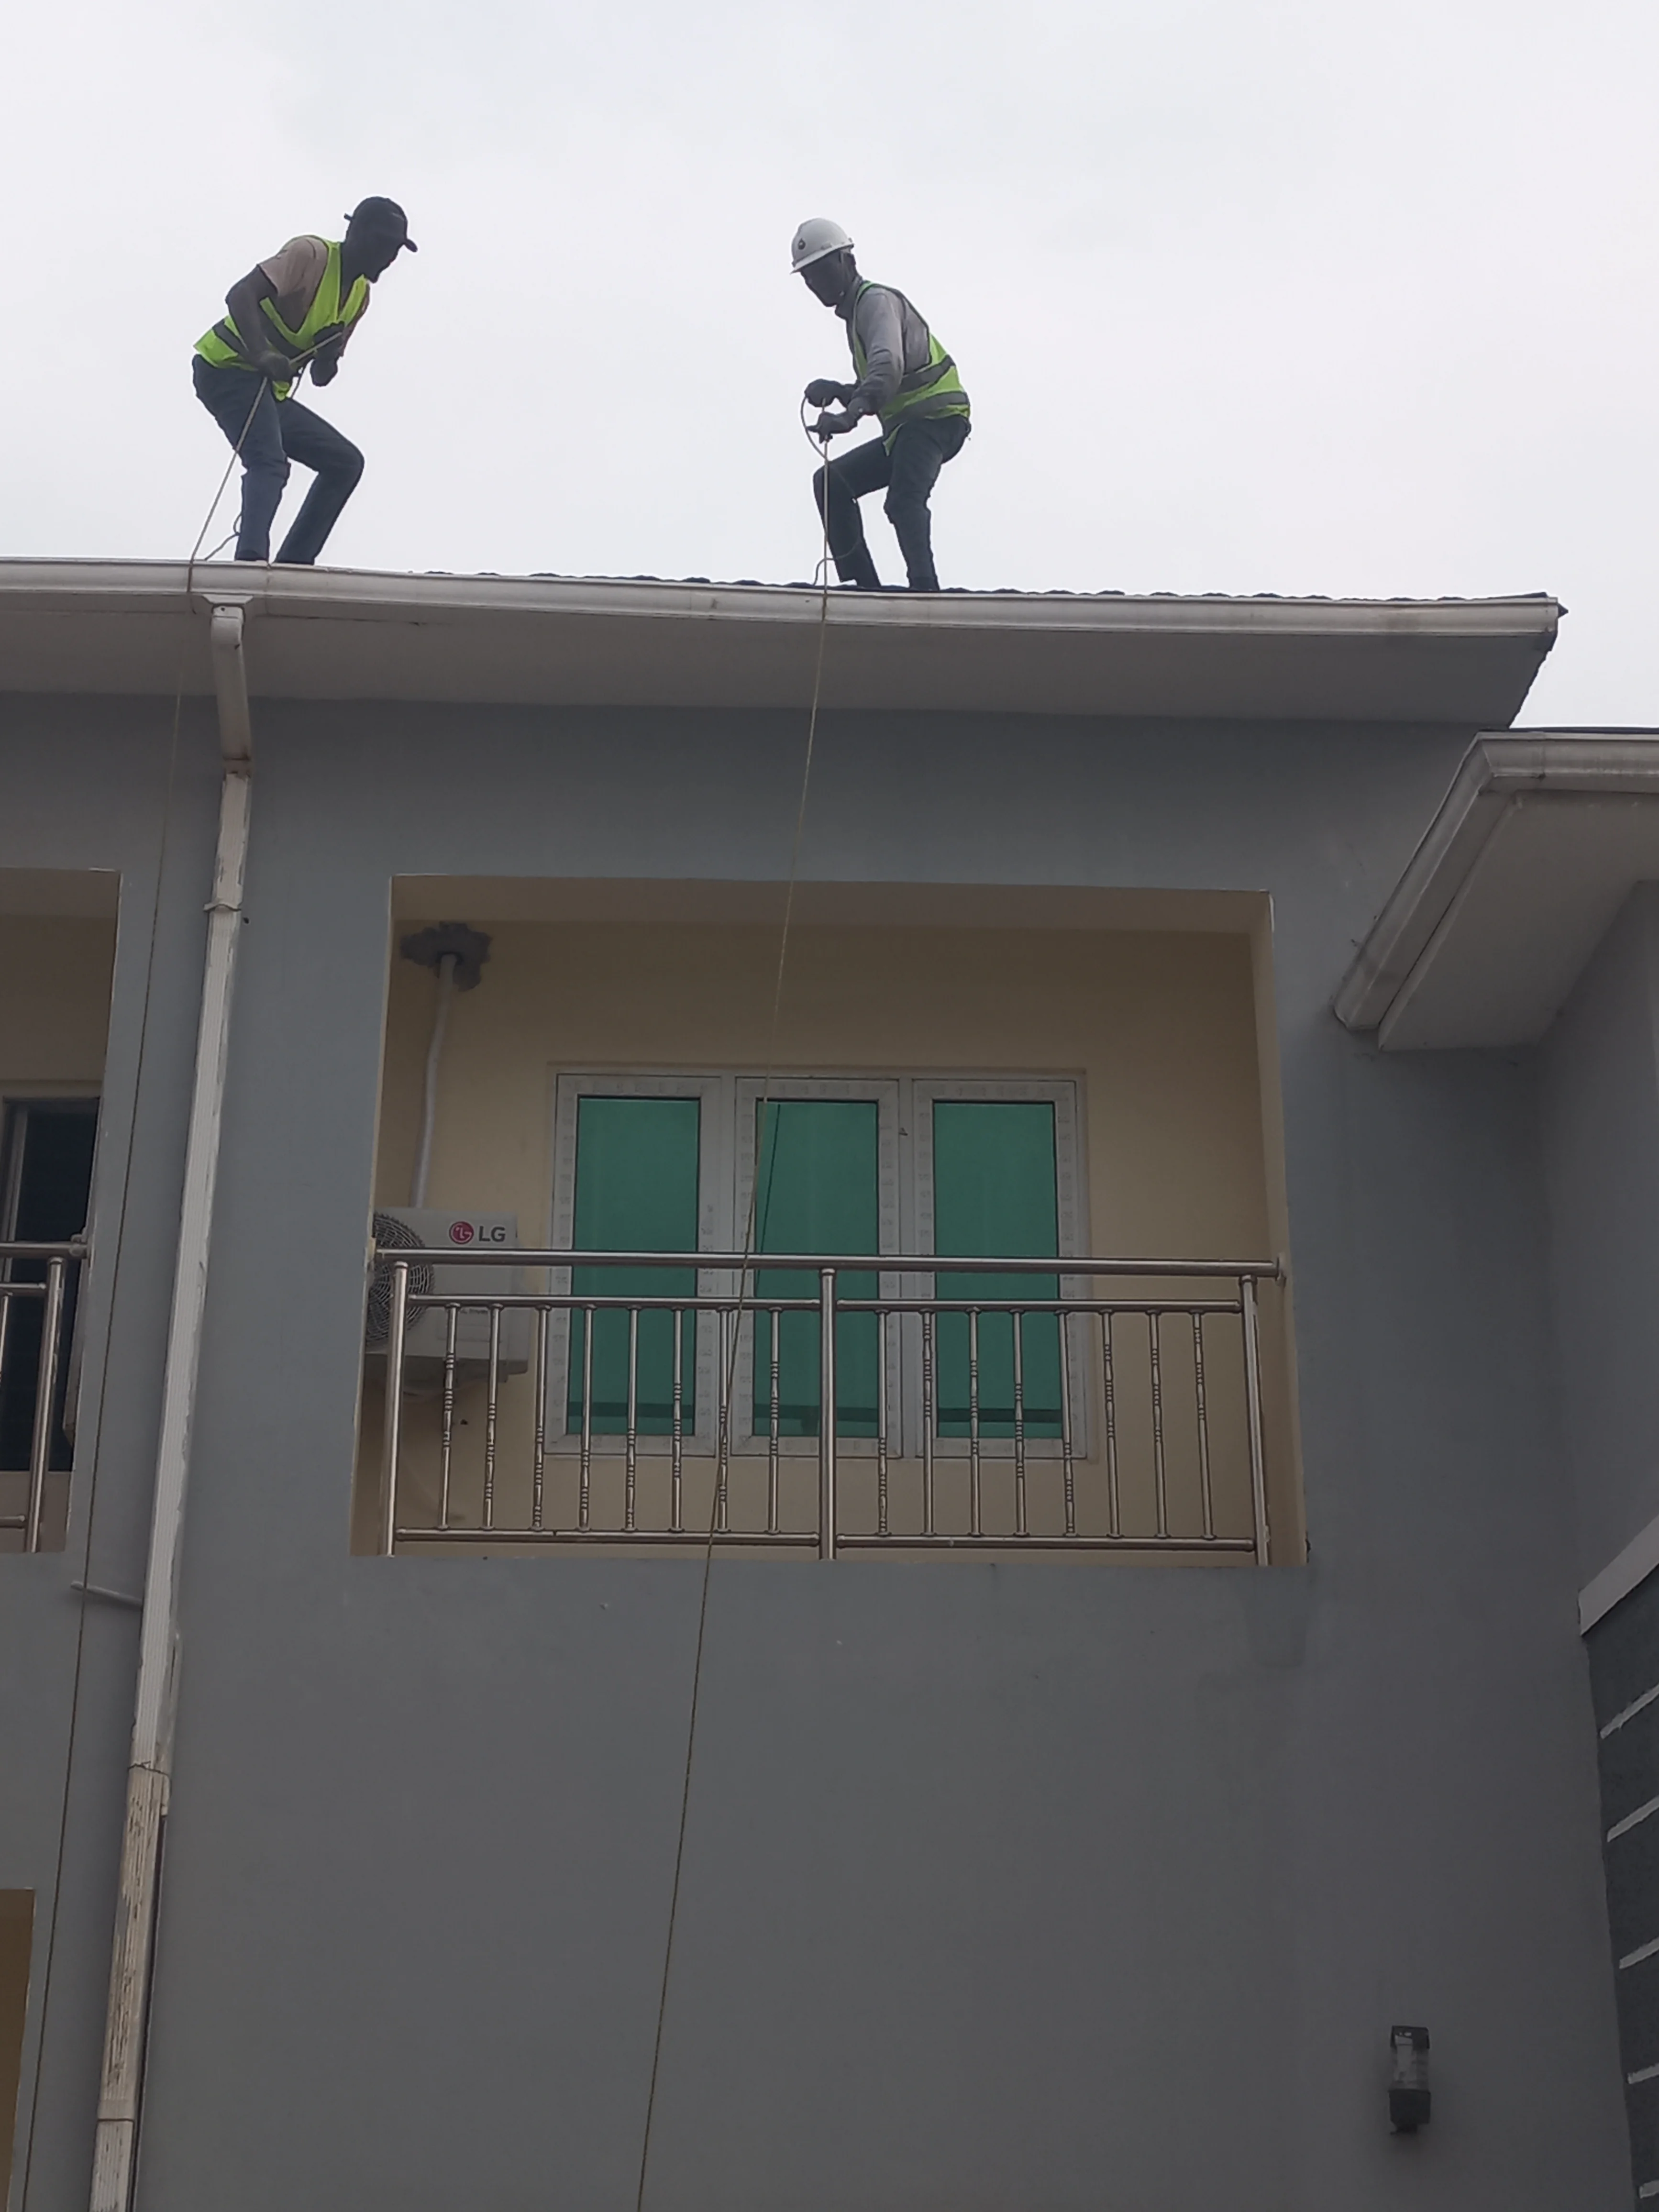
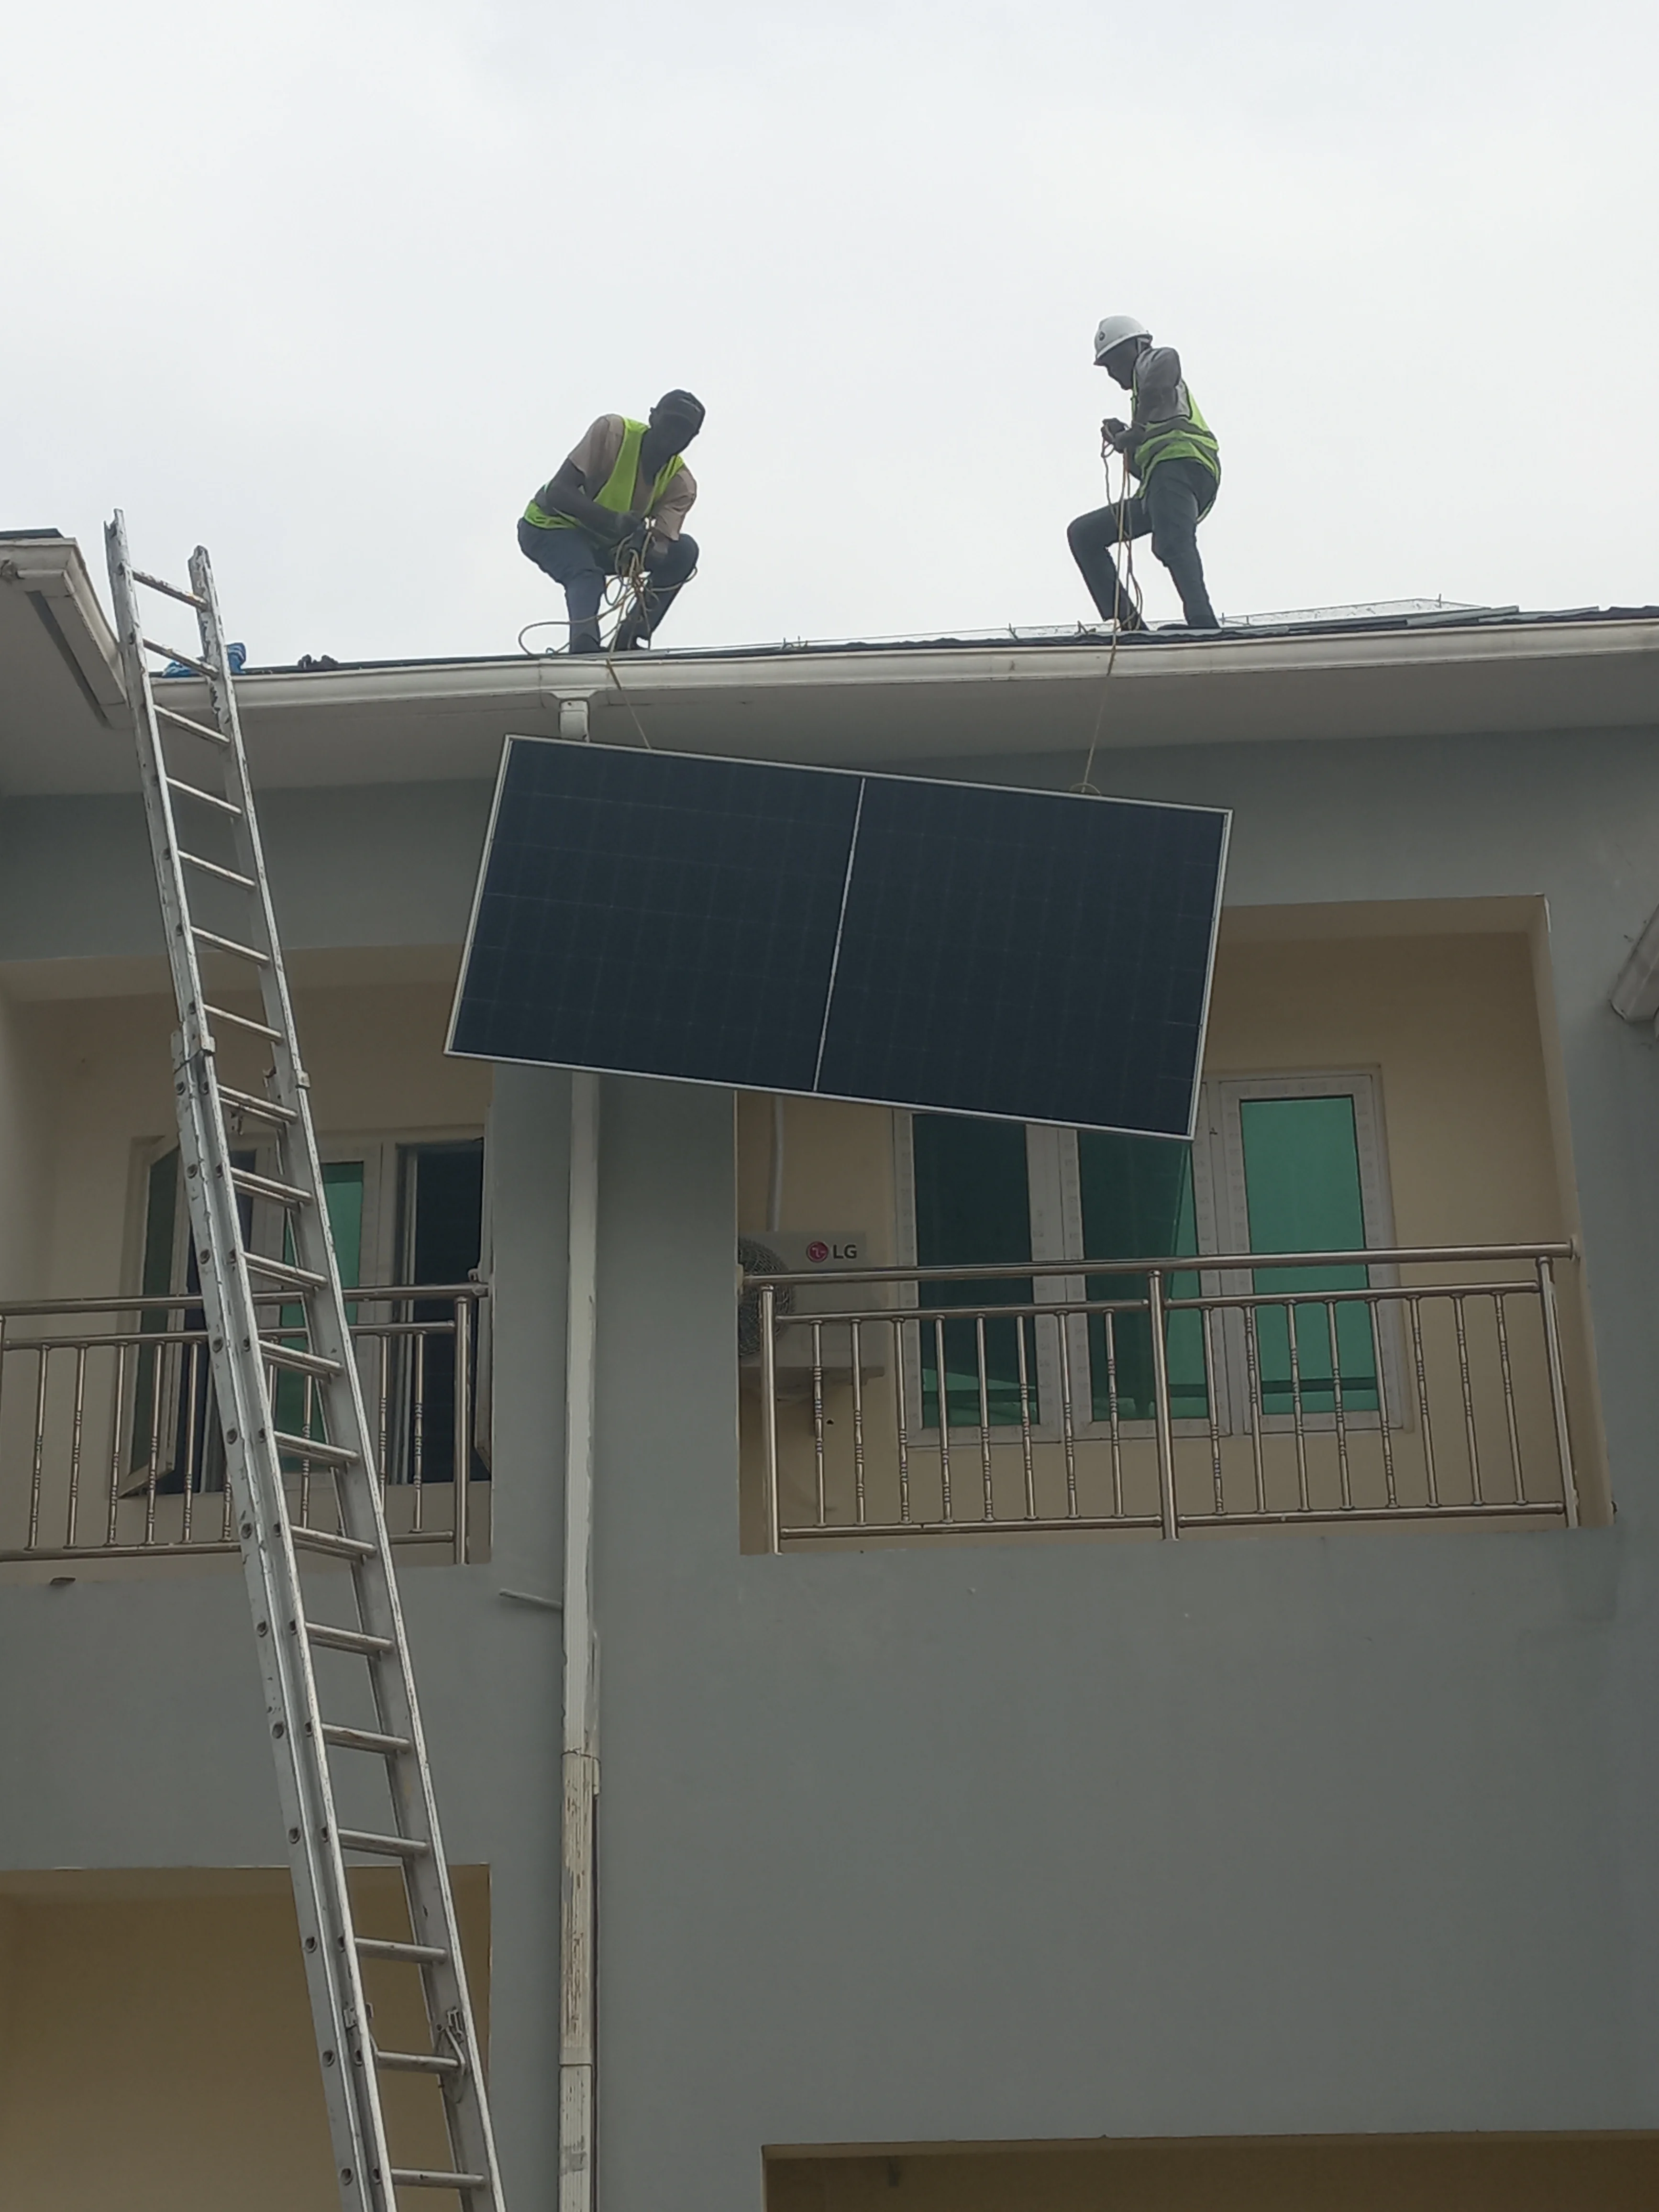
Phase 5: Rooftop Panel Installation
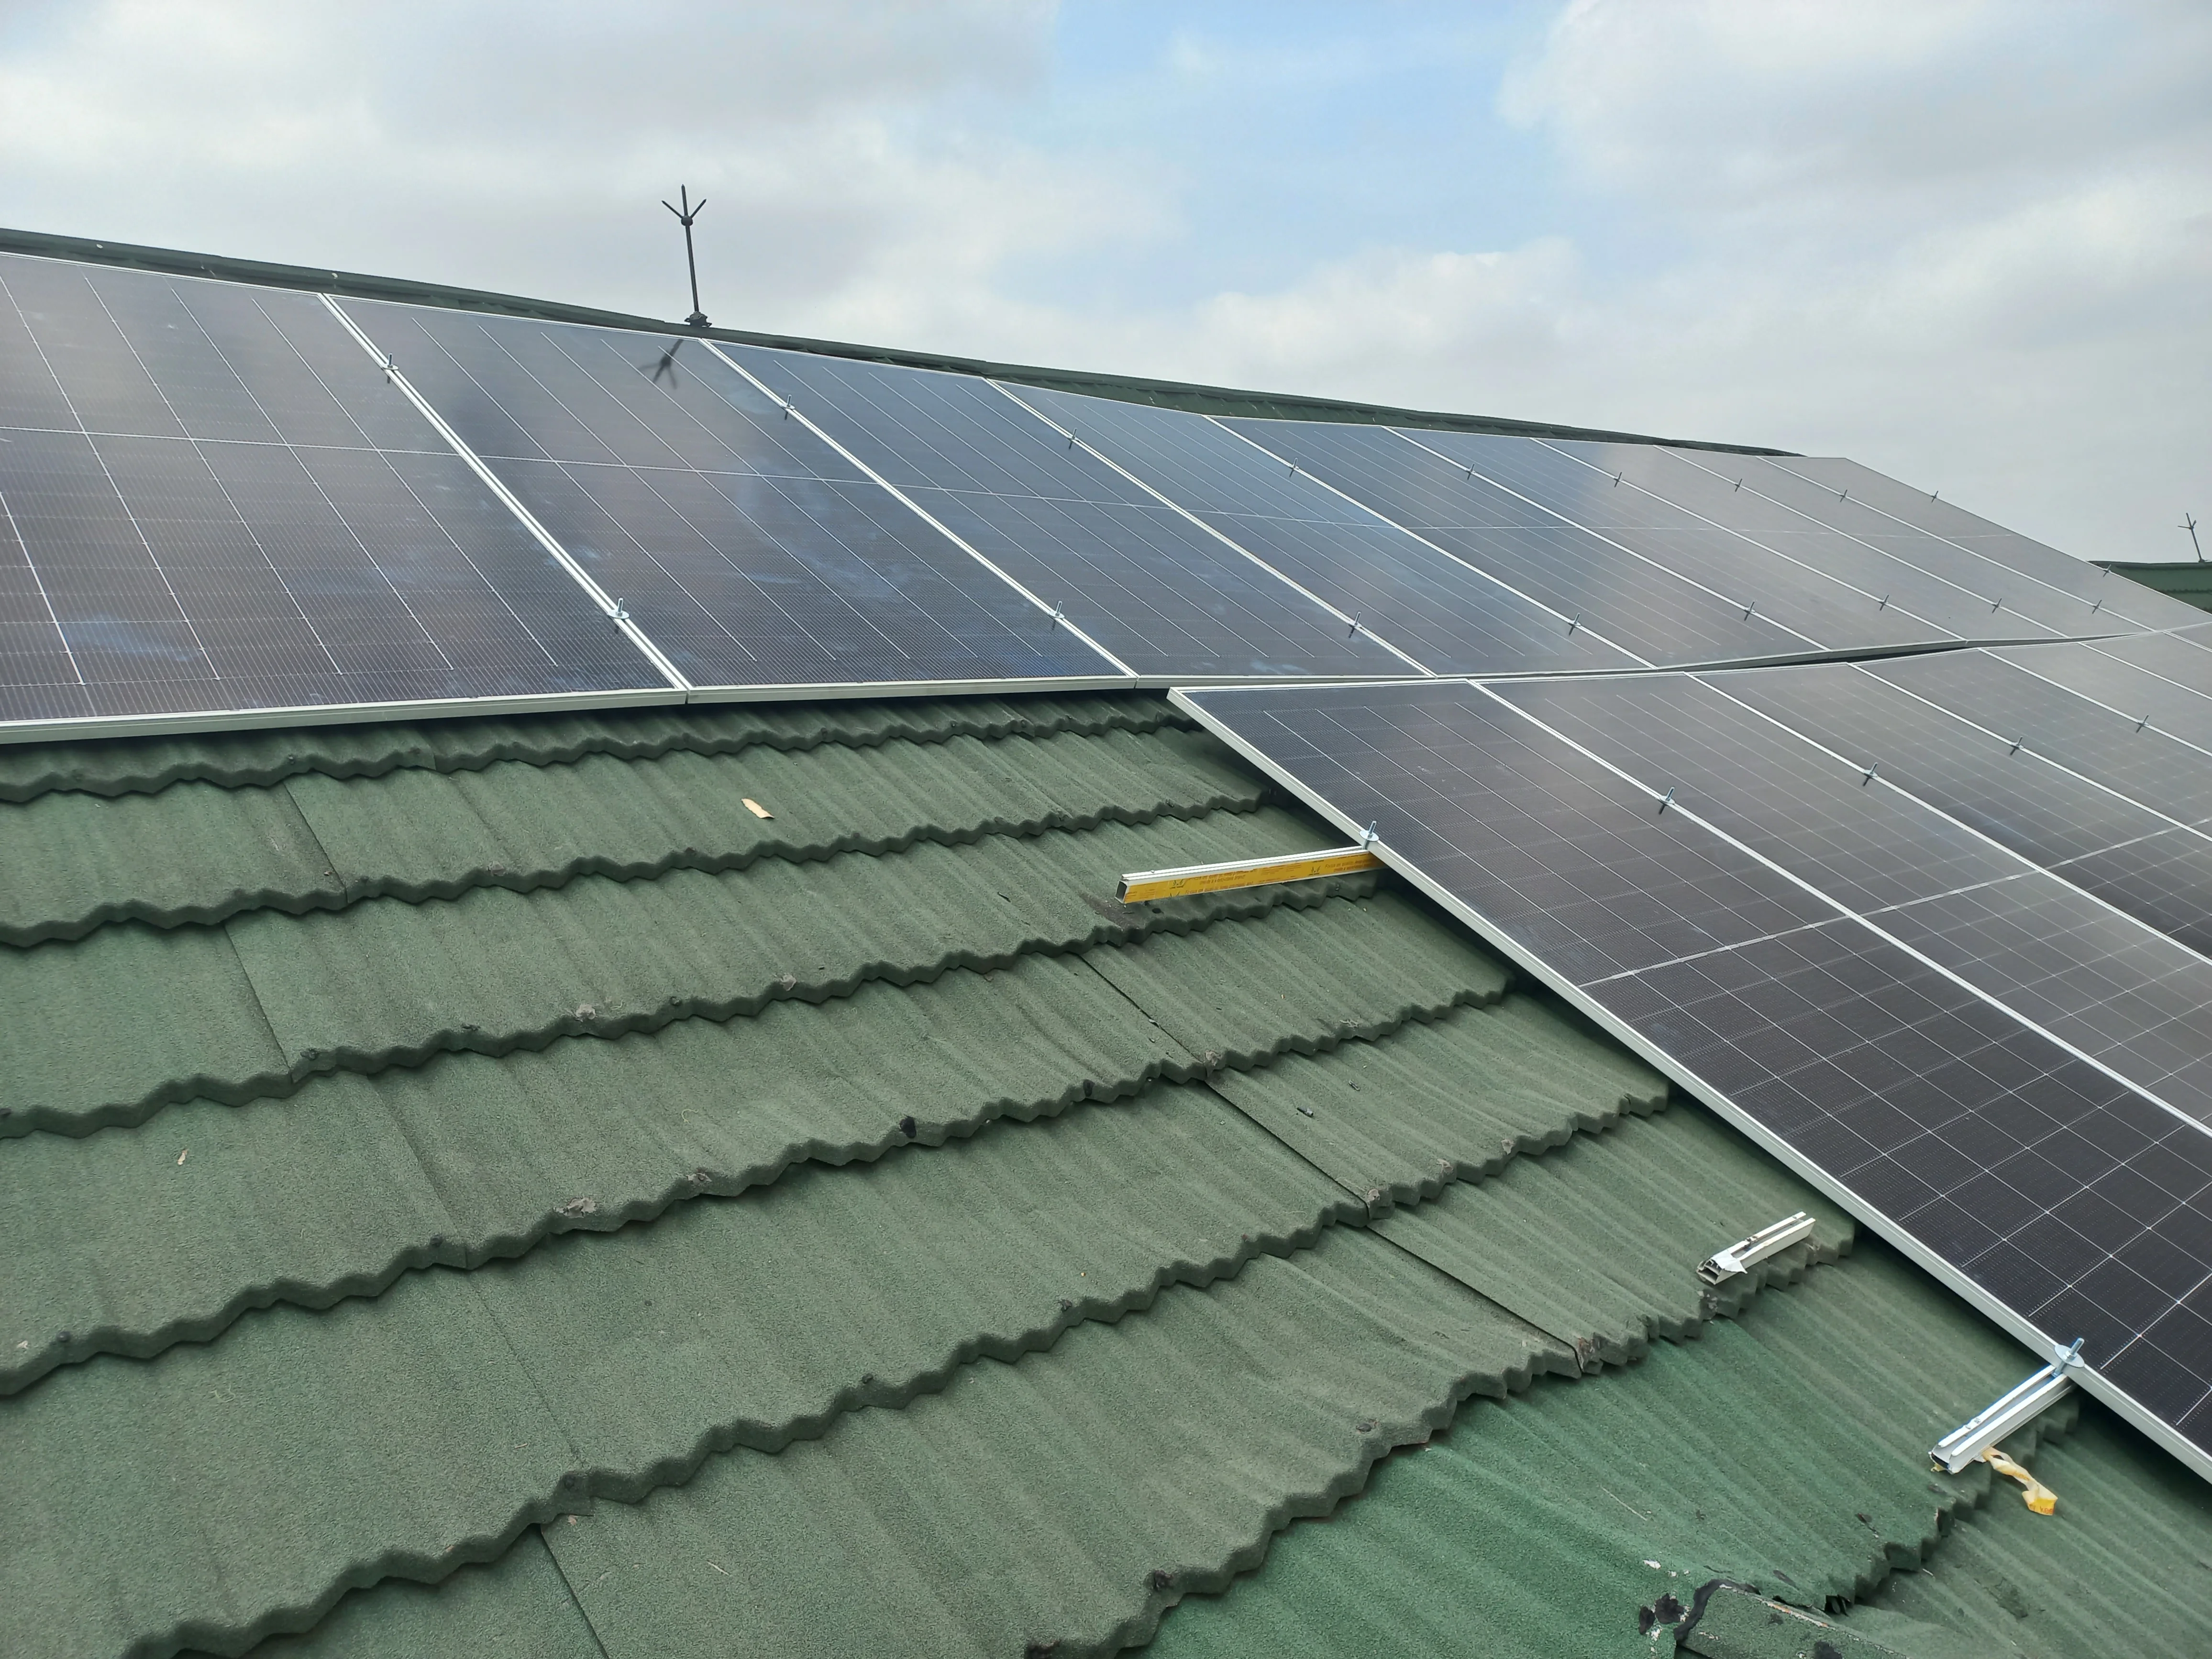
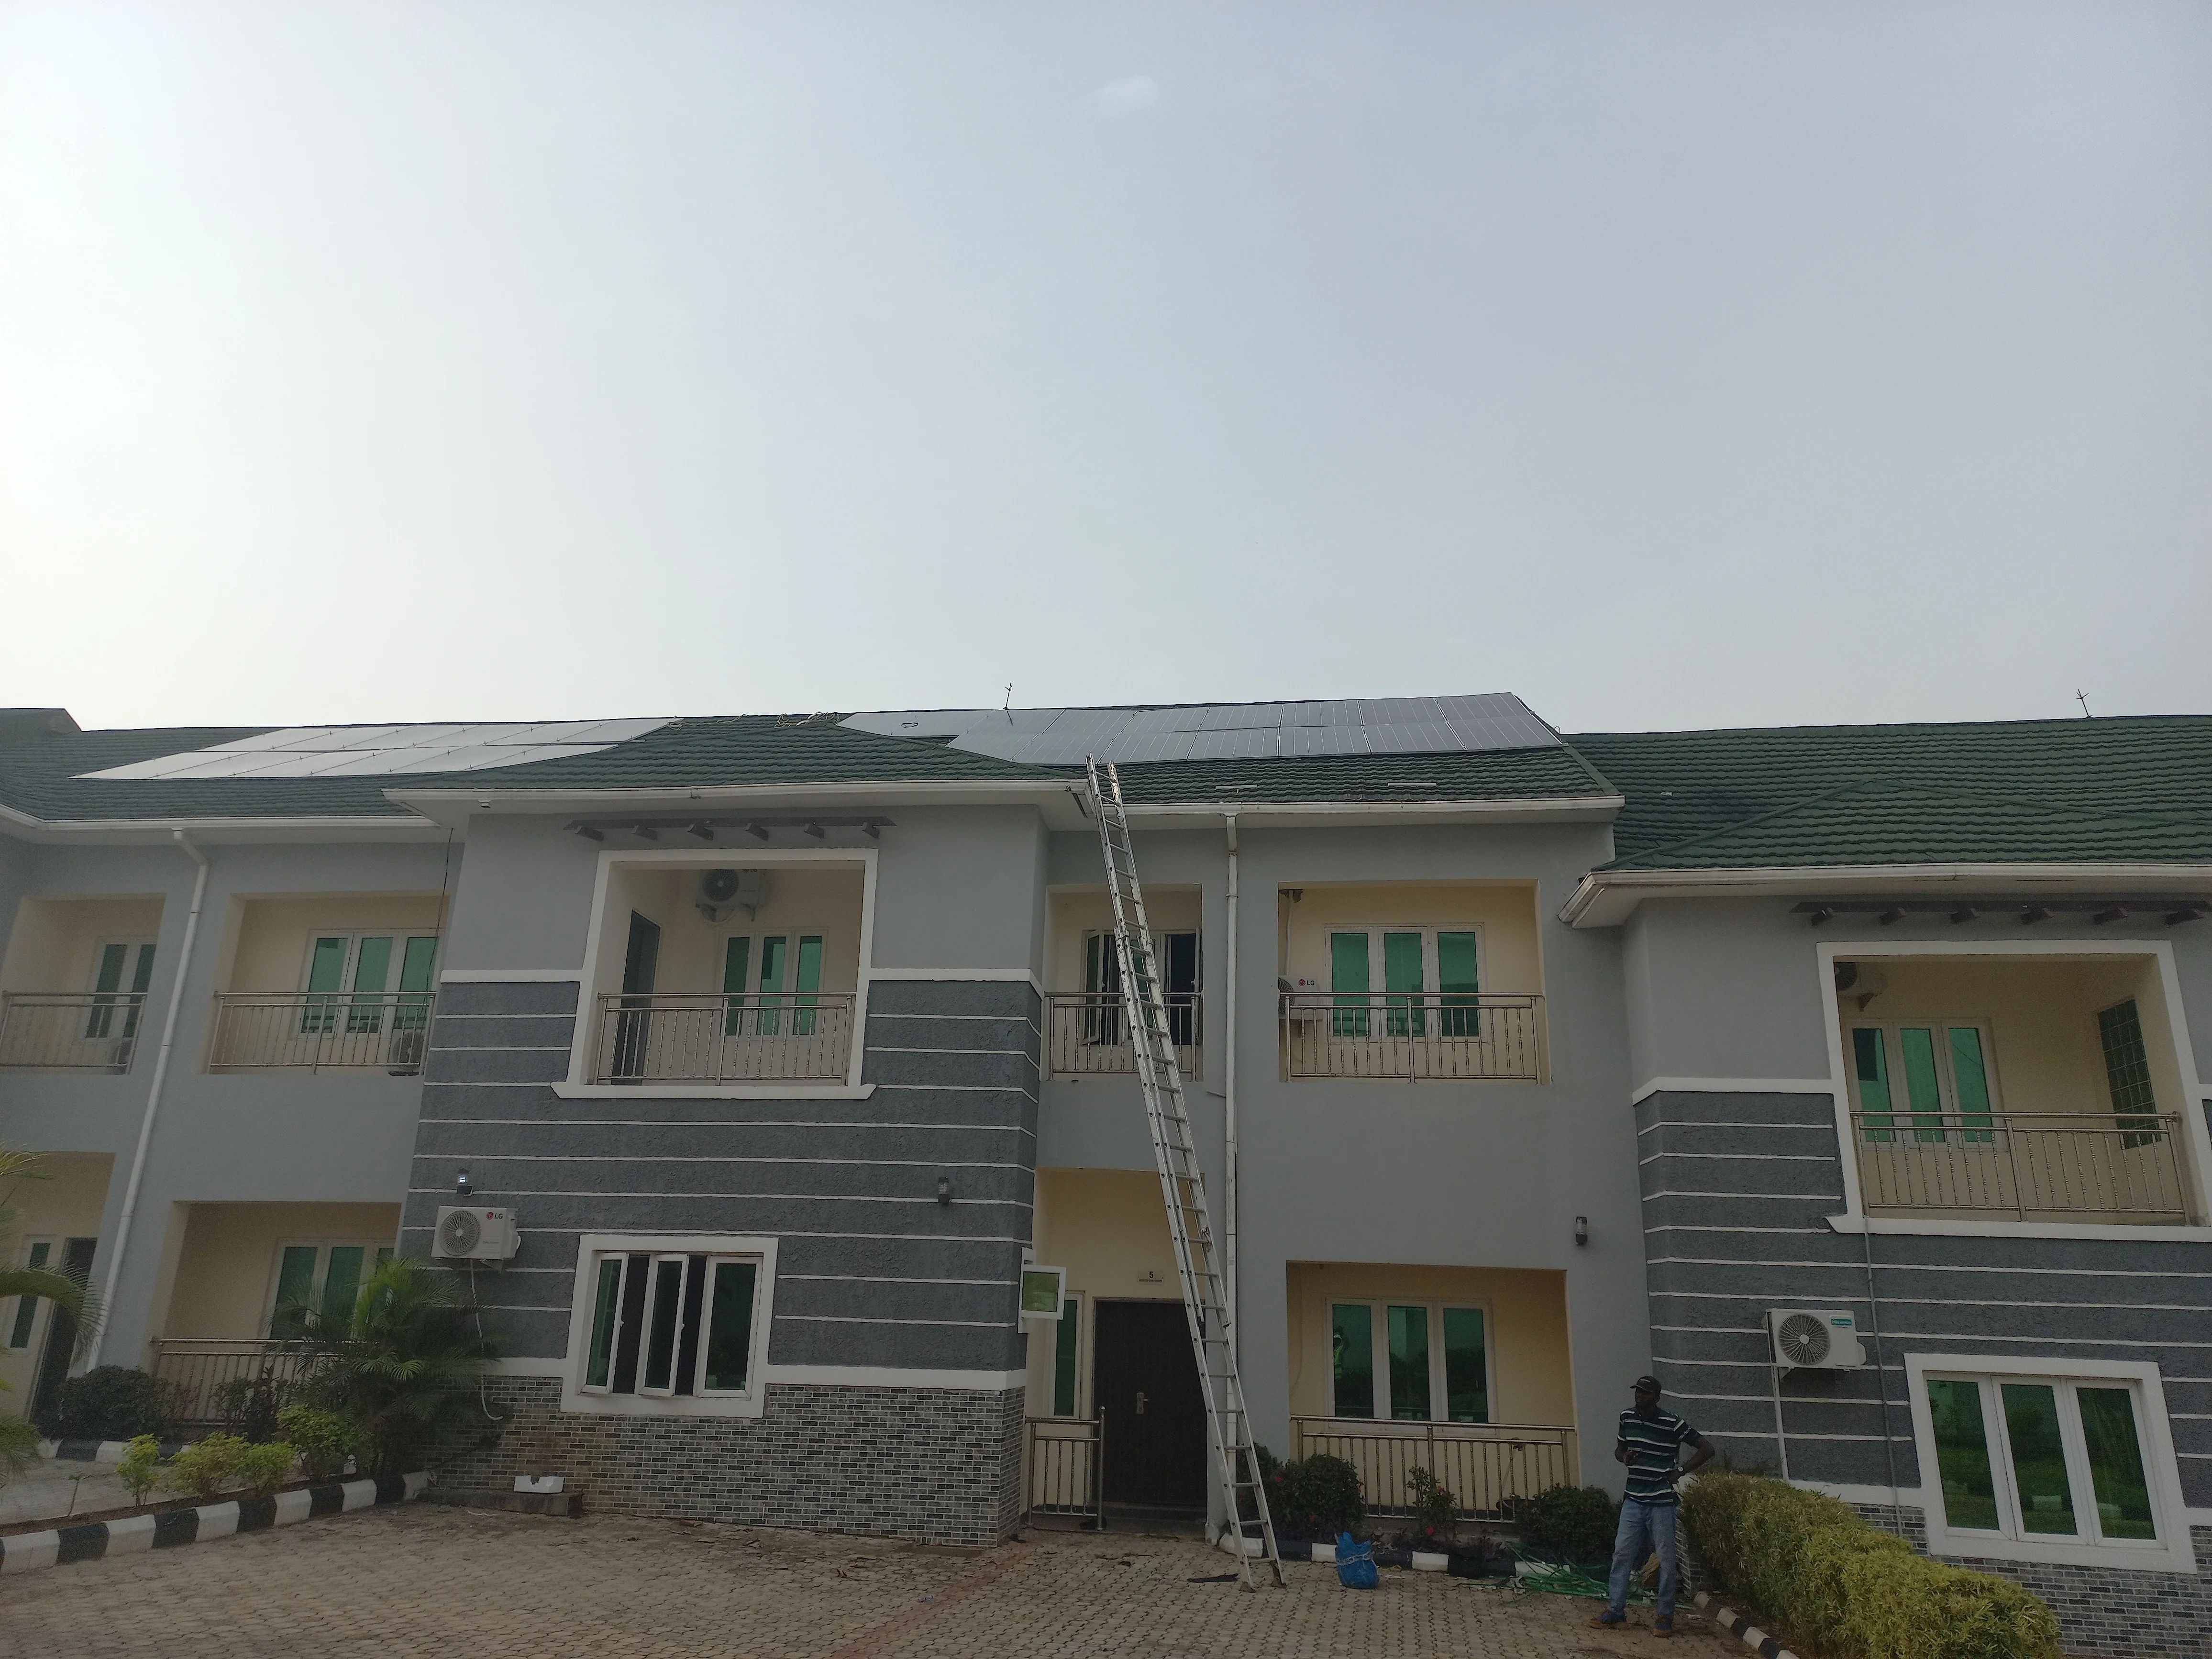
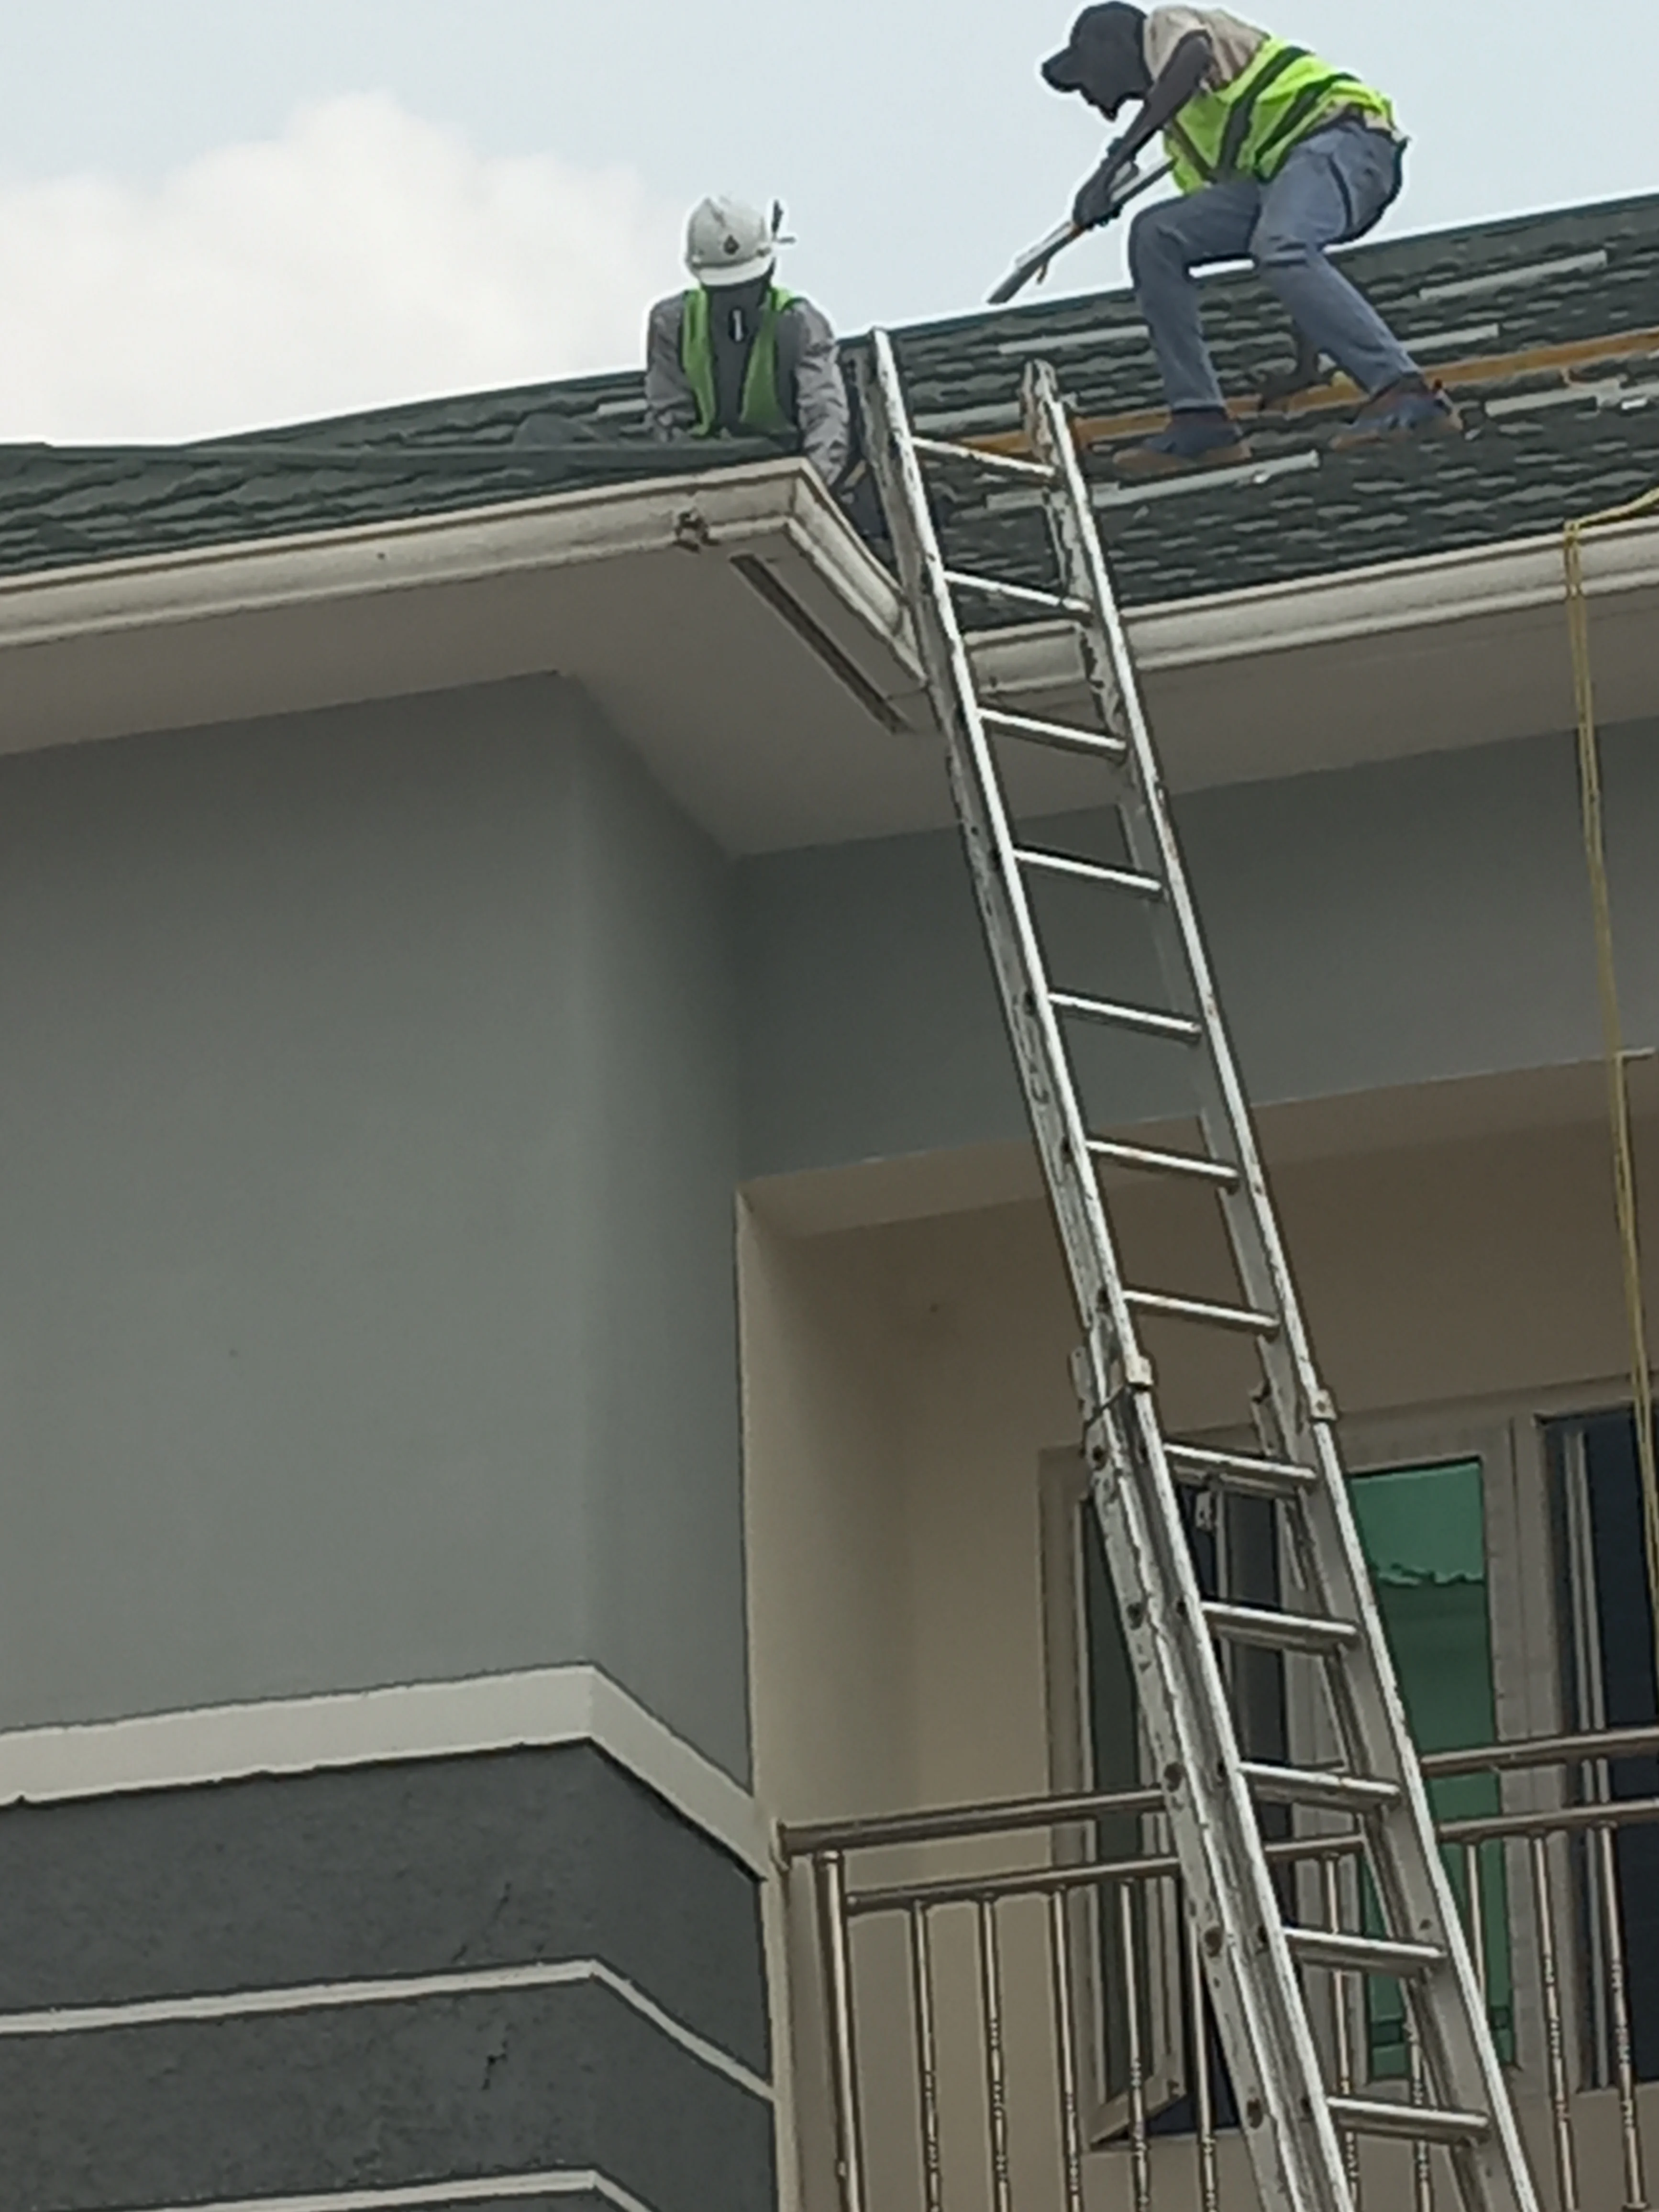
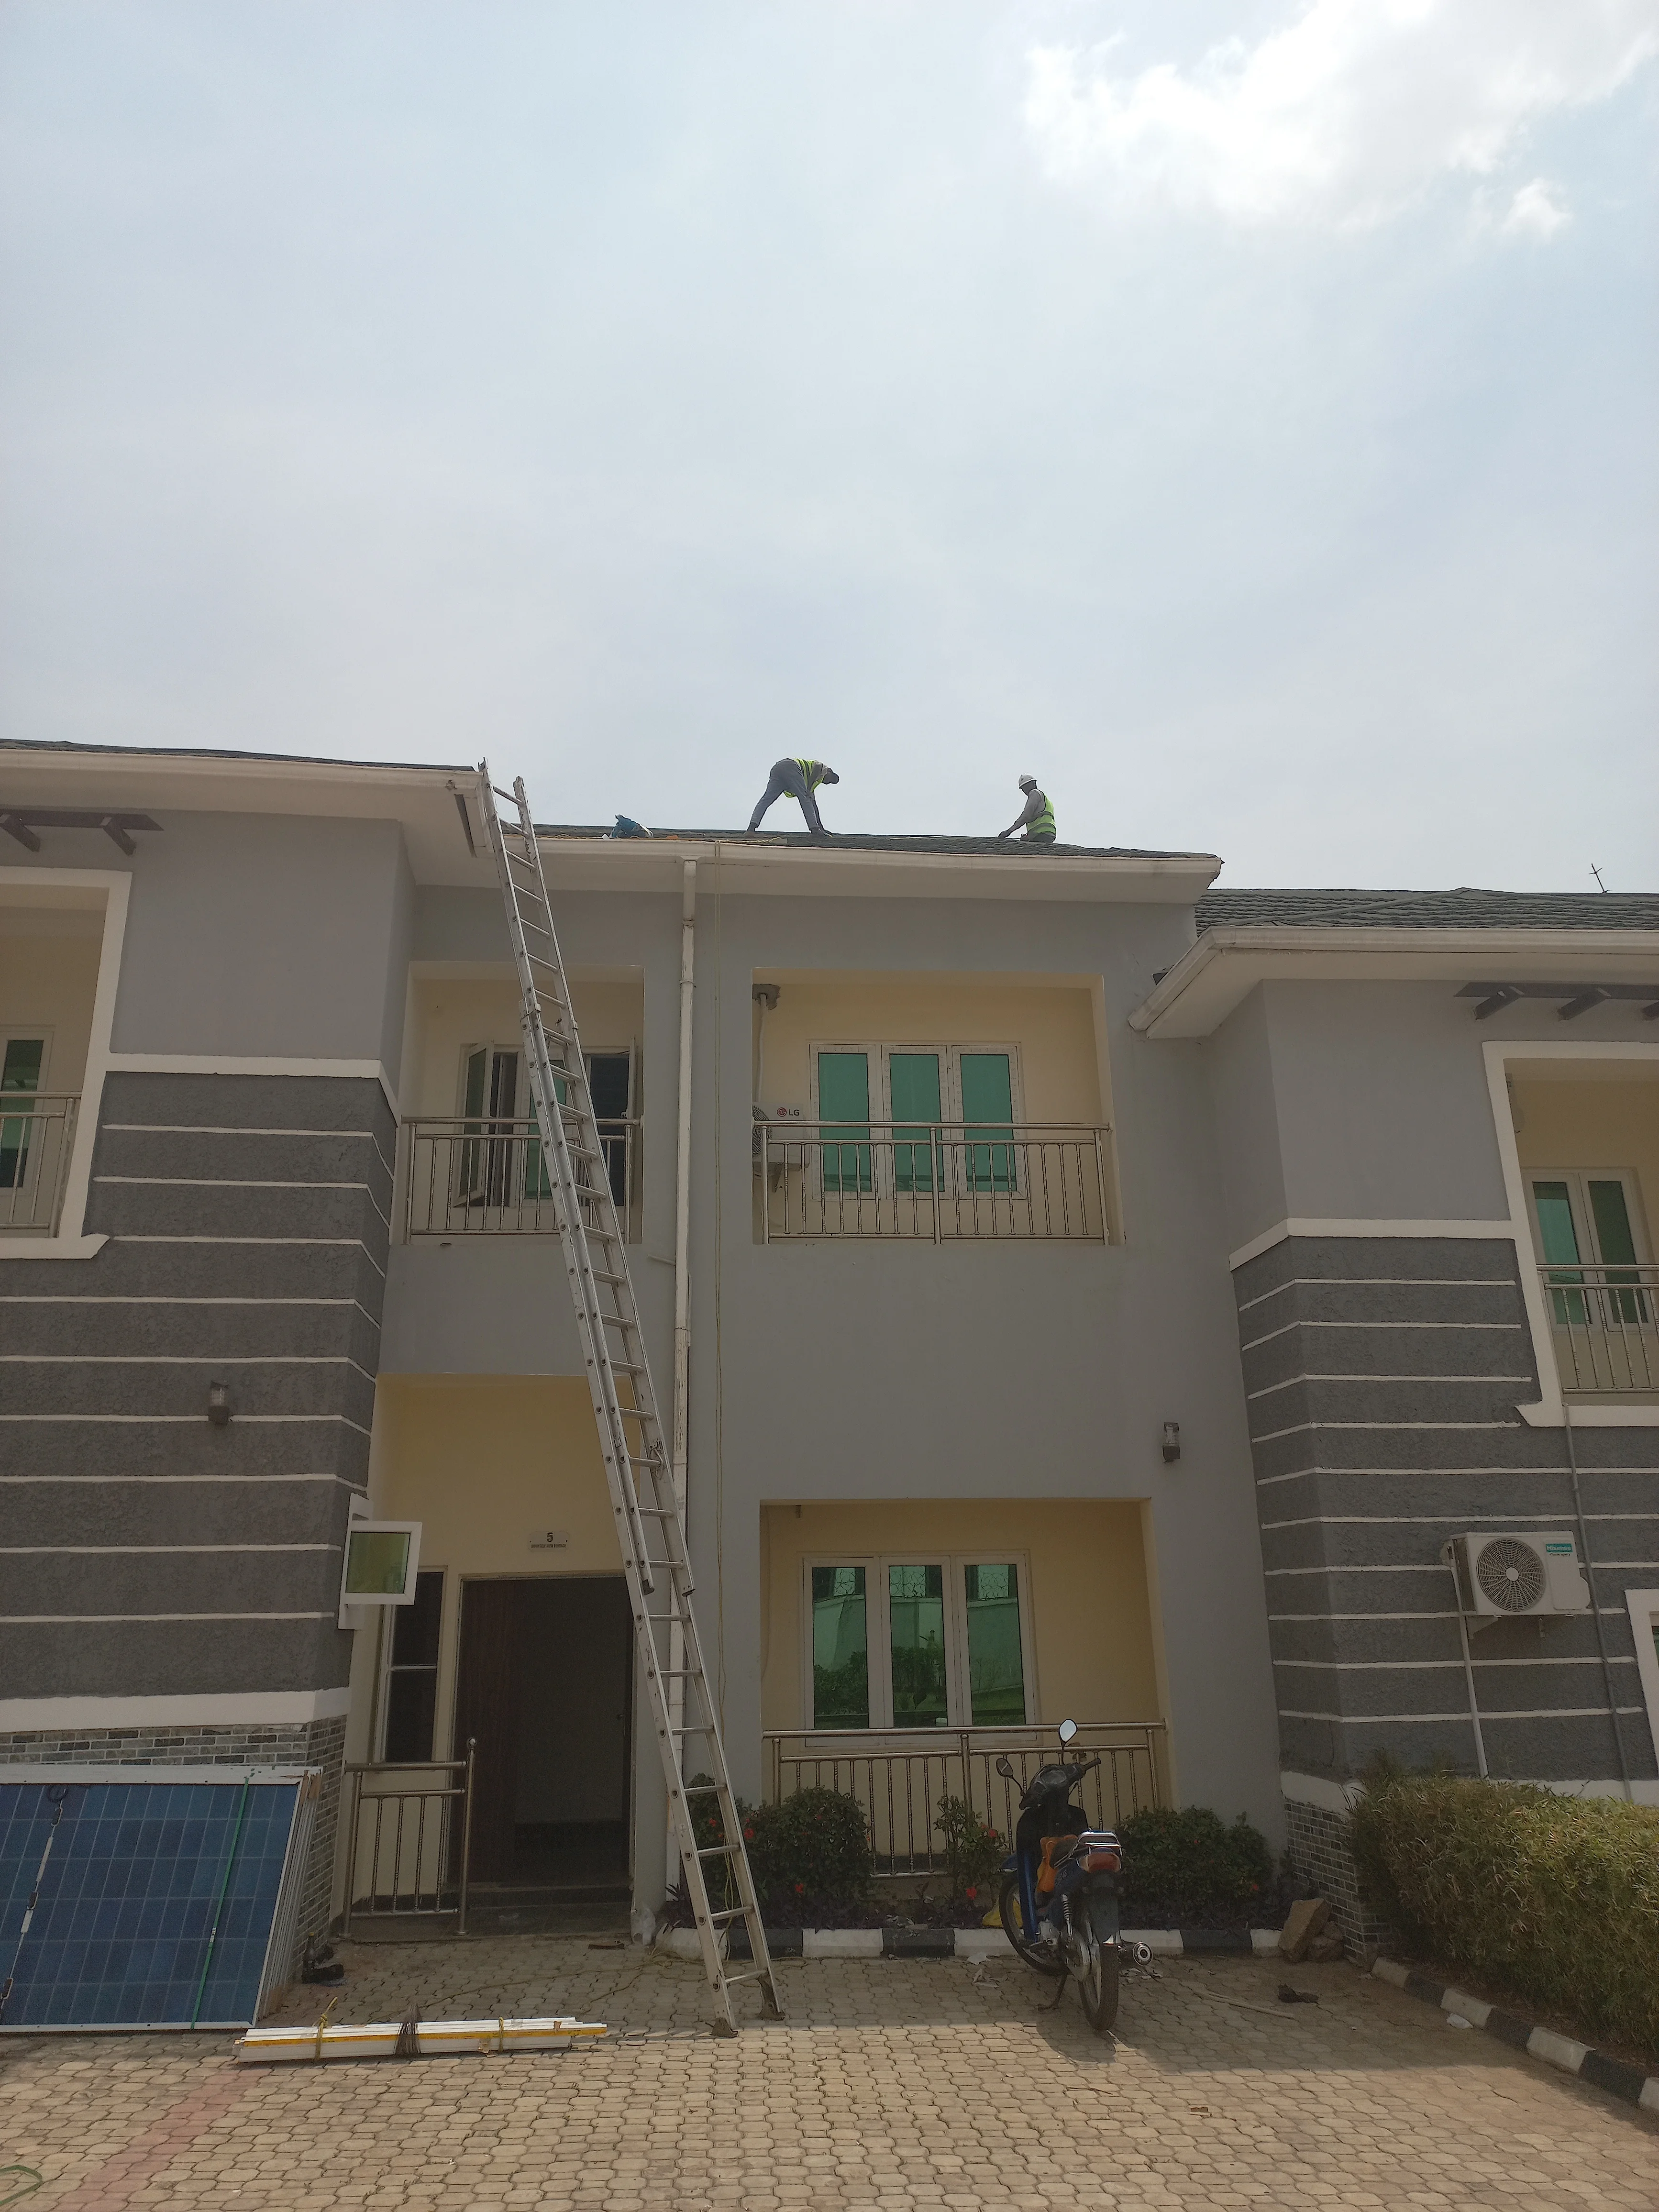
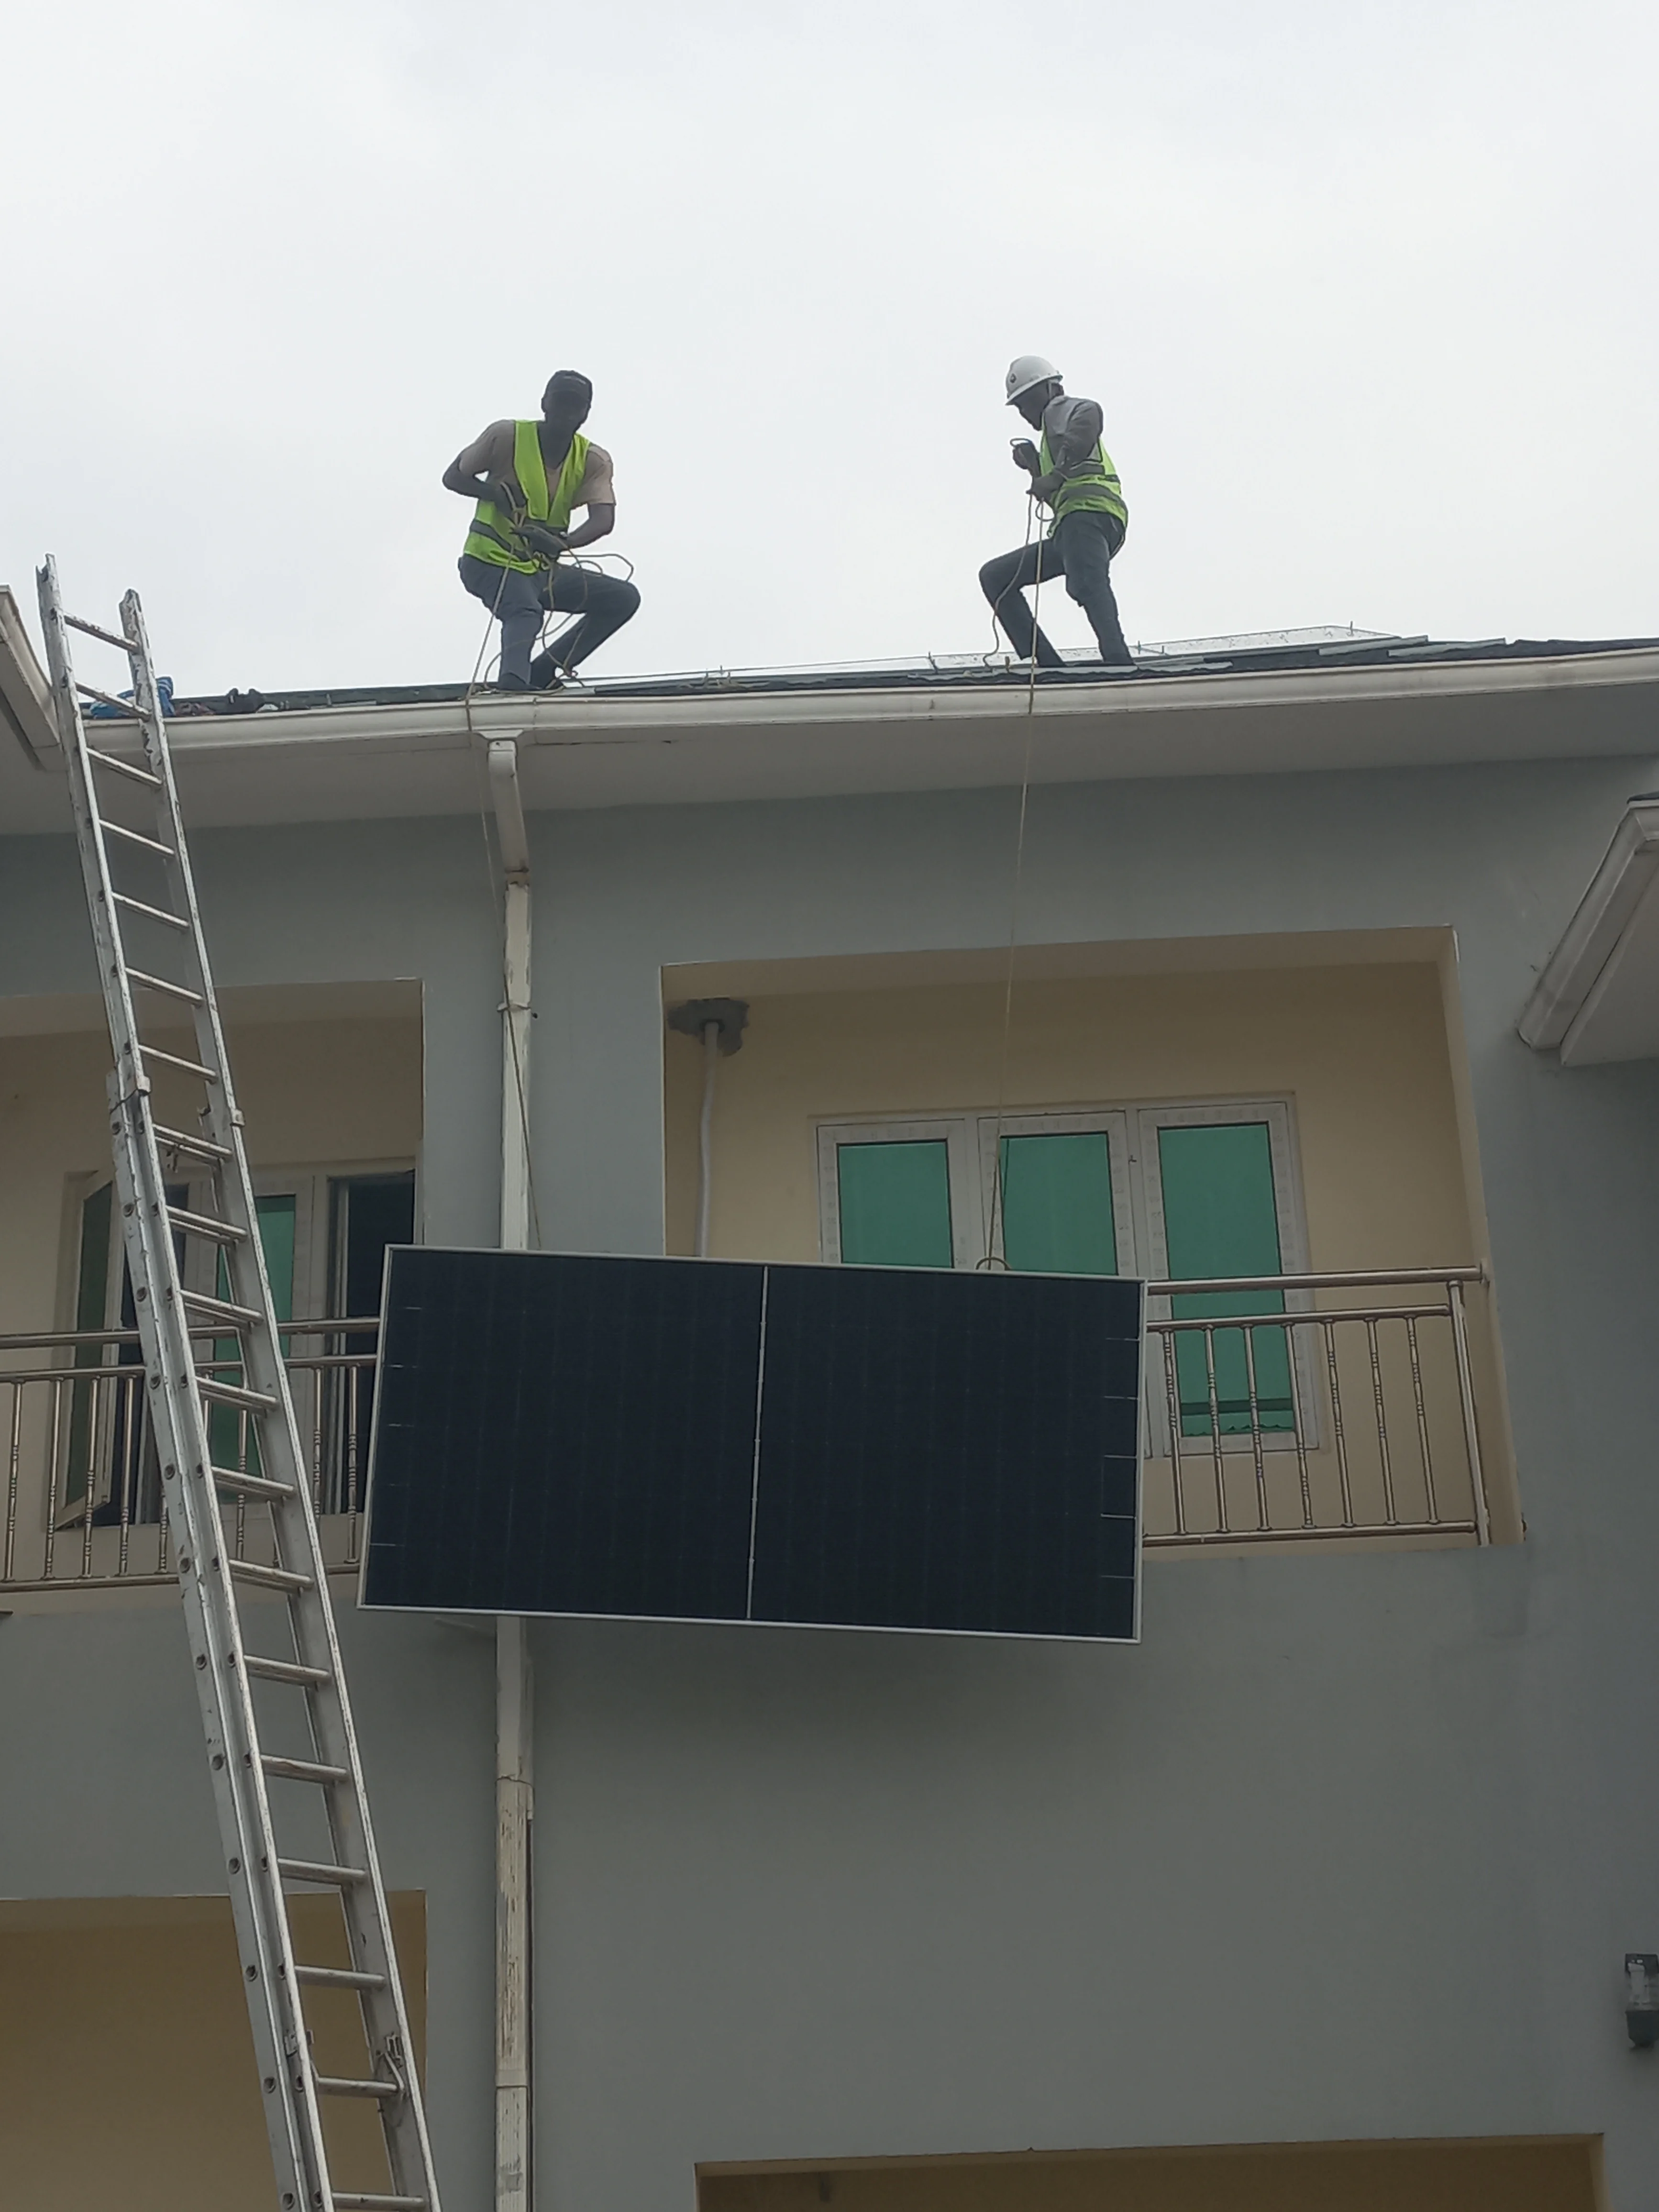
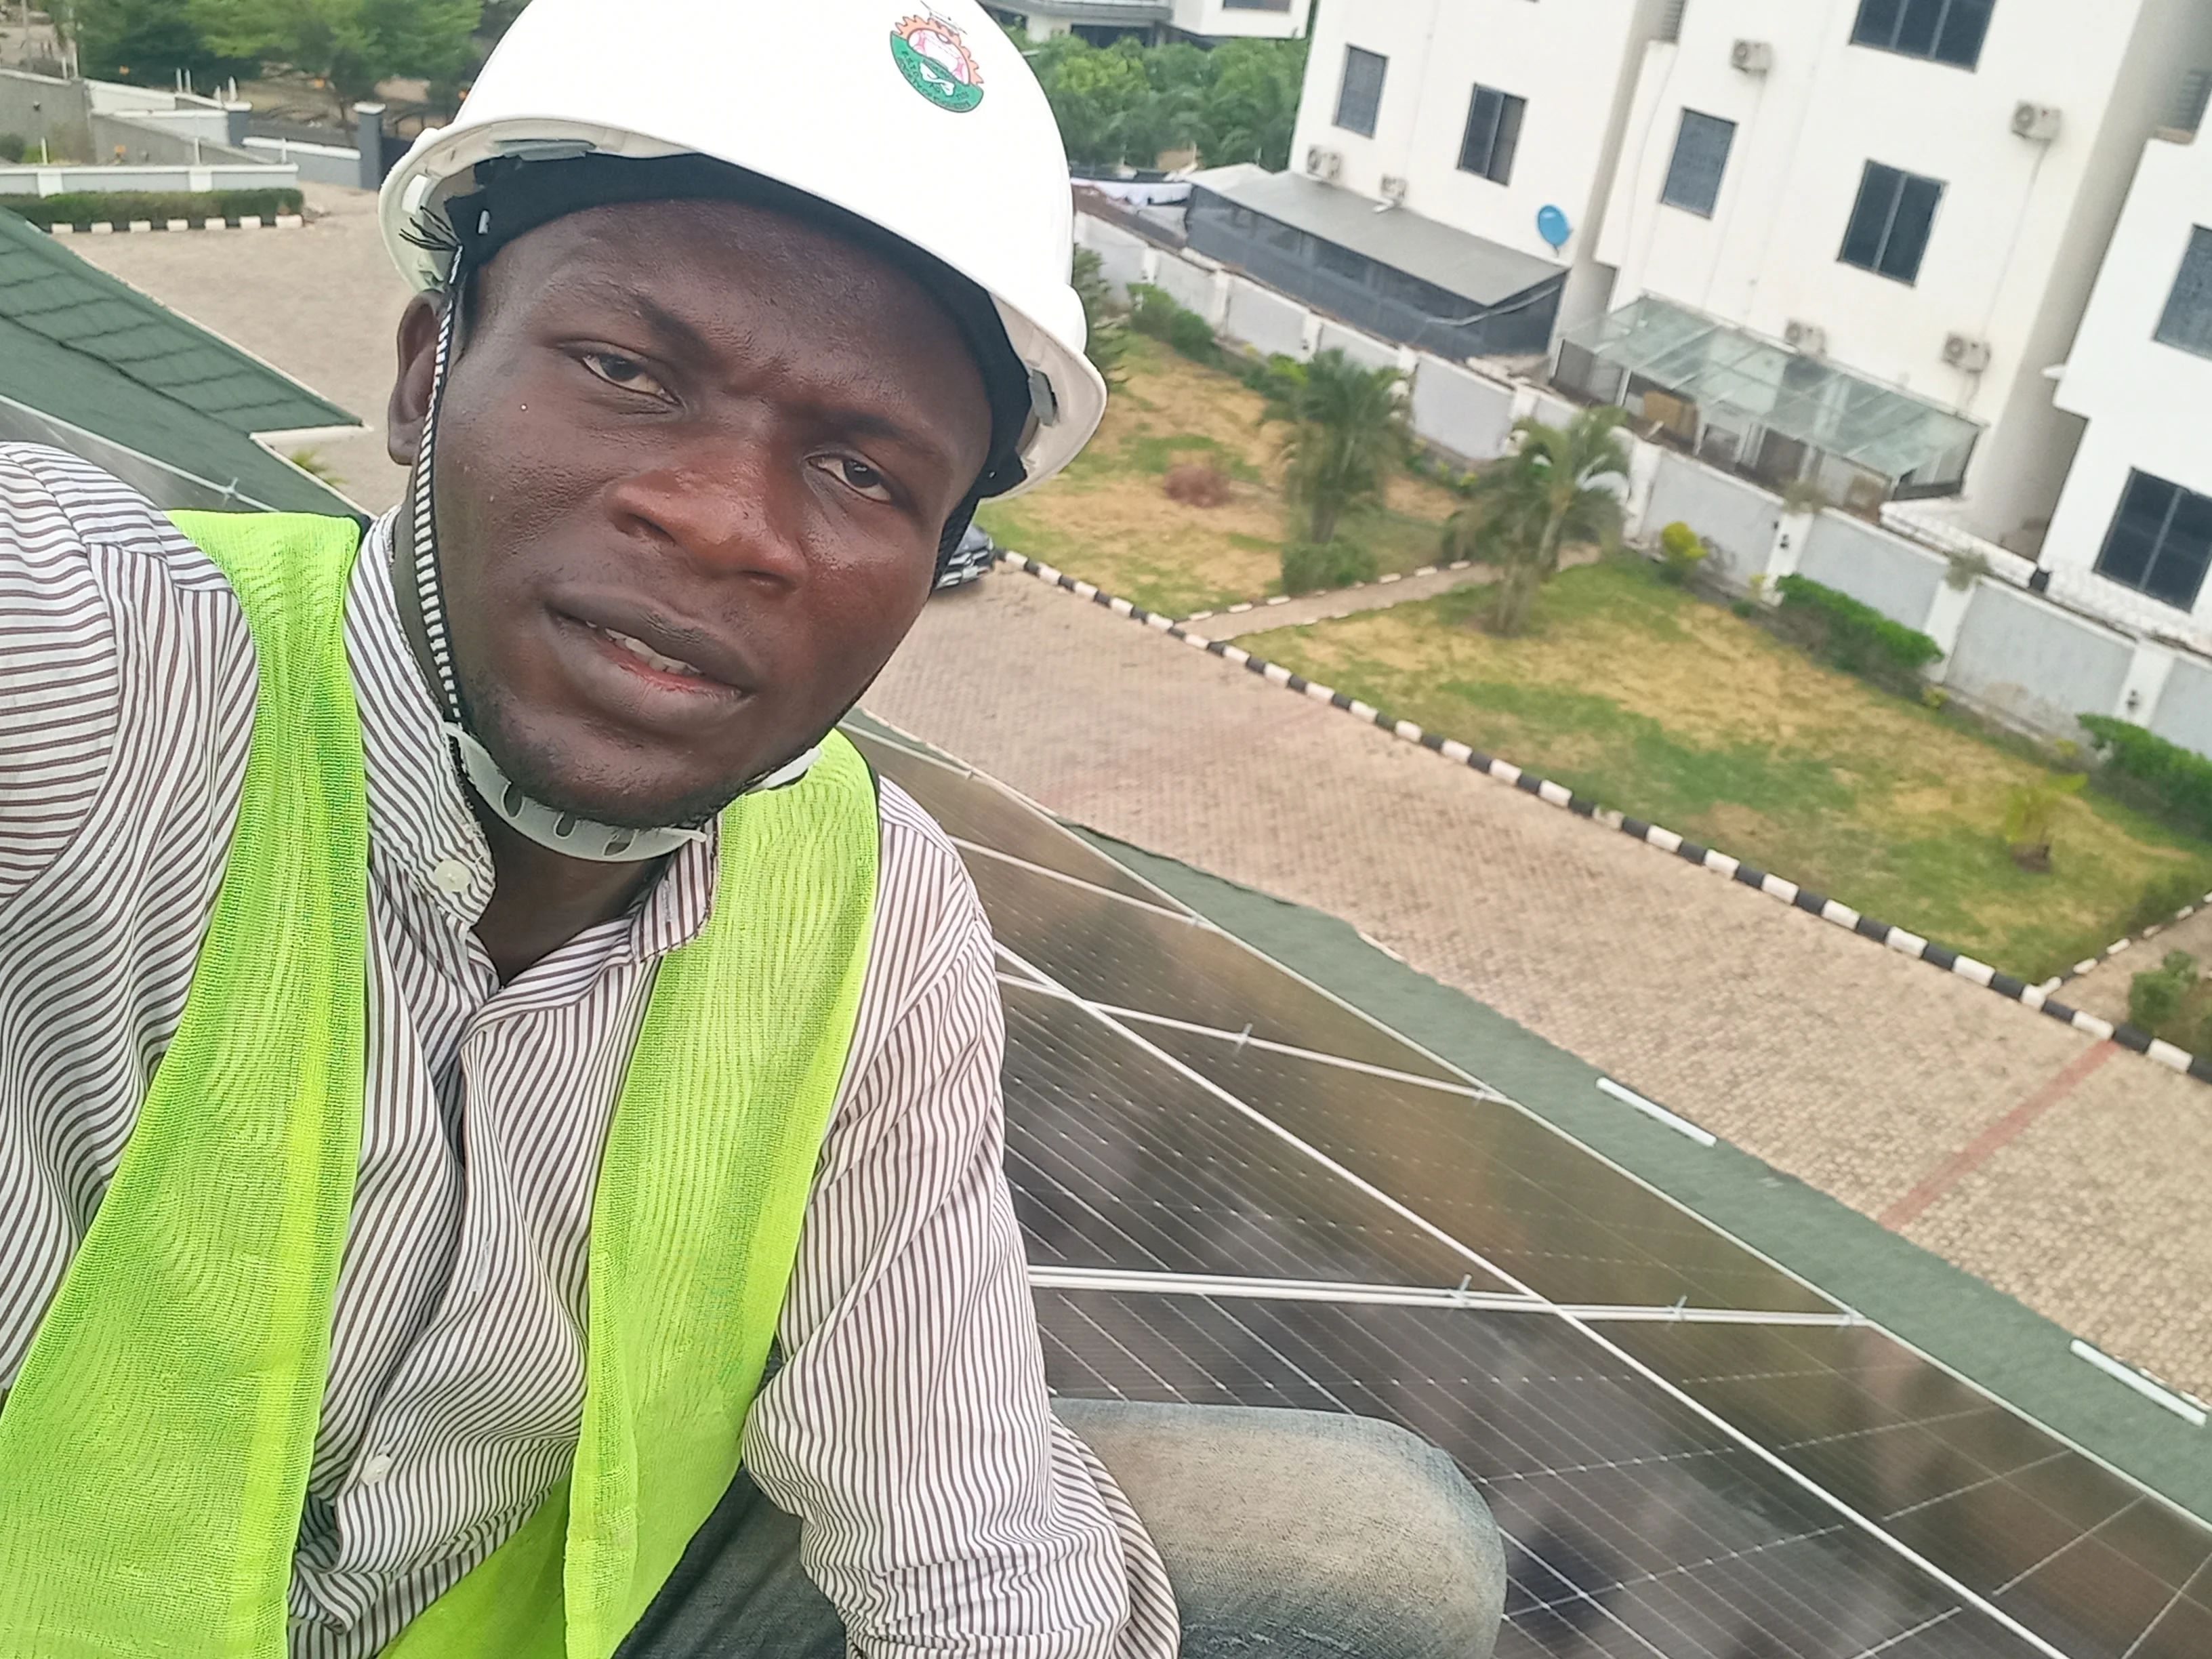
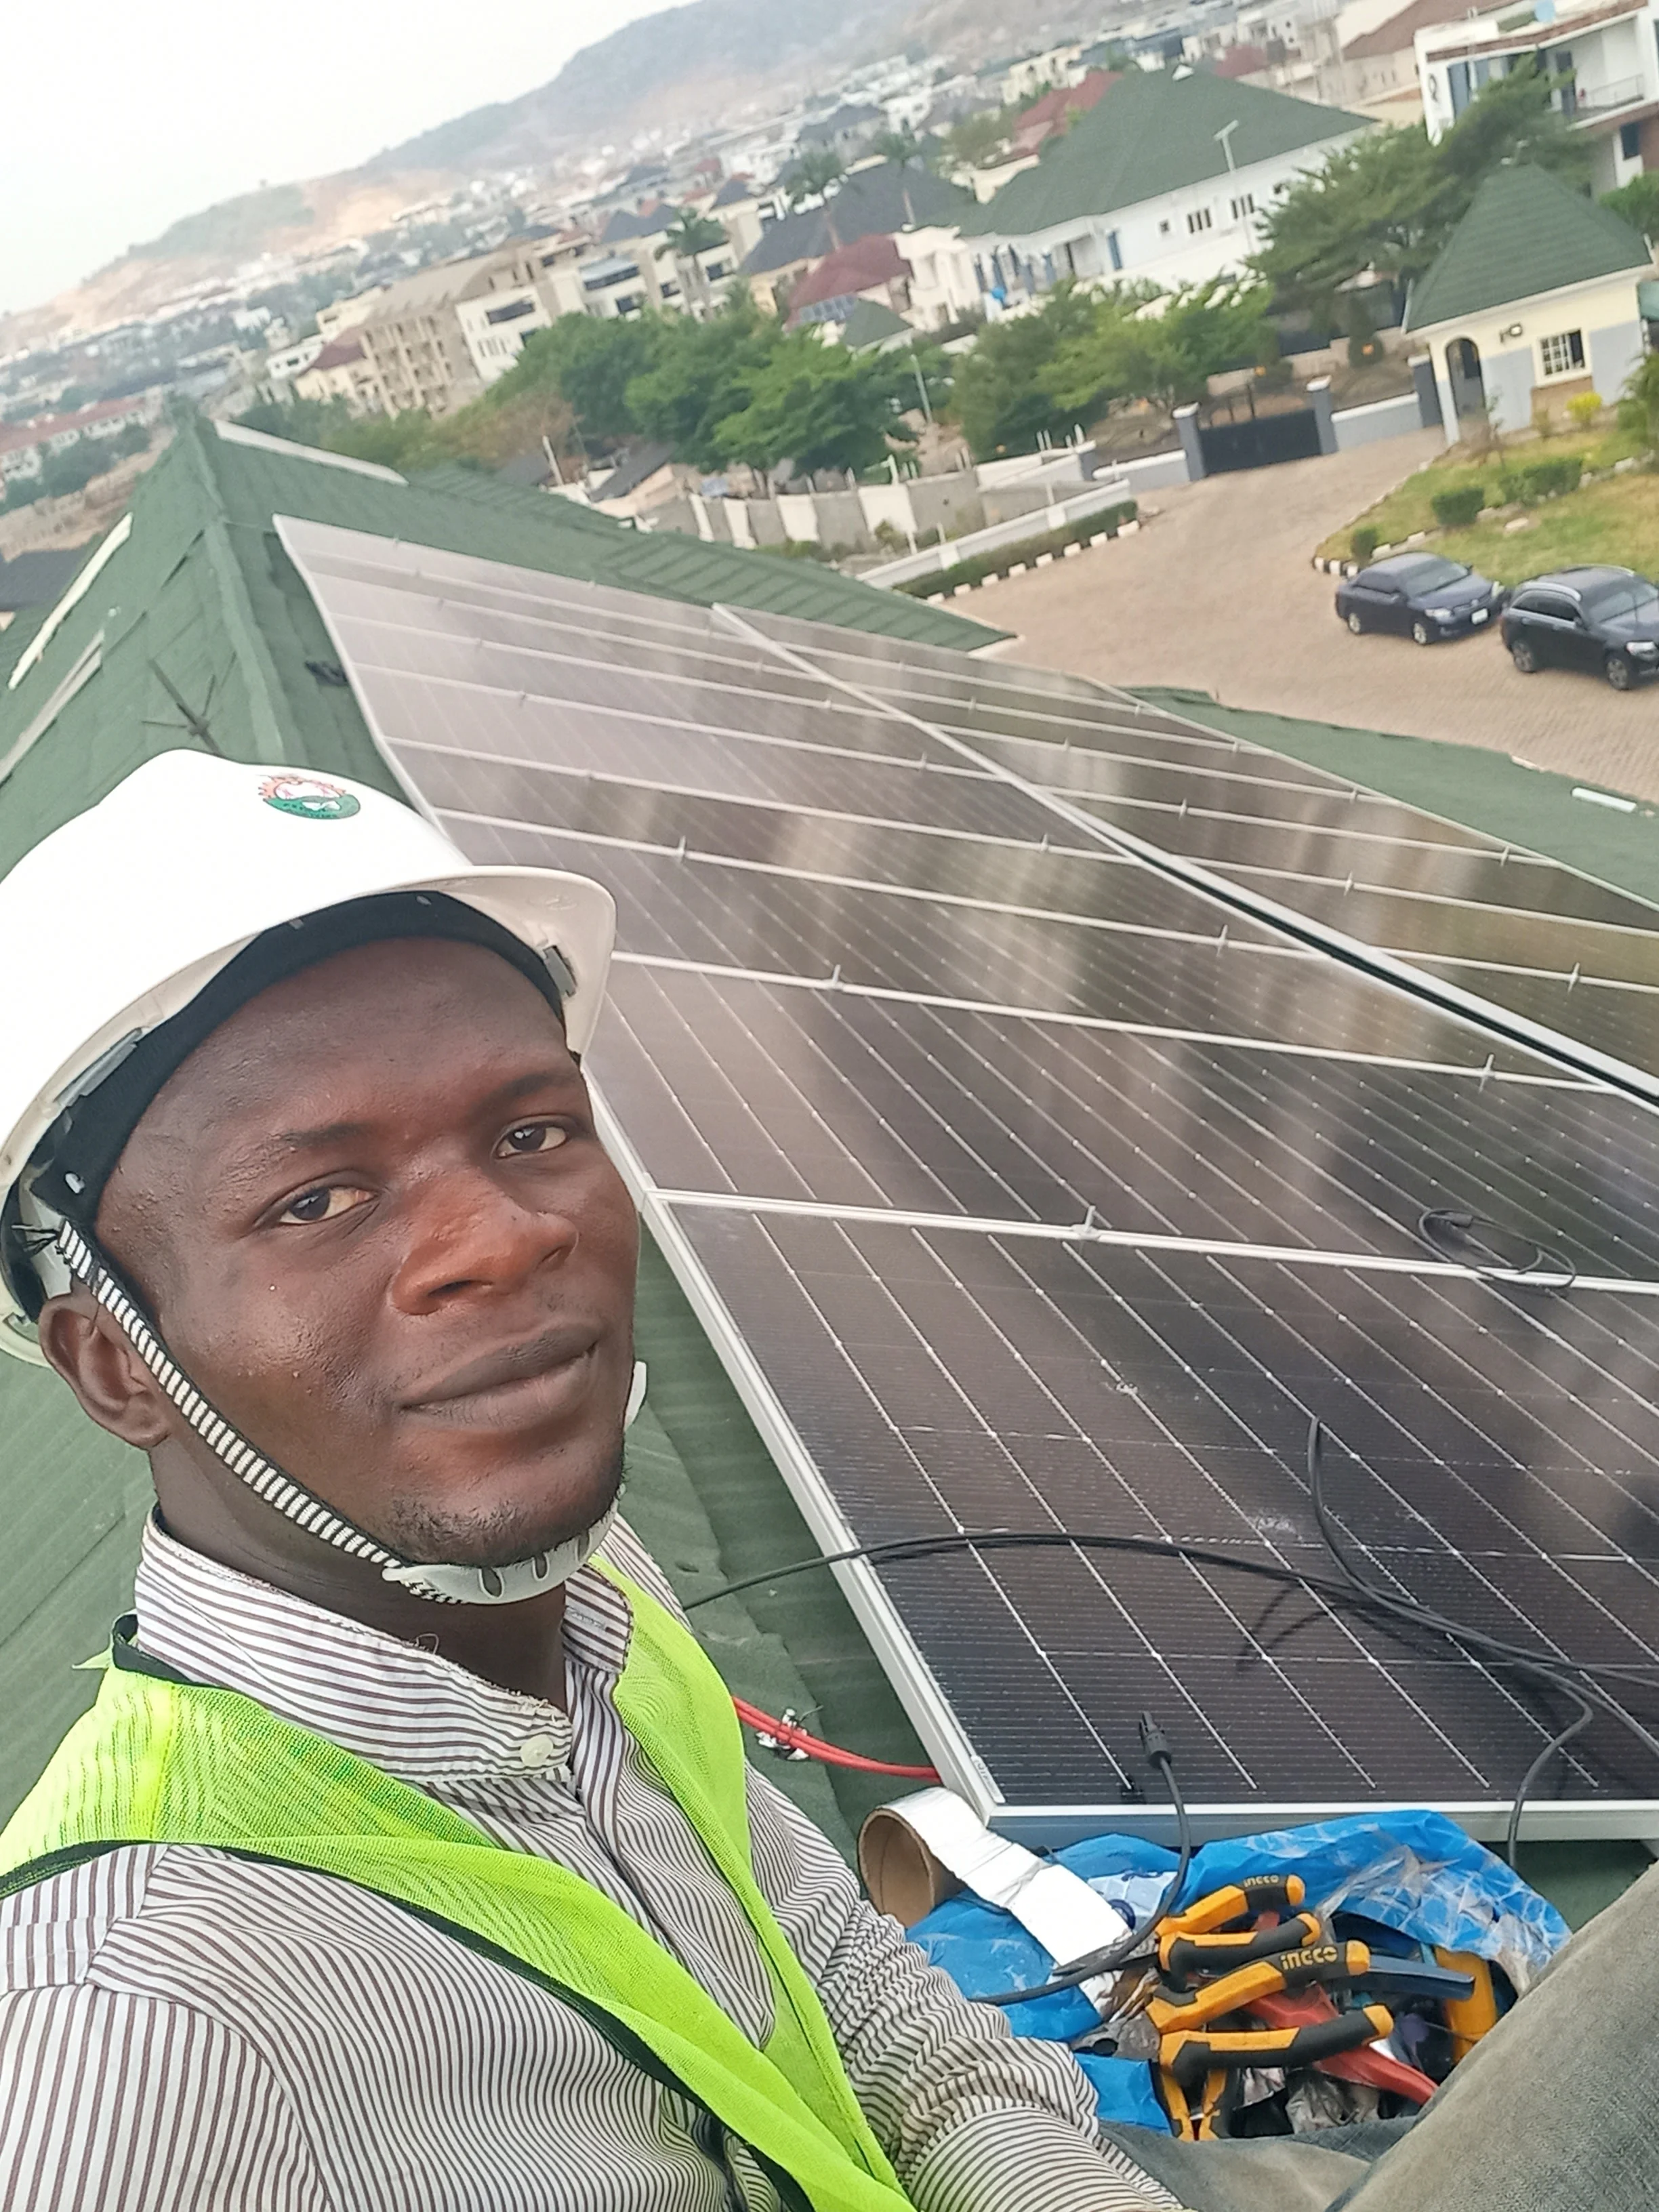
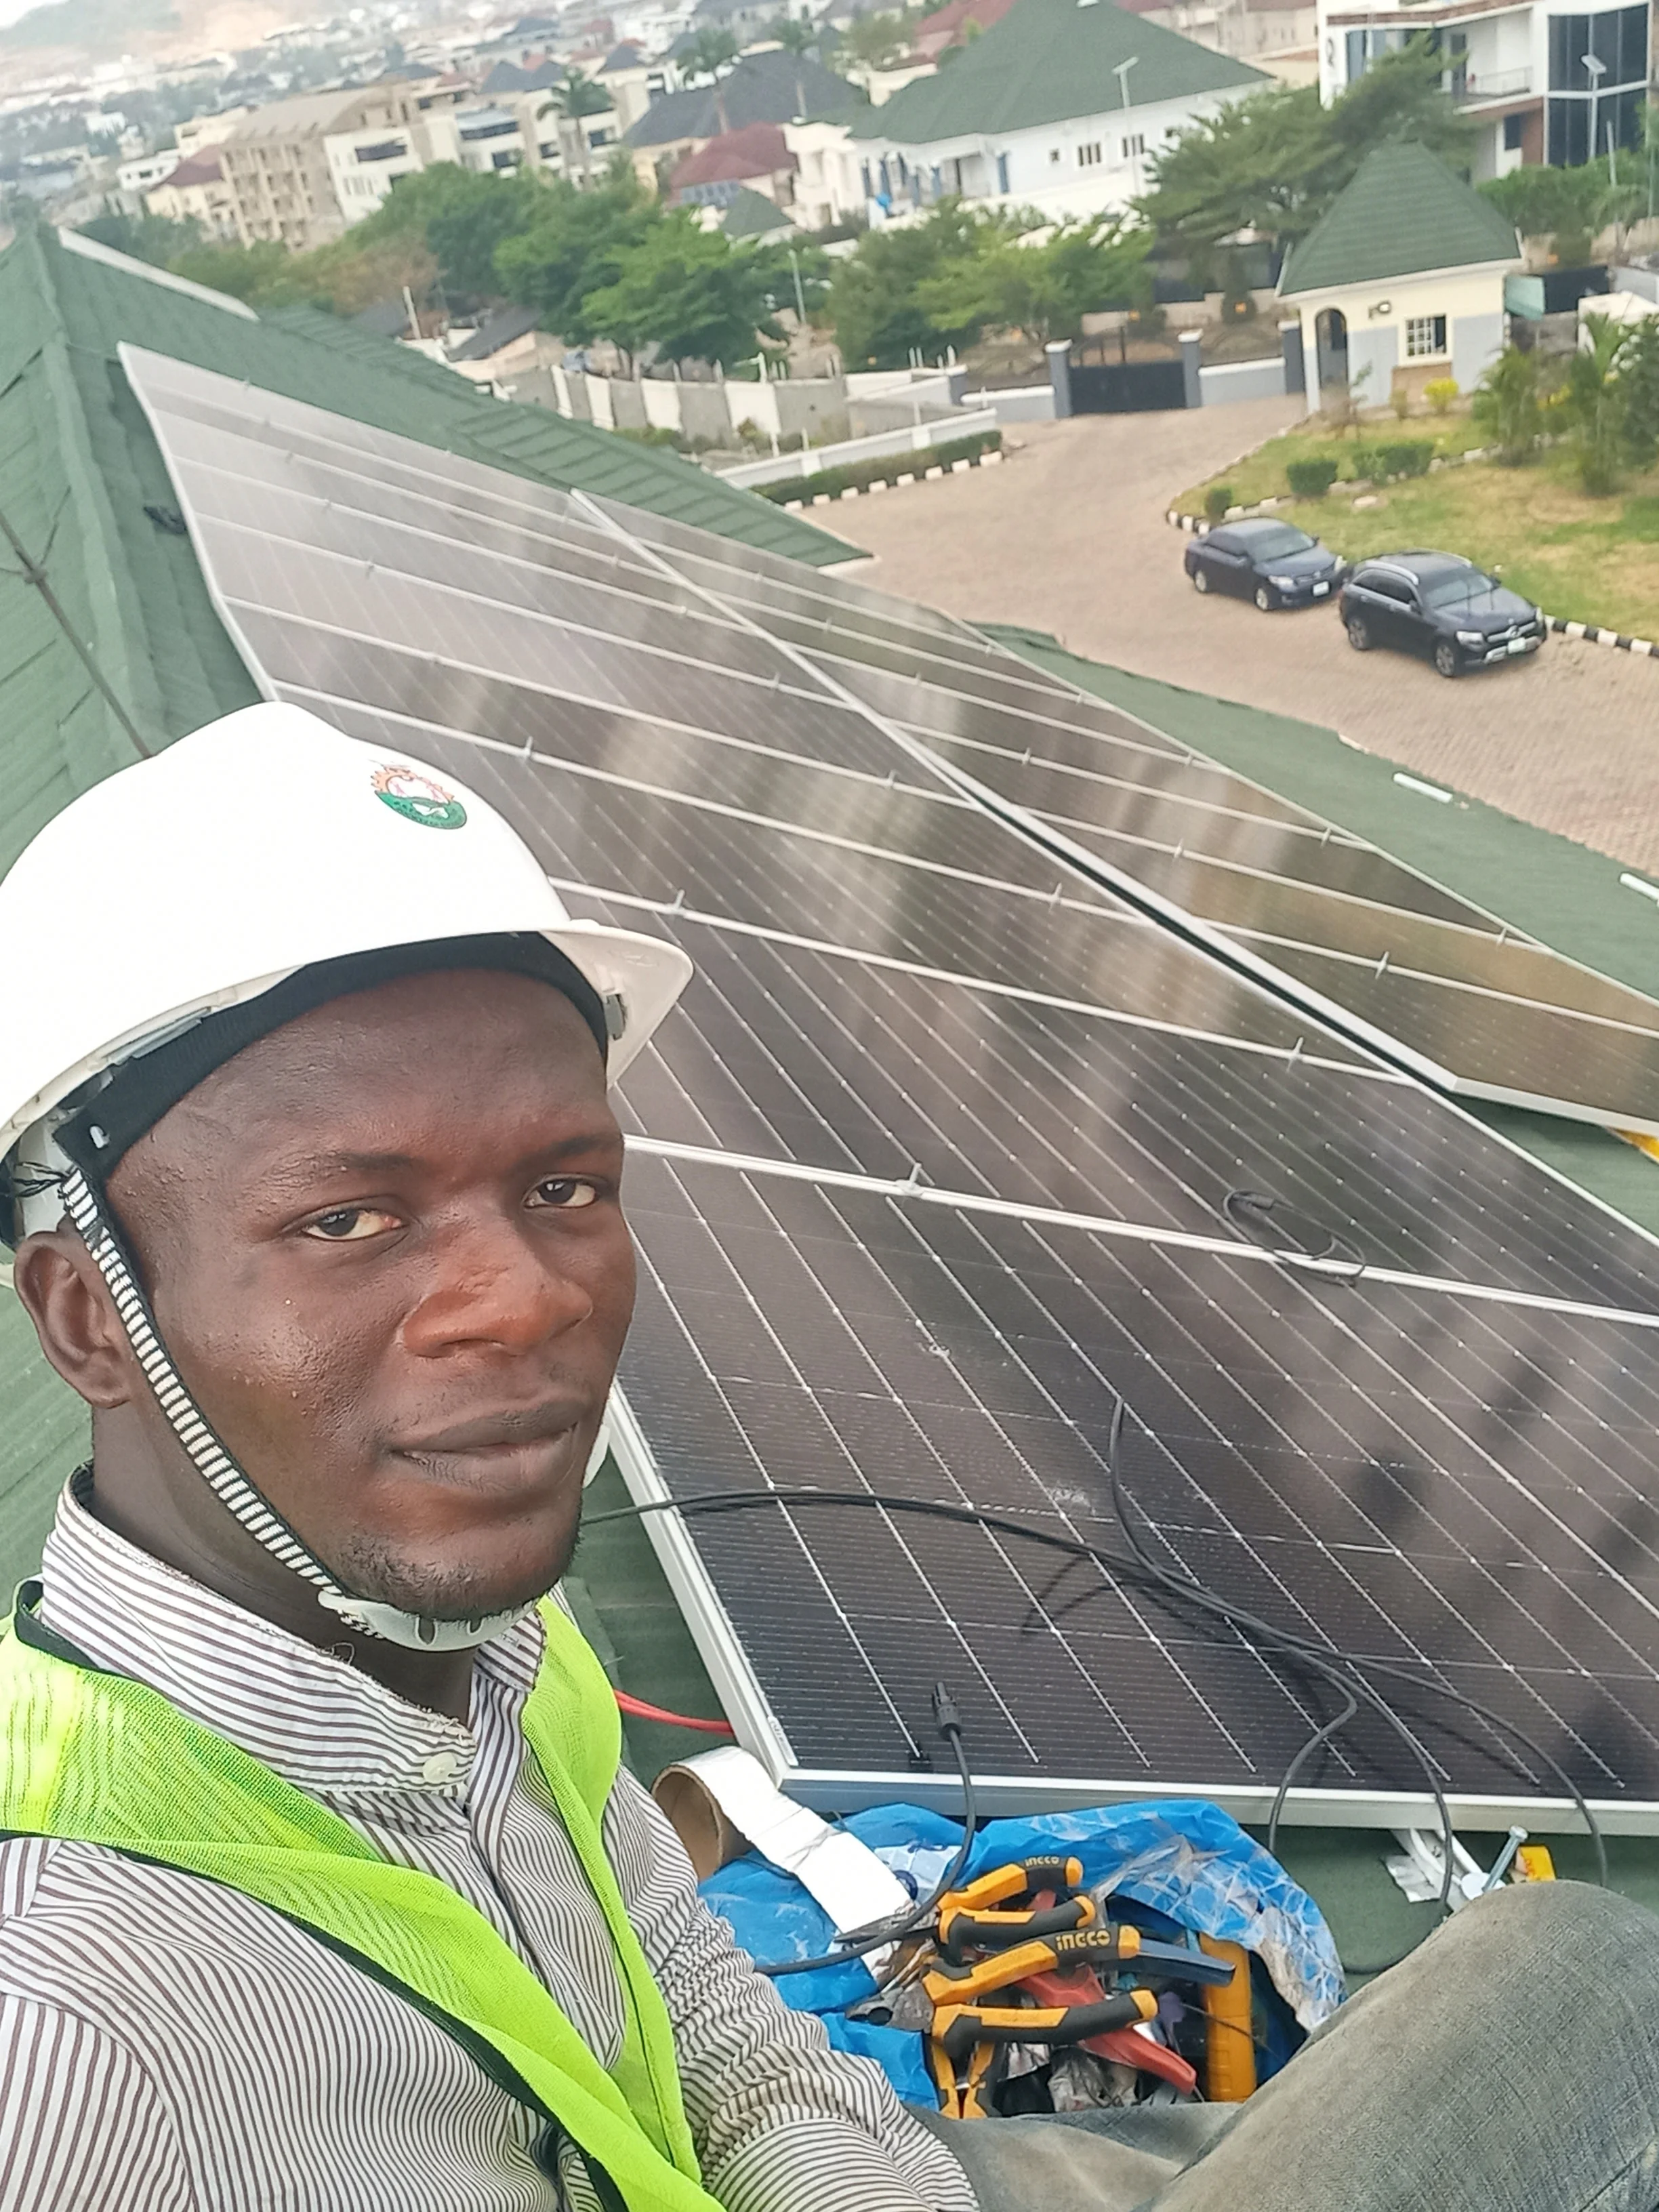
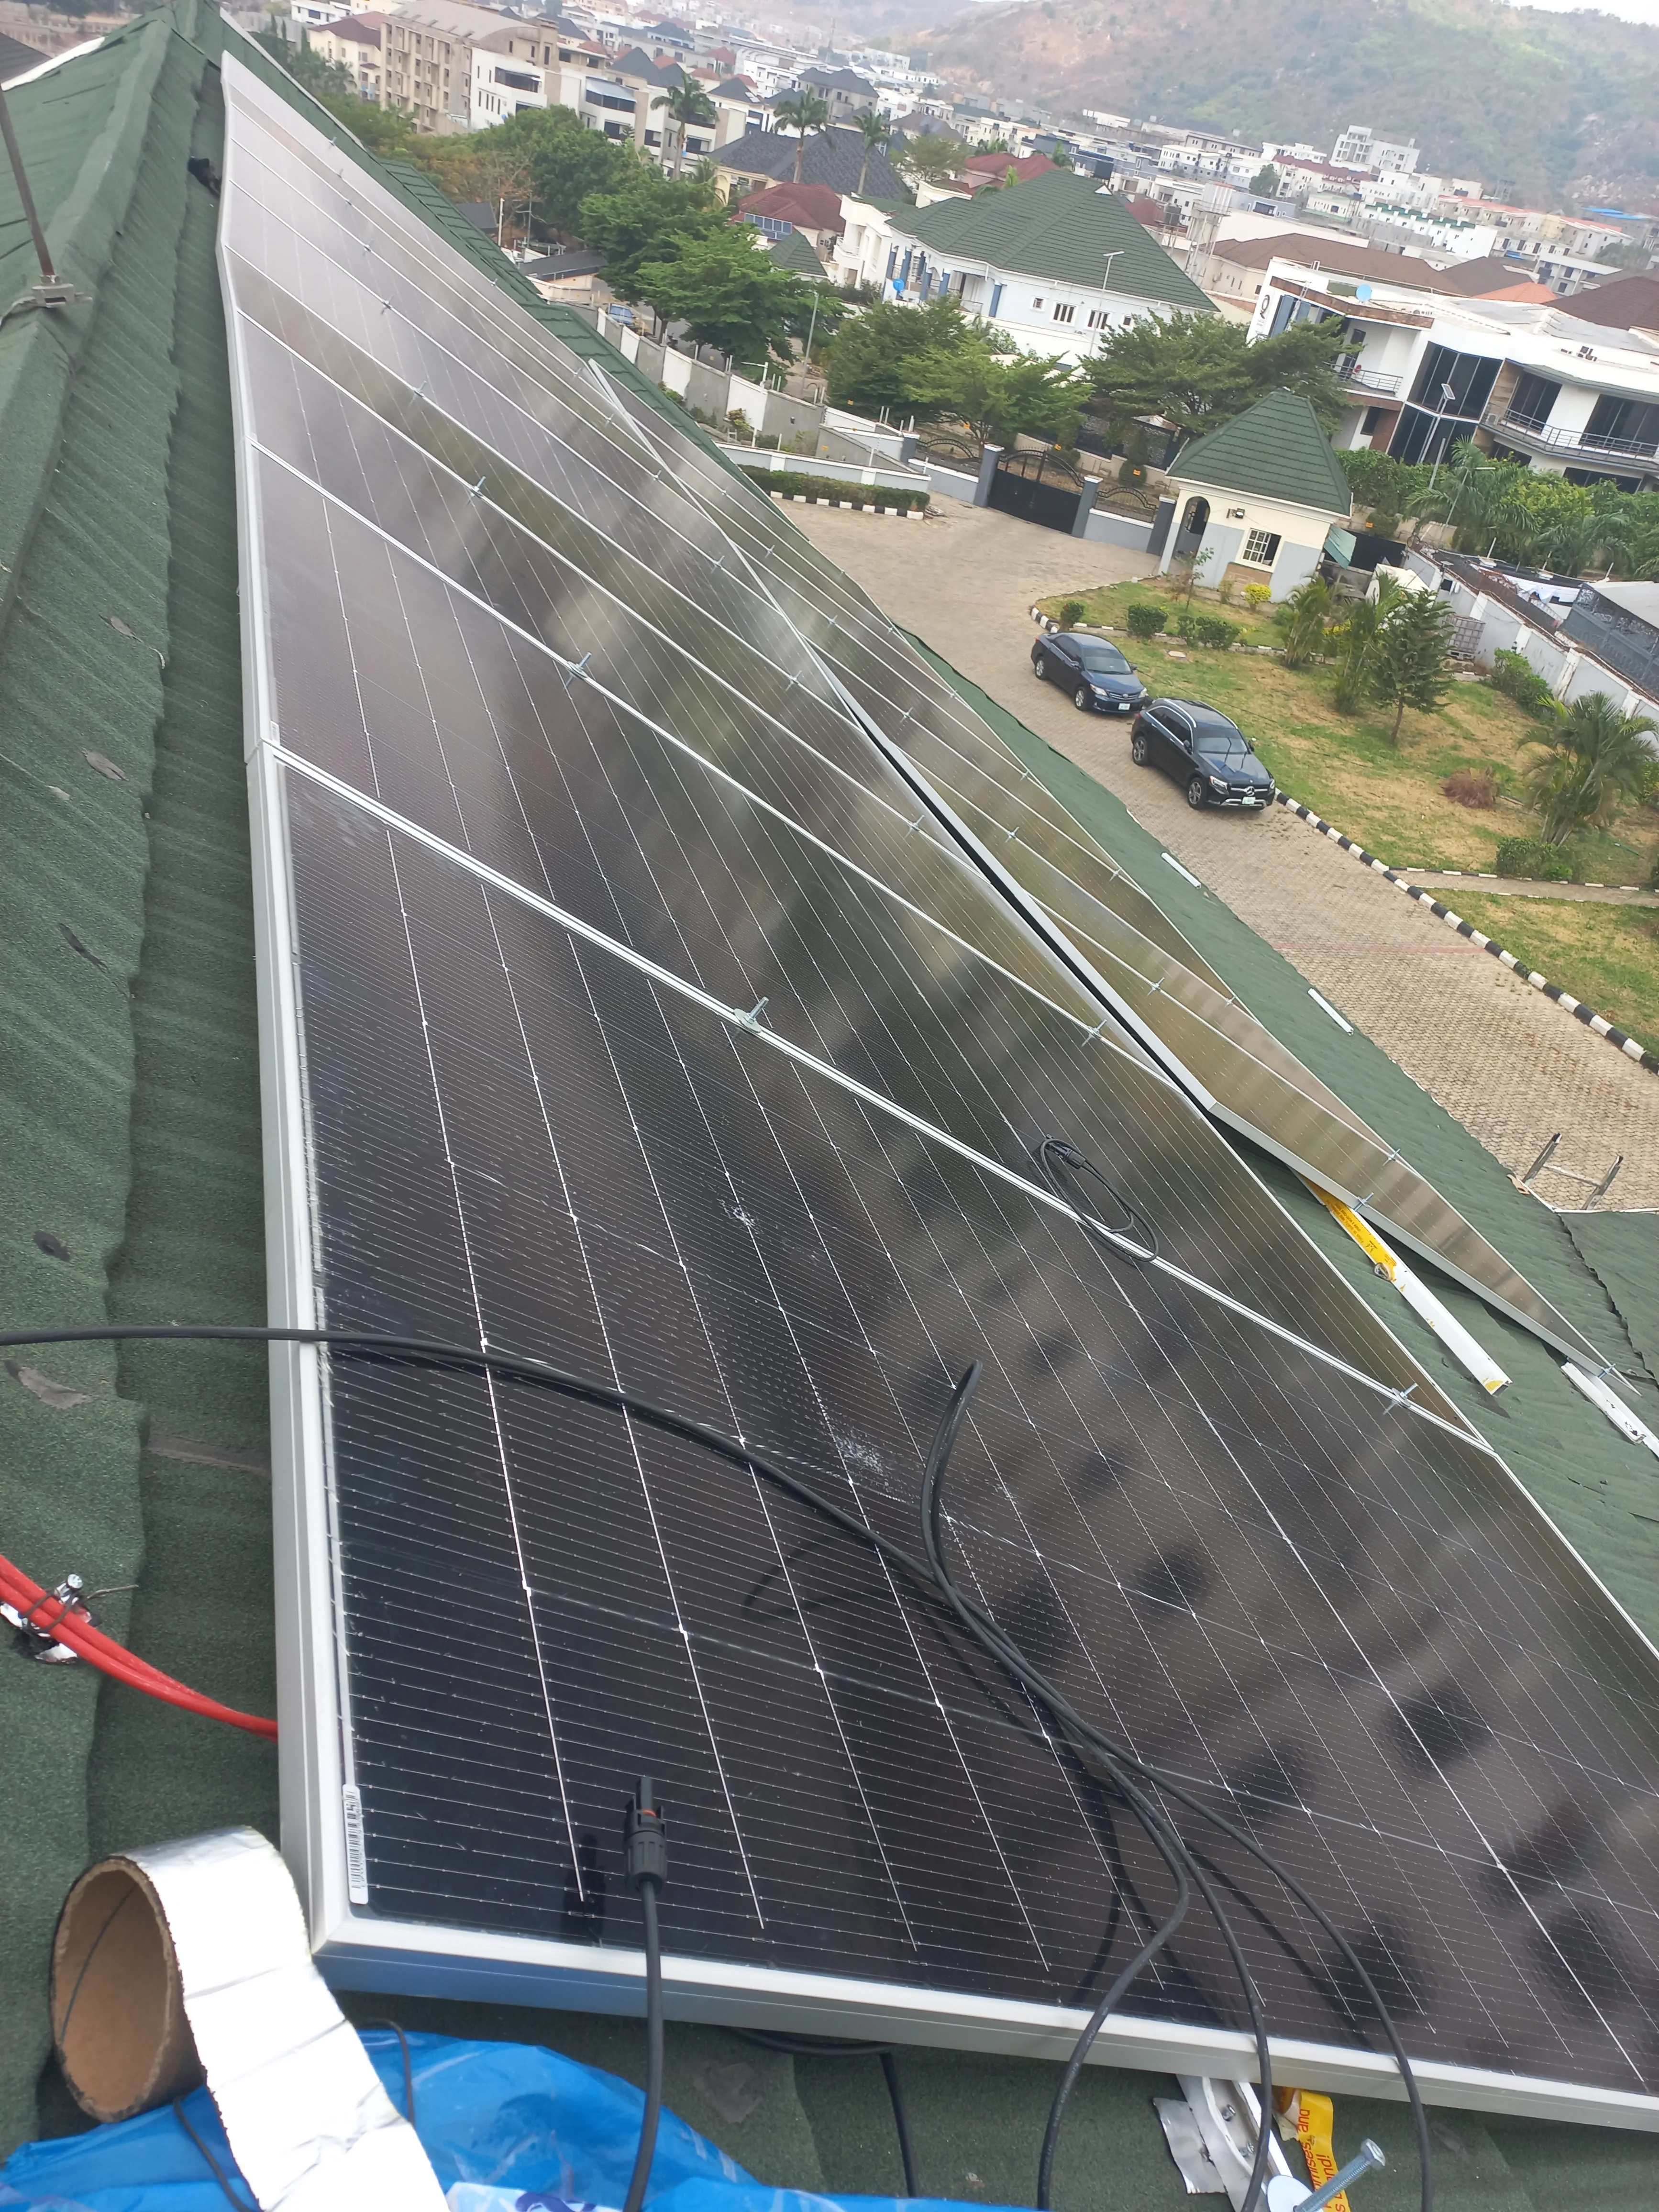
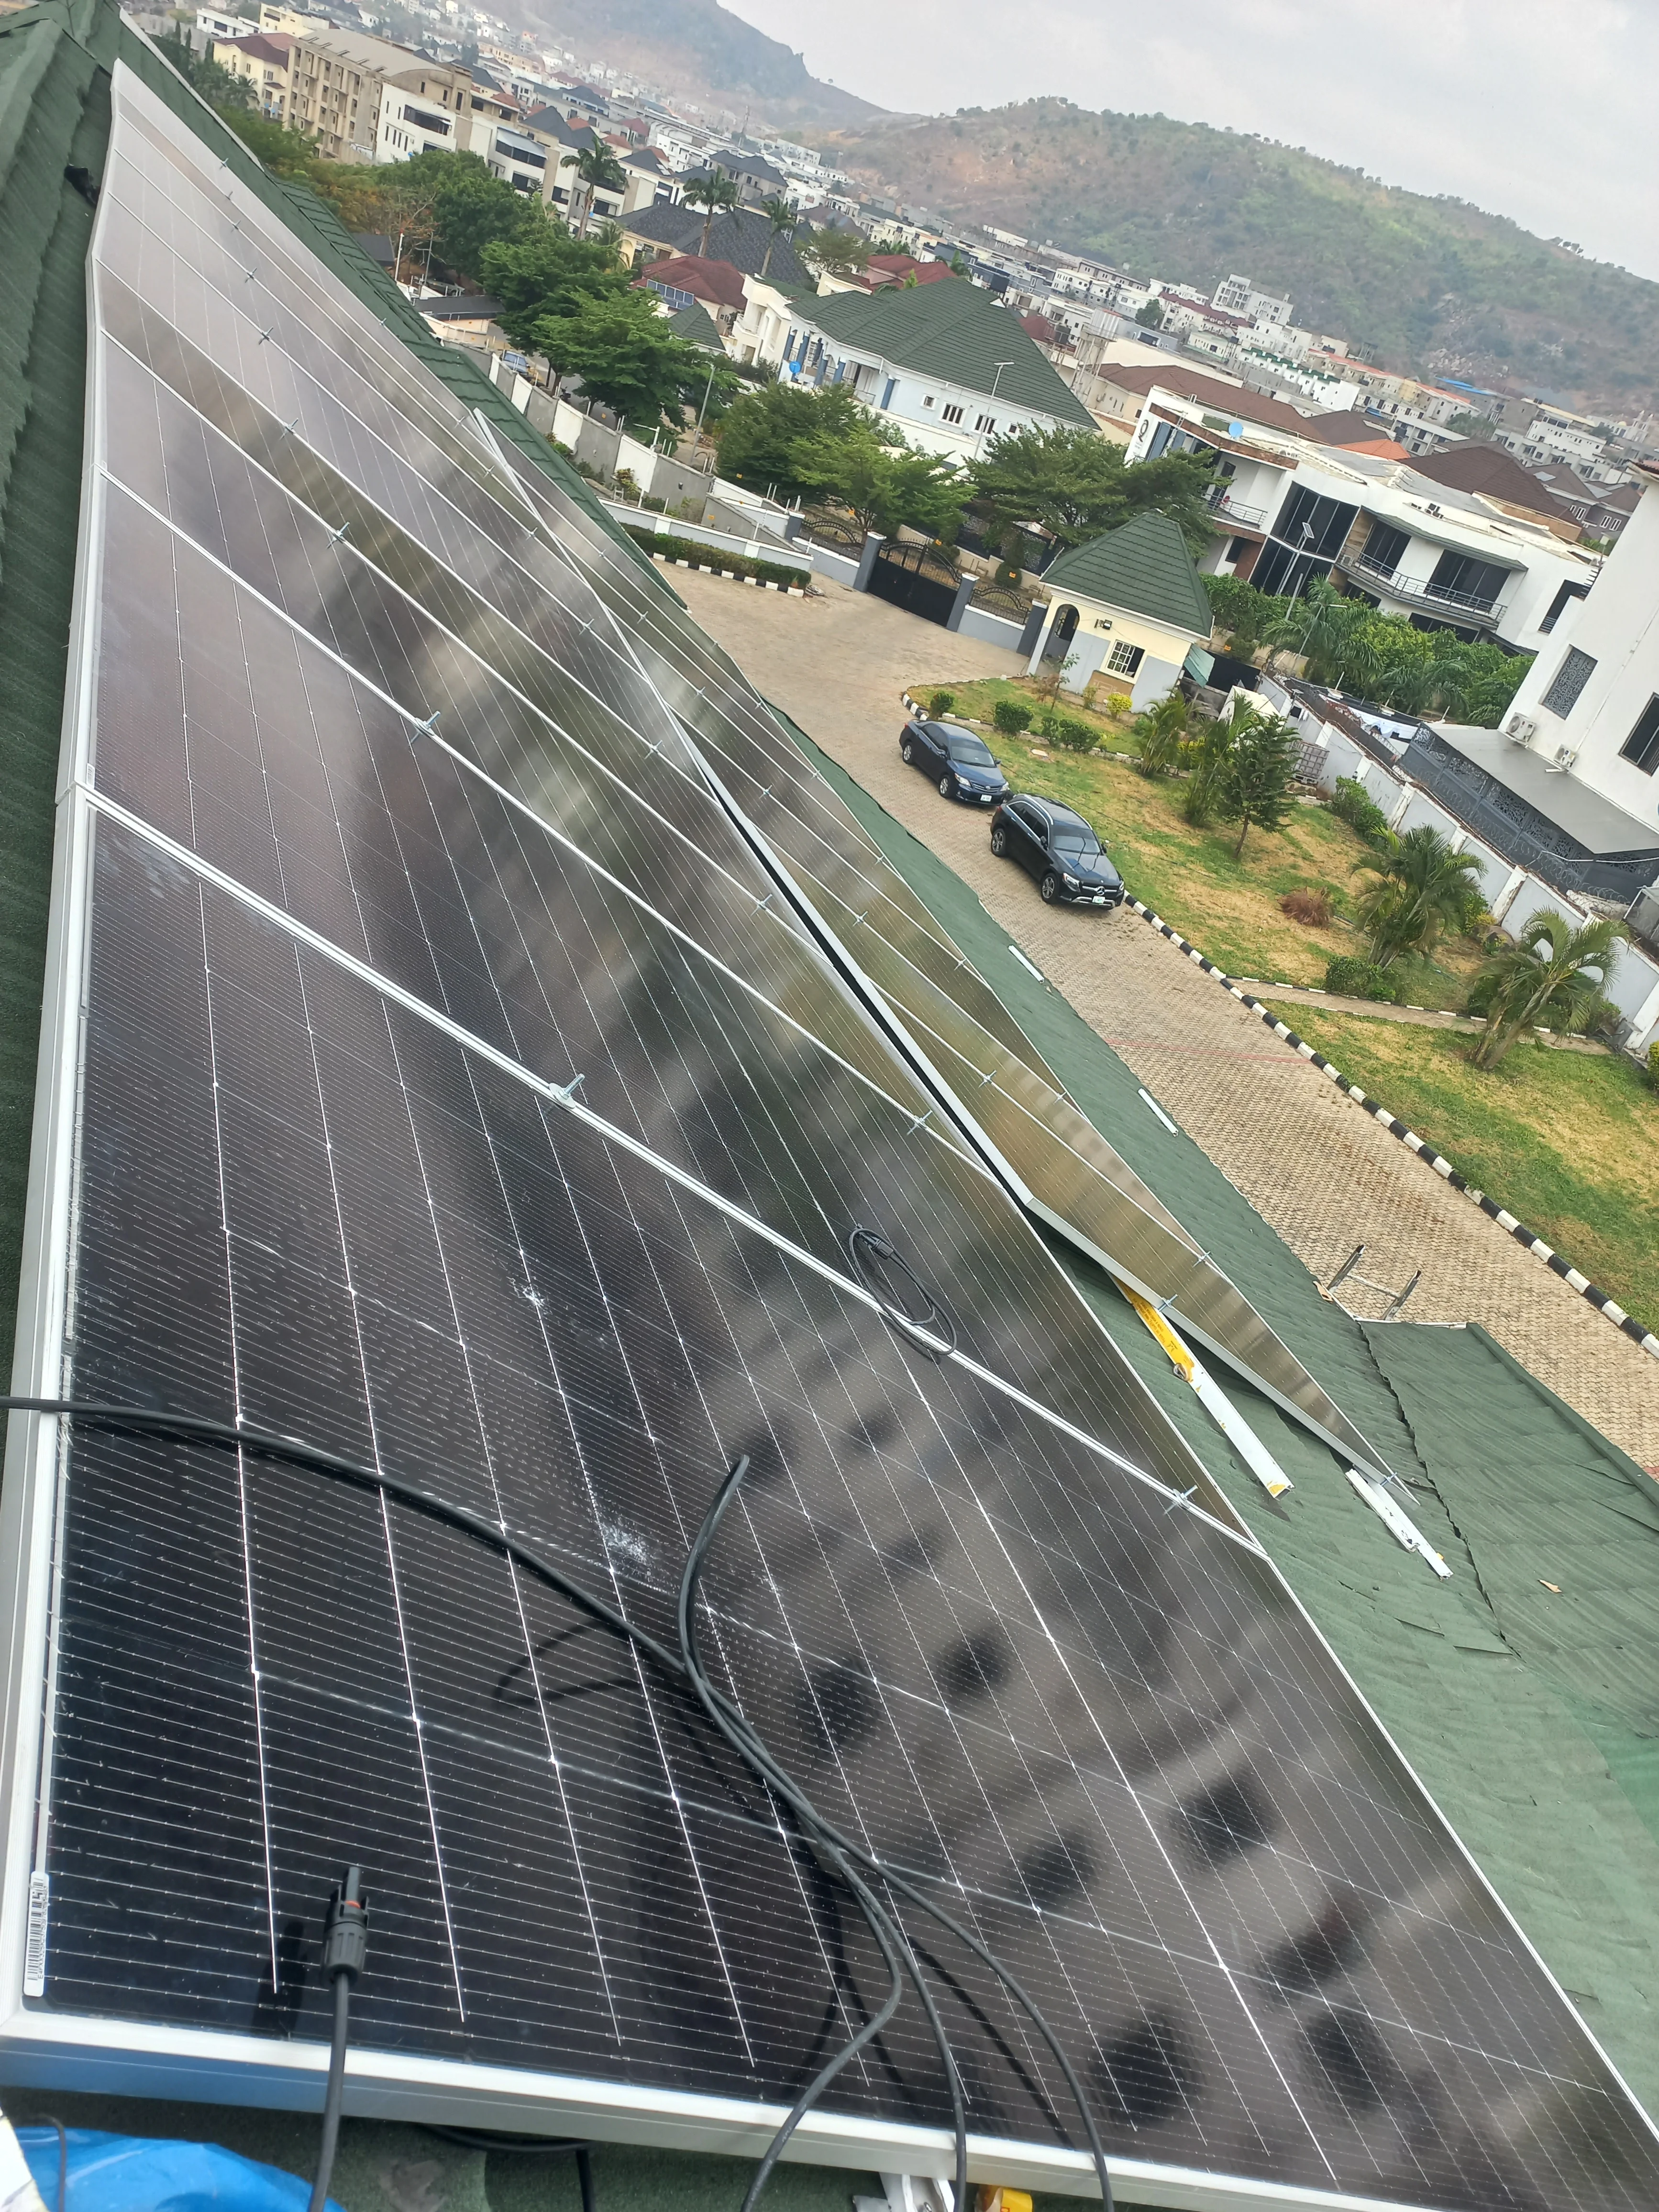
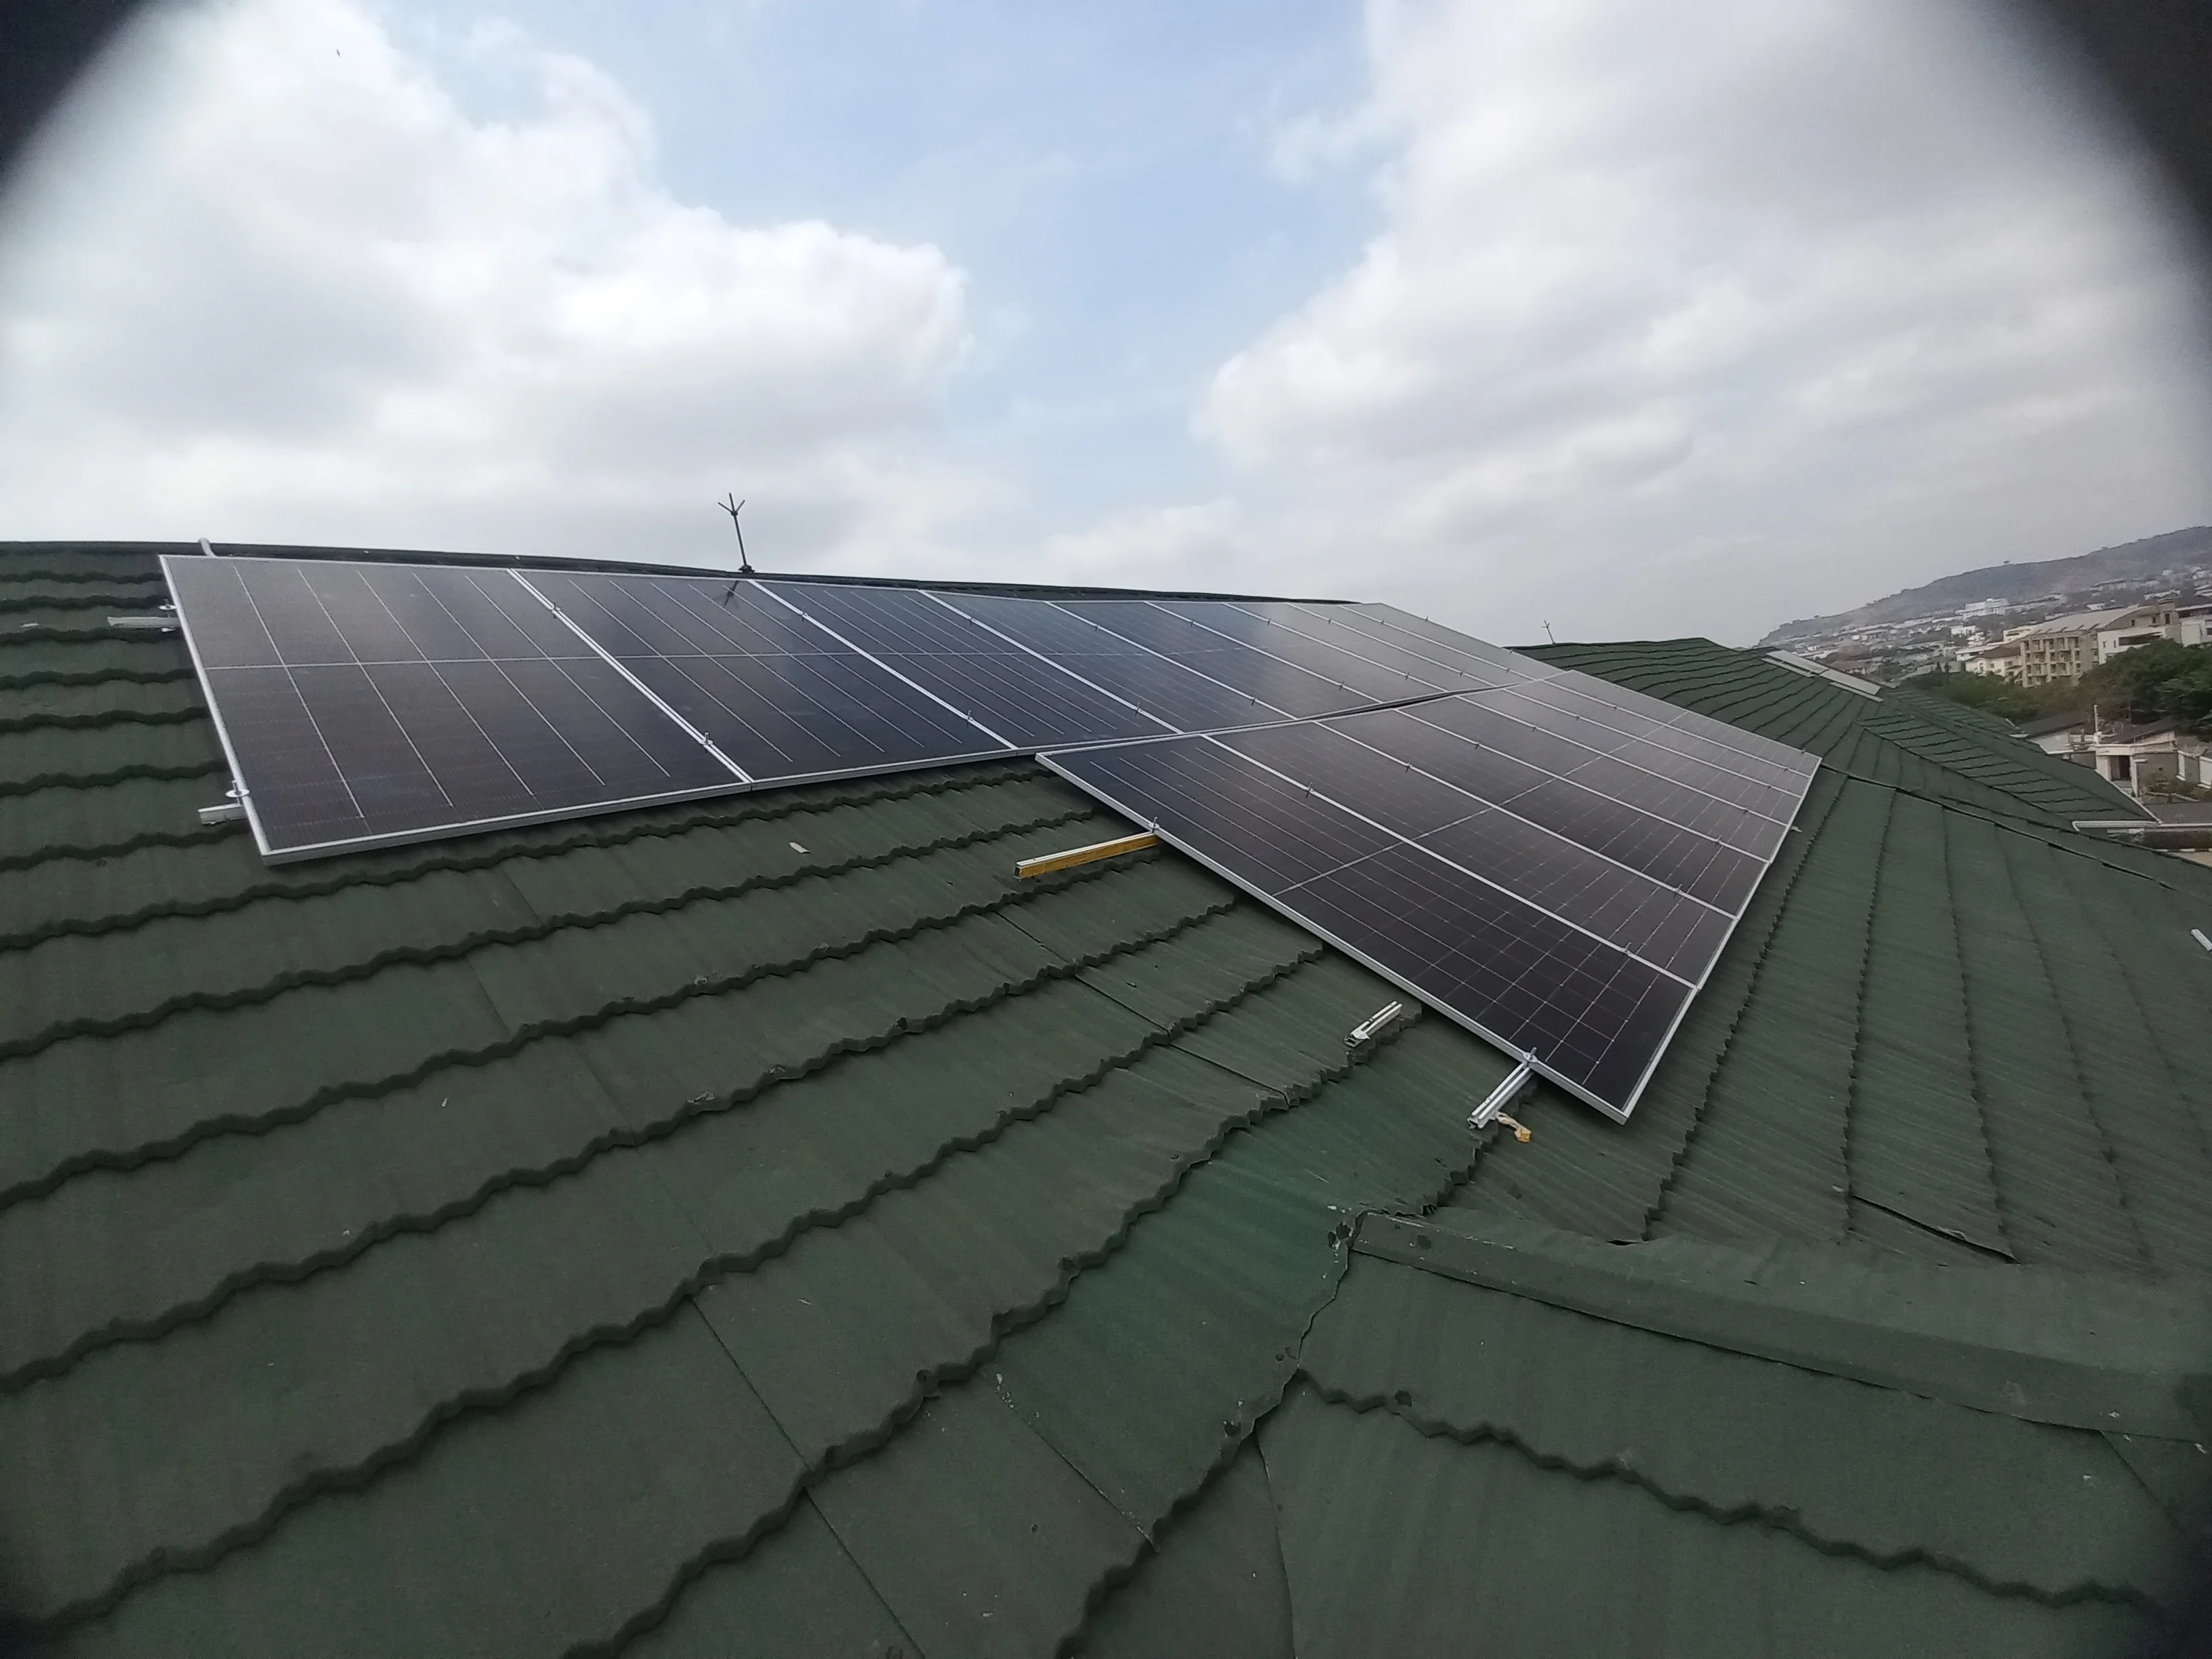
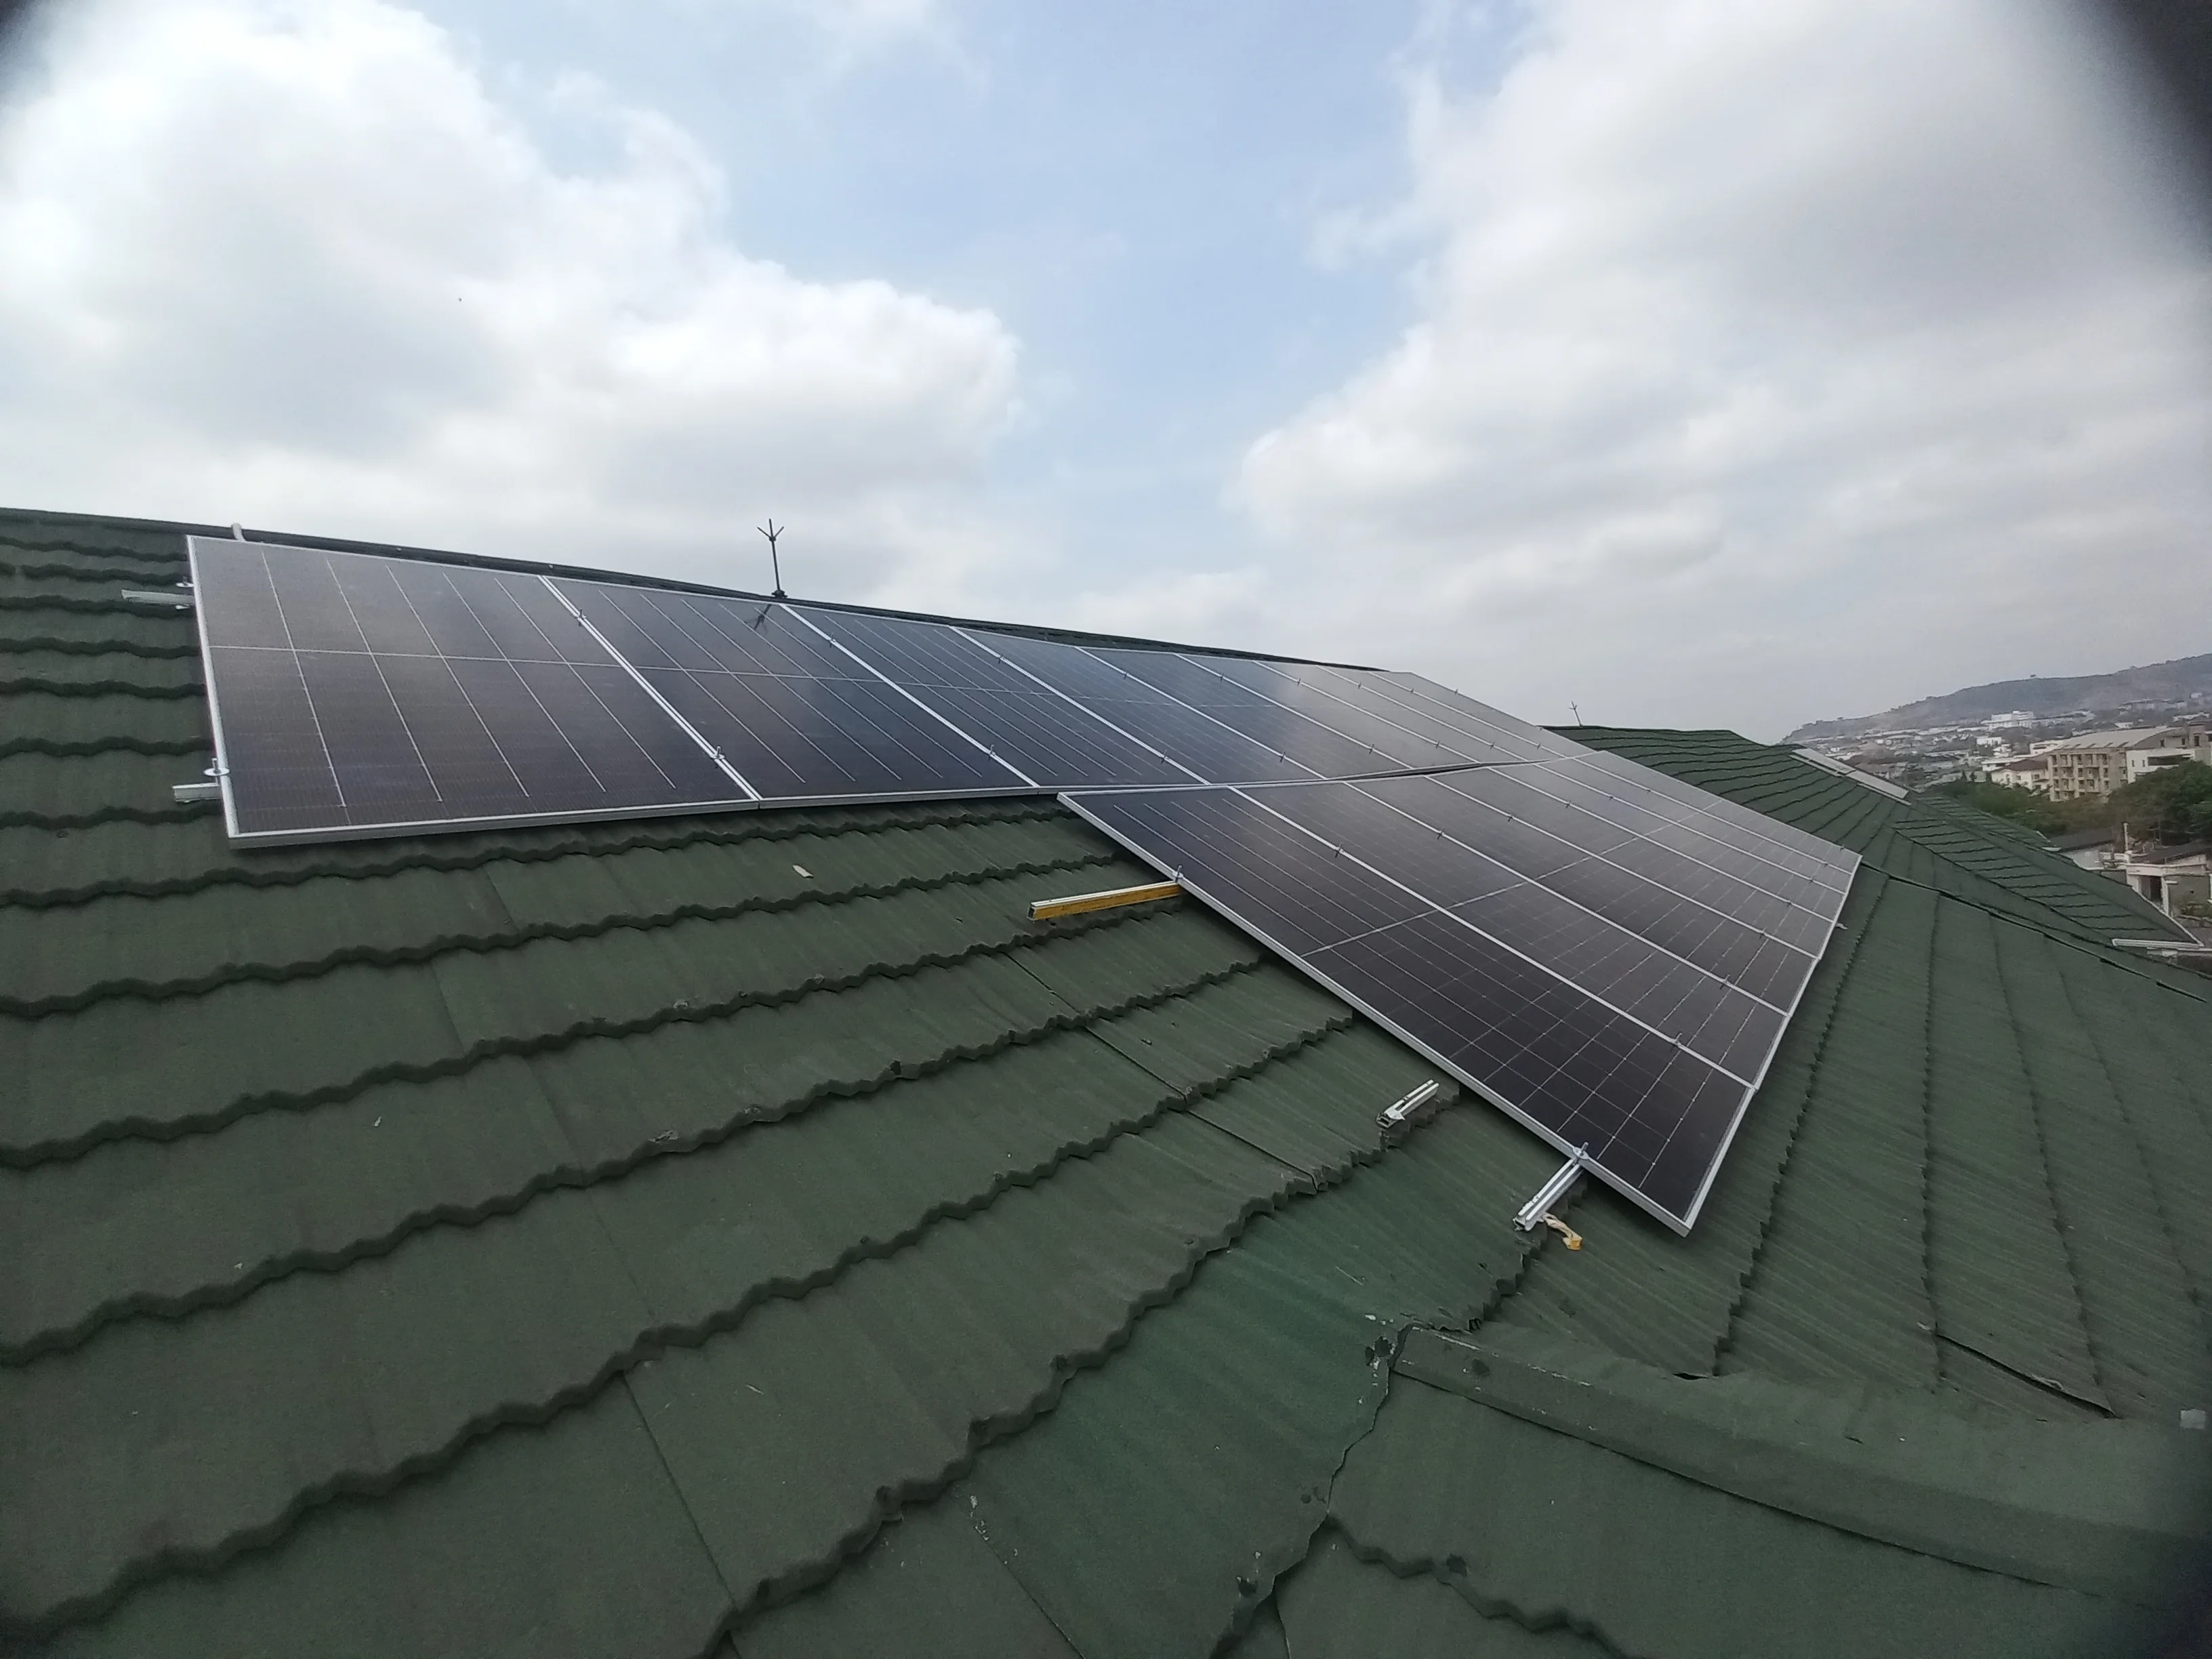
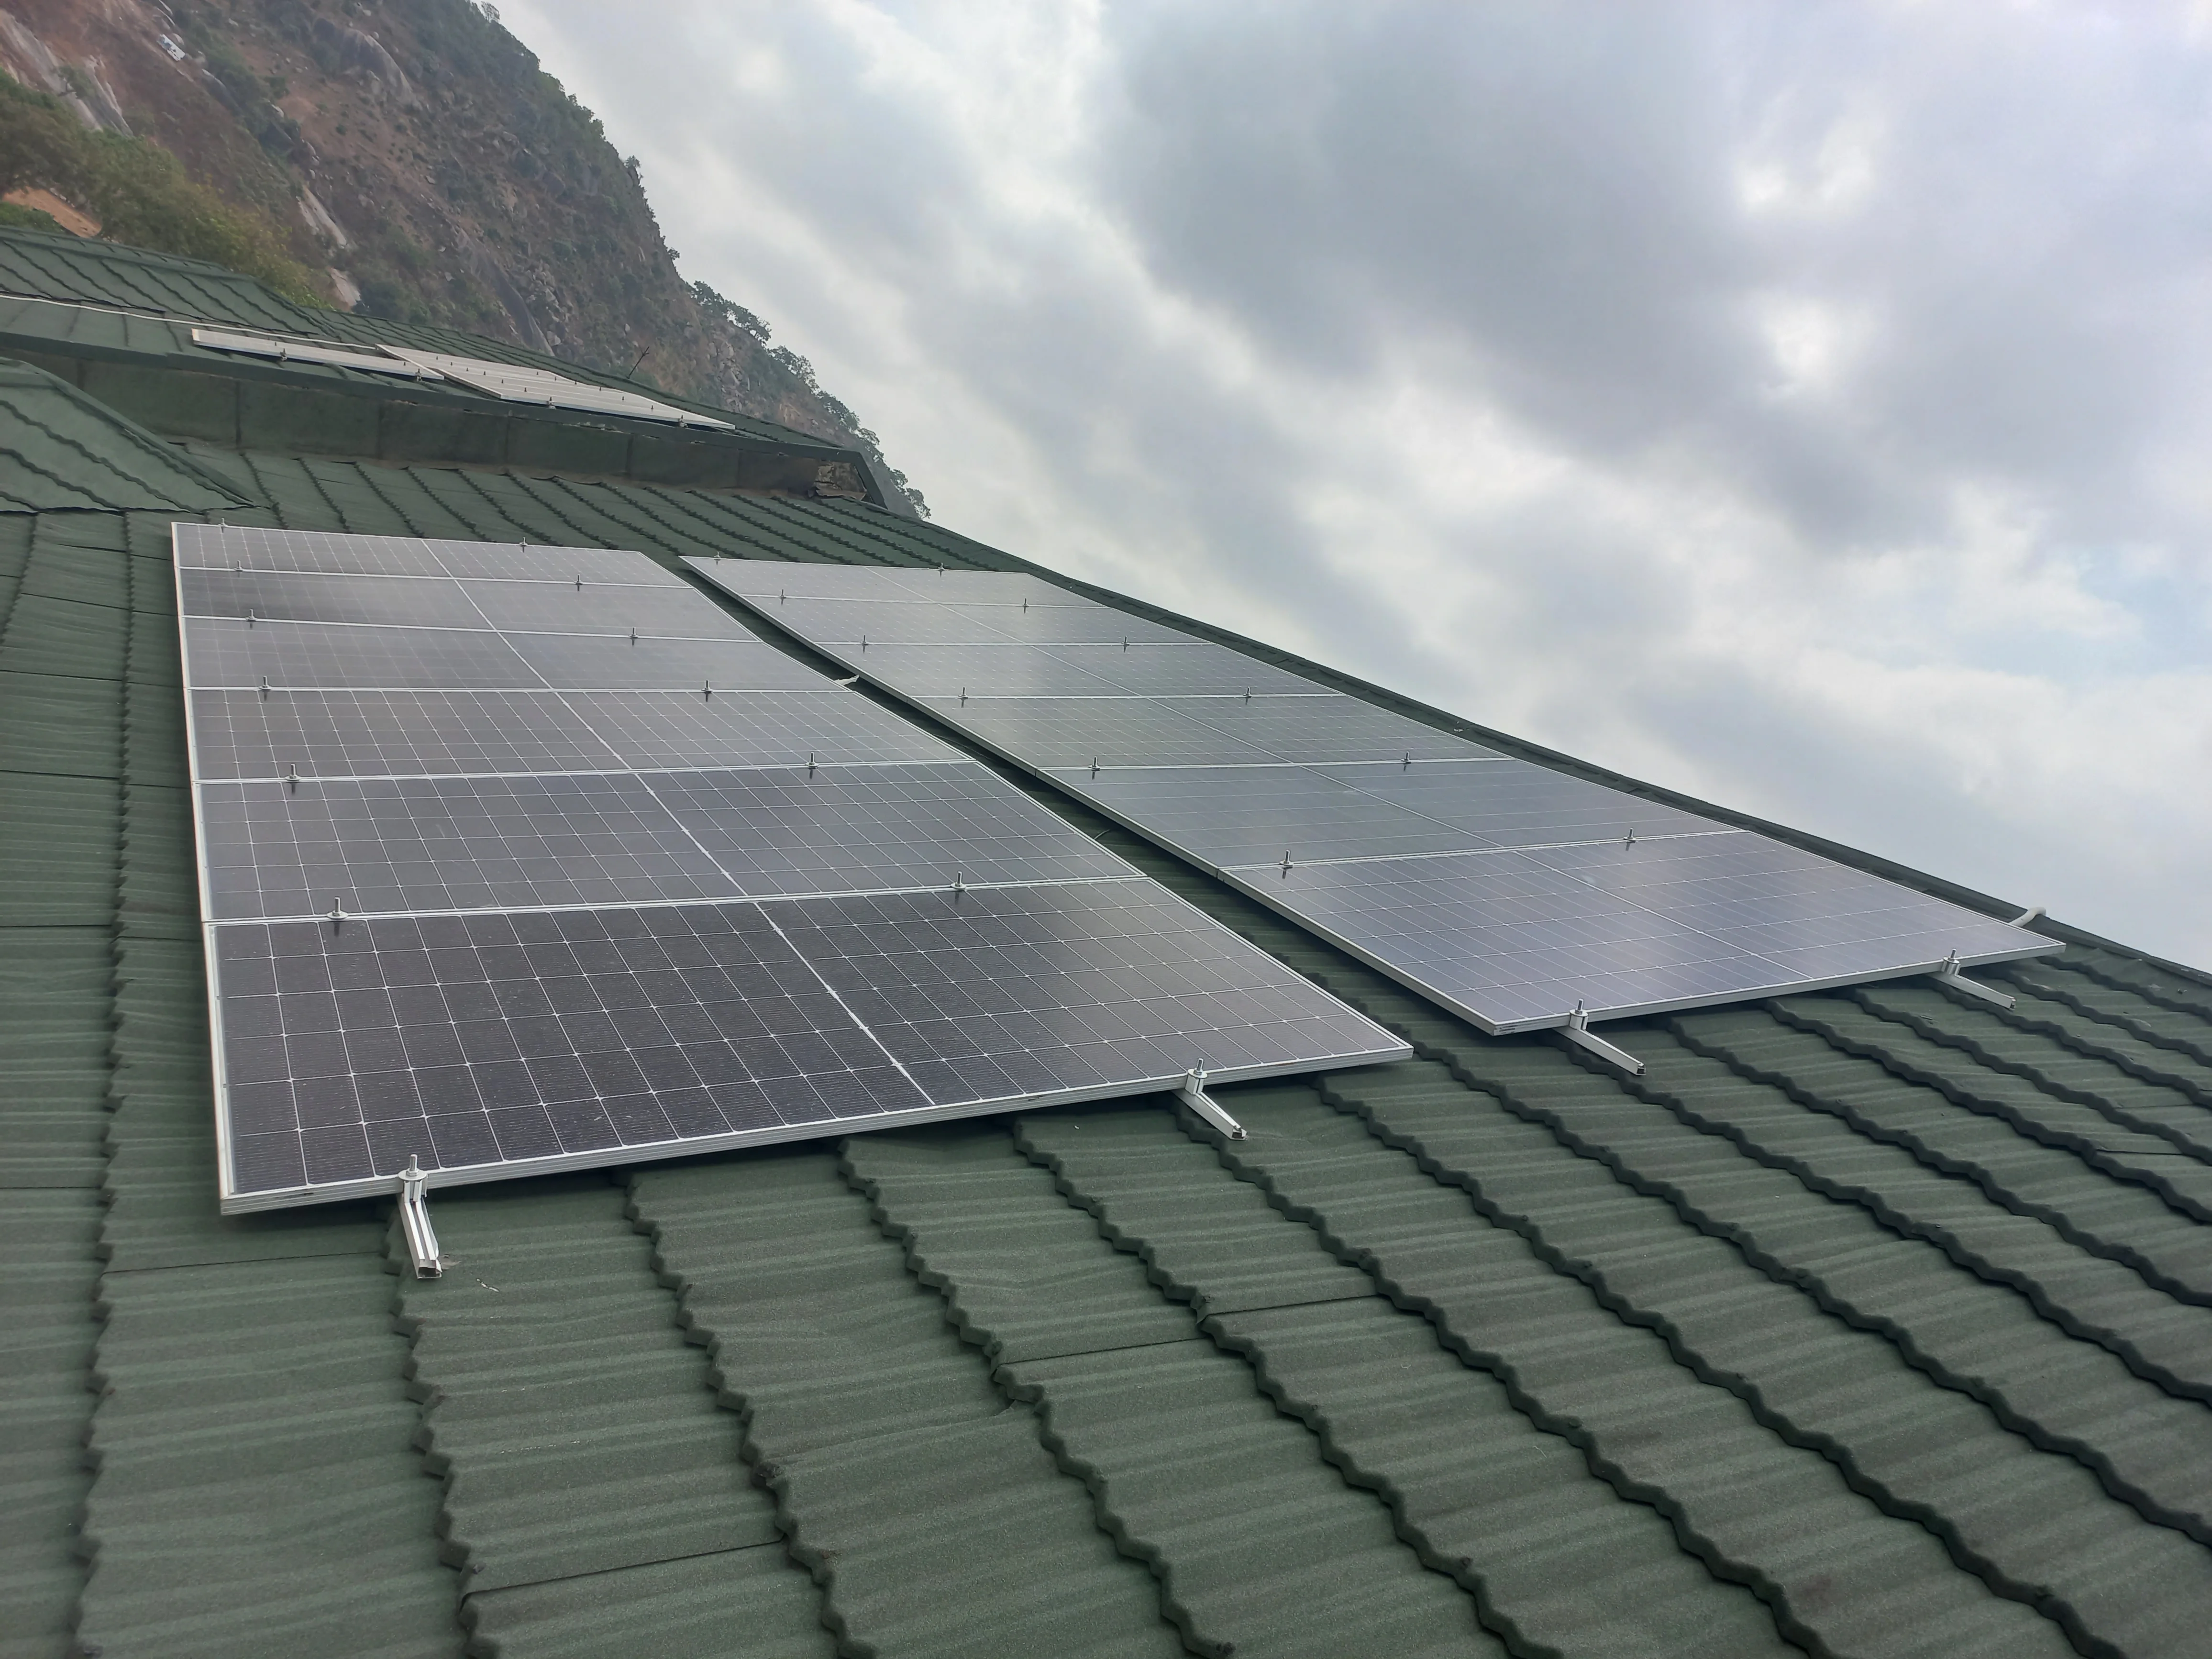
The team accessed the roof of the two-story building via extension ladders. Shingle tiles were carefully lifted to install aluminum mounting rails directly onto the roof structure. The 16 Jinko Solar 620W bifacial panels (32.4kg each) were hoisted to the rooftop using ropes, then secured to the mounting rails with mid and end clamps. Panels were arranged in rows across both wings of the building's roof. DC cables from each string were routed down through conduit to the indoor inverter room.
Phase 6: Commissioning & Testing
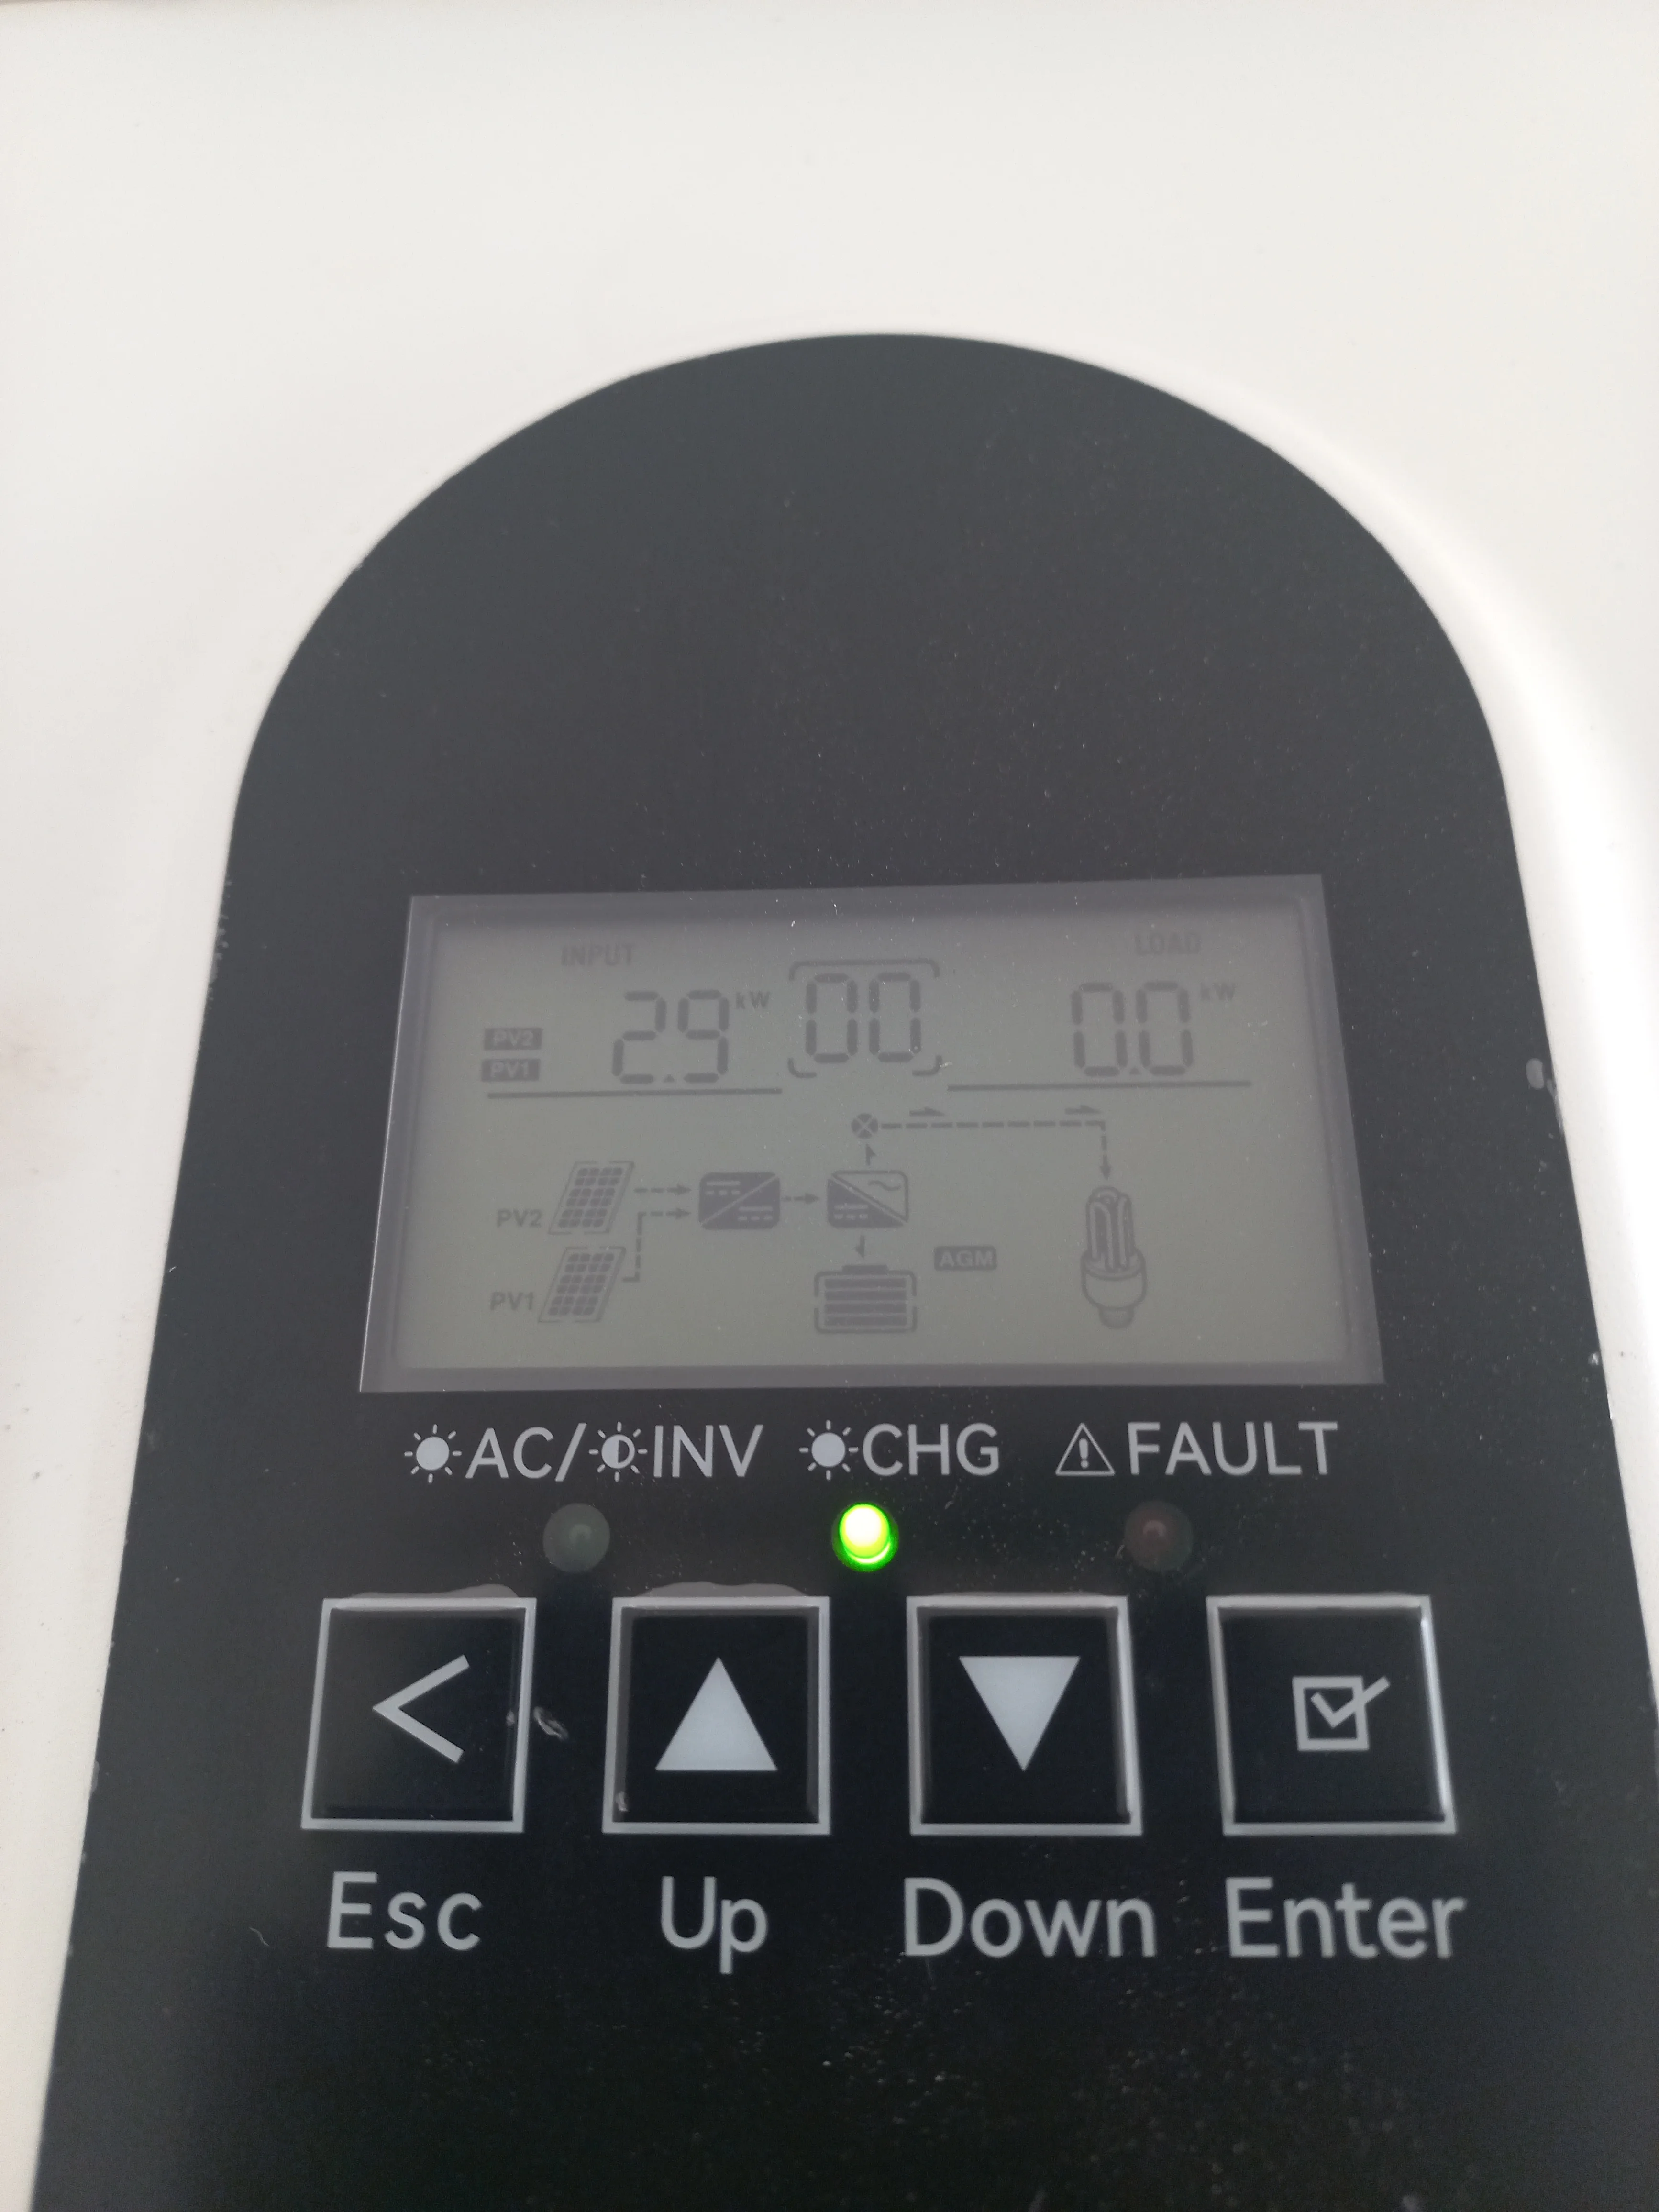
After all connections were made, the system was powered on for commissioning. The inverter's LCD display confirmed successful operation, showing 2.9kW of solar input from the PV strings with the green INV (inverter) LED illuminated and no fault indicators. The energy flow diagram on the display showed power flowing from PV1 and PV2 through the inverter to the batteries and load.
Safety Considerations
- All personnel wore PPE (hard hats with engineering insignia, high-visibility reflective vests, work gloves, safety boots)
- Proper hand tools and power tools used (INGCO cordless drills, hammer drills, cable strippers, crimping tools)
- DC surge protection on both PV strings (CHINT SPDs)
- 250A MCCB main disconnect for isolation
- AC surge protection and MCBs on output side
- Cables routed through flexible conduit for protection
- Extension ladders secured for rooftop access
- Panels hoisted with ropes to avoid manual carry up ladders
Performance Results
Upon commissioning, the system demonstrated successful operation with the following observed metrics:
- Solar Input (observed): 2.9kW at time of testing (partial cloud conditions)
- Peak Array Capacity: 9.92kWp (16 x 620W)
- Battery Storage: 30kWh total (2 x 15kWh SUNESS units)
- Inverter Status: INV LED green, no faults, energy flow confirmed on LCD
- Battery Status: Both units showing green LED indicators (charging/active)
- System Efficiency: 85-90% overall system efficiency
What I Learned
This solar installation project provided hands-on experience across the full lifecycle of a residential solar power system. Key takeaways include:
- End-to-end solar PV system design — from panel string sizing to inverter MPPT configuration
- Working with LiFePO4 battery systems (CATL cells) and understanding BMS communication
- Practical rooftop panel mounting on stone-coated metal roofs, including rail installation and panel hoisting techniques
- Electrical distribution board assembly with DC/AC surge protection, MCCBs, and MCBs
- Hybrid inverter commissioning and energy flow monitoring via LCD interface
- Importance of proper PPE and safe working-at-height practices during rooftop installations
Demonstration & Resources
A detailed video walkthrough of the solar installation project will be added here, covering the complete process from equipment unboxing to final commissioning.
Video will be added soon — placeholder for YouTube embed
- YouTube Video: Watch the Full Installation Process (Coming Soon)
Project Gallery
Complete visual documentation of the solar installation, organized by phase. Click any image to view it full-size in a new tab.
Phase 1 — Equipment Arrival & Unboxing
SUNESS LiFePO4 battery crates (EC-48300F, 137kg each) and AlpSolarr inverter unboxing with mounting hardware.
Phase 2 — Site Preparation & Cable Trunking
Measuring, cutting, and installing cable trunking on the equipment wall. Preparing spools of red and black DC cable.

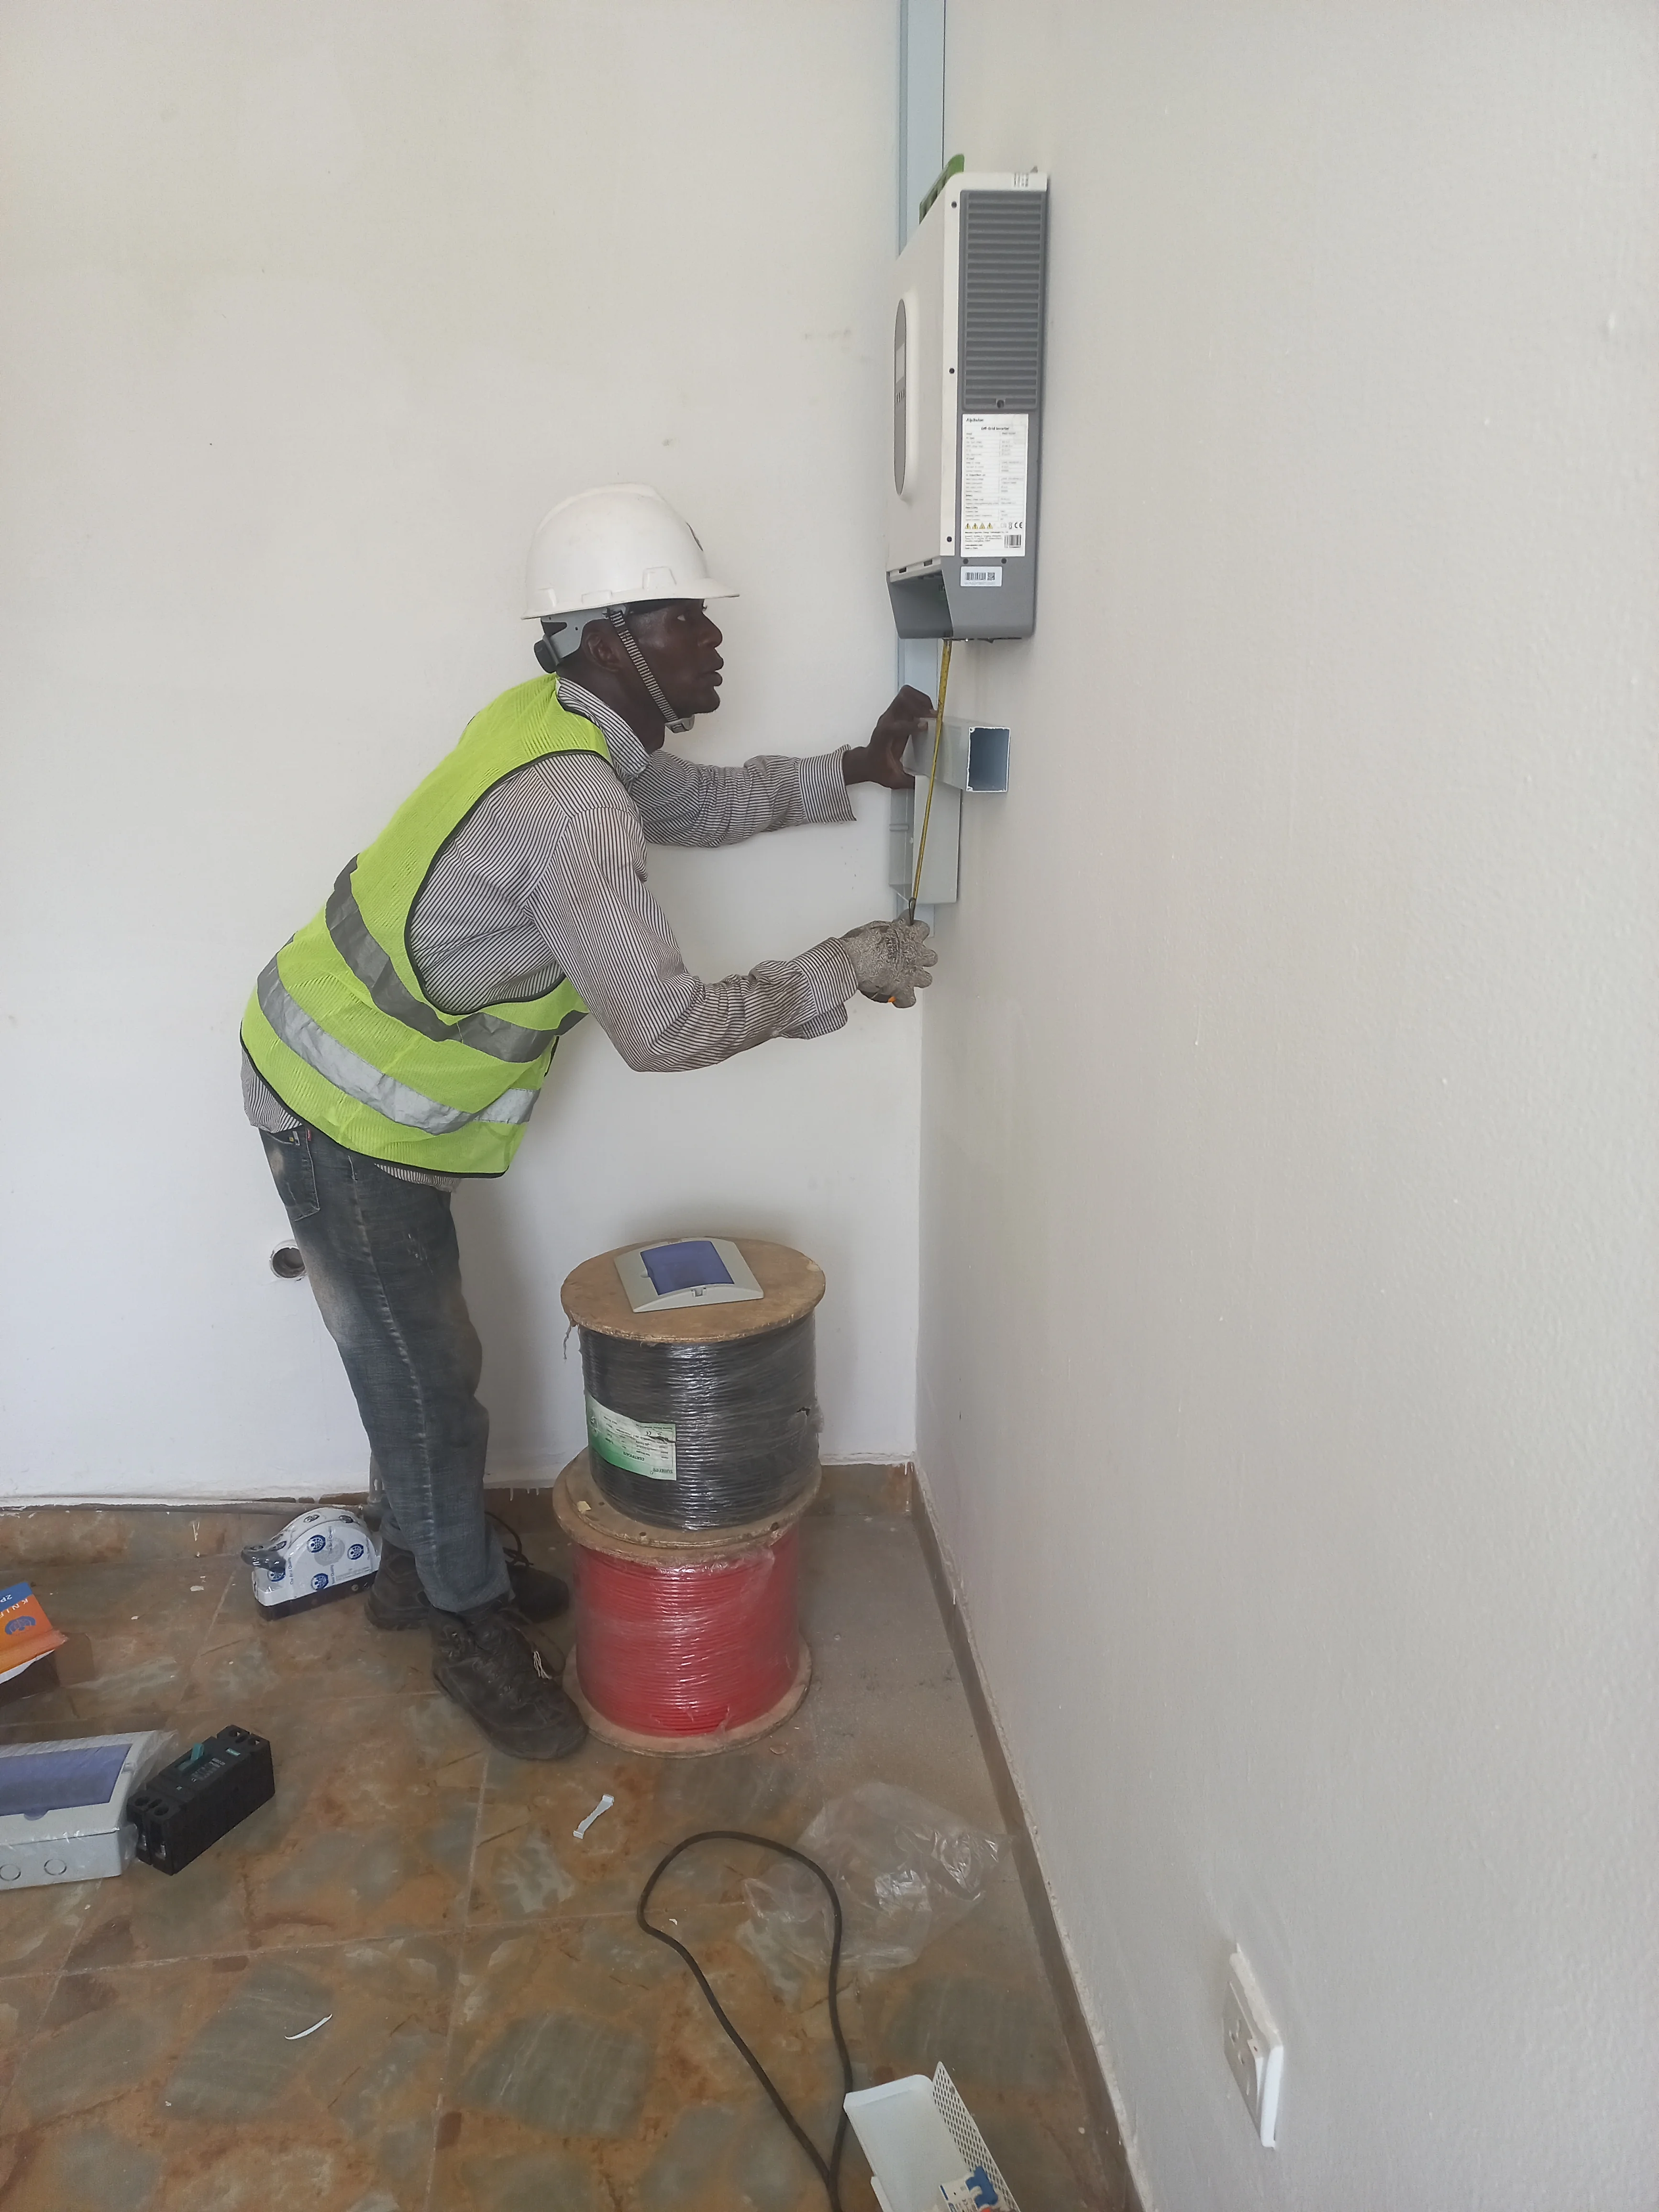
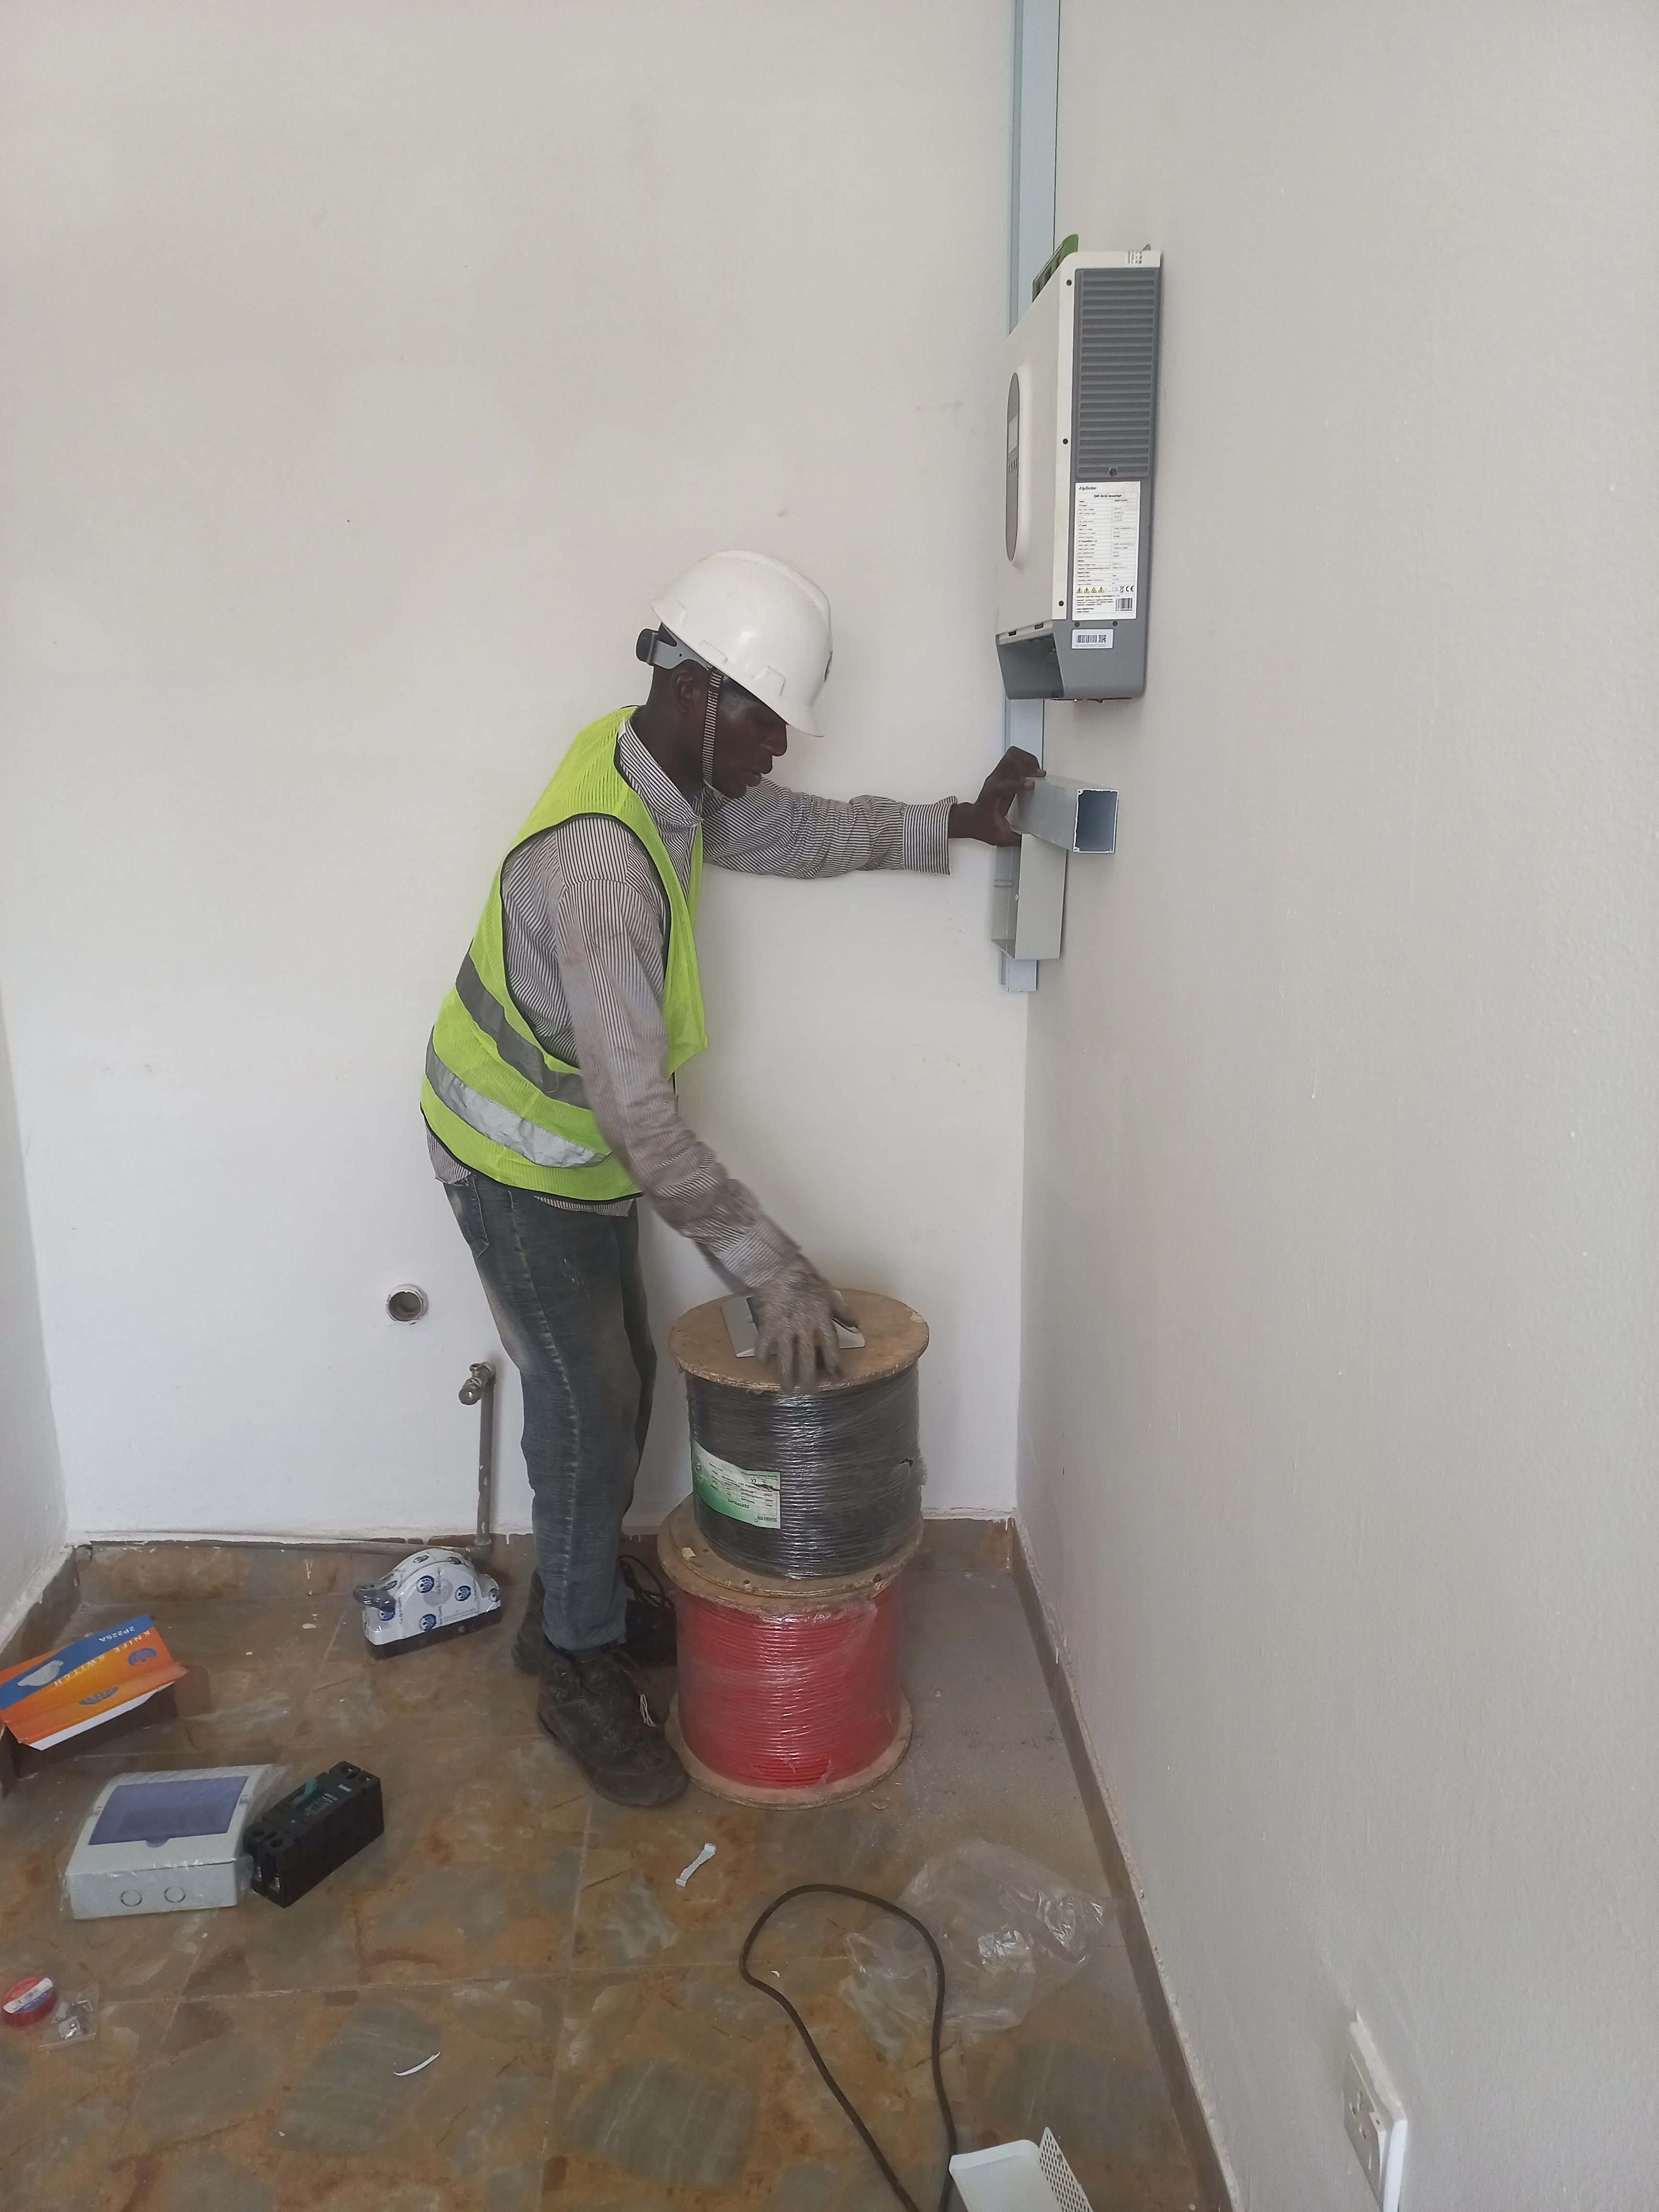
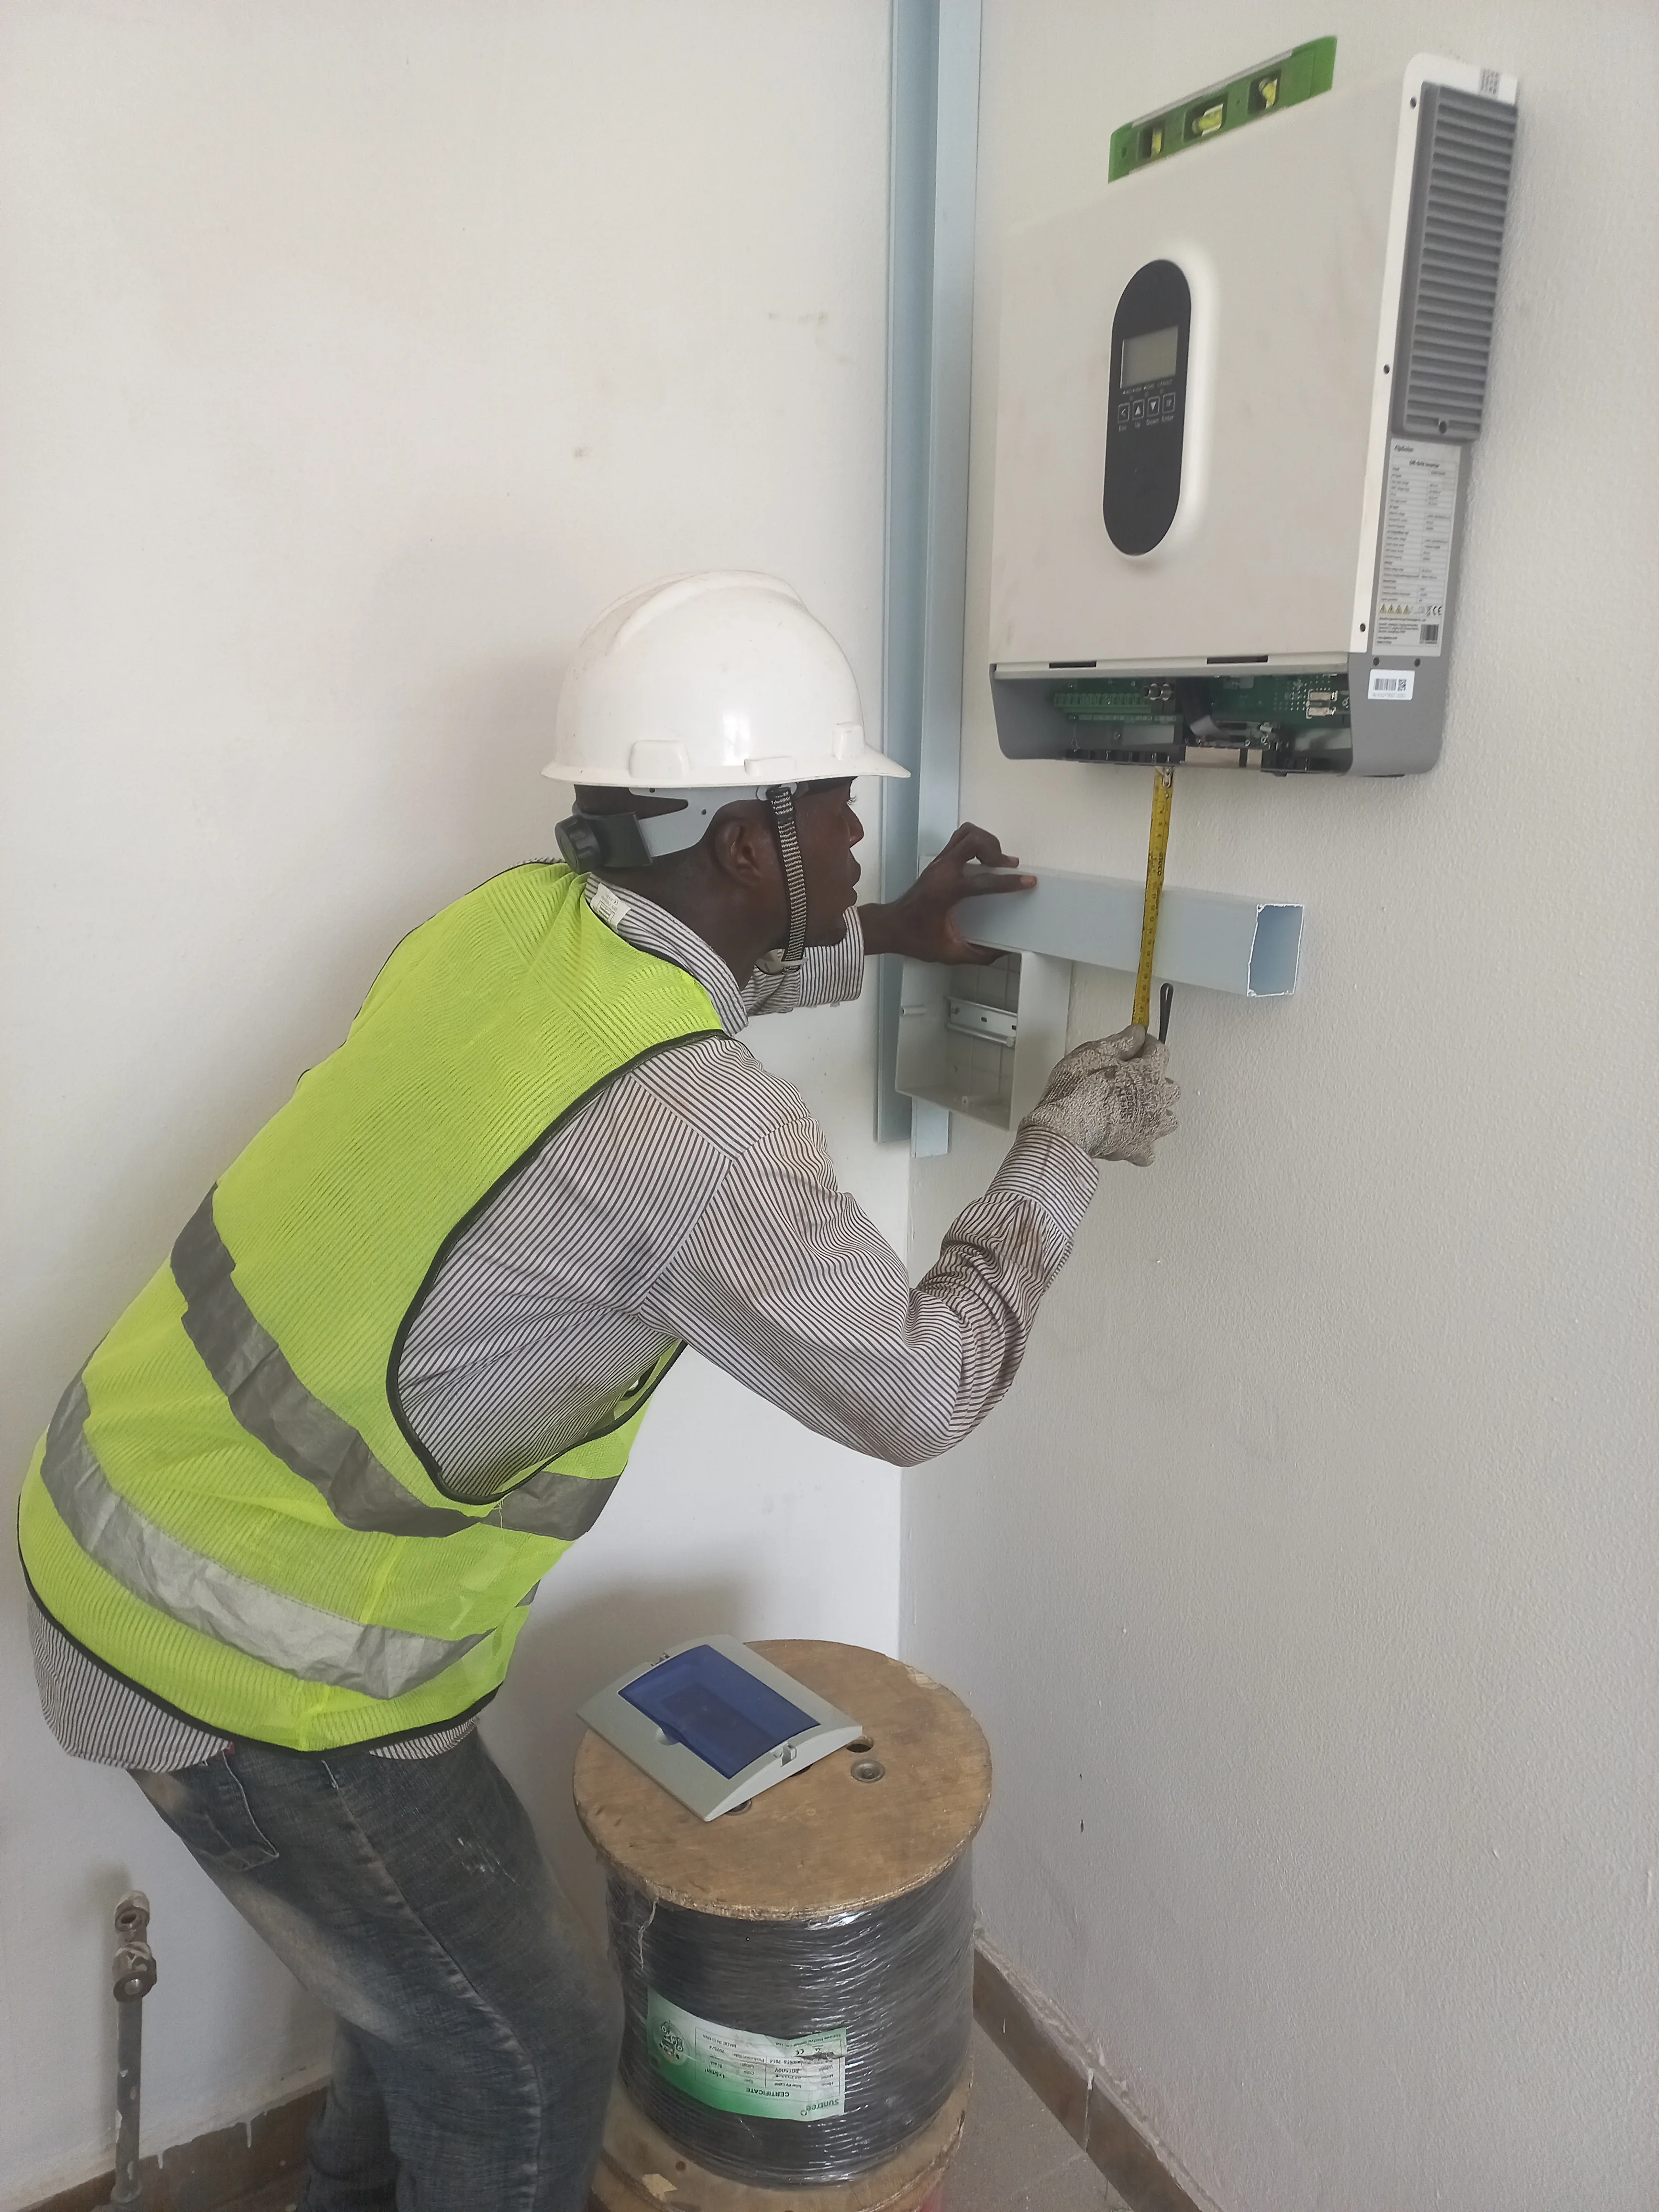
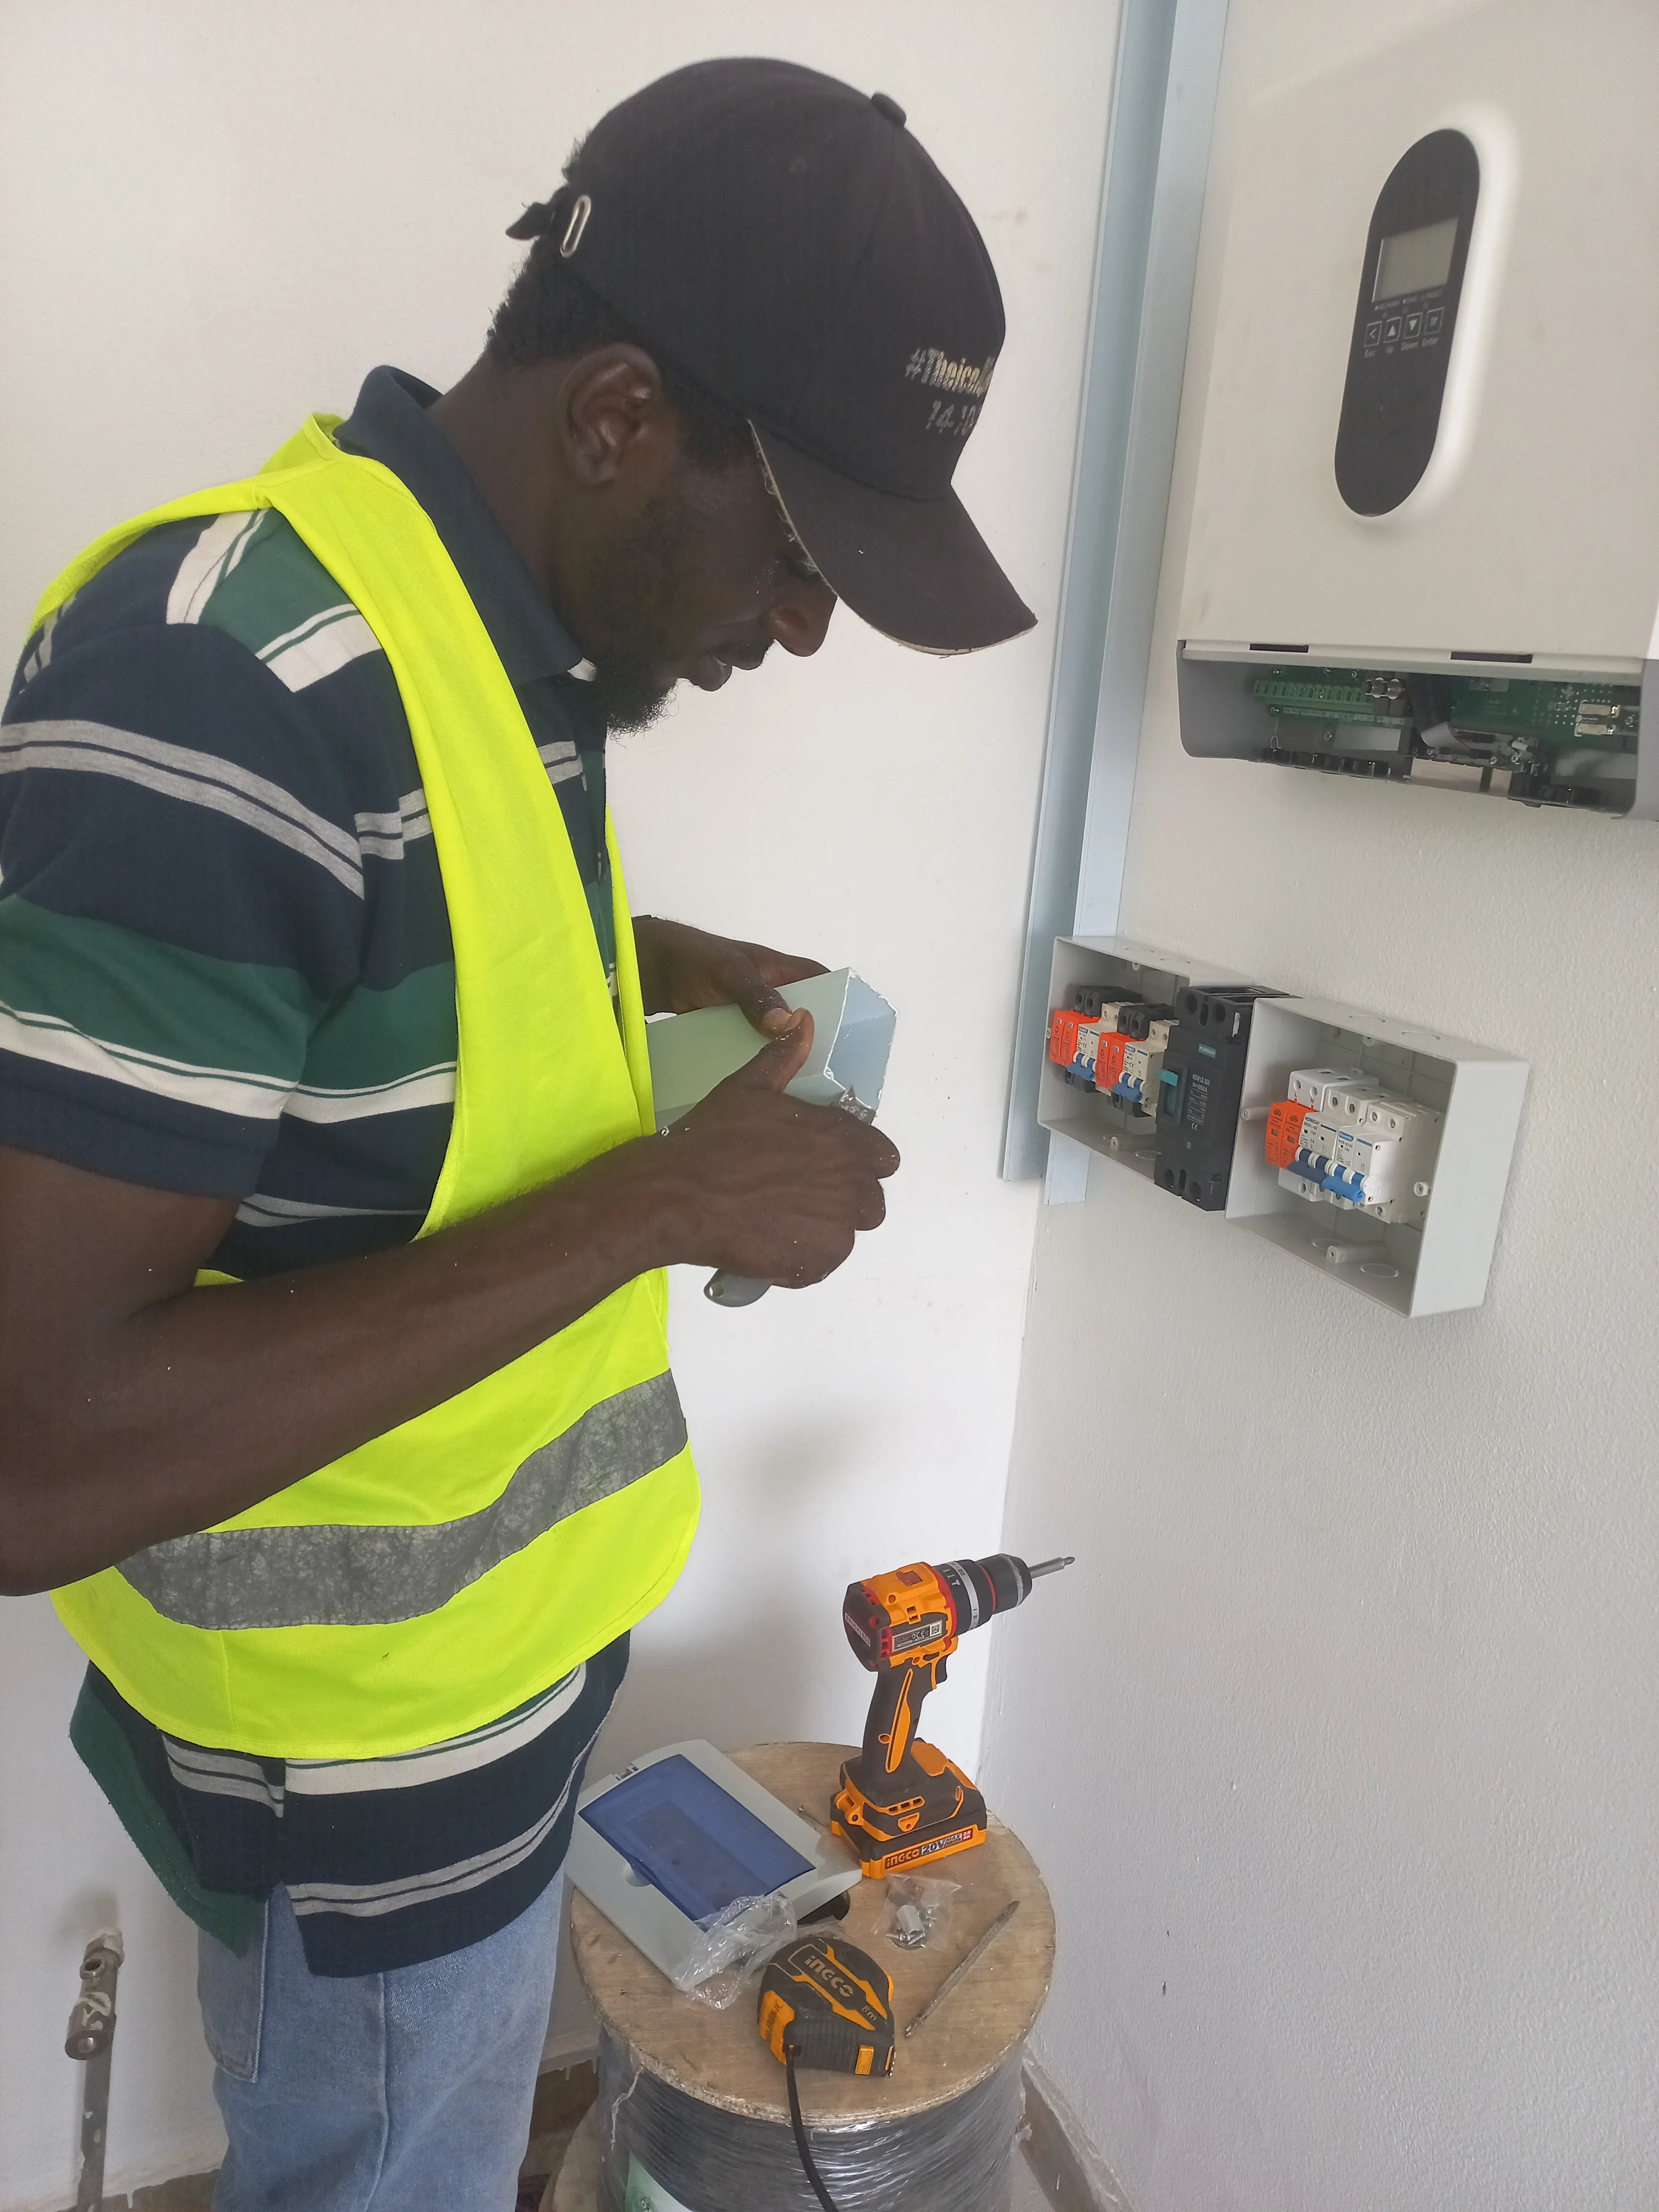
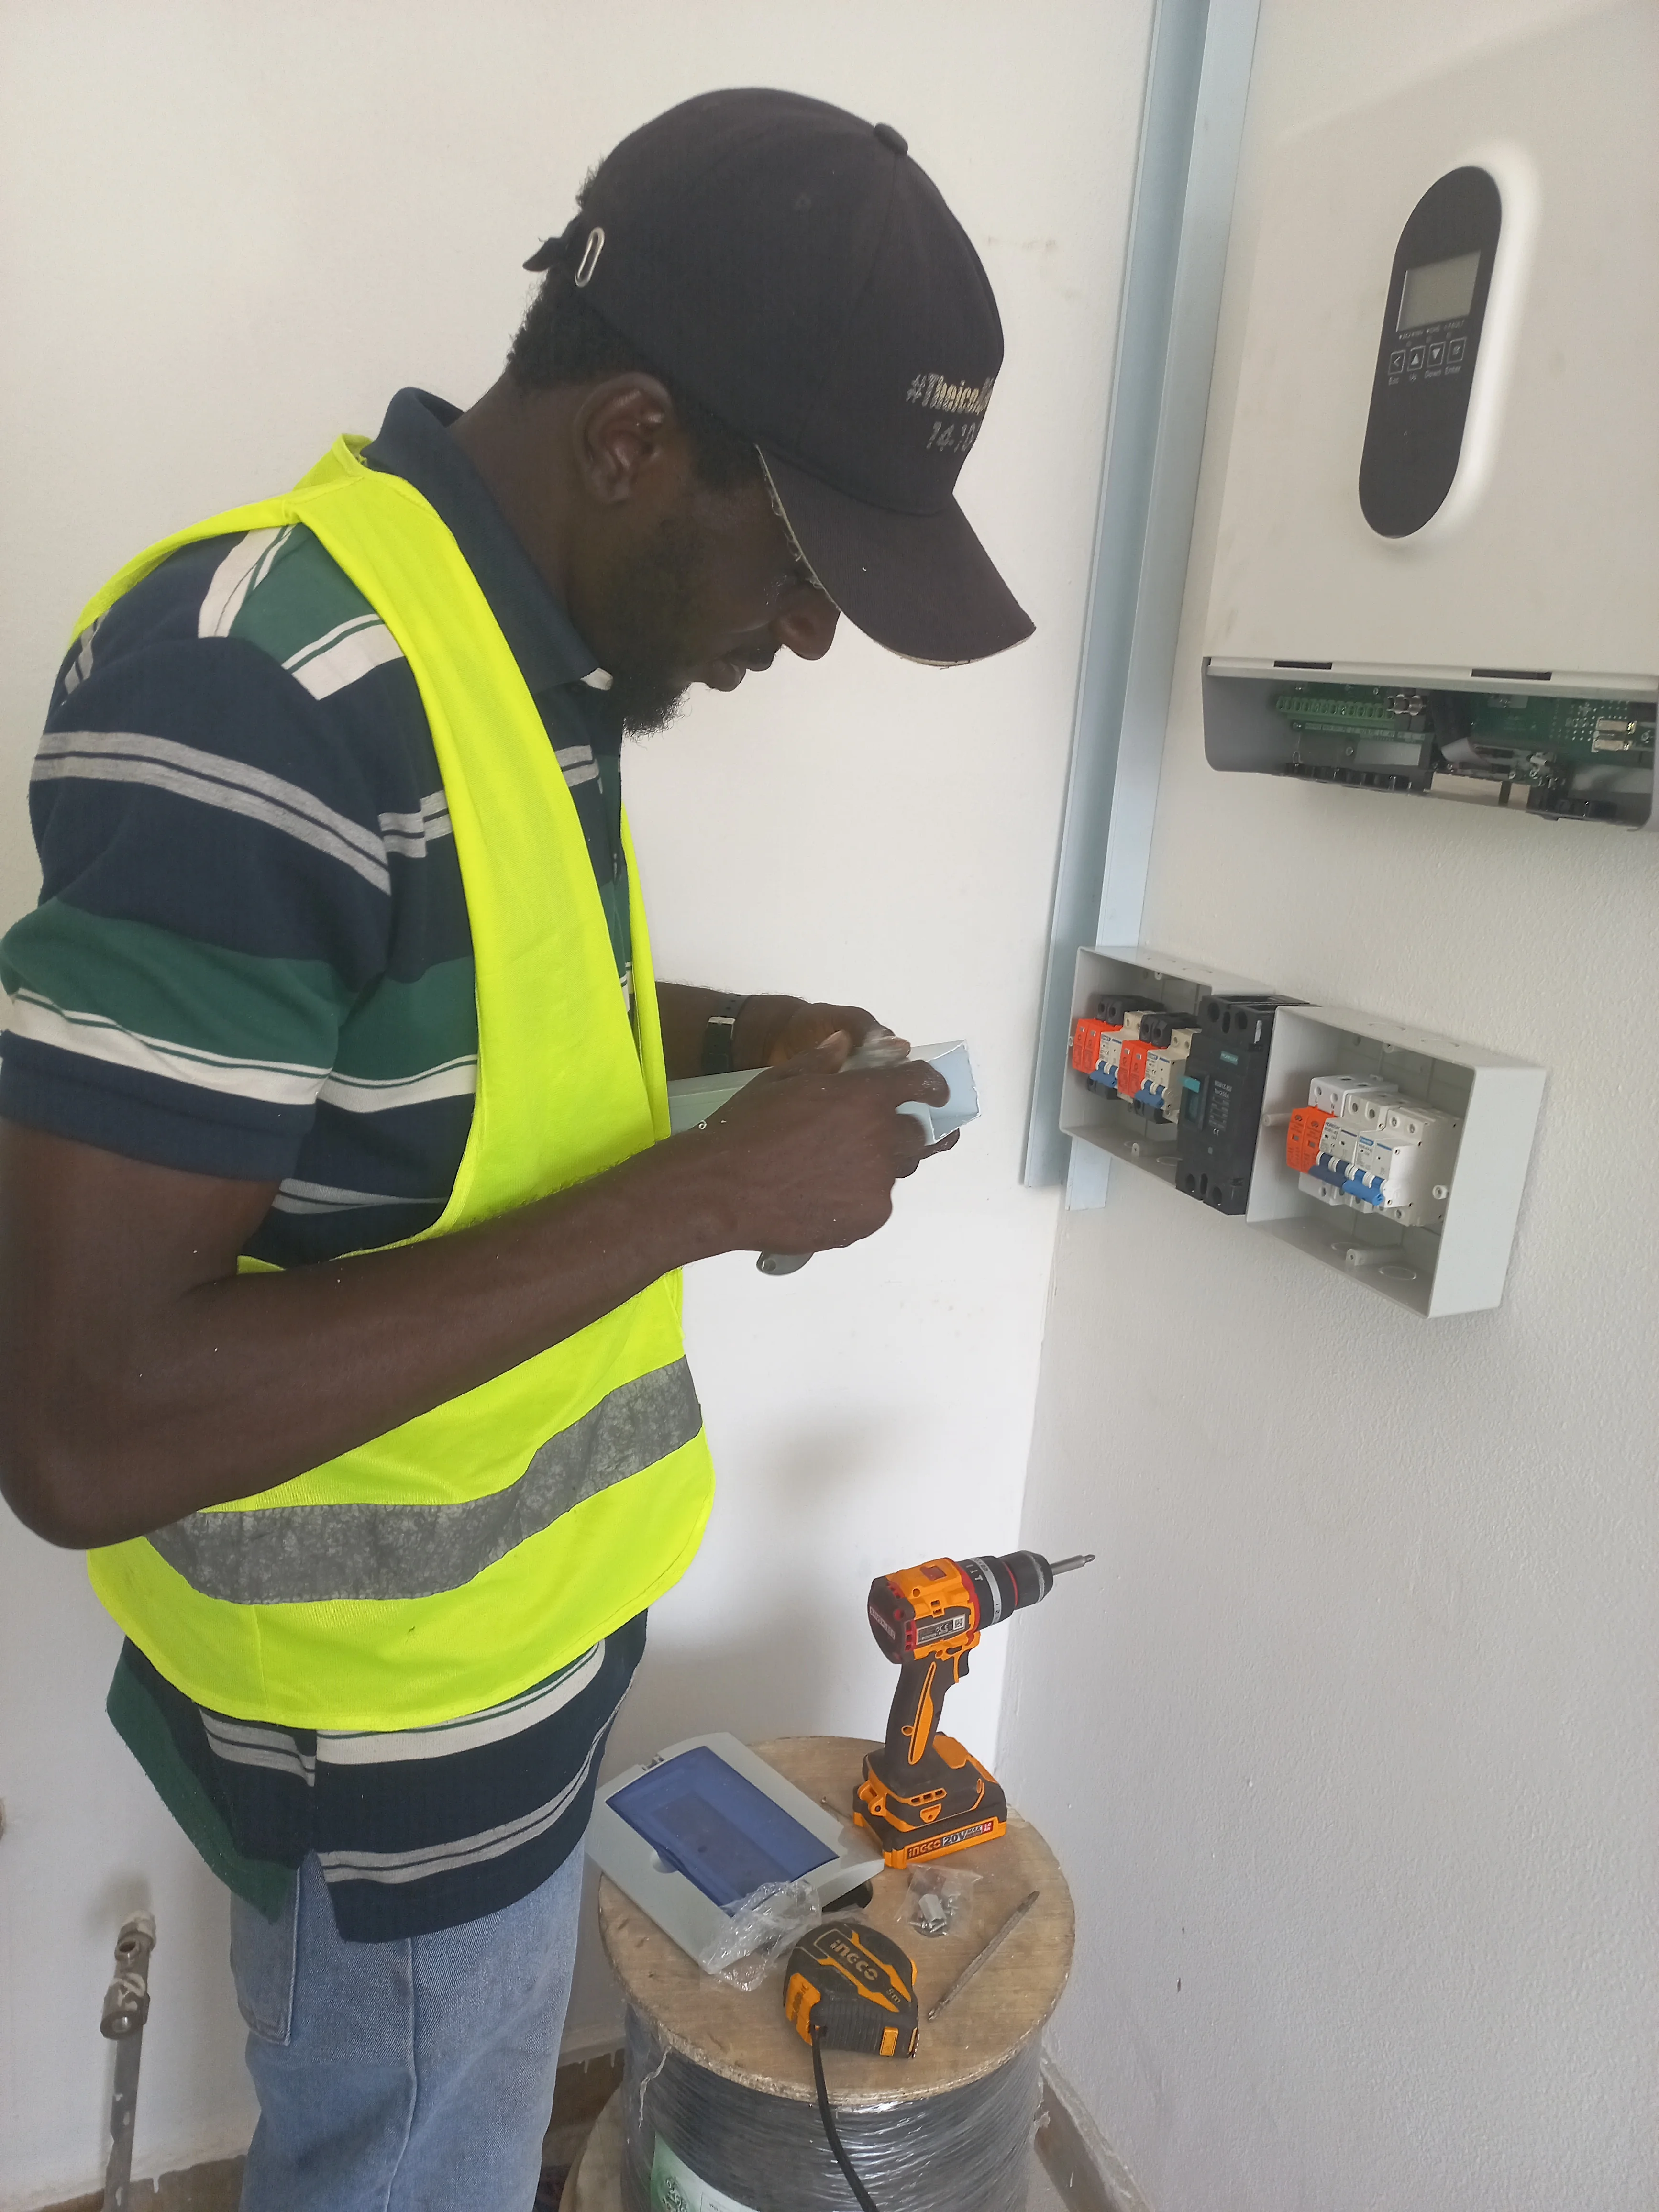
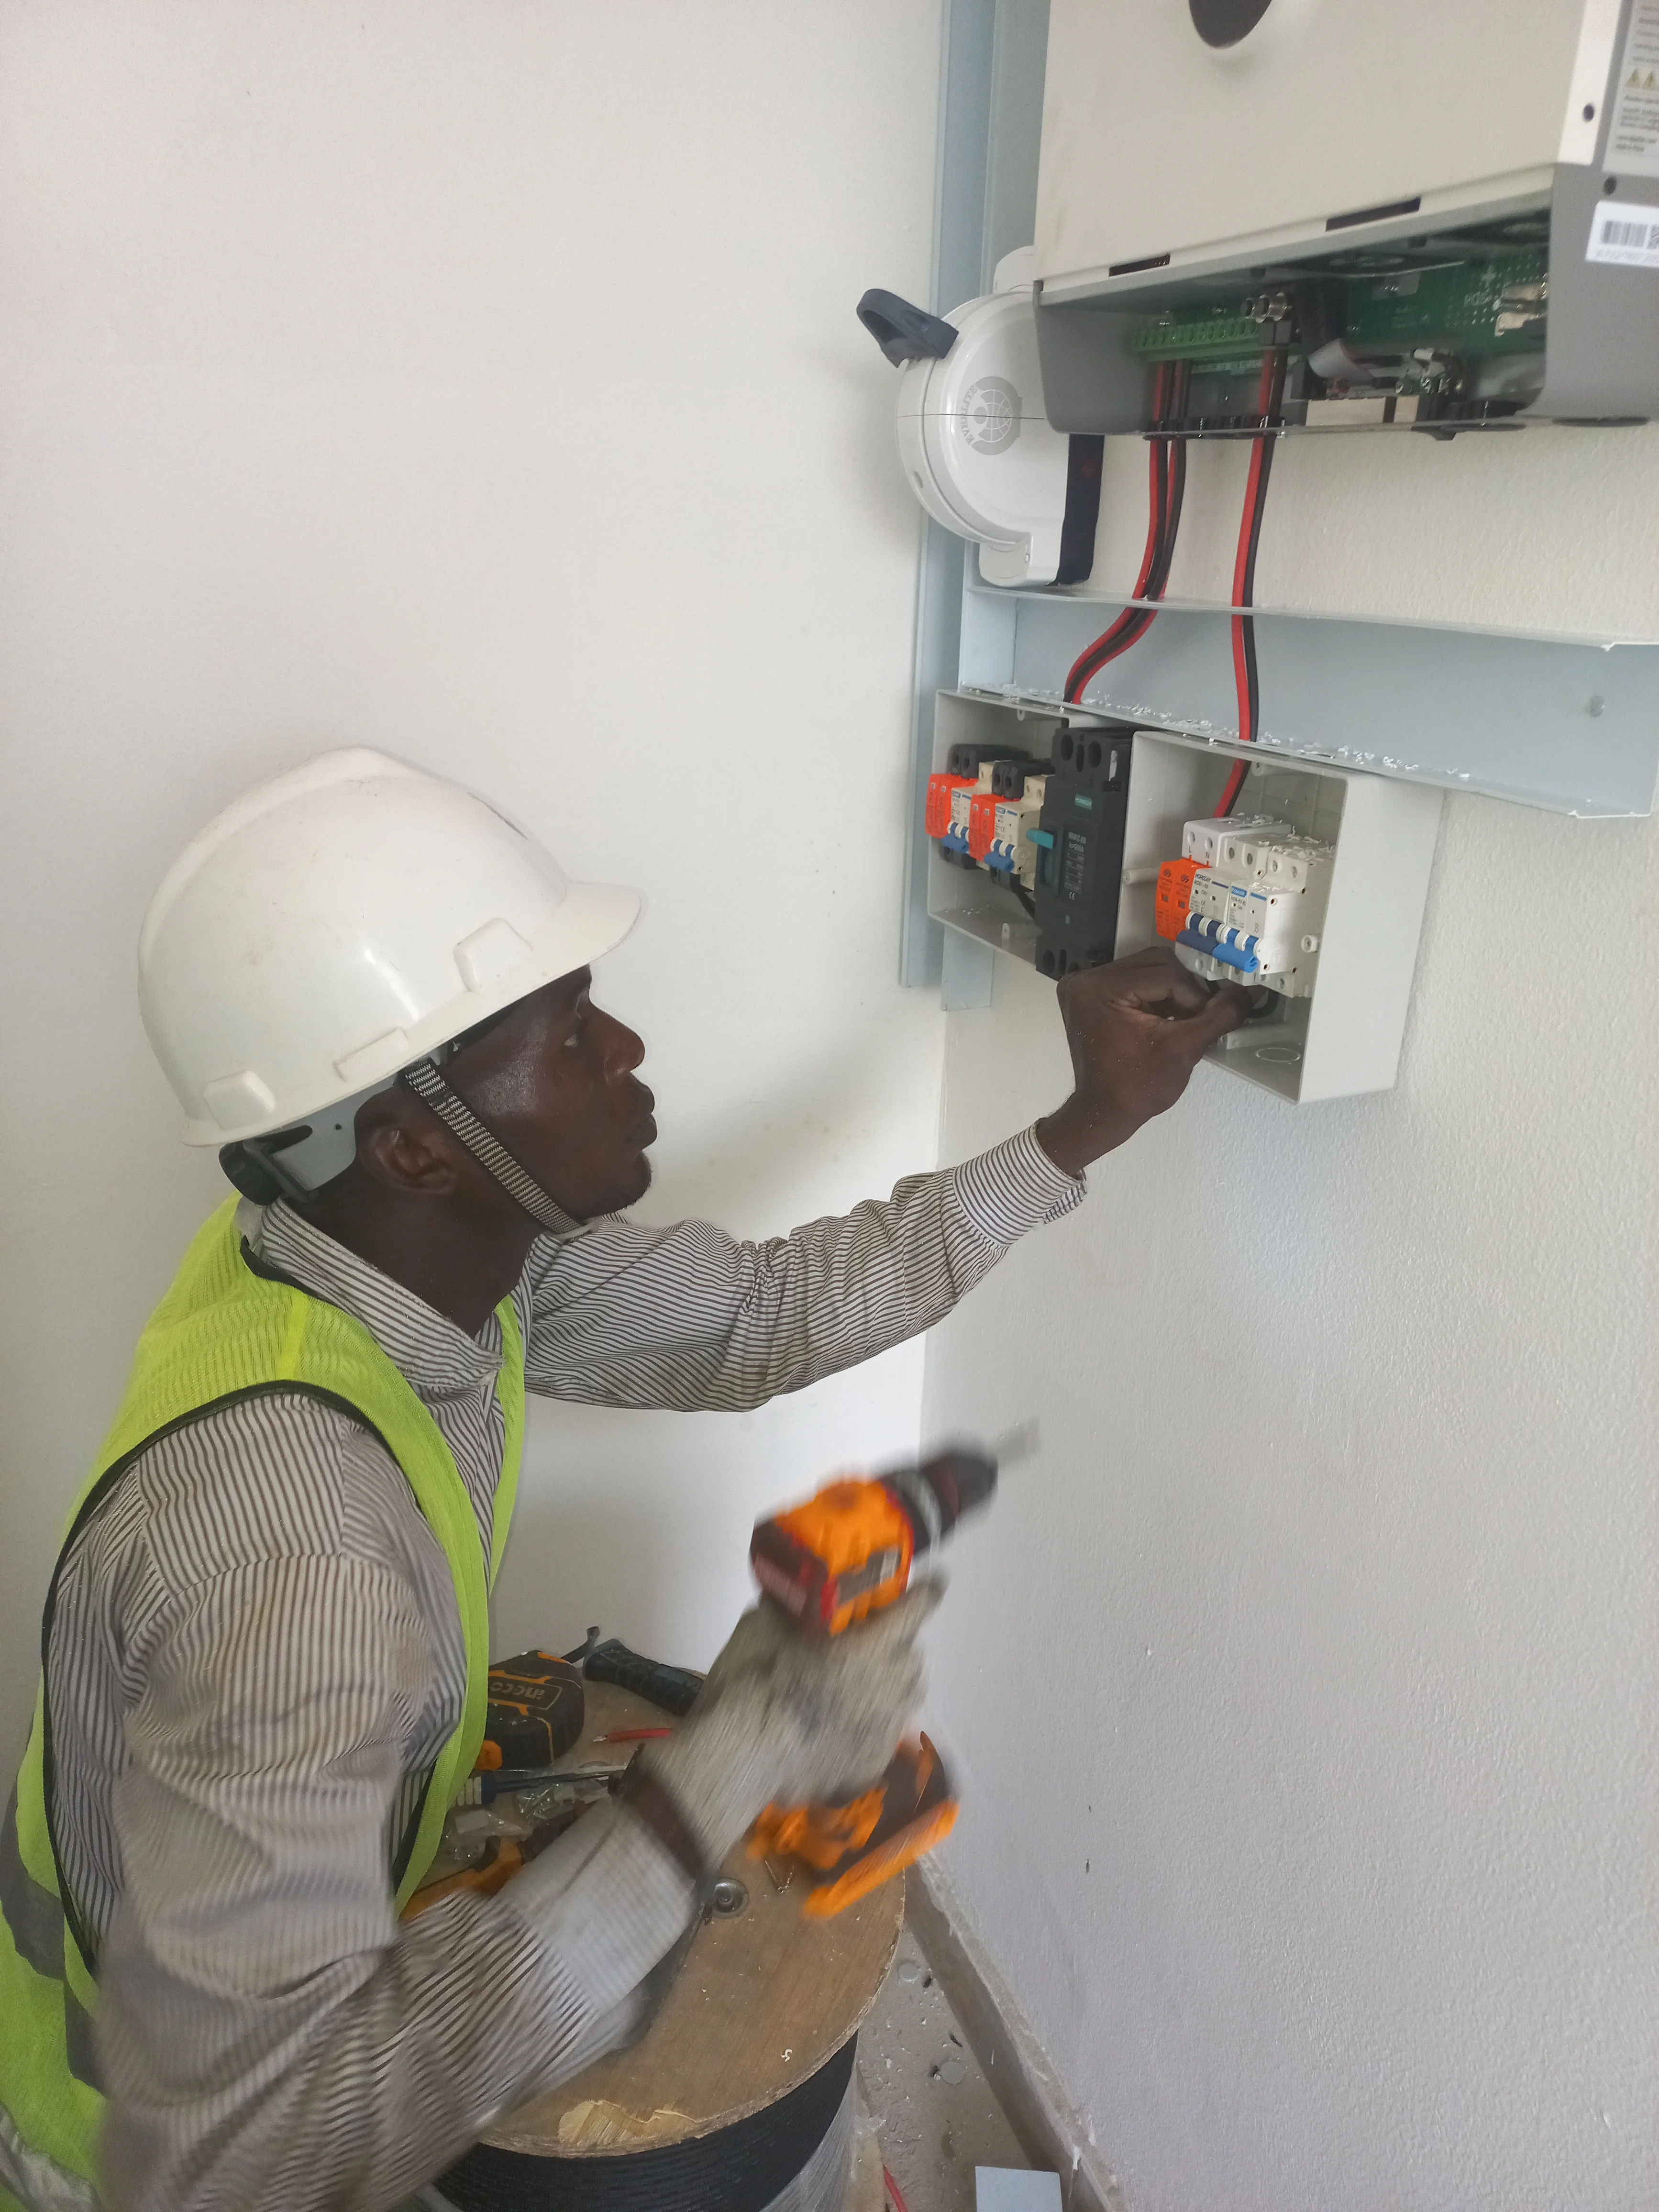
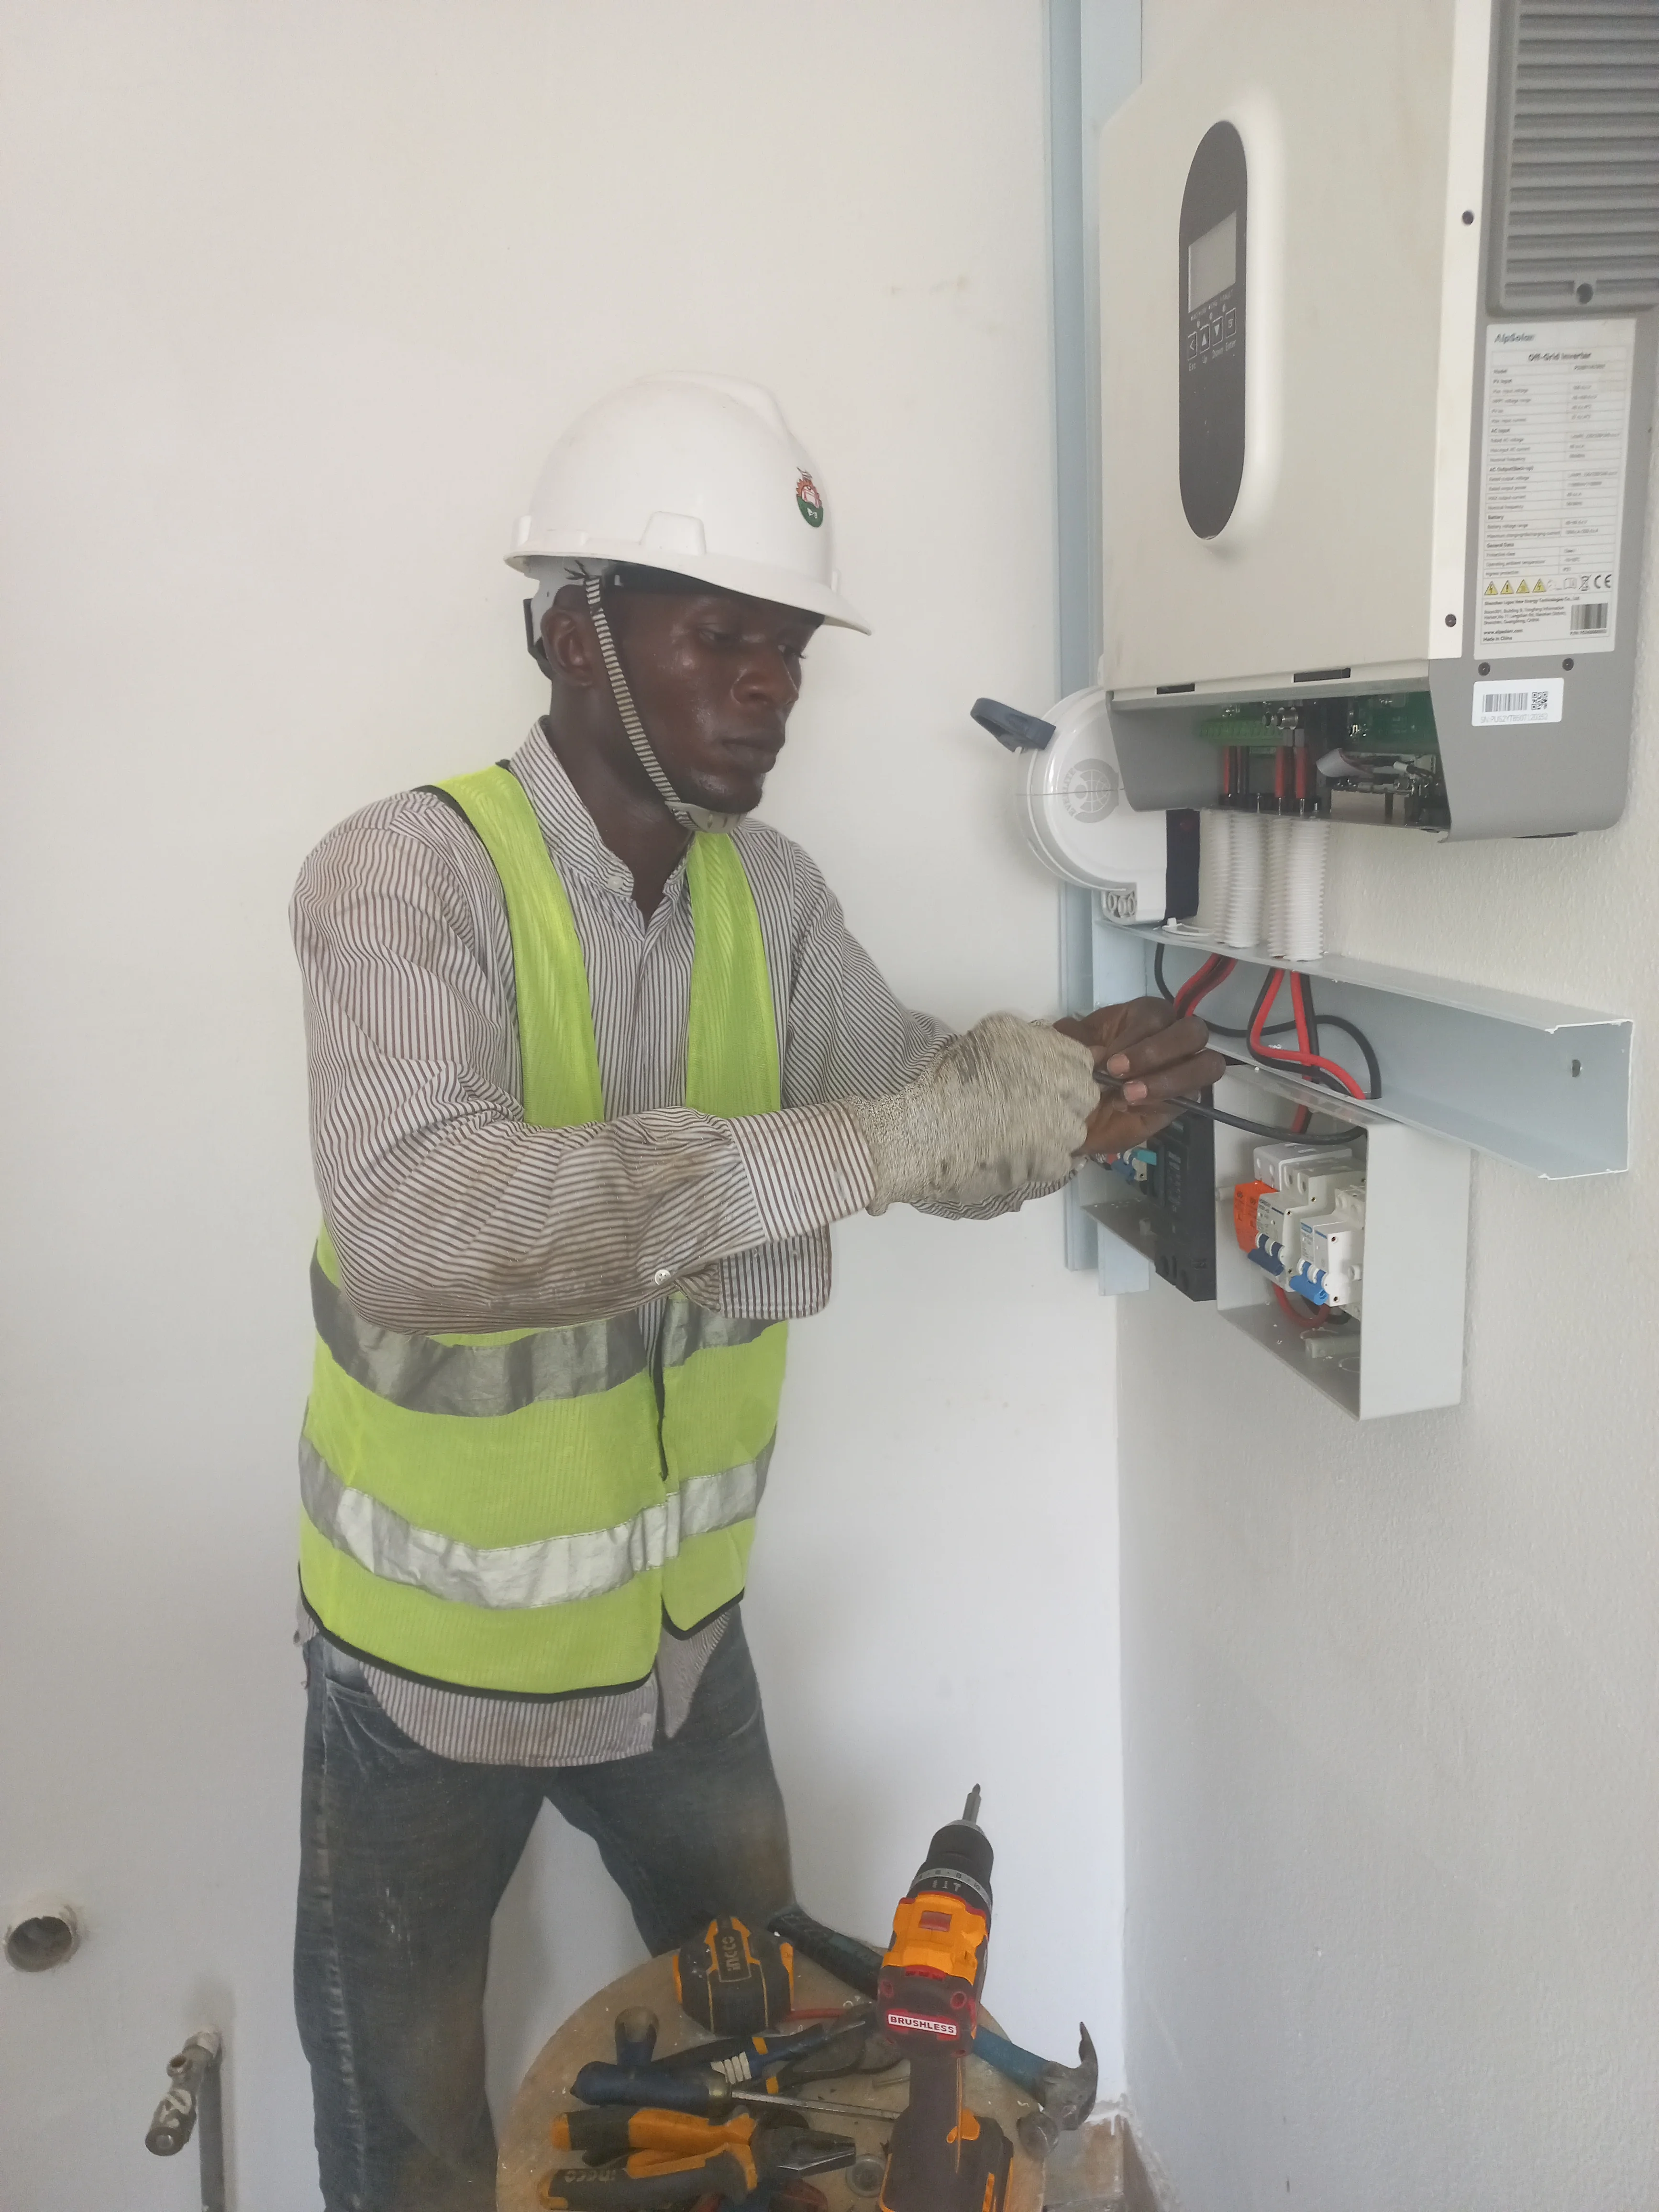
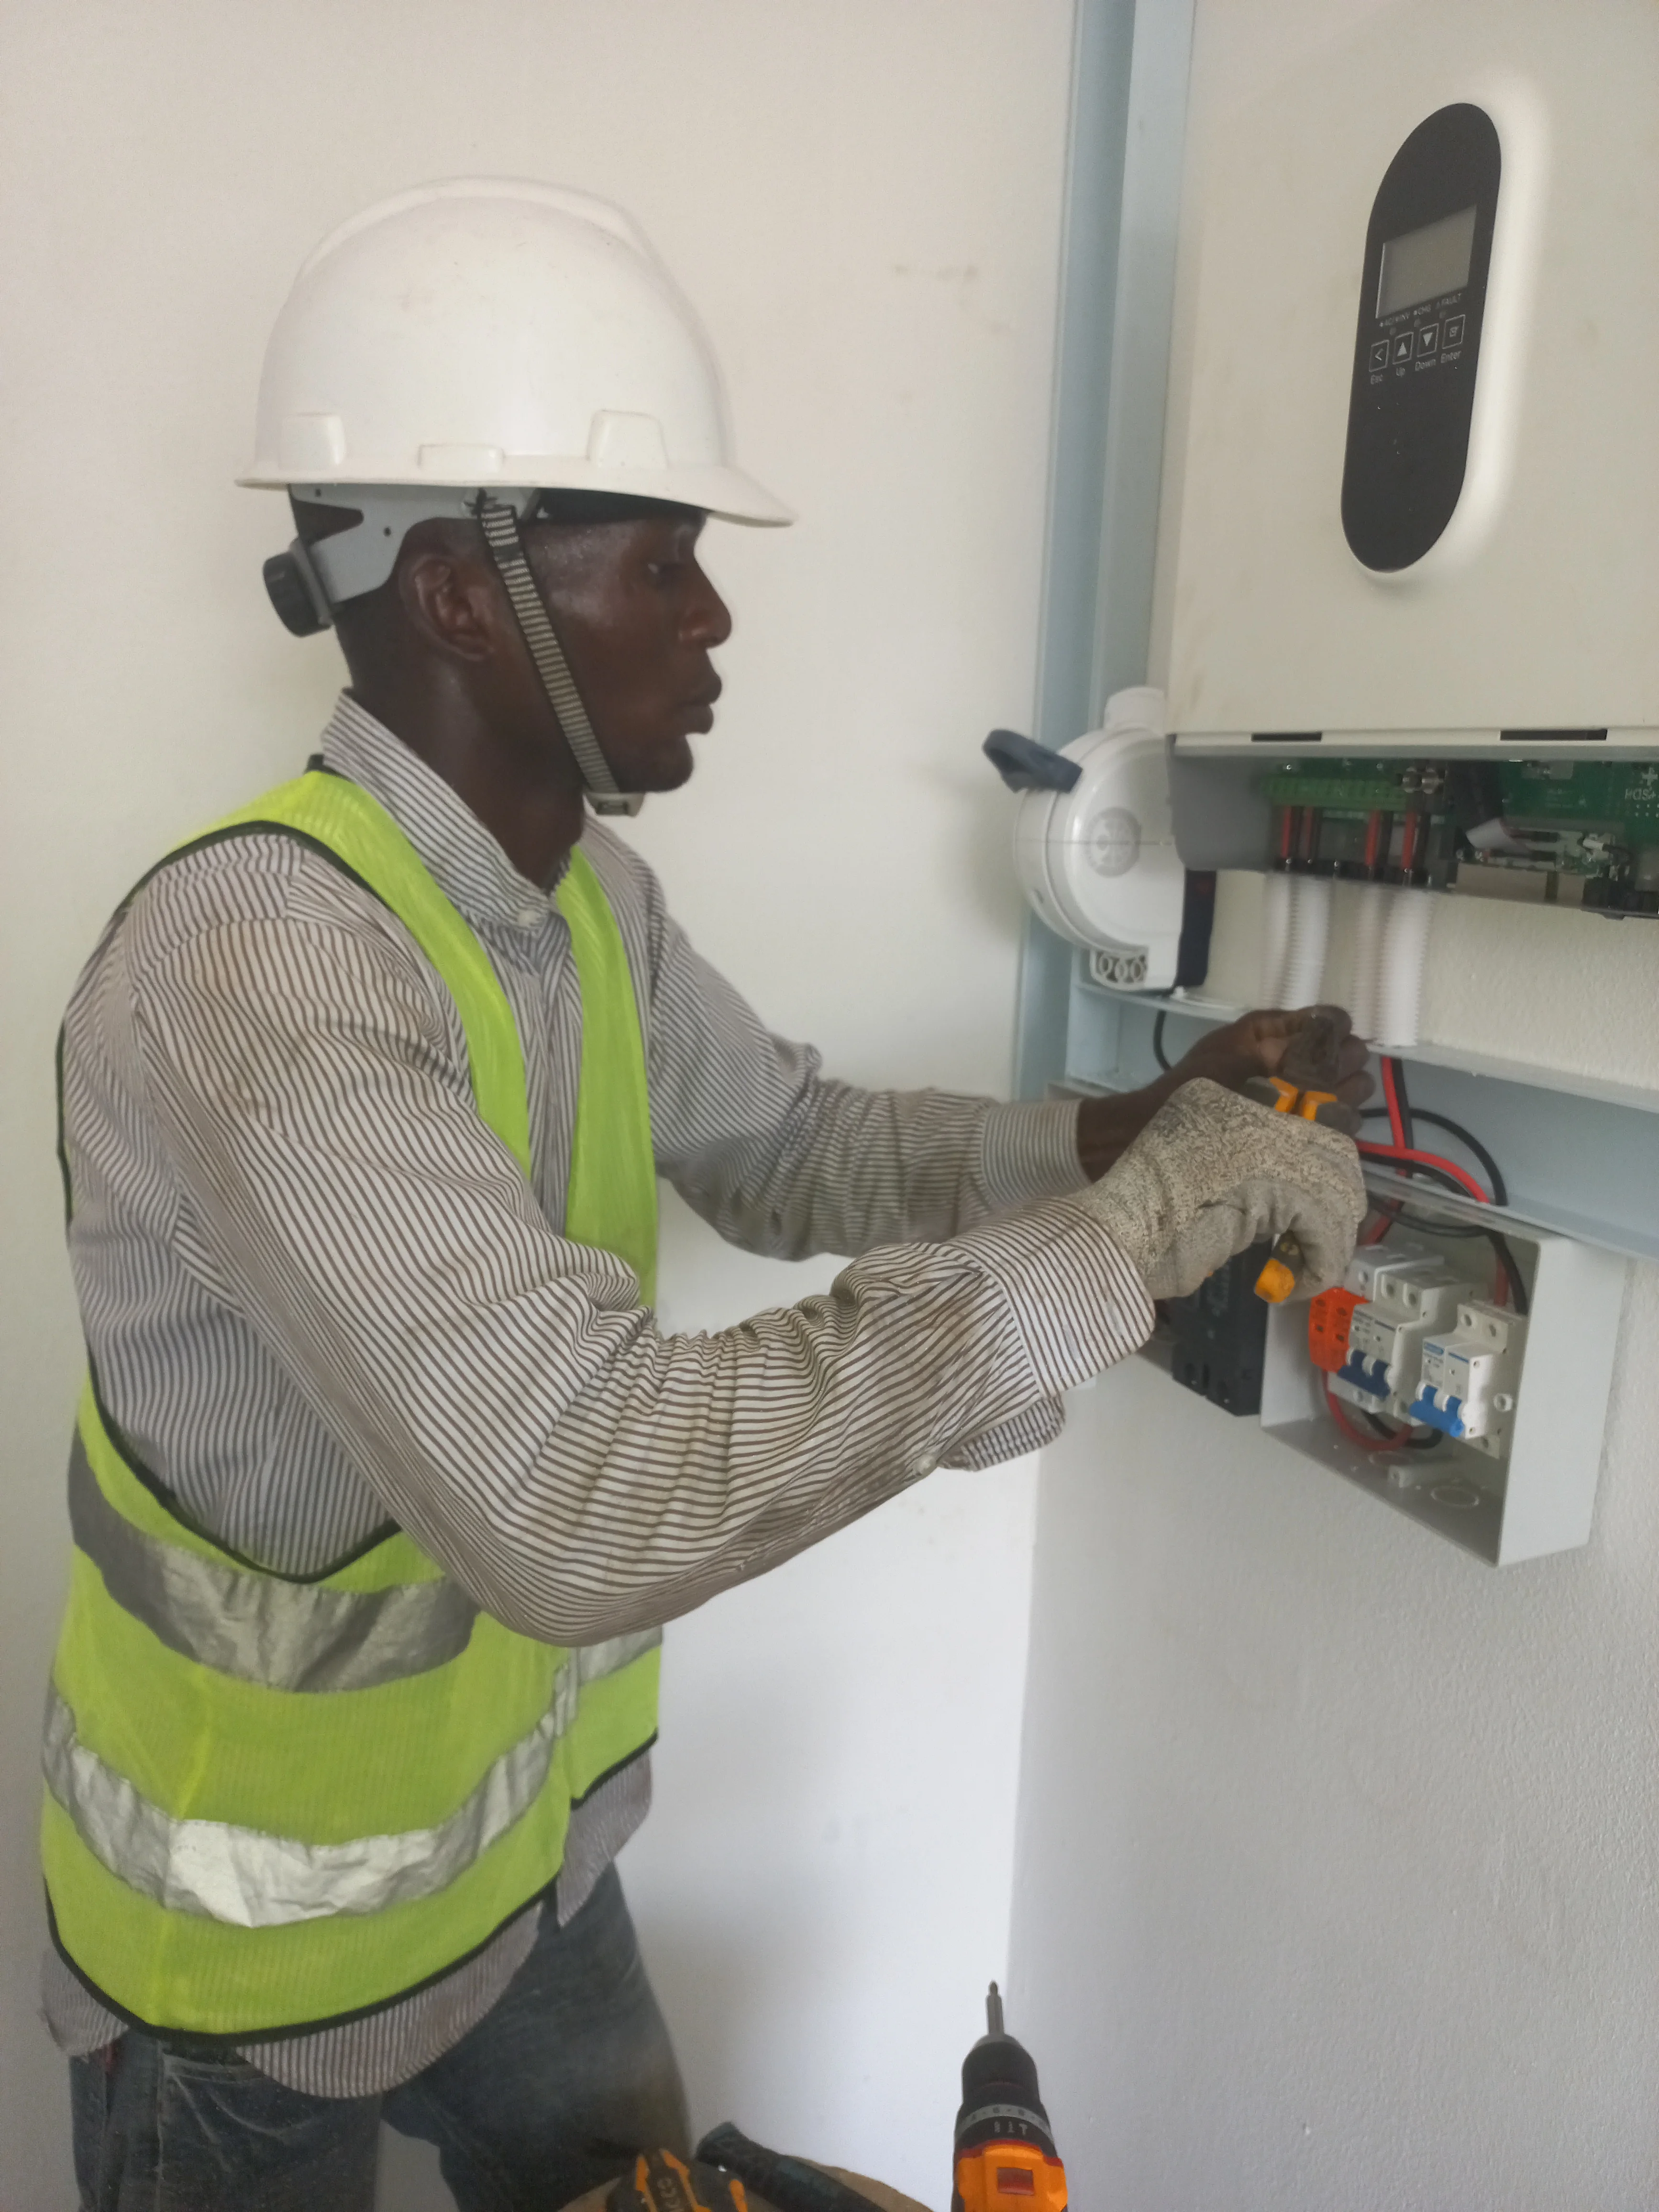
Phase 3 — Inverter & Distribution Board Installation
Wall-mounting the AlpSolarr 11kW inverter, assembling the distribution panel with CHINT DC surge protectors, MDM1Z-250 (250A) MCCB, HOREDAY AC surge protectors and MCBs, and wiring through flexible conduit.


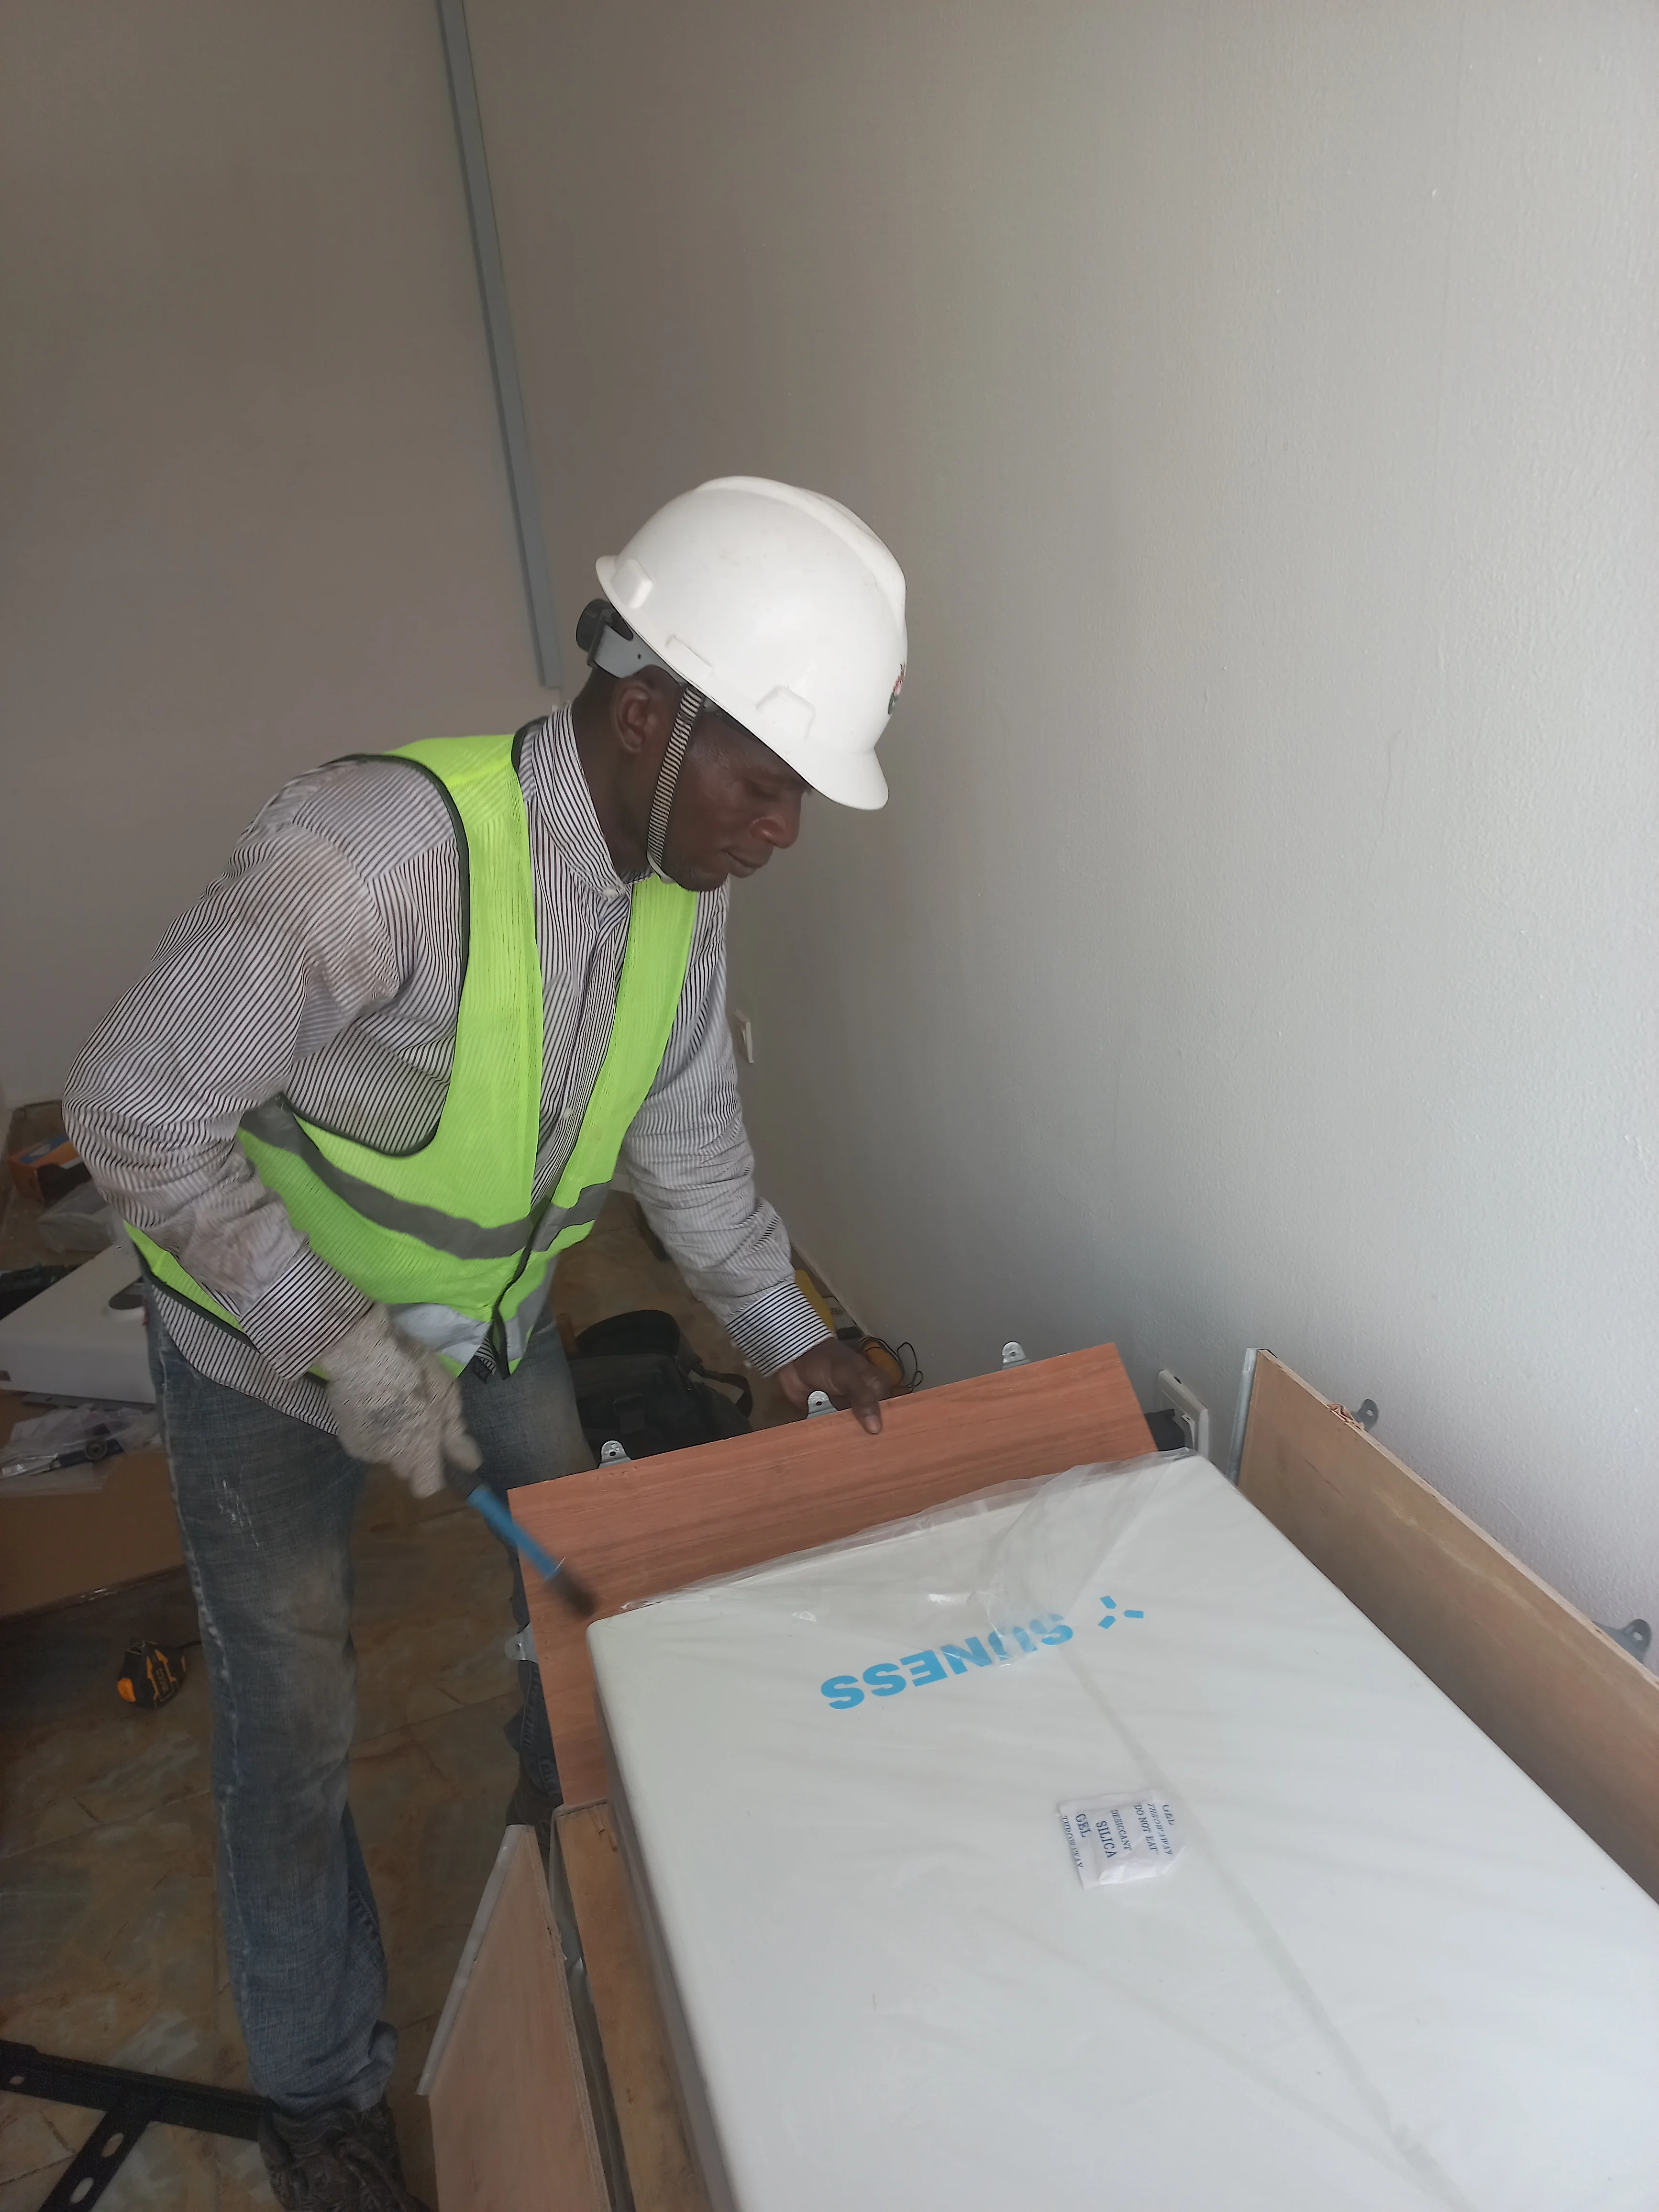
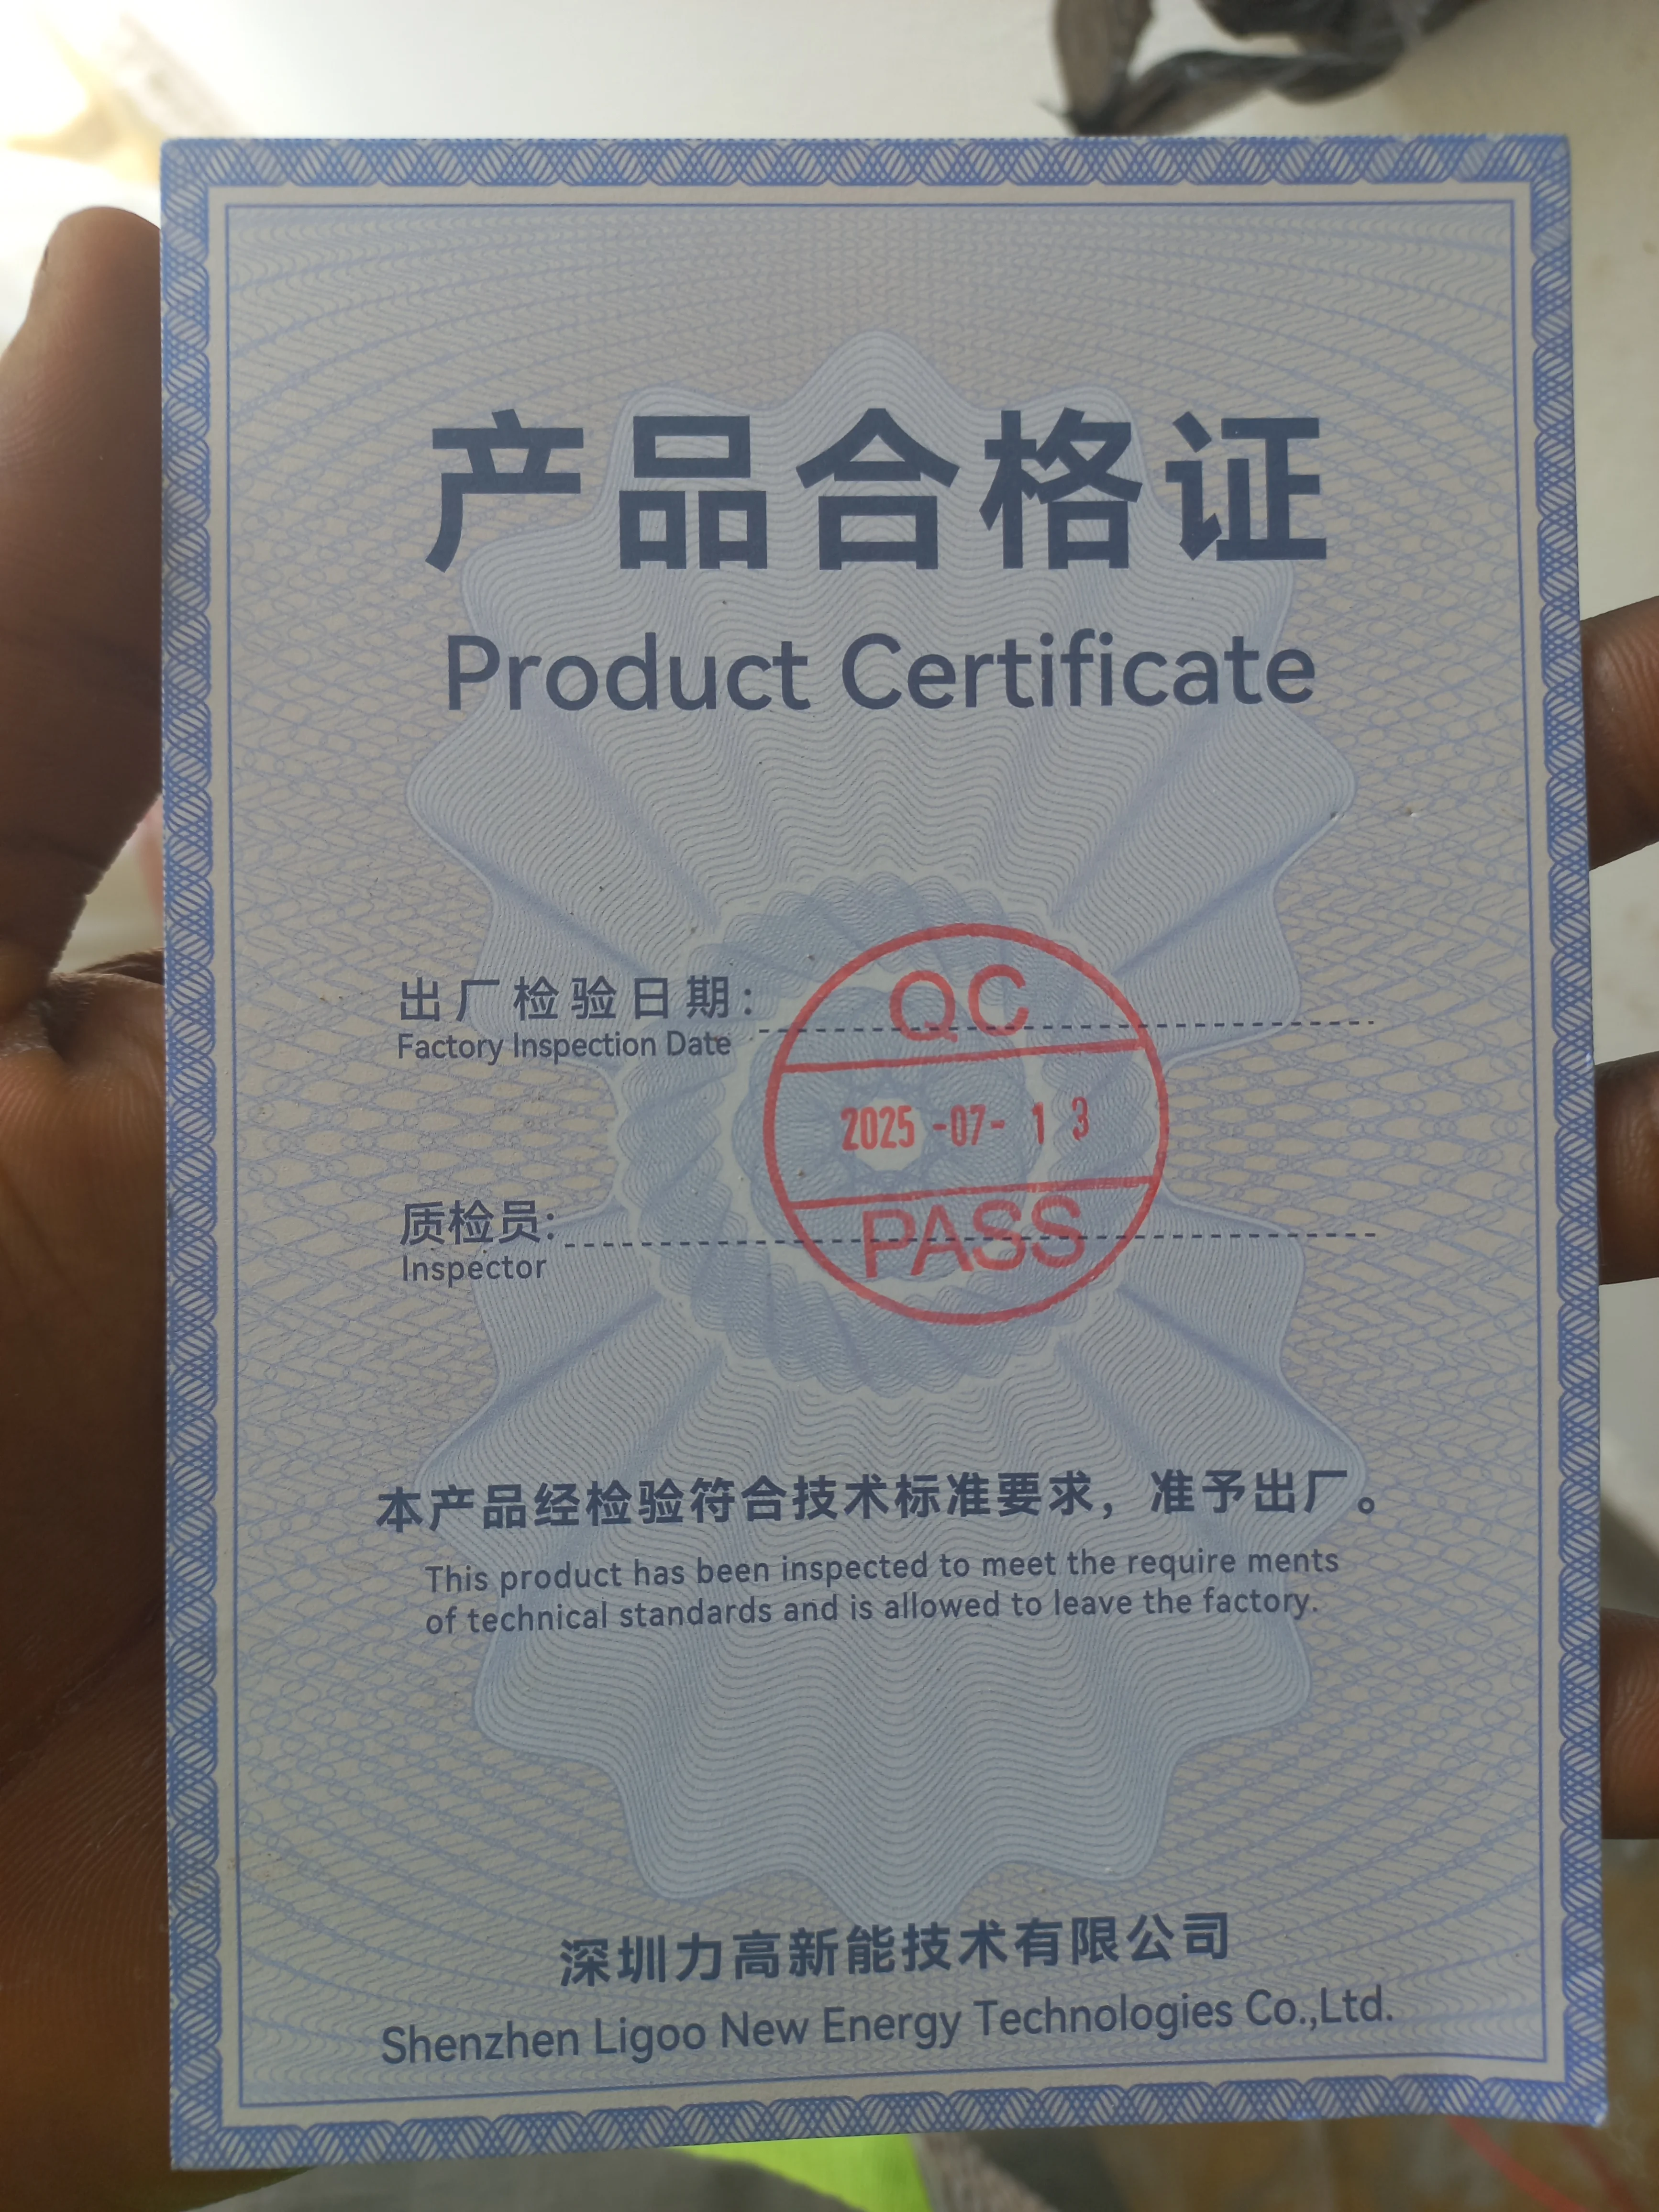
Phase 4 — Solar Panel Preparation & Documentation
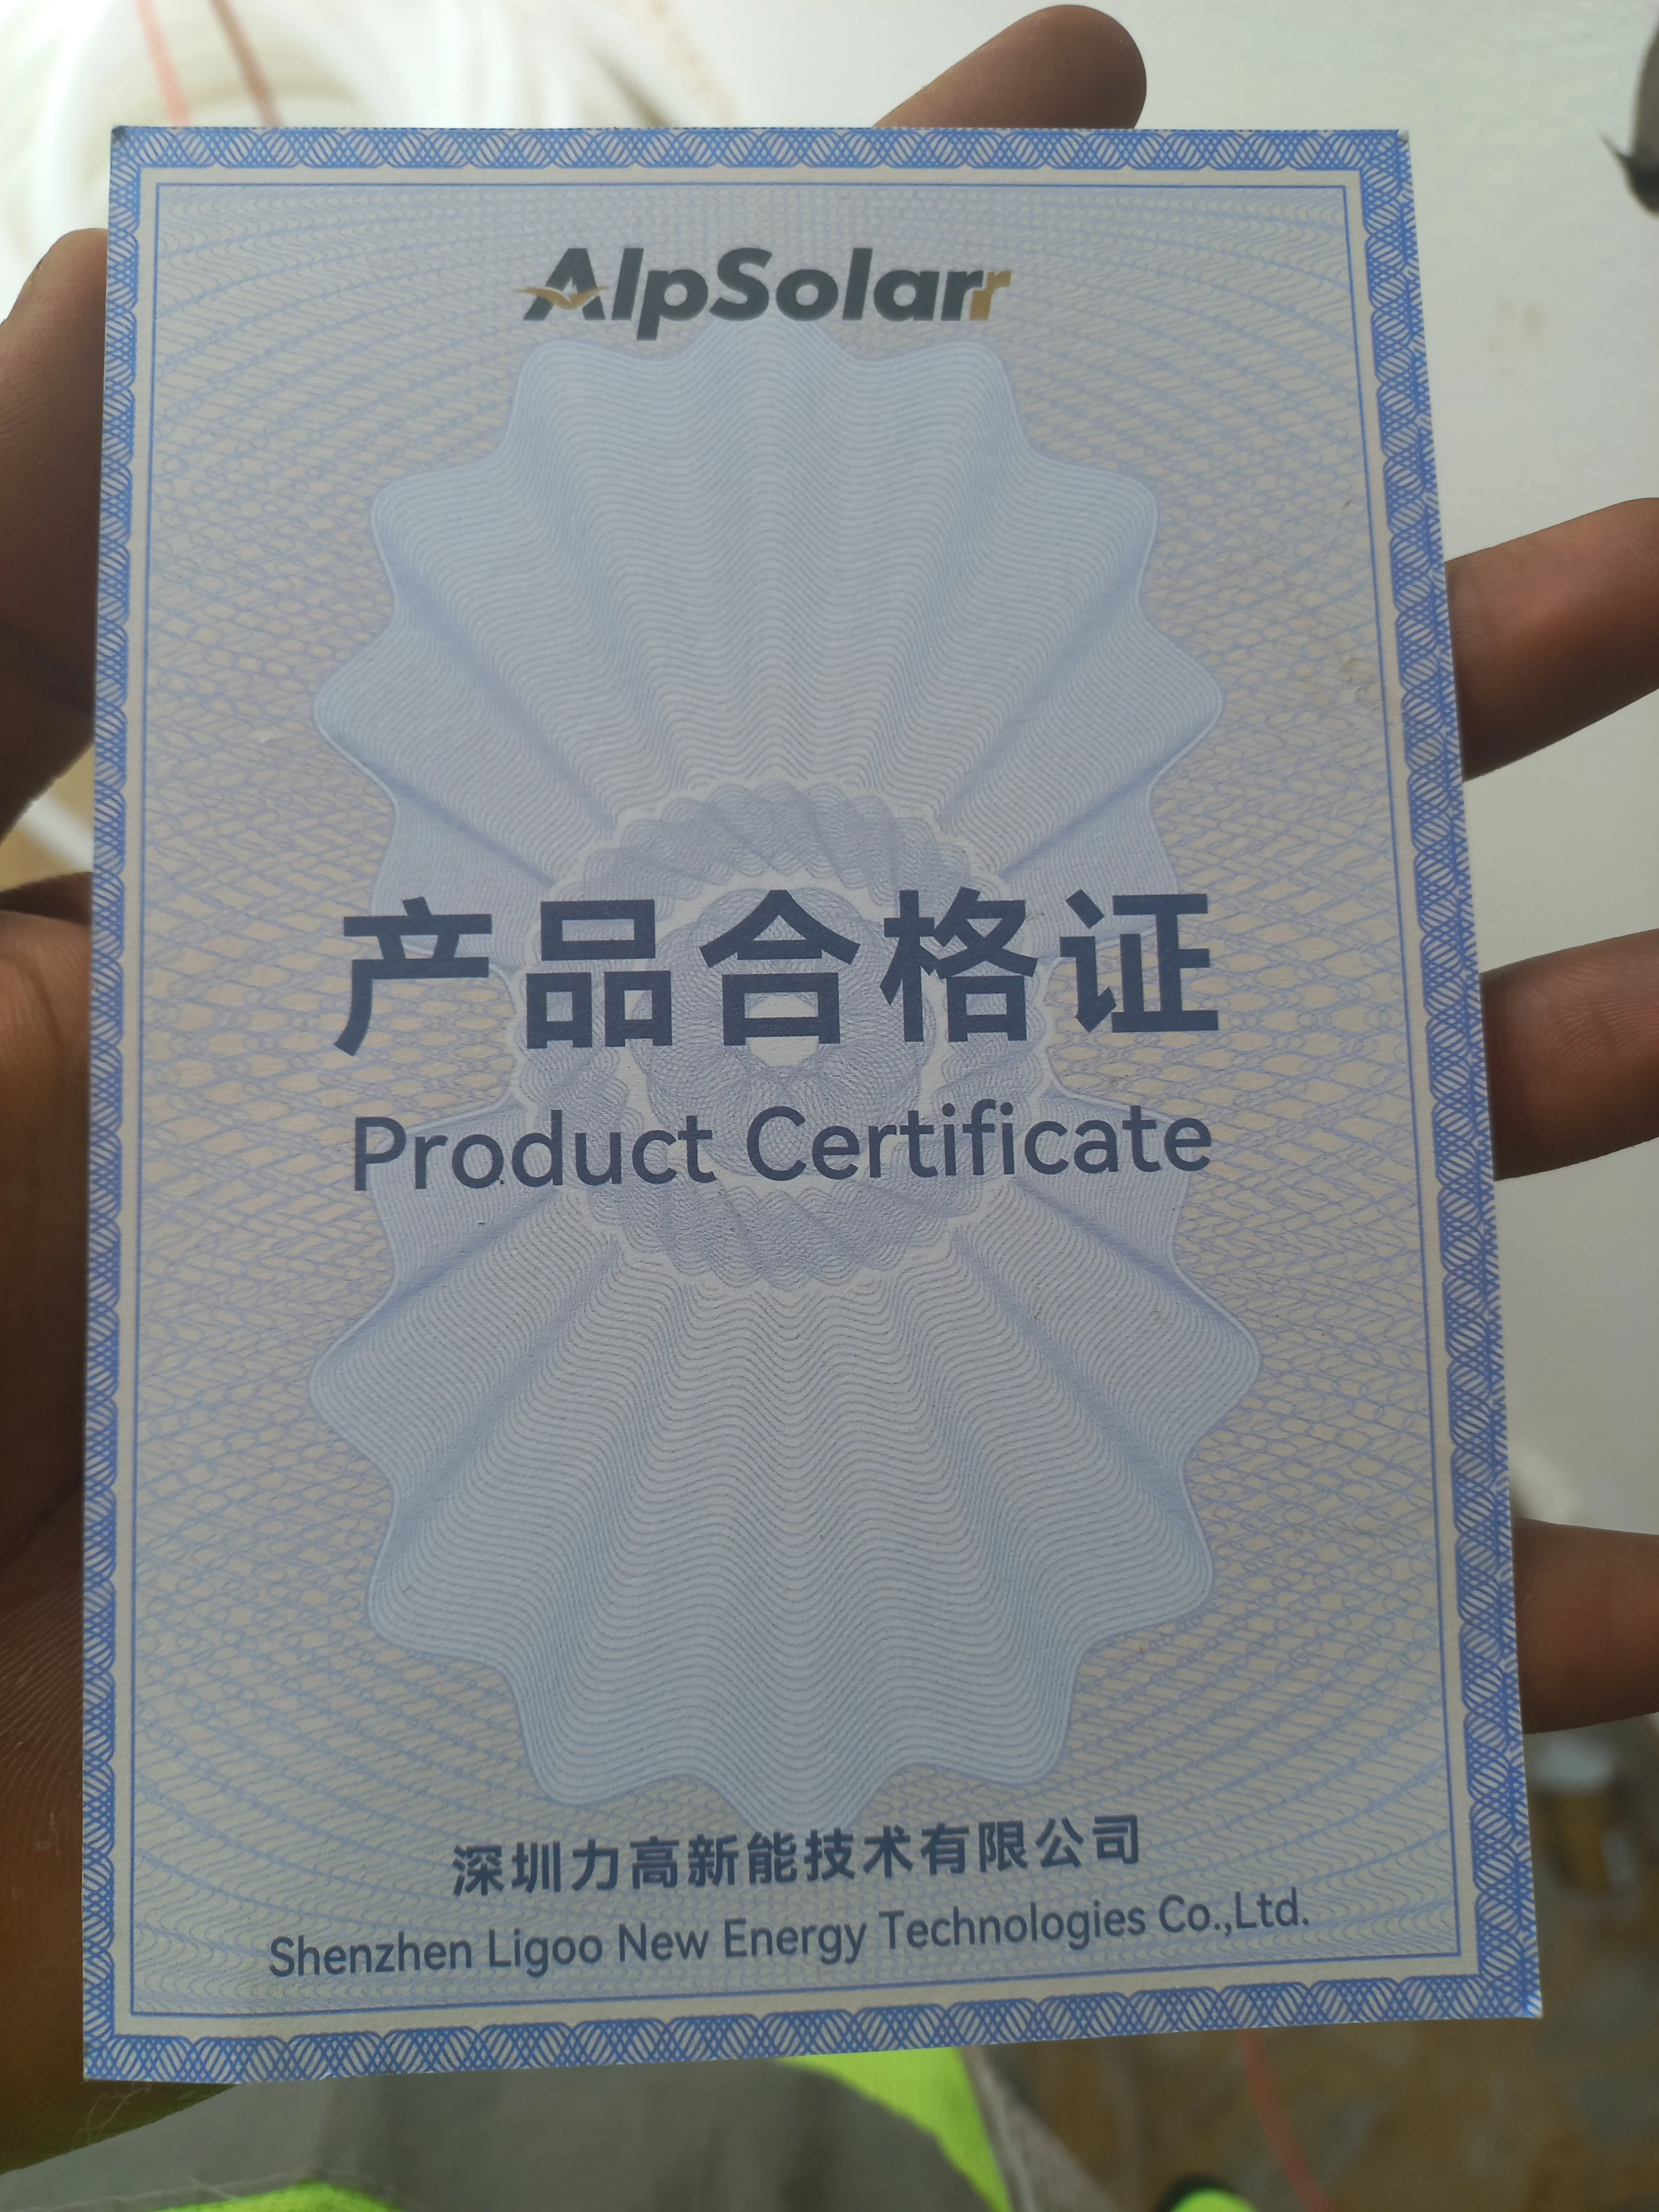
Inspecting the Jinko Solar 620W N-Type bifacial panels, reviewing product certificates, and preparing for rooftop installation.
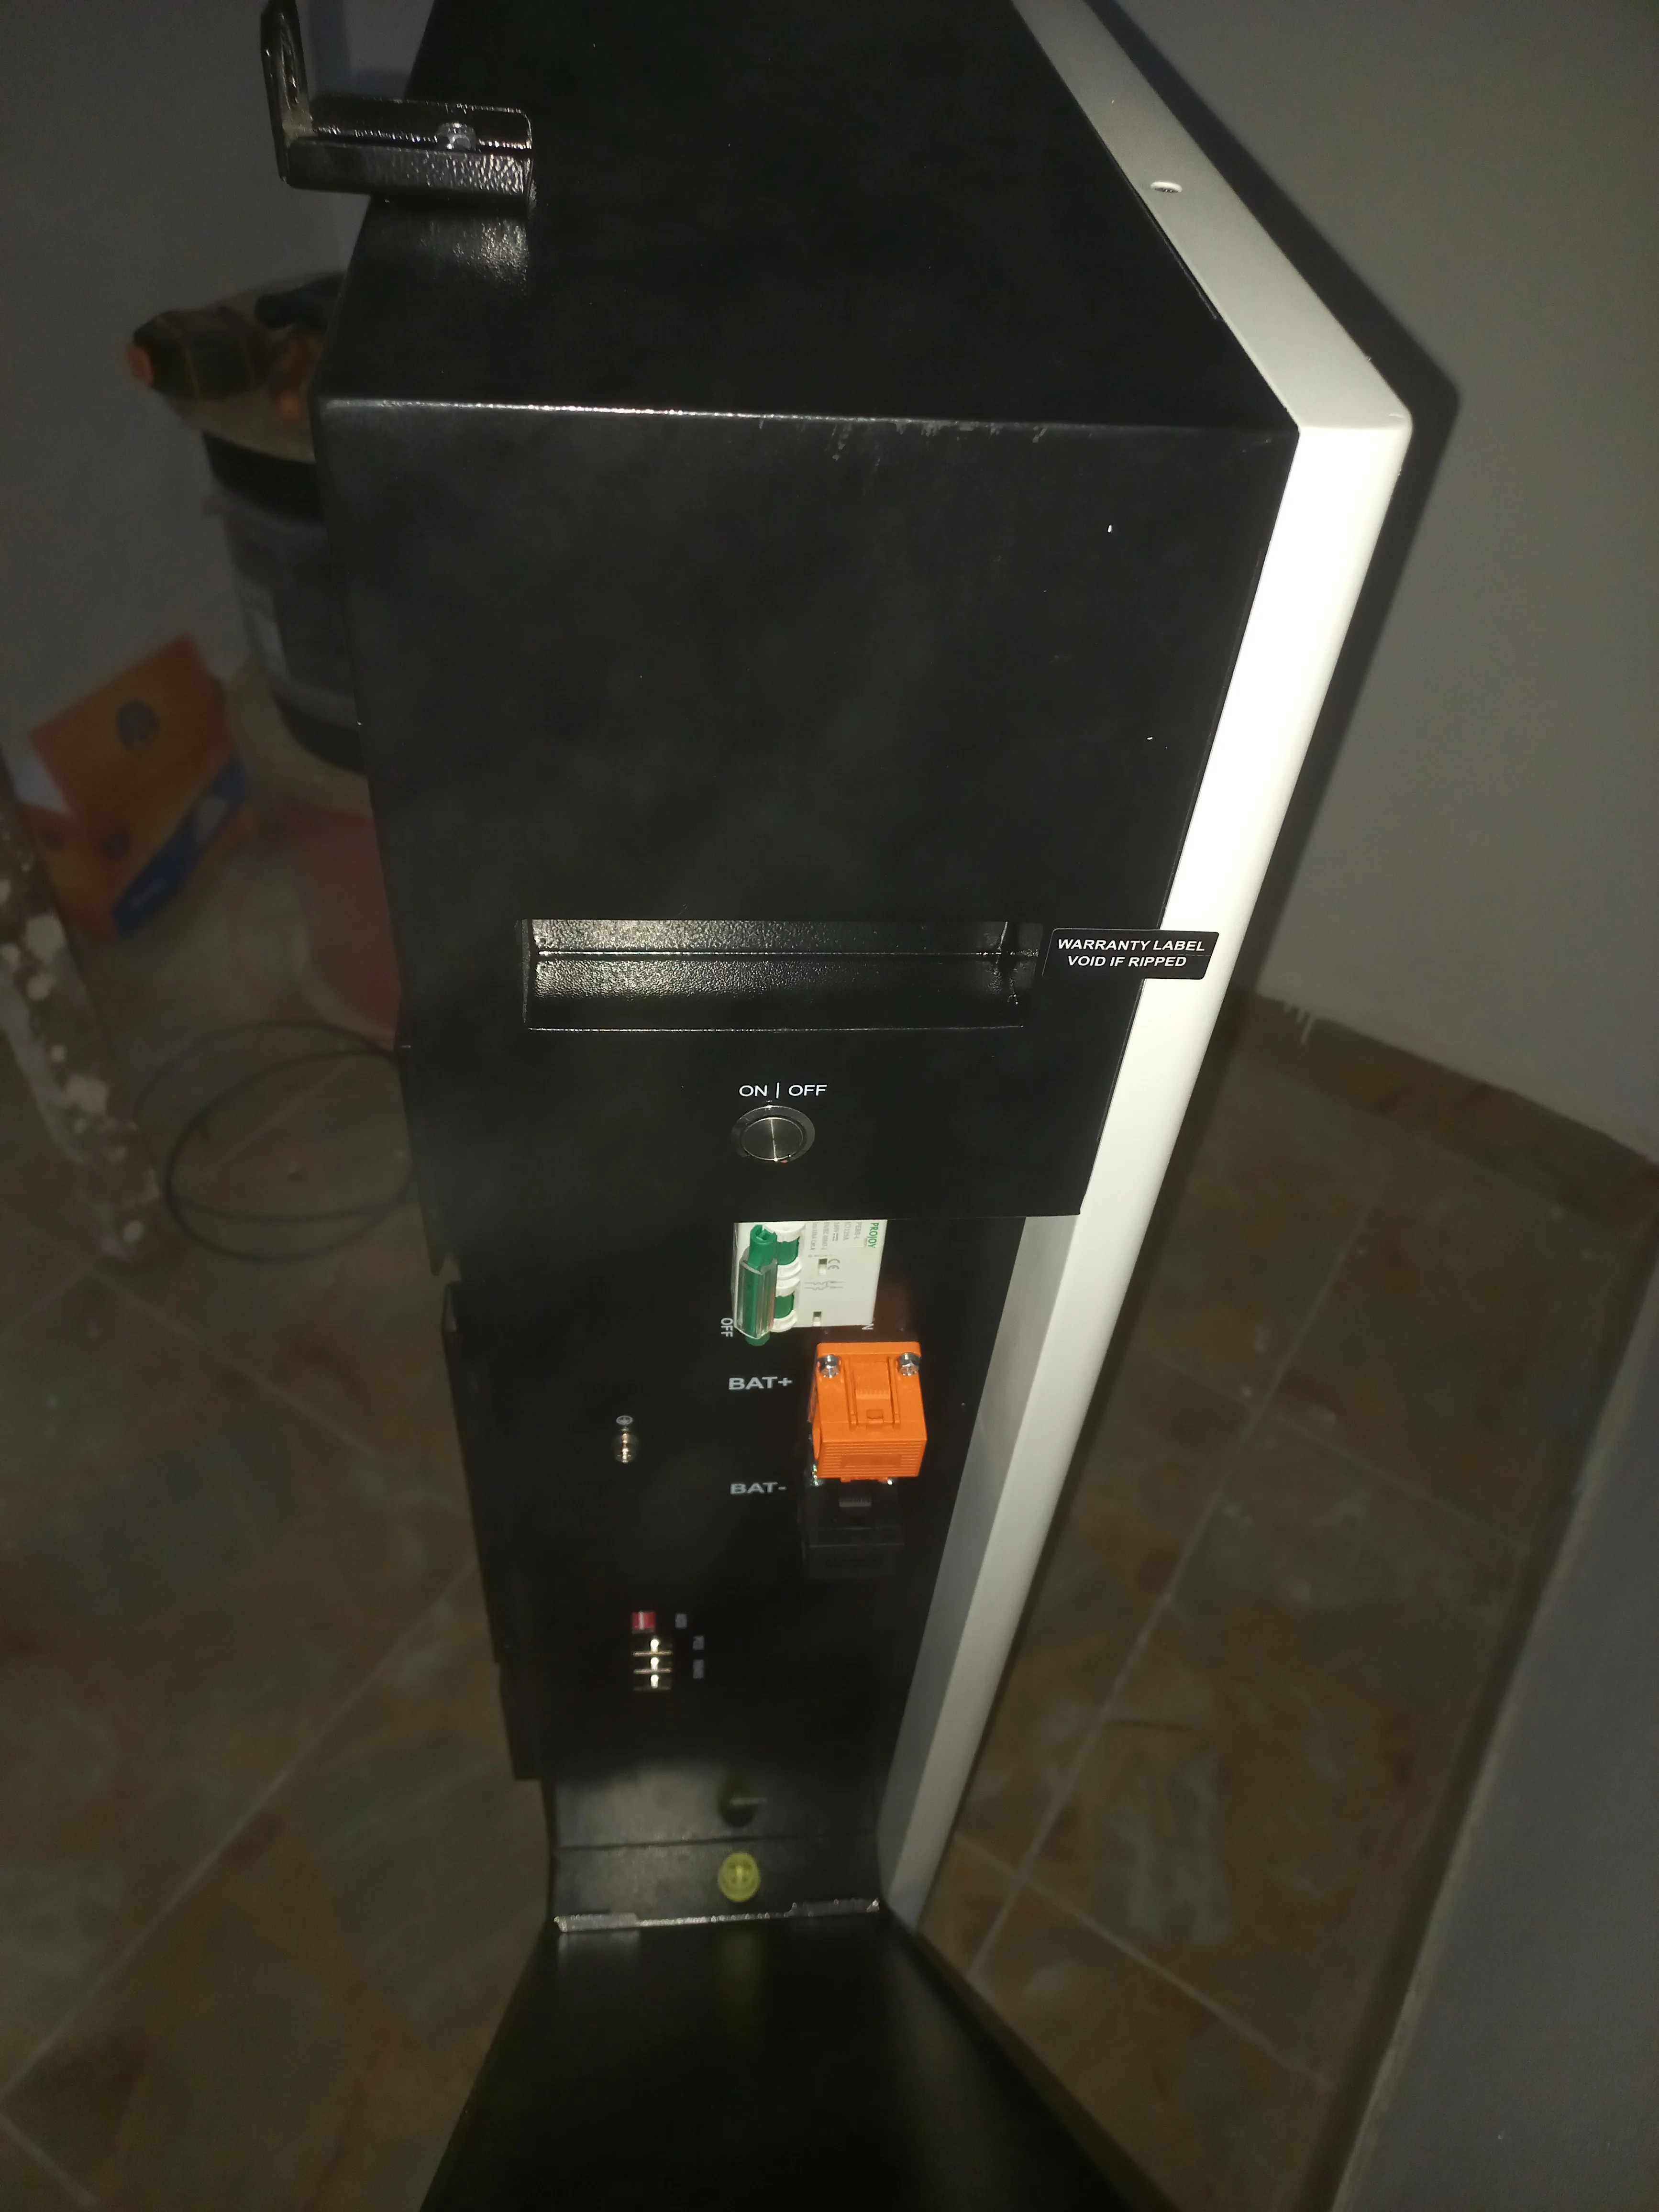

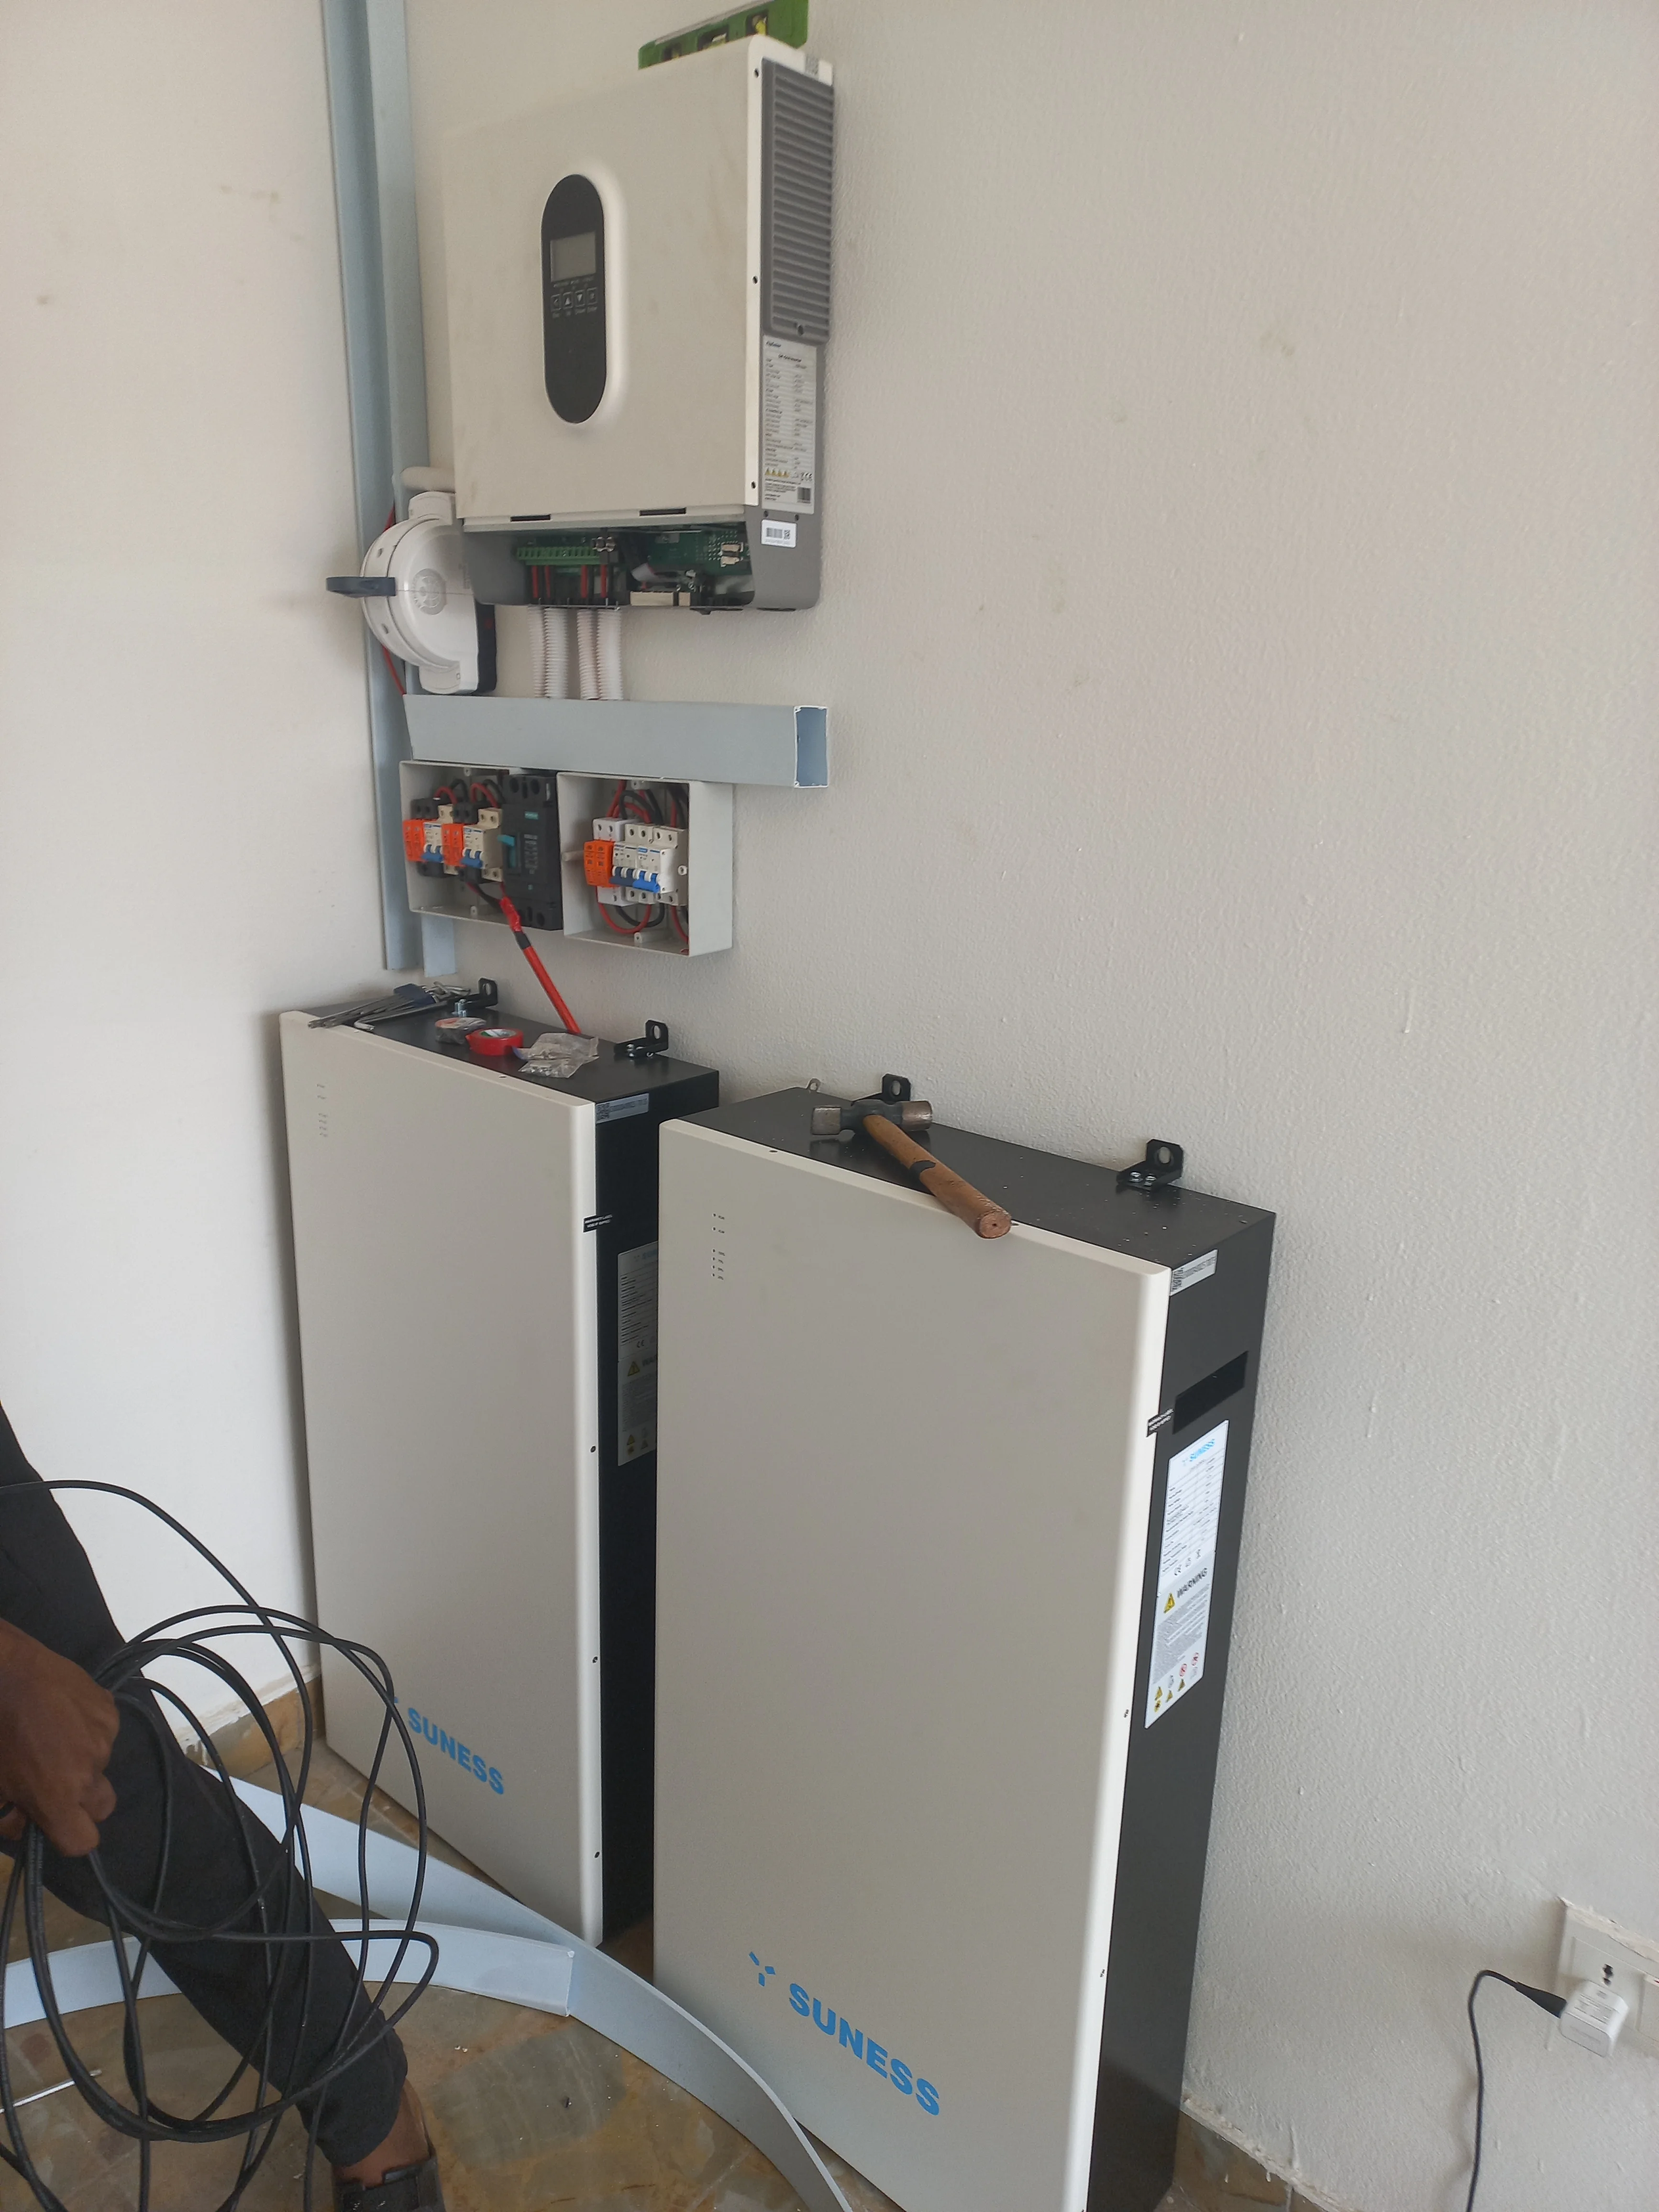
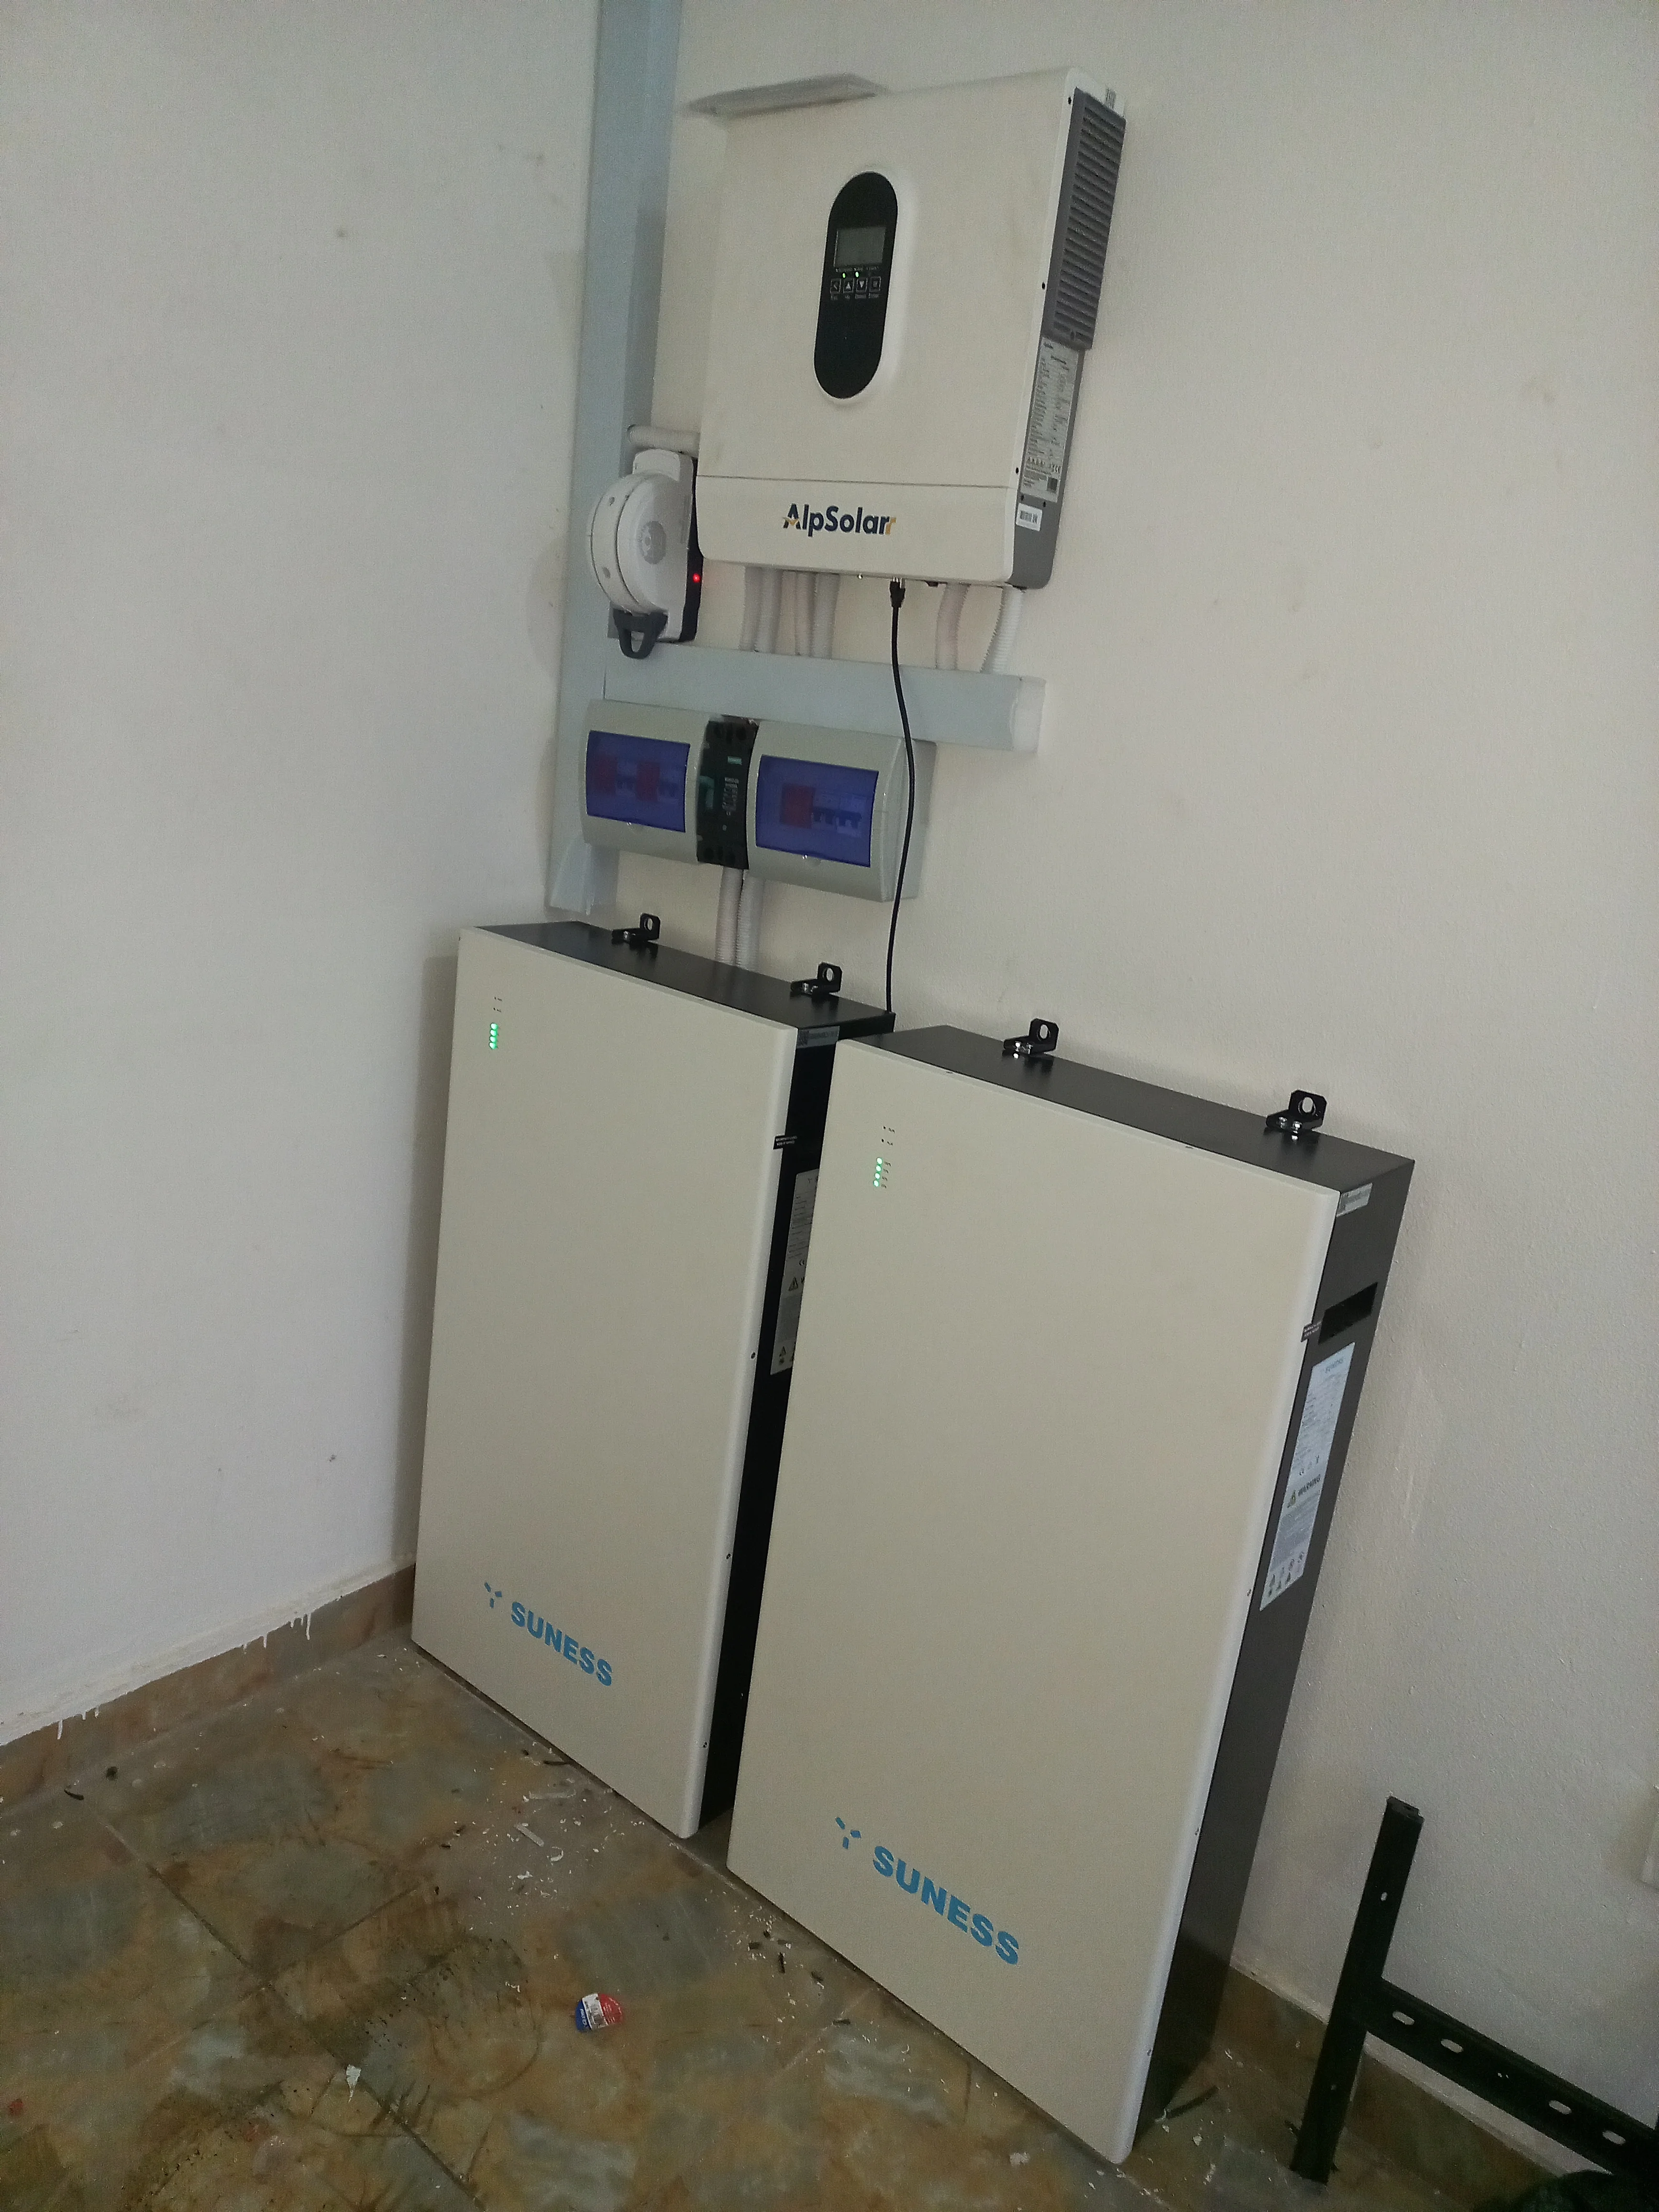
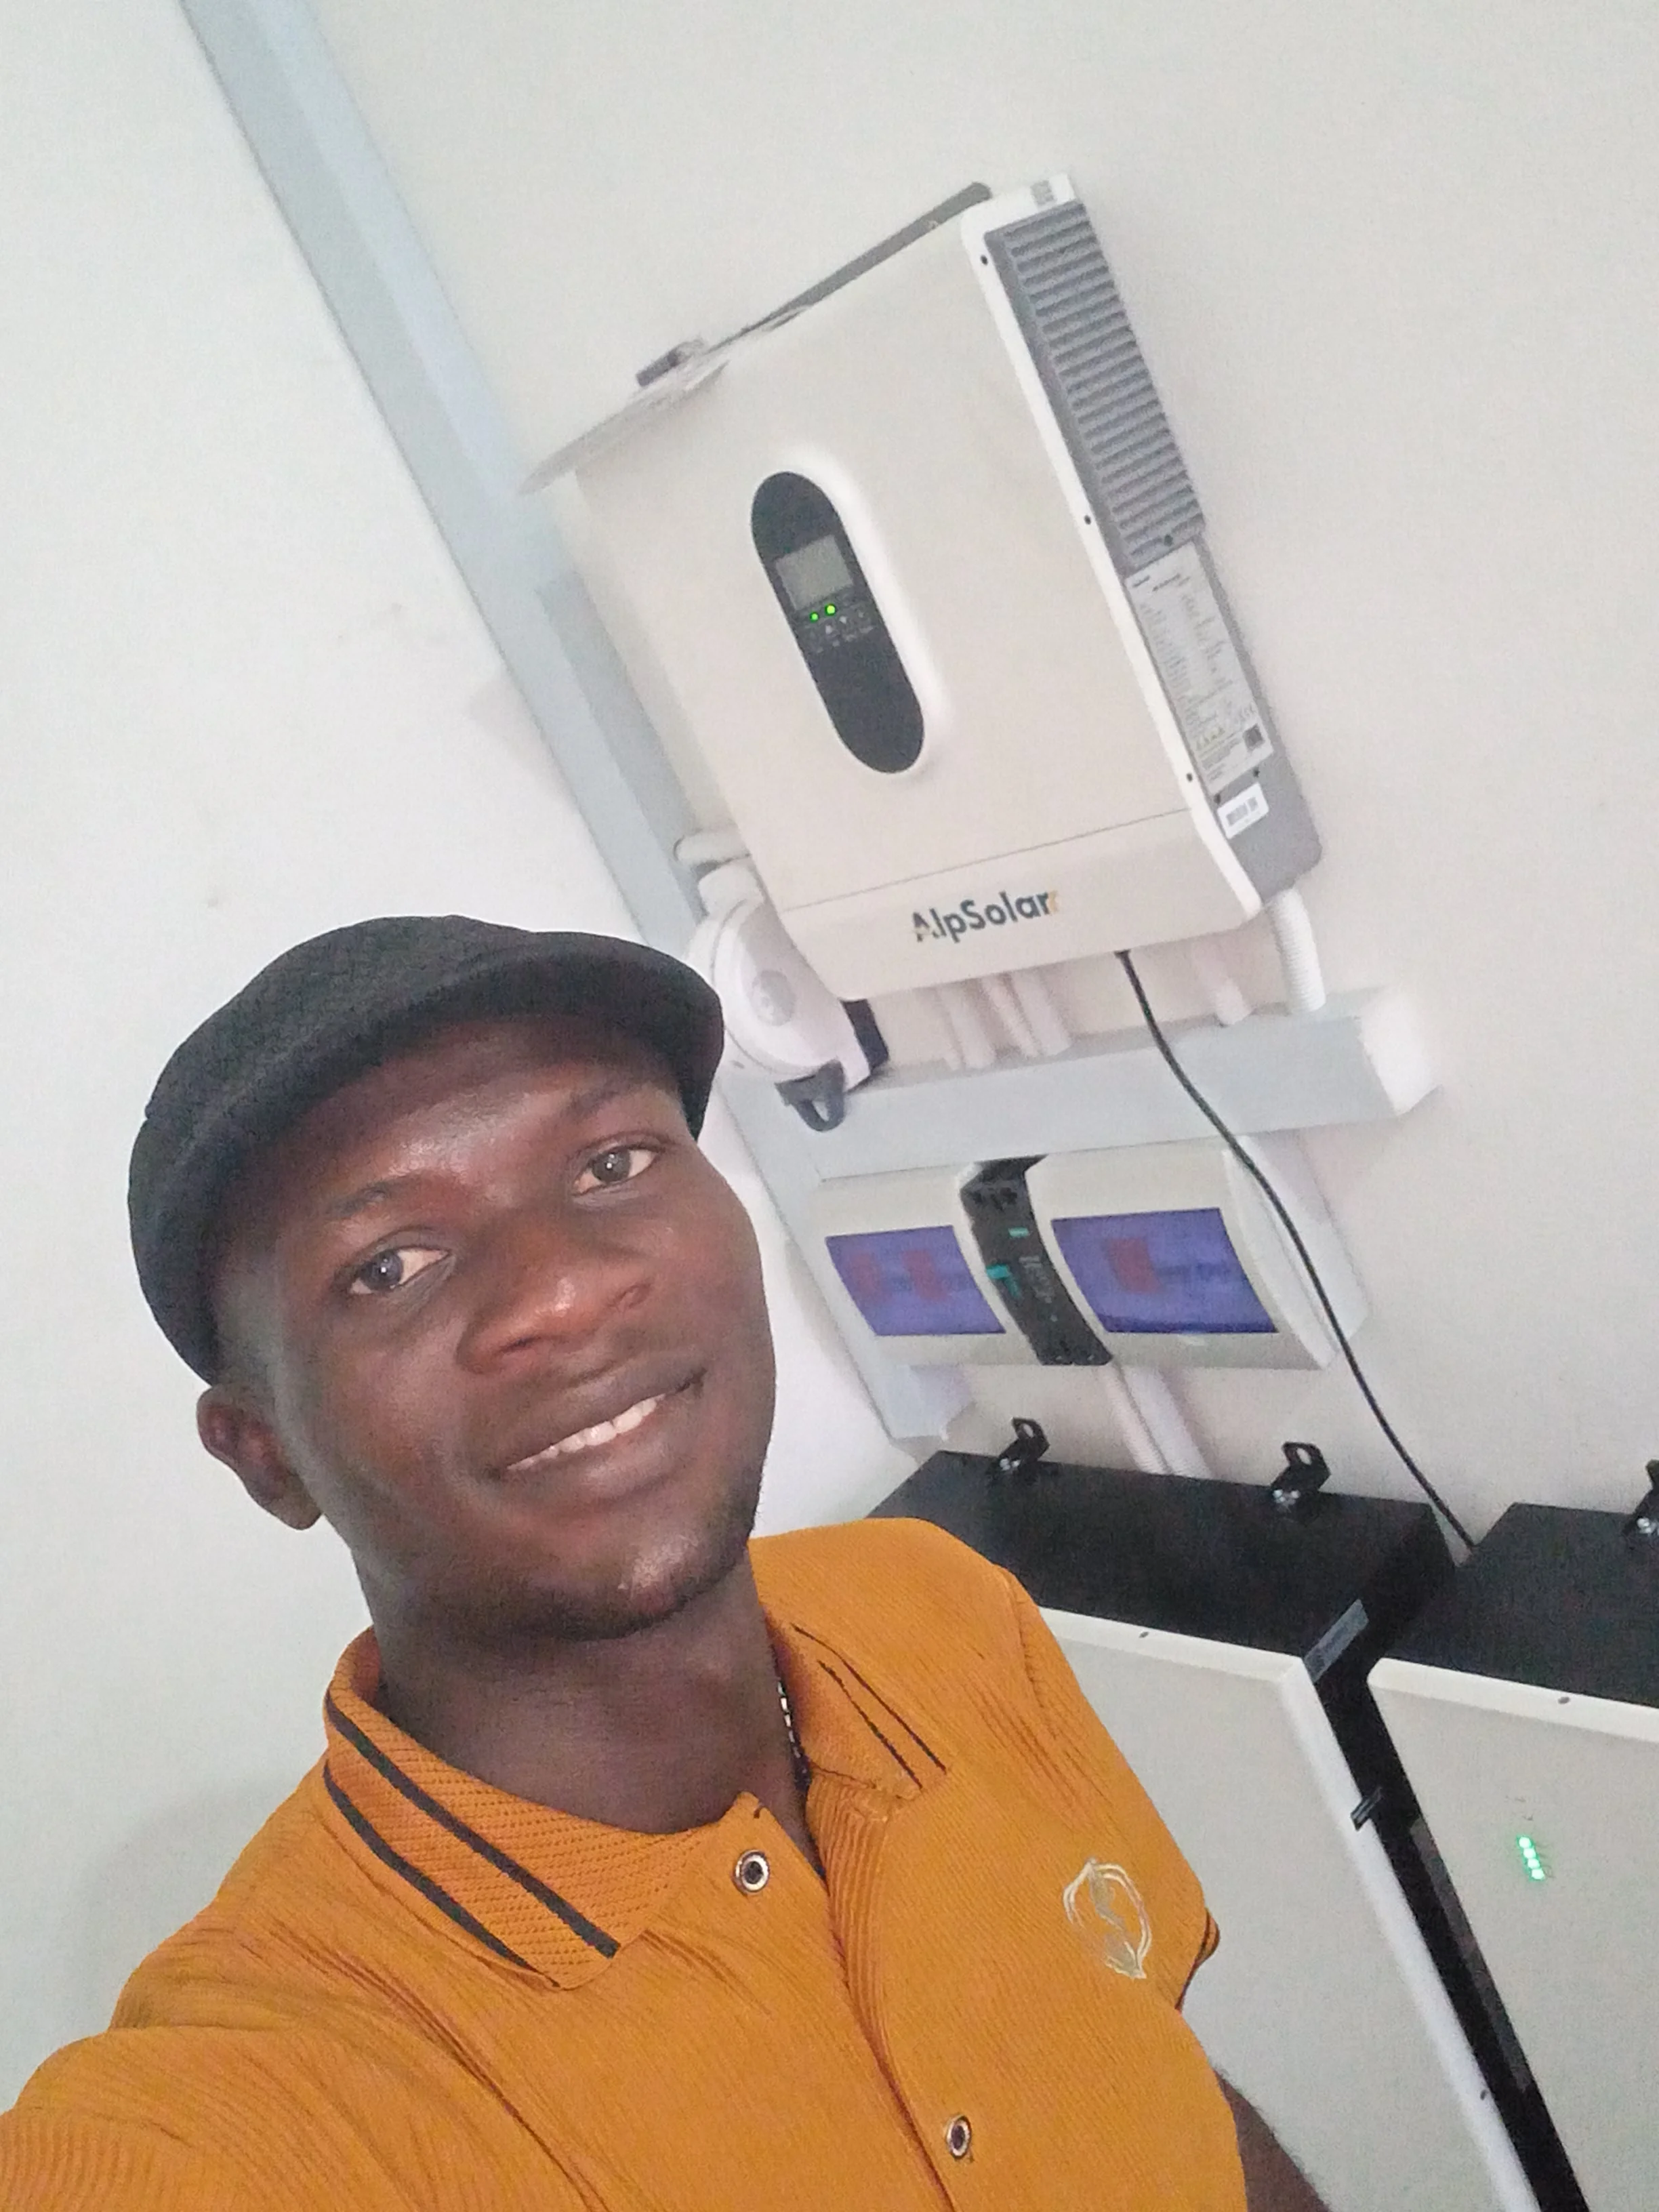
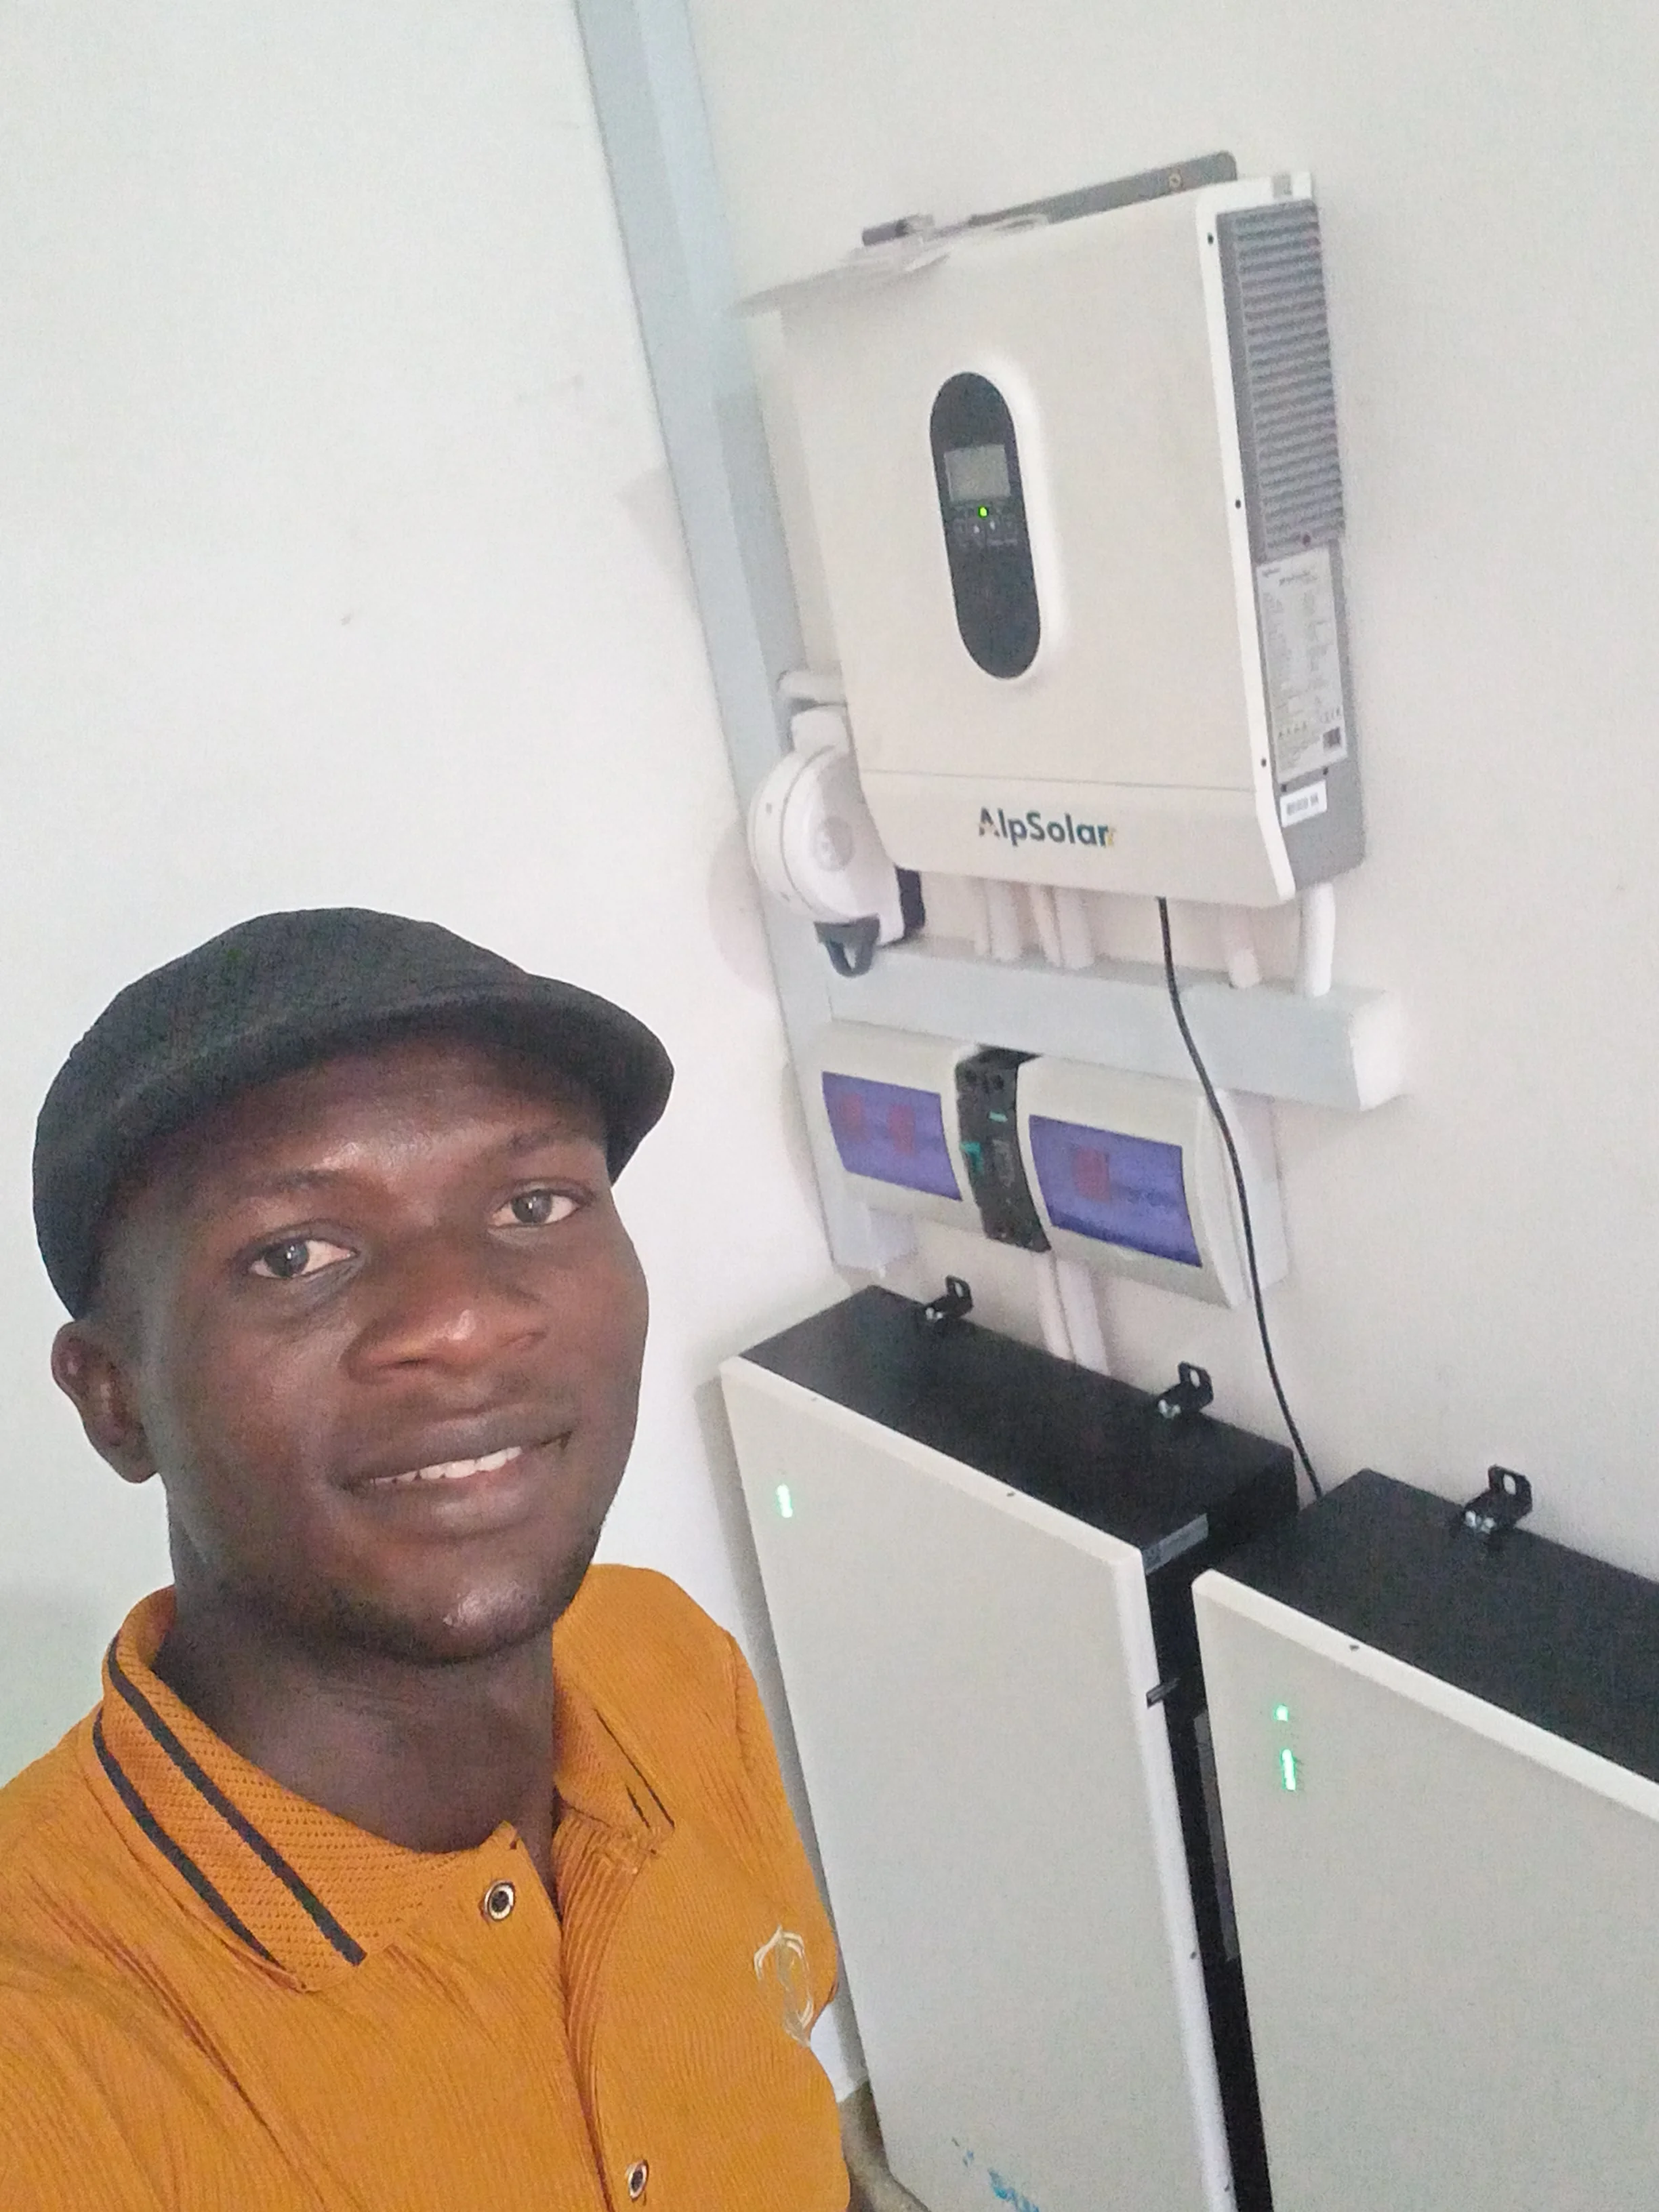
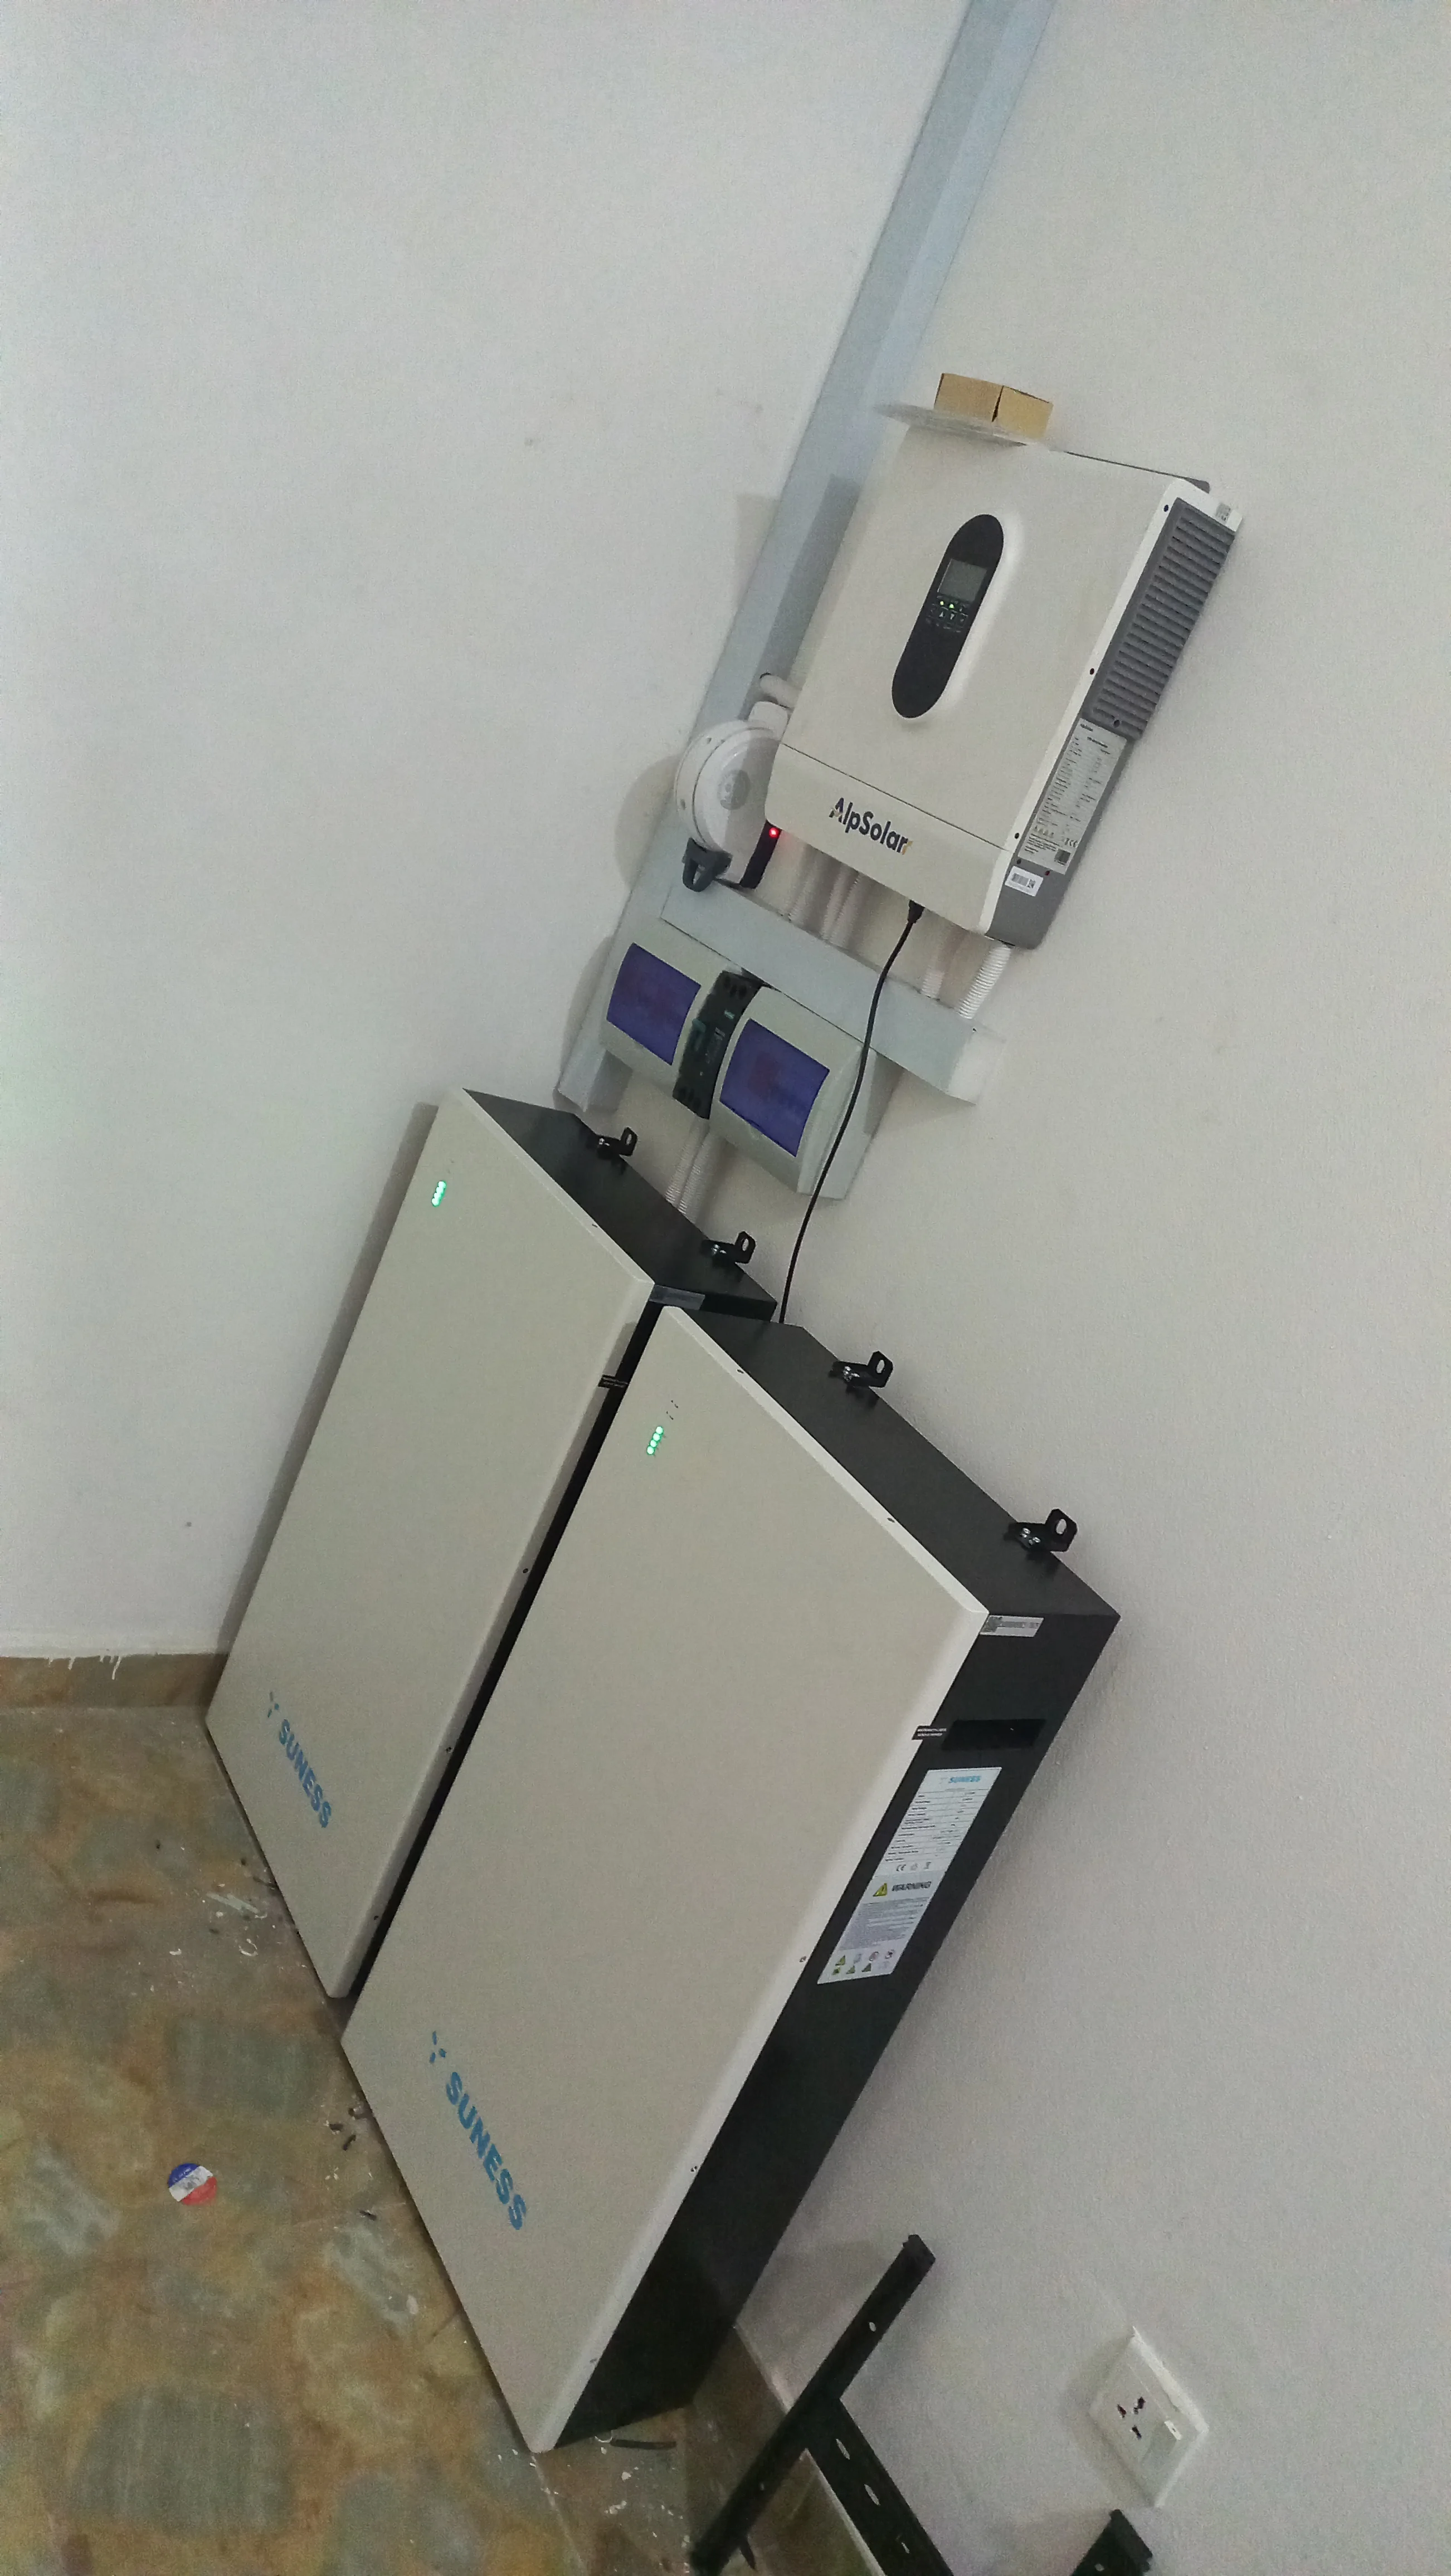
Phase 5 — Battery Installation & Indoor System Assembly
Positioning the two SUNESS EC-48300F LiFePO4 batteries on floor stands, connecting to the AlpSolarr inverter, and verifying BMS communication.
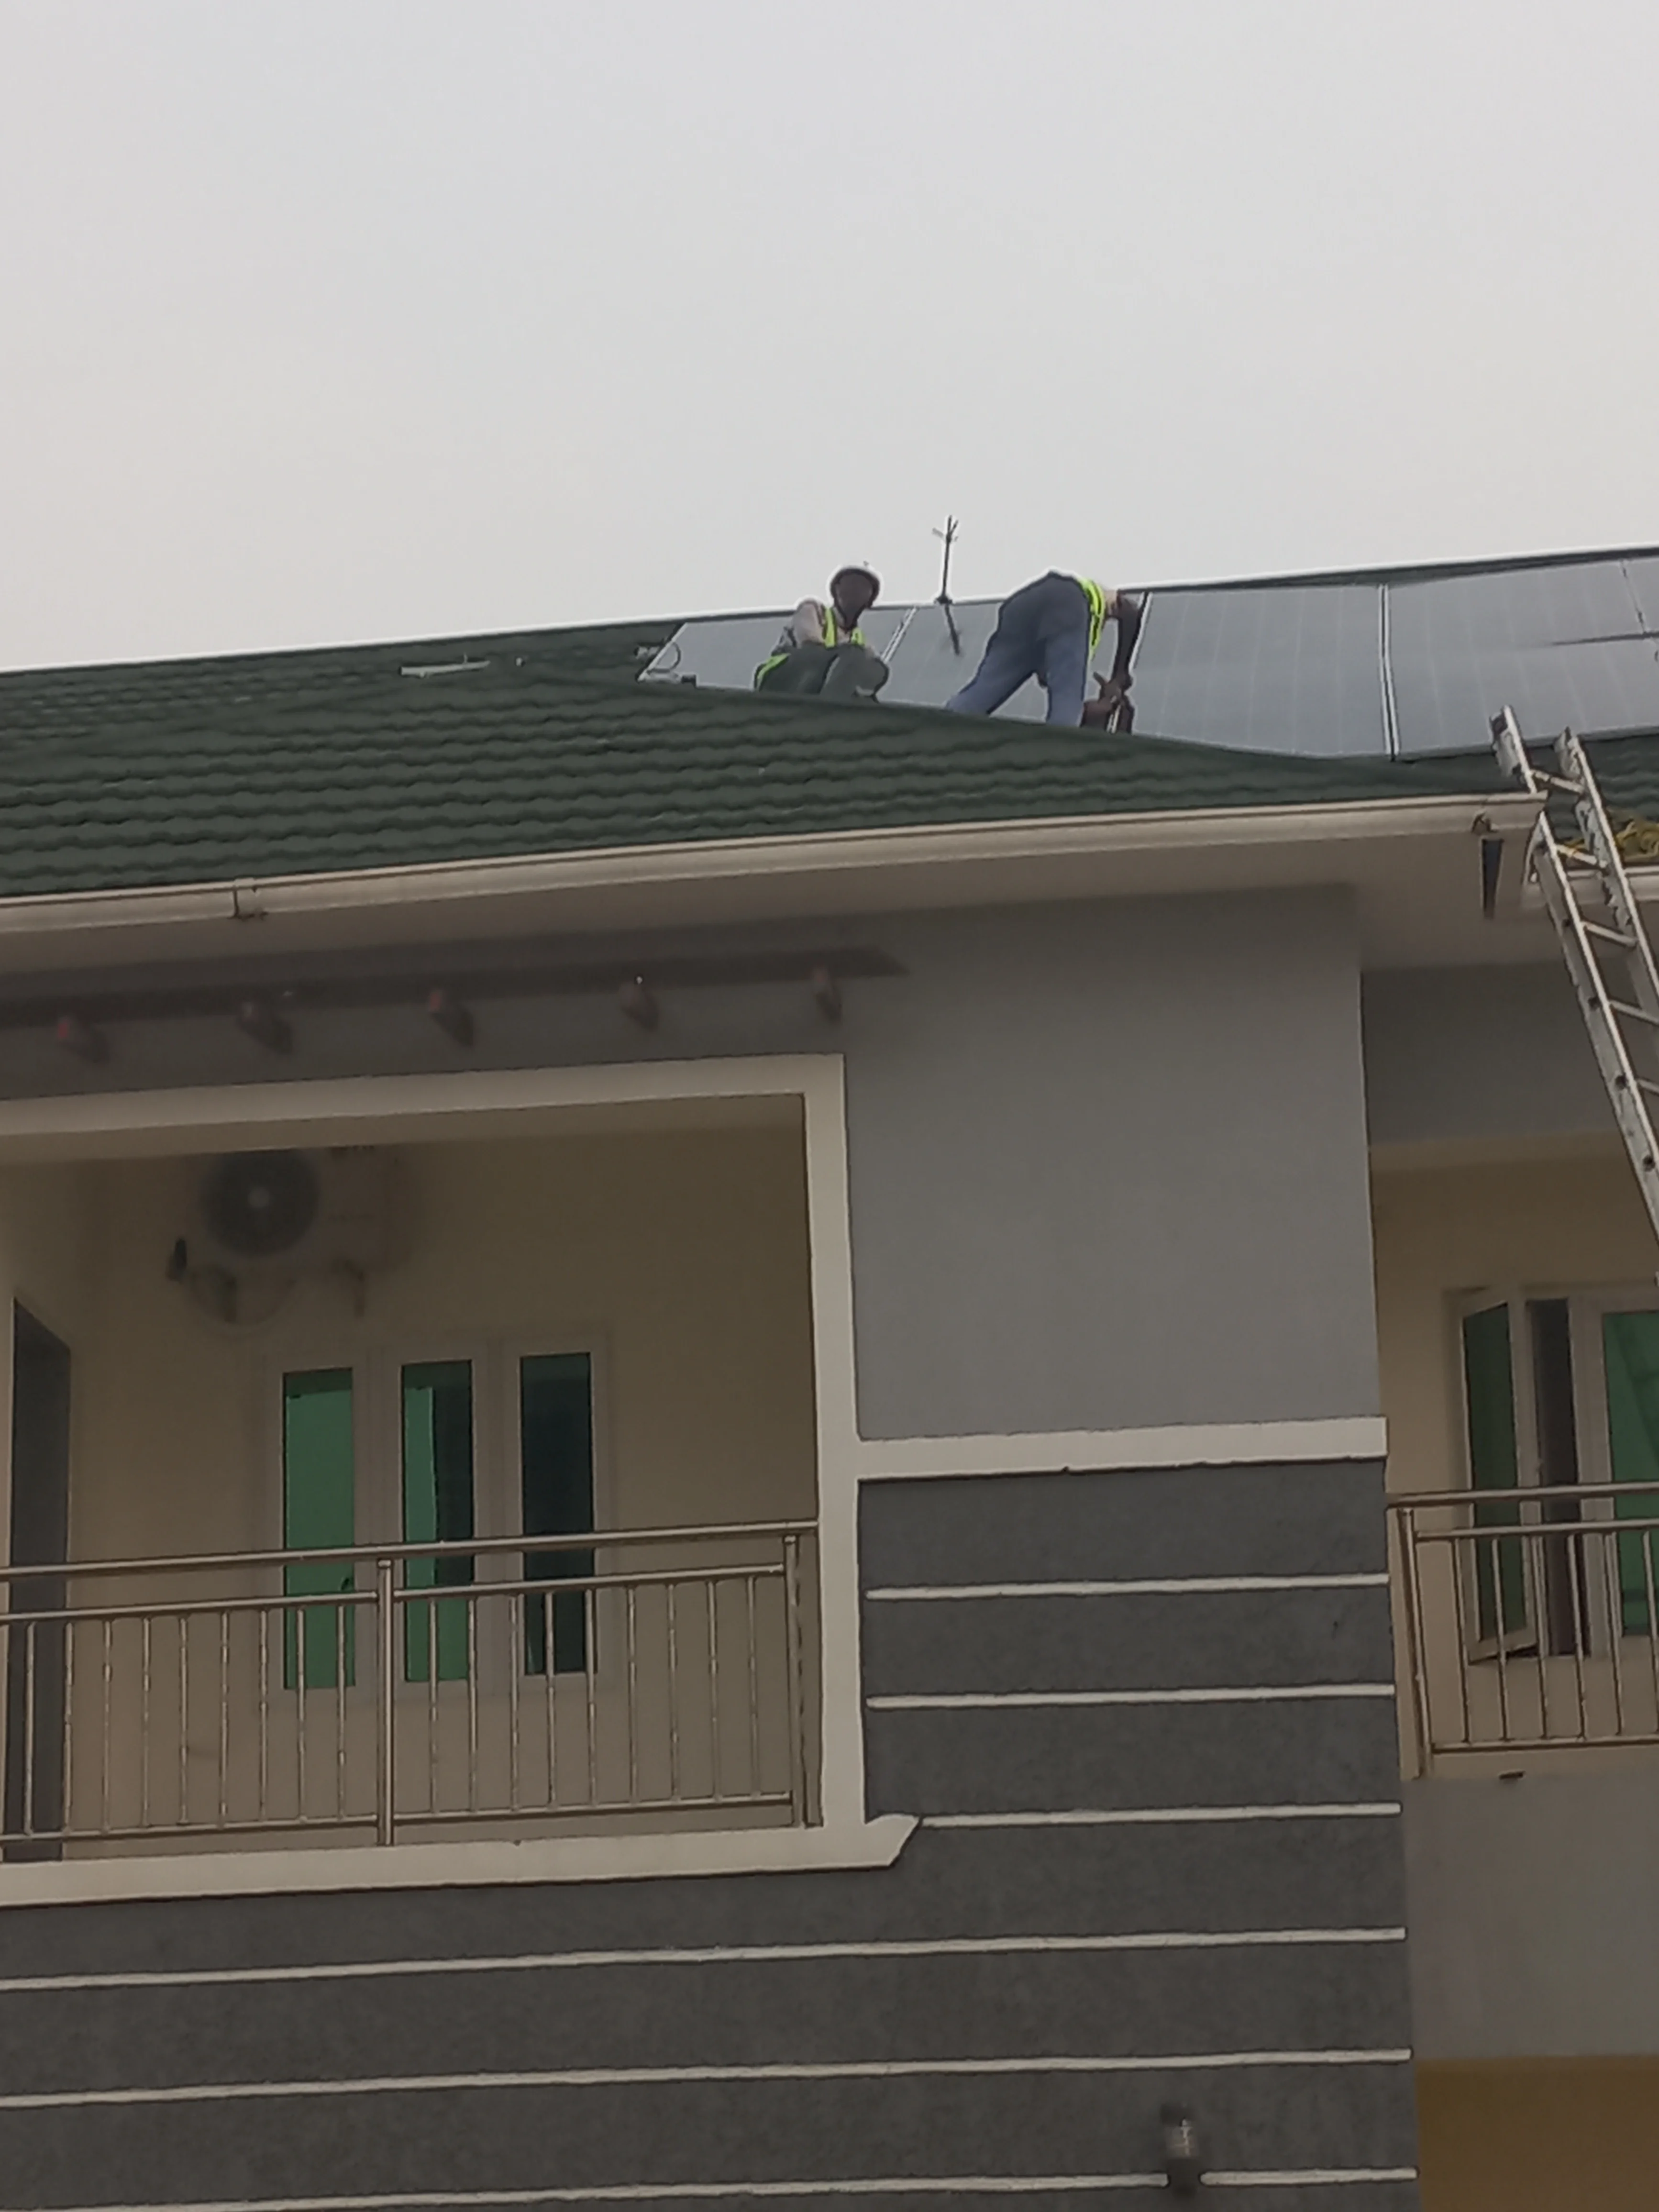
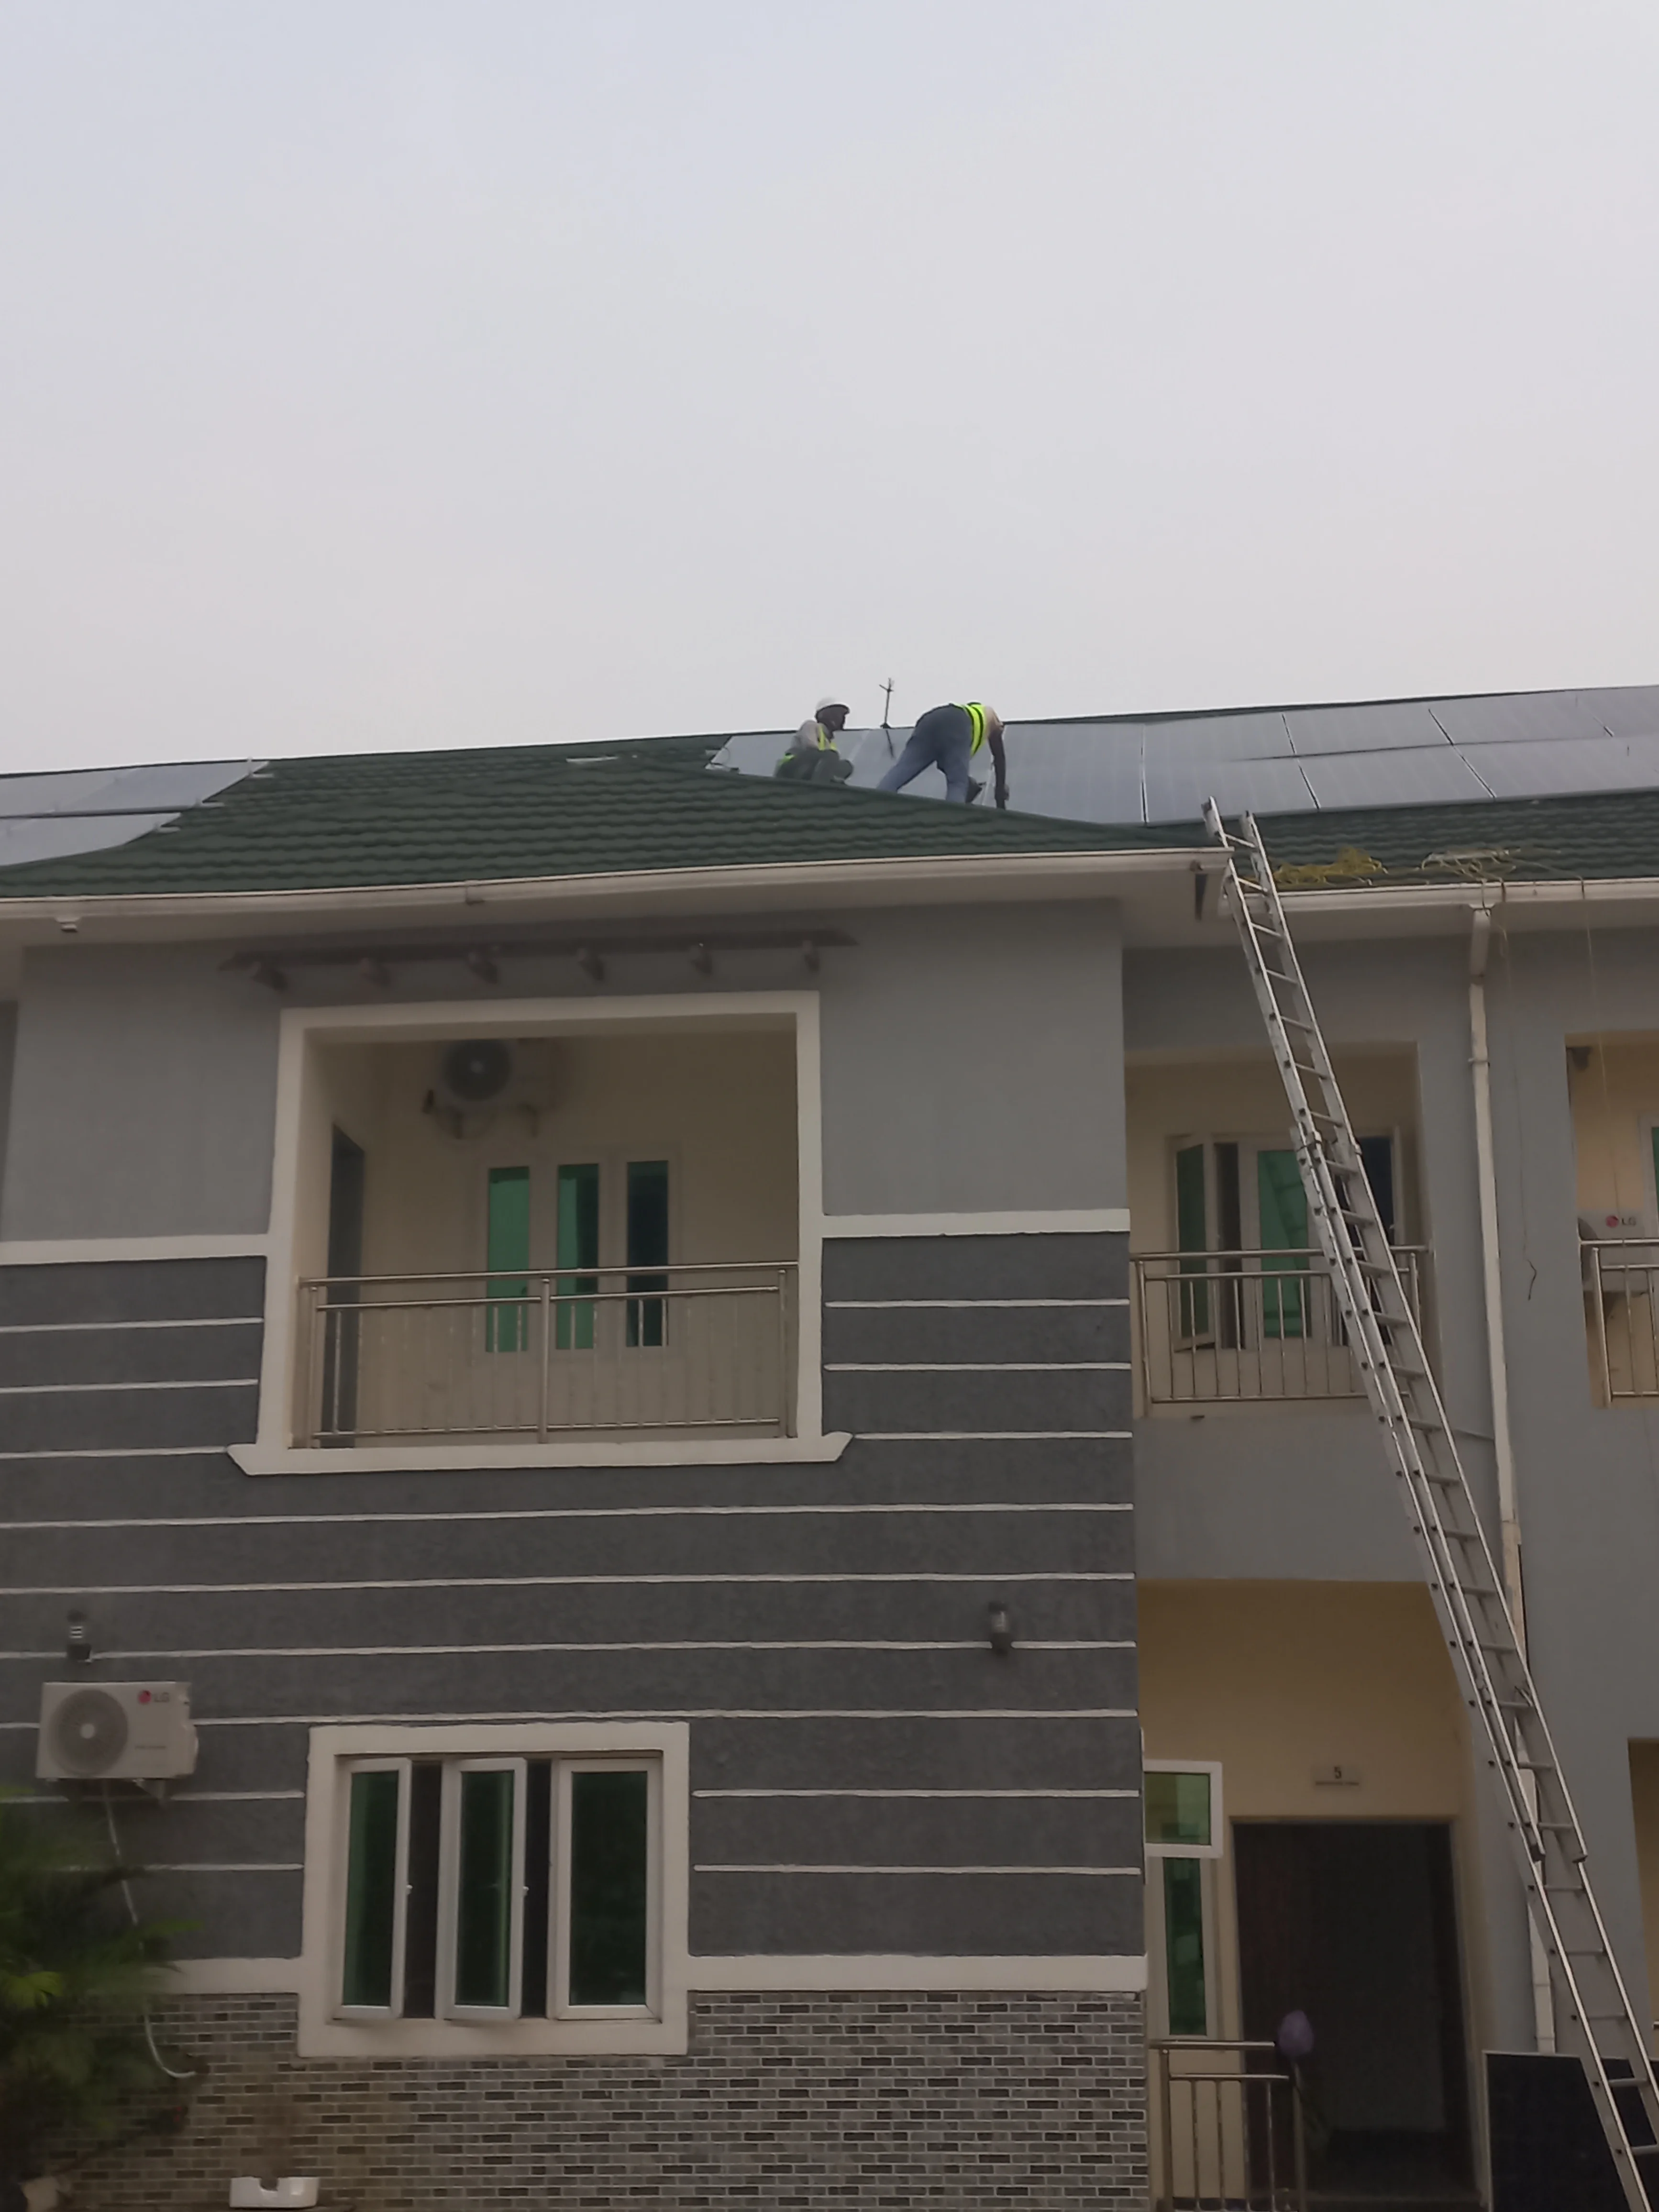
Phase 6 — Rooftop Panel Mounting
Climbing the two-story building, installing aluminum mounting rails on the green stone-coated roof, hoisting 16 Jinko Solar 620W panels (32.4kg each) via ropes, and securing them with clamps.


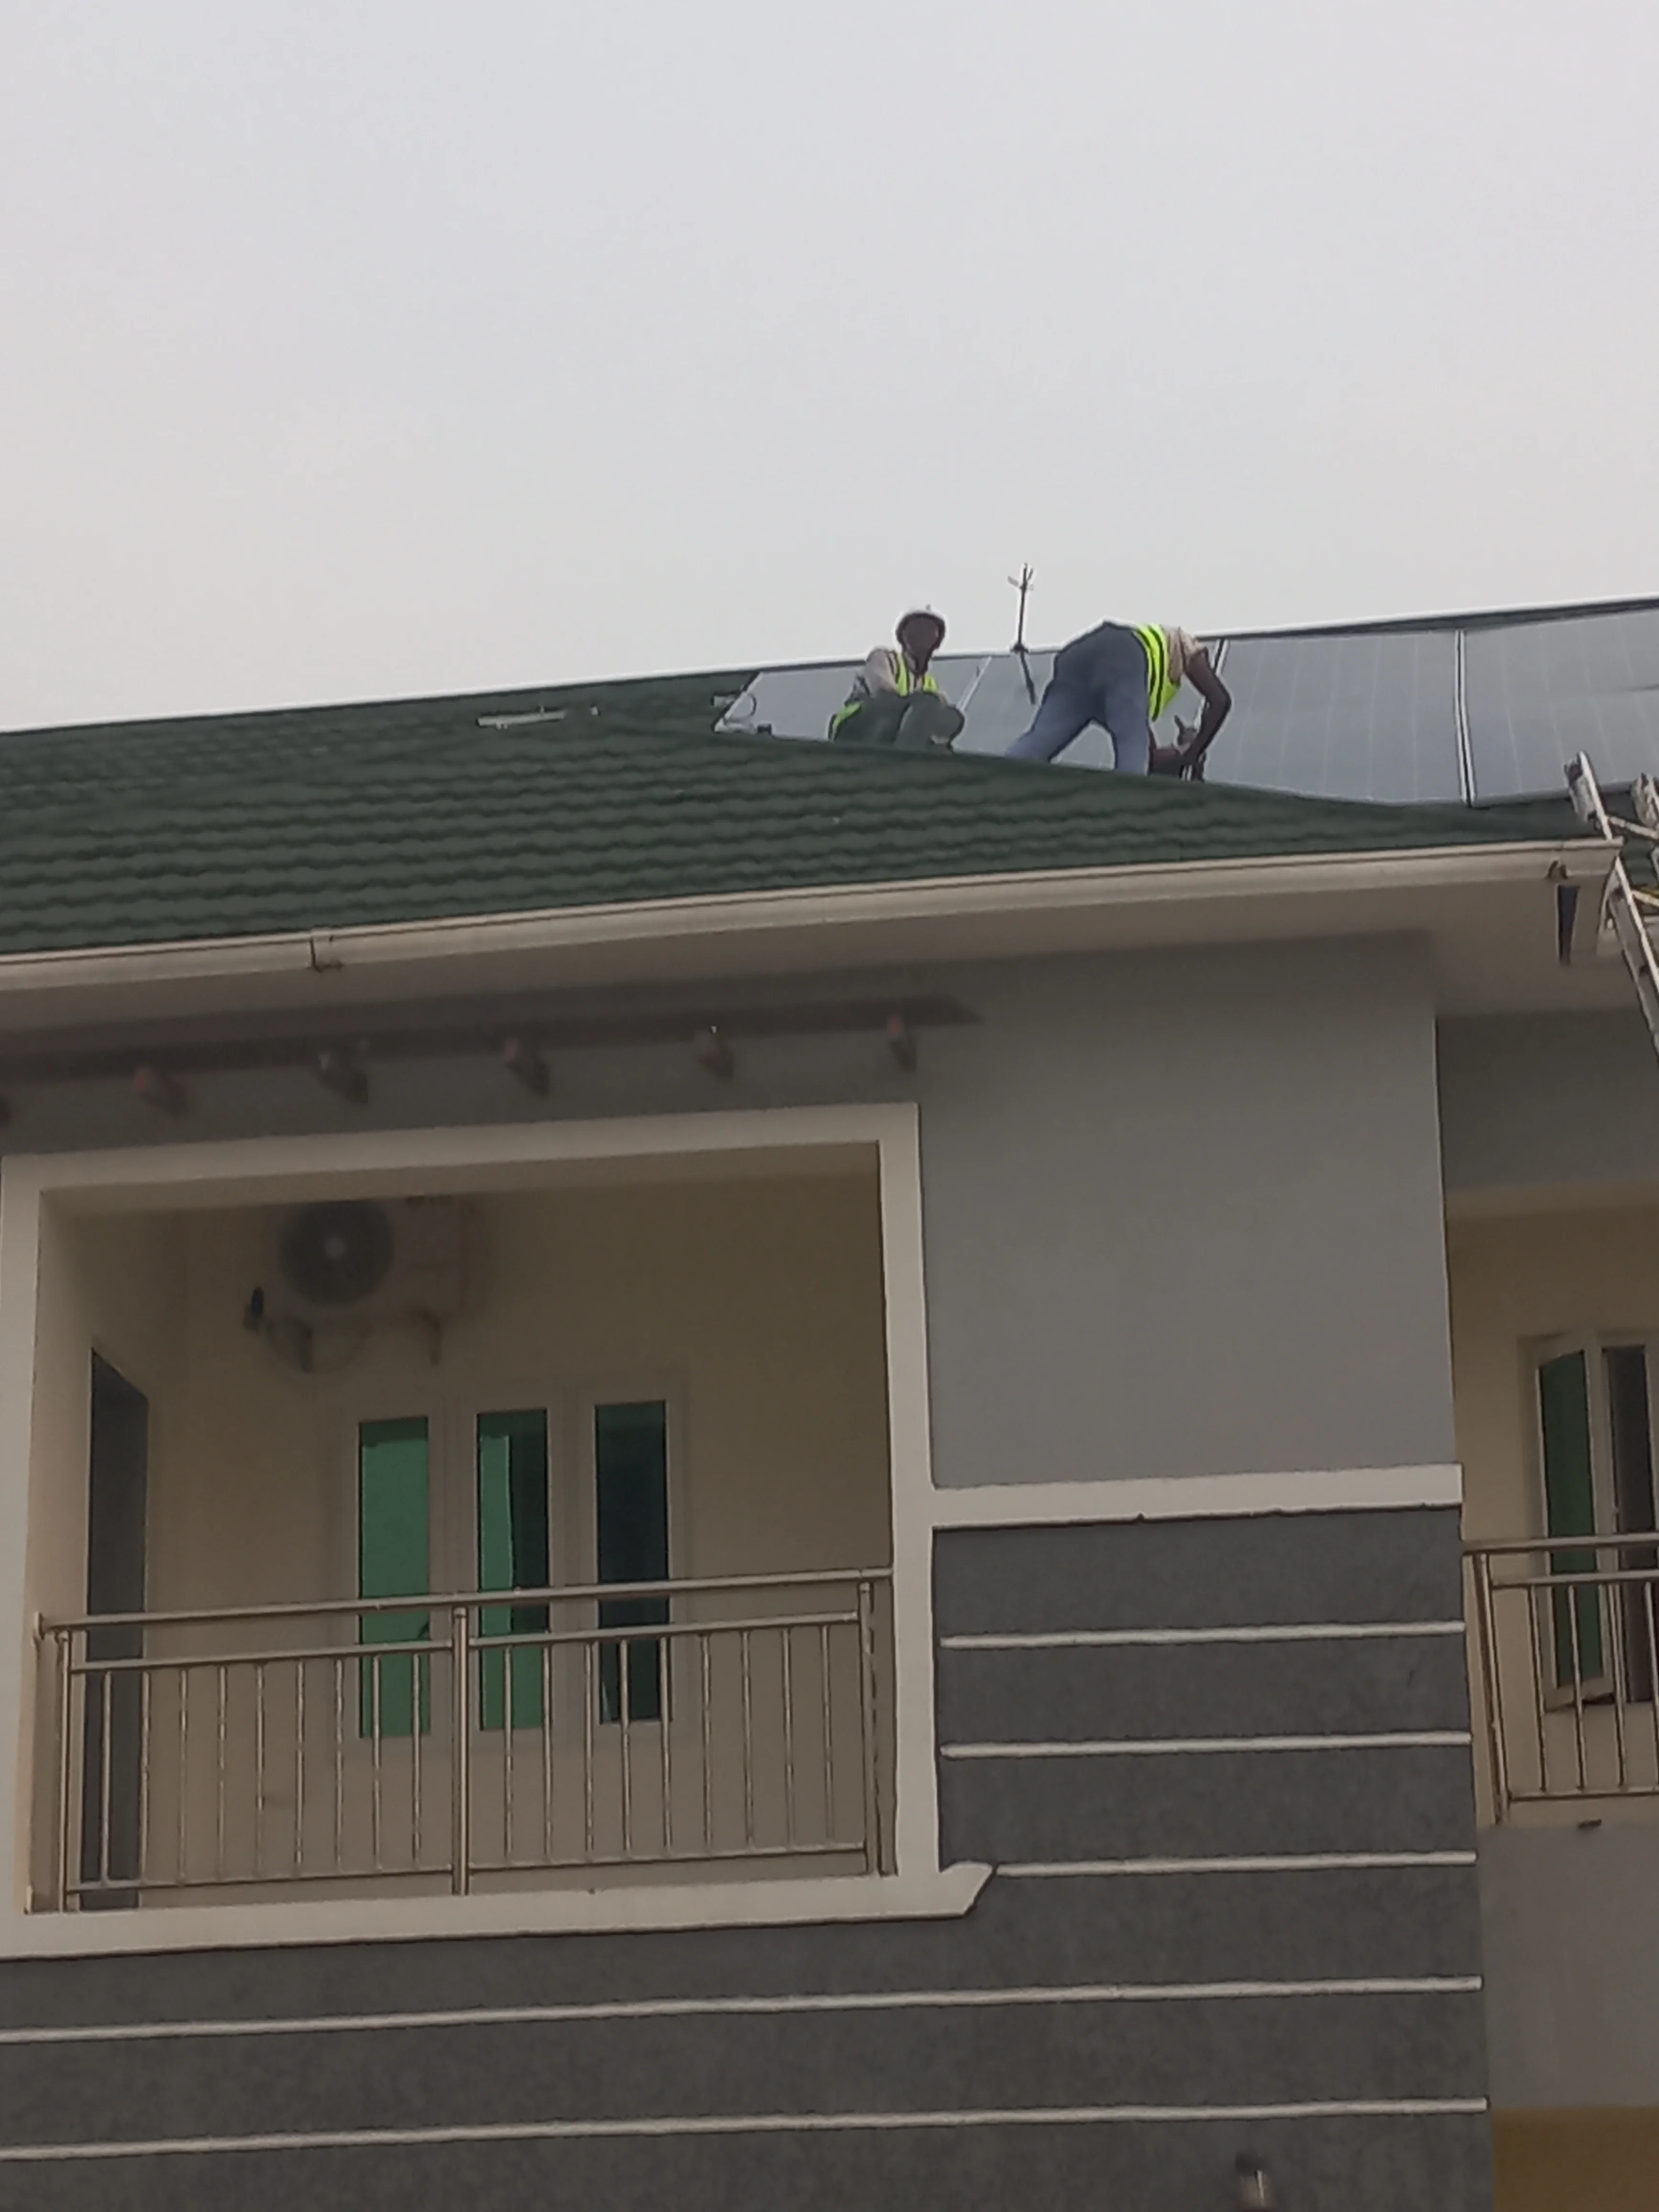
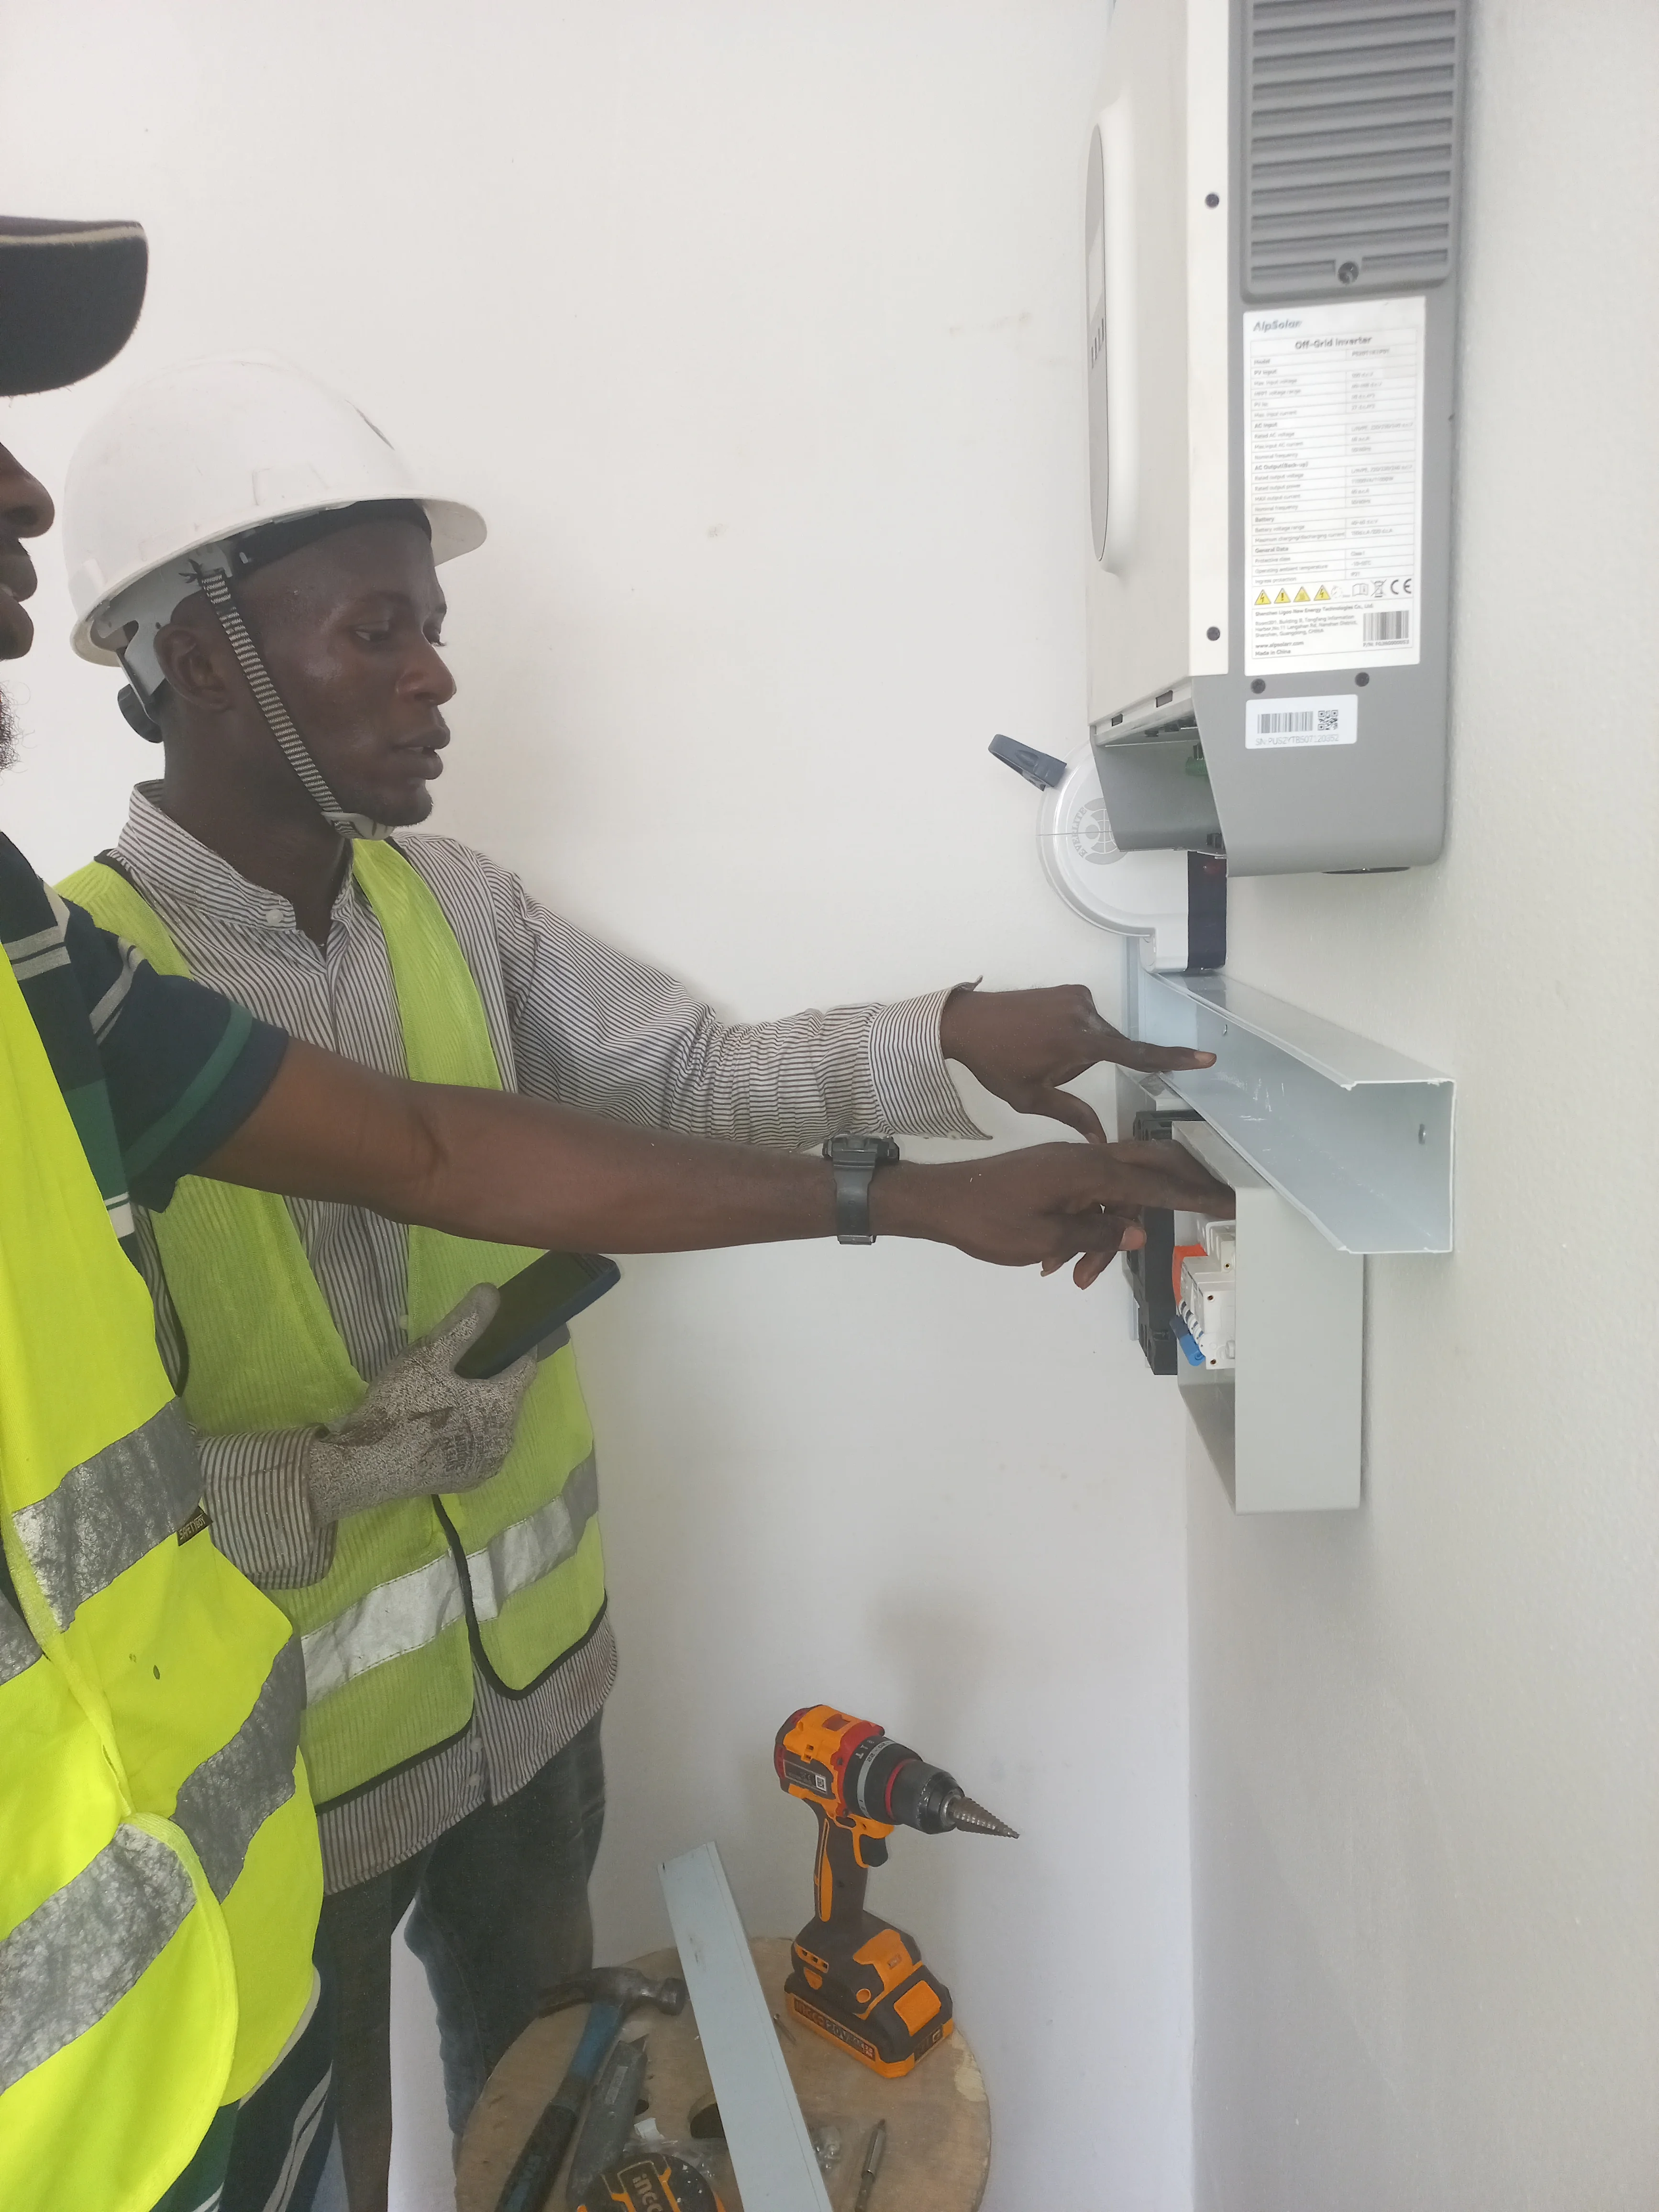
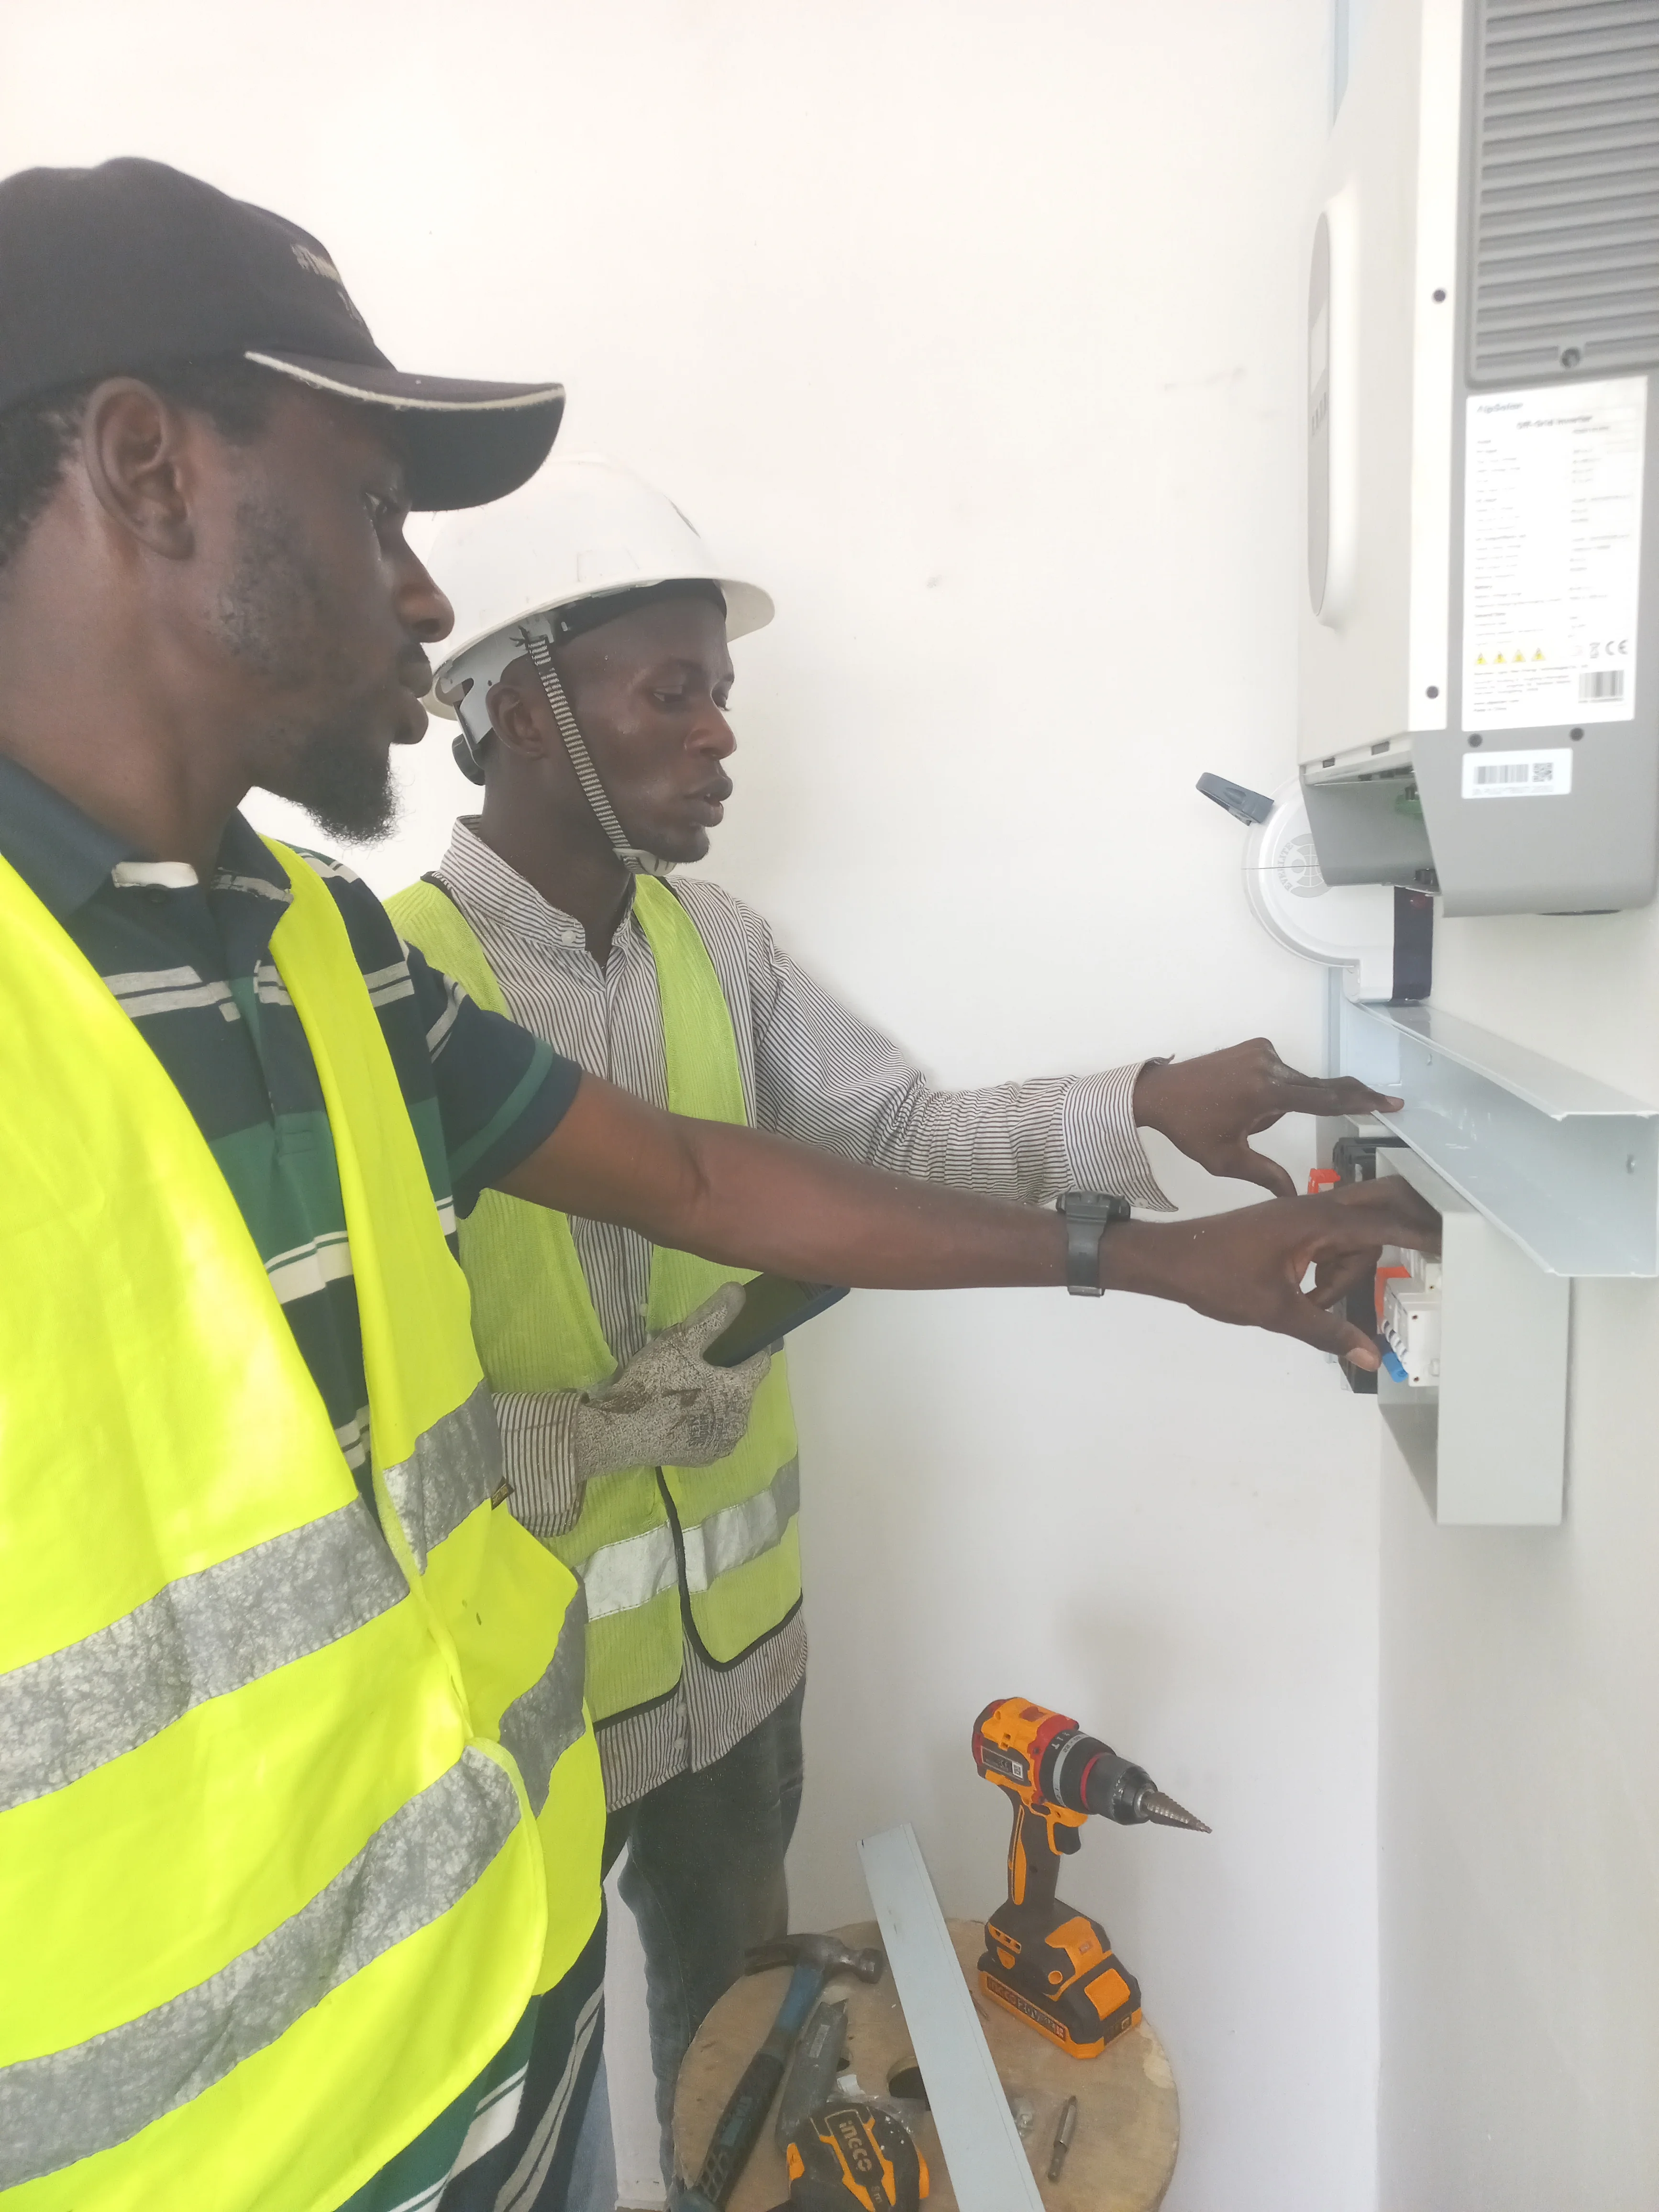
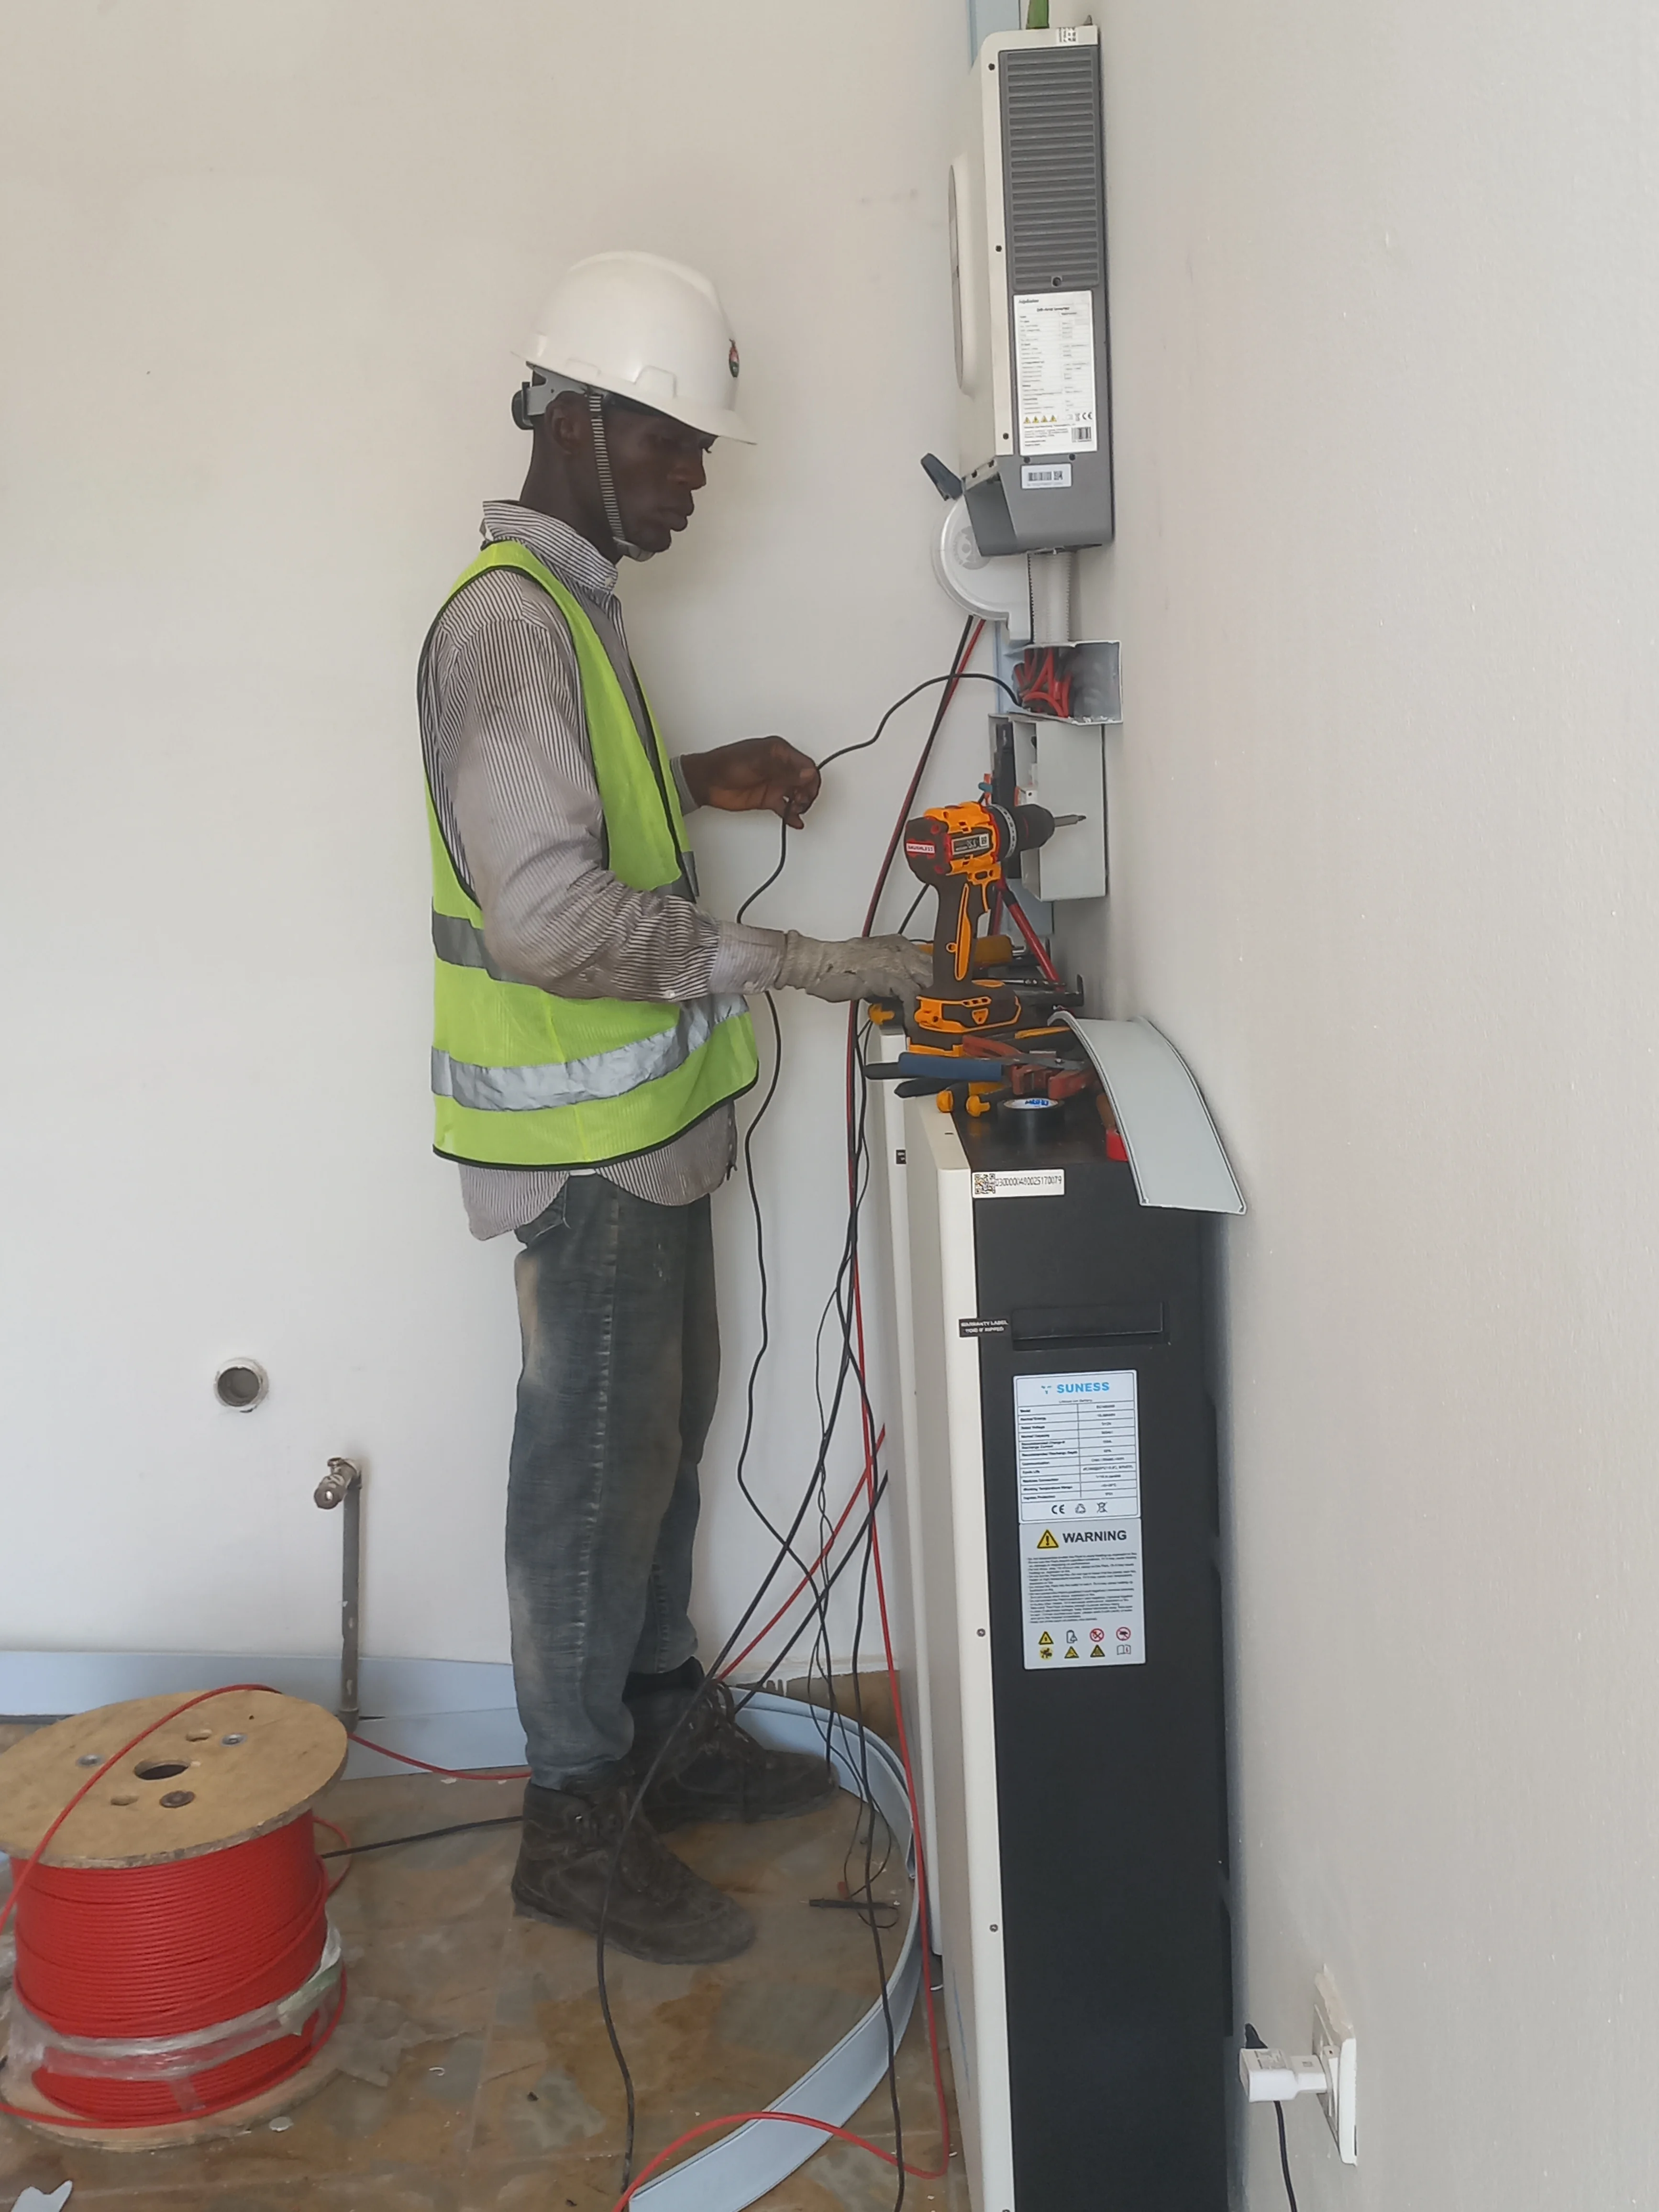
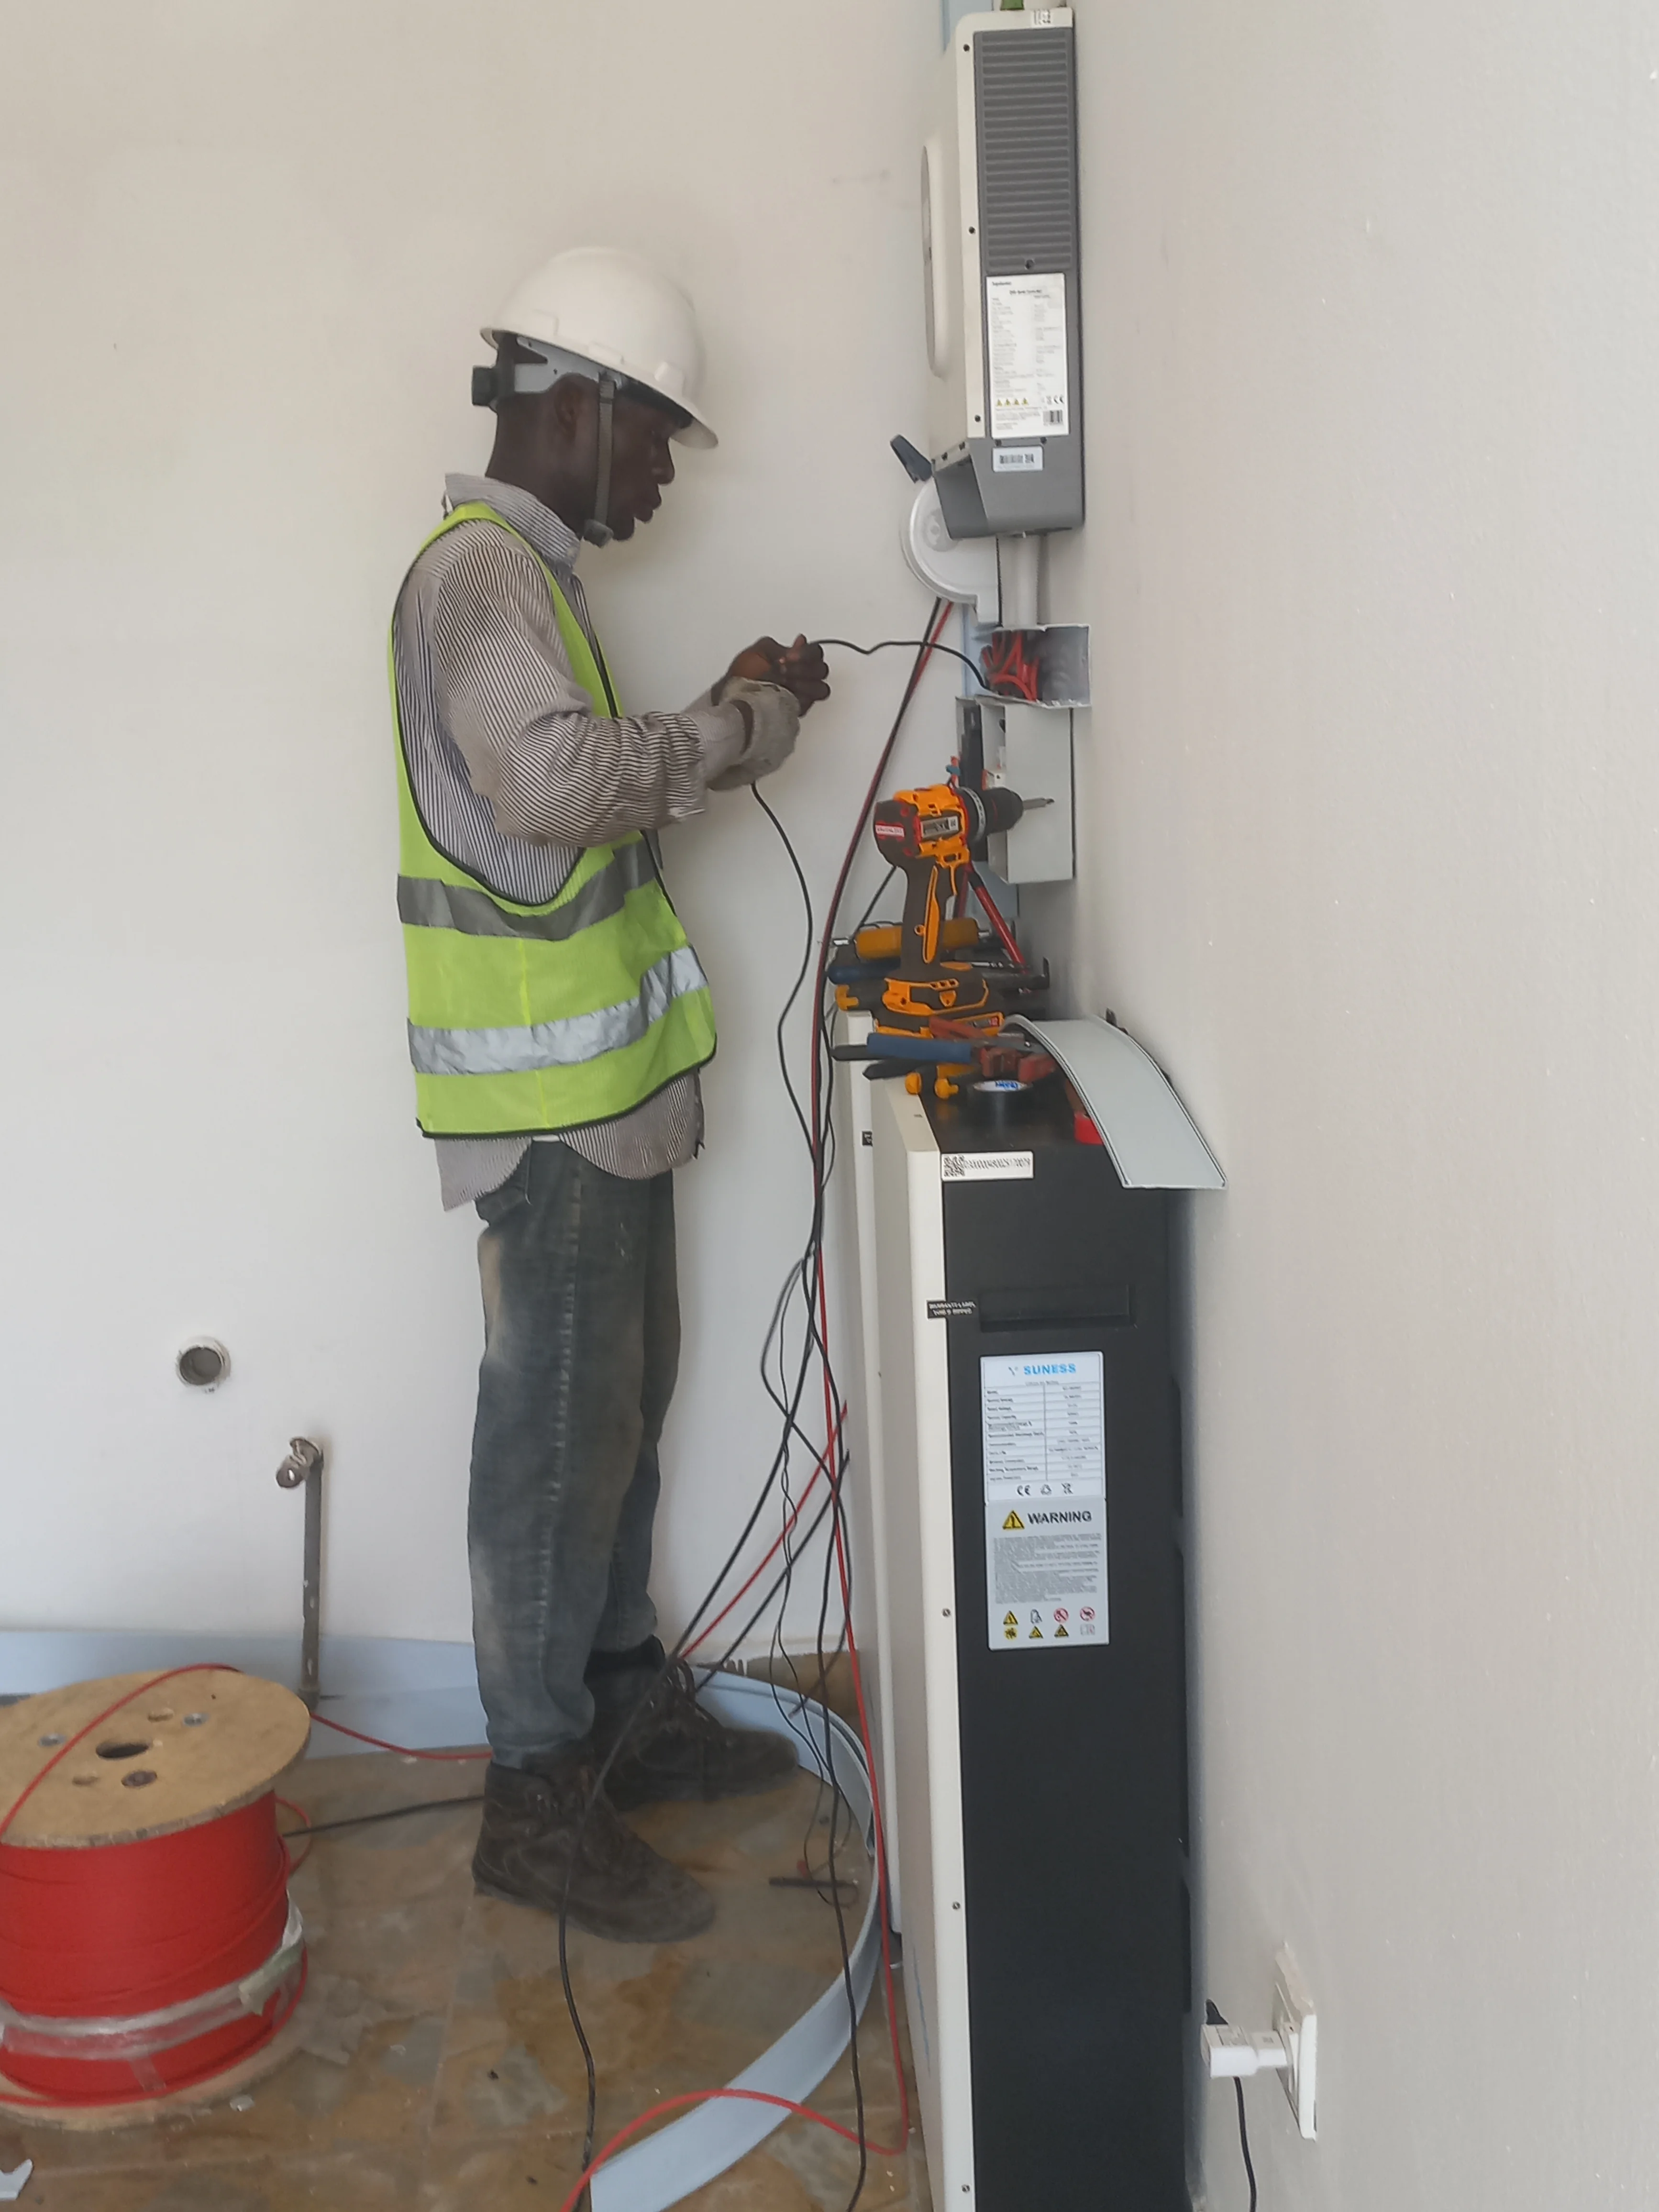
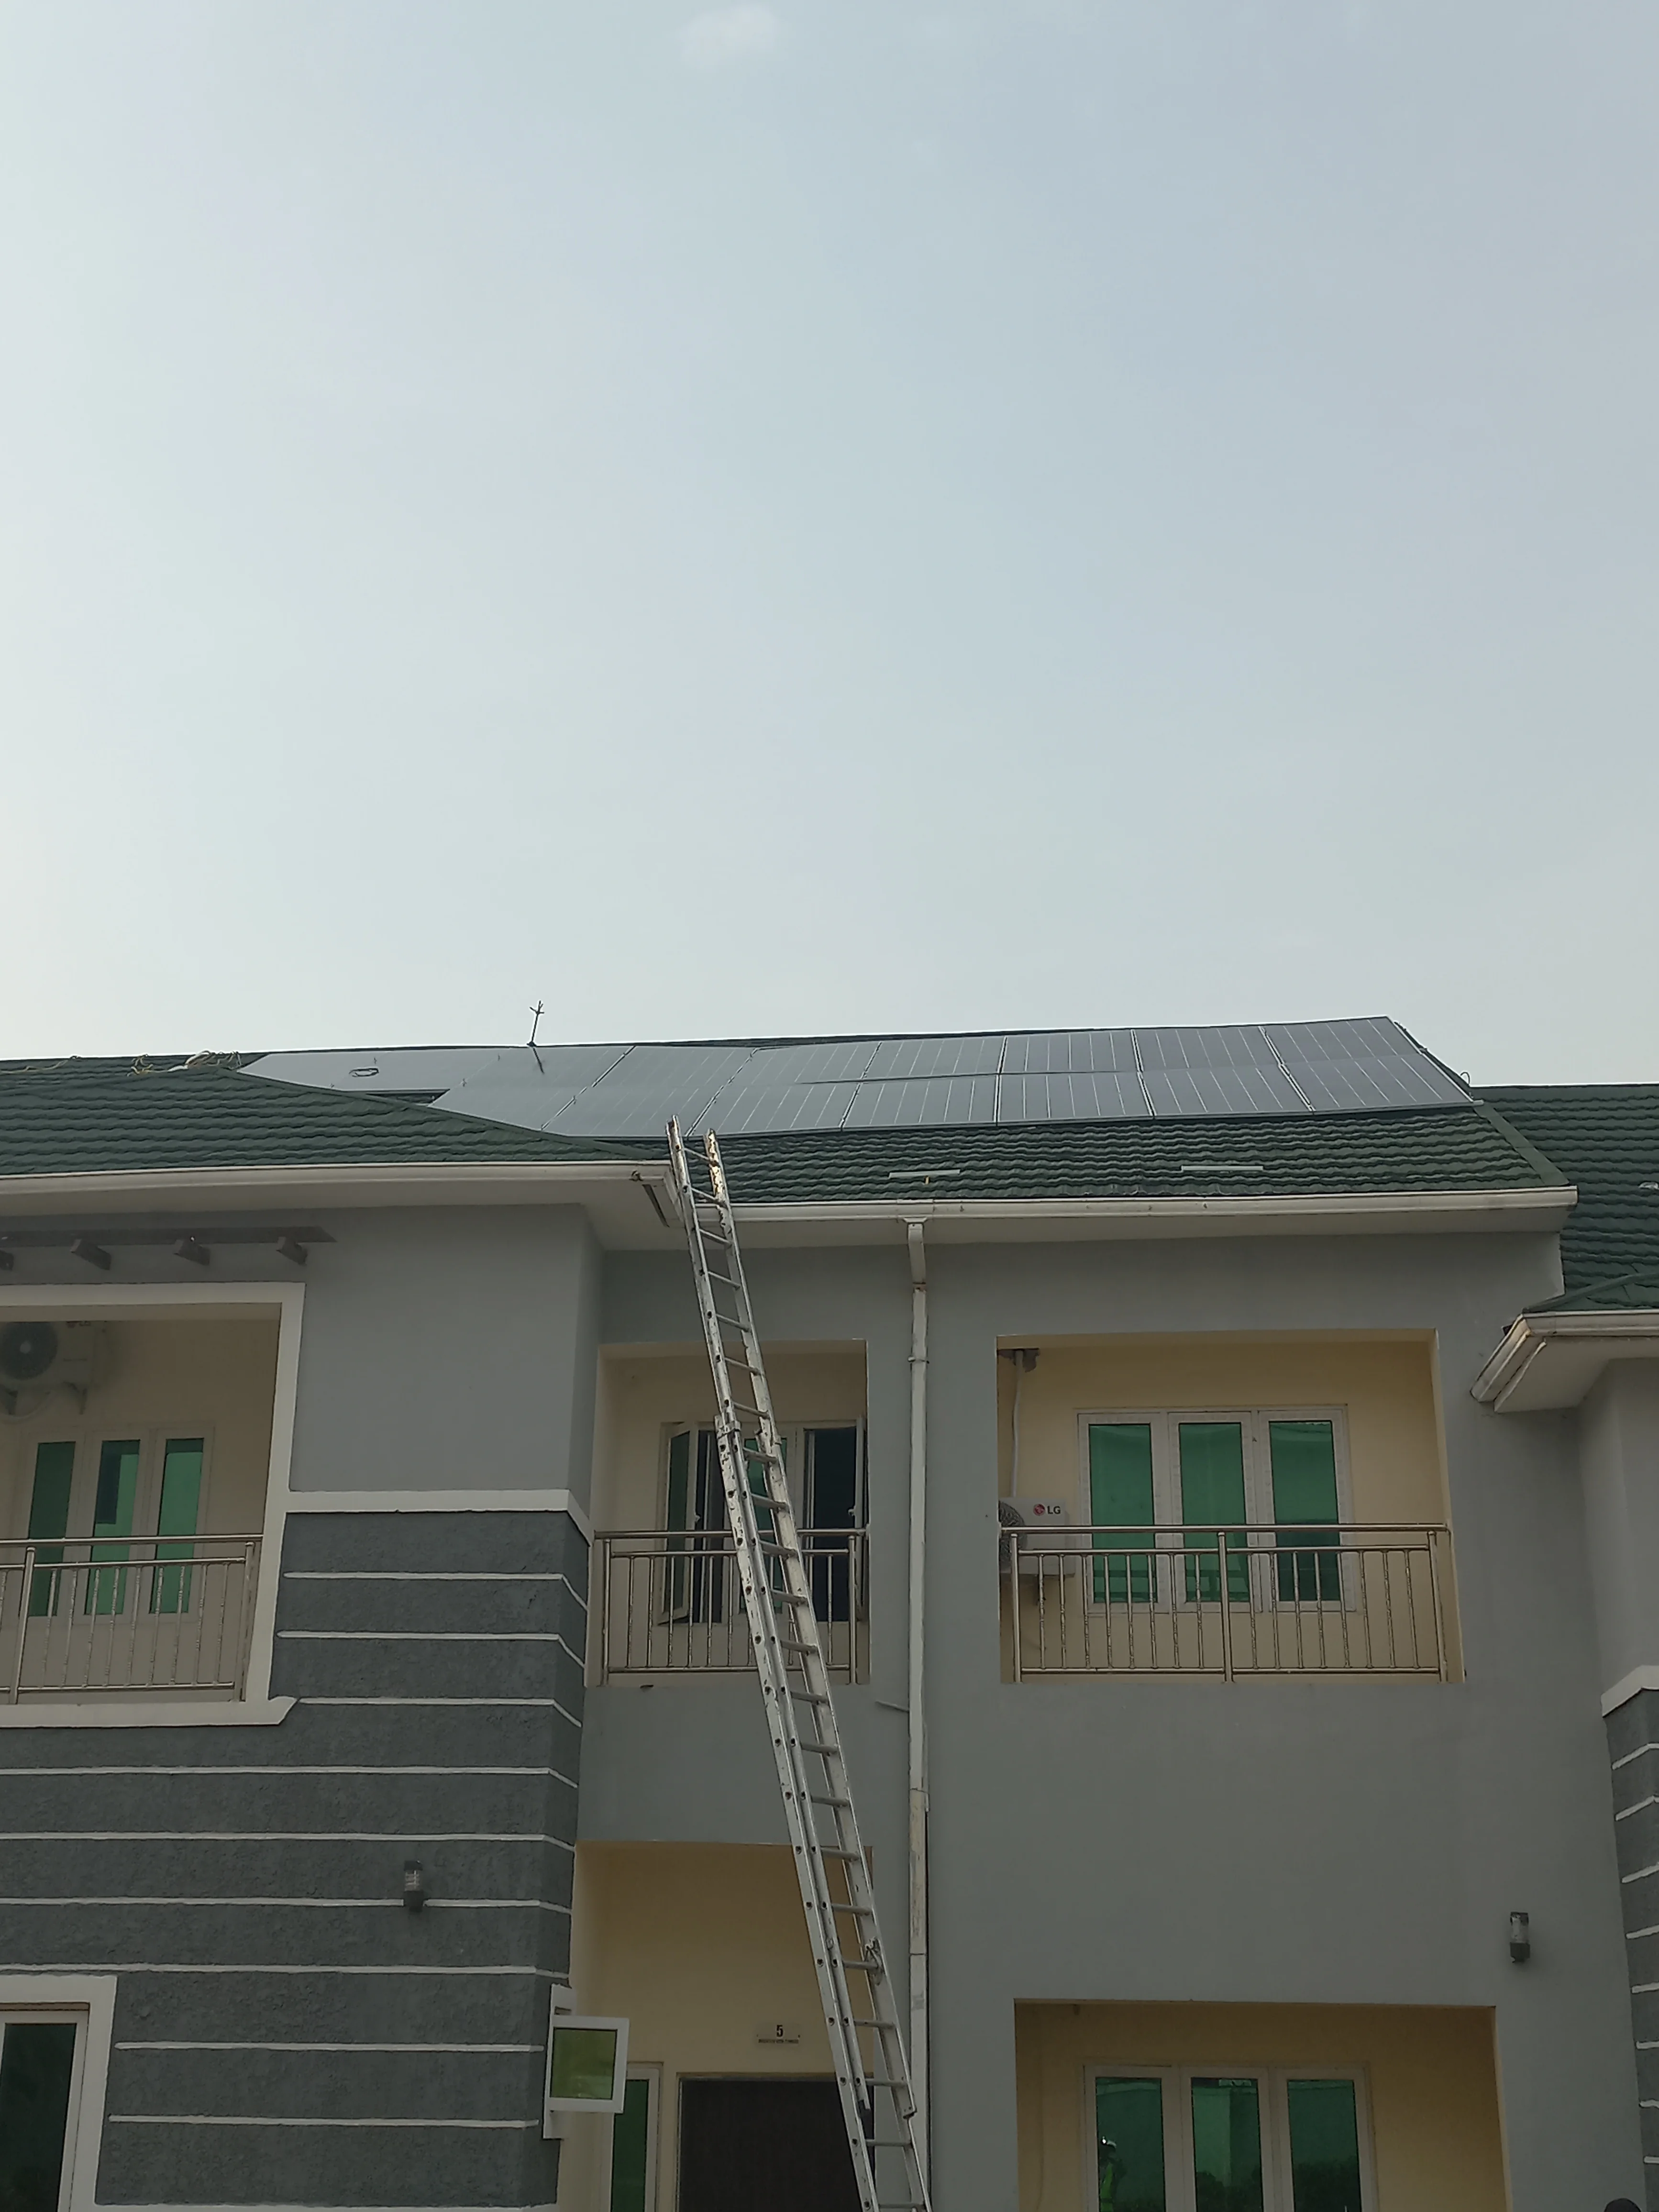
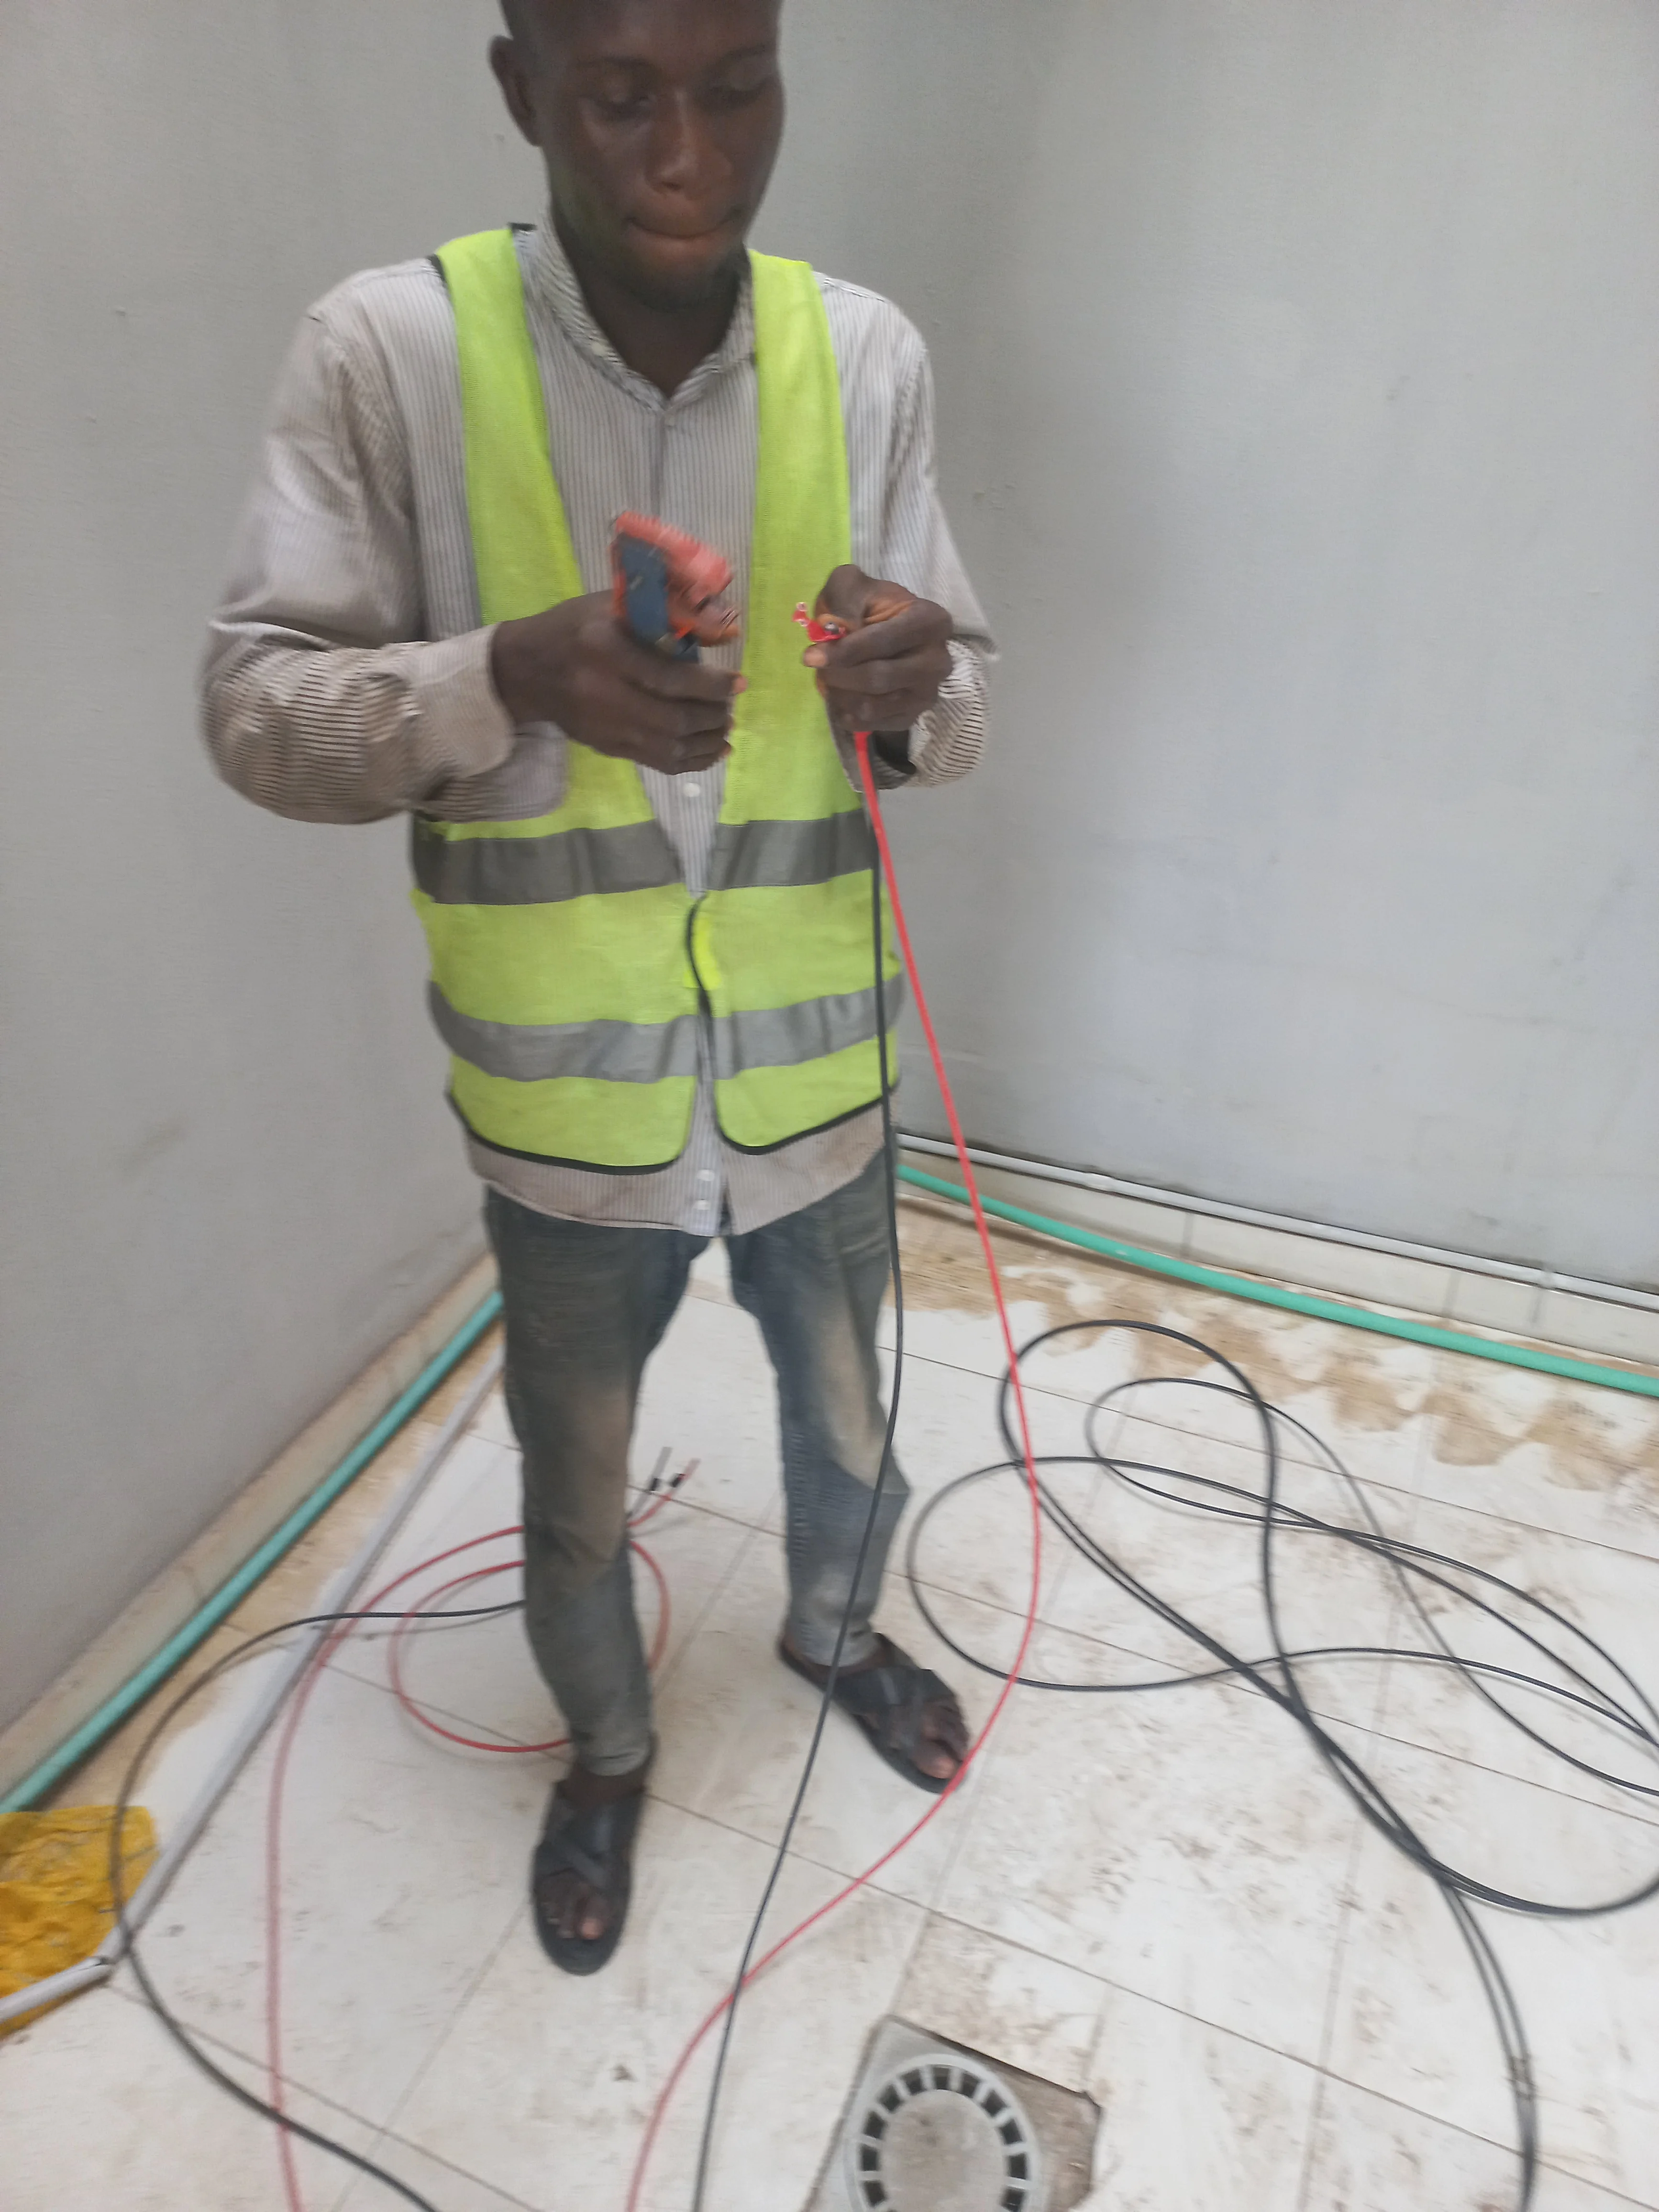
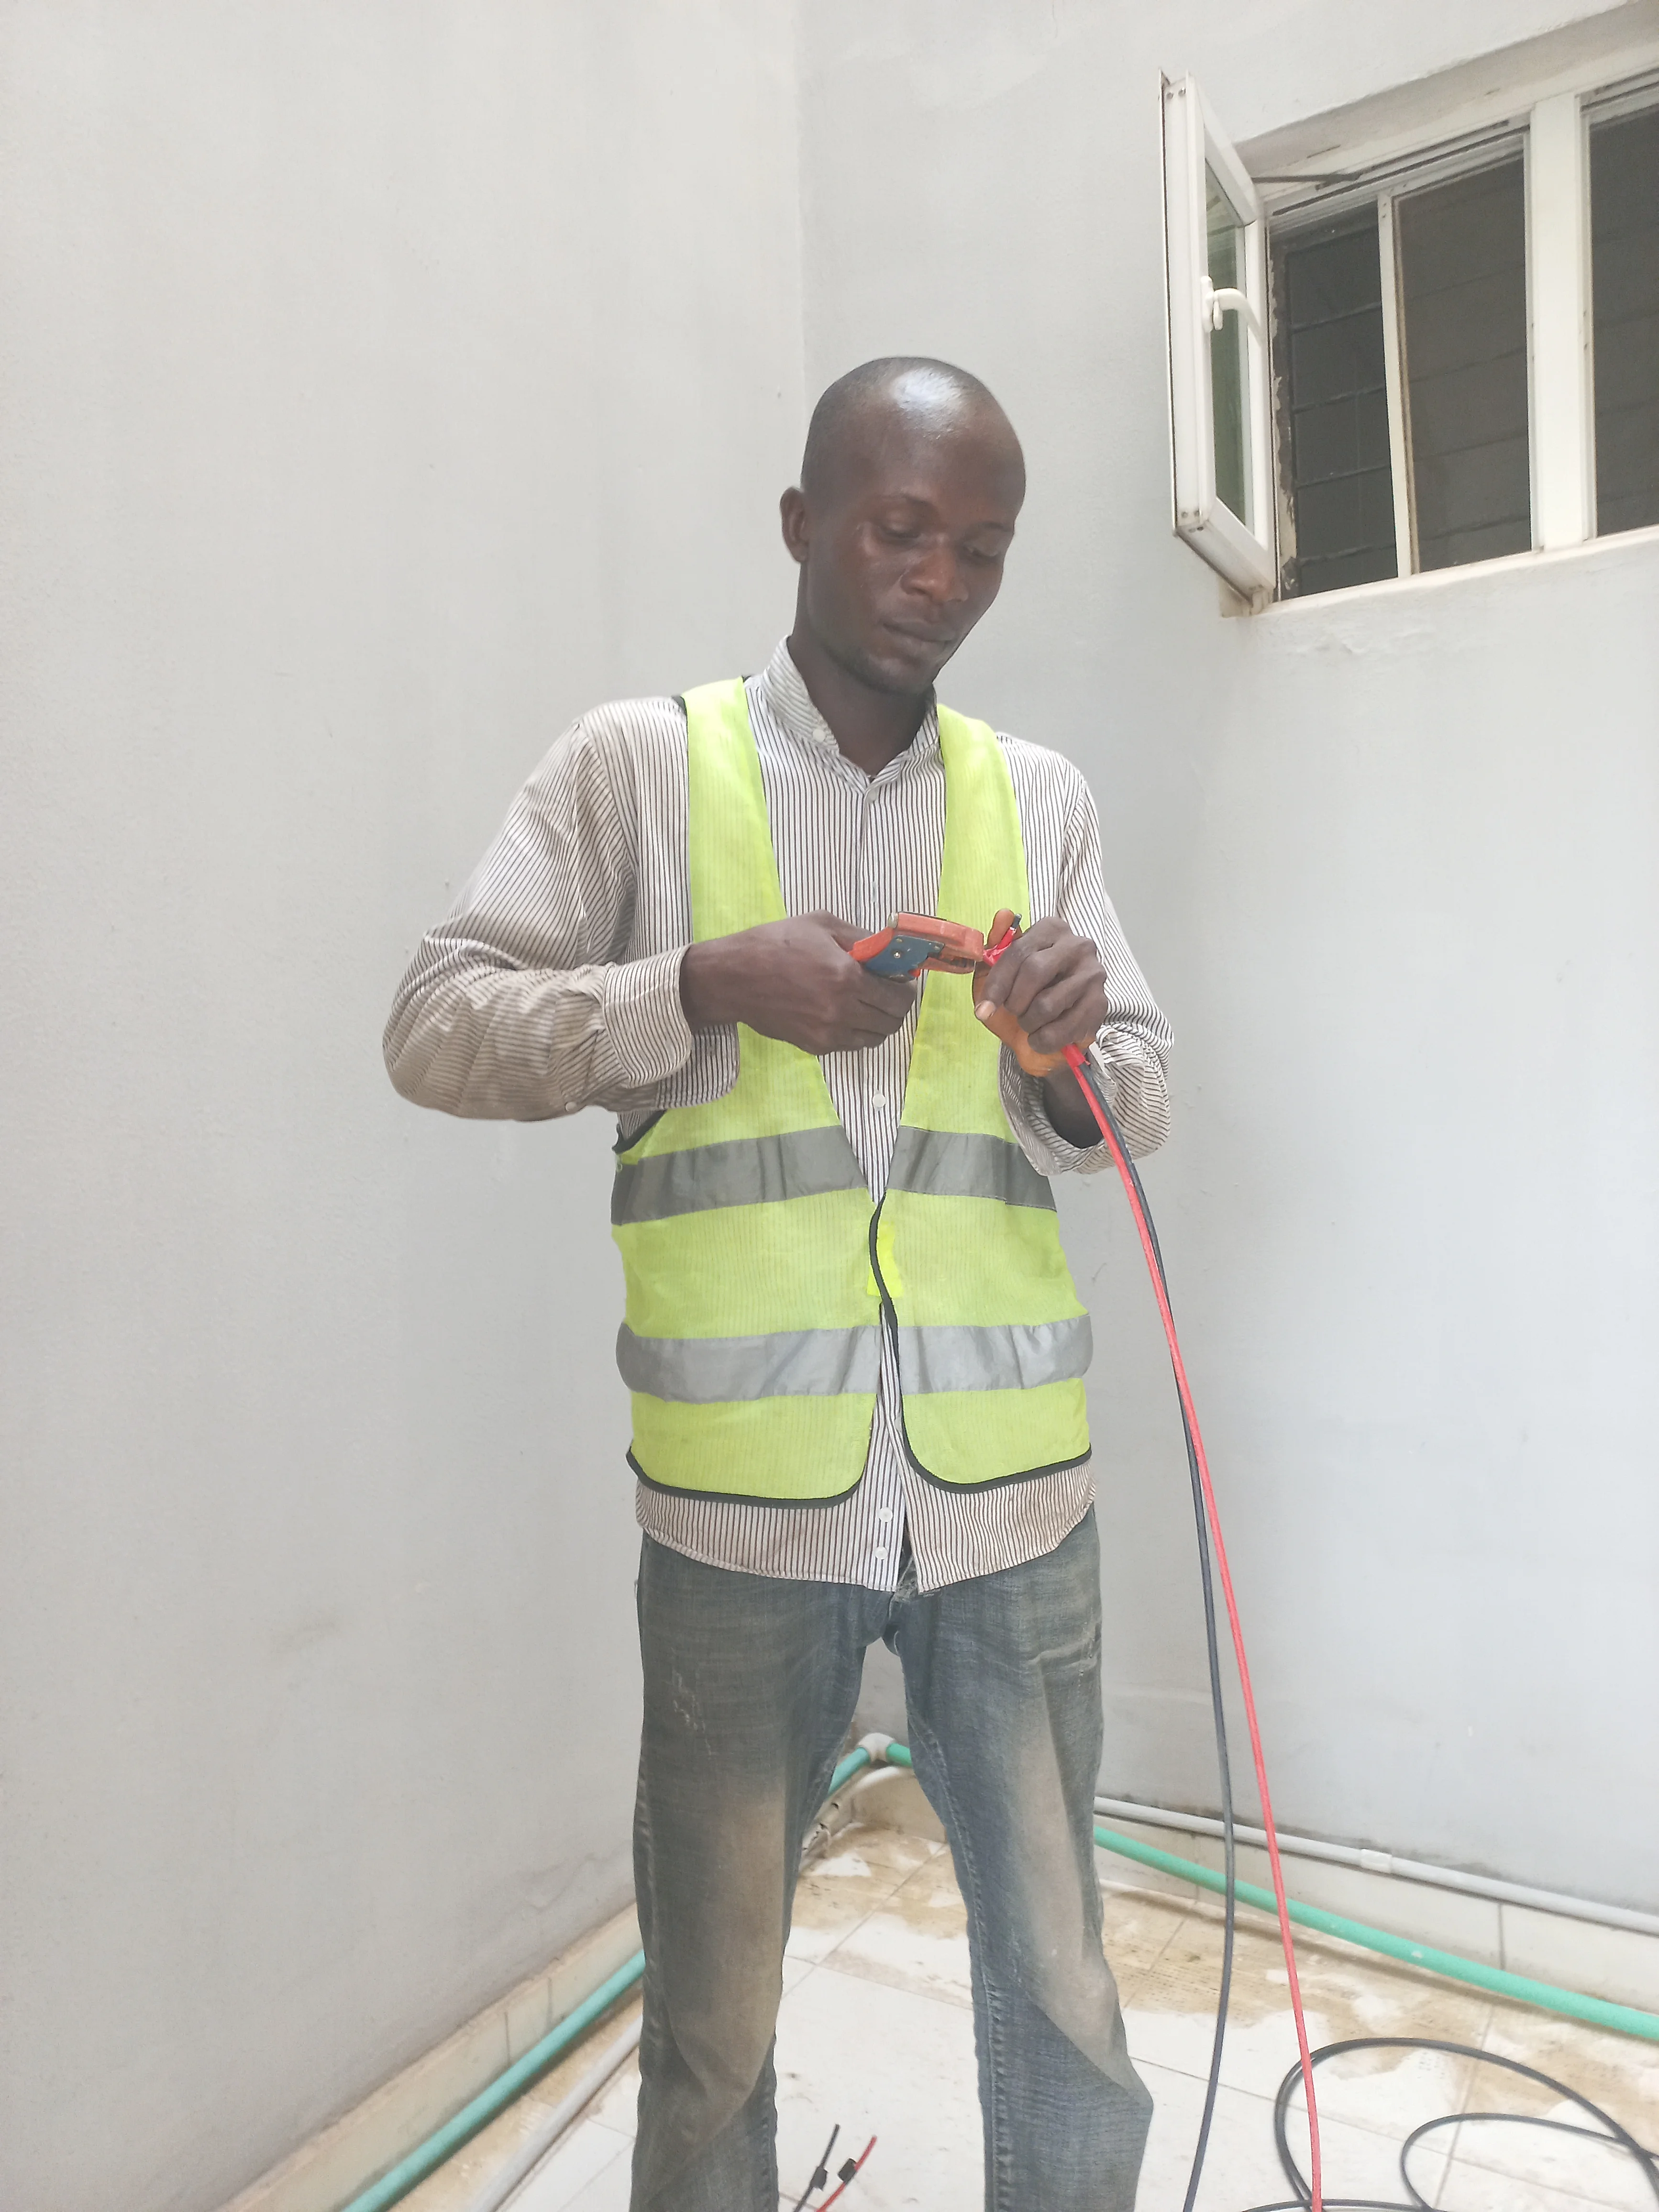
Phase 7 — Completion, Cable Work & Commissioning
Final rooftop views, DC cable stripping and routing, SUNESS battery user manual review, inverter LCD testing showing 2.9kW solar input, and the completed system with both batteries active.


Future Enhancements
- System expansion with additional solar panels on remaining roof area
- WiFi monitoring module integration for remote system tracking
- Smart home automation integration for load management
- Energy usage analytics and generation reporting dashboard
Thank You for Visiting My Portfolio
I sincerely appreciate you taking the time to explore my portfolio and learn about my work and expertise. It is my hope that these projects and insights have demonstrated my passion for innovation, my technical skills, and my dedication to delivering impactful solutions.
If you have any questions, require further information, or wish to discuss potential collaborations, I would be delighted to connect. Please feel free to reach out via the Contact section. Your feedback and inquiries are highly valued and will be addressed promptly.
Thank you once again for your interest in my work. I look forward to the opportunity to collaborate and contribute meaningfully to your projects or organization. Together, let us innovate and achieve excellence.
Best regards,
Damilare Lekan, Adekeye.